Common Tread Supreme Ruler Lance made one of his regular sojourns to ZLA headquarters in Philly from his lair in Ohio in early fall. Although he was up for the trip, his tires were not. His rear Dunlop had seen better days, so he took a little detour up the hill to Lemmy Mountain for some tire attention before making the ride home.
Our first order of business was to eat the doughnuts Lance brought, washing them down with coffee. If you’re swapping tires before 9 a.m., we recommend you do the same. (If it is after 9, please swill beer instead.)
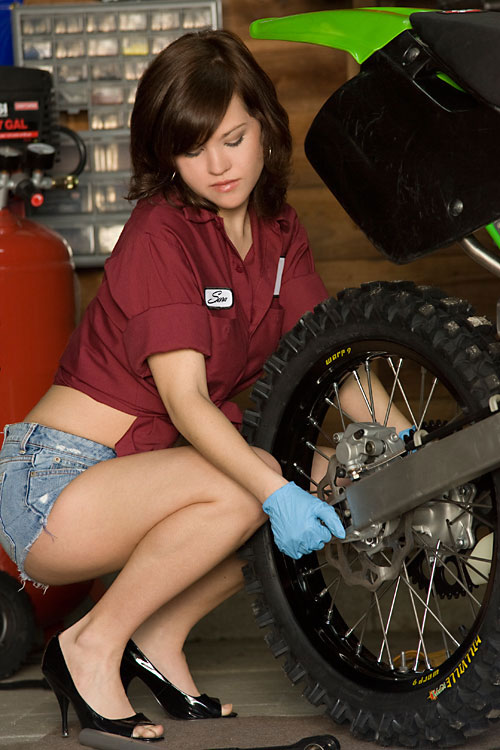
For some reason, we don't always feel comfortable handing off our tire-changing jobs to the "professionals." Photo by Lance Oliver.
Lance's editorial comment #1: Lemmy likes to dive right into a job, but I like to think about the meaning of it all. Such as why do I always change my own tires? There are a couple of good reasons. First, you can save money by buying your motorcycle tires from RevZilla at a good price, probably better than what your local shop charges. Plus, you'll save the fee for changing them. With shops charging $20 to $40 per wheel, the equipment you buy to do it yourself will pay for itself before long. The second reason is that you'll save yourself some time, and that's even more valuable to me than money. I can change my own tires faster than I can make an appointment, take the wheels off the bike, take them to the shop and wait for someone to do the work. I do it on my own schedule, when it's convenient for me.
I should also specify that everything here is about changing tubeless tires. If Lemmy ever gets out and rides his neglected Honda XR650L enough to wear out the OEM tires, maybe I'll be able to get him to do a how-to on changing tube-type tires. Now I'll hand the mic back to Lemmy...
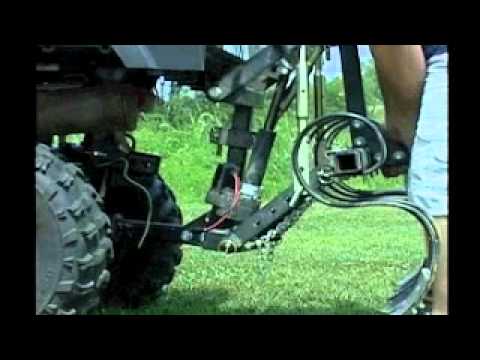
Too many trips across Pennsylvania flat-spotted this rear tire. Before making the 475-mile trip home, Lance wanted a new one. We used jack stands to raise the bike. Photo by Lance Oliver.Our first task was to get the rear end of the bike up in the air. There’s lots of methods for lifting a scooter: bike jacks, ratchet straps to overhead rafters, centerstands, wheelstands, you name it. I’ve even changed tires with a bike frame up on a log before, and I’ve laid them on their sides as well. Be creative, but be careful. Lance set his bike up with a pair of swingarm spools at some point, so we just picked up the machine and put it on some plain old automotive jackstands. We did loosen the axle nut slightly while the bike was still solidly on the ground. No need to torque on it
after it's raised.
There’s lots of methods for lifting a scooter: bike jacks, ratchet straps to overhead rafters, centerstands, wheelstands, you name it. I’ve even changed tires with a bike frame up on a log before, and I’ve laid them on their sides as well. Be creative, but be careful. Lance set his bike up with a pair of swingarm spools at some point, so we just picked up the machine and put it on some plain old automotive jackstands. We did loosen the axle nut slightly while the bike was still solidly on the ground. No need to torque on it
after it's raised.
Lance's editorial comment #2: I have the swingarm spools because at home in my own garage, I'd quickly and easily raise my Versys on my rear stand. Since Lemmy only rides Shovelheads, choppers of muttly lineage and other odd junk, to which no one has ever fitted swingarm spools, he didn't have a rear stand. The jackstands worked just fine.
Next, we loosened the chain adjusters so we could slip the chain off the sprocket, and then slid out the axle. Keep track of the order of the axle hardware, especially wheel spacers. If you fail at this step, you have to put together a little jigsaw puzzle when you reassemble everything.
Lance's editorial comment #3: My tip: I like to put the spacers back on the axle in the proper order and put the nut on loosely. That keeps me from forgetting what goes where and misplacing any pieces. Plus, make a note of where the brake caliper mounting bracket fits into the scheme.
Lemmy uses a drift to coax out the axle. Photo by Lance Oliver.
Rather than let the brake caliper's weight dangle on the brake line, Lemmy suspends it using a bungee cord. Photo by Lance Oliver.Before sliding the axle out, I like to put a little chock of wood under the tire being removed to hold it up. Then I use a drift punch to drive the axle out of the wheel. If you’re doing a front wheel, the process is the same (don't forget to loosen the pinch bolts at the bottom of most fork legs), but you will probably have to remove both brake calipers to remove the wheel.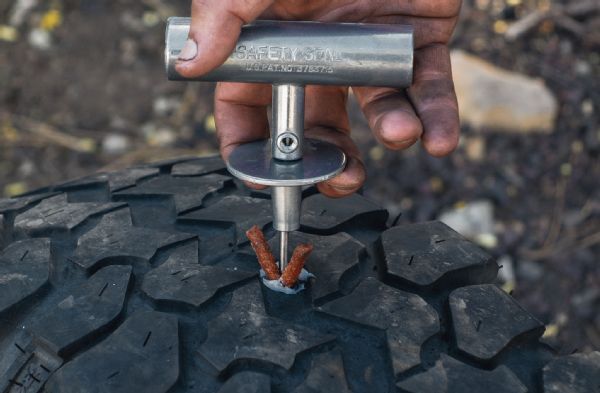 Wire the calipers up out of the way. Don’t let them dangle by the brake hoses.
If you’re so inclined, now is the time to check those wheel bearings. If they feel gritty, repack or replace ‘em! Don’t forget to check the brakes while you’ve got them off, as well.
Deflate the tire by removing the valve core with a valve core tool. After the air has made its exit, it's time to break the beads. There are a multitude of ways to do this, but we elected to use a manual bead breaker. It makes quick work of an otherwise-difficult job.
This bead breaker tool Lemmy has works well. A variety of tools, from clamps to levers and wedges, are available for the job. Photo by Lance Oliver.
Lance's editorial comment #4: Breaking the bead can be the hardest part of the job, in some cases. The tool Lemmy has worked like a charm. At home, I have a Harbor Freight changing stand I bought years ago. It has its drawbacks and doesn't get much respect from tool aficionados, but it has a bead breaker that works well, and that alone makes it worth its cost, to me. There are some other nifty tools that don't cost a fortune.
After the beads are broken on both sides, it's time to begin pulling the tire off the wheel. This part of the job is more of an art than a science. Everyone seems to find their own way of doing things. I like to work on old squares of carpet to keep from beating the tar out of the finish on the wheels.
Lemmy gets down there with the wheel, like an old-style wrassler. Photo by Lance Oliver.
Lance's editorial comment #5: Although it was mildly alarming to watch Lemmy battling my wheel and tire on his knees like an Everglades 'gator wrestler, I have to admit his methods got the job done. Personally, my knees have a lot more miles on them than Lemmy's and I prefer to work standing up. Plus, having the wheel clamped to a stand makes it easier to avoid the possibility of putting pressure on a brake rotor. If you do use the Lemmy method, keep the rotor side up to avoid leaning on it.
There are ways to make your own tire-changing stand, if you're lacking funds to buy one. I've seen some good homemade tire-changing setups created with a few dollars of materials: A discarded car wheel with a section of old garden hose sliced lengthwise and put on the wheel's rim for rubber protection, and a threaded rod in the center to clamp your motorcycle wheel to the car wheel. My store-bought tire-changing stand is another option. If you're ready to pay more, I've seen people change tires in a flash without breaking a sweat using one of those fancy (and pricey) No-Mar changers.
The job will go easier with the right tools. Use tire lube. They make this stuff for a reason — it works! It helps with de-mounts as well as mounting, and protects the bead from rips or tears from the tire irons.
Use dedicated tire spoons. I’m not going to kid you and say I’ve never fudged it with the wrong tool, but I’ve also ruined some wheels half-assing the job alongside the road in the middle of East Jabip. Rim protectors are a great idea if you want to keep your wheels looking good. If you think I’m just pitching stuff we sell, let me dispel that notion: You can easily cut up old milk jugs, or you can use College Lemmy’s impromptu rim-saver: heater hose scraps filched from the auto parts joint.
Removing the tire is prolly the trickiest step. Use the spoons, take your time, and as Lance kept reminding me, “Take small bites!” He’s got a great point. I have a habit of getting greedy. I try to de-mount the whole dang tire at once, and it never works. It bends the spoons, makes my arms sore, and puts the delicate beads at risk. Work smart, not hard. Do little sections of bead at a time and don't forget the tire lube.
With one bead off the wheel, it's easy to see the drop-center and understand how it makes this whole process possible. Photo by Lance Oliver.Here's the most important thing to remember. The act of levering the bead over the rim lip only can happen if the bead is in the “drop-center” on the opposite side of the tire. The drop-center is the shallow channel that runs the circumference of the wheel at the center and it makes the whole process possible. If you're having to use excessive force and still can't get the bead of the tire over the lip of the rim, your problem is that the tire bead is not in the drop-center.
It can be difficult because the tire doesn't want to stay in the drop-center. I typically kneel on the tire to keep it where I want it. At this point, after a few bad words, you should have one bead free of the tire. Repeat the process on the other bead, but the same side of the wheel.
Lance's editorial comment #6: I find that having a couple of different shapes of tire irons makes the job much easier. I have one long iron with a nice bend in it that's almost indispensable for that first grip on the second bead, which is harder to access than the first.
With the tire off, I give the wheel a visual inspection, and then replace the valve stem. You can either pull the old one out with a tool or just cut it out. Lance didn't have a replacement valve stem ready, so we reused the same one.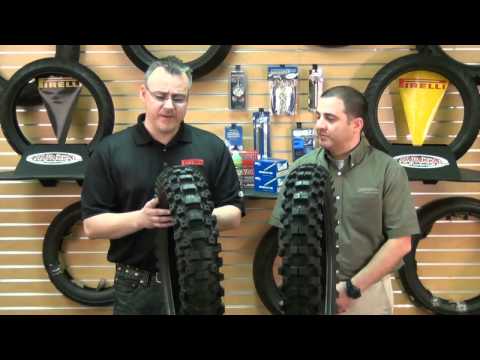 You can do that, but replacing it is cheap protection.
Almost done. Rim protectors keep wheels from getting marred by tire irons. Photo by Lance Oliver.Using the directional arrows on the sidewall, check and double-check the direction of the new tire relative to the wheel. Nothing is worse than mounting it backwards and having to do the job twice. Be generous with the lube and slather the new tire’s beads. Installation of the new tire is much the same as removing the old one. Again, “take small bites” and be sure the opposite bead is in the drop-center of the wheel. If there's a small dot of paint on the sidewall, that's the balancing mark. Line it up with the heaviest part of the wheel, typically where the valve stem bolts in (see balancing section below).
Once the tire is mounted onto the wheel, you need to seat the beads. Remove the valve core from the new stem so you can inflate it faster. A large air compressor will have enough oomph! to blow the beads of most tires onto the wheel, but there are always kludgy exceptions. If your compressor’s not doing the job, there are a number of redneck ways to make the tire assume its new home. I’m not going to claim that I’ve never used ether to blow a bead onto a wheel, but I sure am not recommending anyone else do it. Bead seating tools (also known as Cheetahs) are much less dangerous. Watch your fingers during this step! I have pinched the ever-livin’ bejesus out of myself by getting my finger too close to a bead that was about to seat.
Lance's editorial comment #7: Lube is again your friend when trying to seat the beads. It encourages the bead to slide into its home and, because it is liquid, it will create tell-tale bubbles to show you where air is escaping, instead of inflating your tire. Sometimes pressing on the tread next to the spot where air is escaping past the bead will be enough to get that satisfying and loud "pop!" you're seeking.
With the bead set, replace the valve core and adjust the inflation to the correct pressure.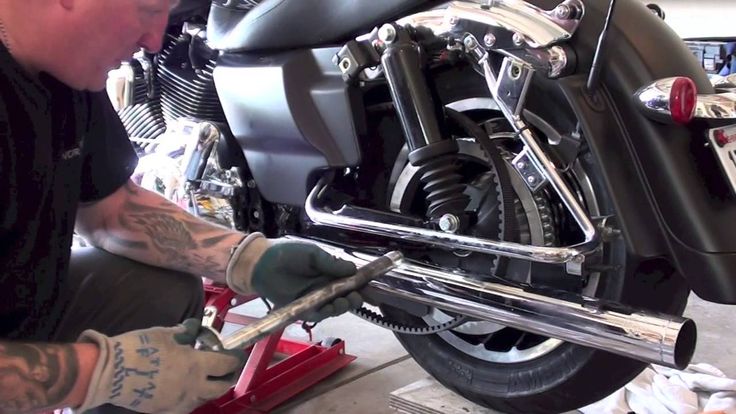 If you are the balancing kind of fellow, now is the time to do so. (Lance and I have similar views on balancing tires. We don’t.) Please don’t leave murderous comments about balancing. I encourage everyone to do what they feel is best with regard to tire balancing.
Lance's editorial comment #8: Uh, actually I've been known to balance tires, especially front ones and especially on a bike I'm going to take to the track and ride at higher speeds, where a vibration can show up that I never felt at street speeds.
Static balancing isn't hard. One of these balancing stands (or a homemade alternative), some stick-on wheel weights and some patience are all you need. The good news is that quality control keeps getting better, and more often these days I find tires need little or no weights to be in balance. You can also use your balancing stand on your wheel alone to determine if the valve stem area really is the heaviest spot on the wheel. That lets you know where to line up the balancing spot on the tire.
With the chain back on the sprocket and the spacers and brake caliper bracket lined up in place, it's time to slide in the axle. Photo by Lance Oliver.
Lemmy's editorial comment #1: This guy sure has a lot of advice to dole out for a guy with clean hands, doesn't he?
At this stage of the game, you ought to be ready to reinstall your wheel. I put that chock of wood back in place to hold the wheel up. Reinstall your caliper (or brake assembly, if your bike has a drum brake), get all your spacers lined up in the right spots and slide the axle back in. Leave the axle nut slightly loose while you adjust the tension on the chain. Snug everything up, check the chain tension again (the chain on Lance's Versys gets tighter when you torque that axle nut), check to make sure the rear wheel is straight by sighting down the chain, lubricate the chain, put a new cotter pin in the castellated axle nut, and go ride! (Carefully, of course, so you can scrub in that new tire and make sure you have everything snugged down right. And don't forget to pump up the brakes before you ride.)
As a parting thought, keep your head about you if this is the first time you’re changin' tars. Even thousands of tires later, these things still get me riled up. Beads don’t seat, tires won’t get onto their rims. It's always something. Patient and methodical work gets the job done, so don't get discouraged!
You’ve planned a motorcycle road trip for weeks, but when you open the garage door, you see it. Your motorcycle has a flat. For an experienced rider who knows how to change a motorcycle tire, this might be a simple fix. If you’re not sure, it helps to learn what to do to replace your bike’s tire.
To get you on the road again, here’s how to change a motorcycle tire[1] in eight steps .
Raise the end of the bike to lift the wheel off the ground. Use a socket to loosen and remove the axle. Release the chain and remove the brake caliper. Put your axle back in place to hold the caliper’s position.[2] It’s a good idea to consult your owner’s manual to learn any steps to take that are unique to your bike’s make and model.
To deflate the tire[3], unscrew the cap on the valve and remove the valve stem core with a special tool. Some valve stems come with built-in caps instead of separate pieces.
When you wondered how to change a motorcycle tire, you might not have realized that you need motorcycle tire changing tools. However, you don’t want to damage your valve stem by trying to remove it with something random from the garage. If you don’t have one already, pause the project and head to your local auto supply store to get a valve core remover.
The bead is the inner edge of the tire where it meets the rim. At the auto parts store, you can also purchase a bead breaker tool to make the job easier. Try to find one with tire spoons, which you’ll use to wedge the tire off the rim.
Insert the tool between the tire and wheel rim and move the tool around the bead. Flip the tire over and repeat this process on the other side. You can use a spray silicone lubricant or glass cleaner to prevent the bead from re-sticking as you move the tool around.[4]
Carefully insert a tire spoon under the bead and push down to pull the tire up. Leave a tire spoon in the spot where you pulled up the tire in order to hold it in place.
Use a second tire spoon to pry the tire away from the rim several inches from the first tire spoon. Leave the second spoon in that spot. Retrieve the first spoon and move it a couple inches. Repeat this until the entire tire separates from the rim. Then flip the wheel and repeat the process on the other side.
Alternative step: If your tire has a tube, you’ll need to unbolt the valve stem from the rim and remove the old tube.
Wipe out the inside of the rim and the inside of the new tire to ensure there’s no debris. Coat the edges of the new tire with bead lube. Hand sanitizer or hand soap work in a pinch too.[5]
Alternative step: If your tire has a tube, insert the new, uninflated tube into the tire. Be sure to insert the valve stem into the hole in the rim.
Use the tire spoons to carefully wedge the entire tire under the rim on one side. Flip the wheel over and repeat this process on the other side.
Fill the tire until it’s completely sitting along the rim. Be sure to check the air pressure. You might have to inflate the tire past the recommended riding pressure number.[6]
Follow your user manual’s instructions to remount the wheel. Check the air pressure again and adjust the alignment of the rear wheel and chain tension.[7] Ensure that all the fasteners are tight before you head out.
Owning a motorcycle offers great recreational opportunities, but it also comes with responsibilities. From insuring your motorcycle to maintaining it, remember to set aside time to properly care for your bike and learn motorcycle riding safety tips. Before you head out on your next adventure, talk to an insurance agent to make sure your motorcycle has the level of insurance coverage you need.
[1] https://www.cycleworld.com/how-to-change-a-motorcycle-tire/
[2] “How to Remove Rear Motorcycle Wheel,” YouTube (September 4, 2016).
[3] https://www.rideapart.com/articles/245897/how-to-change-motorcycle-tires/
[4] https://www.cycleworld.com/how-to-change-a-motorcycle-tire/
[5] https://www.rideapart.com/articles/245897/how-to-change-motorcycle-tires/
[6] https://www.rideapart.com/articles/245897/how-to-change-motorcycle-tires/
[7] https://www.motorcyclistonline.com/how-to/how-to-check-front-and-rear-motorcycle-wheel-alignment-mc-garage-tech-tips/
Text: Andrey Rodionov, Dmitry Kolchugin
Photo: Nikita Kolobanov, Andrey Rodionov, rubber manufacturers
The tasks facing motorcycle tire developers are extremely complex and contradictory. On the one hand, tires must effectively transmit engine power, prevent stalls and slips, provide feedback and allow the rider to “feel the road”. On the other hand, to ensure a minimum tire wear rate, and make it uniform across the entire width of the working surface. Therefore, when choosing a tire for certain operating conditions, we will inevitably have to sacrifice something. nine0004
Our task is greatly facilitated by the experience of global motor rubber manufacturers. Based on the collected data, they have already calculated the optimal ratio of tire characteristics for different conditions, and are ready to offer us ready-made solutions.
There is a great variety of motor rubber models designed for a variety of operating conditions. In this article we will consider its main types. Naturally, the focus will be on road models. We will touch on tires for motocross and enduro only in passing, since in order to fully cover this topic, we will need to write a separate voluminous material. nine0003 So, let's get started...
Motor rubber classification.
First, some boring theory.
Any reference book will tell you that motorcycle tires are Diagonal and Radial. The carcass of the diagonal motor rubber is made of cross layers of cord, which are directed diagonally from one side of the tire to the other. Each subsequent layer of cord is located at an angle of 90 degrees to the previous one. In some tire models, another layer is applied over the cross plies of the cord, directed in the direction of rotation of the tire. Such a layer is called a Belt, and the design of such a tire is Diagonally Belted. In a radial tire, the plies of the cord are located “radially”, at an angle of 90 degrees to the direction of tire rotation.
Cruiser and custom tires.
Bias tires are well suited for cruiser class motorcycles. Their sidewalls resist loads and impacts much better, so a heavily loaded motorcycle with a passenger on board is not a problem for such tires. But for powerful and fast power cruisers such as the Yamaha V-MAX II and Harley Davidson V-Rod, radial tires are more suitable. Their sidewalls are not as strong, so the height of such tires, as a rule, is much less. But they are less subject to internal heating and wear during movement, especially at high speeds. nine0004
Tires for vintage motorcycles.
There are many different types. Starting from vintage tires with a classic look for some Royal Enfield and old school custom, and ending with the high-tech Pirelli Phantom Sportscomp, which differs from most modern tires only in an elaborate tread pattern.
Small displacement tires.
Another class of tires that includes both radial and bias-ply tires is the small displacement tire. The popularity of checks and three hundred among young people forced the designers to produce tires for the most varied use of these motorcycles. Starting from "diagonals" for lovers of leisurely travel around Moscow (sometimes together), and ending with sports radial tires for those who do not get out of the karting track. After all, radial tires are much better suited for fast and accurate aerobatics. Their advantages are especially relevant in motorsport. nine0004
Racing slicks
Highly specialized product designed for competition and training of professional and amateur athletes, exclusively on sports tracks. Not approved for use on public roads. Most often they have a smooth surface without grooves and patterns, in order to achieve the maximum area of the wheel contact patch. The type of tire without grooves is commonly called - Slick. The sidewall shape of the racing tires is also optimized to maintain traction in extreme lean angles of the motorcycle when cornering not only with the knees, but also with the elbows. They have an extremely limited resource. As a rule, they are subject to replacement after a race run or practice session. Provides unparalleled traction. nine0004
In addition to their appearance, these tires are characterized by a special temperature regime. Operating temperature: 80-100°C An unheated tire of this type differs significantly in its properties from the same wheel brought to operating temperature. Accordingly, all its high characteristics appear only after warming up to the specified parameters. That is why in sports competitions so much attention is paid to warming up the rubber with the help of special “warmers”, and during the so-called warm-up lap preceding the combat race. nine0004
Racing slicing
In some racing series, the use of smooth tires - slicks - is prohibited for marketing reasons, etc. Therefore, most manufacturers produce racing tires with the minimum number of grooves necessary to comply with the regulations of these competitions. Otherwise, these are, as a rule, the same uncompromising racing tires that are not intended for public roads. The formal exception is the Pirelli Diablo Supercorsa SC. The Pirelli website states that this model is suitable for driving on public roads. nine0004
But those who have experience with this rubber know that this is an exclusively racing product, not much different from classmates. Caution for newbies. If you decide to use such tires in the city, counting on an unprecedented grip, you will be bitterly disappointed. It is almost impossible to warm them up to operating temperature on public roads. Even after a series of accelerations and decelerations, the sidewalls will remain cold, and you will be indescribably surprised to go into slippery with a completely childish tilt of the motorcycle. For this reason, you should not buy Dunlop D212 and Pirelli Diablo Supercorsa SC for next to nothing with a still “live” middle from riders after the track. Especially if you have never encountered this rubber model before, even on a karting track. nine0004
Street legal racing cut
The main difference from the previous class is in the temperature regime. These tires hold up much better when cold and don't run as hot.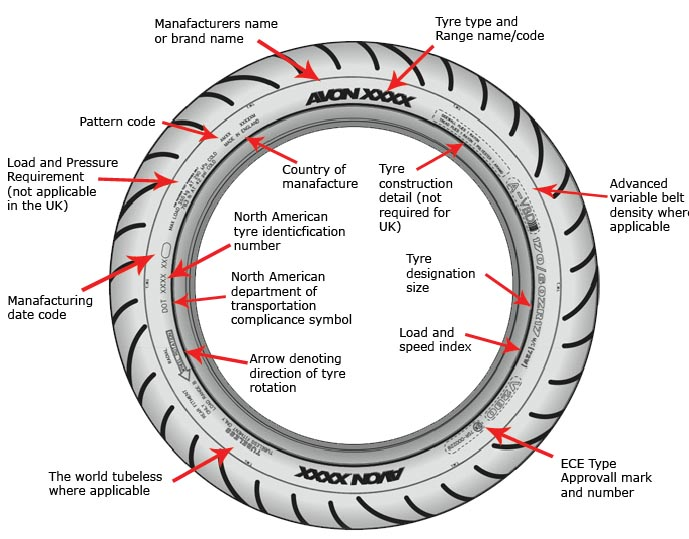 As a rule, it is: 60-80°C. Accordingly, their maximum grip properties are slightly lower. But the best grip in a cold state allows them to be allowed on public roads. And if you get to the training track on your own, then these tires are the best choice. These are the fastest tires allowed on city streets. nine0004
The presence of this class of tires is primarily due to the specific requirements of amateur competitions. In such races, for reasons of economy, the use of heating pads is often prohibited. And so that novice racers do not get killed in the very first turn due to cold tires, the regulations require the use of road tires approved for operation at the DOP.
Racing rain tires
A separate class of racing tires is rain racing tires. Their task is to completely remove water from the contact patch, including when the motorcycle is tilted, as well as the maximum level of grip on wet asphalt. When driving on dry roads, such tires are subject to rapid wear, as they have a very soft composition.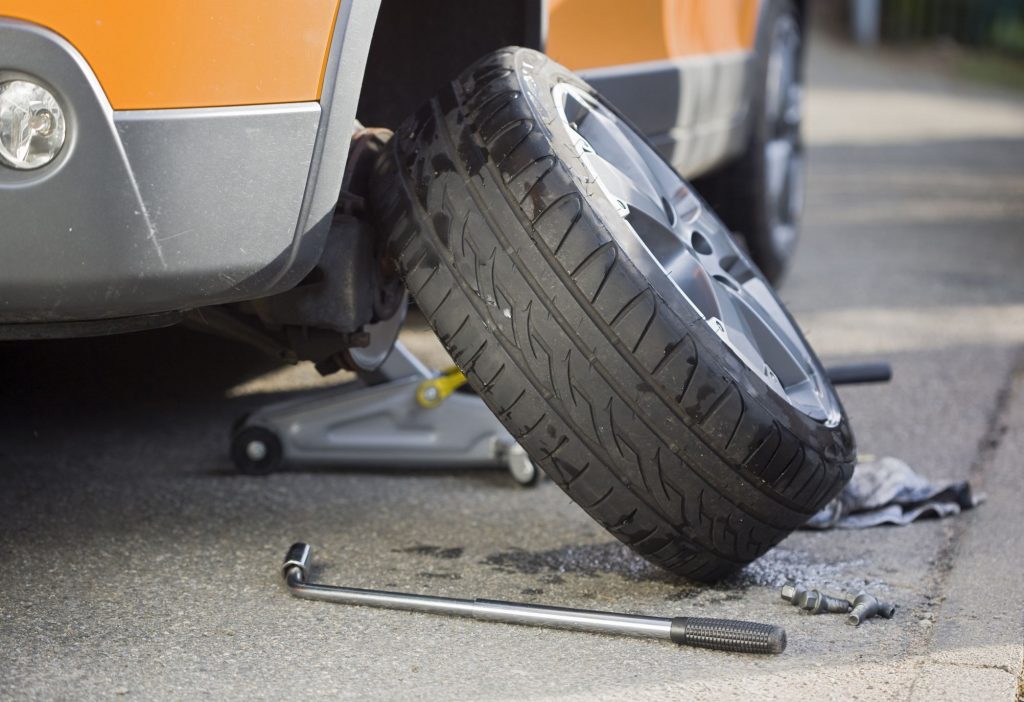 nine0004
Supersport tires
Designed for more aggressive driving than conventional road racing tires. But in terms of grip, they still fall short of street legal racing “cutting”.
Sport road tires
Designed primarily for powerful sports and urban motorcycles. Fully suitable for operation on public roads. The available grooves, most often, are enough to drain water from the contact patch in case of light rain. At the same time, such tires retain most of the positive qualities of their brutal racing relatives on the sports track. What's more, the amateur rider who trains once a week doesn't have to worry about reaching the optimum operating temperature and pressure. nine0004
Sports tires go into operating mode much faster than racing tires, and their parameters in a warm state and “cold” differ not so significantly. But you should not be under any illusions about the ultimate capabilities of such tires in a race, even an amateur one. The fantastic traction properties of racing tires brought to operating temperature are unattainable for sports tires. Therefore, in extreme conditions, be careful and keep your sobriety of mind.
But the resource of such tires is not limited to a couple of races on the highway, and ranges from 4000 km. up to 7000 km., depending on the engine power, the owner's piloting style, and his love to burn rubber, performing rolling burnout. So, sports tires are a reasonable choice for the owner of a sports or fast road bike, looking at the track or karting track 1-2 times a month to brush up on the relevant skills. nine0004
Road touring tires
For this type of rubber, its resource is of particular importance, since it is such rubber that is most often used by motorcycle travelers in their many thousands of runs around cities and countries. In addition to long routes with different quality of coverage, on which the tourist tire must be equally predictable and safe, long trips are usually associated with a large mass of transported belongings, without which the life of a motorcycle tourist becomes dull and bleak. And the tourist motorcycles themselves, in terms of their curb weight, are increasingly approaching diesel locomotives. nine0004
Therefore, a road touring tire must not only withstand long runs, but also withstand high loads well. At the same time, the requirements for the quality of adhesion give way to high predictability and "motorcycle feel" that allows even an inexperienced motorcyclist to feel and stop the development of slips and drifts at an early stage. The main task is not to pass the route at the highest speed, but to reach the final destination in the safest possible mode, while maintaining control over the motorcycle in any weather. nine0004
Accordingly, the water drainage grooves in such tires are more developed. And some models are specially optimized to maintain performance on wet roads. The resource of such tires, as a rule, ranges from 10,000 to 20,000 km. Best of all road-touring tires are suitable for city and travel on road and tourist motorcycles. Moreover, for the latter, given their large mass, special “reinforced” versions of tires are sometimes produced.
Dual purpose tires
The high popularity of enduro motorcycles in Europe is beyond the understanding of domestic brains. Especially if you take into account the average European quality of the road surface. But the fruits of this popularity can be enjoyed by our compatriots who operate all-terrain vehicles.
Tires for "parquet" crossovers
The real heyday of this class of tires happened immediately after the appearance in 2010 of the Ducati Multistrada motorcycle, as well as many of its followers. Just like the Porsche Cayenne and BMW X5 crossovers, these bikes are only nightmares for serious off-road use. But nothing prevents them from amusing the pride of the owners on a trampled primer. nine0004
But back to tires. In terms of its composition and parameters, this is, as a rule, a specialized tourist rubber capable of withstanding long distances, having a tread that provides the minimum necessary “hook” on unpaved areas. It is designed for large and powerful motorcycles, has a high load capacity and speed index, is comfortable, provides good handling at high speeds and wet roads.
The resource of such tires, as a rule, reaches 20,000 km. And also, due to the obligatory presence of exclusively road dimensions in such models, every city madman can put them on his blue Drozd and rush off towards Magadan. nine0004
All-terrain tires
But, unlike in the automotive industry, the rise of the parquet crossover motorcycle class hasn't dampened the popularity of true touring enduros like the Bavarian Great Goose. Such motorcycles can travel on roads with any surface, as well as without it.
Therefore, tires designed for driving on asphalt and dirt in a ratio of 50/50 (as an option: 60/40) are produced by every world-class motor rubber manufacturer. Their task is to provide an acceptable grip on both dirt and asphalt roads. nine0004
The resource of such tires, as a rule, ranges from 13,000 to 15,000 km. It should be noted that the higher the rubber resource, the larger the contact patch of the tread with the coating. Therefore, with the growth of off-road characteristics of tires, the resource decreases. Also, the harder the composition of the rubber, the higher its survivability. But grip on wet roads with hard rubber will be noticeably worse.
Off-road tires
The most off-road, among the “civilian” tires, designed for the most desperate travelers and rally marathon participants. They allow you not to think about the presence of any road under the wheels. nine0004
These tires have a very strong carcass that provides the necessary margin of safety, which allows you to move on some models even on a punctured wheel. Often, a slight reduction in pressure will achieve more even wear and improve traction on wet pavement.
The resource of such tires is approximately 6000 - 12000 km.
Off-Road Sport Tires
Not for highway use only are not certified and do not have an OTP approval. These are special tires for motocross and enduro, not designed for high speeds. True, there are separate models from this category that are approved for use on the roads, but this is more of a nod to consumers. The resource on the roads of these tires is small, road characteristics, such as handling and braking, also leave much to be desired. nine0004
Therefore, we can rather talk only about the possibility of driving on these tires to real off-road without changing shoes. They have a diagonal design and are designed for use with chambers or mousses. They are mainly produced in dimensions R21, R19 and R18 and very rarely - R17. These tires can be divided into motocross tires and enduro tires.
In each of these segments there are sports-oriented models, and amateur formats are more versatile (usually these are old models that no longer satisfy athletes, but are in demand). Unlike many other types of motor tires, motocross and enduro tires are consumables. They must work out their task with maximum effect and, by and large, the residual resource is not of interest to manufacturers. nine0004
Motocross tires
Motocross is a very intense, short ride with high shock and alternating loads from acceleration to braking on a pre-prepared track with relatively uniform soil. To do this, the cross tire has a hard cord, high and aggressive lugs and a relatively hard rubber compound.
Motocross tires are available in different types for different types of terrain. They differ in the tread pattern and the composition of the rubber used. The main pattern: on hard ground, tires with wide lugs and more elastic rubber are used, on soft ground - with rare tread blocks and harder rubber. The tire pressure used is 1.2-0.8 kPa: the softer the ground, the higher the pressure. nine0004
Enduro competition tires
Enduro competitions include other additional types of obstacles: logs, fords, stones, rocks. To effectively overcome them, tires are used that combine the properties of tires for motocross - for overcoming unpaved areas, and trial - for other obstacles.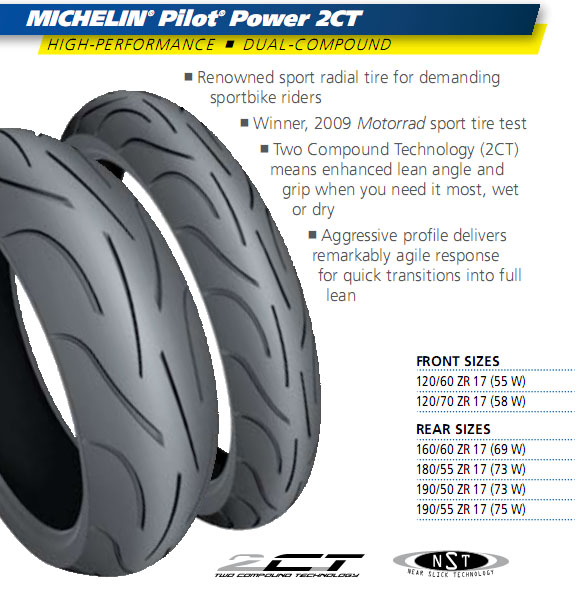 For this, a very soft tire carcass is used, the maximum width and elasticity of the rubber compound for better grip.
The FIM European Enduro regulation provides for a limitation on the height of the tread used, so the block height on these tires is lower than on motocross tires. These tires are used with mousses instead of tubes to maximize the effect of low pressure inside the tire without the fear of blowing or spinning the tire. nine0004
All-terrain tires
Also, most manufacturers produce all-round types of tires, amateur format, combining cross-country and enduro characteristics. (Usually these are old models that no longer satisfy athletes, but are in demand.) Among the tires for enduro, there are also models of a universal format that are suitable for use in both cartri-cross and enduro, can be used with tubes and mousse.
Running in road tires
Having bought and installed new tires on a motorcycle, do not rush to check its adhesion at maximum speeds and angles of inclination. Each new tire must undergo a run-in, during which its carcass, bandage and rubber layer are run in and reach the design characteristics. It is believed that the distance is 100 km. enough to break in a new wheel. After passing it, do not forget to check the pressure in the wheel, as well as inspect it for proper fit and possible geometry violations. If there are no problems, the wheel is ready for full operation. nine0004
It must be remembered that most of the motor rubber models are coated with a special compound before use, which prevents it from drying out and aging during storage. It is believed that rubber coated with this composition retains its properties for five years. After installing a new wheel, you must carefully erase this layer during break-in, gradually increasing the angle of the motorcycle to the maximum values \u200b\u200bthat you use during operation. But remember that by erasing the protective composition, you start the process of drying the rubber compound. nine0004
And after 2 years, regardless of the mileage, the wheel will need to be changed.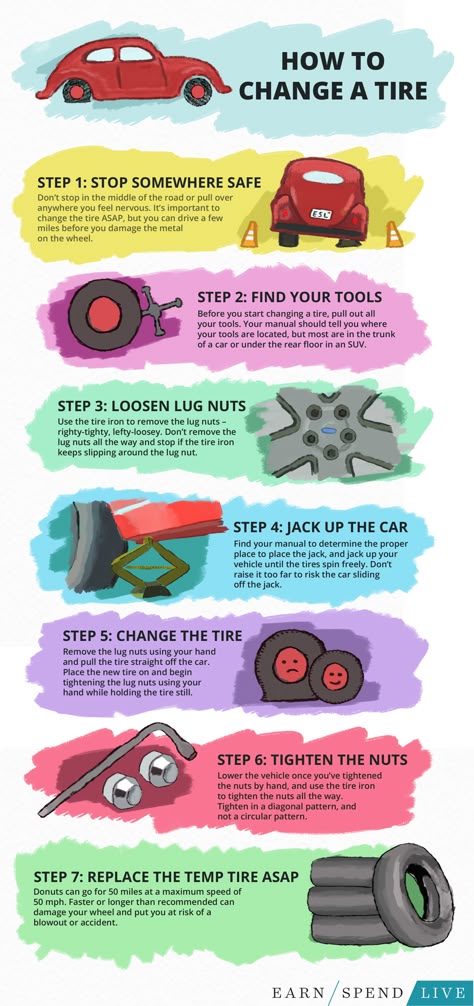 It must be remembered that tires require running-in not only before operation, but also after winter storage. A layer of dried rubber forms on the surface of the wheel, which must be carefully wiped off during the first rides of the new season.
Tire pressure
If you bought your motorcycle new from an authorized dealer, it must have a sticker indicating the recommended pressure for the front and rear wheels. As a rule, this information is placed on the rear swingarm of the motorcycle. In the future, most motorcyclists are guided precisely by the numbers indicated in it, naively believing that they have optimal pressure for all occasions. In fact, the values indicated on the pendulum, at best, are suitable for rubber, which the motorcycle is equipped with at the factory. nine0004
In reality, in order to find the optimal tire pressure, we need to take into account not only the motorcycle model, but also the tire model, the weight of passengers and luggage, as well as the conditions of this particular trip. And the first thing you need to build on is the rubber model installed on the motorcycle. Each motorcycle manufacturer posts on its website information about the recommended pressure in each of its tire models.
These data take into account not only the features of the type of motor rubber we are interested in (tourist, sports, etc.), but also the design features of each model and the technologies used in it. This is especially true when the motorcycle is used "not for its intended purpose." nine0004
For example, when a sportbike is fitted with touring tires and set off on a journey; or when a road builder is used for kart training with uncompromising racing slicks. Remember, in such cases, you need to focus not on the recommendations of the motorcycle manufacturers, but on the information of the engineers who developed your tire model.
But that's not all! If we return to the ground and look at the real operating conditions of motor tires, we will see that on the same tires someone goes to work and to a party place, someone travels to neighboring regions and countries, and someone does not get out from the karting track. How to adjust the pressure in each of these cases? nine0004
General recommendations will be quite simple. Let's say you have a road bike with the recommended pressure on the swingarm: 2.25 BAR at the front and 2.5 BAR at the rear. If you have road or road-sport tires, then this pressure is more suitable for touring on a lightly loaded motorcycle. In this case, the contact patch will be smaller, the tire will dent less, and, accordingly, its wear will be slower. If you are traveling with a passenger and several cases for very long distances and at high speeds, it is better to increase the pressure in the rear wheel to 2.8 - 3.0 BAR. nine0004
After running several thousand kilometers in this mode, the rear wheel will most likely form a flat ground. But the carcass of the tire will not suffer, and there will be no danger of its destruction. The pressure in the front wheel should not be raised above 2.5 BAR on powerful heavy motorcycles, and 2.3 BAR on medium-sized vehicles. If you increase the pressure in the front wheel even more, then the tire life will not increase from this, and the likelihood of losing grip during braking will increase.
In the city, motorcyclists most often ride without a passenger, make more maneuvers, accelerate and brake. The importance of the tire resource in this case gives way to grip properties. The cost of a mistake, loss of traction and unplanned slipping can be unreasonably high. Under these conditions, on an average motorcycle weighing about 200 kg, in road and sport tires, it makes sense to maintain a pressure of about 2.2 BAR in both tires. Thus, we increase the contact patch and help the rubber warm up faster for better grip. Naturally, the life of the tire decreases with decreasing pressure. But you need to be aware of what is more important: the durability of the rubber or the traction reserve. nine0004
On powerful liter motorcycles, the load on the rear wheel - and therefore wear - is even higher. And only the owner himself chooses the balance between road grip and the wear rate of the rear wheel.
Finally, a go-kart or racing track. A place where tire resource does not play any role. Only the coupling parameters of the rubber with the canvas of the race track are important. Numerous experiments and experiments undertaken by people who regularly test motorcycles on karts and racing tracks - motorcycle journalists, experts and athletes - show that most sports, road and road-touring tires provide the best traction at a pressure of 2.1 BAR - on the front wheel , and 1.9BAR - on the back, on cold tires. For some rubber models, this value may differ slightly, but in most cases its difference fits into the error of a conventional pressure gauge manufactured in the People's Republic of China.
Lowering the pressure further does not add traction and only worsens the handling of the motorcycle. When the pressure in the front wheel drops below 1.9 BAR, when cornering, the bike's handlebars begin to bend, that is, it tries to turn in the direction of the turn. If the rear tire loses pressure to 1.6 BAR, then in corners the rear of the motorcycle begins to float on the pavement, there is a feeling that is best described by the word “squish”.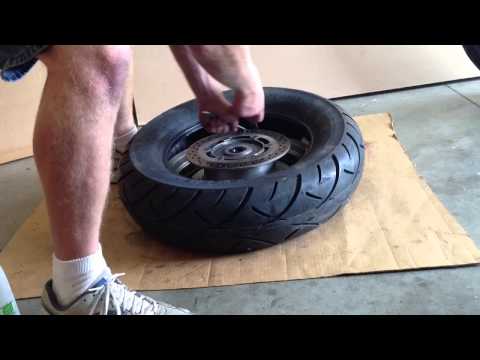 nine0004
Considering that the pressure applied on sports tracks allows for the greatest traction properties of motor tires, many people use it when driving in the city, where the margin of the handle can be a great help when making detours or during emergency braking. But you need to understand that tire wear at such a pressure will be higher, and its resource will be less.
Special mention should be made of powerful sport bikes, which often have a recommended pressure of 2.5 - 3.0 BAR on the swingarms. It must be understood that such motorcycles wear tires much more intensively. And the resource of the same rear wheel model on a road bike and on some Eradin will differ by 2 times. Partly recommended high pressure allows you to slightly extend the difficult life of the “cylinders” on such motorcycles. But don't be under any illusions. When you try to go through a "knee" turn, such a high pressure in the wheel can easily send you into a slippery. nine0004
If, on the other hand, you regularly train on sports tracks, then, most likely, special racing tires are already installed on your motorcycle. As already mentioned, this rubber has a special thermal regime. And if for ordinary sports rubber the working temperature is considered to be 50 ° C - 60 ° C, then the temperature of racing rubber in a warm state reaches 100 ° C. Naturally, the pressure in such rubber in the last laps of the race and in the cold state is seriously different.
As a rule, the pressure in the rear wheel "cold" in such tires ranges from 1.4 BAR to 1.6 BAR, and in the front - from 1.5 BAR to 2.1 BAR. Such low numbers are often shocking to beginners who see the 2.9 on the swingarm of their new "liter" sportbike.BAR. But it is these indicators that allow the tires to quickly warm up to the design temperature and increase the pressure in the wheels to operating values.
In this case, if you are not an experienced road rider who plays with tire pressure, adjusting the behavior of the motorcycle to the characteristics of different tracks, we recommend that you strictly adhere to the values recommended for your particular racing tire by its manufacturer.
Cross tire pressure
Motocross tire pressure is 1.2-0.8 BAR. The main rule: the softer the soil, the higher the pressure. In this case, it is necessary to take into account both the properties of a particular track and the style of the rider. nine0003 In classic enduro, mousses with different pressures are used instead of chambers: 0.4-0.9 BAR, depending on the type of tracks.
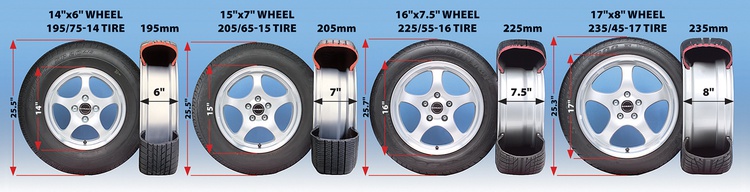
Selection of tires of non-standard size
On various forums, you can often find questions from novice motorcyclists regarding the possibility of installing a rear wheel wider than the stock motorcycle. Most often this is due to the fact that in their eyes a wide rear wheel looks more sporty and attractive compared to a narrow one. Often, some draw analogies with car wheels of a larger diameter and width. We will not argue that no matter how wide the wheel is on the old Super Truck, in the eyes of beautiful strangers, it still will not compete with the shiny and illuminated Golda.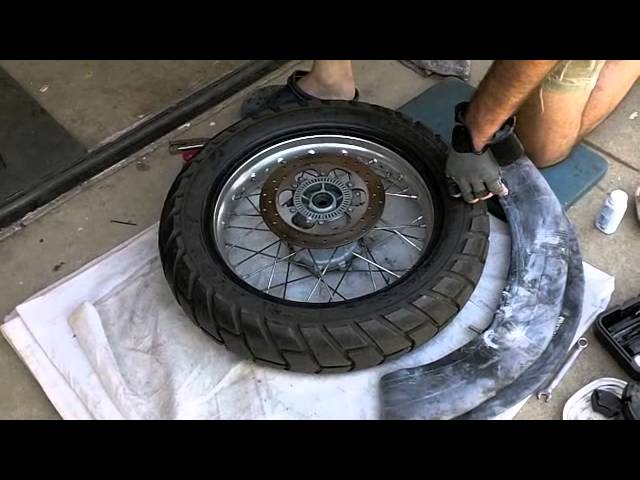 And just try to understand the physics of the process. nine0004
So, what can we expect if we firmly decided to install a non-standard rear wheel with a wider width on the motorcycle.
The first problem we will face is that the rim remains the same width as before. That is, a wheel of greater width, stretched on a narrow rim, does not become wider. It flattens and becomes higher than stock. Its diameter grows, the speedometer starts to lie, the back of the motorcycle rises a little. But most importantly, the tire profile carefully calculated by the manufacturer is violated. nine0004
In 2012, in the Russian championship SHKMG, a single type and size of rubber was approved for all classes and types of motorcycles - 190/55/17. Given that the rear wheel disc of 600cc sportbikes is designed for size 180/55/17. Such a replacement did not bring big changes to the behavior of the motorcycle. Although some athletes, for example, Ilona Sergeeva, noted the worst grip on non-standard rubber in the extreme angles of inclination.
Another example of using a narrow rim and wide tire is the KTM RC 390 and KTM Duke 390. They come stock with a 150/60-17 rear wheel. This means that we will not be able to use the entire surface area of the tire, and the contact patch will be lower than calculated for this model in this size. All this raises questions regarding the optimality of the selected rubber size. We noticed this nuance back in May 2014, during the KTM Duke 39 test.0. And in July 2015, while shooting the RC 390 at the Firsanovka karting track, MotoRRika team rider Ivan Gorev did not take into account this feature of the motorcycle and sent KTM into slippery conditions, missing the rear wheel.
If we're not happy with a simple tire change while keeping the stock rim, and we decide to go further with a wider rear rim on our bike, then other problems stand in our way. It is necessary that the disk and the wheel are normally located in the pendulum and do not touch it when moving. The driven star of a non-standard disk can be shifted to the side relative to the leading star, which will quickly "finish" the chain of the motorcycle. If we managed to get around all these problems, then, as planned, we get a motorcycle with a rear wheel wider than the original. nine0004
If we try to ride such a motorcycle, we will notice that its handling has noticeably deteriorated. And now it takes more effort to "put" the bike in a turn. Why did it happen? The fact is that a motorcycle with a wide rear wheel has to lean at a greater angle, applying more effort, to pass the same turn at the same speed. That is why engineers and experts are well aware of the rule: the more wheels already installed on a motorcycle, the more willingly it “dives” into a turn and steers easier. nine0004
Therefore, even on powerful "liter" sportbikes, for which every square millimeter of wheel grip with asphalt is worth its weight in gold, you rarely see rear tires wider than 190mm. or 200mm.
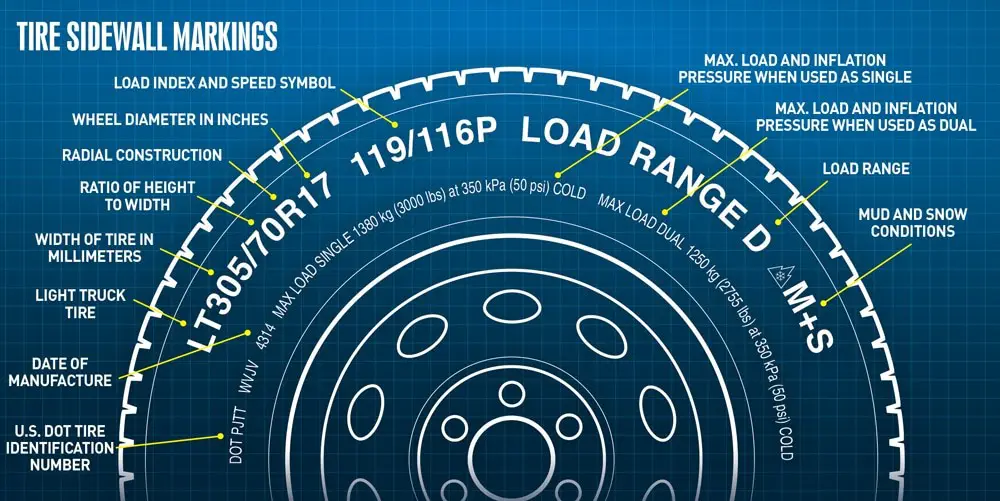
Wheel marking
180/55 ZR 17
Profile width in mm, 180.
Profile height in percent of width, 55.
Tire design radial, ZR.
Rim diameter in inches, 17.
M/C is an abbreviation for motorcycle (found on tires that have car sizes). nine0003 73 - load index.
W - speed index.
Radial - radial tire construction.
Tubeless - tubeless (sometimes referred to as TL), TT (Tube Type) - chambered.
Continental is the name of the manufacturer.
ContiRoadAttac2 GT is the name of the model.
<=Rear - the arrow indicates the direction of rotation of the wheel
www.conti-moto.ru - the manufacturer's website.
The DOT abbreviation indicates that the tire complies with the safety regulations of the US Department of Transportation.
The letter “B” in a circle is the approval mark according to the test results under UNECE regulations, the number next to it is the country where the test was carried out. nine0003 Date of manufacture of the tire - the last four digits in an oval, for example 3811 38th week of 2011.
There is not always a way to call a tow truck, and driving on a flat tire, “chewing” the rubber and killing the rim is at least uncomfortable.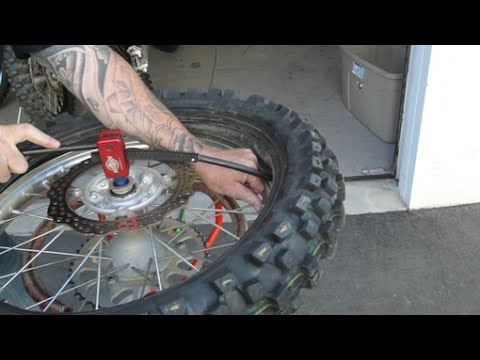
The very first replacement of rubber on a motorcycle or scooter gives reason to think - what is better in terms of quick repairs: tubeless ones that do not require wheel disassembly to eliminate a puncture, but leave the rider helpless if, along with damage, it “led” and flattened the edge of the disc? Or chambers - allowing sealing almost ring breaks (if only there were enough patches), but requiring the removal of rubber from the rim for this? The unequivocal answer is no. Few classics, straights or tourers today remain "loyal" to tube rubber models: tubeless tires are lighter, softer, warm up and cool down faster thanks to simplified heat transfer. In sports, more precisely - enduro and motocross, chamber - on the contrary, prevail: only spoked wheels can "play", withstanding strong alternating loads during landings and impacts. nine0004
The nuance is that a tire with a chamber can be put on any spoked or cast disc, and a tubeless one can only be placed on a cast one, because only it can ensure tightness. Tube – can be installed in a tubeless tire as an emergency measure. In case of major damage to the sidewall, cracks or curvature of the edges of the rim, this will make it possible, after pumping up the wheel, to reach the nearest tire service (and there already - straightening, balancing and other maintenance according to the rules). True, for such a focus, it is advisable to take a camera with a face value one less than the diameter of the disk, otherwise it will create folds inside that will rub for a couple of hundred kilometers. The resource of such a “treatment” is large - until the next puncture, like a new one. nine0004
It depends on the magnitude of the damage whether it will be possible to eliminate it on your own, or whether you will have to “surrender” to the motorized tow truck. In tubeless - holes up to 5–6 mm are patched, in chambers - as much as there is enough glue and patches, the main thing is the condition of the tire. To determine the extent of the disaster - find a place where you can safely stop without violating traffic rules (where it is prohibited - you will have to sacrifice tires and drive on). nine0004
If the wheel deflates slowly, and the object that pierced it is still inside, you can try to carefully drive to the tire shop. A completely deflated "pancake" will have to be resuscitated on the spot, or - remove the wheel and take it to the service.
To find a hole in a tubeless tire, if it is very thin and not immediately visible, the wheel must be pumped up, slowly pouring water - bubbles will go. In place, tubeless tubes can be “harnessed”, or filled with sealant inside, without removing from the motorcycle. nine0004
With the second type of tires - more difficult. A torn balloon must be removed from the tire to detect a defect and seal. In a good way, the wheel must be removed from the motorcycle and disassembled on a clean, flat, hard base. Suppose such a “patch” can be provided even off-road, but how to remove the wheel on a motorcycle if it does not have a central stand? And shooting is not required. The motor must be carefully laid on its side, after making sure that the faucet is closed, gasoline does not flow out through the tank cap (antifreeze does not flow from the tank if the motor is “dropsy”), and removing the plastic or wardrobe trunk with fragile contents (if any). nine0004
You will have to unscrew the wheel from the motorcycle only if you need to replace the tire, or it is decided to patch the tubeless tube with a “fungus”. In the absence of a central stand, this will also have to be done on a lying bike, or - make this stand from improvised materials (bricks, stump, car jack), placing them under the crankcase protection from below, the central tube of the frame, the duplex jumper (but not under the plastic, itself engine crankcase or attachments!), under both footrests - if they are not folding, or - under the pendulum. Before removing the rear wheel on a motorcycle, the front fork must be loaded with something, or an even higher lining is made. nine0004
In a motorcycle tire fitting shop, tubeless tubes are repaired by cold vulcanization. They are removed, disassembled, the puncture site is cleaned from the inside, degreased, lubricated with glue and a calibrated “fungus” patch is inserted into the hole from the inside. The fungus itself is a thin plate of rubber with a “leg” tube in the center. The leg - by the guide wire is dragged through the hole of the damage, and the "hat" seals it.
After half an hour - you can put the tire back. The reliability of such a repair is high, the patch does not cause a significant imbalance, the service life of a sealed tire does not decrease. nine0004
This method is also applicable on the road, the main thing is to have the necessary equipment and materials with you:
The fungus repair procedure does not require much experience. The main thing is to keep it clean, fully clean the place where the patch fits, let the glue dry slightly to a dull finish and press (roll) the surface of the fungus with high quality, expelling all the air between the layers. If necessary, you can degrease the place before gluing with gasoline, but without the rest of the above, it will not be possible to fully carry out repairs. nine0004
The compressor is sometimes replaced by a small cylinder of compressed air or carbon dioxide. Unlike a mechanical pump, it will immediately create a “throw” of pressure, pressing the tire beads against the rim flanges (in emergency cases, even a fire extinguisher was used to pump flat tubeless wheels). When connecting the compressor, start the bike's engine before you start inflating the tire - let it idle. Otherwise, the motor can "land" the battery, and you will not start. nine0004
Manometer - needed for control. It is undesirable to pump over the repaired tire. It is recommended to "inflate" 0. 2 atmospheres less than the nominal value. Inflating too little is also bad: a flat tire has a larger contact patch with the road, so the place of a fresh patch will deform more.
“Burning” a tubeless tube and sealing its internal cavity through a nipple are quick, simple methods that do not require special skills. To repair the damage, you only need the materials themselves, and how to pump up the wheel. nine0004
Now in Moscow, and not only, 6-5 varieties of cans with a sealant are sold - a quickly hardening "liquid rubber", with a volume of 800 to 250 ml.
Applying "Anti-Puncture" is simple: put a tube with a fitting on the nipple of the camera, turn the can over, and hold the button according to the instructions. Then - pump up the wheel, cleaning the nipple from the foam, roll it, making a full turn to distribute it. nine0004
The sealant is blown out with air into the puncture hole and clogs it, solidifying. After 20 minutes - you can go. Reliability of repair is high. Resource - until the next puncture.
If you have a compressor, start immediately pumping up the wheel, so it will be easier to work with a puncture, insert a patch, and it will swell faster.
Procedure:
You can go in 5 minutes, you just need to make sure that it doesn’t descend anywhere else.
Outwardly identical, repair kits for harnessing wheels can differ in price by almost half. This variation is explained by different configurations - one will have only three items, the other - six or seven.
A complete tubeless tire repair kit contains:
Regardless of the cost, you need to choose a kit in which the harnesses will be reinforced, and the awl - with a deep spiral winding (notch), and not a “needle file”. Inserting a flagellum is sometimes easier with a regular thin screwdriver.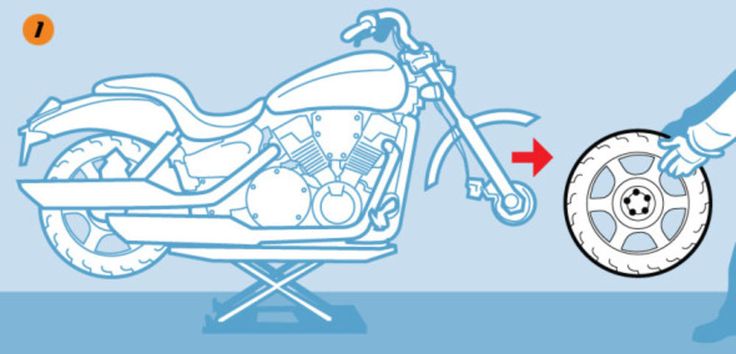 If there is no glue in the kit, or it has dried up, the flagellum is moistened with gasoline. nine0004
At motorcycle service stations and car services, holes in the chambers are closed by hot vulcanization: a layer of raw rubber is applied to the cleaned, fat-free puncture site and, after squeezing it well, it is heated with a special “iron”. Iron - burns, layers - are fused into a single whole. Reliability of repair is high. The resource will be almost like a new one.
Cold vulcanization (patching) - used if the workshop is not equipped with a vulcanizer. In this case, the quality of the service and the reliability of the repair will depend on the accuracy of the master. For the convenience of gluing, the camera is completely removed in the service, but, I repeat, this is not necessary. It can be repaired on the spot in the same way (there are no other options except for replacing the camera), but without removing it from the motorcycle. nine0004
This can only be done if you have two metal mounting blades. At least one, the second can be replaced with another flat tool. You can still disassemble the wheel with a wide screwdriver and a “family” key wrapped with electrical tape. But this is only as a last resort, otherwise you can damage the cord.
Sequence of work:
 Let the glue dry for a minute. nine0345
 The fencing must be carried out twice as carefully and more slowly than dismantling, lubricate the side with water or soap, “help” more with your hands, otherwise there is a risk of picking up the edge of the chamber with a spatula and tearing it.
Important! If the wheels of the motorcycle are equipped with tow bars - before pressing the tire bead from the rim, you need to loosen this tow bar! But do not unscrew the nut completely, do not disassemble to the end.
A standard “first aid kit” (a set for repairing classic motor rubber) contains only patches and glue, so it is advisable to supplement it yourself with a piece of “skin” or a needle file. You can degrease with gasoline, or apply a little glue first and wipe off immediately, rolling up the dust with it.
Now there is no shortage of specialized motorcycle workshops not only in Moscow - in all major cities there are motorcycle helpers who help motorcyclists directly on the track, or tow to where you can quickly change the camera, or patch the tubeless correctly, so that there is no trace left. Where there is a guarantee. nine0004
Self-replacement of a tire on a motorcycle requires a certain physical condition, and for the first time - a “kilometer of nerves”.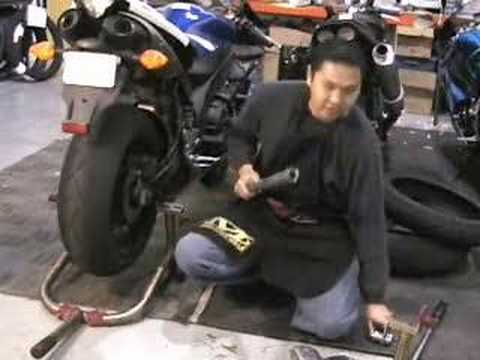 At the service station, instead of you, automation will “sweat”, which will not lock up the board and will not scratch the disc coating with a spatula. The main thing is to do it quickly (if you need to go urgently, the price sometimes does not matter).
Repair at the service - may be the only possible one if, due to driving on a flat tire, the tire nipple is turned and torn off. Especially if he flew off and got lost, but there is no spare. In mototiremontazhke - there is always a set of consumables for any wheel diameter. In the same place, in extreme cases, you can buy a new tire, or a used dokatka. nine0004
In addition to the patch, for normal operation of the wheel, balancing must be ensured. This is generally a useful procedure during any change of rubber, otherwise if there is a strong imbalance, the wheel bearing will inevitably break due to vibrations, and the hands will quickly get tired and “buzz” after long rides.
The first couple of tens of kilometers - do not drive, go at the speed of the flow.