Carburetor from a Yamaha YFM200 Moto 4.
Carburetors were the standard for fuel delivery in gasoline-powered passenger cars and trucks up until the late 1980s, when fuel injection saw greater widespread use and eventually overtook the carburetor as the preferred method. Then-new government regulations of emissions and fuel economy dictated the changeover and the very last production passenger vehicle for the North American market to use a carbureted engine was the 1994 Isuzu TF Series Pickup (the last-ever production passenger vehicle to use a carburetor was the 2015 Lada Riva).
The Yamaha YFM200 Moto 4 is a popular vintage ATV model that uses a carburetor.
Unlike passenger vehicles, small engines do not fall under the same set of restrictions for pollution and fuel economy and it is still quite common to find late model motorcycles, ATVs, snowmobiles, powerboats, and other recreational powersports vehicles that use carburetors as opposed to fuel injection systems.
Weber carburetors under the hood of a Shelby Cobra.
Compared to modern fuel injection, carburetors are relatively low-tech. Perhaps, even archaic by today’s standards. There is, however, beauty in simplicity. Carburetors less expensive to produce and far less complicated to build, maintain, and/or repair. Unlike an electronic fuel injection system, carburetor maintenance is easy enough for anyone to perform with the most basic mechanical skills. Our quick how-to instructional piece will show you how to clean and maintain the carburetor on your motorcycle or ATV for maximum performance and efficiency.
Yuck!
All that nasty black soot that you see caked around the exhaust pipe exits, that’s all carbon deposits. Carbon is a byproduct of combustion and all gasoline-burning engines produce it. Engines that experience regular daily use are less-prone to carbon buildup as proper heat cycles and fuel flow help to clean and break up carbon deposits before they can accumulate.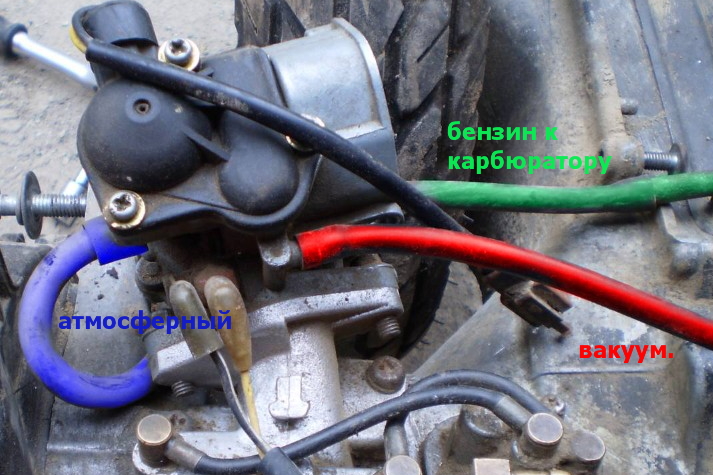 When engines sit unused for long extended periods of time, carbon deposits can harden and varnish can form in the carburetor, intake, and combustion chambers. Also, in many parts of the country, gasoline is mixed with ethanol and a nasty side-effect of ethanol is that draws moisture directly from the atmosphere. We all know that water and gasoline is a problem. This excess moisture can also promote rust on sensitive carburetor parts such as in the float, the jets, along the throttle plate, and also on the exterior linkages and connections. That’s why it’s a good idea to use a water displacer or fuel stabilizer if storing your powersports vehicle for a season or for any extended timeframe. The tell-tale signs that your carburetor may be due for a good deep-cleaning include rough and choppy idle, poor throttle response, difficulty starting, and the possibility of random stalling. At first, these symptoms can seem quite scary but more often than not, the solution is a simple but thorough cleaning of the carburetor.
 Especially, if you haven’t started your engine in over a month.
So, now that you know the reasons why you should keep your carburetor clean, let’s go over the steps on how to do it.
YOU WILL NEED:
 Only use this for the throttle plate.)
Turn off the fuel valve on your fuel tank and then track the fuel line down to the carburetor. Remove the hose. This would be a good time to inspect the condition of the fuel hose and check for any cracks or dry rot (replace if necessary, do not reuse damaged fuel line). Remove the overflow hose that runs out of the carburetor and then loosen the clamps at the front and rear of the carburetor. The carburetor will now be loose, but held in place by the throttle cable. Don’t let it hang under its own weight as this can cause premature wear and stretching of the throttle cable. Twist the top cap to remove the throttle cable and remove the carburetor. Once the carburetor has been unmounted, remove the throttle slide from the cable.
When cleaning a carburetor, this is the first thing to be taken apart. Common problems include engine flooding, running too rich (too much fuel) or too lean (too much air), and stalling under engine load. Remove the float bowl by loosening the four screws on the bottom of the carburetor. Be mindful not to use excessive force as these screws can strip easily. Gently pull the float bowl off the carburetor.TIP: You might want to replace the gasket.
With your needle nose pliers, gently pull out the float pin. Once the pin has been removed, the float itself can be removed. Note that on some carburetors, the needle will be hanging on the float and come out with it.
WARNING: Some carburetors have splash jets that need to be removed before the jets themselves can be extracted.
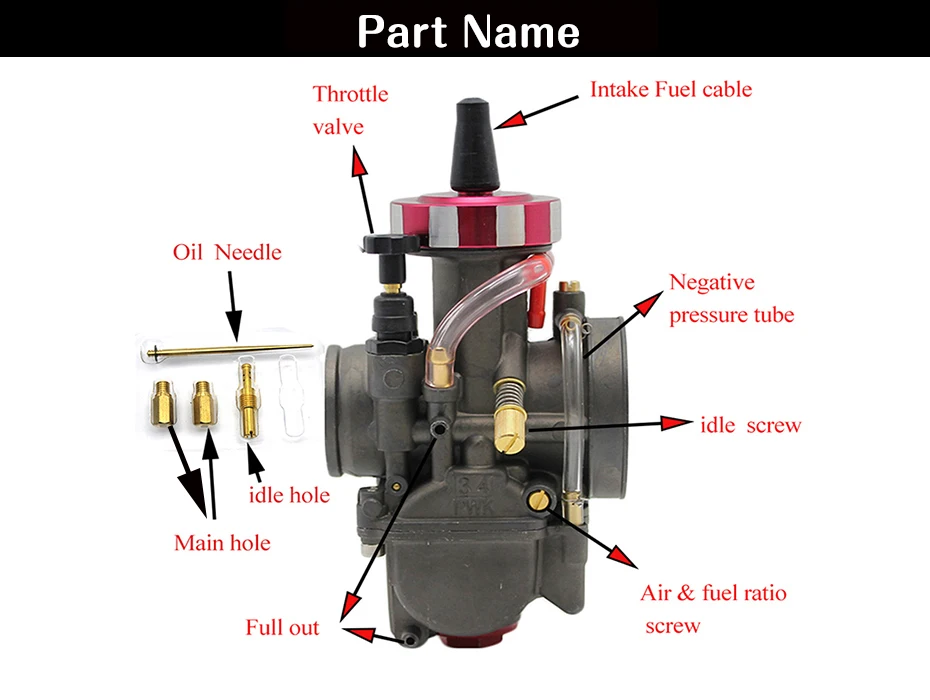
The jets are where the fuel flows and mixes with the atmospheric air. These are screws with a small hole through them, much like a brake bleed screw.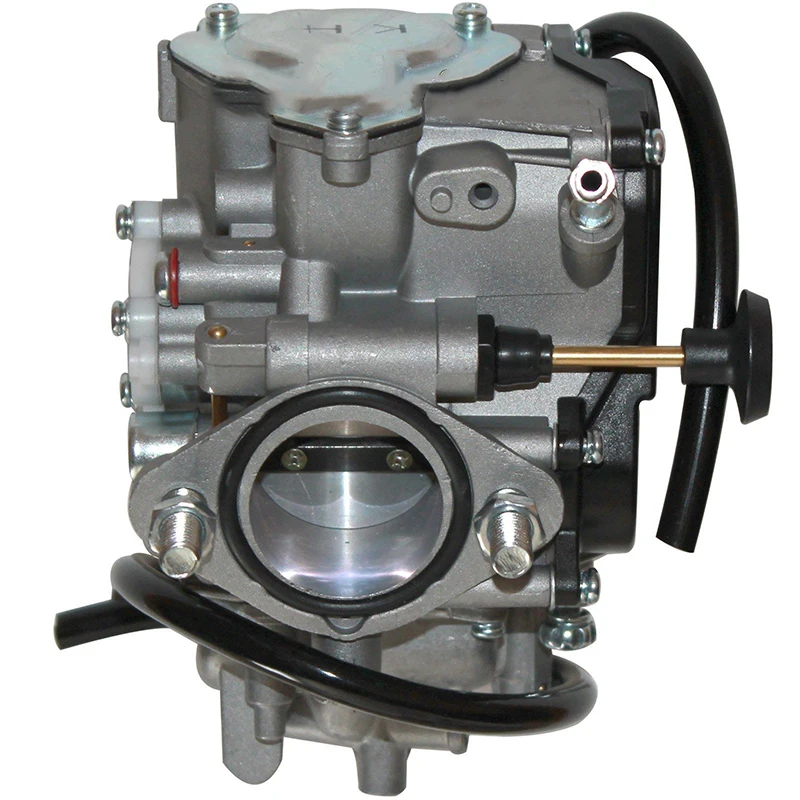 The main jet is short and fat and will have either a hex head or a flat screw head. The pilot jet is long and thin and have a flat screw head. Be careful not to use too much force when removing the jets; the biggest risk is accidentally stripping the screw threads and getting tiny metal shavings inside the hard-to-reach spots and crevices within the carburetor interior.
This is the idle screw, air screw, and the choke (if external). With a flathead screwdriver, remove the idle and air screws. Again, be mindful not to use heavy force. If the carburetor has an external choke, turn the top with a wrench. The choke should easily slide out.
WARNING: Remove all gaskets and o-rings prior to cleaning the carburetor. Carburetor cleaner chemicals will eat through rubber o-rings. Also, be sure to wear nitrile gloves and safety glasses when using the spray cleaners. It’s nasty stuff and you don’t want it soaking into your skin and/or getting in your eyes.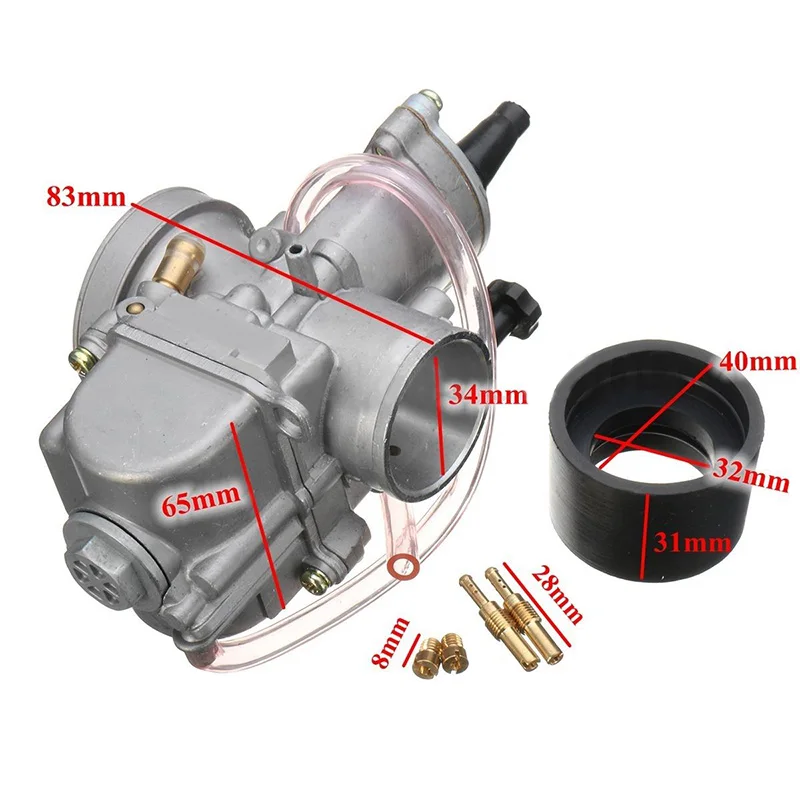
Spray a little bit of carburetor cleaner on the exterior and use your wire brush/tooth brush to break up and agitate the debris. Give it another good shot of the spray cleaner and begin to work the holes where the jets, air and idle screws, float needle, and choke reside. Spray the holes directly with the cleaner. For stuck, caked-on debris, try to blow it out with compressed air (a thin needle or steel guitar string can also help fish out the gunk). For the throttle inlet, spray the throttle cleaner while breaking up the deposits with your brush. Spray again to wash away the residue. When finished, blow off the carburetor with compressed air. Don’t let the loosened dirt/carbon debris/cleaner sludge dry back onto the carburetor and its components.
Race Driven sells complete carburetor rebuild kits, such as this one for a Yamaha Moto 4.
This would be a perfect opportunity to replace your old gaskets and o-rings with brand new ones.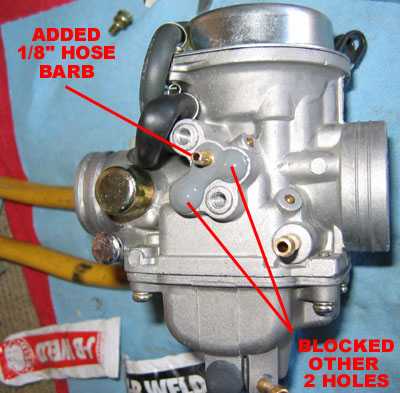 These pieces are meant to form tight impenetrable seals and by dislodging and disassembling the carburetor, you risk damaging these protective layers. At Race Driven, we specialize in small engine parts for motocross, street and competition motorcycles, and off-road and performance ATVs. We have full carb kits that include all the vital components such as replacement jets, springs, gaskets and o-rings for popular models by Yamaha, Kawasaki, Honda, Polaris, Suzuki, and more.
Last updated:
ATV Carburetor Adjustment involves tuning your ATV’s carb for maximum performance. How do I know my jetting is off? My ATV bogs down a lot, is jetting to blame? I have performance parts, what now? These are all common questions so lets get you up to speed on ATV carburetor adjustment.
You can tune your own ATV jets and avoid common jetting mistakes if you understand some jetting basics, explained below.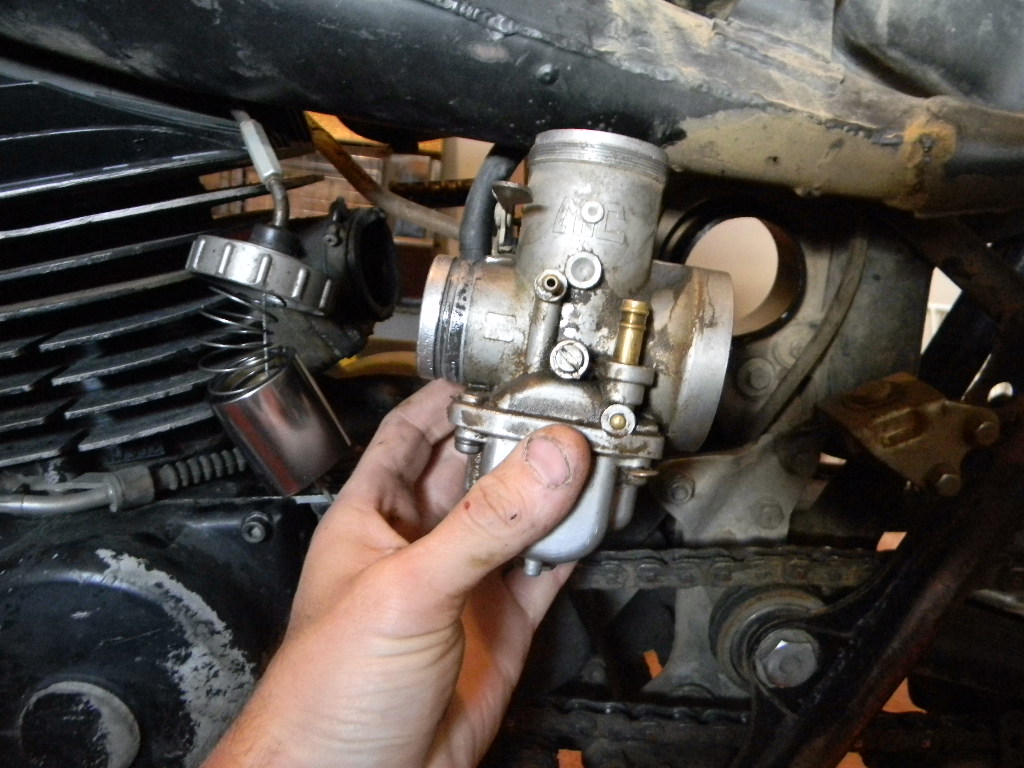 A comprehensive installation guide will come with the jetting kit you purchase for your make and model of ATV so instead this guide will focus on explaining the basic principles of how ATV jets work. How jetting works…
#1 – The first thing you need to remember is that ATV jetting refers to throttle position, not engine rpm. Each jet is effective for a specific throttle position range. The pilot jet, or pilot screw as it is sometimes referred to, controls the flow of fuel between Idle speed and about one eight of wide open throttle (WOT). The needle jet controls the flow of fuel from the one eight position up to about the three quarter throttle position. Lastly your main jet controls the flow of fuel between the three quarter and wide open throttle positions.
#2 – The second thing you need to know is that aftermarket performance parts will change your jetting requirements. Increased engine performance usually means an increased demand for fuel so learning ATV carburetor adjustment techniques is important.
Other factors that affect jetting are rev limiters, altitude and fouled plugs if your jetting is off. Altitude directly affects engine performance because the higher you go from sea level the thinner the air gets.
The pilot jet, also referred to as pilot screw, controls carburetor fuel/air mixture between Idle and 1/4 throttle. Turning the screw IN makes the fuel/air mixture leaner. Turning the screw OUT makes the fuel/air mixture richer. Lean means less gas, rich means more gas.
Every jet is identified by a number and that number relates directly to the size of the opening inside the jet. Again smaller is leaner, larger is richer. When jetting your carb if you find that you need to turn the pilot jet all the way in to improve response then you likely need to switch to a smaller number of screw.
If on the other hand you need to turn it more than 2.5 turns out you likely need a larger numbered screw. When your engine bogs down at the smallest increase in throttle position your pilot jetting is likely too rich.
The needle jet and its needle controls the fuel/air mixture from the 1/8th throttle position all the way up to the 3/4 throttle position. The needle within the needle jet is a long tapered pin. As you increase the throttle position the pin pulls out of its jet allowing the fuel/air mixture to become richer. There are several different shapes and diameter of needles/needle jets but the needle jet is often left alone during tuning as it doesn’t affect idle or top end performance. The same rich/lean characteristics apply as with the pilot screw.
The main jet controls the fuel/air mixture from 3/4 throttle position up to wide open throttle. Again the main jet is numbered and a larger number indicates a larger hole and a richer mixture. A stock engine will perform well with a stock main jet but once engine performance parts are added its likely that you will need to revisit at least the main jet of your carburetor. Different performance part combinations will create different demands from your carburetor.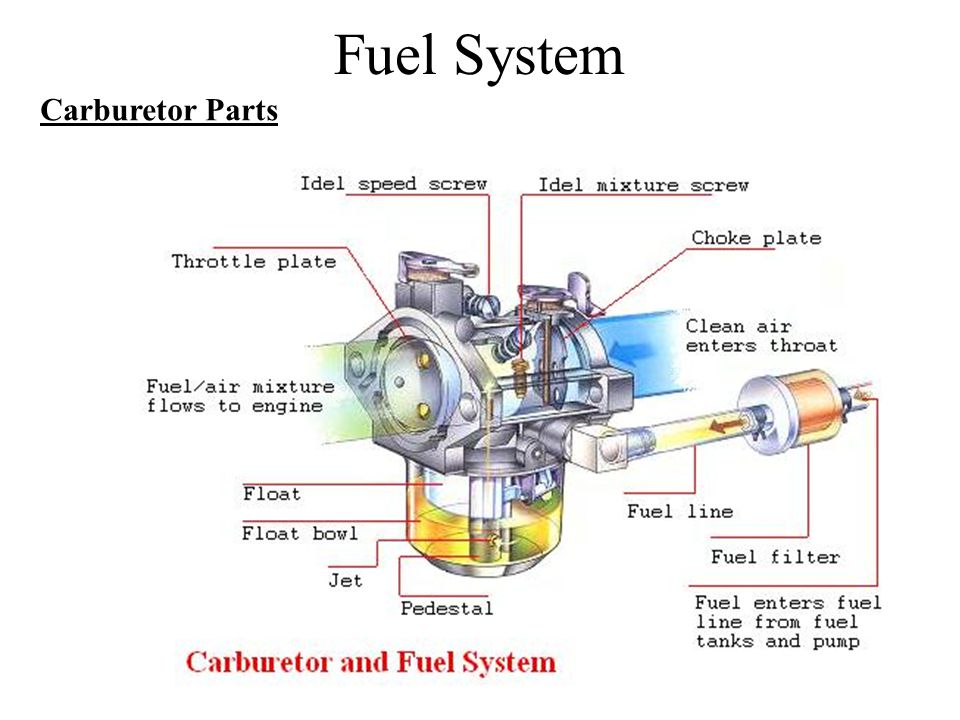 Anything that increases horsepower will also increase fuel demand.
All the performance parts in the world won’t improve performance if you don’t tune your carb. If you have a rev limiter in place you may need to tune or upgrade that as well because a rev limiter will tend to bog down the engine at full throttle. Make sure to follow the instructions included with most jetting kits.
Now that you, hopefully, understand a bit more about the basics of how ATV carburetor parts work these are the steps to take if you’re in a jam on the trails. Blockage, damage, fuel contamination, mud in the air intake system and other conditions can cause your ATV carburetor to be unable to deliver the right amount of fuel to your ATV engine. You always want to tune your ATV carburetor at home or in the shop but that’s not always possible. If you’re in a jam, this is what you can do.
 With the engine off grasp the spark plug wire and make sure it’s securely attached to the engine. Look for signs of obvious damage or dirt in the air intake. Make sure the battery is properly attached.
 An ATV engine that runs too lean will run hotter and you risk burning a piston or damaging rings. If it runs too rich you risk valve damage and backfiring.
Carburetor jets control the amount of fuel which is mixed with air inside the throttle body of your carburetor. This carburetor jet size chart shows you how effective each jet is at specific throttle levels. A Pilot jet is effective at idle speed up to 1/4 throttle(low-range). A needle jet is effective from 1/4 throttle to 3/4 throttle(mid-range). A main jet is effective from 3/4 throttle up to wide open throttle(top-end).
When diagnosing a carburetor or tuning problem look at the jet responsible for the range in which the problem is occurring.
ALWAYS follow the manufacturer’s specifications whenever possible. Jet size is usually stamped onto the jet itself, typically in milimeters(mm), ranging from small to large. Changing a carb jet for a smaller sized jet will reduce fuel flow. Likewise, installing a larger jet will increase fuel flow and may help a performance engine run more smoothly. Note: an engine that runs rich is less likely to sustain heat damage than and engine that runs lean.
I hope that this carburetor tuning guide helps you understand how jets work so that you can best dial in your ATV for maximum performance(and fun!).
 You will need this information to adjust the mixture upon re-assembly.
Carburetor jets become clogged naturally over time and a periodic carburetor cleaning is required. Always consult with your ATV owner’s manual for specific maintenance instructions. Always check the fuel lines, filter and gas tank for contaminants and clean as required at the same time to avoid further clogging.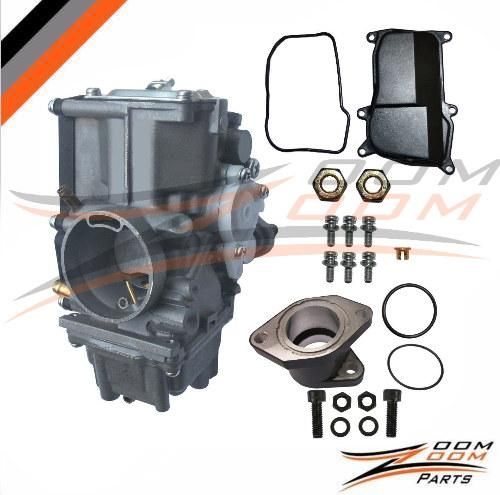
The majority of carburetor problems are a result of blockage and worn out parts. Troubleshooting a clean ATV carburetor is also much easier than troubleshooting a dirty carb. Typical tools required include a flat head screw-driver, compressed air, an 8mm wrench and carburetor cleaner. Note: Some gaskets and plastic components will swell if exposed to carb cleaner so remove these prior to use.
How to adjust the carburetor on an ATV? What to pay attention to? What are the signs of misuse of the device? About this today in our article. Using the proposed instructions, you will be able to set up the carburetor step by step without the help of specialists.
For stable operation of the ATV, it is necessary that the engine receives the optimal amount of combustible mixture corresponding to its rev range. Otherwise, the following problems may occur: nine0003

What needs to be applied in this case:
Important! Carry out tuning only when the carburetor is cleaned outside and inside, as well as when the engine is warmed up to operating temperature. nine0003
 1 until it stops. Wait for the gasoline to merge completely, and tighten screw No. 1 back.
  nine0010
 Note. The location of the bolts on each carburetor model may vary, so read the instructions that came with your machine.
1. Start the ATV and test ride. Wait until the engine has completely cooled down. nine0003
2. Check the condition of the spark plug. To do this, unscrew the cap and inspect the candle.
What to look for:

3. Unscrew the needle cover at the top of the carburetor. Pull the needle. This is the main element that regulates the supply of fuel to the combustion chamber, since the needle is connected to the gas trigger. When the trigger is pressed, the needle rises, slightly opening the hole for supplying the fuel mixture. This directly affects the growth of power and speed of the ATV.
4. Remove the cable, then press the needle to pull it out. The needle has 5 grooves and a retaining ring. By default, it is set to medium. The lower the retaining ring is located, the higher the needle is raised, which means that a lot of gasoline and little air is supplied. Accordingly, the higher the ring - the less gasoline and more air. nine0003
5. Reposition the circlip in the desired direction to optimize carburetor performance. Insert the needle into place.
6. Start the engine and press the throttle trigger. With proper adjustment, the engine should not stall from a sharp pressure.
And remember, you should resort to adjusting the needle only as a last resort, when adjusting the quality and quantity screw does not bring results.
The performance of a four-wheeler depends on the correct level of gasoline in the carburetor. An excessive amount will flood the candles, spill onto the ground and lead to unnecessary expenses. If there is too little fuel, the engine simply will not start.
How to optimize the fuel supply
The operation and life of the engine directly depends on the quality of the fuel mixture. The carburetor is responsible for the preparation of the composition, but after prolonged use of the equipment, the settings “go astray”. This results in:
 Traction can disappear for one or several seconds. But the most unpleasant thing is that such failures occur sequentially, which significantly interferes with speed gain.
 Many riders who decide to buy an inexpensive ATV simply do not spare the technique and ignore this procedure. But even if you plan to change your device in 1.5-2 years, adjustment is needed. The reason for this is increased fuel consumption. A quad with an untuned carburetor "eats" 30-40% more gasoline, and these are tangible costs.
So how do you adjust the carburetor on a Chinese ATV? For this you need:
 The procedure is performed using a special screw, which is responsible for the quality of the composition and the number of revolutions.
 However, it is important to remember that all adjustments are made only with a "clean" carburettor. This means that the rider needs to remove all the dirt from the node and flush the system to remove condensation and sediment from it.
Note: The engine must be warmed up to operating temperature immediately before adjustment.
To set the carburetor idle speed, the float chamber must first be cleared of fuel. To do this, start the ATV, close the fuel cock and wait until the machine stalls (5-10 minutes). To speed up the process, you can take a little ride on the quadric. Of course, gasoline can be drained, but in any case you will have to warm up the device, so the first method of "removing" gasoline is more effective. nine0003
Then:
Read the manual before adjusting the carburetor on a 125cc ATV to be sure. Remember that the location of the bolts is different in different devices, so read the documentation in advance. nine0003
To evaluate the quality of the fuel composition, make a test run. After that, unscrew the candle, and evaluate its condition. If it is:
Also look out for these "symptoms": damaged tip (electrode failure), oil deposits (damage to rings and caps), chips and inclusions (sign of motor failure).