Delivery options and delivery speeds may vary for different locations
Sign In
or enter a zip code
Email * Password *
REPAIR & HOW TO
MAINTENANCE
TROUBLESHOOTING
GUIDES
TIPS & TRICKS
ALL ARTICLES WATCH VIDEOS ABOUT US SHOP PARTS CONTACT US
If the timing chain on a Honda ATV slips a tooth or is incorrectly laid over the timing sprocket during an engine rebuild, you have to reset the cam timing.
Watch the video above and follow the steps below to learn how to set the cam timing on a Honda TRX400EX.
NOTE: To access the timing cam, you’re going to have to do a bit of disassembling first.
Honda TRX400EX Set Cam Timing DisassemblyStep 1. Remove the seat, plastics, fuel tank, and the engine cover beneath the fuel tank.
Step 2. Remove the air intake, and the top motor mount bolt and the pair of spacers that secure the cylinder head cover.
Step 3. Remove the cylinder head cover from the top of the motor to expose the timing cam and timing belt.
Watch the video below to see how to disassemble a Honda TRX 400.
Honda TRX400EX Setting the Cam TimingStep 4. Remove the crankshaft cover and the camshaft inspection cover, located on the left side of the crankcase in the flywheel cover.
Step 5. Rotate the crankshaft counterclockwise until the T mark on the flywheel lines up with the mark on the inspection hole. The motor is now at top dead center or bottom dead center (TDC or BDC). It needs to be at TDC, so look at the camshaft lobes and if they’re facing down, the motor is at TDC, or at BDC if they’re facing up. Continue rotating the crankshaft until the T mark lines up in the inspection window again
Step 6. Once the motor is at TDC, look for the two marks on the cam timing sprocket. The two marks should be aligned with the face of the cylinder head for the timing to be correctly set.
Step 7. If the marks are not level with the cylinder head, you'll need to reset the TRX400EX’s cam timing. To do this, remove the two bolts holding the camshaft. Lift the timing chain off the timing sprocket, then the timing sprocket off the cam and rotate it so the two marks align with the cylinder head. Replace the timing sprocket back on the cam and the timing chain back over the sprocket.
Step 8. Reinstall the two camshaft bolts and rotate the crankshaft counterclockwise until the engine reaches TDC again and the T mark on the flywheel is centered in the inspection hole. Check that the two marks on the cam timing sprocket are correctly aligned and if they aren’t, repeat Step 7.
Honda TRX400EX Set Cam Chain Timing ReassemblyStep 9. Reinstall the cylinder head cover onto the motor.
NOTE: Use a new cylinder head cover gasket when reinstalling the cover.
Step 10. Reinstall the top motor mount bolt and spacers, air intake, engine cover beneath the fuel tank, the fuel tank, plastics and the seat and you’re done.
body
 com
comEngine timing is mission-critical. Getting this stuff wrong can spell big trouble. If you suspect timing is out, best not to run the motor.
Checking ATV engine camshaft and crankshaft timing marks is the correct way to verify timing. It’s a simple 4 step process:
By the end of this post, you’ll understand clearly how to check your ATV engine timing marks, why timing jumps and how to fix it, and also other causes of bad timing.
Page Contents
Timing is everything, every component of your engine has an important job to do, and some components have to do it at a very precise moment in the engine cycle. Doing their job too early or too late can make the difference between an engine on full song and no singing at all.
The bottom end of your engine (crankshaft) coordinates the top end (valve train). It employs sprockets, chains, tensioners, and guides rails to keep everything in time. The valves positioned in the cylinder head open and close sequentially, allowing fuel in and spent gases out.
The spark plug needs to fire at the correct time. Ordinarily, when the engine is idling, the plug fires when the engine is at TDC, and it signifies the beginning of the power stroke.
As the engine speeds up, though, the plug is fired earlier. Know as BTDC (Before Top Dead Center), this is because the spark plug takes time to produce a spark. Starting the process early, therefore, means the plug continues to fire at the sweet spot in the engine cycle.
The firing, advancing, and retarding of the spark plug is controlled by the trigger (aka pulse, pickup, or crankshaft sensor (CKP)) and the CDI box (Capacitor Discharge Ignition).
An ignition timing issue may be caused by a faulty CDI box or an incorrectly positioned pickup sensor.
Your ATV engine is a four-stroke simply because it has four clearly defined stages in its operation.
The piston moves down the cylinder and draws fuel mix in through the open intake valve.
The piston moves up the cylinder, compressing the air-fuel mix (valves closed).
Plug fires and the piston moves down the cylinder powering the crankshaft (valves closed).
The piston moves back up the cylinder forcing spent gases out the open exhaust valve.
And the cycle starts over.
There may be lots of reasons why your ATV engine doesn’t sound or operate like normal. Timing is not one of the first items checked unless it suffers from some of the following symptoms:
Don’t rule out some of the simple causes first and they include the following:
Checking your timing is a straightforward procedure, but you’ll likely need to remove a few items to gain access.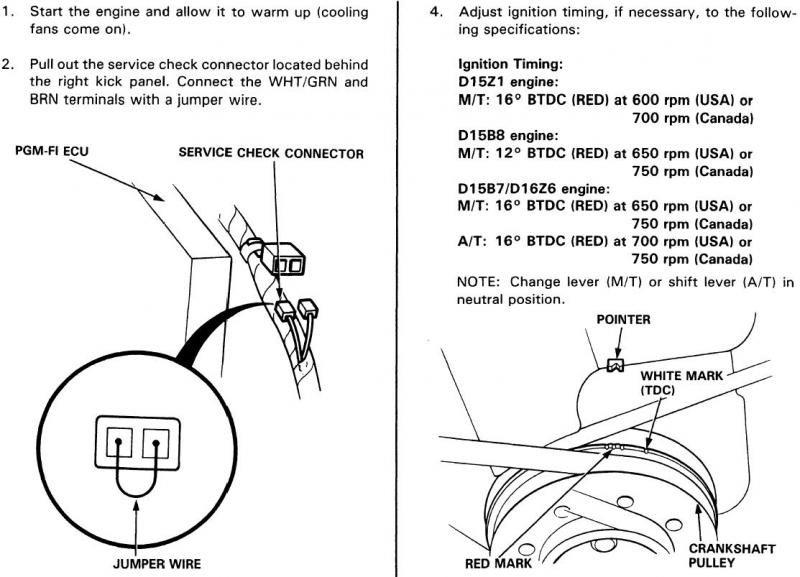 This guide guesses that your engine is an Over Head Cam found in most modern ATVs. I’ve included a single and a twin-cam, your timing markings will likely be different but not to worry, from the timing diagrams below, you’ll get the picture.
The process goes like this:
 It should align with the mark on the cylinder head.
For twin-cam engines, the process is similar, with just an extra sprocket mark to line up. Typically, both sprocket marks align with the horizon plain of the cylinder head (marked as red lines below) and some sprockets may have an additional mark (not in the pic below), and typically they point straight upwards (90°).
The timing chain and valve train are all mechanical and require adjustment and maintenance for trouble-free service.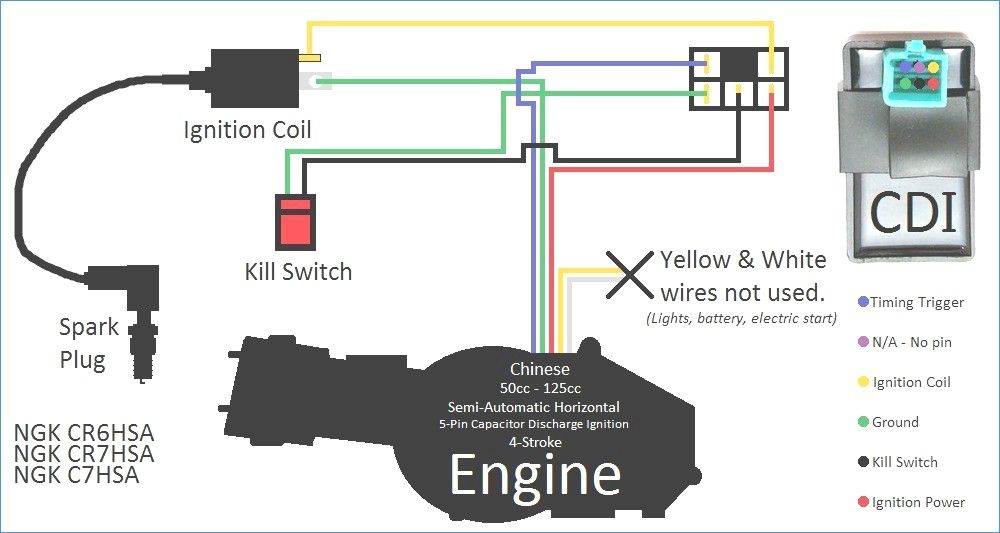
The more usual causes of jumped timing include:
Resetting the timing can be a pain in the ass, but you do need to get it correct. If the timing isn’t correct, the piston could impact the valves, causing some very expensive repairs. Your very first job is to find a manual for your engine. The process, torque specs, and tightening sequences vary from engine to engine.
Critical information and tools
You’ll need to know your timing marks, torque specs, fastener sequences, and you’ll need a torque wrench. You’ll find a list of all the tools I use here on the ATV tools page.
This guide will give you a general flavor of the job ahead.

A full inspection of the chain, sprockets, guides, and tensioner is advised. A failing tensioner is a very common cause of jumped timing, and obviously, if root causes aren’t fixed, timing will jump again and maybe with costly consequences.
You may find these posts useful:
How often to service an ATV?
ATV parts page
ATV won’t jumpstart
Air-cooled ATV white smoke
Will ATV start with a bad stator?
It often seems like an insurmountable task for beginners to tune and adjust the carburetor of an ATV, but in fact, it is far from being the case. Using our instructions, you can easily set up a carburetor with your own hands.
Due to incorrect carburetor settings, problems such as: acceleration dips, jerks while driving, uncertain start of the engine, poor acceleration dynamics, overheating, loss of power, increased fuel consumption, formation of deposits in the combustion chamber. nine0003
So what exactly are we going to tune?
Attention! The adjustment is carried out under the condition of a warm engine and a clean carburetor.
First, make sure there is no condensation in the carburetor. First, you need to drain the gasoline from the float chamber, for this you need to close the fuel cock and partially unscrew the screw No. 1, after the gasoline has drained from the float chamber, tighten the screw No. 1. nine0003
Let's look at photos of candles with various deposits and defects.
A 100% indicator of a correctly adjusted combustible mixture is carbon deposits on a candle.

Consider the location of the screws for adjusting the quality of the mixture and idle speed of carburetors of different models.
#1 Float chamber plug; No. 2 Mixture quality screw;
#3 Idle adjustment screw.
1 - quality adjustment screw at idle; 2 - fuel inlet fitting; 3 - fitting through which you can sleep fuel from the float chamber; 4 - screw-plug of the float chamber.
1 - ventilation tube; 2 - idle speed adjustment screw; 3 - screw for adjusting the composition of the air-fuel mixture.
ATV carburetor speed and mixture adjustment.
1. Start and warm up the engine until it reaches operating temperature. nine0003
2. Adjust the idle screw to set the idle speed to normal. Completely, until it stops, tighten the fuel mixture screw, the engine should stall. If this does not happen, check the tightness of the air supply system from the air filter.
3. Loosen the fuel mixture screw 1 turn. (Turning the screw clockwise, we enrich the mixture, unscrewing it counterclockwise, we lean).
4. Start the engine and, by adjusting the idle speed screw, set the speed slightly higher than normal
5. Slowly unscrew the fuel mixture screw until the engine reaches maximum speed (we unscrew the screw no more than 2 turns, but depending on engine wear and other malfunctions, the range may vary).
6. Re-adjust the idle screw to set the idle speed to normal.
7. Press the throttle trigger several times, check if the idle speed is stable.
Adjustment of the mixture quality with a needle. nine0008
Probably you have heard more than once about adjusting the quality of the mixture on the carburetor by manipulating the needle. I note that these are extreme measures, for the initial adjustment, use the mixture quality screw, and only if you do not get the desired result, unscrew the mount and remove the needle. What does she represent? This is the main element that regulates the amount of gasoline supplied to the combustion chamber. Connected directly to the throttle handle through a cable. When you turn the knob, the needle rises higher, opening up a channel for fuel, thereby delivering more mixture, which increases power, which translates into speed. nine0003
You will see 5 grooves on the needle at the attachment point. Initially, the retaining ring fixes it in the central position, this is the best option. But sometimes it is not possible to achieve the required quality of the mixture. Then we will need the remaining grooves, 2 on top and 2 on the bottom, this suggests that we can adjust the dose gradually.
Lifting the retaining ring up and locking it in this position lowers the needle, which, in turn, blocks the channel more than usual. Gasoline enters less than air, and the mixture becomes leaner. Lowering the ring down, we raise the needle, and everything happens exactly the opposite. nine0003
Be aware that an excessively lean or rich mixture can lead to serious malfunctions from overheating to loss of power, carbon deposits in the combustion chamber and all the consequences that follow from this. Keep an eye on the condition of the spark plug electrodes, this is the main indicator that will help you determine the quality of the mixture.
If you have any questions about the adjustment and tuning of the carburetor, you can ask them below in the "Comments" column.
Many users of technology sometimes do not know how to use it correctly. As a result, poor-quality operation of the device, quick breakdown and dissatisfaction with the possession of equipment. The following will explain how to use the action camera.
Contents
Action cameras are fairly simple technical devices, but there is still a certain sequence of actions that should be followed after purchase. nine0003
First, you need to connect the battery to the camera and insert the flash card . Not all manufacturers include a memory card in the basic package. It is possible that you will have to purchase an additional card. If you can’t immediately buy it, then don’t worry: the camera has some internal memory, but, as a rule, it won’t be enough for a full-fledged shooting.
Memory cards are not all the same, you need to find out which card the device will support. nine0003
The next step is to charge the battery . There are two main options here.
At the charging stage, you can already try turn on the camera . You will be prompted to select a language, after which instructions are shown. It is important to read all the information carefully. It is possible that the user gets access to the main menu only after connecting to a smartphone. If you have such a case, then there will be detailed instructions for connecting the phone to the camera. nine0003
Until the moment of full-fledged shooting, you should study the menu and settings of your specific camera. Some of them will be intuitive. The settings will be discussed in more detail below.
Then you should try to connect the camera to the smartphone if it is possible. Sometimes the phone opens up new features to control the action camera. You should not ignore the phone when working with the camera.
Read also: how to choose an action camera. nine0003
Depending on the operating system of your phone, download the official camera application. You can find the name of the application in the instructions that came with your action camera or on the Internet.
You will need to register and allow the program access to the required information. In order to connect your phone to the camera, you should:
Depending on the type of camera, the connection can be made in several basic ways:
After connecting, some device models require you to enter a PIN code or scan a QR code.
The manual has information on where to find it.
In general, there should be no problems when connecting the camera. The only thing worth paying attention to is compatibility of the application version with the operating system version of your smartphone. Incompatibility may cause problems with the application.
When buying an action camera, you can hear from the seller that the setting for this device is not required. One button turns on the camera, the second starts recording video. Actually this is not true. An action camera, like a camera and a camcorder, requires a certain setting that will allow you to influence some video parameters - its quality, size and other details. You can set up an action camera once, but it has enough parameters that you need to change under different shooting conditions. nine0003
 A large viewing angle allows you to fit more space into the frame, but at the same time distorts the edges of the picture (fisheye effect). You can change the viewing angle in the camera, but it is worth remembering that with its increase, the edges are blurred. nine0012
Action camera control can be:
Direct control is the easiest and most accessible on all kinds of devices. To start shooting or stop it will have to interact from the camera menu. Here the main minus appears. If the camera is mounted on the head or on the quadcopter, it will have to be removed and performed the required manipulations, then mounted back. This is inconvenient and can be critical, especially when valuable frames disappear. And the plus is ease of use.
Remote control can be implemented by voice or by remote/telephone. If everything about the phone was described above, then it is worth dwelling on voice control in more detail. Some advanced models do have this capability. But almost always these commands should sound in English. This is not possible for some users. Also adding fuel to the fire is the fact that such control sometimes requires an additional microphone.
For voice control, please check with the seller in advance. Only a small number of models have support for the Russian language.
Action camera remote control
To get the most out of your camera, you need to make sure that the accessories are securely mounted. After all, the main task of such a camera is to free the hands of the shooter. If you are into active or extreme sports and want to capture your progress, then the best option is to mount the camera on your head or shoulder. But not always such mounts come out of the box. They will have to be purchased separately. nine0003
All action camera mounting options can be found in our article.
If shooting will take place underwater, in rain or in dusty conditions, then you should shoot in a special aquabox . Such a box often comes with the device. For underwater shooting, you will also need a special float to determine the location of the action camera and color filters to even out the color gamut underwater. With such shooting, it is best to control the camera remotely, using the remote control. nine0003
Aquabox protects the camera from moisture
For more static shots, you only need the tripod and the microphone for clearer sound. A tripod and a microphone are sometimes not included in the basic package. You can buy them at any specialized store. You can control the camera directly through the menu.
The camera is also used for filming from above. Here you need a quadrocopter . Mounting the camera to the quadcopter is most often provided in its design. You also need to take into account the maximum weight that the drone can lift, so as not to make an unnecessary purchase. nine0003
In addition to the above ways to use the action camera, it can be used as a DVR in a car, as a webcam on a computer, as a video camera in an apartment. And this is not a complete list of possible applications of the camera.
See also: accessories for action cameras.
After shooting video with an action camera, there is always a need to transfer the data to a computer or immediately view the recording on a TV. There are two ways to connect the action camera with other devices: wired and wireless. nine0003
Important! In addition to the Wi-Fi function, you will need a special application for a wireless connection.
Most often, data is transmitted via wire to a computer, laptop or TV. You can connect the action camera to your computer via a USB cable, which is usually supplied with the device. Most action cameras do not require special applications to transfer photos and videos. If the computer does not see the action camera via USB, then several options are possible:
There are no particular difficulties to fix these problems, but for those who do not want or cannot do this for some reason, there is an even easier way to reset the video on a PC - take out a memory card and use the SD adapter to transfer all information through the card reader.
To connect an action camera to a TV , you will need an HDMI cable and the presence of this connector in the device itself. As a rule, the camera is equipped with mini-HMDI, so the cable must be of the appropriate type. With this connection, it is possible to view data on the TV, control is carried out using the remote control.
Many modern action cameras are equipped with a Wi-Fi module , which allows you to connect it wirelessly to any gadgets. This is a very useful feature, because often during the shooting you need to view the video. It is quite inconvenient to do this on the small screen of an action camera, and it is not always possible to carry wires with you. nine0003
Any experienced action camera owner knows that making video is only half the battle. Then it needs to be processed, and this will require special programs. In them, you can edit video, remove unnecessary sounds or, on the contrary, add music, and also perform a number of other useful actions to improve the quality of a photo or video.
Action camera software can be divided into two groups:
Camera MX is an app with a lot of functionality. Here you can not only edit videos and photos, but add various special effects, sounds, apply filters and adjust layers. The advantage of the application is ease of use and the ability to preview how the special effect will look. Through this application, you can adjust the contrast or adjust the white balance. nine0003
Camera 360 Ultimate is another powerful photo and video application. In addition to layers, masks, special effects and all kinds of filters, this software allows you to make miniatures or posters. To work with videos, you can use ready-made templates or create your own. Selfie lovers will surely be delighted with the wide functionality for working with photos. You can immediately work on the background, adjust the color of the skin or eliminate defects (beautification). In fact, this application is a miniature photoshop for smartphones. nine0003
The nice thing is that all settings can be adjusted immediately before shooting. You can also process the finished video.
Better Camera is an application from the Almalence studio that has collected all the old developments. Here you can work with HDR, experiment with night shooting or panorama. The program allows you to work with shutter speed, focus. There are many built-in shooting modes and a wide range of different settings. The application can be safely called professional, but you will have to pay for it. The free version is only available for the first 30 days. nine0003
Camera Awesome - originally created for iOS devices, but later ported to Android. In addition to a huge number of settings, it is possible to add an effect or filter to the required segment of the video. There is also a slow motion function, which is very relevant for processing video from an action camera.
Programs for video processing are more relevant for installation on a laptop or PC. Obviously, editing and editing is much more convenient on a large screen than on a smartphone display. nine0008 Of course, you can use giants for processing photos and videos such as Adobe Photoshop, Pinnacle Studio and the like, or you can install special software for working with action cameras. The most popular are the three applications listed below.
 That is, the user gets the opportunity not only to process the already finished video or photo, as well as transfer it to the hard drive, but also to control the settings and the camera itself from the PC.
 Many owners of digital equipment know that 80% of breakdowns are related to battery failure. At the same time, almost 90% of the cause of the breakdown lies in improper charging of the device. There are three rules to follow in order to prolong battery life.
 If the battery is not charged for a long time, then it plunges into a kind of lethargic sleep, which usually ends in death. If the camera is not going to be used for a long time, the battery should be stored separately from it and charged periodically, at least once every 3-4 weeks. nine0012