Maintenance June 16, 2022
We’re all feeling pain at the pump these days, and with gas prices continuing to rise, getting better gas mileage is top of mind. Fortunately, one of the best ways to improve your vehicle’s gas mileage is also the least expensive: keeping your tires properly inflated!
With just a few minutes of your time and a couple of dollars out of your pocket, inflating your tires can increase your gas mileage by up to 3%! Correctly inflated tires will also result in improved handling, longer tire life, and a lower risk of accidents and tire blowouts.
We recommend checking your tire pressure at least once a month. Pick a date you will remember, like the first day of the month or payday, and be consistent about checking the pressure on that day, especially as the seasons change.
Read: 7 Tips on How to Get Better Gas Mileage
All vehicles manufactured after 2007 have a Tire Pressure Monitoring System (TPMS) that alerts you when your tires are overinflated or underinflated. However, it’s still a good idea to regularly check your tire pressure manually.
When measuring tire pressure, you’re looking at pounds per square inch (PSI). Most cars require around 30–35 PSI.
To properly check your vehicle’s PSI, you will need:
Tire Pressure Gauge
Tire gauges come in a variety of styles and can be found at most automotive parts stores. A basic “pencil”-style tire gauge will get the job done, but a digital gauge is more reliable and easier to use.
A high-quality gauge is essential for accurate readings, and it will only cost you $15–$20.
Recommended Air Pressure
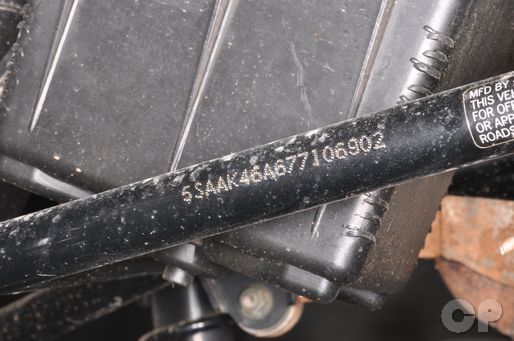
The manufacturer’s recommended tire pressure can be found in the owner’s manual and on a sticker on the driver’s side door or door jamb. There may be different pressure requirements for the front and back tires.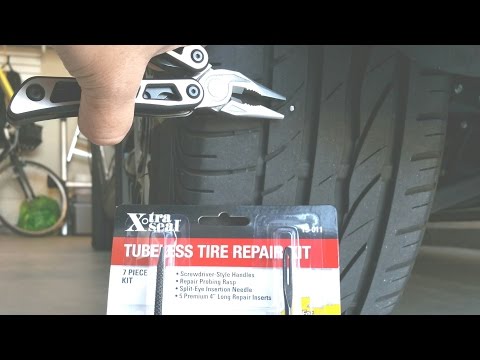
DO NOT use the PSI that is printed on the sidewall of your tires. This is not the recommended PSI; it is the maximum inflation pressure. Filling your tire to this pressure is unsafe and could cause a blowout.
Vehicle manufacturers set the recommended pressure when the tires are cold. So, for the most accurate measure of your tire’s PSI, you should check them in the morning before you leave or after the vehicle has been parked for three or more hours.
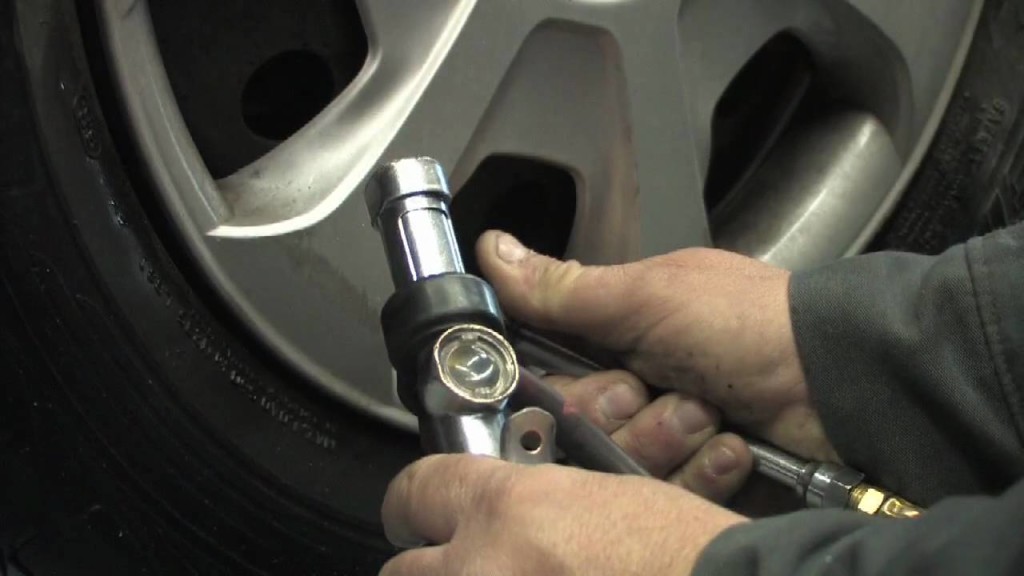
To measure tire pressure, first park the vehicle and set the emergency brake. Remove the tire valve cap and put it in a safe place, like your pocket. Then, press the tire gauge firmly onto the valve stem and hold it for a couple of seconds until you get a reading.
If you hear any air leaking while holding the tire gauge in position, move the gauge around until it seals and the hissing stops.
With a pencil-style gauge, a thin bar will pop out from the bottom of the gauge. Markings on the bar will show the PSI. A dial gauge will show the PSI on the dial, and a digital gauge will display the PSI on the screen.
You may need to take a reading 2-3 times to get the most accurate result. Write down which tires are below the recommended pressure setting so you know which tires to inflate. And don’t forget to check the spare!
Read: How Does Cold Weather Impact Tire Pressure?
When you have an underinflated tire, it’s time to find an air pump!
Some people opt to purchase their own air compressor. There are portable options available for as low as $50. However, most people choose to use the air pump at their local gas station.

Many Virginia Tire & Auto locations have a free air pump available outside the store. And if there’s not a pump, we will gladly pull your vehicle into a bay to check and inflate your tires for free!
And if you’ve purchased tires from us, you get free nitrogen top-offs for the life of the tire with tires&! Nitrogen helps your tires maintain proper tire pressure longer by not leaking as quickly as regular air. This leads to increased fuel efficiency, longer tire tread life and improved tire performance.
Read: Why You Should Consider Filling Your Tires with Nitrogen
We all know that routine maintenance is important for everything from our computers to our cars. But sometimes, we fall short. One of the most neglected routine car maintenance tasks is to check tire pressures and inflate them as necessary. That’s why newer cars have tire pressure warning lights, or tire pressure monitoring systems (TPMS), that let you know when you have under- or over-inflated tires (when any tire is 25% underinflated).
Older vehicles don’t have this useful warning light. So, don’t wait for a rupture to check or change a tire. Use this guide to learn how to check the pressure (PSI) of your vehicle tires and how to inflate them to the proper air level.
Why should you check your tire pressure?The number one reason why you should periodically check your tire pressure is SAFETY, but there are monetary and handling reasons as well:
Proper tire pressure (as recommended by the manufacturer) is needed to drive safely and efficiently. According to a 2009 report by the National Highway Traffic Safety Administration:
“…about 28% of light vehicles on our Nation’s roadways run with at least one underinflated tire. Only a few psi difference from vehicle manufacturer’s recommended tire inflation pressure can affect a vehicle’s handling and stopping distance. Poor tire maintenance can increase incidences of blowouts and tread separations. Similarly, underinflation negatively affects fuel economy.”
When your tires are underinflated, the tires get fatter, increasing their surface area. This causes high heat generation and extra resistance that could result in higher fuel costs, blown out tires, tire wear, and loss of control.
If you feel like you’re spending too much at the gas pump, it might be your tires. According to the US Department of Energy:
“You can improve your gas mileage by 0.6% on average—up to 3% in some cases—by keeping your tires inflated to the proper pressure.
Under-inflated tires can lower gas mileage by about 0.2% for every 1 psi drop in the average pressure of all tires.”
In addition to safety and fiscal concerns, keeping your tires properly inflated will also reduce your impact on the environment. When your tires are properly inflated, you’ll pay less for gas, replace your tires less often, and improve your handling and stopping distance. You’ll also feel better knowing that you are emitting less carbon dioxide and other harmful substances into the atmosphere.
What is the right PSI level?PSI stands for pounds per square inch. The recommended PSI for your vehicle’s tires is determined by the vehicle’s manufacturer and the recommended tire size.
One big question that we get is whether you should follow the recommended PSI level on the tire itself or the recommended PSI level printed in your owner’s manual or on the placard inside of door edge, glove box door, or fuel door.
Do NOT use the max PSI that is printed on the tire sidewall. This is not the recommended PSI level. The pressure amount on the tire is normally the maximum allowed pressure. The correct PSI level is almost always less than what you see printed on the side of the tire. Over-inflation can lead to poor handling and comfort, overheating and blow outs. Over 40 PSI is a dangerous level for most vehicles!
Make sure you always use the recommended PSI as provided in your owner’s manual and don’t go any more than 5 PSI over the recommended level. You should make sure, however, that your tires are appropriate for your vehicle. You can do this by checking the car’s owner’s manual or the placard that is on the inside of the driver-side door, glove box, or fuel door.
Most car tire pressure recommendations range from 30-35 PSI.
How often should I check tire pressure?A question in many minds is when is the appropriate time and frequency for checking and inflating vehicle tires.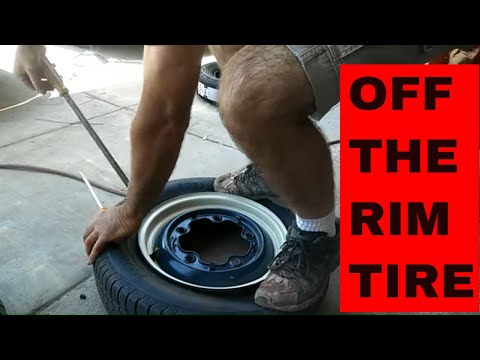
A quick google search will reveal a variety of different opinions and suggestions. Some say that you should check your tire pressure every 2nd visit to the gasoline station, while others say once every 3-6 months is OK.
Most tire and vehicle manufacturers, on the other hand, will say that you should check your tire pressure at least once every month, or every second trip to the gas pump. Your tires will lose around 1 PSI each for every month that goes by.
Unfortunately, not one answer will fit every situation. There are several factors that influence how often you should check your tire pressure, including:
Did you know that for every 10°-drop in temperature, you lose 1 pound of pressure?
If you have a leaky valve or a small puncture, you will lose air pressure much more quickly. This is one more reason why you should frequently check the tire pressure on all of your tires.
Since tire pressure constantly fluctuates, it’s important to check it periodically (at least once a month) and add air as necessary.
How to Check Tire PressureFinding out the tire pressure of your tires is incredibly easy. All you need is a pressure gauge (click here for additional items you should have in your vehicle).
Just make sure that you are checking your tires when they are relatively cold. If you check your tire pressure after a long drive, you will get an inaccurate reading since heat will temporarily increase the tire pressure reading.
Unfortunately, not all pressures gauges are created equal. Some are better than others. We recommend shelling out a couple extra bucks for a digital reader. The pop-up, stick-type versions are notoriously inconsistent and unreliable. A reliable gauge will be well worth the investment. Prices range from about $5 for the stick-type and about $30 for the digital and dial-type pressure gauges.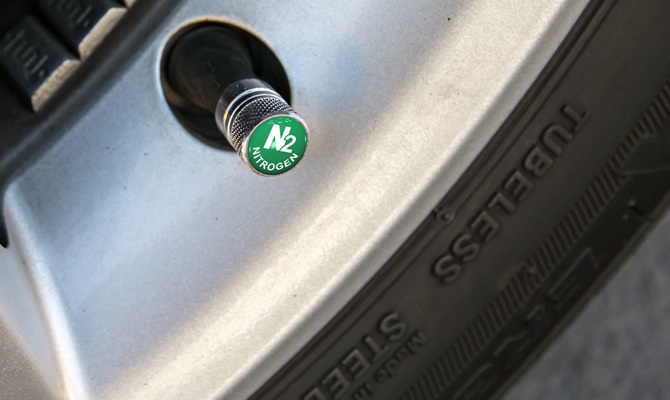
You can also check your tire pressure at most gas stations or auto repair shops. Discount Tire offers free tire pressure checks and inflation.
Here are the steps for checking your tire pressure: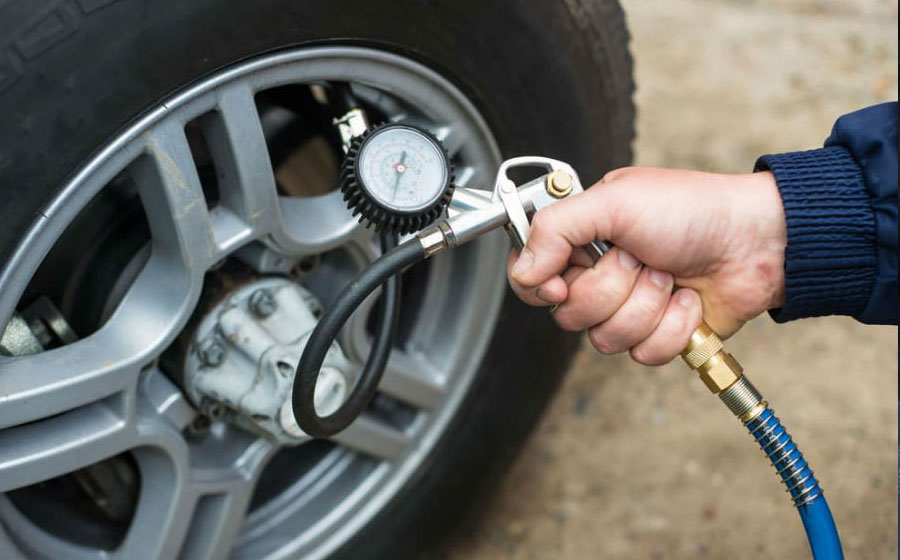 Check the tire pressure again. Release more air if necessary. If you release too much air, you can always add some air back.
It should only take you a couple minutes to check the air pressure of your vehicle’s tires. As soon as you restore tire pressure to the recommended levels, you’ll start experiencing the safety and savings that come with this regular maintenance task.
Watch this video for more information on how to check your tire pressure:
How to Inflate TiresHere are the steps for adding air to your tires:
 Instead, go to your local gas station that has a coin-operated air pump (ask the attendant if you can’t find it). You can also purchase your own automatic air compressor, but it will cost you around $50-$150.
 Hold it firmly against the valve as you listen to the air filling the tire.
 You’ll want to screw them back on now.
Remember, just one drop in PSI can lower your gas mileage by about 0.2%. For every 3-4 PSI units that your tire is underinflated, you are burning around 1% more fuel.
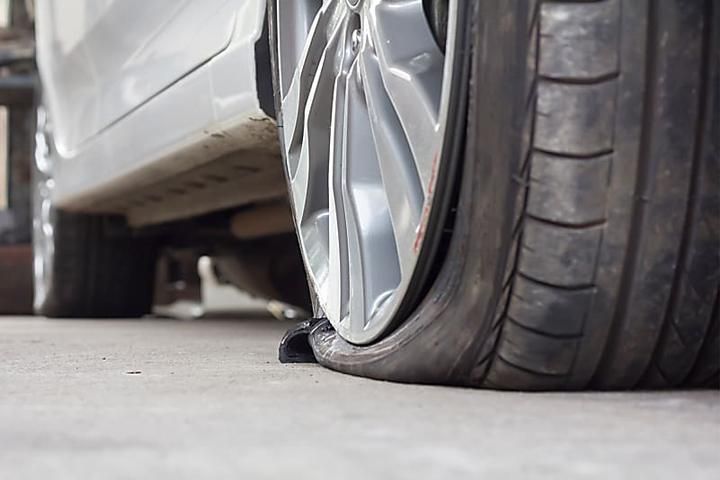
If your tires are flat, then you probably have a leak. Add air and see if you can drive around without the pressure dropping. If you hear air escaping the tire while you are filling up, then it’s time to replace the tire.
Tip: Learn how to use the air pump properly first. Some automatic air pumps at gas stations have a handle/switch that you need to depress in order for the air to flow. When you let go of the handle, a tire pressure gauge will pop out showing you the tire pressure. At the same time, air will be slowly released. If your air pump has this kind of handle, then you will want to hold down the handle for most of the time, periodically releasing it to check the pressure reading. Consult your own tire pressure gauge for accuracy.
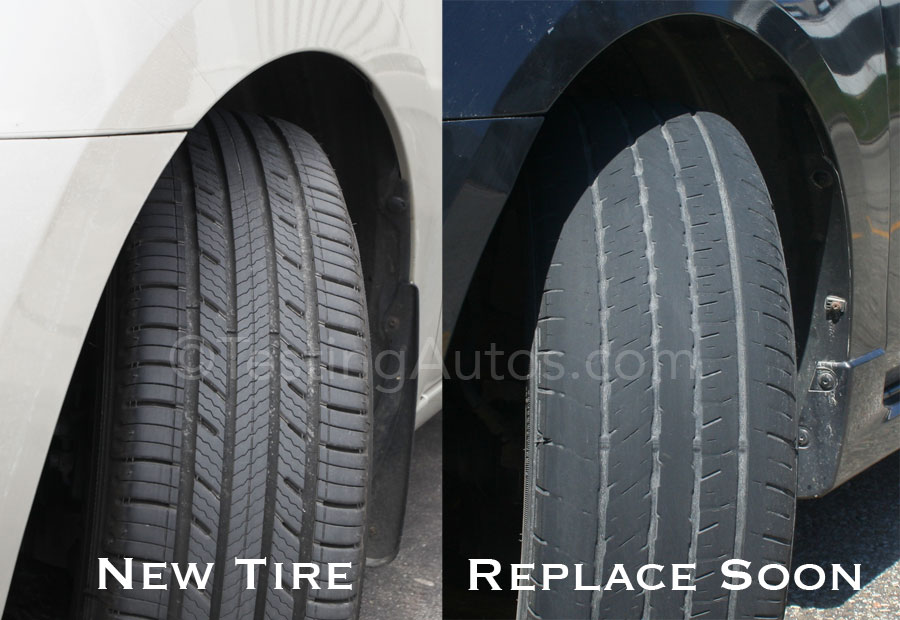
When should I replace my tires?If you check your tire pressure at least once a month as recommended, you’ll also get a good idea of the general condition of your tires and when you should replace them.
We recommend using the penny test:
Source: bridgestonetire.com
Click here for more car maintenance tips. Click here for car winterization tips.
Auto Simple wants you to find a vehicle you love at a price you can afford. We carry a large selection of hand-picked, Certified Pre-Owned vehicles, all with a 6 month/6,000-mile Powertrain Warranty.
If you have any questions, don’t hesitate to speak with one of our Online Specialists or give us a call:
Chattanooga, TN – (423) 551-3600
Cleveland, TN – (423) 476-4600
Dayton, TN – (423) 775-4600
Dalton, GA – (706) 217-CARS (2277)
Follow us on social media for more useful information on buying, selling, and maintaining vehicles: Facebook, Twitter, Youtube, and Google+.
Operation November 25, 2019
Content
To inflate a wheel without a pump, the driver must take into account that alternative methods may be useless and dangerous to health. Sometimes tools and spare parts are required, which are not always in the trunk.
To inflate the wheel, the cylinder is connected through the nipple. It is recommended to use propellants with compressed air, because when using cans of sealant or other substance, there is a risk that such contents will begin to dissolve or cement the tire.
This method is presented as more convenient and simple in comparison with how much effort and time it takes to inflate the wheel with a compressor. However, the volume of a car wheel is at least 20-25 liters, so more than 1 dozen cylinders will be needed.
Such material costs are not rational. This approach is also not practical because it will take no less time to pump than when using a hand pump.
The bicycle wheel has a smaller volume and you can expect that the compressed air from the cylinder is enough to inflate the tire.
To inflate the tires in this way, a hose must be connected to the air path (behind the turbocharger).
The turbo boost pressure is 0.6-1 bar and depends on what type of engine the vehicle is equipped with. If this is not a sports model, then there may not be enough pressure in the line between the compressor and the engine intake valves. Standard automotive pumps start at 2. 02 bar and go up to 20 bar. Therefore, it is recommended to use an alternative method only in the event of a malfunction or lack of a pump.
The use of the brake system is fraught with difficulties:
In some cases, in order to pump air into the wheel, use flammable liquids: gasoline or other fuel. According to motorists, hairspray is also suitable. Videos on the web create a false sense of security and ease of implementation of this method.
The wheel is carried more than 10 m away to eliminate the risk of flames on the machine.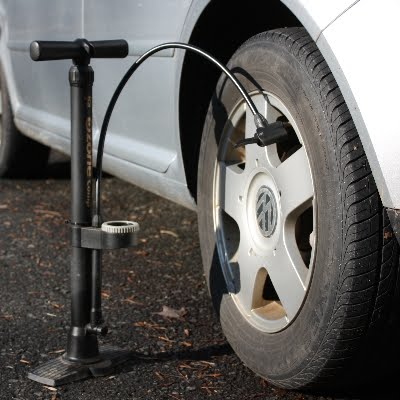 It is necessary to unscrew the spool, then spray the liquid inside the tire and set it on fire. It is assumed that the shock wave from the explosion should press the rubber against the rim and no further pumping is required. It remains to screw the spool into place.
There are controversial points in this theory:
Simple and effective way. A carbon dioxide fire extinguisher is used, since a powder extinguisher does not give the desired result, and its contents contaminate the inside of the tire.
The fitting of the instrument is connected to the nipple. To do this, you will have to assemble a device that includes a hose with an adapter. What will play the role of the latter, the driver comes up with himself, because. this part is not included in the standard kit from the manufacturer.
The tire is filled with carbon dioxide, which on contact with air is converted into a gas. The transition from a liquid to a gaseous state provokes a strong cooling of the tube, but the filling rate is higher than when using a compressor.
Carbon dioxide is recommended to be bled off as soon as possible, as it is not designed to fill tires.
Exhaust system capable of delivering pressures of 2 bar or more. To inflate, the hose is connected to the exhaust pipe, after which the gas pedal is pressed until the desired amount of air in the wheel is reached.
It is difficult to seal the joint of the hose with the exhaust pipe: the manufacturer did not provide for such a system. At home, improvised materials are used: nuts, washers, covers, electrical tape.
There is a risk of damage to the bellows and other components of the exhaust system during this procedure. Therefore, it is not recommended to give preference to it over inflating tires with a pump.
Although the method is effective, the problem will be solved for a short time. You need to get to the point where standard tire inflation methods will be available as soon as possible. In addition, the preparatory stage (sealing and depressurization of the joint) can take a long time.
This method consists in pumping air from 3 other car tires through a hose into a flat tire. To connect the two wheels, you have to unscrew the spool. This can lead to the fact that instead of 1 pumped up, you get 4 flat tires.
Over time, any villager and summer resident gets a lot of various wheeled vehicles that require constant attention and care, including the repair of pneumatic tires and their regular paging. And it often happens that at the most necessary moment the wheels turn out to be flat. And as technology ages, this happens more and more often. For example, these troubles began to haunt me constantly, and especially often in winter, in the most severe frost. And that's even worse.
To fill the wheel tire with foam, you first need to drill several holes in the disc with a diameter of 10 mm…
Finally, I got tired of it, and I solved the problem radically - I “pumped up” the tire not with air, but with polyurethane foam. I first tried filling the tire with foam through the nipple hole. It turned out, but not entirely successful - in some places, due to traffic jams, air sacs remained unfilled with foam. In addition, a significant part of the foam from the hole of the nipple squeezed back.
But the trouble is the beginning! After trying several different options, I eventually found a way to fill the tire with foam without plugs or air pockets. To do this, I drilled several holes 010 mm around the circumference of the wheel disk in such a way that the tube from the foam can freely enter into them. Before starting to fill the tire with foam, it is necessary to prepare several wooden plugs-pegs (according to the number of drilled holes in the disk), which should fit tightly into these holes and prevent the foam from breaking free.
We insert the canister tube into any of the holes drilled in the disk and start the foam supply.
As soon as the first traces of foam that have reached it appear in the adjacent hole, we stop the supply from the can and immediately plug the first hole of the plugs tightly with a peg. After that, you can start feeding foam into the next hole. Then to the next...
In the same way, you can fill the tires of any other wheeled equipment, such as a garden cart, with foam.
Fill the tire with foam as follows. We insert the tube of the can into any of the holes drilled in the disk and start the flow of foam. As soon as the first traces of the foam that has reached it appear in the adjacent hole, we stop the supply from the can and immediately plug the first hole tightly with a peg. After that, you can start feeding foam into the next hole. Then to the next. The last hole, as a rule, no longer needs to be foamed, and as soon as foam appears from it, you just need to plug it with a peg plug. With this sequence of filling, air sacs usually do not remain.
The process of self-vulcanization of the foam inside the tire - in a closed volume without air access - takes a little longer than under normal conditions. The operation of foam-filled wheels can be started no earlier than in a day. And with a large volume of tires, it is better to wait at least two days.
I have been using this technology for filling tires with foam for more than 10 years, and the first foamed tire is still working properly today, although I use it without any discounts both in winter and in summer. For several years, one of the wheels of my old truck was filled with foam.