Motorcycle tire mounting and balancing prices
The Overage Cost of Mounting and balancing the motorcycle tires (front & rear tire both) is from $40-50 but I will suggest you not give more than $50 for mounting and balancing the motorcycle tires.
If the motorcycle mechanic quotes more than that I will suggest you take the wheels by yourself so this way the charges will become even more down.
I and My friend goes to 21 Shops and quoted the price some of them were quoted $50 but some of them quoted $130-150. (the price also includes a tire disposal fees)
However, some shops will charge zero if you buy a motorcycle tire from them. but again it may charge you a little bit for mounting and balancing but it will be up to $20.
In Some Places, the Shop’s owner will try to charge you more, but they may give you the best price to beat their competition in some areas. Another Fact is That in Large Cities,s the charge for mounting and balancing motorcycles will be way higher than in small towns.
How much will you give for mounting and balancing motorcycle tires if you ask me: I won’t give more than $50. (it depends on my area).
Table of Contents
The Reason Why Shops In Cities Charge More MoneyThere is one reason that shops in cities charge more.
It’s because in the cities there are more customers than in small towns, Therefore, they don’t care if someone goes to another shop or does it themselves. But if someone agrees to pay $150-180 Then the Shops will Earn More Money.
But compared to Small towns where shops didn’t have Many Customers they agree to Mont and balance the Tires for less money.
Who Can/will Mount Motorcycle TiresThe tire shop has a skilled worker who can mount and balance tires.
But what happens if you want to mount and balance your motorcycle tires see below
How You Can Mount and Balance Your Motorcycle TiresAlmost everyone has a motorcycle and all motorcycles come with tires. Tires play a crucial part in the comfort of your Motorcycle, if you have even one flat and need to be repaired then you can surely imagine how much discomfort it brings.
Today, our focus is on motorcycle tires, more specifically mounting them and balancing them properly to ensure that they run smooth and last long.
If you happen to be new to mounting motorcycle tires or have not done so before, some things should put you at ease.
All mounting equipment required is readily available from shops. The only challenge might be identifying the information given on the tire sidewalls which will help find the correct matching specifications for mounting and balancing your wheels.
Mounting and balancing motorcycle tires is very easy. If you want to pay someone else it will not good at all. But to do it, you will need some special tools to mount and balance motorcycle tires which is
And to Balance your motorcycle tire you need a Balance Stand And Wheel weights
When mounting motorcycle tires it’s important to let the air inside the tire out. To do this, use a long-bladed screwdriver and insert it into the valve stem hole located at the center of the wheel mounting area.
Push firmly on the tire bead to make sure there is good contact with the mounting surface as you press down on its air chamber. This should cause an audible hissing sound which will alert you that all of its air has been successfully released from inside.
Then spray a little Windex around the tires after doing that remove the tube from the rim while doing this put the tire irons to do it easily remember some tires can be easily removed with two iron tires but some may be removed with the three tire irons
Then remove the tire and repeat this process for the other side of the tire as well.
Once you remove the tire it’s time to put another tire into the rim.
But before doing that I will suggest giving some heat to the tire you can do it in two ways. One is the sun and the second is the hairdryer.
For a more in-depth method, I will suggest watching this video it will help.
Motorcycles need to be balanced so that they are able to spin smoothly while you are driving. If the tire is not properly aligned, it will shake violently when it spins too fast and throw your entire ride off-balance with its vibrations. This can become dangerous over time as more problems crop up from a poor balance.
Most people don’t know but tires can be very dangerous to have unbalanced. There are many negative aspects of having an unbalanced tire, such as not being able to control your motorcycle properly.
Luckily professionals can come to check on how well-balanced they are for those who need help with these things or just want their ride smoother in general by using weights when needed!
Balancing tires is an important part of keeping yourself safe on the road. From time to time, you may need your tire balanced in order to prevent any problems and make sure that they are not wearing out too quickly.
Manufacturers recommend having them checked every 8,000-10,000 miles depending on factors like driving habits or terrain conditions which can increase wear and tear more than on normal roads.
Tires must be rebalanced periodically because there are many different things that affect their balance such as air pressure changes due to weather fluctuations between seasons but also uneven
Rough roads can quickly unbalance your tires and throw them off track. If you are regularly driving on rough terrain, then it is important to get your tire checked more often than the recommended 10,000-mile interval.
Rough road conditions may be closer to an 8000-mile frequency of balancing for optimal performance that will help avoid any unwanted blowouts
The off-balance signs on a motorcycle are often difficult to detect unless you’re paying close attention. If your bike is making odd noises like an unusual vibration, it’s time for new tires or adjustment of the wheel alignment. (rear-wheel or front wheel)
As long as you keep things in mind and look out for signs that things are off-balance, then life will be easy! Signs such as weird vibrations when accelerating can indicate there might be something wrong with newly installed tires – so don’t forget about them.
Should You Ever Mount and Balance your motorcycle Tires Yourself?Mounting and balancing tires is not a job that you’re going to be able to tackle yourself in most cases.
Unless you’re an expert with access to the proper equipment, it’s best left up for professionals who can do the work and make sure your ride stays safe on all terrain. They’ll have everything necessary from tire changers, rotations machines, mounts/balancers you name it!
ConclusionConclusion paragraph: Today, we’ve learned about the cost of mounting and balancing motorcycle tires. We hope you found this information helpful. If so, please share with your friends on social media or in-person today to help them make informed decisions when it comes time for their next tire purchase. Thank you for reading our blog post have a great day!
As a rule of thumb, it costs about $20-$80 to change a motorcycle tire. If you take off the wheels and bring them into a shop you can expect to pay $20-$40 per wheel. But if you bring the whole bike into the shop be prepared to pay $40-$80 per wheel, in addition to the cost of the tires of course. Some dealerships may quote you much more, but don’t be ripped off!
If you want to learn more about motorcycle tire change costs, you are in the right place.
We at PowerSportsGuide have gathered the average prices as well as the cheapest solutions under one roof!
How much does it cost to change motorcycle tires?It’s safe to say that the cheapest way to change motorcycle tires would be if you do the work yourself.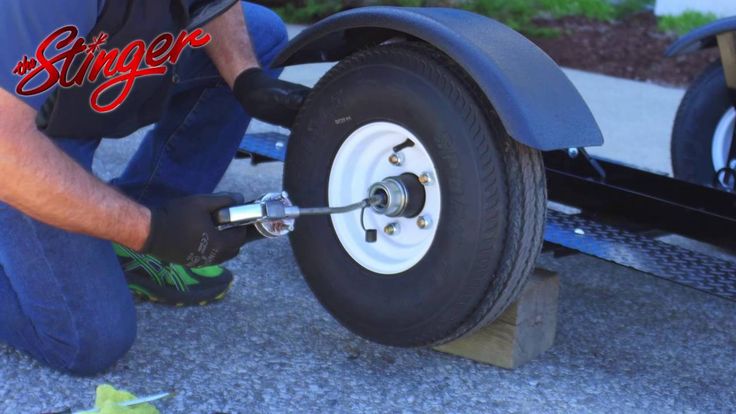 However, as you will see, this is not recommended for security reasons.
A reputable shop can not only professionally mount your tires, but they also balance the wheels with a special rebalancing machine.
Balancing the wheels is very important since only a slight weight difference can lead to vibration. That’s why it’s recommended that you get the tire change done by a professional who can rebalance the wheels along with changing the tires.
Moreover, many shops offer a discount or don’t even charge for the change if you buy the tires from them.
You can also keep your costs low if you pull the wheels off yourself and bring them into the shop. This way it will cost about $40-$80 to change a pair of motorcycle tires.
On the other hand, many riders simply prefer riding to a dealership or a local shop to get the tire change done. This is arguably the most convenient solution, but also the most expensive!
If you are also considering visiting a shop, it’s recommended that you shop around to find the best rates available.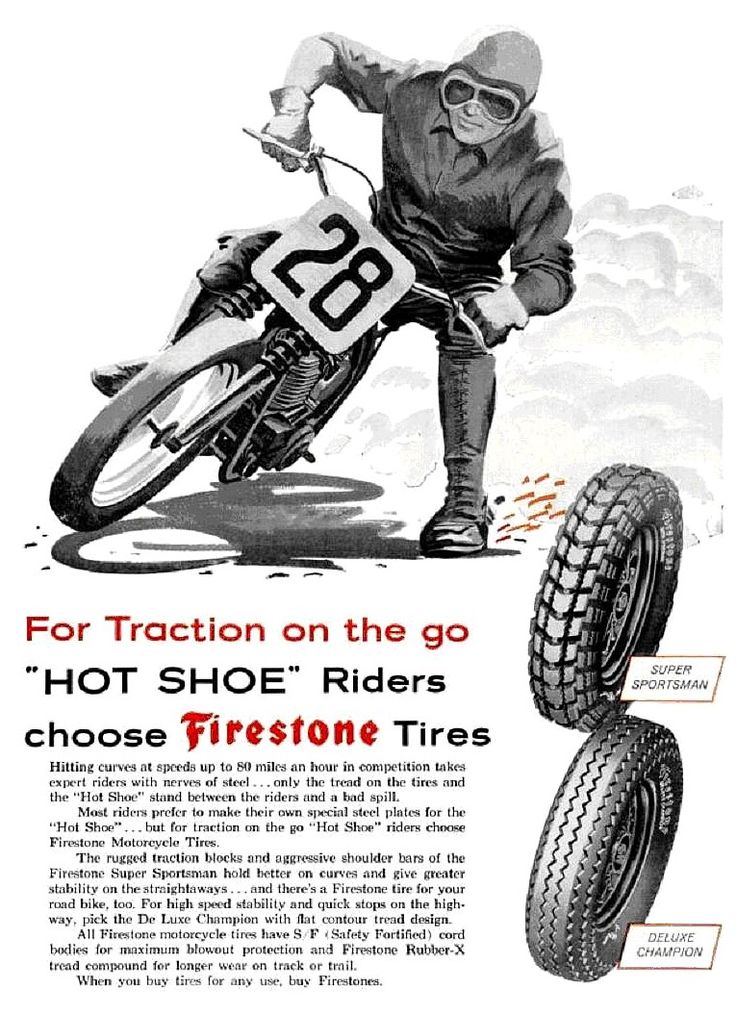 The labor costs vary widely depending on the size and location of shop.
As you may assume, you can expect the highest rates at authorized dealerships. It’s not uncommon for dealers to quote $150-$400 to change motorcycle tires!
In contrast, small local shops are significantly cheaper, as they usually charge $80-$160 for the entire job.
It’s also good to know that replacing the tire on the front wheel is always significantly cheaper than the rear, a 50% difference in price between the two wheels is not uncommon.
However, best practice is to replace both tires at the same time!
Can I change a motorcycle tire myself? – we get this question a lot and the answer is that it depends. Although it is possible to change the tires on your motorcycle at home, in most cases this is not recommended. Why?
When it comes to motorcycles, the primary consideration should always be safety.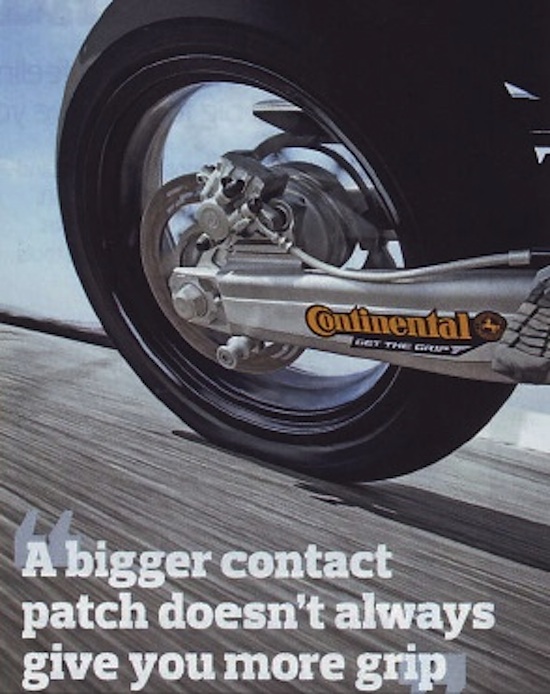
And improperly mounted tires can be dangerous in many ways, so it’s not worth the risk of gambling with them! Contrary to popular belief, changing tires requires skill as well as some specialized tools.
Even if you can properly mount the tires, you always risk scratching the rims or damaging the new tires.
Additionally, a professional shop not only changes the tires, but their service typically includes the balancing, lining, setting the chains tight, and a test ride as well.
Although you can do all of these tasks yourself, it still takes time and effort. It may take hours just pulling the wheels off, mounting and inflating the tires, and finally balancing and replacing the wheels.
This is why best practice is to get it done by a tire shop. Let’s see where you can find one!
It’s safe to say that the majority of tire shops can change motorcycle tires, even dedicated auto tire shops. In most cases, it makes sense to visit a local shop rather than ride many miles to a dealership. What’s more, local shops are typically much cheaper as well! But to make sure they can handle the change it’s worth a phone call first.
Whether you can change a motorcycle tire on a car tire machine is strictly dependent on its design. While many older machines could change motorcycle tires without any issues, modern machines clamp on the rim and feature a rotating table. This means if you want to change a motorcycle tire on these machines you will likely need an adapter, which holds the wheel higher off the rotating table.
Unfortunately, many of the newest car tire machines can’t be used at all to change motorcycle tires. This is because some manufacturers don’t provide adapters for motorcycle wheels.
If you have access to a tire machine and are considering replacing the tires yourself, make sure to have somebody close by who is familiar with using the machine.
Operating a tire machine is not rocket science, but like any other power tool it can be dangerous in many ways. Doing it wrong can damage the tire or even the surface of the rim!
If you want to change the tires on your motorcycle you have four options:
DIY tire replacement: Even if this is the cheapest way to change the tires unless you’re an experienced mechanic it’s not recommended that you do it yourself. Keep in mind that doing it wrong can damage the tires or even the rims. Keeping safety in mind, best practice is that you leave it for professionals.
Remove the wheels: Many riders prefer pulling the wheels and bring into a local shop or a dealership, so you may want to consider this solution. This way, you can get much better rates while making sure that the tires are professionally replaced and balanced. If you bring the wheels in yourself, changing a pair of motorcycle tires typically costs $40-$80 in most tire shops.
Ride to a tire shop/dealership: The most convenient solution is arguably riding into a tire shop or a dealership to get the job done. The rates of smaller tire shops range from $40 up to $80 while dealerships can even quote $150-$400!
The rates vary widely depending on the size and the location of the shop, so it makes sense to shop around before making a decision!
There is not always a way to call a tow truck, and driving on a flat tire, “chewing” the rubber and killing the rim is at least uncomfortable.
The very first replacement of rubber on a motorcycle or scooter gives reason to think - what is better in terms of quick repairs: tubeless ones that do not require wheel disassembly to eliminate a puncture, but leave the rider helpless if, along with damage, it “led” and flattened the edge of the disc? Or chambers - allowing sealing almost ring breaks (if only there were enough patches), but requiring the removal of rubber from the rim for this? The unequivocal answer is no. Few classics, straights or tourers today remain "loyal" to tube rubber models: tubeless tires are lighter, softer, warm up and cool down faster thanks to simplified heat transfer. In sports, more precisely - enduro and motocross, chamber - on the contrary, prevail: only spoked wheels can "play", withstanding strong alternating loads during landings and impacts.
The nuance is that a tire with a chamber can be put on any spoked or cast disc, and a tubeless one can only be placed on a cast one, because only it can ensure tightness. Tube – can be installed in a tubeless tire as an emergency measure. In case of major damage to the sidewall, cracks or curvature of the edges of the rim, this will make it possible, after pumping up the wheel, to reach the nearest tire service (and there already - straightening, balancing and other maintenance according to the rules). True, for such a focus, it is advisable to take a camera with a face value one less than the diameter of the disk, otherwise it will create folds inside that will rub for a couple of hundred kilometers. The resource of such a “treatment” is large - until the next puncture, like a new one.
It depends on the magnitude of the damage whether it will be possible to eliminate it on your own, or whether you will have to “surrender” to the motorized tow truck. In tubeless - holes up to 5–6 mm are patched, in chambers - as much as there is enough glue and patches, the main thing is the condition of the tire. To determine the extent of the disaster - find a place where you can safely stop without violating traffic rules (where it is prohibited - you will have to sacrifice tires and drive on).
If the wheel deflates slowly, and the object that pierced it is still inside, you can try to carefully drive to the tire shop. A completely deflated "pancake" will have to be resuscitated on the spot, or - remove the wheel and take it to the service.
To find a hole in a tubeless tire, if it is very thin and not immediately visible, the wheel must be pumped up, slowly pouring water - bubbles will go. In place, tubeless tubes can be “harnessed”, or filled with sealant inside, without removing from the motorcycle.
With the second type of tires - more difficult. A torn balloon must be removed from the tire to detect a defect and seal. In a good way, the wheel must be removed from the motorcycle and disassembled on a clean, flat, hard base. Suppose such a “patch” can be provided even off-road, but how to remove the wheel on a motorcycle if it does not have a central stand? And shooting is not required.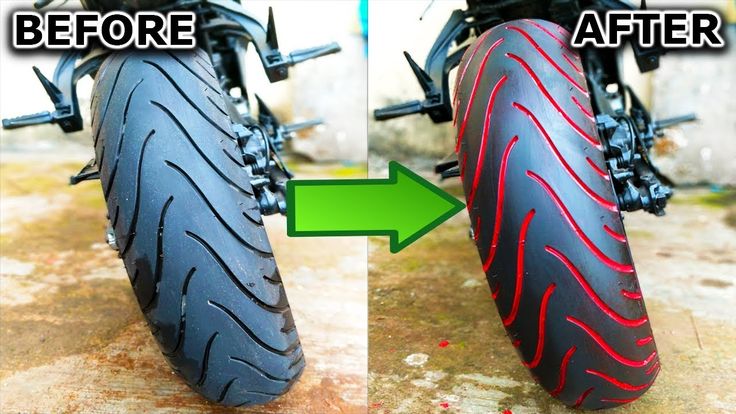 The motor must be carefully laid on its side, after making sure that the faucet is closed, gasoline does not flow out through the tank cap (antifreeze does not flow from the tank if the motor is “dropsy”), and removing the plastic or wardrobe trunk with fragile contents (if any).
You will have to unscrew the wheel from the motorcycle only if you need to replace the tire, or it is decided to patch the tubeless tube with a “fungus”. In the absence of a central stand, this will also have to be done on a lying bike, or - make this stand from improvised materials (bricks, stump, car jack), placing them under the crankcase protection from below, the central tube of the frame, the duplex jumper (but not under the plastic, itself engine crankcase or attachments!), under both footrests - if they are not folding, or - under the pendulum. Before removing the rear wheel on a motorcycle, the front fork must be loaded with something, or an even higher lining is made.
In a motorcycle tire fitting shop, tubeless tubes are repaired by cold vulcanization. They are removed, disassembled, the puncture site is cleaned from the inside, degreased, lubricated with glue and a calibrated “fungus” patch is inserted into the hole from the inside. The fungus itself is a thin plate of rubber with a “leg” tube in the center. The leg - by the guide wire is dragged through the hole of the damage, and the "hat" seals it.
After half an hour - you can put the tire back. The reliability of such a repair is high, the patch does not cause a significant imbalance, the service life of a sealed tire does not decrease.
This method is also applicable on the road, the main thing is to have the necessary equipment and materials with you:
The fungus repair procedure does not require much experience. The main thing is to keep it clean, fully clean the place where the patch fits, let the glue dry slightly to a dull finish and press (roll) the surface of the fungus with high quality, expelling all the air between the layers. If necessary, you can degrease the place before gluing with gasoline, but without the rest of the above, it will not be possible to fully carry out repairs.
The compressor is sometimes replaced by a small cylinder of compressed air or carbon dioxide. Unlike a mechanical pump, it will immediately create a “throw” of pressure, pressing the tire beads against the rim flanges (in emergency cases, even a fire extinguisher was used to pump flat tubeless wheels). When connecting the compressor, start the bike's engine before you start inflating the tire - let it idle. Otherwise, the motor can "land" the battery, and you will not start.
Manometer - needed for control. It is undesirable to pump over the repaired tire. It is recommended to "inflate" 0. 2 atmospheres less than the nominal value. Inflating too little is also bad: a flat tire has a larger contact patch with the road, so the place of a fresh patch will deform more.
“Burning” a tubeless tube and sealing its internal cavity through a nipple are quick, simple methods that do not require special skills. To repair the damage, you only need the materials themselves, and how to pump up the wheel.
Now in Moscow, and not only, 6-5 varieties of cans with a sealant are sold - a quickly hardening "liquid rubber", with a volume of 800 to 250 ml.
Applying "Anti-Puncture" is simple: put a tube with a fitting on the nipple of the camera, turn the can over, and hold the button according to the instructions. Then - pump up the wheel, cleaning the nipple from the foam, roll it, making a full turn to distribute it.
The sealant is blown out with air into the puncture hole and clogs it, solidifying. After 20 minutes - you can go. Reliability of repair is high. Resource - until the next puncture.
If you have a compressor, start immediately pumping up the wheel, so it will be easier to work with a puncture, insert a patch, and it will swell faster.
Procedure:
You can go in 5 minutes, you just need to make sure that it doesn’t descend anywhere else.
Outwardly identical, repair kits for harnessing wheels can differ in price by almost half. This variation is explained by different configurations - one will have only three items, the other - six or seven.
A complete tubeless tire repair kit contains:
Regardless of the cost, you need to choose a kit in which the harnesses will be reinforced, and the awl - with a deep spiral winding (notch), and not a “needle file”. Inserting a flagellum is sometimes easier with a regular thin screwdriver. If there is no glue in the kit, or it has dried up, the flagellum is moistened with gasoline.
At motorcycle service stations and car services, holes in the chambers are closed by hot vulcanization: a layer of raw rubber is applied to the cleaned, fat-free puncture site and, after squeezing it well, it is heated with a special “iron”. Iron - burns, layers - are fused into a single whole. Reliability of repair is high. The resource will be almost like a new one.
Cold vulcanization (patching) - used if the workshop is not equipped with a vulcanizer. In this case, the quality of the service and the reliability of the repair will depend on the accuracy of the master. For the convenience of gluing, the camera is completely removed in the service, but, I repeat, this is not necessary. It can be repaired on the spot in the same way (there are no other options except for replacing the camera), but without removing it from the motorcycle.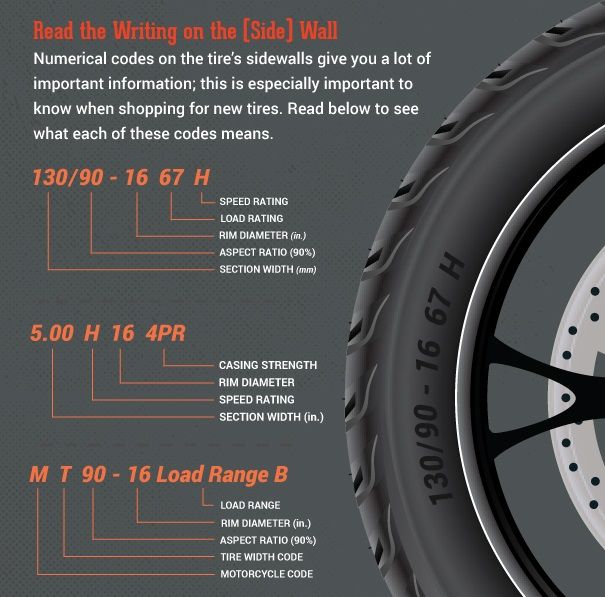
This can only be done if you have two metal mounting blades. At least one, the second can be replaced with another flat tool. You can still disassemble the wheel with a wide screwdriver and a “family” key wrapped with electrical tape. But this is only as a last resort, otherwise you can damage the cord.
Sequence of work:
 Let the glue dry for a minute.
 The fencing must be carried out twice as carefully and more slowly than dismantling, lubricate the side with water or soap, “help” more with your hands, otherwise there is a risk of picking up the edge of the chamber with a spatula and tearing it.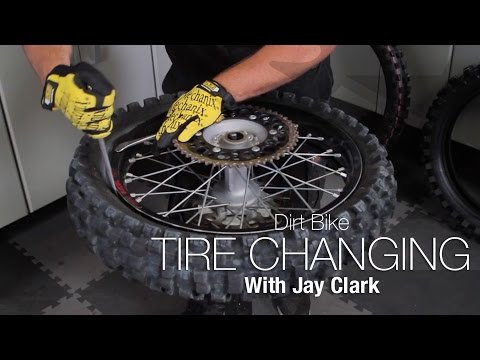
Important! If the wheels of the motorcycle are equipped with tow bars - before pressing the tire bead from the rim, you need to loosen this tow bar! But do not unscrew the nut completely, do not disassemble to the end.
A standard “first aid kit” (a set for repairing classic motor rubber) contains only patches and glue, so it is advisable to supplement it yourself with a piece of “skin” or a needle file. You can degrease with gasoline, or apply a little glue first and wipe off immediately, rolling up the dust with it.
Now there is no shortage of specialized motorcycle workshops not only in Moscow - in all major cities there are motorcycle helpers who help motorcyclists directly on the track, or tow to where you can quickly change the camera, or patch the tubeless correctly, so that there is no trace left. Where there is a guarantee.
Self-replacement of a tire on a motorcycle requires a certain physical condition, and for the first time - a “kilometer of nerves”. At the service station, instead of you, automation will “sweat”, which will not lock up the board and will not scratch the disc coating with a spatula. The main thing is to do it quickly (if you need to go urgently, the price sometimes does not matter).
Repair at the service - may be the only possible one if, due to driving on a flat tire, the tire nipple is turned and torn off. Especially if he flew off and got lost, but there is no spare. In mototiremontazhke - there is always a set of consumables for any wheel diameter. In the same place, in extreme cases, you can buy a new tire, or a used dokatka.
In addition to the patch, for normal operation of the wheel, balancing must be ensured. This is generally a useful procedure during any change of rubber, otherwise if there is a strong imbalance, the wheel bearing will inevitably break due to vibrations, and the hands will quickly get tired and “buzz” after long rides.
The first couple of tens of kilometers - do not drive, go at the speed of the stream.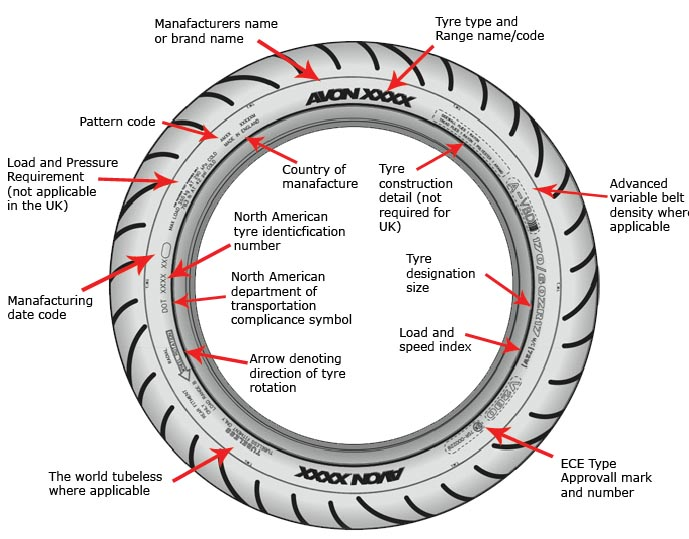 Stop, check for a flat tire. If the patch is not of high quality, it will manifest itself almost immediately. Parking will tell about the long-term perspective: if the cylinder has not lost volume in the first day or two, then everything is in order, you can drive as before.
Knowing what to do if a flat tire is on the road is important not only “for yourself”. To help a newbie or a fragile girl is to earn an important “plus in karma”, which will later return at the right moment. But, I hope, this knowledge will be useful to you only in theory. Good luck on the roads, no nail, no wand!
Well, for starters, we ignore the advertising descriptions of a wonderful “hold” on any surface (“universality” of rubber is a myth, and a highway declared as such holds much worse than a special one in difficult conditions). The principle of “taking the most expensive and popular one” is also not suitable for choosing motorcycle tires: if you choose the wrong type or profile, the same advantages can turn into a serious problem, therefore, we carefully study the characteristics. And here it is important that you know about the types, tire design, features of the choice of operation (oddly enough) and the timing of changing tires. Let's fill in the thematic gaps together.
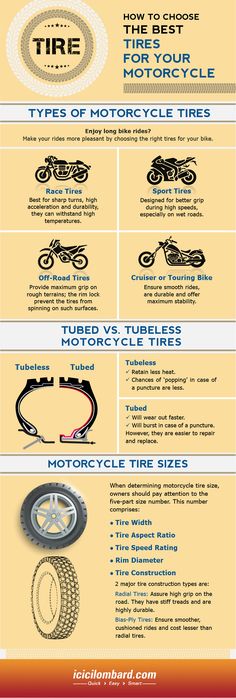
Each class of motorcycle has its own type of “shoe”, designed for efficient transmission of torque, better grip, stability when maneuvering in the conditions in which a particular bike is most of its life. Conventionally, motorcycle tires can be divided into road, off-road and racing. Within the class, tires are divided according to tasks: road, slick, rain, cross (endur), mud, studded, and dual-use. Diameter and width - depend on the class and dimensions of the equipment. By class, we will consider it.
In this category, most of the products are designed for limited use and have an extremely small resource - just one race or training session. Provides the best grip on asphalt. Their profile allows you to lay the bike almost parallel to the ground in the turn, however, only after warming up.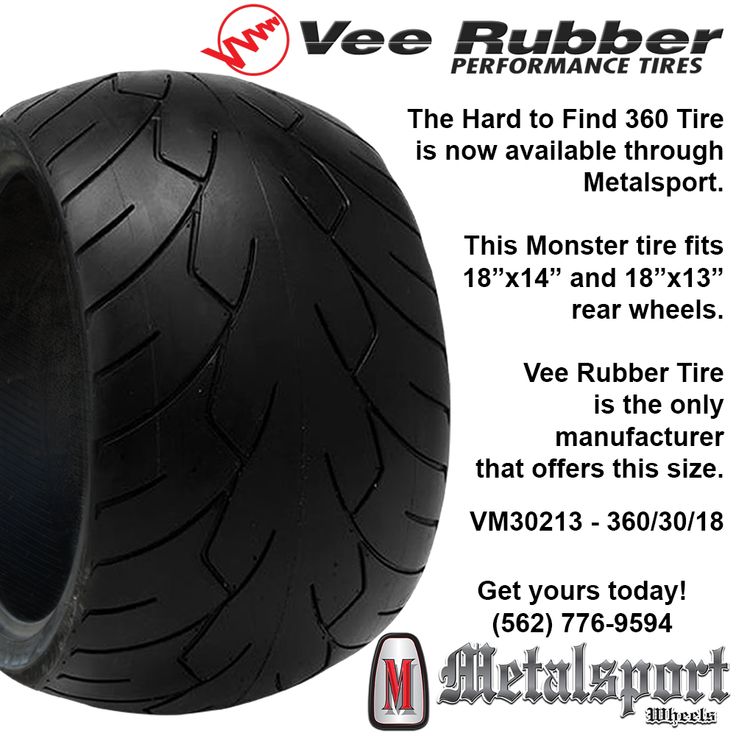
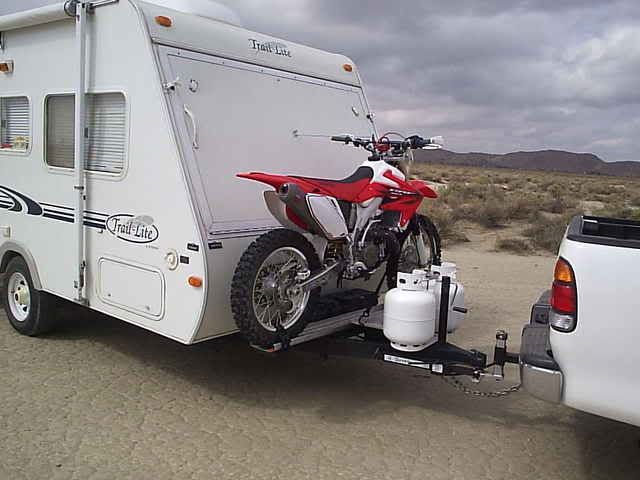 They start to “work” at lower temperatures than slick or cut, but do not “catch up” with them in tenacity, cope with water quite effectively, and are less susceptible to wear. Used for everyday riding with infrequent trips to the track "on their own".
 These motorcycles mostly "live" on the track, observing the primer only from a distance, from the height of the main road, so their "shoes" are designed for asphalt: the most durable, designed for the heavy weight of the motorcycle (passenger + luggage), and "all-weather".
 The resource, depending on the pace, is 10-20 thousand km.
 The scatter of equipment in this category is very large - from "evil" tuned fifty dollars for mini-cross to light enduro for travel, so there are a lot of models here. You can combine them into classes according to their purpose: purely sports, amateur and rally:
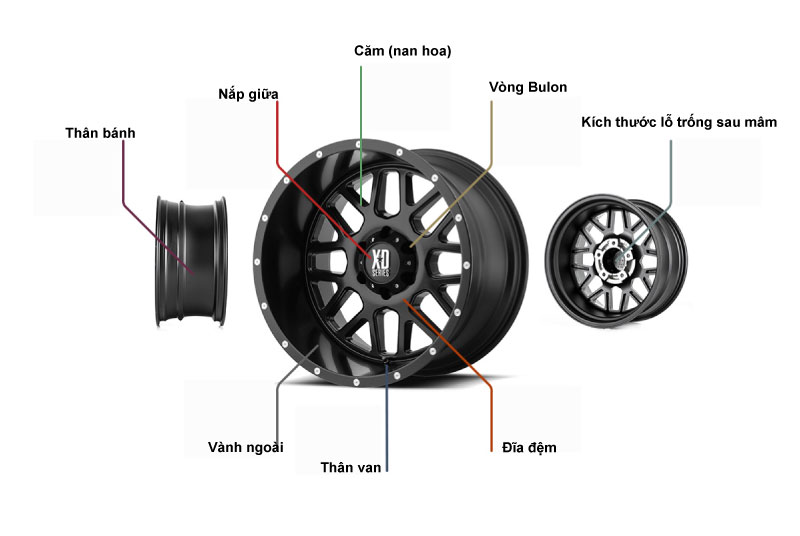
For medium-sized classics, small-capacity, retro and custom motorcycles, various road tires are produced with a low semicircular profile, moderately developed tread, revealing working properties at temperatures below 80 about C. There are a lot of options, as well as specifics (all-season, rain, universal).
Motor tires are designed for high side loads. Its profile - even for the widest models - is more rounded than that of an automobile, consists of a working part responsible for traction, and a side part that “works” only when tilted in a turn. Parts not in contact with asphalt are also very important. It depends on them how much the tire will weigh, how much it will be washed under the weight of the bike, how long it will last.
Hidden part between the inner and outer layers of rubber, which gives rigidity and takes on the load. The structure of the cord is multi-layered. Steel wire, or threads made of polyamide, aramid fibers (Kevlar), or polyamide are arranged in dense rows either across the tire, or - intersect at an angle of 30–40 degrees in the direction of its rotation.
The edge of the tire, going inward, into the grooves of the edges of the rim, having an annular metal (internal) reinforcement. The reliability of its fixation in the rim determines the life of a motorcycle tire, and sometimes a motorcycle with a driver.
The working part, covered with an intricate pattern, the size, shape and depth of the grooves of which depend on the purpose of the product.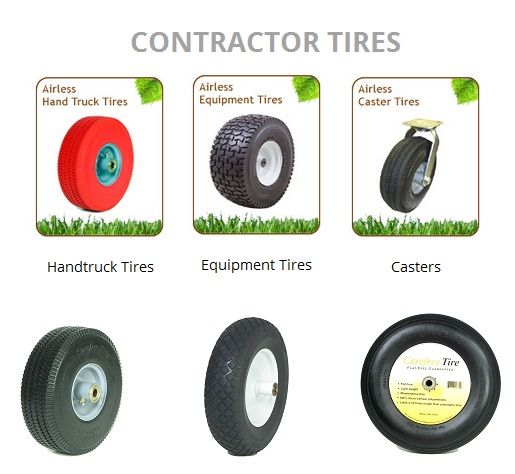 A larger high tread is typical for off-road and cross-country motor tires, a lower, smooth one - for road and racing.
A zone connecting the tread and the bead that is not inferior to them in strength, but does not work with either the road surface or the rim. It is on it that “letters” are applied that reveal the properties and characteristics of the tire.
The three main indicators of motor rubber - width, profile (height), seat diameter (internal) - are measured in millimeters and inches. There are about a dozen markings adopted in different countries, but only four systems are widely used: Metric, Alpha, Standard (inch), Low profile (inch). For each of them, corresponding tables are available. For our market, more characteristically - Metric.
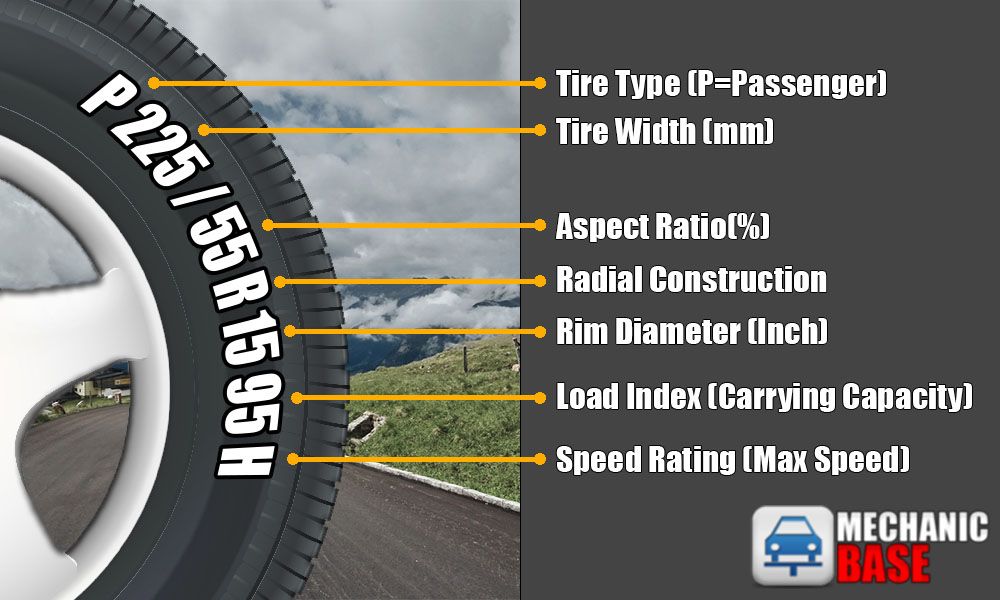
The name of the manufacturer (brand) and the name of the model are written in the largest letters on the product.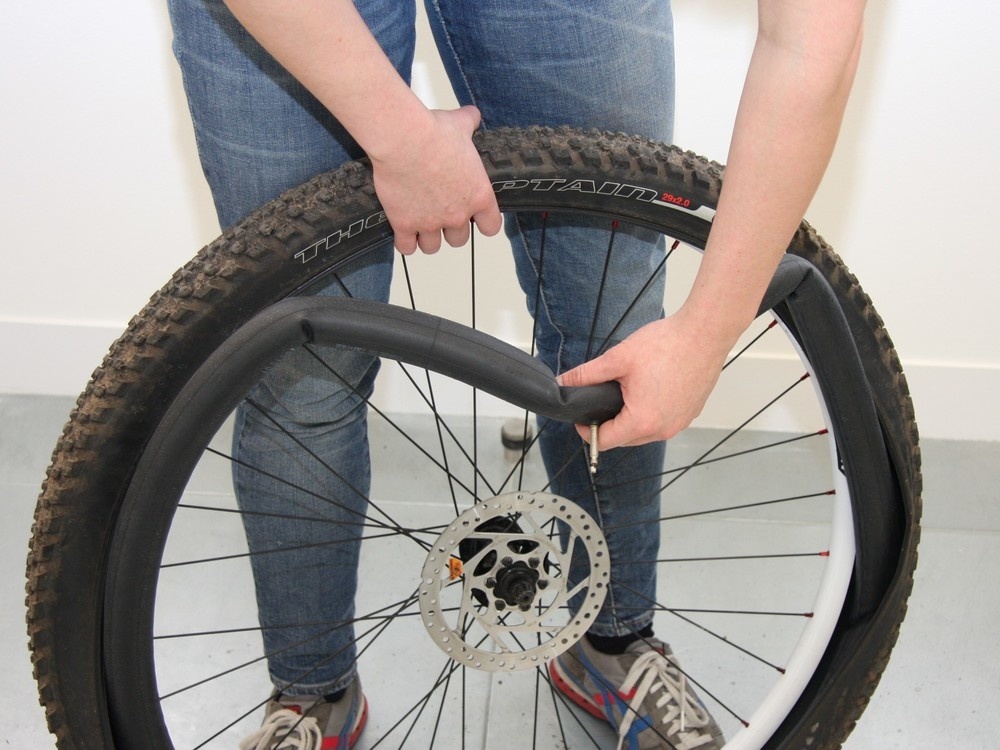 The next in size is a "sausage" of numbers and Latin letters, indicating the width, height of the profile, the diameter of the rim for which the tire is intended, the weight limit per axle (rear / front), and the speed to which you can accelerate on this rubber. A little smaller - the country of origin, certificate, information about the material, design. Further, “small print” indicates no less important properties, which we will also consider separately.
I’ll immediately note the most common mistake in reading the rubber size index: the letter R is not a “radius”, as some motorcycle and car owners believe. This letter means "radial" model and indicates the radial direction of the inner carcass reinforcing layers of this tire. There are two main designs - radial - when the cord layers run across the tire, and diagonal - when they cross.
You don’t see the letter “R” in the index, but you see a gap, or “B” - it means the rubber is diagonal, and if “reinforced” or “reinf” is written nearby, it is also reinforced with an additional layer of cord.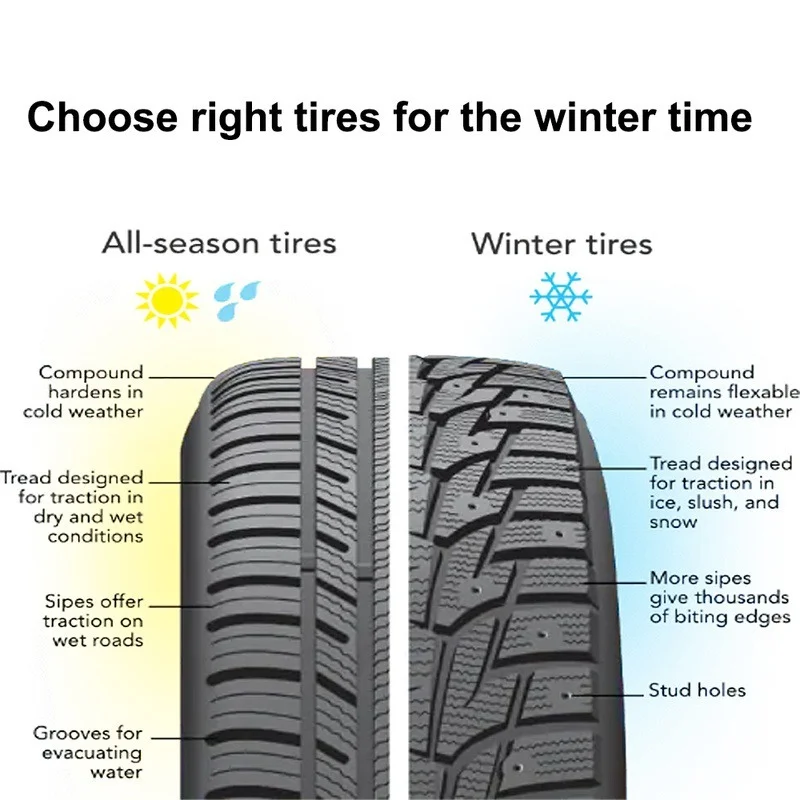
"Sausage of letters and numbers", for example, 120/70 ZR17 (73W) TL, stands for:
The arrow with the words "wheel rotation" strictly regulates where the tire should rotate during operation. If there are letters ND (non directional) on board, it can be placed in any direction.
If the manufacturer clearly limits the installation location of the tire, he writes “Front” on it for the front or “Rear” for the rear. Without this marking, rubber can be placed on either side.
TL or tube less - as we have already deciphered earlier - tubeless. TT stands for tube type, or "suitable for camera use."
All manufacturers unanimously recommend “not wearing” rubber for more than five years, and if the equipment has been “shod” in it for ten years, even mothballed, urgently change the “bagels” without hesitation. A couple of decades ago, the resource of tires was regulated only by their external condition and the courage of the driver, but this was even before the mass “epidemic of planned obsolescence of goods”. Now, two years are taken into account in the calculation of the service life, and five years is the allowable storage period for rubber in a warehouse, as a result of which it should not be sold, but disposed of. The release date is marked with two two-digit numbers enclosed in a circle or oval. The first is the week number from the beginning of the year, the second is the year of production itself.
It is a common practice to buy lightly worn race slicks or cuts - only makes sense for training on the "ring" or karting track, but not on the DOP. In addition to poor handling, longer stopping distances on slippery surfaces, and increased risk of blown tires at high speeds, riding old tires carries legal risks. When passing a technical inspection, a cracked or worn protector (hypothetically) can cause a refusal to issue a diagnostic card. In fact, this is the same malfunction as badly worn brake pads. Also, in the event of an accident, due to the unsatisfactory condition of the rubber, the insurance company may refuse to pay you, referring to your favorite excuse - speeding (based on the increased stopping distance).
"From the factory" modern motorcycle tires are covered with a preservative silicone impregnation that prevents drying out during storage. It is slippery and penetrates deep into the pores of the rubber. Until you wipe it on the asphalt - do not count on a good "hold" and "sharp" brakes. It is not necessary to wash off the grease with gasoline or other solvent (it is useless), just ride measuredly for the first couple of hundred kilometers. By the way, after long-term storage of used road motor rubber, it is also recommended to “run in” it in order to remove a layer of coarsened material from the surface.
Even if you provide ideal storage conditions, motor rubber still ages over time, becoming covered with microcracks. If the "age" of tires has exceeded 10 years or more - do not buy them, despite their attractive appearance.
Signs of critical wear:
The principle of evaluating the residual depth of the tread grooves is now outdated - most manufacturers add an integrated tire wear indicator to the options, which is worth focusing on.
Let's start with what happens if you put a wider tire back without changing the "native" rim. This question worries many inexperienced motorcyclists who want to look more "sporty".
Firstly, you will not wait for the expected increase in traction due to the increased area of \u200b\u200b"support".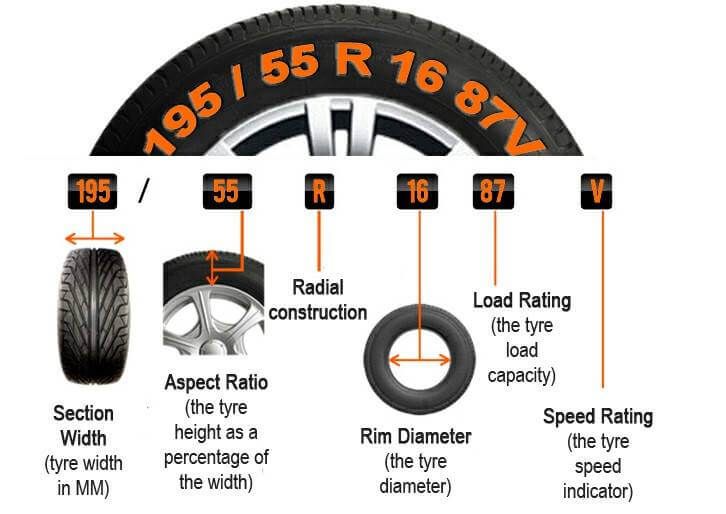 Wider rubber, squeezed by the edges of the rim not in size, will tend to “up”, so the calculated wheel profile will be violated. It will be higher, respectively, the contact patch will not increase. Secondly, the controllability in corners will worsen, the speedometer will “lie”, the weight distribution will change due to the rear of the motorcycle raised.
This is highly discouraged for most modern sportbikes that hit the track, but many classic models, nakeds and cruisers are often fitted from the factory with a combination of radial front and diagonal rear tires. Unlike the radial, the diagonal one is a little “softer”, allows for moderate overload, is sold a little cheaper, so why not?
The choice of how much to inflate the wheels to is a constant compromise between the loads on the rubber and its capabilities.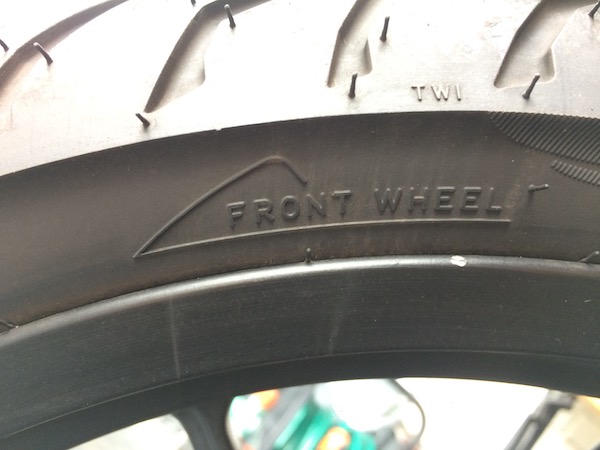 On most motorcycles, the recommended pressure for each axle is indicated on a sticker (on the fork and swingarm), but this value is only relevant for the rubber model that was supplied from the factory. On a new model, look for a designation on the tire (next to the max load load) indicating the maximum allowable cold pressure. Do not take a tire if this value is lower than recommended for your motorcycle.
Let's say your bike has a sticker with the recommended 2.25 bar for the front and 2.5 bar for the rear wheel. If you ride mainly with a passenger, with luggage, making long “flights” along the track, your motorcycle weighs 200 or more kilograms, and its volume is close to a liter, keep the pressure in the rear wheel at least 2.8–3.0 bar, and in the front 2.5 bar. If you ride around the city, alone, with almost no luggage, and are not fond of “flights”, it would be optimal to set equal pressure in both wheels at 2.2 bar.
For lightly loaded medium-sized engines, the interval varies from 2. 0 to 2.3 bar, and for slender "Chinese" 2.1 bar - in the front, 1.9 bar - in the rear cylinder (especially if the tires are also Chinese). The pressure in road tires must not be lowered below 1.9 so that the motorcycle does not start to “float” in corners or on bumps - this is dangerous.
The more we inflate the closed volume of the wheel, the more “round” it becomes and the smaller the area in contact with the asphalt. A larger contact patch means greater rolling resistance and accelerated tire wear, a smaller one means worse stability, lower braking and acceleration efficiency. Up to a certain point, these nuances are compensated by the tread, so on motocross and enduro bikes, the wheels can be lowered to 1.2 bar - front and 0.8 bar - rear. However, air is an unreliable business, therefore, in hard enduro and trials, a gel filler is now more often used, which allows maintaining a pressure of 0.4 and 0.9bar. Such a set will not live long, but this is a sport in which, as we remember, rubber consumption is not considered.
Definitely yes. The older the cylinder, the harder its surface and the lower the residual tread height, the worse the bike “holds” the road. Bald or improperly matched tires increase the braking distance, and can cause an unexpected “leaving” the track into a ditch. On an over-inflated tire, the fork or pendulum will “beat” hard, and on a flat tire, the motorcycle will become less predictable in corners and “gobble up” more gasoline than in a normal ride.
No, because their rims are not sealed and you simply cannot inflate the tire. Not all alloy wheels are suitable for tubeless, so always check what type of rubber was on the bike before. In addition, the hole in the rim designed for the camera nipple may not match the size of the new nipple.
Only if the damage to the wheel does not allow you to inflate the tire, and you still need to get to the “repair”. In all other cases, the idea is controversial. The inner surface of a tubeless rim is not designed for other rubber to constantly rub against it, creating additional heating, and the inner part of a tubeless rim may have protrusions that injure the chamber. It is possible to get a “beautiful” wheel by putting a tubeless tube on a spoked rim, but objectively, this will increase its weight (remember the unsprung masses), and reduce the life of the camera. About when it frays to break - you will know already on a flat tire. You can repair a puncture of a tubeless tire without removing the wheel, but you will have to remove and patch the tube with its disassembly.
Undesirable. Even if it does not look worn yet, its resource is already less, from frequent “heating-cooling” cycles, it becomes rougher than new, frays or cracks faster. The old tube may not fully expand and fold if the new rubber has a lower profile (and internal volume) than the previous one.
If it belongs to the Racing Street or Street Legal class, this is a completely justified choice for the owner of a sport, street, naked or classic with claims to “aggressiveness”. In other cases, it is not recommended. Firstly, the use of racing slicks or cross-country tires is not allowed on the DOP. Secondly, sports tires are designed for intensive work with a certain warm-up. At competitions, before the race, they are warmed up in special covers, and then they are “given” one warm-up lap so that from the first seconds of the test race they can provide the bike with good contact with the asphalt (sticking).
In the city, even if you ride aggressively, the slick simply does not have time to warm up to operating temperature (more than 80 about C). Or even before it does not heat up for the whole trip, given the ragged rhythm of traffic lights and possible "toffees". Accordingly, it will not give adequate grip when trying to “give a corner”, the wheels will be demolished during braking, and instead of an energetic start, the bike will “grind” on the spot.