What is Tire Repair?
Tire repair refers to the process of replacing a faulty tire with a new one or simply repairing a tiny puncture. While it sounds like a job anyone with two hands can handle, it’s recommended to go to a shop that specializes in repairing tires to ensure that you get your problem solved completely.
Why You May Need Your Tire Repaired?
Years ago, car owners frequently dealt with the superfluous hassle of repairing their tires due to the quality. Thanks to the manufacturers and present day technology, tires are meant to withstand even the worst conditions on the road. While this holds much truth, it is not uncommon for people to find themselves needing to have their tire(s) repaired due to weather or other hazards on the road.
How Much Will A Tire Repair Run You?
While a tire repair won’t cost you an arm and a leg, it will cost you a bit of your time. If you’re looking into having a puncture repaired on a tire, you’re looking at spending on average between $10 to $20 dollars. The size of the puncture makes a huge difference and will determine the amount you will spend on getting your tire repaired.
Important Facts You Should Know About Tires
What Process is Used When Repairing a Tire?
A tire plug is exactly what it sounds like; a sticky expandable plug that is inserted into the puncture in hopes of keeping the injury secure long enough for the tire to re-inflate with air. A patch is also pretty self-explanatory when it comes to description. Better known as a radial patch, this piece of material is used to seal up the damaged tire. Due to the heat caused by driving, the patch eventually melts into the tire completely erasing all notices of repair.
Most vehicles are equipped with a spare tire if you happen to be running on a flat. In some cases, you might have to go to your local car shop to purchase a tire depending on the circumstances.
The Difference Between a Plug and a Patch
While the plug takes less time and can be down without removing the entire tire in comparison to the plug, it’s more likely for a car owner to come back in a shorter amount of time for yet another repair after getting a plug opposed to a patch.
Sources:
http://www.tirereview.com/back-to-basics-1-basic-tire-repair/
https://www.carsdirect.com/car-repair/average-tire-puncture-repair-cost
http://txtire.com/blog/view/fixing-flat-tires-tire-plug-vs-radial-patch
Your Name (required)
Your Email (required)
Phone (required)
What is the best way to reach?
Phone
Email
Tire patches are a huge money maker for auto shops.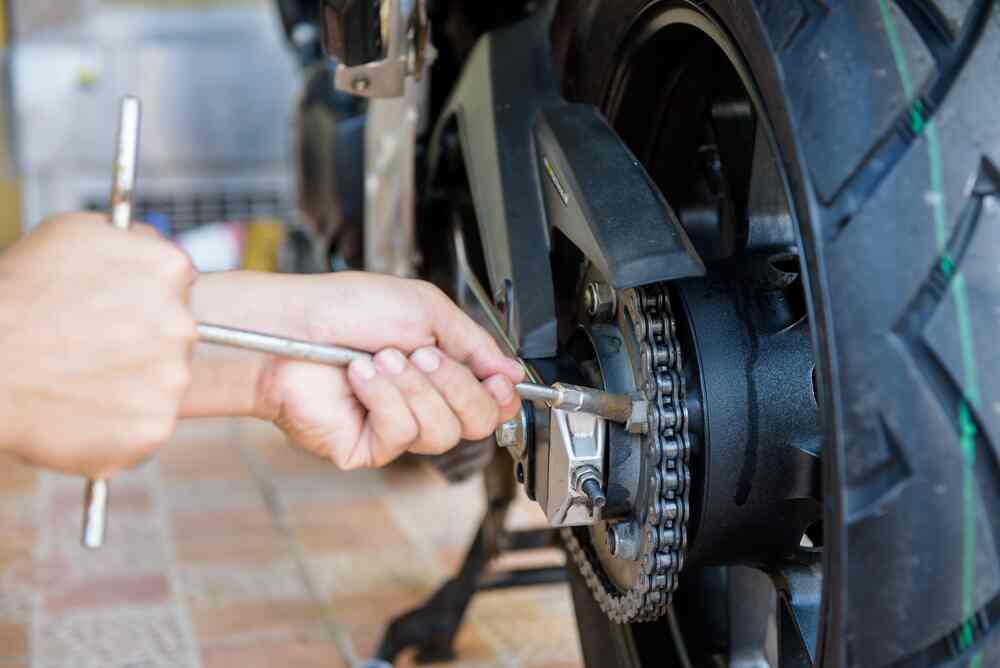 They don’t require much labor, and the cost of a patch is really low compared to most other auto parts.
But what is a good price to pay to get a tire patched? Well, that depends. If you patch the tire yourself, expect to spend $6.00. If you take it to the shop, you’re looking at spending anywhere between $10-$40, depending on the situation.
Patching tires yourself is always everyone’s first instinct, since the cost is so low. But many people are deterred when they find out they can’t, due to any number of reasons. Deciding when to do it yourself, versus taking it to the shop is what we’ll explore in this article along with why tire patches can be so pricey. We’ll outline the different reasons you should, or shouldn’t do it yourself. We’ll also examine the different types of patches and the pros and cons of each.
I used to work at a shop on a main highway. Every day, during rush hour traffic, at least 3 customers came in requesting a tire patch. Over the years, I’ve learned the simplicity of the tire patch can be deceiving.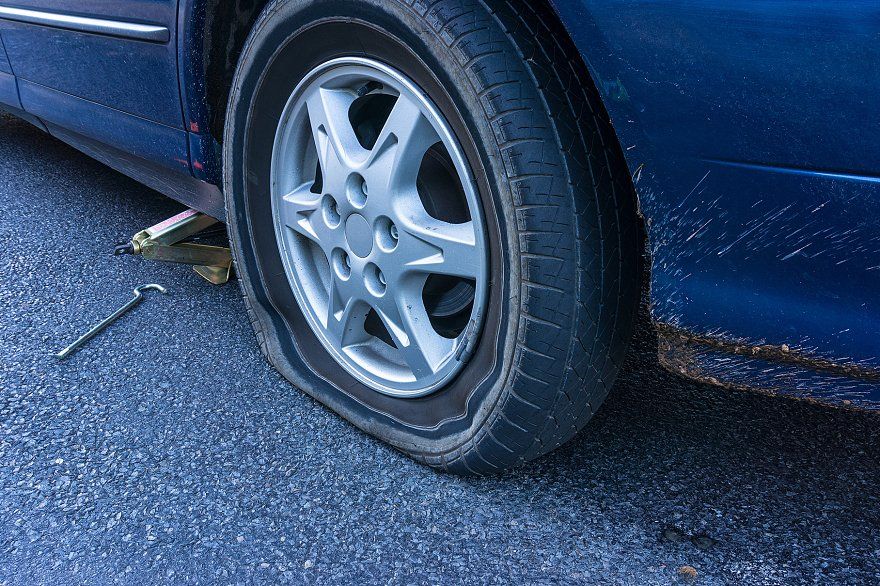 Not all tires are created equal and the same goes for patches.
When a shop patches your tire, most of the cost stems from the mechanic’s time.The wholesale price of a tire patch is less than $2.00. The glob of bead sealer that’s used to seal the patch costs less than $0.10.
But it takes the average mechanic about 15 minutes to patch a tire. Most shops charge around $120 per mechanic hour, so you’re looking at $30-$40 for time and parts. If you want the tire re-balanced, as is recommended, tack on another $13.00.
While a tire patch is among the most simple jobs, it takes time away from mechanics who could be working on higher paying, more demanding jobs. Hence, the hourly rate being applied to the job.
Not all tires can be repaired. There are some tests that mechanics, or you yourself, can perform. Doing these tests will give you a good idea as to whether or not your tire can be repaired.
When your tire becomes flat, the first thing to do is not drive on it.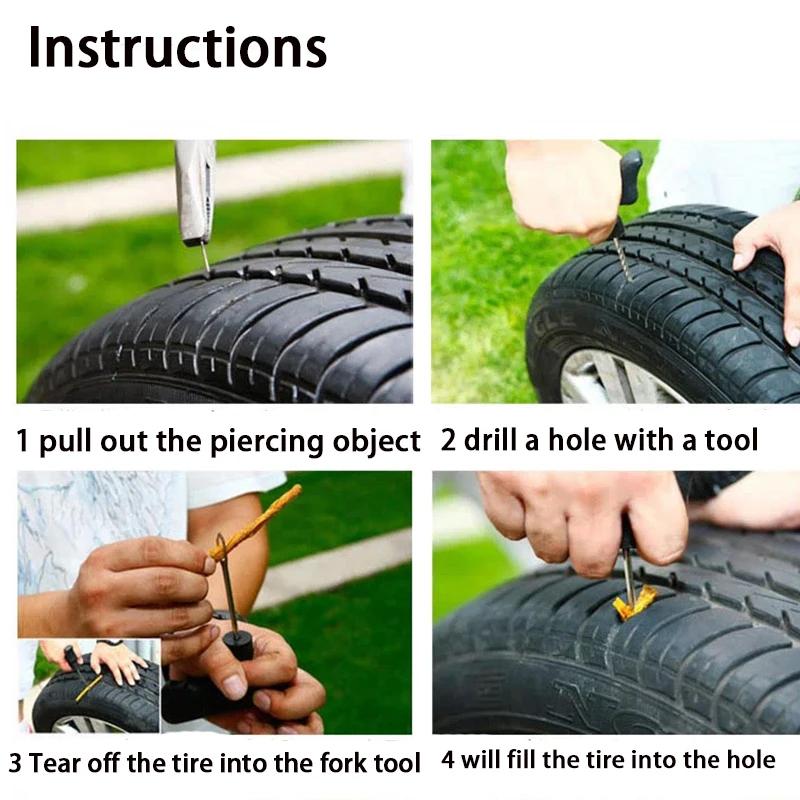 Driving on a flat tire, even for a short amount of time, can damage it beyond repair. When a tire is operated without air, the vehicle’s weight crushes the tire’s innards turning it to dust.
The next thing to do is see what caused the flat. Nails directly in the middle of the tread are a common occurrence. They can be easily spotted from a distance. If you can’t see it, running your hand around the tread will reveal the location of the nail.
Tire punctures that occur within 2 inches of the sidewall are considered non-repairable. This means neither you, nor the shop, can repair this.
It’s actually against the law for auto-shops to repair tires that have punctures close to the side wall. The issue is, tire patches placed close to the side-wall often result in tire blowouts, due to the shifting nature of a tire’s sidewall to tread relationship.
A good test to measure the distance between the puncture and the sidewall is to place your thumb in that space.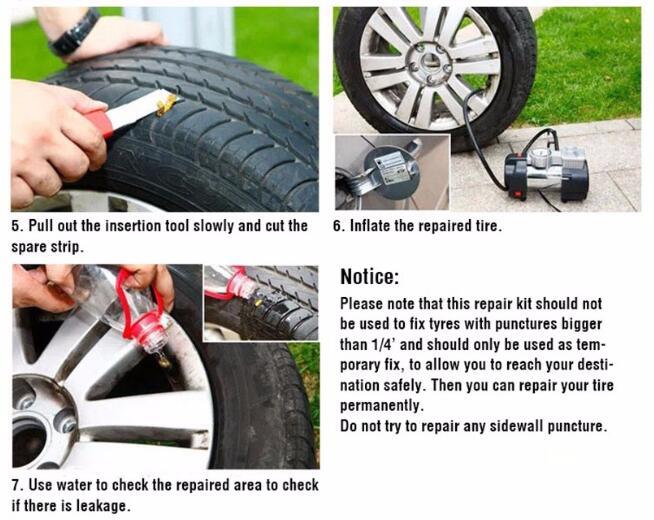 If the puncture is a thumbs width (or more) away from the side wall, you’re in the clear.
If not, sadly, it’s time for a new tire.
The length of the puncture is the next thing to look at. Most nail punctures are just as wide as the nail itself. In this case, with the puncture being so small, it’s ok to plug the tire yourself. But if the length of the puncture is 2 ½ inches or more, you cannot patch it.
You cannot patch it, or a shop cannot either. Punctures this large are not repairable, because patches aren’t meant to hold in air over that big of an area.
The inner tire liner doesn’t become fully sealed, even with the largest patches available. If your puncture is more of a gash in the tread, it’s time for a new tire.
Fully patching a tire requires you to complete the following steps.
So as you can see, the full, official way to patch a tire is quite involved. This is why you can see prices up to $45.00 for a simple patch.
If the tire has to be rebalanced, that’s around $13.00 and if it needs new valve stems, or a TPMS sensor, this can also tack on extra costs.
This patch is so effective that it saves you from having to purchase a new tire. You can enjoy the full length of the tire as if no puncture ever happened. Patching a tire can be quite the life saver when you’re in a jam.
The obvious issue here is that tire machines aren’t commonplace in the average driver’s house. So doing it yourself this way isn’t really feasible, but the method we discuss next can be done almost anywhere.
Tire plugging is a simple fix applied to various types of tire punctures. The majority of tire punctures can be repaired by doing a plug yourself.
To plug a tire, just push the plugging strip with the T-Handle in as far as it will go. Then, with all your might, quickly pull the t-handle out. This will plug the tire, and all that’s left is for you to cut the excess plugging strip away.
Tire plugging is looked down by Tire Shops because they consider it not fully seal the surface. But I’ve plugged well over 500 tires, and have never had an issue. Most independent shops are fond of tire plugging as well, since it keeps prices down for them, and the customer.
Tire plugging can be done by yourself, in your driveway. If you don’t feel comfortable doing it, call up an independent shop and ask if they plug or patch tires. Most likely, they probably offer both, but they’ll charge half for a plug, compared to what they would for a full patch.
Plugging tires, while usually a simple task, can turn into a complex issue. For example, if you plug a tire, and you can still hear a slow hissing noise, it can be a pain to hunt down the source of the leak.
Or if you spray the whole tire down with soap in order to locate the leak, and can’t find it. You might start to question your sanity. Don’t! These issues can take up hours, even for master techs.
There’s actually a machine in some tire shops that puts the tire under water using a crane-like object from above. Even this machine still fails sometimes, and mechanics are left scratching their head. So if you start to encounter any issues of locating the leak, or plugging a leak, it’s time to take it to the shop.
If the tire is totally flat when you walk out to your car, you should be able to use your spare tire, and repair the issue at home with a plugging kit. But if you plug the tire, and it’s still leaking, take it to the shop and let them repair it.
If you are questioning the length test or edge test results, it’s also recommended that you take it to the shop. Some mechanics will say, “use double the amount of plugs”, to fix large gashes. This is wrong. If one plug can’t fix it, take it to the shop and see what you can recoup.
But for the majority of situations, where a nail has punctured your tread somewhere in the middle of the tread face, it’s totally acceptable to purchase a plug kit, and do the repair yourself. It will save you a couple bucks, and you will have had the opportunity to go under your car to do a quick visual inspection. Or take off the tire and glance at the brake pads.
Photo: Mikhail Tereshchenko / TASS
adv.rbc.ru
See also
Nail, rebar or sharp stone - sometimes you can damage a tire almost from scratch. First of all, the scale of damage is important, and often rubber can still be repaired. Most often, motorists turn to tire shops for repairs in the middle of autumn or spring - just in the season of replacing summer tires with winter tires and vice versa.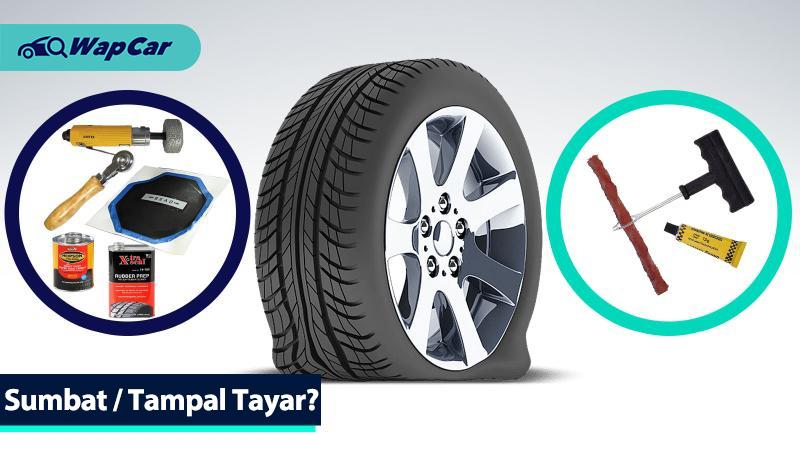 In order not to stand in lines, it is worth knowing exactly when to go to the tire shop and when to go to the store.
The most common "injury" to rubber is a puncture, and it can most often be repaired. Professionals in the nearest service will do it much faster, and your hands will remain clean. But if the puncture caught you in a deserted place, and there is a pump and a tire repair kit with harnesses in the trunk, you can patch up the tire yourself. Most often, when repairing the front tires, the wheel can not even be removed, it is enough to turn the steering wheel in the right direction and find the puncture site.
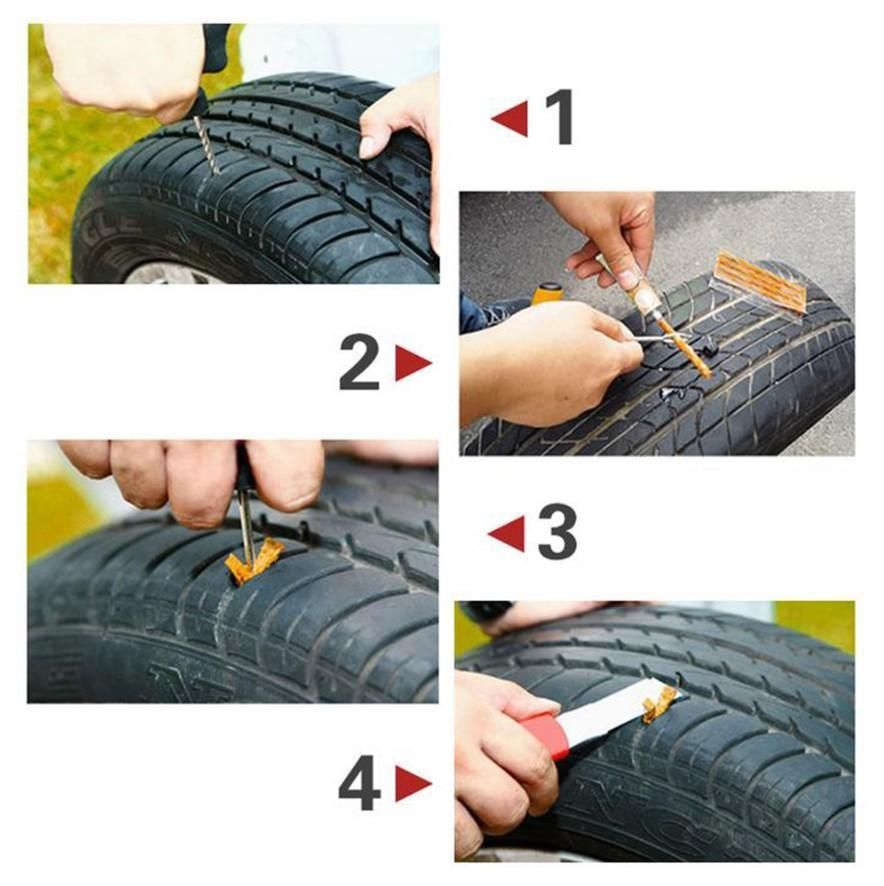
First, the hole is cleaned with a helical awl, the repair harness is smeared with glue and tucked into the eye of the awl, after which it is inserted into the tire hole. With a sharp movement, the tool is removed, and the tourniquet remains inside and securely clogs the hole. The tails are cut with a knife, but it is recommended to leave about 20 mm. After that, the tire can be inflated and the pressure checked.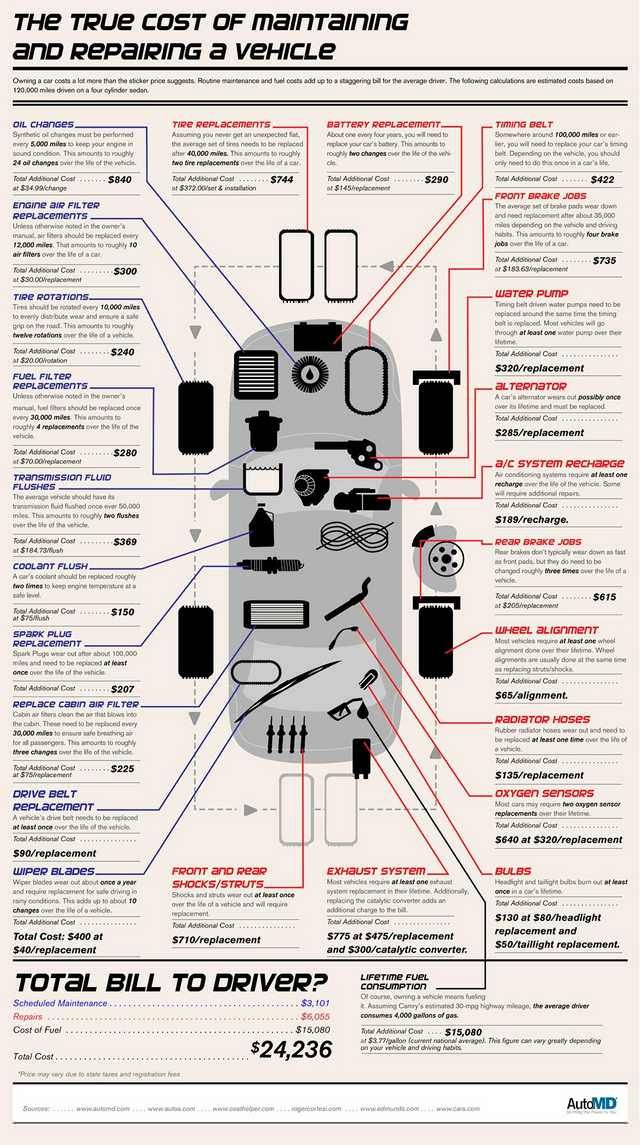
Repair with tourniquets is not considered long-term, because after some time they dry out and begin to let air through. A more advanced puncture repair method is vulcanization. The hole is sealed with an elastic patch, and the funnel at the puncture site is filled with a special compound. A vulcanizer is put on top, which heats the patch and solders the excess.
Under service conditions, the puncture is also repaired with cord fungus. The puncture site is processed and drilled to roughen. Everything is smeared with glue, after which a fungus is introduced from the inside of the tire, its cap is rolled, and the excess legs are cut off from the outside.
Photo: PA Images / TASS
A puncture can also be repaired with sealant. Many car manufacturers with run flat tubeless tires put compressor repair kits in the car instead of a spare tire - a bottle of pressurized sealant. The car is raised on a jack, after which the sealant is pumped into the damaged wheel through the nipple. Next, you need to spin the wheel and pump it up. After repair, the car should be driven a couple of hundred meters to check the tightness of the tire. If it has not recovered, the procedure is repeated.
It happens that a self-tapping screw or a nail closes the hole in the tire, remaining inside. Do not rush to pull it out - until the pressure drops, you can safely get to the service for vulcanization. Sometimes the wheel begins to blow off a few weeks after the self-tapping screw got into it. Therefore, it is better to check tire pressure periodically, and if the pressure sensor lights up, you should at least visually inspect the tire for a nail head.
A bump or bulge most often occurs on the side of a tire after hitting an obstacle or hitting a hole at speed. From the impact, the sidewall carcass threads are damaged, the tire ceases to hold the load and pressure, swelling appears. Any small bump eventually turns into a larger one, and with such a defect, the wheel can burst at any time. This is a direct safety hazard because a sudden flat tire can cause loss of control and a road accident.
Some bulges can be repaired, but no patch will ever restore a tire to factory stiffness. The ideal option in this case is to replace the tire. If a hernia has appeared on the tread, then you can extend the life of the tire with the help of cord patches - ready-to-use patches with an adhesive layer. But if swelling is found on the sidewall, the likelihood of repair is minimal, the wheel is easier to change. Blisters on low profile tires are generally not repairable.
Only car service professionals can repair a side cut. Cord patches will be needed to repair the damage, but after some time the wheel will still have to be changed. This method will work only if the gap is not in the shoulder area of the tire, then no one will repair it.
In general, cuts or punctures, unlike punctures, are considered non-repairable, since the integrity of the frame is violated.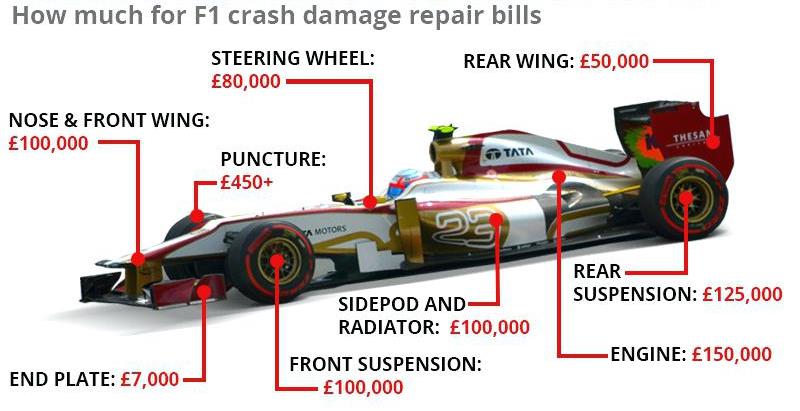 And breakdowns do occur on the go, when the tire abruptly loses pressure and has time to make only a few turns “on the rims” before it comes to a complete stop. In this situation, the cord breaks and the layers of the tire are destroyed. Even if it is possible to close the hole, it is not recommended to use such a weakened tire.
Photo: Mikhail Pletsky / Russian Look
Cracks, sidewall abrasions and unprofessional tire fitting can also lead to tire problems. Cracks can occur as a result of improper storage of tires. Their danger is that moisture begins to flow to the cord, and this already renders the frame unusable. Air can also escape through cracks. Cracks cannot be repaired and tires will not last long. A tire with cracks is deformed, blistered, and may even break while driving.
Rubbing against curbs or driving on uneven roadsides can damage the tire sidewall. When driving like this, it is worth inspecting the tires for damage regularly. If a slight wear is found, the wheels can be swapped, which will slightly extend their service life and allow you to delay the purchase of new ones.
Improper fitting can damage the tire bead. In this case, the tire will lose its geometry and sit on a disc with a bevel, “eights” will be visible during rotation, and the driver will feel vibration while driving. It is impossible to repair this defect, the wheel must be changed as soon as possible, otherwise there is a risk of damage to the suspension.
How to Tires
According to history, one day in 1888, an English veterinarian and cyclist, John Dunlop, tired of shaking through the countryside of Britain on molded rubber tires, glued a piece of water hose with a ring and pumped it up with a football pump - this is how the first pneumatic tire appeared.
History is silent when it was pierced for the first time - but most likely it happened in the same year.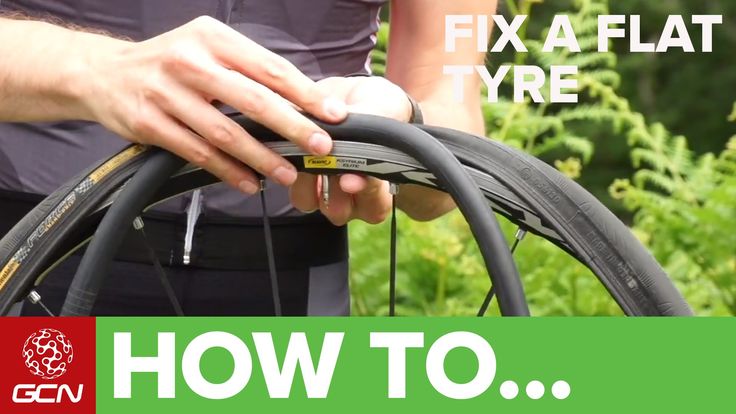 So the need for tire repair appeared simultaneously with their appearance.
Over the past 124 years, tire repair technology has been brought to almost perfection. For several decades (after tubeless tires in the vast majority have given way to tubeless ones), the procedure for repair has practically not changed.
This procedure is outwardly quite simple - and car owners (as well as part of the workshop workers offering this service) have the false impression that it is not particularly important to follow the prescribed technology exactly - they say, "it will do." And many "specialists" do not really know the technology. And therefore they sincerely believe: why do we need all sorts of "extra" actions? Why take the tire off the rim when you can keep the wheel off the car at all? The client is in a hurry - so you can plug a puncture (and a cut) with a cord, as they say, “on the go”. Does not poison the air, and everyone is happy. By the way, some workshops that promise “repair of punctures and cuts” do not have anything at all, except for cords and an awl for their installation.
In fact, each stage of tire repair technology is, as they say, "written in blood" - like military regulations and safety instructions. And this is not an exaggeration: what threatens a sudden rupture of a wheel at speed is not worth saying - if people do not die, then they are very lucky ...
We asked our expert, one of the heads of the Russian representative office of the German company "REMA TIP-TOP GmbH" Alexander Akhapkin, to talk about tire repair technology and those common mistakes (or even outright hack work) that car owners have to face.
- Tire repair, in general, comes down to a simple and understandable action: you need to plug the resulting "hole" in it. It sounds simple - like the instructions for skydiving: stepped out of the plane and pulled the ring. Only now, no one jumps with a homemade parachute, especially one packed according to rumors and advice from neighbors. Although the consequences of such a jump and improper tire repair are quite comparable.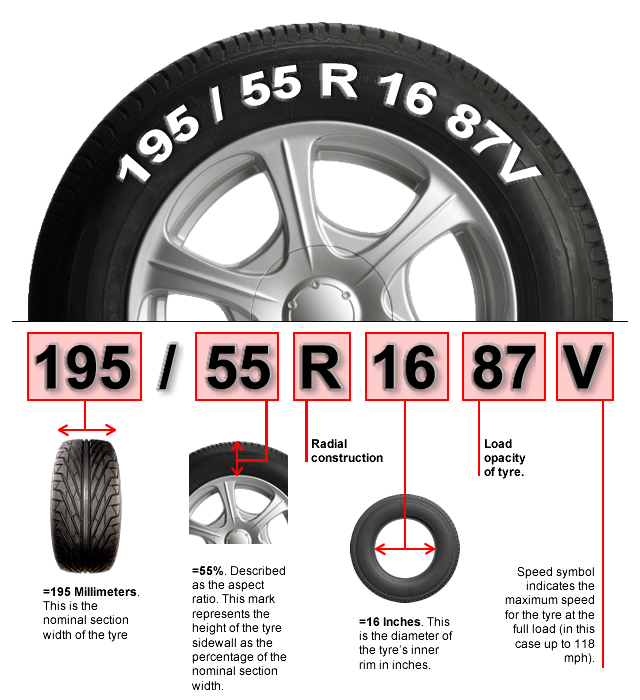
So let's go in order: how to do it!
So, the first step: determine the type of damage - is it a puncture or a cut?
The difference, of course, is in size. Roughly speaking, if no more than 1-2 cord threads are damaged, then this is a puncture. Anything more is a cut.
If it is a cut, it is important to determine its size. Tires have speed categories - and the higher it is, the smaller the amount of damage that can be repaired. For example, it is allowed to repair the tread of a category Q tire (not higher than 160 km/h) if the damage is not more than 20 mm. If the tire category is S (up to 180 km / h), then the size of the permissible damage is not more than 12 mm. And on a category H tire (up to 210 km / h), only a puncture with a diameter of not more than 3 mm can be repaired.
In general, damage limits depending on their location, size and speed category of the tire are given in special tables RemaTipTop, compiled according to the results of tests and tests.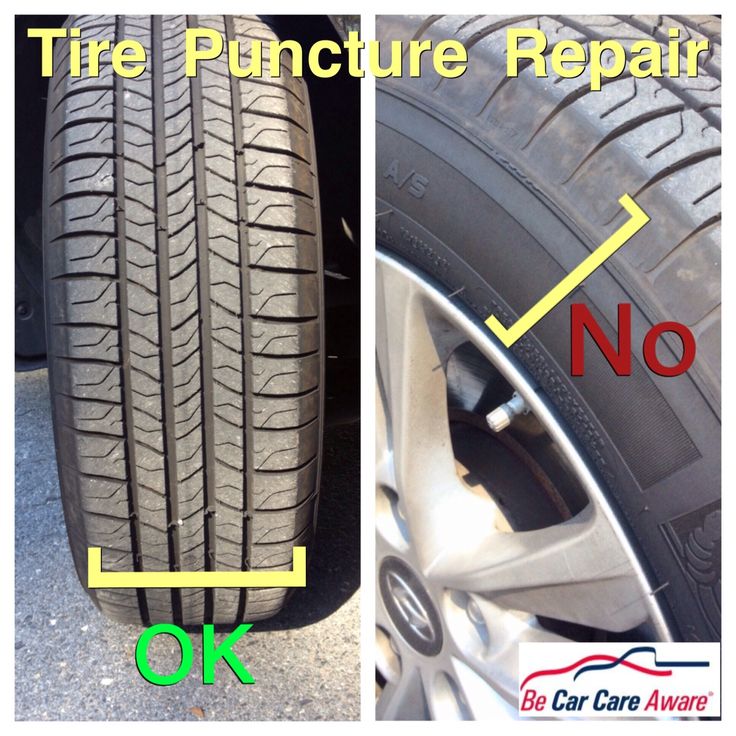
For example, regarding damage to the shoulder of a category Q tire (up to 160 km/h), repairs are allowed if the “injury” does not exceed a diameter of 8 mm. And damage to the sidewall can be repaired if it is no more than 35 mm long (along the side height) and up to 20 mm wide.
Second step: what kind of repair is needed? To get there - or capital? The fact is that the most common repair of a puncture with a cord is actually exclusively temporary - just to get to the station and overhaul the tire. And often the car owner asks to fix an expensive tire with a cord, which he puts on an expensive car - and stops there. And at the stations they “go forward” to him: they say, the consequences are at the expense of the customer ...
But even with such a repair, some "masters" manage to cheat. The cord, before placing it in the puncture, is not even smeared with glue. There is a category of cords made of "raw" rubber (they are also called "snotty").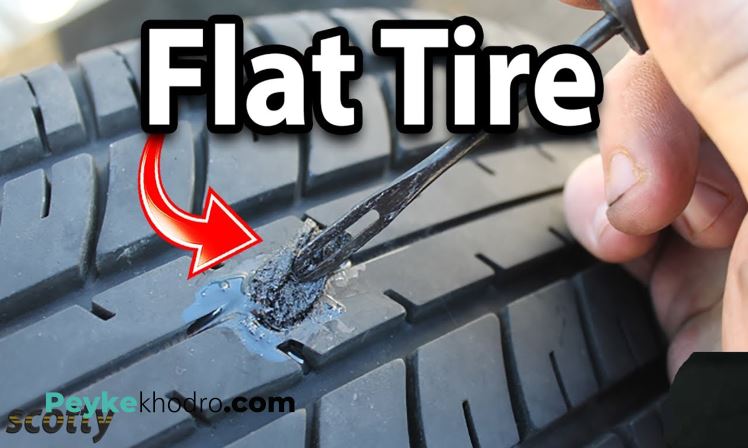 And it is mistakenly believed that glue is not needed for them. No - it's a must!
In addition, when repairing with a cord, it is necessary to form a hole with a burr to enter the repair material. And this is very often not done (on the principle - and so it will do!). For ten kilometers, maybe it will “get off” ...
Step three: puncture overhaul, after which the tire will reach its physical wear.
Fungi are installed at "vertical" puncturesHere the choice of repair tactics depends on the location and area of damage. If the puncture axis runs perpendicular to the tread surface, then it is preferable to seal it with a fungus. If the puncture axis runs at an angle of more than 12 degrees from the surface, then a plug must be used.
Tire repair fungus is preferred, but if the puncture is at an angle, the fungus head will not be able to fit snugly against the inside of the tire. And over time it can come off - which, of course, is unacceptable.
In principle, all actions of the wizard when using both fungus and cork are the same. The puncture is drilled with a burr with a diameter of 3 mm or 6 mm. The repair area from the inside of the tire is processed with a roughening tool - this is done so that the glue applied to the fungus cap or patch (if cork is used) firmly adheres to the surface of the tire.
But this is followed by an outwardly simple but obligatory operation - the dust formed after drilling and roughening is carefully removed with a brass or coconut brush, and then vacuumed. Moreover, simple “blowing” or brushing with a rag is unacceptable!
Processing with a special solution - required! Then the repair area is smeared with glue (the Germans call it "cement" - that's what it says on the containers with it. In fact, this is a high-tech adhesive system) and a fungus or cork is introduced into the hole - from the inside of the tire! Moreover, until the moment of installation, it is impossible to remove the packaging from the fungus or cork - it can be easily removed when they are introduced into the hole to be sealed. After installing the cork, its excess is cut off - and the repair area is smeared with glue. A patch is applied on top.
Next, the fungus cap or plaster is rolled on. And it remains only to cut off the excess fungal stem or cork from the outside of the tire.
It is very important to use materials from only one company for temporary repairs with a cord and a major fungus or plug! The fact is that the adhesives themselves are spilled: there are those produced on the basis of hydrocarbons, and there are those based on trichlorethylene. In addition, adhesives from different companies, even on the same basis, differ in composition. And therefore, in case of confusion, a reliable connection will not work - at best, it will last for some time. But - a little time ...
Fourth step: overhaul of large damage. Let me remind you that damage that exceeds a puncture, but does not exceed the maximum allowable, is considered large. With such damage, the tire is only scrapped - it is no longer possible to achieve the necessary reliability.
The technology of such a repair is simple - but there are no "extra" steps and steps in it. Outside, the place of damage is cut "under the funnel" - part of the damaged rubber is removed, the remains of the cord. From the inside, the place under the patch sticker must be roughened.
The plaster is a high-tech articleThen the dust must be carefully removed after processing with a vacuum cleaner - and this operation must not be skipped!
Next, the “funnel” is treated with a special solution: in the case of using the “Tip Top” technology, this is “MTRThermopress”.
And filled with raw rubber of the same brand as on the tire - heated strips or a special extruder. Raw rubber is treated with the same solution. And immediately closed with insulating foil for subsequent vulcanization.
Please note - do not skip a double treatment with mortar, nor cover the vulcanization site with foil!
A plaster is applied from the inside of the tire to the damaged area. And be sure to roll with a special rolling - this stage also cannot be skipped.
Something about Band-Aids: Don't try to save money by replacing your branded Band-Aid with the first piece of rubber you find! In fact, a patch is a rather complex rubber product reinforced with synthetic or steel threads that coincide with the direction of the tire cord threads.
Patches are produced separately for bias and radial tires. For their correct orientation (it is very important!) Arrows are applied on each of them, which are directed to the sides. You cannot cut the patch "to size" - it cannot be cut at all due to the complex internal construction of the cords. Companies produce several sizes of patches - and you need to choose from them using the Type Top damage table.
There are also inexpensive vulcanizers - for example "Junior" Naturally, the use of patches and adhesives with which they are glued, produced by different companies, is unacceptable - “cement” is applied to the surface of the patch, which needs to be smeared on the surface from the inside of the tire: only in this case the connection will be reliable and durable.
Step five: vulcanization. In order to vulcanize a “sandwich” of raw rubber, a tire and a plaster, it must be heated. But the problem is that vulcanizers, whose power allows you to warm up the entire volume of the repaired area, are expensive and consume a lot of electricity. In addition, they are bulky - the area of \u200b\u200bthe heating plate must exceed the size of any patch. So not every workshop can afford such a vulcanizer.
There is another solution - the so-called "two-stage" repair method. This is when a vulcanizer that is more affordable and consumes less electricity is only the site of damage. Its size is not enough to vulcanize the connection of the patch and the tire.
But it's okay - there is an effect called "cold vulcanization". Glue BL and the coating of the plaster from Tip Top are just capable of such a "cold" vulcanization.
However, if after a one-stage - “hot” - vulcanization, the tire can be mounted on wheels and installed on a car, then after a two-stage one (when only raw rubber warms up, and the patch is glued “cold”), you will have to wait at least 24 hours before mounting.