Every RV owner should know the significance of tire pressure and how to monitor tire pressure in order to decrease the chances of tire blowouts and other problems that may arise. We looked into the factors that go into determining the tire pressure of an RV, and we made a comprehensive guide to shed some light on the topic.
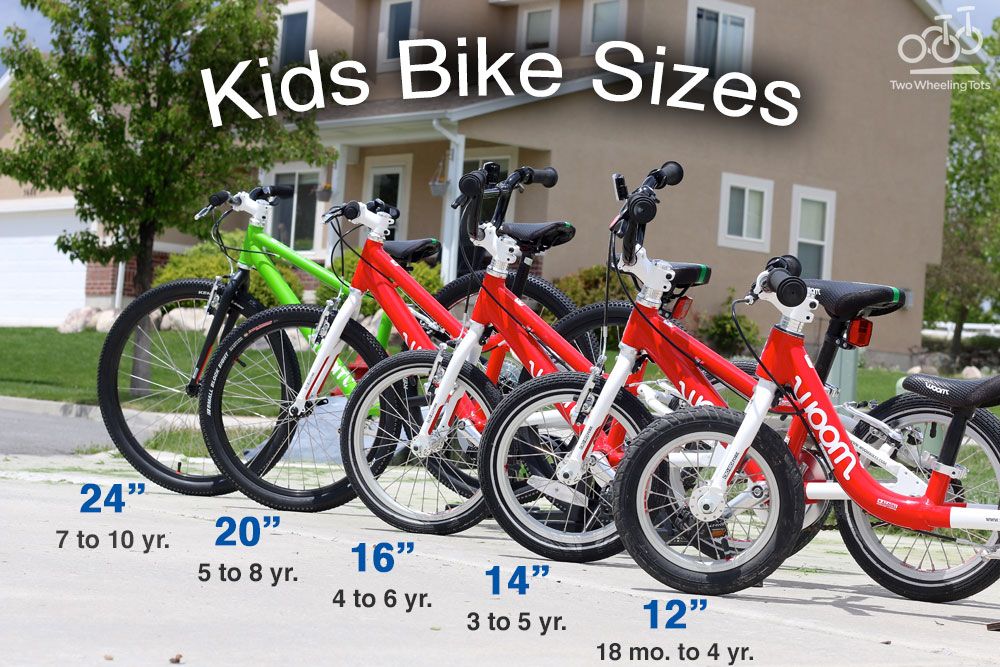
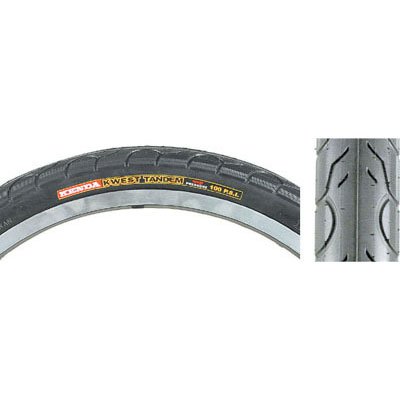
The tire pressure on an average 16" RV tire can be anything between 35-80 PSI or 280-550 kPa. That's a wide range - and you need to find the right number for your specific weight and number of wheels. Manufacturers provide data-plates in all RVs that include the recommended maximum tire pressure, based on the maximum weight of the RV. Therefore, if you load your RV lightly, then your tires may be overinflated.
There are other factors that go into determining the correct tire pressure for the tires on your RV, but you should be alright if you base your decision on the manufacturer's recommendation and make sure that your RV is not loaded too lightly. If it is loaded lightly, then make the needed adjustments so that you do not damage your tires.
Before you continue reading, let us say we hope you find the links here useful. If you purchase something through a link on this page, we may get a commission, so thank you!
In this article, we will go more in-depth on the topic of determining the tire pressure for the tires on your RV. We will also go over the basics of tire air pressure, the significance of tire pressure, what happens if your tires are under or over-inflated, where to find tire specifications, and how to monitor your tire pressure.
PSI, or pounds (of force) per square inch, is the unit of pressure chosen by most people in the US to represent tire air pressure. You may also see kPa mentioned here and there - that's kilopascal, a unit that represents the same measurement but on a different scale.
Maintaining the proper tire air pressure is a matter of safety for you, the passengers you may have, and the vehicles that may be around you.
Driving your motorhome or towing your travel trailer or 5th wheel with the wrong level of tire pressure can lead to all sorts of problems, affecting your stability, ease of ride and even gas mileage.
The over-inflation of tires makes the sidewalls and tread of the tire harder than normal. This can limit the performance and traction of the tire. Also, it may cause uneven tire wear.
Also, tire pressure that is too high can cause a slight increase in gas mileage by reducing the rolling resistance of your tires.
Plus, overinflation will lead to a harsh ride, wobbly handling in the wind, and reduced braking effectiveness that is especially reduced on wet roads. If you're towing a travel trailer, it could also lead to sway issues. Read more on how to prevent travel trailer sway in this post.
Most tire blowouts are caused by underinflation. Underinflation will force tires to come into contact with the ground more than properly inflated tires would. Read more on RV tire blowouts (and how to prevent them) in this post.
To be more specific, the sides, or shoulders, of tires flex more when overinflated which produces an excessive amount of heat, and excessive amounts of heat lead to tire failure.
If your tires are under-inflated by just 10 or 15 psi, then the temperatures on the sides of the tires can reach 200 degrees Fahrenheit.
Is High or Low Tire Pressure More Dangerous?There is a simple answer to this. Low tire pressure is more dangerous than high tire pressure.
Low tire pressure leads to dangerous blowouts while high tire pressure is generally less dangerous. This is true as long as the tire pressure is below the "maximum inflation pressure." If you go over that, you could end up with a blowout as well. Of course, there are other safety issues associated with high tire pressure, such as increased sway when towing.
Overall - sticking to your right tire pressure recommendation is always best.
There is almost always more than one place to check your tire's recommended specifications.
WARNING: Keep in mind that the previously stated places will typically only represent the minimum or maximum PSI, and they do not necessarily represent the best possible tire pressure for your vehicle. Read the next paragraph for more information on finding the correct tire pressure for your vehicle.
Setting the correct tire pressure on the tires on your RV is crucial to the tire performance, tire life, vehicle handling, and, most importantly, the safety of you and the people that are around you..jpg)
In order to get the best possible tire pressure, you should base your figures on the load being carried by the tires.
When you base the tire pressure on the load being carried by your tires, you ensure that the tires flex properly, are in the correct shape, will not produce an excessive heat build-up, and provide the strength to carry the total weight of your RV without losing tire patch (contact with the road).
Tire manufacturers like Michelin provide detailed tables for load & tire pressure.
The basic rule of manufacturers is to make sure that all tires on the same axle are set to the exact same pressure. This is based on the heaviest side.
Weighing an RV by axle positions and assuming that the load is equal on both sides of an RV is a bad idea. There is no way to calculate tire pressure without knowing the individual wheel weights. You could weigh the full axle, weigh one side, and then subtract from another side to get the weight of the other side.
Keep in mind that it is common for a difference of 1,000 pounds or more to be present between different sides on the exact same axle. Also, dual axles are close together, and they can be treated as a single unit (one wheel).
Get Tire Load Information From the RV DataplateThe next best source of information is the RV dataplate. RV manufacturers are mandated by law to post a recommended tire pressure on the dataplate.
Manufacturers expect the owner to load the unit to its maximum weight. This is why they always post tire pressures based on the maximum weight of the RV.
You probably will load your RV lightly if you use the dataplate as a source. This will eventually lead to overinflated tires. Read the paragraph above to learn about the problems that can arise if you overinflate your tires.
On the flip side, you could load your RV beyond the axle rating (GAWR) or Gross Vehicle Weight Rating (GVWR). In that case, choosing to use the dataplate pressure will lead to under inflation.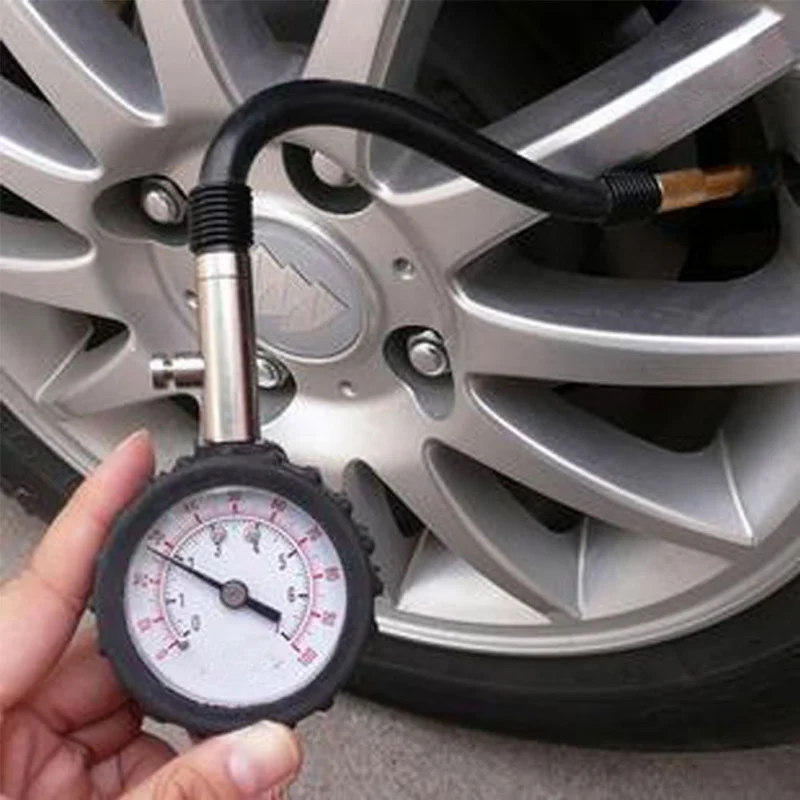
Finally, using the dataplate as a source may not be a good idea because it does not take into account the fact that an RV may be loaded in a remarkably unbalanced condition which is quite common.
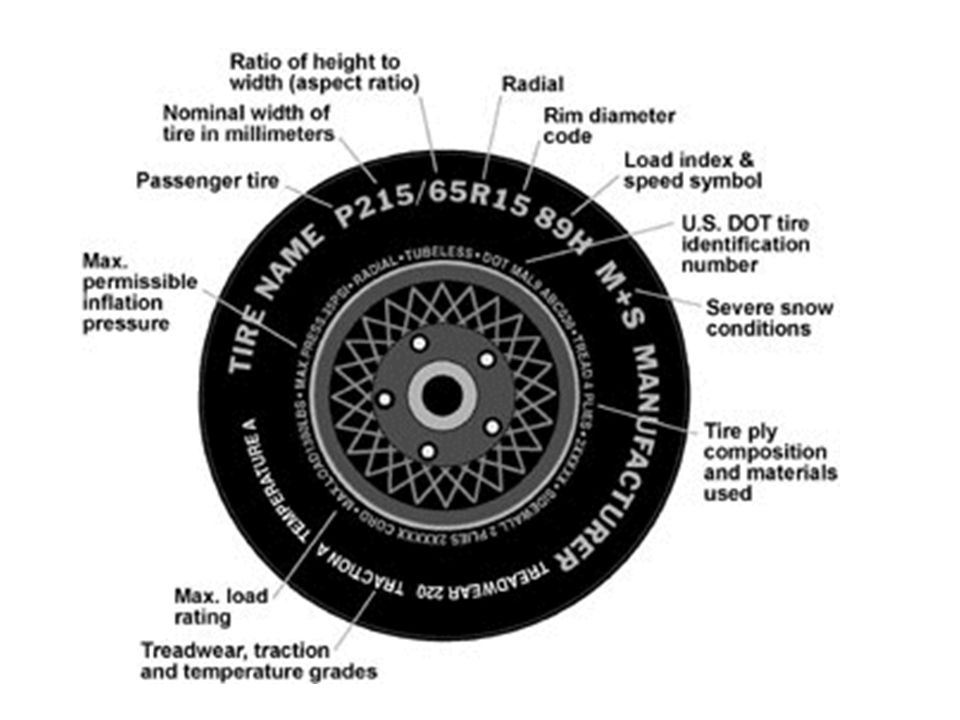
It is important to understand that the pressure that is shown on the sidewall is not the maximum pressure for the tire. It is the minimum pressure needed to attain the maximum load rating of the tire.
Setting your tires can be set to the pressure indicated on the sidewall will lead to obtaining the design load rating of your tire. Keep in mind that the pressure indicated on the sidewall does not take into account all of the many factors that go into choosing the optimum tire pressure.
Monitor your tire pressure with a tire pressure monitoring system (TPMS). Your RV might have one pre-installed, but if it does not, then simply buy one and install it in your RV.
You could monitor your tire pressure the old fashion way with a tire pressure gauge too.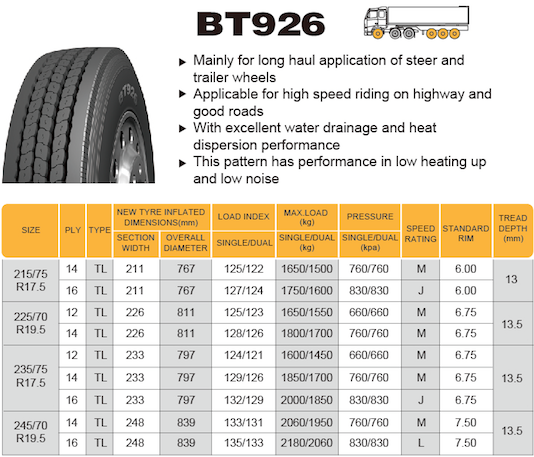 Digital tire pressure gauges are a decent option.
This may seem like common sense, but some people do not realize that tires lose air pressure over time. They lose around 1 pound per square inch (PSI) every thirty days, and they lose around 1 pound per square inch for every 10-degree (Fahrenheit) decrease in temperature.
Remember to monitor your tire's air pressure, or else you may suffer the consequences. You may want to set reminders to check the tire pressure unless you have a tire pressure monitoring system that alerts you when tire pressure is too low or high.
In ConclusionMaintaining the proper PSI, or pounds (of force) per square inch, is very important since it can have an effect on your safety and the safety of those around you.
A tire pressure that is too high and a tire pressure that is too low will lead to tire damage and other issues, but a tire pressure that is too low is worse because it leads to tire blowouts.
You can figure out the specifications and correct tire pressure for your tires in a variety of ways, but the best way to determine the correct tire pressure, in our opinion, is to look at the information that the manufacturers provide in the dataplates that are included in all RVs.
Dataplates include the recommended maximum tire pressure which is based on the maximum weight of the RV. Therefore, if you load your RV lightly, then your tires may be overinflated (if you make your decision based on the manufacturer's recommendation).
Before you go, be sure to check out these guides that pertain to RV safety -
Driving A Motorhome (9 Things You Need To Know Before Getting Behind The Wheel)
Should A Travel Trailer Be Level When Towing?
When Should I Replace My Travel Trailer Tires?
How To Safely Drive An RV On Mountain Roads
Tire pressure is an influential factor for gas mileage, tire wear, and other important travel details. You need the right tire pressure to make sure you are not overworking those tires and ruining them before their actual lifespan is up.
You will get a lot of different opinions on how you should inflate your trailer’s tires. The ideal tire pressure will depend on the size and type of trailer you are towing. However, that pressure should be within 40 to 65 PSI no matter the trailer brand, size, or model.
To learn more about this important topic, just continue to read our article. It has the information you want to know about so you can set your trailer’s tires to the right air pressure level. Take a few minutes to see how this important information can help you out on your next vacation.
Travel Trailers Tire Pressure 101
Should You Fill Travel Trailer Tires To Max Psi?
What Should The Tire Pressure Be on a Travel Trailer?
How To Determine Trailer Tire Pressure
Trailer Tire Pressure Calculator
Travel Trailer Tire Pressure Chart
Trailer Tire Pressure Cold vs Hot
Trailer Tire Pressure Loaded or Unloaded
Double Axle Trailer Tire Pressure
How To Check Trailer Tire Pressure
What Should Boat Trailer Tire Pressure Be?
What Should Tractor-Trailer Tire Pressure Be?
Why are Trailer Tire Pressures So High?
Will Low Tire Pressure Cause Trailer Sway?
There is an ongoing debate about this specific topic.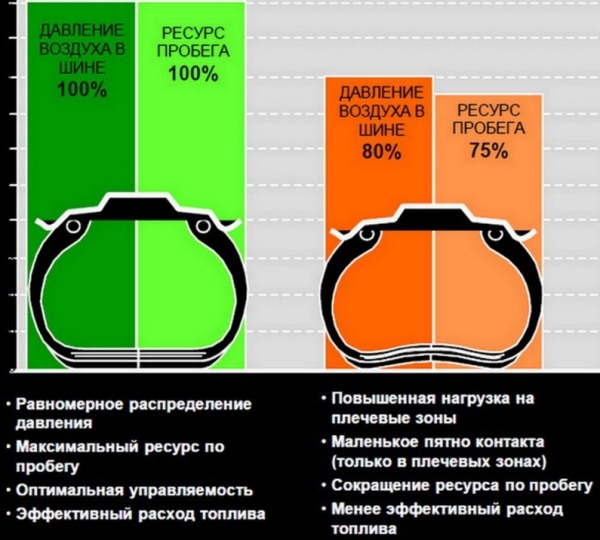 If you read the different RV discussion forums, you will find that there are people on all sides of the issue. Some say you should put the maximum amount of air in your tires while others are saying not to.
What compounds the confusion is that the PSI listed on the side of your tires is an average figure. There is no definitive answer for the correct tire pressure for your or any trailer because all trailers are different.
There are some very qualified people who say there is nothing wrong with filling your tires to the maximum level that is listed on the side of your tires. The problem comes in when you are not wary of the different trailer tire types.
They may be the same size but some tires are Load C, others are Load D and still, more are for Load E. Those are the different categories, or some of them, that come into play when you are buying tires and wanting to find the correct tire pressure.
Different tire types require different PSI levels.
As we just said, there is no definitive tire PSI for all trailers. Each trailer will require a different amount of air pressure. This level is determined by trailer weight, size, axle rating, and trailer tire type.
You should be cautious about using the PSI your friends or any YouTube personality claims to be the perfect tire pressure. That level they claim works for them may only work for them. Since your trailer is different from theirs, you may need a different PSI level for your trailer.
You can check the sticker that is supposed to be inside your trailer or the information listed in your owner’s manual. Those two items should give you the right PSI for your trailer and its weight. The side of the tire will also give you the maximum PSI level that you can fill the tires too.
The problem that comes in, is if you underinflate your tires, you could be asking for trouble. Under inflation is not your friend and depending on the trailer, etc., your tires should be inflated to somewhere between 40 and 65 PSI.
It is said that every tire manufacturer produces and publishes a tire pressure chart and includes tire load stats as well. However, this is not a simple chart to read for many people. You can try using it but there is a simpler way.
On every trailer, there is supposed to be a federal certification tag on the trailer’s front left corner. On this tag is listed the trailer’s GVWR, GAWR, and the tire pressure information. That tire pressure information is calculated by the trailer’s weight.
It is an accurate calculation and it is only thrown off if you put an extra weight inside or on the trailer. When the trailer is not loaded with cargo and supplies, the tire pressure should be somewhere between what the tag says and what the maximum PSI is listed on the side of the tire.
However, you are not to exceed the maximum PSI listed on the side of the tire at any time. When replacing the tire, the maximum PSI should not be smaller than the PSI listed on that tag.
A quick search on the internet using this sub-section’s heading will result in a lot of tire calculators.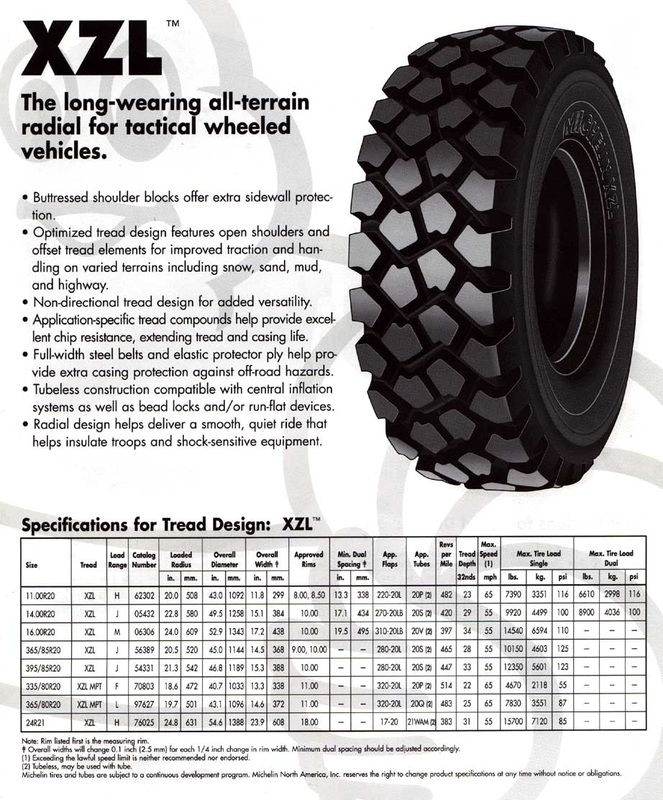 The problem is that these tire calculators may not work for trailer tires. The Firestone option was for agricultural machinery and not good for trailers.
Others focused on cars and trucks and made no mention of trailer tires. There are some websites that are strictly for figuring out PSI for different trailer tires. One is more for European or Australian trailers and you can look at it here.
Another is a simple chart for North American trailer owners. You can take a look at it at this link. There is also a website that teaches you the equation you need to use if you do not want to use the calculators on the internet or you are not near a computer.
You can find his detailed explanation and equation at this link. Do your own search to see if you find some tire pressure calculators that you like better. The major tire makers should have some listings for trailer tires you can use.
You will find that the different tire makers will have tire charts for the tires they make for trailers and RVs. It is the same principle as the previous section and you can find these charts by using the sub-section’s title as your search words.
These charts classify the tires by wheel diameter and then make a table with the PSI listing as the main heading. They will also give you the load amount for each tire so you can get an accurate figure and know how much PSI you need to put inside your tires.
To look at Michelin’s tire chart for trailers and RVs, just click on this link. For Toyo Tires, just click on this link
. For your specific tire brand, you should look up the company’s website or use it in your search terms.
Every company may have different figures for your trailer tire PSI levels and it is best to check your brand of tire out on their website or contact them directly if you can’t find it.
Once you learn the difference, you will see how practical and sensible those words are. A cold tire has sat all night and has not been used yet for the day. A hot tire has been used for some time throughout the day.
The latter describes the tire after it has been warmed up by use and the ambient temperature levels. A hot tire will show between 4 to 6 higher PSI than a cold tire will show. The rate is about 1 PSI pound per 10 degrees ambient temperature.
But the key is you cannot inflate your tires according to the hot levels. If you over or under inflate your tires you will cause some damage to the tires and make your journey a bit rougher than it should be.
No matter the conditions you are driving under, you cannot inflate your tires past the cold PSI maximum level listed on the side of the tires. If you violate that level you can overheat your tire and overheating is the leading cause of trailer tire failure.
The good news here is that the tire PSI does not change when the trailer is loaded or not. You may see a difference in the shape of the tire if you overload it but the PSI will not change just because the shape changes.
In what may be called extreme circumstances, you may see a 1 PSI change but that is not enough to damage your tires. The key is not to exceed the PSI level listed on the tire. That is the maximum amount of air you can place in your trailer tires.
The reason some people may lower the PSI in their tires is that their trailer is empty and they want to stop the bouncing that comes with properly inflated tires. Do not confuse the load range with the PSI level.
The former is for how much weight the tire can hold and the latter is telling you how much air you can put in the tire.
This is not going to change. Each tire, no matter the number of axles, will have a maximum amount of air it can hold. That maximum amount is listed on all the tires. You do not go over that PSI level even if you have 4 tires and two axles.
Of course, some people say that if you under inflate your tires when carrying a load, they will grip the road better. This is not the case. Under inflated tires may cause you tire trouble in different ways and make it more dangerous to drive. The same warning applies to over-inflated tires.
Just do not go over the PSI level listed on the tire and you should be fine. The weight held by each tire is not a factor in this issue and it is usually not known how much each tire is carrying. Stick to the PSI level on the side of the tire and you should ward off any problems even if you bounce more.
This is a simple step to take. If you take the time to check your tire pressure before you leave your home or camping spot, you can save yourself a lot of trouble. All you need to check your tire pressure is an accurate tire pressure gauge.
Take the covers off the valve and press the gauge down hard and firm onto the valve. The result spurt of air will push the needle or white gauge to the level of air pressure inside your tire. If you have a digital tire pressure gauge then you should get a clear read-out.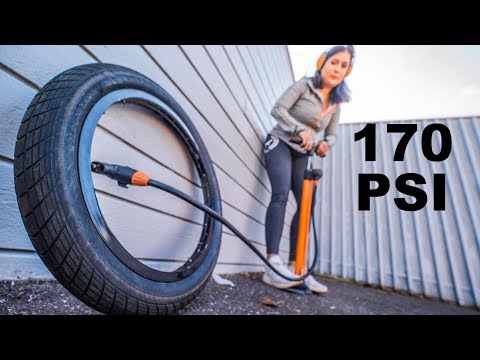
Then check your reading with the PSI level listed on the side of your tire. If the two do not agree, you may have to add more air or let a little bit out. However, take into account that warm tires will read higher than cold tires.
So you want to adjust for the different reading. It is best to check your tires when they are cold as the PSI level on the side of the tire is set for cold tires.
The answer is going to be the same for this type of trailer as it is for regular travel trailers. The maximum amount of air you should put in a boat trailer tire is listed on the side of the tire.
It doesn’t matter how heavy the boat is, that is the most air you can put in a boat trailer tire or any trailer tire. There is nothing scientific or special about tires no matter where they go. They can only hold so much air pressure and that is it.
Over inflate or under inflate those tires and you will face the same risks and dangers travel trailer and other trailer owners face.
This is the same answer as the previous section. Whatever is listed on the side of the tire will be the most air you can put inside the tire and have it perform up to its claims. At no time can you go over that listed PSI level even if you are hauling your crop in from the furthest field from your barn or silo.
The tires are made to hold only so much air and if you go over it, you will have some sort of trouble eventually. While tires are made to handle different loads, their PSI capacity does not change.
You have to look on the side of the tractor-trailer tires and see how much air pressure it can hold. This holds true for the semi-trailers you may be driving. The capacity does not change when the load weight changes. Read your tire to get the maximum PSI level no matter what.
The basic reason is that trailer tires have to hold more weight than a passenger tire has to hold. Sometimes, those trailers can weigh up to 15,000 pounds and they need a lot of air to hold that weight and move down the road
A passenger vehicle may only hold between 2000 and 8000 pounds, depending on if it is a small car, sedan, light truck, or SUV and carrying cargo. Also, the trailer tire is built with thicker sidewalls so they can hold more air with ease.
The lighter the trailer, the less PSI you will need in the tires. The maximum tire pressure is determined by the weight of the trailer so you may find that lighter trailer tires may not hold as much air as their heavier counterparts.
Yes, that is one of the many sources why trailers sway as you drive along the road. The tires are said to compress and decompress with each bump in the road. This reaction influences the trailer’s performance and you should start to see some sway taking place.
Low or under inflated tires give a lot more freedom of movement to the tires and that means you are losing control over your trailer.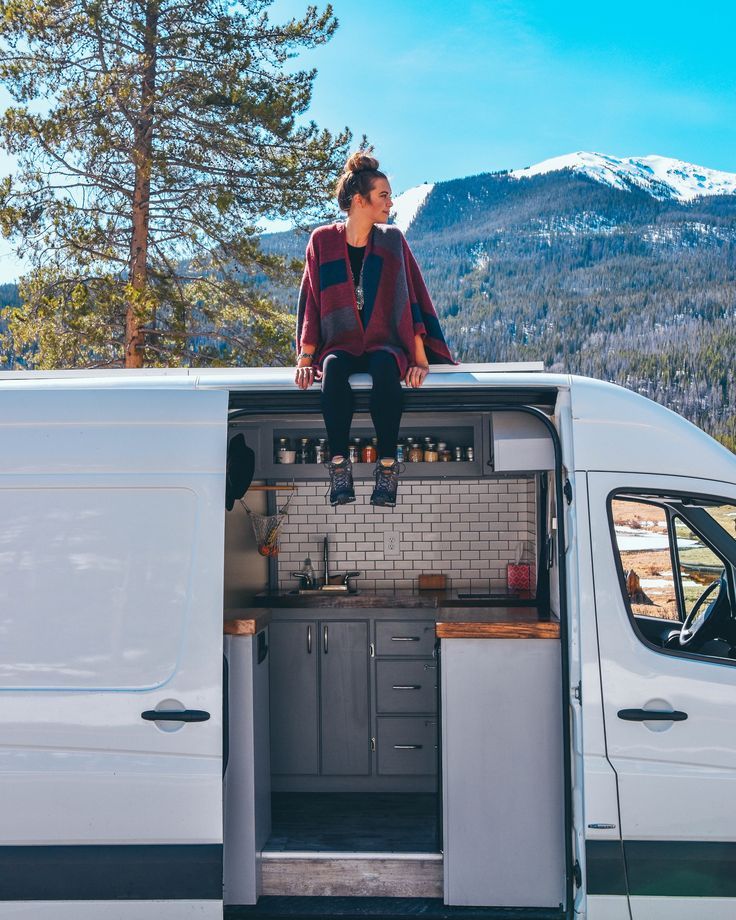 When you see your trailer swaying, take the next opportunity you can to check the tire pressure.
If they are inflated to the right level then you need to start looking at other sources for this problem. Those other sources would include too much weight, the weight is not distributed properly, you are experiencing wind gusts or you are driving too fast.
The maximum speed trailer tires are rated for is 65 mph and some are rated for lower speeds.
Having the right air pressure in your tires is very important. Too little or too much can result in damage to the tires, make them wear out faster, or an accident. No matter how much weight you are carrying, the PSI levels never change.
What it says is the maximum tire pressure for the tire, you cannot exceed that level no matter what. It doesn’t matter what anyone says either. Do not go above that PSI level.
EN ES PT EN FR
Oops... Javascript not found.
Sorry, JavaScript is disabled or does not support JavaScript in your browser.
Unfortunately, this site cannot work without JavaScript. Check your browser settings, maybe JavaScript is turned off by accident?
| It's very simple: Need help? x This unit converter is very simple. Truth.
|
| ||||||||||
? Converter settings:
x
By the way, you don't have to use the settings. You may be fine with the default settings.
it is more convenient to get a rounded result. In such cases, choose 3 or 4 significant figures. Maximum accuracy -
Your value (pound per square inch, psi):
» open »
» collapse »
| psi to bar | |
| pound per square inch to kilopascal (kPa) | |
| pound per square inch to hectopascal (hPa) | |
| pound per square inch to megapascal (MPa) | |
| pound per square inch to millibar | |
| pound per square inch to pascal (Pa) | |
| pound per square inch to gram-force per square centimeter (gf/cm²) | |
| pound per square inch to kilogram-force per square centimeter (kgf/cm²) | |
| pound per square inch to tonne per square centimeter | |
| pound per square inch to kilogram-force per square meter (kgf/m²) | |
| pound per square inch to ton-force per square meter | |
| pound per square inch to newton per square meter (N/m²) | |
| pound per square inch to kilonewton per square meter (kN/m²) | |
| pound per square inch to meganewton per square meter (MN/m²) | |
| pound per square inch to newton per square centimeter (N/cm²) | |
| pound per square inch to newton per square millimeter (N/mm²) |
Units: bar / kilopascal (kPa) / hectopascal (hPa) / megapascal (MPa) / millibar / pascal (Pa) / gram force per square centimeter (gf/cm²) / kilogram force per square centimeter (kgf/cm²) / ton force per square centimeter / kilogram force per square meter (kgf/m²) / ton force per square meter / newton per square meter (N/m²) / kilonewton per square meter (kN/m²) / meganewton per square meter (MN/m²) / newton per square centimeter (N/cm²) / newton per square millimeter (N/mm²)
» open »
» collapse »
| pound per square inch to ounce per square inch (osi, oz/in²) | |
| pound per square inch to ounce per square foot | |
| pounds per square inch to pounds per square foot | |
| psi → 1000 psi (ksi) | |
| pound per square inch to tonne per square inch | |
| pound per square inch to ton-force per square foot | |
pound per square inch to long ton (U. K.) per square inch K.) per square inch | |
| pound per square inch to long ton (U.K.) per square foot |
ounce per square inch (osi, oz/in²) / ounce per square foot / / pound per square foot / 1000 psi (ksi) / ton force per square inch / ton force per square foot / British ton force per square inch / British ton force per square foot
» open »
» collapse »
| pound per square inch to inch of mercury | |
| pound per square inch to centimeter of mercury | |
| pound per square inch to millimeter of mercury (torr) |
Units: inch of mercury / centimeter of mercury / millimeter of mercury (torr)
» open »
» roll up »
| pound per square inch to meter of water | |
| pound per square inch to centimeter of water column | |
| pound per square inch to millimeter of water | |
| pound per square inch to foot of water | |
| pound per square inch to inch of water column |
Units: meter of water column / centimeter of water column / millimeter of water column / foot of water / inch of water column
"open"
"collapse"
| pound per square inch to physical atmosphere (bar) | |
| pound per square inch to technical atmosphere (at) |
Units: physical atmosphere (atm) / technical atmosphere (at)
» open »
» collapse »
In physics, natural units are based only on fundamental physical constants. The definition of these units is in no way connected with any historical human constructions, only with the fundamental laws of nature.
| pound per square inch to Planck pressure (L⁻¹MT⁻²) |
Units: Planck pressure (L⁻¹MT⁻²)
Try to search:
Other options:
See alphabetical list of all units
Ask a question on our facebook page
and you liked it at Convert-me.Com. Come again!
! The unit value is approximate.
Either no exact value,
or it is unknown. ? Please enter a number. (?) Sorry, unknown substance. Please select something from the list. *** You need to choose a substance.
The result depends on this.
Tip: Can't find the unit you're looking for? Try site search. Search field at the top of the page.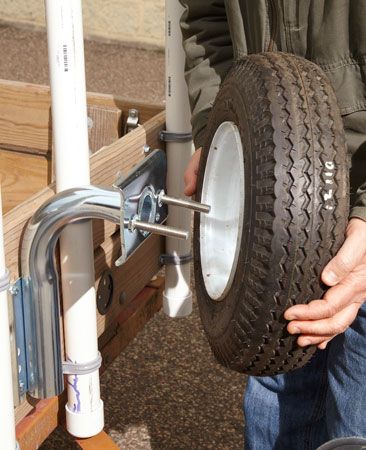
Found a mistake? Would you like to suggest additional sizes? Contact us on Facebook.
Has our site really existed since 1996 years old? Yes it is. The first version of the online converter was made back in 1995, but there was no JavaScript then, so all the calculations were done on the server - it was slow. And in 1996 the first version of the site with instant computing was launched.
Unit blocks can be displayed collapsed to save space. Click on the heading of any block to collapse or expand it.
Too many units per page? Difficult to navigate? You can collapse the block of units - just click on its title. The second click will expand the block back.
Our goal is to make conversion as easy as possible. Do you have any ideas how to make our site even more user-friendly? Share!
Camping is a great way to get outside and enjoy nature. There are many fun activities you can do while camping, such as hiking, mountain biking, and rock climbing, just to name a few. The biggest problem that most people face after spending all day playing outside is how to stay clean.
While you can definitely take a bath with baby wipes to cleanse yourself, this is no substitute for a full shower. But how are you going to do it? Well, it really depends on how you go hiking!
There are many ways to go camping, which means there are also many ways to shower while camping. For this reason, we've broken down our methods into 3 common ways people camp so we can offer a solution for each group of people. Feel free to read through each method or jump to the method that is most helpful to you!
Using the shower while camping with a camper is one of the easiest ways to clean yourself up. Most campers are equipped with showers inside and outside the camper. Why two? Well, there are pros and cons to using each.
Indoor shower pros:
Cons of indoor showers:
When you're thinking about buying a camper, keep in mind that there are two types of bathrooms you can put your camper in: dry and wet bathrooms.
In dry bathrooms, the shower and toilet are separate entities, just like in a regular residential bathroom, but on a much smaller scale. It's great when you have multiple people using the camper at the same time so that your bathroom space can remain as hygienic as possible.
In wet bathrooms, the shower and toilet areas are mostly combined. This saves space and can reduce the weight and cost of your camper. The biggest downside to this style of bathroom is that it takes a bit more cleaning to keep the entire space clean for use. It's best to get a wet bath if you intend to use it with no more than one person.
Regardless of the style of bathroom your camper comes with, you will probably also have a built-in outdoor shower. Outdoor showers are great because they work very similarly to indoor showers, so the learning curve is very low.
An outdoor shower has several advantages, for example:
However, outdoor showers are not for everyone. Here are a few cons to consider when choosing an outdoor shower:
If you're in a special location dirty place, an outdoor shower can be a godsend. You can easily avoid tracking nasty things inside your camper. Of course, you'll probably have to deal with the fact that you won't have as much privacy as you would with an inside shower, but with the right ingenuity, you can create a space that's easy to maintain privacy when using an outside shower. .
Another thing to consider is the fact that you are likely to be standing on a dirty surface when showering outside. For this reason, make sure you have the ability to get up and out of the mud before showering outside. Wear sandals so you don't get your feet dirty while showering.
And of course, make sure you have a way to organize your shower supplies when you shower outside. A shower stall is a great way to store all your toiletries in one easy-to-move place. Shampoo, conditioner, shower gel and everything you need to freshen up and cleanse can be stored in the shower enclosure to use when you shower outside.
The best thing about outdoor showers is that almost every tourist has one. From the fanciest glamping sites to the humblest temporary campers, you have access to the soul.
But what if your campsite doesn't have a shower?
Something that has been trending in the last few years is the rise of camper vans. Whether you use a van as a temporary shelter and sleep in it on the weekends or live #vanlife, you need to find a way to shower when you're away from civilization.
To get a good shower as well as the design of your van, you need to follow this guide to building your own outdoor shower.
First, be sure to install a solid roof rack system on your van. Most sprint vans come without them, so you'll need to professionally install one on your roof so you have maximum strength for your rack.
The main problem with most self-mounting roof racks, such as Thule or Yakima, is that they are not designed to carry very high dynamic weights. This basically means that their ability to support heavier items is very small when your vehicle is in motion. Self-mounting shelves are great for light items, but for the shower, you'll want the strongest shelf you can afford.
Once your roof rack is installed, you will assemble these materials to build your shower van:
Now that you've got all your materials, let's build this outside shower!

source: @mrandmrsadventure
Now that your shower is assembled, let's look at how to use it. You will fill the shower at the top where you screwed the cap into the tee. Pour enough water into the shower, but not so much that it almost runs out of the pipe. You want to leave some room at the top for air to pressurize the shower so water can squirt out of the hose.
After your shower is full, connect the hose to the ½-inch bib. The best thing to do here is to use a hose with a spray head that can be controlled by pulling the trigger to release the water. The last thing you want is for water to flow out of your hose and you have no control over its flow!
After connecting the hose, pressurize the shower by pumping it up with a bicycle pump or an air compressor.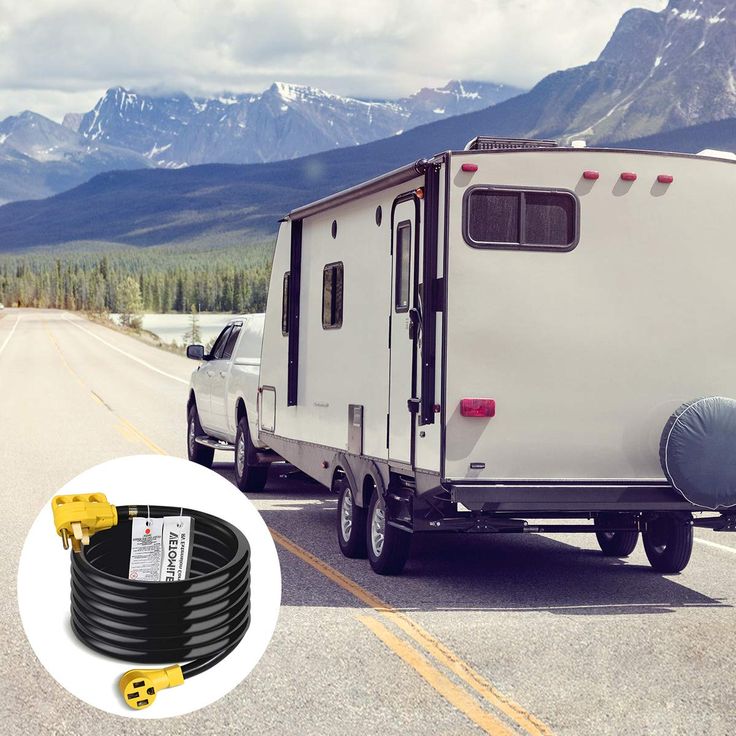 Pump up the shower so that a constant stream of water comes out of it. This won't take long, so just play around with the pressure a bit to find a sweet spot. 4" Grade 40 PVC can withstand 220 psi (psi) before they burst, so pay attention to how much pressure you apply in the shower.
Once you've created your pressure shower, it's time to turn it on! Open the hose bib to allow water to enter the hose. Now you can shower outside!
But if you want a more private shower, you need to add one more thing to the roof rack. You can quite easily create a round shower curtain rod so you can shower outside!
One of the easiest ways to solve this problem is to buy a U-curtain rod from Amazon. Find outdoor U-shaped curtain rods and choose the one you like best. After it arrives, take it to a hardware store and find some U-bolts that fit around the circumference of the curtain to secure the shower bar to the roof rack when it's in use. Be sure to purchase a few washers and nuts to secure the cornice to the roof rack securely.
Check your installation, but attach the eaves to the roof rack. Install the curtain rod on top of the roof rack and insert the U-bolts into the curtain rod. Install washers and nuts under the roof rack to keep the eaves in place.
Hang the curtain on the cornice and voila! You have a functional outdoor shower room that will give you privacy.
Take your shower van one step further by creating a surface to stand on while you shower. The reason you need an elevated surface to stand on is because it will keep your feet from getting muddy when the shower water hits the ground.
This is a fairly simple project as all you need is some wood, a sander, deck stain, a saw, a few screws and a drill.
Start by cutting the tree into several small sections. Aim to create a shower surface approximately 1x1 foot in size. Then orient the wood to make a small pallet shape. With pallet shaped wood, use a drill to drive screws to hold each piece of wood together.
Now that you're done, use your sander to create a nice smooth surface. This will help you avoid splinters in your legs! Once it is nice and smooth, apply stain to the entire surface of the shower. This step is important because it will keep your shower surface in good condition for many purposes.
After painting, your shower surface is ready to use! Whenever you want to shower, just lay it around the perimeter of your shower curtain to stand on something clean while you shower!
For those who live in a campground, you do not have access to an inner or outer shower like those who use campers. You also probably don't have the space to build your own PVC shower like you would in a camper van. So what can you do to shower while camping with a tent?
Well, the first thing you can do is camp at campsites that have access to showers. This is one of the easiest solutions as you don't need to bring anything extra with you to set up an outdoor shower. Many national park campgrounds have showers, so be sure to reserve a campground site with shower access if you want easy shower access.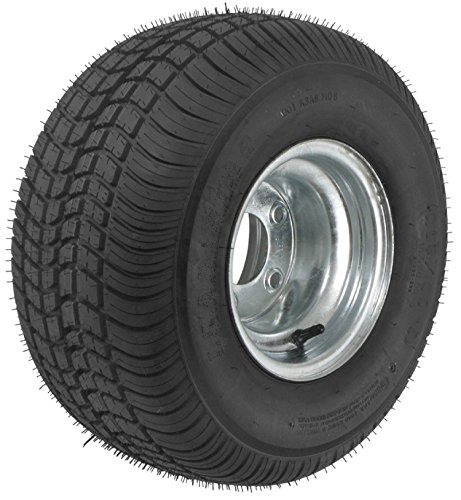
If you plan to go hiking outside the campsite, you can still take a shower. The easiest solution to take a shower while camping is to bring a portable shower cabin with you.
These are great because they are easy to put on and take off. They have hooks at the top of the cubicle that you can hang your shower bag on, which means all you have to do is operate a valve to open the water flow and let gravity do the rest of the work!
If you need a shower with more powerful water pressure, you can purchase shower buckets that can be pressurized with the supplied pump. It works the same as a PVC shower in terms of pressurizing the air inside the bucket to push the water out.
Either way, you can take long hikes everywhere and still stay hygienic while camping with a tent, with a portable shower cabin and the shower delivery method of your choice!
There are so many ways to take a shower while hiking. No matter how you go hiking, you can always stay nice and clean no matter what.
Make sure that no matter how you shower, you use biodegradable soaps and shampoos to limit your impact on the environment. This is especially true for caravans and tents, as the soap from your shower washes right onto the ground and into the soil.
Now that you have a good idea of how to shower in any way, get out and enjoy your next hike knowing you can stay fresh and clean wherever you go!
Sharing care!
527 shares
First and last name
Email address
Message
HobbyKraze is a member of the Amazon Services LLC Affiliate Program, an advertising affiliate program designed to provide website owners with the means to earn any advertising fees through advertisements and links to amazon.uk a website that may be linked to the Amazon Service. Affiliate Program Ltd.