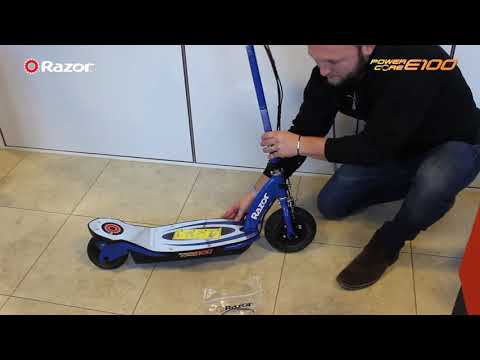
A flat tire on an electric scooter can stop the fun your kids are having by riding it. However, you can bring the fun back by simply replacing the tube or the wheel. In this article, we are discussing how to fix a flat tire on Razor Electric Scooter E100 and E300.
II. Tips before you attempt disassembling anythingStep 1. Use two 5 mm Allen keys, loosen the axle bolt, and take out the front wheel. Place the fasteners safely.
Note: ElectricScooterCritic.com is reader-supported. When you buy through links on our site, we may earn an affiliate commission at no added cost to you.
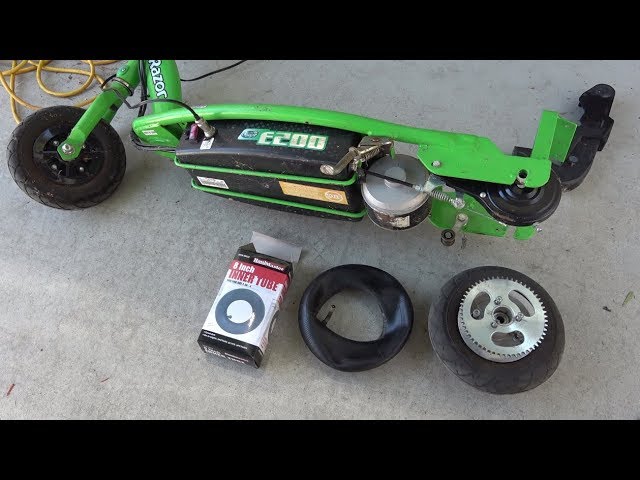
Step 2. To take out the tube, you have to disassemble the hub. The hub has two parts (upper and lower) fastened together by 4 screws. Remove the screws and take out the hub. Take out the old tube and examine the tire for the source of puncture and remove it.
Push the new tube into the tire, inflate a little and ensure the tube is completely inside the tire. Assemble the hub and mind the location of the valve stem. Tighten the screws.
Inflate the tire to the correct pressure and assemble the wheel onto the scooter. Now you are ready for a test ride.
Note: If the tire is damaged, it is better to replace the complete wheel.
Rear wheelThe rear wheel of Razor E100 is made of Urethane and there is no tube. If there is damage to the rear wheel, the whole rear wheel with the hub motor must be replaced. You can take out the wheel by following the steps below:
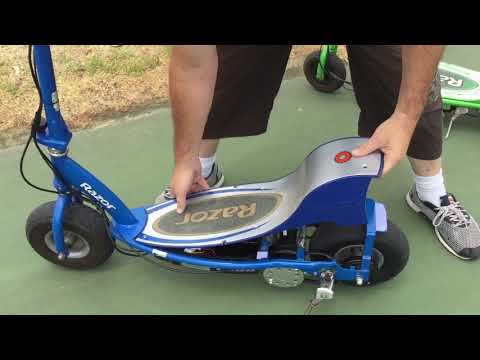
Step 1. Remove the deck plate and battery strap. Use a Philips screwdriver to remove the six screws on the deck plate and take it out. The screws may be of different sizes, so keep them in order.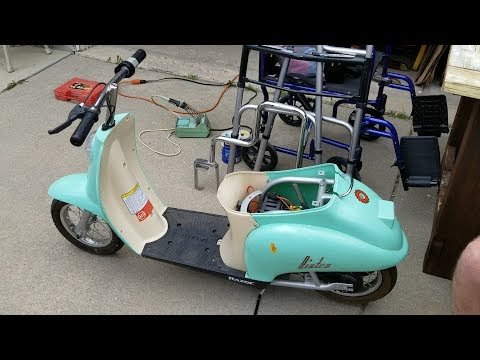 Using the same Philips screwdriver, remove the two screws and take out the battery strap. Keep the screws in order.
Step 2. Disconnect the battery from the control module and take out the battery with due care. Disconnect the motor wire connection with the control module.
Using a pointed rod, depress the connector tabs and remove the wire from the connector. Pull the wire out of the battery space.
Step 3. Use a Philips screwdriver and remove the three screws that have fastened the motor housing to the left side frame.
Step 4. Use a 13 mm size wrench and loosen the locknut on the outer right side frame. Take the help of another wrench to prevent the rotation of the inside locknut.
Now you can take out the damaged rear wheel with the hub motor and replace it with a new rear wheel with a hub motor. Take the reverse steps and reassemble. Make use of the photos you took before disassembling.
You can download a PDF copy of the owner’s manual for Razor Power Core E100 from this link.
Step 1. Use two 17 mm wrenches to loosen and take out the lock nut, 2×washers, and spacer from the left and right side. Take out the wheel and the front axle bolt. Keep the fasteners safely in order.
Step 2. Unfasten the four screws using a Philips screwdriver and disassemble the hub upper and lower parts. Take out the old tube, examine the inner tire surface for pin or nail, remove it, and fit the tube into the tire.
You can inflate the tube a bit and it goes inside. Ensure the tube is not projecting out of the tire and assemble the hub. Inflate the tire to the correct pressure.
Assemble the wheel back and refer to the photos you have taken for reference.
Note: If the tire is damaged, it is better to replace the complete wheel.
Step 1. Use a Philips screwdriver and take out the chain guard. Keep the two screws safely.
Step 2. Use an Allen wrench and detach the brake cable from the brake.
Step 3. Use two 8 mm wrenches and loosen the brake housing anchor and disconnect it from the wheel. Keep the fasteners together.
Step 4. Use a 10 mm wrench and loosen the two numbers of axle adjuster screws (counterclockwise) equally by 5 turns.
Step 5. Use two 17 mm wrenches to loosen the axle, slide the wheel forward and loosen the chain. Remove the wheel, disassemble the axle and the fasteners and keep the axle and fasteners in order.
Step 6. Remove the brake drum by turning it counterclockwise. You can use a screwdriver, a small hammer, and use the hole on the brake drum to hammer it counterclockwise. Remove the brake drum, disassemble the hub by unfastening the 4 screws.
Take out the tube. Examine the tire for pins or nails. Push the tube inside the tire properly and you can inflate it a bit to ensure it is completely inside. Assemble the hub and brake drum (mind the location of valve stem). Inflate the tire to the correct pressure.
Assemble back the wheel by referring to the photos. Test ride.
Note: If the tire is damaged, it is better to replace both tire and tube.
You can download a PDF copy of the owner’s manual for Razor E300 from this link.
YouTube videosV. ConclusionA flat tire on an electric scooter may happen at any time. It is better to be ready with the spare kit, and the tools, so that replacement can be done immediately.
Cooperation
Comprehensive electric scooter reviews from all of the top manufacturer brands.
Razor is a renowned worldwide leader in electric scooters. Since 2000, they have sold more than 15 million electric scooters. Due to their unique technology and features, they have become global experts in electric scooters innovation.
Razor believes commuting from one place to another should be both fun and practical. From manual scooters to skateboards, from hoverboards to electric scooters, they ensure people experience a fun ride with every product they bring into the market.
However, even the best scooter in the market is of no use if your tires wear out or go flat. If you are looking for repair or replacement of your tires, this guide is for you. In this write-up, we will discuss how to get a replacement tire for a Razor electric scooter.
But before we get into the detailed guide on replacement, you must know some basics about the tires offered by Razor. As we all know, Razor comes with various models of electric scooters. Every model has different types of tires.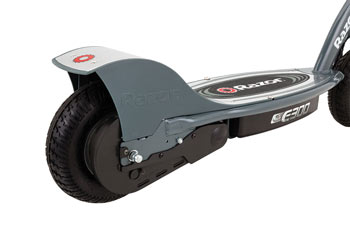
So here are two types of tires that are primarily used in the production of Razor electric scooters.
Pneumatic tires are air-filled tires. Razor Eco-Smart motor, E300, E200 are popular Razor electric scooters that are fitted with pneumatic tires.
Overall, Razor electric scooters that are constructed with pneumatic tires perform better as compared to solid tires. This is because air-filled tires are more efficient and offer better traction and balance.
Most tires you see on Razor electric scooters are pneumatic tires. All pneumatic tires are made of flexible rubber, and to maintain their structure, air pressure is required. There is a valve stem either on the side or center of the wheel used to fill the air in the tire. There are two subtypes of pneumatic tires: tubeless and inner tube tires.
Tubeless pneumatic tires are rare on electric scooters. Such tires have an airtight seal over the tire rim. Tubeless tires are more heavy-duty, puncture-resistant, and high performance.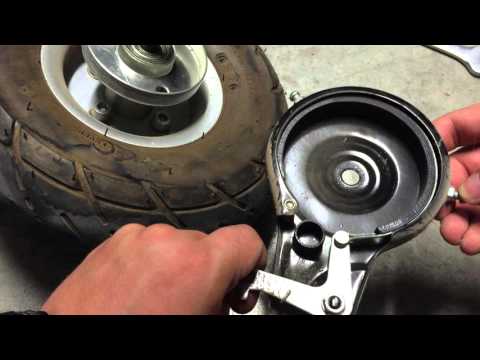 Generally, only expensive electric scooters are equipped with tubeless tires.
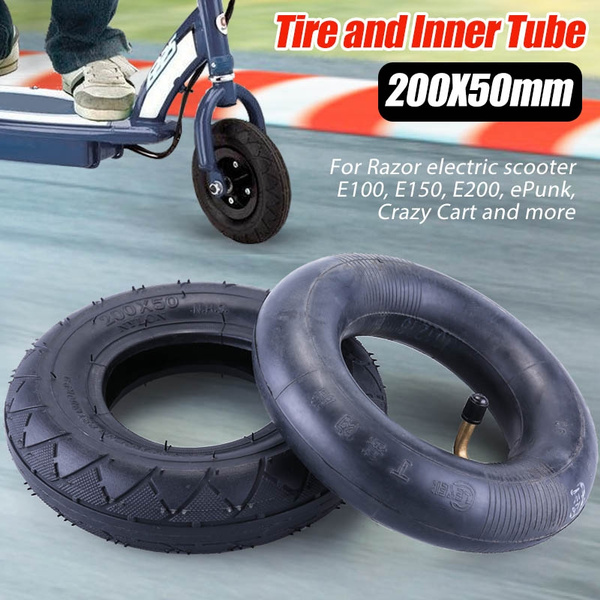
Inner tube tires on electric scooters are common. They have an outer shell with treads that touch the road when you are riding the scooter. Inside the outer shell, an inner tube has a valve system that holds pressurized air. These tires are easy to manage when you get a flat. All you need is to replace the inner tube.
The three significant benefits of pneumatic tires are better cushioning, better traction, and lower friction.
Lower rolling friction means that the tires lose less energy as they roll on the ground. There will be better mileage and better speed with pneumatic tires.
Better cushioning is due to air pressure in the tubes. They can absorb bumps in the road better.
Better traction allows you to stop quickly when sliding. Also, these tires offer better traction on wet roads.
There are two disadvantages of Pneumatic tires: maintaining tire pressure takes a lot of work, and these tires are easier to become flat. The most common complaint that a rider comes with pneumatic tires electric scooters is a frequent need to replace the tires.
Solid tires are made from either rubber or foam. The solid rubber provides integrity, which makes them more durable than pneumatic tires. Solid tires are immune to punctures and never get flat like pneumatic tires.
The Razor Dirt Quad SX McGrath is equipped with solid tires, which are tough to change and require the entire wheel to be replaced. They never go flat from getting punctured. They are often made of hard plastics that wear down quickly. There are two types of solid tires: honeycomb and filled tires.
Honeycomb tires have an internal design like a honeycomb that offers structural integrity and keeps the weight down. These tires offer more cushioning and tend to be lighter than pneumatic tires.
Filled solid tires are stiffer and heavier than other tires.
The primary benefit of solid tires is that they never flatten, and there is no need to maintain air pressure. They are also less expensive than pneumatic tires.
Disadvantages of solid tires include poorer traction and lower performance relative to pneumatic tires.
If you are looking for a replacement for your Razor electric scooter’s tire, then you should know what the process is and from where you can quickly get a replacement. Here, we will explain where you get a replacement tire for a Razor electric scooter.
To get a replacement tire for Razor electric scooter, you can visit the official website to learn about the quality and price of the tire you are looking for.
Whether you want pneumatic or solid front or rear tires, Razor gives you the convenience of getting your replacement tires all in one place, right from the scooter’s manufacturer.
As we all know, Amazon is a worldwide shopping platform that has everything from electric scooters to its spare parts. It is also a great place to get a replacement tire for a Razor electric scooter. For example, if you are looking for Razor E200 Electric scooter tires, buying TOPEMAI replacement tires (ASIN: B07h5NLNDB) is a great option. All you need to do is check your tires’ product model number and size before look up a replacement tire for your electric scooter.
Like Amazon, Walmart is a retail and online shopping platform where you can buy most anything you want. When it comes to replacement tires for Razor electric scooters, Walmart has almost every model and every size tire. To order tires online, you need to filter the search first with your model number, tire size, and types of the tire like pneumatic or solid, and there you proceed with the replacement of Razor electric scooter’s tire. You can also visit your nearest Walmart and go to the tire section to see the selection available there.
Monster Scooter Parts is an online retail shop that specially sells vehicle accessories and replacement parts.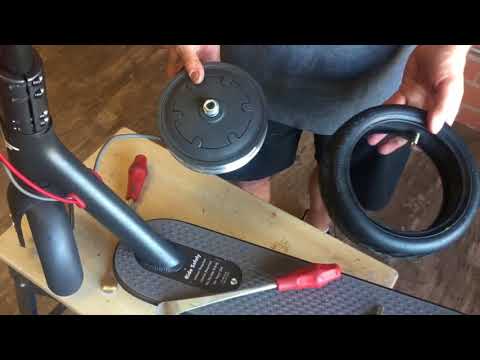
Whether you are looking for a Razor E200 electric scooter rear-wheel or tube set for MX 400, you can always count on the website for high-quality and durable replacements at an affordable price. The website also comes with a return and money back policy; if you are not satisfied with the size or material of the tire, you can rely on their return policy.
When you need a replacement tire for a Razor electric scooter, you can visit the Electric Scooter Parts store and look at its website. It is an employee-owned company that specializes in selling electric scooter parts.
eBay is an online selling platform that also offers electric scooter parts. Regardless of the brand, you will find most every spare part and tire for an electric scooter on the website. This is another good source for getting a replacement tire for a Razor electric scooter, but make sure to check the shipping costs before you put through your order.
Before we get into replacing Razor electric scooter tires, solid tires and pneumatic tires have different replacement processes. Replacing solid tires is much more difficult compared to replacing pneumatic tires.
There are three ways to fix a flat tire of your Razor electric scooter.
The first method involves:
The first method is a bit complicated in some models as sometimes removing tires means removing many parts around the wheel. If this is the case, try the second method, fixing the tire without removing the tires.
The third way is to go to a professional to fix a flattened tire.

Tires are an essential component of an electric scooter, and they have to be intact and in proper condition to ensure a smooth ride. Whether you want to replace your Razor electric scooter tire or repair it, this article is intended to help you move ahead for your tire change and we hope it is helpful to you.
Depending on the type of soil, the pressure in the tires of a car, motorcycle or bicycle has to be varied in order to get the maximum flotation from the vehicle.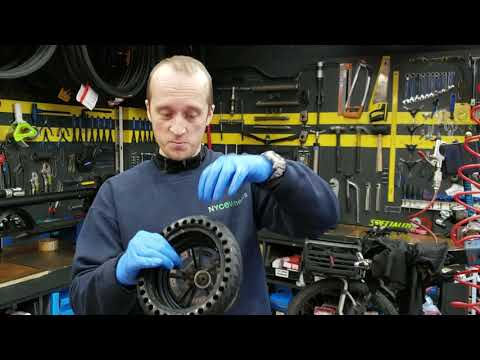 But if in the case of a car, what to let down, what to pump up a tire is not difficult (I inserted the compressor into the cigarette lighter and just “business”), then in the context of “two-wheeled friends”, the problem is more acute.
Dmitry Zlenko
Many bikes come with compact hand pumps. It seems that you know as well as I do that while you “breathe” one and a half or two atmospheres into the tire with such a “magic wand”, you will get tired so that you don’t want to go anywhere. And here, you understand, the second wheel is in line! And the degree of reliability of this kind of plastic compressors leaves much to be desired: then some part will fall off, then the stem will bend, then the check valve will stick. In a single season on my bike, I scrap a couple of these "hand trainers." Yes, and an eight-year-old son without the help of adults is not able to pump up a wheel on his “friend” with such a device.
Eh, to combine the ease of use of a car compressor with the compactness of a hand-held bicycle pump . .. And while I was dreaming about this miracle, the well-known to all motorists manufacturer of electric compressors Berkut has already created such a “device”! Imagine, it looks like an ordinary bicycle pump, except that it is packed in an aluminum case and does not have a handle, which traditionally has to be pulled up and down. From one end of the Berkut Specialist VL-1000 there is a hole for screwing a small hose, and from the other end there are two buttons and a connector for recharging the pump from a 220 Volt network. On both ends of the pump, everything is closed with dust and moisture protective rubber plugs.
There is a mechanical pressure gauge on the hose, thanks to which you can determine the degree of inflation of the bicycle tires by touch, but what is called with the help of a precise device. At the end of the hose there is a fitting for a wheel valve (in the common people "nipple"). In fact, there are two fittings, one is screwed onto the other: this design allows the compressor to be used to inflate tires with “nipples” of different standards.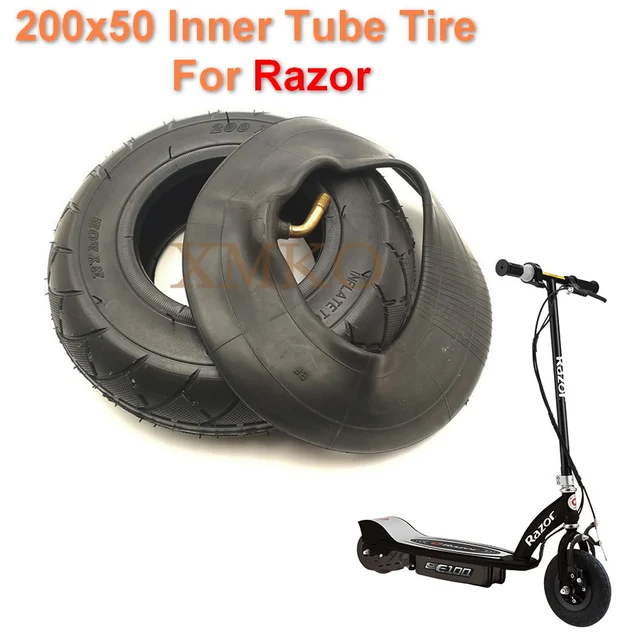
The Berkut Specialist VL-1000 is turned on and off with the help of a large red button, which, as we said earlier, is located on the end of the pump. Nearby there is a smaller button - it is responsible for the operation of the LED flashlight. Why does a compressor need a flashlight? Well, don't tell me... If the need for pumping up the wheel arose after sunset, the built-in LEDs will help you quickly find the "nipple" and screw the fitting onto it. And to find in the dark the same cap from the nipple or some other “lost thing” with a flashlight is much easier than without it.
Does Berkut Specialist quickly inflate a 27-inch bicycle tire? Almost instantly. This accumulator compressor inflated a deflated bicycle tire to the rims to two “points” in 13 seconds! The instructions for this "gadget" say that it is not recommended to inflate more than two wheels up to 28 inches at a time, as this can lead to overheating of the pump. And if the wheels are of a larger diameter, then you need to take a break after "swindling" each wheel.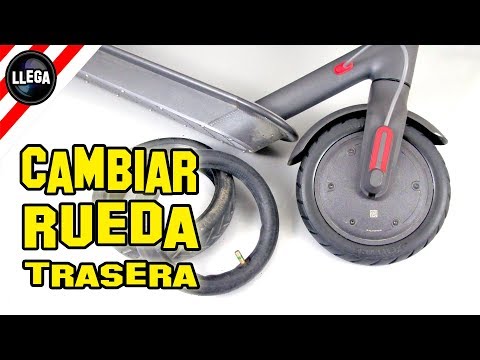 Well, I don’t know, having pumped up two “twenty-seventh” wheels in a matter of seconds, the pump was still cool outside temperature. By the way, you can use the pump in the temperature range from minus 10 to plus 45 Celsius.
If we continue the topic of the technical characteristics of the Berkut Specialist VL-1000, it should be noted that in one minute the pump is able to pump up to 10 liters of air from the atmosphere into the tire, and the maximum pressure given out by the device is as much as 8 bar!
Although the Berkut Specialist VL-1000 is positioned as a bicycle compressor, we decided to check whether it can become a friend for motorcycle tires. A pit bike wheel is about the same diameter as a bike tire, but due to its higher profile and wider width, it requires a significant amount of air. But our test subject in some 34 seconds stuffed the rear tire of a pit bike up to two atmospheres. It took ten seconds more to inflate the front tire from 0 to 2 units (the fact is that the front wheel is one and a half times larger than the rear).
It can be said unequivocally that this battery bike compressor is the ideal solution not only for "pedal horses", but also for motorcycles or scooters. Indeed, in the end, on two-wheeled vehicles there is no 12-volt outlet into which an electric car compressor could be inserted, and if we talk about pit bikes, then many of them do not have not only a “cigarette lighter”, but even a battery. Naturally, this pump will be a great help in everyday life: pumping up the same soccer ball or inflating tires in a baby stroller with the Berkut Specialist VL-1000 is as easy as shelling pears.
Subscribe to the Avtovzglyad channel:
off-road, spare parts, accessories, bikes, motor vehicles
Wheels are an important component. They determine the main technical characteristics of the device: the allowable user weight, terrain, maximum speed, etc. The diameter of the wheels is responsible for the cross-country ability and maneuverability of the vehicle, and their rigidity is responsible for traction with the road surface.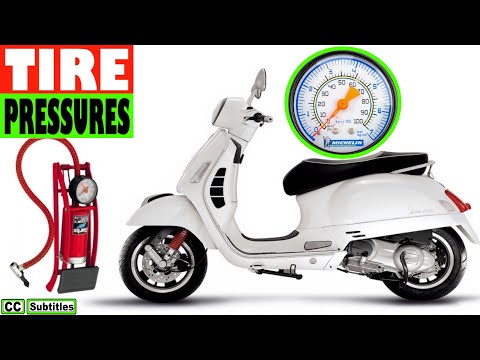 Moreover, even such parts are not durable and need to be replaced or banal cleaning for better functioning. Next, we will look at how to remove the wheels on an electric scooter and in what cases this procedure is necessary.
A regular or folding electric scooter requires regular diagnostics and troubleshooting. This applies not only to the controller, but also to other details. The procedure for changing wheels is really important. It is recommended that every owner of electric transport know about the sequence of actions in order to prevent adverse consequences.
Whether it's an 8", 12" or any other diameter wheel, the replacement instructions are the same, so you don't need to look for additional information.
The need to change the wheel occurs in two situations :
Wrong or defective wheels make the scooter uncomfortable to use. In addition, they often cause falls.
In most cases, users are unlucky with wide wheels, because such an electric scooter is more difficult to control.
The owner of the device will have to determine the frequency of wheel replacement himself. But it is important to learn a few points:
The procedure for changing a wheel is not too complicated, but one tool is not enough. You will first need to prepare:
The list of tools is the same, regardless of the diameter of the wheels and other parameters.
If you need to remove two wheels, do not rush. Although there are no particular difficulties in this process, the front and rear elements have some differences in their designs, and therefore each of them requires an “individual approach”. Consider the sequence of actions in the case of removing the front and rear wheels.
The same instructions can be used for an electric scooter with cast wheels.
Removing the front wheel on an electric scooter is easy even for beginners. All the small elements that need to be removed are in prominent places, so you won’t need to look for them and perform complex manipulations.
The electric scooter must be switched off before removing the wheel.
Consider the removal process using the example of device Mijia Xiaomi M365 .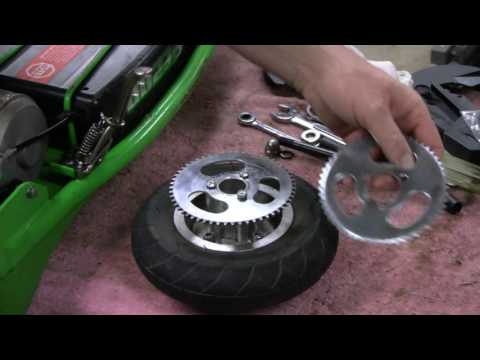 The instructions here are:
You can remove the rear wheel on an electric scooter according to the instructions above. Both wheels of the vehicle are mounted, removed and installed in the same way. This is done using the same tools.
You don't need to be a high-class handyman to remove the wheel motor. Here you will need to show your own accuracy and care. The user will not only have to follow the instructions in the process of unscrewing the rear wheel, but also monitor all the removed elements - nuts, screws, linings, etc. Having lost at least one detail, the device is not recommended to be used in the future without it.
In the process of removing the motor-wheel, be aware of the wire attached to it, which is undesirable to damage, so you need to do it carefully.
No tools are required to remove the tire. In this case, the user will only need their own hands and patience.
To remove tire from the electric scooter, proceed as follows:
Remove the tube from the electric scooter only after the wheels have been removed from the vehicle structure. This is necessary in cases of puncture or simple diagnosis.
The sequence of actions for is as follows:

It is possible to replace the camera at home, but it is important to buy an element of the right size for installation in the wheel - for this it is recommended to take the damaged camera with you to the store and show it to the seller.
Repair work does not begin with the removal of the wheels, but with their disassembly. A correctly performed procedure will help to avoid the appearance of new breakdowns and quickly see the cause of an existing problem. At the same time, it will be easy for a user without skills to cope with both thick wheels and thin ones. The most important thing is to be careful, because small parts are easy to damage or lose.
It is possible to dismantle the front wheel on an electric scooter in just 5 minutes. This is done as follows:
You can disassemble the rear wheel of the electric scooter according to the same instructions as for the front element. In such devices, they have the same size, and therefore it will not be difficult to cope with the task.
Some users mistakenly believe that only a real master can disassemble the motor wheel. In fact, you can do it yourself, following a strict sequence of actions. It does not matter where exactly the motor-wheel is located - in front or behind.
Disassembly procedure :

It is recommended to disassemble the motor-wheel when buying a used electric scooter to make sure that it works.
Wheel repair can be done by yourself using tools that are available in many homes. The size of the element does not matter in this case. Wheels of 10, 6 or 8 inches are quite realistic to bring into working condition at home.
When repairing the wheels of an electric scooter, experience in this area is desirable, but without it, it is also possible to achieve the desired result if you strictly follow the instructions in our article.
Malfunctions can occur both in an electric scooter with large inflatable wheels and in children's vehicles. Consider the most common problems:
 In this case, it is imperative to replace the tube, and it is also recommended to install a new tire, even if the damage is minor.
 Sometimes it happens that the electric scooter does not turn on at all. Then we advise you to read an article on this topic.
Most manufacturers of electric scooters include compact pumps with their devices, with which it is possible to inflate the wheel at any time.
The recommended tire pressure for electric vehicles depends on the user's weight. Values should be as follows :
These pressures make the wheels more resistant to punctures and other damage.
Avoiding punctures is a problem, whether it's an adult electric scooter with large wheels or a children's model. But if you listen to the advice, it is still possible to prevent undesirable consequences. It is important to remember the following points:
A wheel with all parts will cost about $30.
Before you can remove the tubeless wheel on a Xiaomi electric scooter or a device from another manufacturer, you need to deflate it.