Whether you are taking your mountain bike for a ride on the local trails, packing your cruiser bike for a trip to the beach or bringing your road bike along for family vacation, you may find yourself needing to remove the front wheel to take your bike where you want to go. Removing a wheel from your bike will make it easier to fit in the back of your car and some bike racks require the front wheel to be removed before you can strap your bike into the rack. You will also need to know how to remove a wheel if you get a flat tire. Check out our video on how to remove a bike tire and fix your flat.
A quick release axle has a 5mm rod with a camming lever on one side and a nut on the other and its function is to allow you to remove the wheel of your bicycle without the use of a tool. A quick release axle also allows you to remove the wheel without removing the axle. The axle will stay inserted in the hub.
All you have to do is pull the lever to the open position and loosen the nut on the other side.
Some bike hubs (particularly mountain bikes) require larger axles (12mm, 15mm or 20mm), which are called thru axles. These axles also have a camming lever on one side of the hollow rod, while the other side is threaded into the fork. This system allows you to remove the wheel without the use of any tools BUT you do have to remove the axle from the hub to take your wheel off of your bike.
If you have a bike rack on top of your car that requires you to remove your front wheel, make sure you have the correct adapter for your bike’s axle!
1. Release Your Brakes: If your bike has rim brakes or cantilever brakes, you will need to release the cable tension so you can remove your front wheel. For rim brakes, there should be a lever near the caliper that will release some cable tension, thus allowing your brake pads to be far enough from the rim for your tire to slide past them.
2. Flip Your Bike Over: Flipping your bike over to remove your wheels is ideal, unless you have a mechanic stand handy. When you are changing a flat tire on the side of the road or trail, allowing your bike to rest on the seat and handle bars will give you a more stable platform to work with. Flipping your bike over makes things a little easier and reduces the risk of your bike falling over after the wheel is removed.
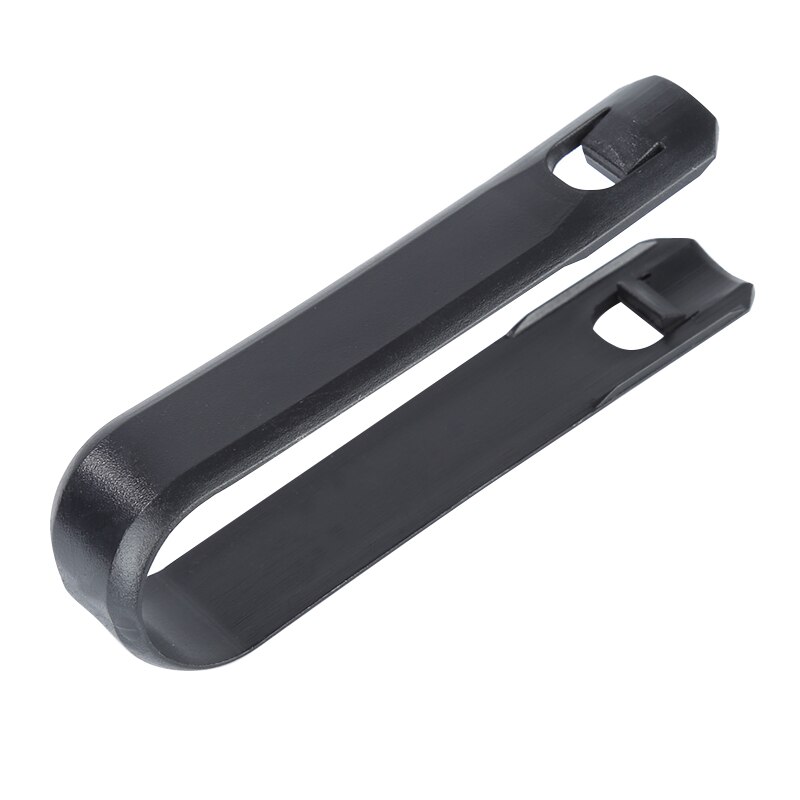
3. Open the Quick Release or Remove Axle: If your bike has a quick release, flip the lever into the open position. If the lever is tight, you can use a tire lever to pry it open. Holding the lever still, loosen the bolt on the other side of the axle, but DO NOT remove the bolt completely. For thru axles, open the lever into the open position and turn the lever counter-clockwise to unthread the axle and remove it from the hub.
4. Lift the Wheel Up and Out of the Fork: Make sure you do not dislodge your calipers if you have rim brakes and be careful with rotors if you have disc brakes.
1. Guide Your Wheel Back Into The Fork: If you have rim brakes, be careful not to dislodge calipers when you reinstall your wheel. If you have disc brakes, guide the rotor in between the brake pads.
2. Tighten the Axle: If you have a quick release axle, settle the wheel completely into the dropouts. Make sure the quick release axle is on the non-drive side of the bike, matching the wheel. Holding the lever in place, tighten the nut on the opposite side and push the lever into the closed position. It should feel tight, but it should not be too difficult to close the lever. If you have a thru axle, line up your hub with the holes at the bottom of your fork. Look to see which side of the fork is threaded and push the axle in through the opposite side. Turn the lever clockwise to thread the axle into the fork. Once tight, push the lever into the closed position.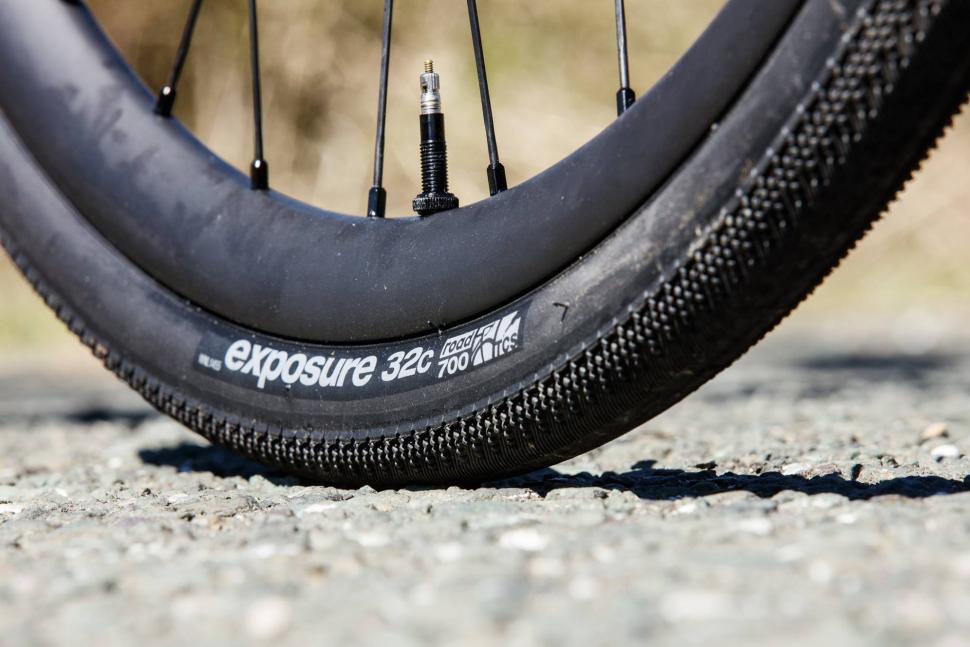
3. Flip your bike over: If you have cantilever or rim brakes, make sure your brake cable is reconnected or tightened properly.
4. Spin your wheel: By spinning your wheel, you will make sure your brake pads are not rubbing the rim or the rotor. If your wheel does not spin, it could be crooked in the fork’s dropouts. Flip your bike back over, loosen your axle, push down on the wheel and tighten the axle again.
Need to learn how to remove your rear wheel? Check out our video!
Helpful Tip: If you have hydraulic disc brakes do not squeeze the front brake after you have removed your front wheel. The brake pads will move closer together and you will not be able to get the brake rotor back between the pads. If your brake lever is accidently compressed, the ideal tool to separate the pads is a pad separator tool. If you do not have this tool, you can use a flat bladed screw driver or a credit card to wedge in between the two pads and carefully work them apart. It is possible to damage the pads if you use too much force. Also, make sure whatever tool you use is clean so it does not contaminate the brake pads. Replace the wheel and squeeze the brake lever a few times to reset the pads.
Hopefully refitting the front wheel will be straight forward, but sometimes it just doesn’t seem to want to go in. This is particularly frustrating if you had no problems removing it! Fortunately, Cycle Maintenance Academy is here to show you how to put a front wheel on a bike with whatever brakes or wheel fastenings you have.
How to put a front wheel on a bike when the wheel won’t go past the rim brake
If you had a flat tyre when you removed your wheel, then the squishy tyre slid past the brake pads. Now your tyre has been inflated, it won’t go past the pads. You will need to make sure you have released the brake.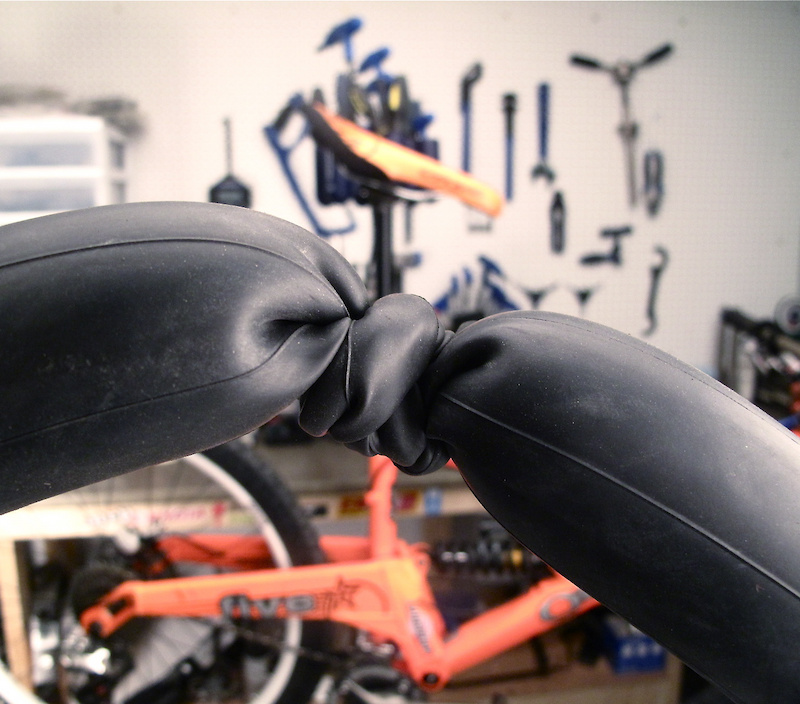
Undoing a v brake can seem a bit daunting, but if you follow the instructions you should be able to manage this task. If you are really struggling we have a special tip at the end. There is a chance that your brake cable is too tight and can’t be released in the way that we are describing. If this is the case then you may need to seek help with adjusting it.
Let’s have a look at the caliper. At the top of the right hand arm is a cable clamp. This holds the cable in place.
At the top of the left hand arm is a pivoting piece of metal called the cable bridge.
A curved tube (the noodle or guide pipe) sits in this.
You are going to remove the noodle from the cable bridge. First, with your left hand, use your index finger and middle finger to hook around the noodle.
With the thumb of the same hand push the top of the noodle down. This keeps the cable straight and at its loosest. Pull the noodle towards you.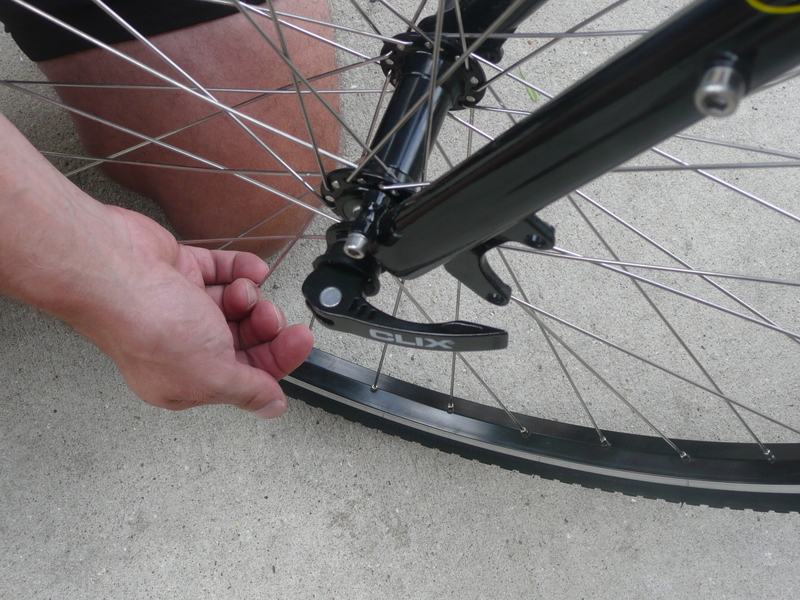 This pulls the left hand arm towards you.
Now push the right arm with your right thumb.
Finally, use your right index finger to release the noodle from the cable bridge. Not working? Check the following:
If it isn’t that the cable is too tight, but you are struggling to hold the noodle in the correct position, then try this tip:
Find a long cable tie or easily adjustable strap. An old toe strap is ideal. Put the strap or cable tie around both arms of the caliper and pull hard.
The pads are now hard against the rim. It gives you two hands to undo the noodle. Now release the strap.
Et voila, the cable has been released.
Undoing a cantilever brakeLet’s look at this brake. Two arms that push the pad onto the rim, linked with a cable going across.
This is called a straddle wire. One end of the straddle wire or possibly the brake cable itself is clamped on the top of the left arm.
Near the top of the right arm you will see where the straddle wire is hooked in. The idea is that this can be unhooked to allow the brake to be released.
How this is done depends on the make of straddle wire. It may have a tab near where it hooks in to help you pull on it or there may be an extension at the end. Sometimes there is neither. If necessary use a pair of pliers to grip the end. Push the arms close to the rim and unhook the straddle wire.
If it is really difficult, employ the use of a third hand, a cable tie or adjustable strap. There is no special technique here. If you really can’t do it, then deflating the tyre is the easiest route.
Undoing a caliper brakeBecause a caliper brake is normally on a bike with narrow tyres, they don’t need to be released very far. Look at the caliper. Find where the cable is clamped. There is generally a little lever here. It should be pointing to the floor.
If your brake is functioning properly then you should be able to flip it up and open the brake.
It may not seem to be much of a gap, but it should be enough to allow the wheel to be released.
If you have a very wide tyre, even with the brakes undone, it is still very difficult to refit the wheel. If this is the case, you will need to deflate the tyre before fitting the wheel. Some older bikes and Brompton bicycles have caliper brakes with no quick release mechanism. As with the wide tyres you will need to deflate the tyre before fitting the wheel.
The rotor on the wheel won’t fit between the disc brake padsIf you have hydraulic disc brakes on your bike and you press the front brake lever without the rotor being in place, then the pads will push together and won’t release enough to allow the rotor to slide in between.
You will need to push the pads apart to open up the brake and enable your wheel to be fitted. You don’t want to damage the surface of the pads, so use a flathead screwdriver and position it between one of the pads and the piston.
Gently push the pad against the other pad and this will force the piston back into the caliper.
Now do the same on the other side.
This will open the gap between the pads.
Check the quick release leverIf you have a quick release lever now it is worth checking that the springs are mounted correctly. It’s a good idea to do it now before you replace the wheel in case you forget later. There should be two springs, one at each end of the lever. The springs are conical. The thinner end should rest against the axle and the wider end fits into each end of the lever.
They need to be the correct way around otherwise the springs cover the end of the axle and stop the wheel fitting into the dropout correctly.
When refitting the front wheel, it is often important to make sure it is the correct way around. Because the bike is upside down fitting the wheel can seem confusing. If you have a quick release skewer and you didn’t remove it then the lever side should be on the left hand side of the bike (the side without the chain). If you’re not sure about the original position of the skewer or have wheel nuts then look at the tyre. If it’s a rim brake, and the bike is upside down, the tread’s direction should point backwards.
If you are working on the bike and it is upright, possibly in a bike stand, then the rotational direction will be forward.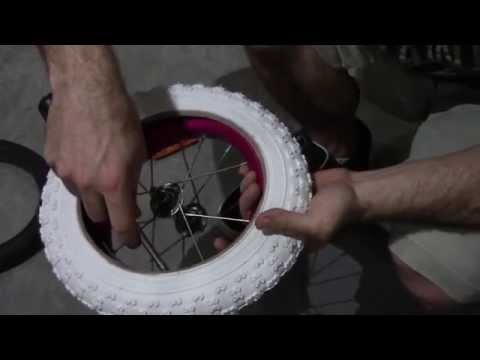 If the tyre is smooth or the tread is the same then it really doesn’t matter. If you have a disc brake then make sure that the rotor is lined up with the disc caliper.
First, grasp the rim in your hand and guide the axle into the dropouts.
If you have a disc brake make sure that the rotor goes between brake pads.
When it is in place, if you have a quick release skewer you will need to tighten this properly to secure the wheel. First choose the position where the lever will be locked.
Now put the lever 180 degrees to the final position and hold in place.
Start to tighten the nut opposite to the lever. It is a “normal” thread so it tightens clockwise.
When you can start to feel it tighten, stop and push the lever into its final position. It should start “biting” at 90 degrees.
If it doesn’t feel at all tight, move the lever back to the starting point and tighten a bit more.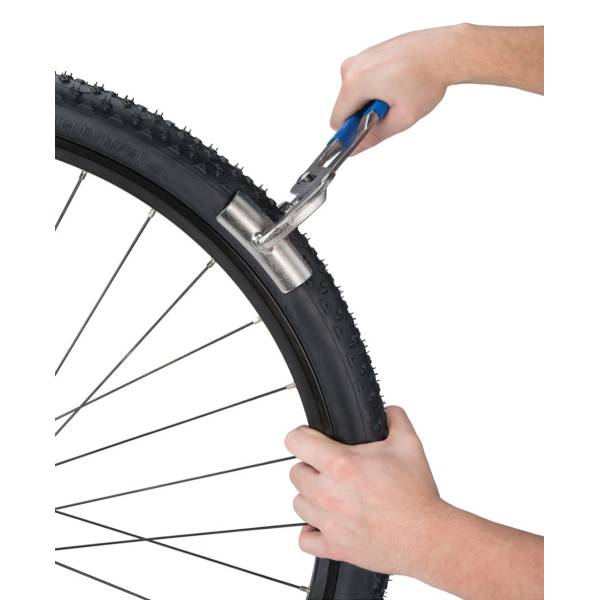 If it’s too tight, move the lever back to the starting point and loosen a bit. Repeat this process until you can feel the lever tighten as you push it towards the closed position.
You will need to use the heel of the hand for the final closure. Don’t force the lever if you feel that it doesn’t close, that means it’s too tight and it will be very difficult to open again.
If you don’t tighten it enough then it could flop open and cause the wheel to come off.
Remember that the quick release skewer doesn’t tighten the wheel in the same way as wheel nuts so don’t use the lever to tighten the skewer like a wing nut.
The reason for this is that the parts of the quick release nut that touch the frame have ridges all the way around the surface. When a quick release skewer is tightened fully, neither side of the lever rotates so then the ridges can bite into the frame. If the lever is tightened by holding the nut and rotating the lever, when the wheel feels tight, the ridges on the lever will have spun instead of biting into place resulting in the wheel not being fitted in place as tightly as it should be.
Hold the forks steady with your left hand.
With your right hand firmly, but carefully push the axle through the dropout and then through the hub until it stops. Make sure it has gone through all the way.
Now start screwing the axle clockwise until it is tight.
Grip the lever and give it a final tighten.
Push the lever into its final position.
If you have wheel nuts, then you tighten them a bit at a time, first one and then the other, until they are tight.
To get the correct tightness, push quite heavily on the spanner. If you are using quite a long spanner, holding near the end as you tighten will help get the correct tightness.
Finally, Don’t forget to close your brake.
Closing the brake“V” brakeIf you were successful undoing your “V” brake, then you should be able to refit it.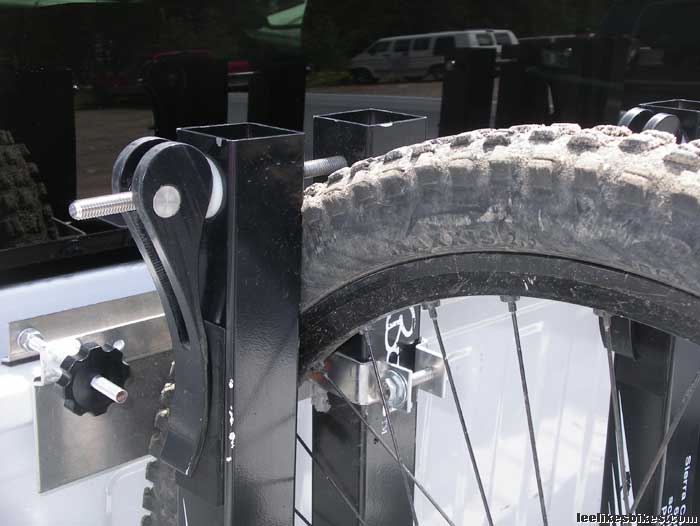 At the top of the right hand arm is a cable clamp. This holds the cable in place. At the top of the left hand arm is a pivoting piece of metal called the cable bridge. A curved tube (the noodle or guide pipe) sits in this. You are going to put the noodle into the cable bridge. First, with your left hand, use your index finger and middle finger to hook around the noodle. With the thumb of the same hand push the top of the noodle down. This keeps the cable straight and at its loosest. Pull the noodle towards you. This pulls the left hand arm towards you. Now push the right arm with your right thumb. Finally, use your right index finger to slot the noodle into the cable bridge.
Push the right hand caliper against the wheel. Grasp the end of the straddle wire with your other hand and pull it down as far as you can. This will pull the left hand caliper against the rim.
Now hook the end of the straddle wire into the arm of the right hand caliper.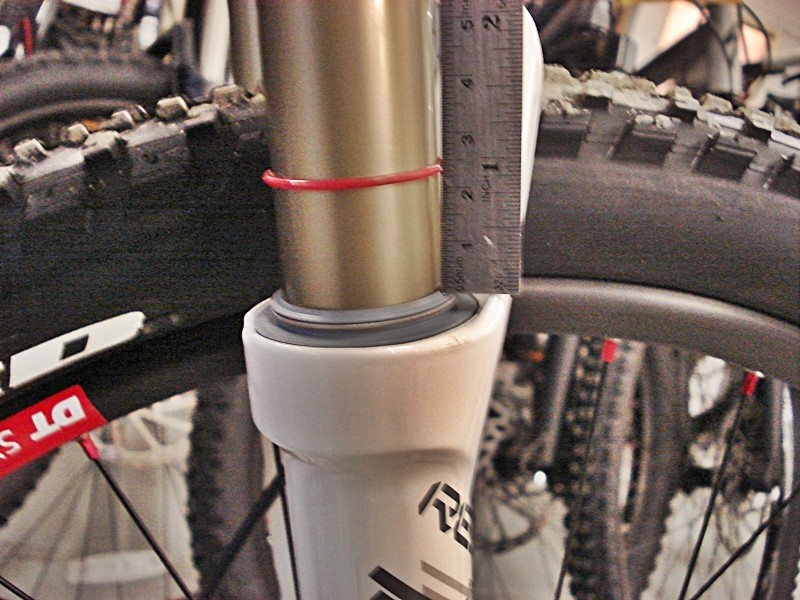 If you find the brake too stiff, use a pair of pliers on the straddle wire.
Grasp the lever and move it downwards until it is pointing down. You will see that the pads are now closer to the rim.
We hope our blog post has helped you learn how to put a front wheel on a bike correctly, we also have an article on how to put back wheel on bike. To watch the Cycle Maintenance Academy team in practise head over to our YouTube channel:
admin
As a rule, the front tires of a bicycle last three times longer than the rear ones. This is because the rears carry much more weight than the fronts. The second reason for increased rear tire wear is that the rear wheel of the bike is the drive wheel. The wear bias is even greater on bikes that use rear brakes.
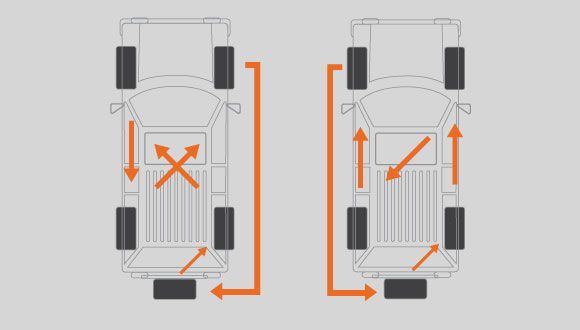
Very smart and practical cyclists (forgive them), and sometimes even “professional” bike mechanics (but they don’t), can’t think of anything more original to deal with the above phenomenon, how to rearrange bicycle tires in places.
That is, they install a less worn tire from the front wheel to the rear, and a rear tire that lives out its last days on the front wheel. The main purpose of such actions is to equalize the wear of both tires. This is a serious mistake and should not be made!
Probably the only time you can change bike tires is if you have to replace a rear tire for any reason. For example, when driving, you felt that something was wrong with it, or visually it was completely worn out and had obvious defects, then you can do this. When using the same tires at the rear and front, you can rearrange the old front tire and the new one on the front wheel.
The reason for such actions is very banal - it is the safety of the cyclist. The good condition of the front tire is much more important for the same safety than the rear. Therefore, it is better to put a more reliable tire in front. In the event of a rear tire rupture, it is much easier for the cyclist to handle the bike and stop it. When a front tire ruptures, first of all, control of the bike is lost, and the consequences can be sad.
Sheldon Brown
Bicycle tire damage. Wearing a bicycle tire is a rather complicated process. It is generally accepted that the main wear of the tire falls on the place where it touches the ground. But, wear also occurs where the tire meets the wheel rim, especially when riding on tires with…
How to prolong the life of a bicycle tire. When driving on a flat asphalt road, the tires must be inflated to the maximum allowable pressure. When driving on a bad rough road, on the contrary, the pressure is reduced, but not too much. The cyclist gains experience over time in choosing the optimal pressure .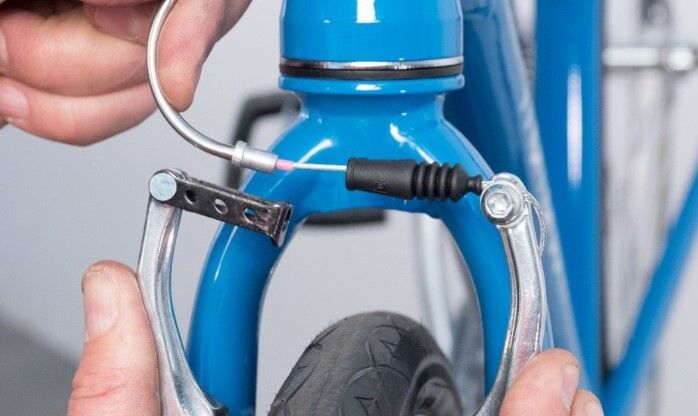 ..
..
Checking the quality of a bicycle tire. If you run a dry finger over the surface of the rubber with strong pressure and a noticeable dark mark remains on it, then there is too much filler in the rubber and such rubber will not last long.
Ground wheels and tires. When the wheel rolls on the ground, both the ground and the tire are deformed. Because of this, the rolling resistance force increases and, accordingly, wasted work is added during the formation of the rut. Its depth directly affects the rolling resistance…
Bicycle tire tread. When choosing a tire for a bicycle, several factors are taken into account: - type of bicycle; - condition of the road surface; - weather; - season ...
Tips for a cyclist Tips for a cyclist
When it comes to punctures, prevention is better than cure.
We've all heard that awful hiss and felt the tire warp from the puncture. This usually means 15 minutes on the side of the road and often happens at the most inopportune time when it's going to rain, it's cold, it's getting dark - or all three.
It's good to be prepared, have a spare tube and know how to fix a puncture quickly. You usually have two options: repair the punctured tube or replace it with a new one.
However, there are many things you can do to reduce your chances of getting punctures altogether. After all, when it comes to punctures, prevention is better than cure. Here are six steps to help prevent your bike's tires from puncturing.
Contents
A durable road or semi-slick gravel tire will provide extra puncture protection, but may rob you of some speed.
First of all, choose tires designed for specific conditions.
The best road tires are a joy to ride - light, rolling fast, responsive and comfortable. But punctures are much more common on wet winter roads, often strewn with sand and debris, so as summer turns into fall, it's a good idea to switch to winter tires.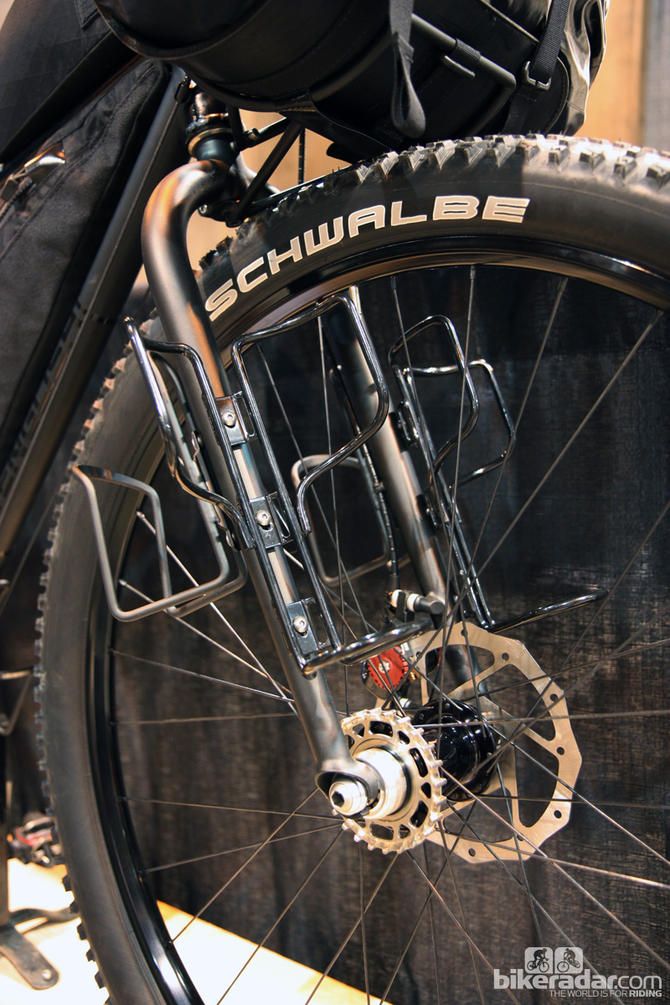
Winter bike tires are more durable than summer tires with more puncture protection and are made with thicker rubber. The best tires for year-round training combine speed, durability, traction and puncture protection.
Wider tires can give you more grip and better riding comfort, and if you have clearance in your frame, a light tread gravel bike tire can also be a good choice for cycling, winter cycling or mixed riding. terrain.
Inflating your tires to the correct pressure will help prevent punctures.
If your tube tire pressure is too low, you risk pinching when the tube gets caught between the rim and the tire carcass when you roll on the road or rough trail. This results in a puncture with two parallel slits in the chamber, also called a snakebite puncture.
It is therefore important to inflate your bicycle tires to the correct pressure. It will also reduce the chance of sidewall damage, reduce tire wear, reduce the chance of rim damage, and improve your bike's handling.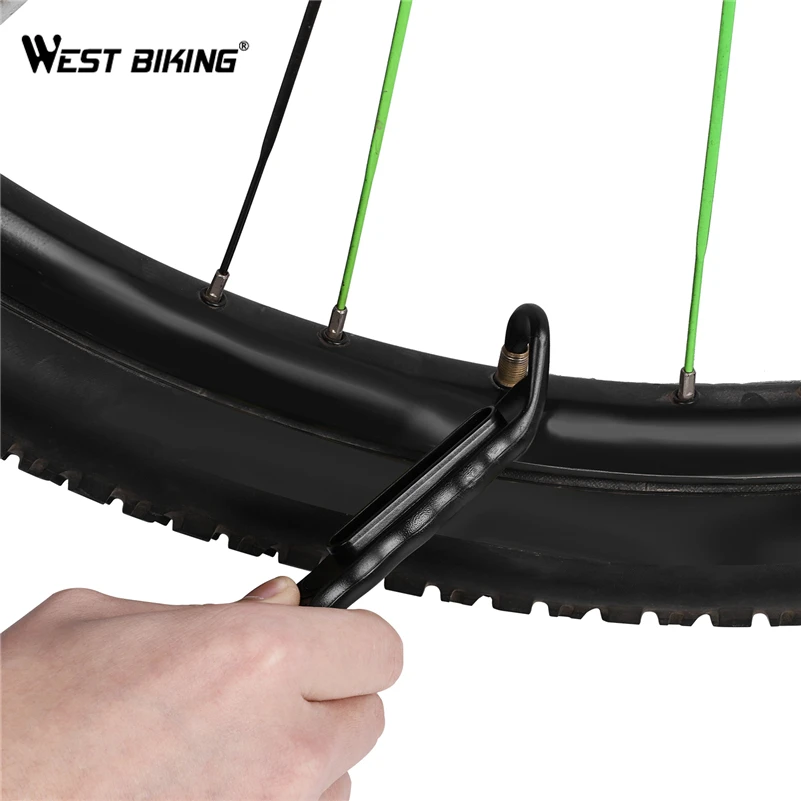
It takes a bit of trial and error to find the right pressure and it depends on the terrain you ride, your weight and conditions.
The sidewalls of the tires will have a recommended pressure range, but you can usually lower the pressure if you ride with tubeless tires because you don't risk pinching flats.
Wheel manufacturers also often list the recommended pressure range for their wheels on their websites.
Adding sealant to the bladder can help prevent punctures, but will increase weight and rolling resistance.
Another option is to add sealant to your tubes, which will give you the benefits of extra puncture protection without having to invest in tubeless technology, though it will add weight and rolling resistance.
Adding sealant is easier if your inner tube has a removable valve core, so you can pour sealant into the tube without risking clogging the valve. Also make sure the sealant is compatible with your tubes, especially if you are using latex tubes.
Slime is one of the brands that sell sealant designed for use in cameras. Another option is to use internal chambers already filled with sealant. Again, Slime offers them in a variety of sizes to fit most popular road and mountain bike tire and wheel sizes.
Inner tube sealant works in the same way as tubeless sealant. The sealant coats the inside of the chamber as the tire rotates, and if you drive over a puncture-causing object such as a stud or glass, the air escaping from the chamber sucks the sealant into the hole. Sealant particles should plug the hole before it deflates the tire.
Using tubeless tires eliminates the risk of pinching flat surfaces and sealant will often fix small cuts in the tire before they turn into punctures, but some tweaking and ongoing maintenance is required.
Now all the hype revolves around tubeless tires for road bikes. Tubeless benefits include lower rolling resistance and a more comfortable ride, plus you can (probably) forego those pesky tubes.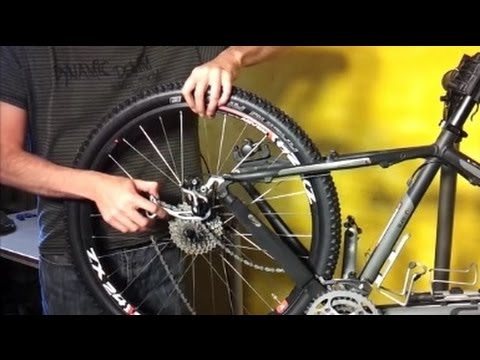
Without a tube, you will not be able to pinch, so you will avoid this type of puncture. The sealant in the tire also seals the smaller holes and prevents many of them from becoming a full blown puncture.
However, like tubes filled with sealant, tubeless tires are not perfect.
If you get a puncture that the sealant cannot close, you can use a tubeless repair kit to close the hole. If that doesn't work - or the hole is too big for the repair plug - you'll need to install a replacement camera.
You will need ready-to-use tubeless wheels and tires to upgrade to tubeless. Most new wheels come with tubeless-ready rims, but the best tubeless road tires are usually a bit more expensive than tubeless tires.
Do not attempt to convert tubeless to tubeless components because the technology requires tight tolerances.
If you do switch to tubeless tires, you also need to keep an eye on the sealant level and make sure it doesn't dry out - top up if necessary - so extra routine maintenance is required.
Check tires regularly for pressure and wear. Also look out for any debris stuck in the rubber that could cause punctures.
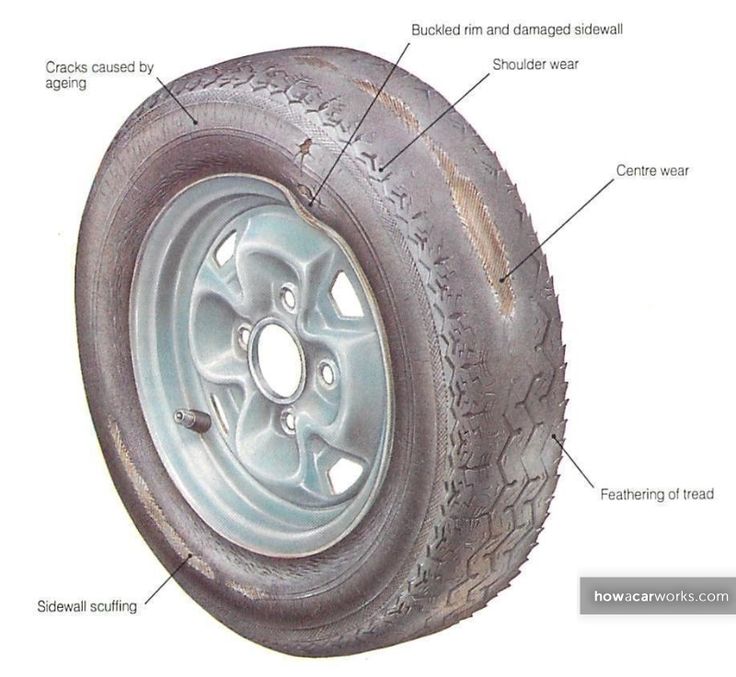
A worn tire is much more likely to be punctured, so it's a good idea to check the condition of your bike's tires regularly. A badly worn tire will have a flattened or square profile where the thickness of the rubber has been eaten away by the road or trail.
Some tires have wear indicators built into the tread so you can see when they need to be replaced. If you've rubbed the rubber down to the puncture protection belt or the carcass threads of the tire are visible - even if only in one place - it's definitely time to install a new tire.
Even if your tires are not worn out, it is important to check them regularly. Tires can collect rocks, glass, spikes, or other debris, so inspect the tread as part of your regular safety check before riding your bike.
If you find something stuck in the tire, remove it with a small screwdriver or the point of a sharp knife before it can penetrate further into the tire and cause a puncture.
Beware of large cuts on the tread or sidewall of the tire that could make driving unsafe. If you get a puncture while riding, be sure to check the tire carefully to remove whatever was causing the puncture.
When riding a bicycle, beware of debris that can cause punctures and avoid riding in a drain.
If you are driving on the road, there is usually more debris on the side of the road than where other vehicles' tires have rolled, so do not drive in the gutter or too close to the edge of the road.
Choosing the best position on the road will also help you drive around other road users more safely.
Conversely, don't drive too far, because this is another area where car tires usually don't go. Debris can also accumulate closer to the center of the road, especially on country roads with narrow carriageways.
If you have to cross the center of a narrow road, look for gaps in the gravel or dirt and cross them at an angle that limits your exposure to sharp puncture-causing objects.