ChinaRiders Forums > Technical/Performance > ATVs > Bought a 110, need help with no spark & brake bleed.
PDA
View Full Version : Bought a 110, need help with no spark & brake bleed.
Rago
04-22-2013, 12:51 PM
A couple of weeks ago I went to buy a 110 Kazuma pit bike for $250. When I got there the guy threw in a helmet & a 110 ATV for free. Not sure on brand, but it looks like maybe a Taotao, Sunl, or Coolster. According to the guy, it's a 2006 model that he bought new for his daughter & it never got rode. It has sat in the weather for 6 years untouched & fading. First thing I did was tear everything apart for a clean up. Cleaned carb, found a crack in tank, changed oil, bought new brake master cylinder, repainted everything, & am at the point of firing it up.
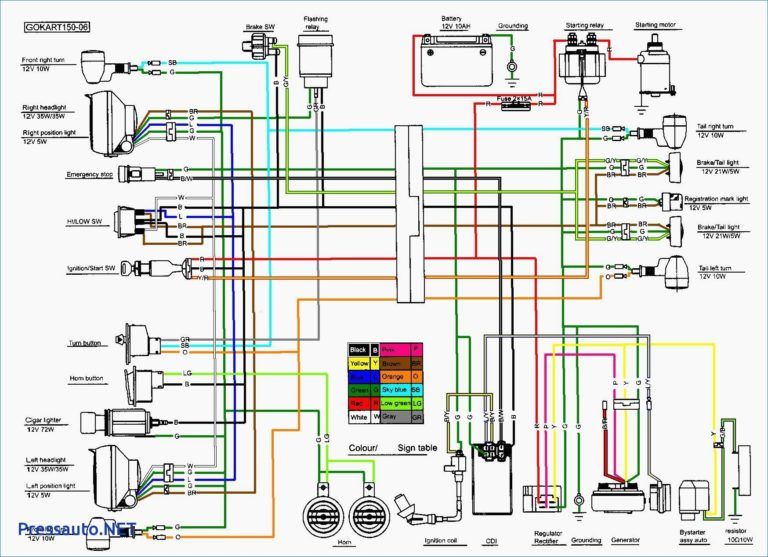
It struggled to turn over for a second & then spun over just fine, but I'm getting no spark at all. I have a Roketa 90 that I borrowed the CDI from & still not getting spark. This one has some weird remote to kill power & I am wondering if maybe this is the culprit? The remote batteries are long dead so I was wanting to just bypass it all together. Anyone have any ideas?
Also how do you bleed the brakes on these? I had to buy a new master cylinder/brake lever because the old one had dry rotted. I filled it up & opened the bleeder out back, but not getting fluid to come through at all even trying to pump the brake like you would a car. I guess I'm clueless on this one too.
Third & least important question; do all of these suffer from flat tire syndrome? Every small Chinese ATV I have bought has had at least one tire that wouldn't hold air for more than a couple of hours.
coombes1
04-22-2013, 04:19 PM
You could check to see if it has a teather cord and whether it is seated properly or missing. The one on my kids 125 was located at the back of the machine next to the bar that comes out from under the seat. Also push in the button for the kill switch - looks like a turn signal switch that you push in to cancel in the centre position.
Have the same problem with the master cylinder myself, glass (plastic) fell out and haven't replaced it yet - sorry
Rago
05-06-2013, 11:16 AM
Well I still never figured out the nonfire situation, but picked up a Hummer Sport 150 for nothing. It's been swapped to a 110 motor & has no wiring harness, so I'm gonna use this smaller 110 as a parts quad for my others. My daughter's 9th birthday is coming up quick & I think with her long legs that she'll be more comfortable on the bigger one anyways.
Would still like to know how to bypass the remote start. I've got the harness out & ready to go, just gotta figure out where to mount the taillight, bypass the tether, & hopefully bypass the remote start. Looks like it could be tedious though. :(
Also from the looks of it, the 110 engine bolted into the 150's frame with no modifications & PLENTY of spare room if anyone ever needs to go that route. If she ever gets bored of it, I'll look into a 200cc engine to swap in, but for a beginner I think this should work fine.
Weldangrind
05-06-2013, 12:14 PM
It never occurred to me that the GY6 150 and the horizontal motors might have the same bolt pattern.
Rago
05-06-2013, 12:40 PM
Me neither, but I looked the frame over & there are no weld or cut marks from where they may have altered the mounts. It's good info for anyone that has a larger frame & needs a quick alternative. Might actually be a fun idea if you were wanting to do a major build with one of those big bore horizontals. More aftermarket support & similar power potential from what I've seen.
The 150 chassis is more stable compared to the 110 chassis so it might actually be a better beginner quad. Ask me how many times I've flipped the little 90-110s, lol. Hit a bump going fast & you really get the pucker factor.
Weldangrind
05-07-2013, 01:21 AM
Of course, a 50cc small quad with a GY6 and a widened track for drag racing has a certain appeal. :lol:
:lol:
Rago
05-07-2013, 09:55 AM
Oh yeah! I'd be first in line for a drive on that one.
SpudRider
05-07-2013, 02:41 PM
You can learn how to change your brake fluid by reading the following thread. :)
http://chinariders.net/modules.php?name=Forums&file=viewtopic&t=9814
Spud :)
Rago
05-07-2013, 02:50 PM
Thanks Spud!
I figured out why my fluid wasn't coming through & this could be another bit of useful info for someone in the future. When I installed the new master cylinder, I didn't have the bolt hole lined up with the brake line hole. To make it easier, I scribed a mark on the head of the MC bolt to show where the hole was. This made it much easier to line up during install. Scribing should be easy enough with a small knife, but you could also use a permanent marker if you prefer. :D
I realize that was common sense, but sometimes we get into a rush & leave common sense at the door. Happens to me quite often.
vBulletin® v3.8.4, Copyright ©2000-2022, Jelsoft Enterprises Ltd.
As an ATV owner, it’s a good idea to learn a few basic mechanical skills, such as being able to bleed the brakes when needed.
This job is relatively easy to do and can save you quite a few bucks on mechanical expenses. Follow this guide, and you have a great chance at succeeding with just about every brake bleeding job.
Hydraulic brake systems use special brake fluid to transfer the energy from your hand or foot and down to the brake caliper. The fluid is essential for proper brake function.
Inside the caliper, a piston is being activated by the brake fluid when pressure is being applied. The piston will then press the brake pad against the brake disc, creating friction to stop the bike.
Bleeding the brakes means letting out some of the brake fluid to remove trapped air or to replace the brake fluid altogether.
There are two leading causes for having to bleed the brakes on your ATV:
Brake fluid cannot be compressed, but air can. If even the smallest bubble of air enters the system, the brakes will not function as they should but rather feel soft and squishy. To get all of the air out of the system, we need to “bleed” the brakes.
Air may enter the system if you replace or disassemble one or more components connected with the brake line, such as removing the brake caliper for a service. Or you may have a brake line come loose, allowing air to enter the system.
Please note that air should not get into the system under the regular operation of the ATV. Therefore you have to locate and address the cause of the leak before bleeding the brakes.
Another common situation where knowing how to bleed the brakes comes in handy is when it is time to replace the old brake fluid with new. So-called flushing the brakes.
Brake fluid is hygroscopic, which means it absorbs water over time. Also, it breaks down when being exposed to heat. The fluid closest to the brake calipers is the most affected because of the heat produced when breaking.
Healthy brake fluid should look clear or with just a slight amber color. If it looks like cola, it is well overdue for being replaced.
Bad brake fluid will negatively affect your brakes’ performance, so make sure you replace it in time. Luckily this job is both cheap and usually relatively easy to do.
It’s a good idea to completely replace the brake fluid on your bike every time you change your brake pads or at intervals according to your ATV service manual.
Most ATV’s have one master cylinder for the front brakes on the handlebars and another one for the rear brakes in a separate location. The reservoir for the foot pedal is often located a bit away from the actual cylinder unit.
The setup will vary from model to model. Some bar-mounted master cylinders will operate both the front and rear brakes as well.
The method for bleeding them, however, is pretty much identical.
To locate the master cylinder(s) on your bike, trace the brake lines from the brake caliper. You need to address each brake fluid reservoir connected with the brake you are having problems with.
Here you can see the hose running from the rear brake master cylinder and up to the brake fluid reservoir.If you are not sure where your problem is, you might as well bleed the brakes on all four wheels. Then start with the caliper the furthest from the master cylinder and move against it.
Let us begin with the standard method for bleeding any hydraulic brake system. It requires almost no tools or previous mechanical experience. Just follow the steps below:
Optional (but recommended):
 Use it to collect old brake fluid for proper disposal. Not only will the environment thank you, but you will keep your shop and ATV clean as well.
1. Jack up the ATV.
Start by jacking up the ATV and remove the wheels where you are bleeding the brakes. It is possible to bleed the brakes without removing the wheels, but you will get much better access to the bleed nipple with the wheel out of the way. If this is your first time bleeding the brakes, I always recommend removing the wheels.
2. Remove the brake fluid reservoir cap.
You will need to add new brake fluid as the old goes out. The lid on the reservoir up on the handlebar is held in place with two hex screws. Be careful as the threads strip quite easily.
You find the brake fluid reservoir up on the handlebar.Depending on the bike’s age and the time since the screws were removed, they may be grown in there pretty good. This is where the small impact drivers come in handy. Find the correct bit and use the driver by giving a light tap.
This will knock loose any corrosion and open the screw slightly at the same time. One knock is usually sufficient. The reservoir for the foot pedal usually has a twist cap that unscrews by hand.
3. Clean the cap and rubber diaphragm thoroughly.
You do not want to contaminate the system with debris, dirt, or water when reassembling it later.
Clean the area surrounding the brake fluid reservoir before opening the lid carefully.4. Top of the brake fluid up to the maximum level mark.
Pay close attention so that the brake fluid level in the brake fluid reservoir never drops below minimum while bleeding the brakes. You may need to top off the reservoir several times before you are finished.
It’s recommended that you reinstall the lid before moving to step 5. While it is possible to pump the brakes with the cover off, you run a significant risk of quirting brake fluid all over your bike if you pump the brakes too hard or too fast.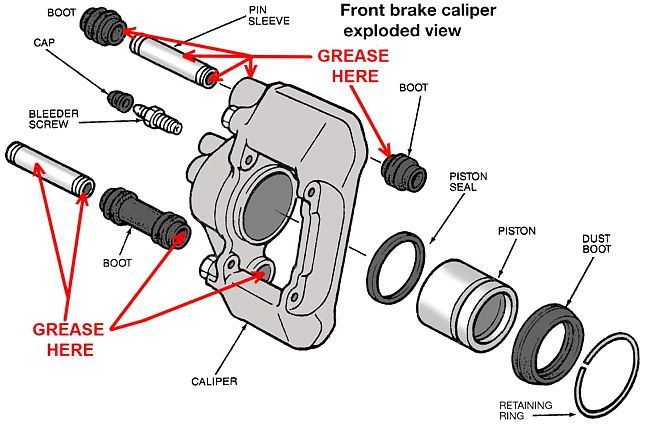
5. Pump the brake lever or foot pedal 3-4 times, depending on which brake system you are bleeding.
Remember to pump carefully if you do this with the lid open! Then keep the lever-activated by hand or by putting on a spring-loaded clamp to keep it under tension.
A spring-loaded clamp or even a bungee cord may be of good help if there is no one around to assist you.6. Open the bleeder valve.
Start with the valve that is the furthest from the brake fluid reservoir. It is located on top of each brake caliper and is opened by turning it anti-clockwise about half a turn. You should see brake fluid squirt out of the bleeder.
Let the brake fluid flow into a container to keep your ATV and garage clean.7. Close the bleeder valve when the brake lever or foot pedal reaches about 80% of its overall travel length.
Do NOT overtighten the bleeder. The threads in the aluminum brake calipers strip easily!
8. Repeat until the brake fluid that comes out of the bleeder is completely free of air bubbles.
This may take a while, depending on how much air there is in the brake lines.
9. Follow the same procedure on all four wheels.
Some bikes have just one combined brake caliper for the rear wheels.
10. Top off the brake fluid reservoir up to the maximum mark.
The mark may be a line found inside the reservoir or an inspection gauge on the side. Other reservoirs have a gauge on top of the reservoir cover that is white when brake fluid levels are low but turns black when the correct level is reached.
This is how it should look like when you have enough brake fluid in the reservoir.11. Replace the lid and rubber diaphragm.
Make sure it is seated properly. Do not over-tighten the bolts. You are now done and can reinstall the wheels.
The manual method works fine most times, but not always. It comes with a few annoying downsides as-well:
The master cylinder on an ATV and the piston inside it are relatively small compared to those you find on cars on any other larger vehicles. Because of its small size, it can only pump a relatively small amount of brake fluid with each pump.
This makes the standard method of bleeding brakes work less efficiently on smaller brake-systems found on ATVs, UTVs, dirt bikes, motorcycles, or snowmobiles.
The amount of fluid being pumped may not be enough to move the bubbles of air out before you bottom out and have to start a new pumping cycle.
It will take about 10-15 minutes to completely flush the brake system on an ATV using the standard method. It will take even longer if you do it on your own.
If you’re having problems removing all of the air, you may be looking at several hours of struggle before you eventually succeed or give up.
When you pump the brakes, you force the air downwards against the bleeding valve.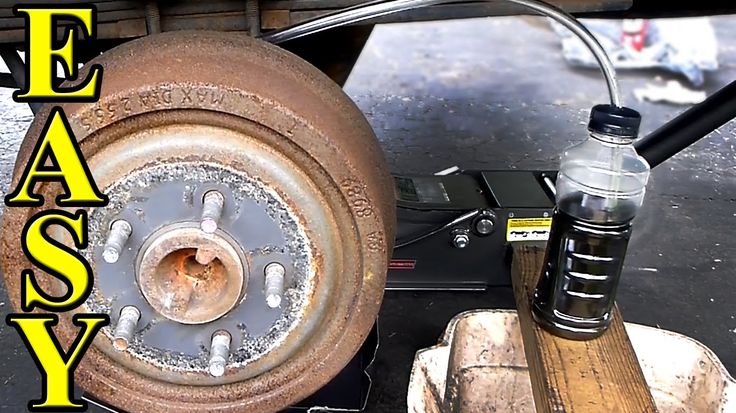 Air is lighter than brake fluid and will always want to go upstream, away from the bleed valve.
Combined with a small pump, you may not be able to get all of the air down to the bleed valve.
So then what? Luckily there is another cheap and easy method for bleeding the brakes that work very well.
Vacuum bleeding is another cheap and easy way you can use to bleed the brakes properly.
In addition to the five first bullet points listed for the standard method, you will also need a hydraulic brake bleeder tool.
These come in various shapes, but they all work by the same principle: they suck the brake fluid down and out through the bleed valve using a vacuum.
Some models use a hand pump to create the vacuum. They will also have a one-way check valve that allows brake fluid to flow out of the brake caliper without letting air back into the system when you release the pump.
Other models connect to an air compressor to create the suction effect.

Now you should be ready to tackle almost any brake bleeding jobs. But from time to time, even the vacuum pump won’t be sufficient to bleed all of the air out of the system.
Before taking the bike to your dealer, it’s worth reading through this post on what to do when you’re not having success bleeding the brakes using the methods described above.
Alternatively, you can try to reverse bleeding the brakes on your ATV.
ATV brakes are a basic safety system and should work perfectly. And if you notice the slightest slippage or decrease in the efficiency of the nodes, the system needs to be checked. Therefore, let's figure out how to pump the brakes on an ATV and diagnose all the components.
The first fluid change is recommended as soon as the rider has purchased the ATV. The fact is that many manufacturers fill in the cheapest composition, which does not have a high operational resource.
After buying a used ATV, you also need to service the brake system: change the fluid, check the hoses and pads. Remember that during the operation of equipment, moisture and air enter the composition. This leads to the formation of corrosion and even freezing of the liquid in winter. For example, if the composition contains only 3% water, its operating temperature drops from 230 to 165 degrees.
You need to figure out how to pump the front and rear brakes of an ATV even in case of their “failures”. If the lever has lost its elasticity, then air or moisture has accumulated in the system, which has affected the characteristics of the fluid.
Before you adjust the brakes on your ATV, have the necessary tools ready. To bleed the system you will need:
 It is best to take a bottle and a tube from a dropper, which can be connected to a drain fitting. Thus, the spent composition will not get on the parts of the ATV.
 It is worth noting that in order to pump the ATV, you need a partner who will clamp the brake lever. If there is no assistant, you can fix the position of the brake lever with a belt.
Bleeding the brakes scares many motorists. However, the procedure itself is very simple, so even a novice ATV rider can handle it. The rider only needs:
 Before you bleed the front brakes on your ATV, make sure you have access to the caliper. If you can’t get to the node, you need to remove the wheels.
  Such pumping is performed until the lever becomes elastic.
 This procedure is carried out for all calipers (front and rear). But if the brakes on the ATV do not pump, then you need to find places in the system where air accumulates and eliminate them.
Experienced motorists recommend using only high-quality brakes that are suitable for specific temperatures. This means that for summer and winter you need to choose different compositions.
Riders also advise:

Also buy a spare brake. If the documentation indicates that 0.5 liters of fluid is needed to bleed the system, buy 1 liter of the composition. The fact is that the recommended volume is indicated based on the experience of specialists. A novice ATV rider can spend more brakes.
19.02.2021 3938
Bleeding your car's brakes is part of regular maintenance. ATVs are not diverse. Although the procedure for bleeding the brakes may vary depending on the make and model of your vehicle, standard steps involve draining the brake fluid and then adding new lubricant to eliminate any type of air bubbles. which may be built into the system.
As an ATV owner, it would be a good idea to learn a couple of standard mechanical abilities, such as the ability to bleed the brakes when needed.
In this article, you will definitely find out what, why and how exactly to bleed the ATV brakes so that everything works as efficiently as possible, so that you can relax and enjoy the ride.
Contents
Hydraulic brake systems Use special brake fluid to transfer power from your hand or foot to the brake caliper. Fluid is vital for proper brake performance.
Inside the caliper, the piston is actuated by brake fluid when a load is applied. The piston will then press the brake pad against the brake disc, creating friction to stop the bike.
Bleeding the brakes means bleeding some brake fluid to remove trapped air or completely replace the brake fluid.
Bleeding the ATV brakes eliminates old brake fluid, allowing you to add brand new brake fluid. It is recommended to change the brake fluid each time the brake pads are replaced.
You may also need to bleed your ATV's brakes to get rid of trapped air. Air in a cylinder or brake line can make your brake lever soft as well as soft when you press it, seriously affecting braking performance.
Bleeding your ATV brakes is a relatively simple process that can be done at home with basic tools. There are 3 methods: manual method, vacuum method using a brake bleeder, and reverse bleed method.
 -- use it to collect old brake fluid to make proper disposal much easier and also less messy.
You need to jack up your ATV and remove the wheels before you can bleed the brakes. Theoretically, it is possible to bleed the brakes without removing the wheels, but this is much more difficult. Removing the wheels makes it easier to access the bleeder valve and is therefore recommended.
You need to add new brake fluid because the old fluid is leaving the system.
The reservoir cover is fixed with 2 hex head screws. Be careful when you remove it as string stripping is easy to do. .
If it has been a while since you last removed the screw, you may need an impact screwdriver. Find the correct bit and then press it gently with the driver. Hopefully this will remove any corrosion and open up the screw a bit.
Fortunately, the foot pedal reservoir is usually a swivel cap that can be made by hand.
Brake fluid must be kept clean, so any exposure to debris, dirt, or even water must be kept to a minimum.
You must ensure that the brake fluid level in the reservoir is kept above the minimum during the bleeding procedure. During operation, it may be necessary to refill the tank several times.
It is best to change the caps at this stage. You don't have to, and you can bleed your brakes uncoated, but you're much more likely to get brake fluid everywhere.
You will either pump the brake rod or the pedal, depending on which system you are bleeding. Inflate carefully if you risk and also go capless!
You must hold the lever activated by hand or by using a spring clip. Basically, you just need to keep it energized while you bleed.
It is much easier to start with the outlet valve as far away from the fluid tank as possible.
The valves will definitely hit the top of the brake caliper and also open by turning counterclockwise about half a turn. If you did everything right, the brake fluid should start to flow out of the pump.
When the brake rod is more than three quarters of its total stroke, close the release valve.
It is very important not to overtighten the valve as the threads can easily come off.
Repeat these steps until there are no air bubbles in the brake fluid coming out of the bleeder valve. Be prepared to do this for some time if there is a lot of air in the brake lines.
Repeat for all wheels. Remember that some bikes only have one brake caliper for the rear brakes - they will be combined into one.
The brake fluid needs to be topped up to the maximum mark. This may hit the evaluation sensor on the side of the storage tank inside. Some have a sensor at the top that changes color depending on whether the level is low or high.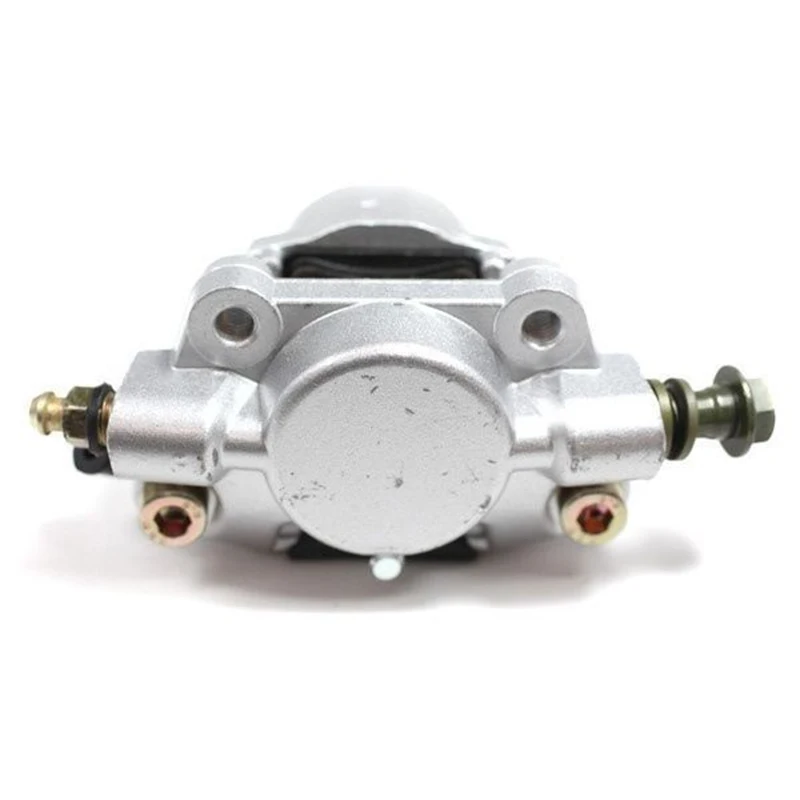
If you are unsure, contact your manufacturer for more information.
Make sure the clean and dry cover and seals are installed correctly and that the screws are not overtightened.
Now you can change wheels like everyone else!
Although this method is a bit more complicated, it is still a very easy and cheap way to bleed the brakes and can also remove more air.
Some versions of hydraulic brake bleeders have a manual vacuum pump. Additionally, there will be a one-way valve to keep fluid in one direction. Other models are connected to a compressor to obtain the same vacuum.
Follow the same steps for the manual method until the brakes are bleeding. Stop right here.
You currently need to get an 8mm wrench to be ready to use.
Connect the brake fluid hydraulic pump to the outlet valve. For best results, it is best to follow the manufacturer's directions.
Turn on the pump and then turn the outlet valve half a turn. The air bubbles should get along with the liquid and fall into the container.
You need to pay attention to the level in the reservoir, as the pump can immediately drain it if you don't pay attention.
If your level starts to drop, you will need to re-tighten the valve and also turn off the pump. Pour additional fluid into the tank, turn the pump back on and also loosen the outlet valve.
Continue pumping until the brake fluid flows in a steady stream - no splashing as this indicates air bubbles - and until it is clear or slightly amber.
Tighten the release valve and then turn off the pumping tool.
Repeat this process for all brakes you wish to bleed.
When you are done, make sure you top up the brake fluid reservoirs so that the fluid is at the maximum line.
If you don't want to buy an expensive bleeding tool, another quick way to remove trapped air and old oil is to cancel the bleeding.
Bleeding works in the opposite way to normal bleeding. Instead of pushing the old brake fluid out of the reservoir and draining it through the outlet valve, new brake fluid is added through the outlet valve and the old brake fluid is sucked out of the reservoir.
Not only is re-priming easier and faster (especially since you don't need a pump brake lever), but it can sometimes be better to remove entrapped air pockets.
You will need 2 syringes, a 5/16" clear tubing, a Phillips screwdriver and an 8mm wrench. Here is the step by step process.
There are 2 reasons to bleed your ATV brakes:
The smallest air bubble in the brake system can cause function problems and also make the brake soft or soft. This is a huge safety issue and all air must be purged from the system immediately. You need to pump your brakes.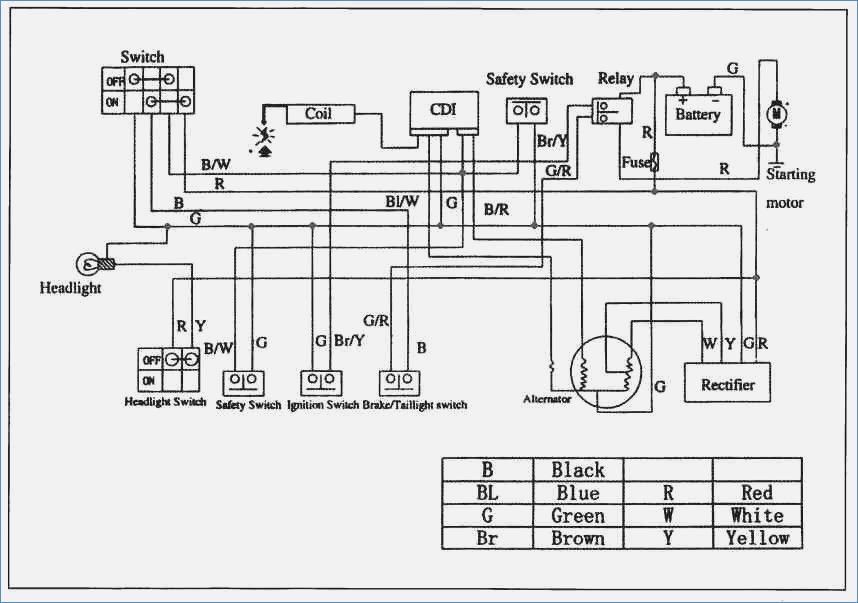
Air will not enter the brake system during normal use. You must find the problem and fix it. It is best to do this before you bleed the brakes, otherwise you will have to bleed again.
Air can get into the brake system if it is not closed. Look for any loose brake lines and also repair them according to the manufacturer's directions.
Replacing or disassembling any component connected to the brake line may introduce air into the system. You may find that you need to bleed your brakes after service, especially if the brake caliper has been removed.
Because brake fluid is hygroscopic, it will absorb water as long as it stays in your ATV's brake system. Direct exposure to heat will certainly further break down the brake fluid, minimizing its effectiveness and also limiting the power of your brakes. Any type of fluid that is near a brake caliper will by far be the most susceptible to thermal degeneration due to the high friction near the disc when damaged.
Healthy or new, quality brake fluid will be somewhere between completely clear and clear with a brownish yellow color. Any brake fluid that looks more like cola or coffee is long overdue for replacement. Replace it ASAP!
Because bad brake fluid can negatively affect the performance of your brakes, it's important to change it on a regular basis. As a general rule, you should change the brake fluid every time you change the brake pads.
Bleeding your ATV brakes is really important to keep them functioning properly.
You can use the manual method of bleeding your ATV brakes to easily change the brake fluid or eliminate air bubbles.
If you have a lot of air in your fluid after this process, you may need to try again using a vacuum pump to remove the brake fluid faster and also with more pressure. This will draw more air out of the brake system.
How to bleed motorcycle brakes? Best Guide 2022
Rodney L.