Skip to content
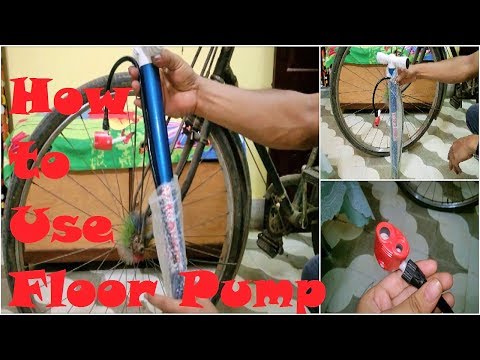
All bike tires slowly leak air every day. Even if you’re an occasional rider, and you only take your bike down from the bike rack once a week, the tire pressure will still decrease. Before you ride, you should always check your tires’ PSI and, if needed, inflate them with a floor bike pump or a handheld pump.
On the sidewalls of your tires, you’ll see the manufacturer’s recommended pressure range for PSI (pounds per square inch). Different bike tires have different ranges, and narrow tires need more pressure than wide tires. The recommended PSI for different tires are:
Experienced cyclists can often estimate whether their tires need to be pumped by pinching the tire between their thumb and forefinger. The more accurate way of knowing when your tire should be pumped is by measuring its pressure with a pressure gauge; if the air pressure is measured below the recommended PSI, it’s time to pump.
First pump your bike tire to the middle of the range for the recommended PSI. You also need to take your body weight into account. Tires that bear a heavier rider need more PSI. Weather conditions and terrain also affect how a bike rides, so you’ll need to experiment with different PSIs to feel what’s most comfortable to you.
A Schrader valve is the type of valve you’ll find on car tires, older bike tires and mountain bikes. It consists of a metal pin in the center of a threaded valve, and a rubber cap that’s screwed onto the valve. Most bike pumps like those we reviewed have a dual head to accommodate both Schrader and Presta valves or a single head with an adapter.

A Presta valve is found on road bikes and some mountain bikes. It’s a slender valve with a nut at the top that is loosened and tightened before and after inflation. Almost all new bike pumps have a head with openings for both Schrader and Presta valves, or they have an adapter for switching from Schrader to Presta, like one of our top picks, the Topeak – Road Morph G.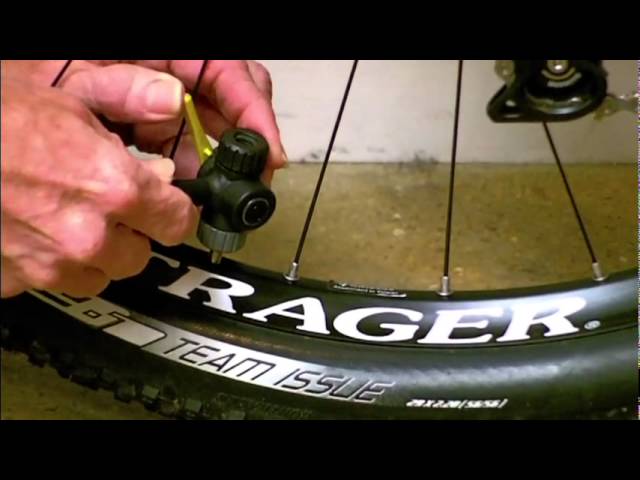
If you’re out riding and your tires need air, you could give them a quick inflate with a CO2 injector, like the one we reviewed. But if you don’t have a CO2 injector in your bag, and you forgot your mini pump, then you can pull into a gas station and inflate your tires there.
If you don’t have a pressure gauge, ask the station attendant for one. Inflate your tires to optimal pressure in short bursts; a gas-station air pump has very high pressure, and you run the risk of popping your tire.
A gas-station air pump will only fit a Schrader valve. But if your tires have Presta valves and you don’t have a Presta valve adapter, there’s still a way to inflate them.
Share this Review
Gene Gerrard, Writer
Gene has written about a wide variety of topics for too many years to count.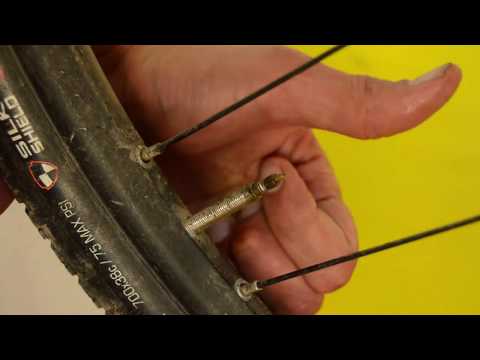 He's been a professional chef, cooking-appliance demonstrator, playwright, director, editor of accountancy and bank-rating books, Houdini expert and dog lover (still is). When he's not writing for Your Best Digs, he's performing as a magician at the Magic Castle in Hollywood.
I headed off from my house one Saturday early in my biking career, drooling with excitement for the mountain bike ride I’d been awaiting all week. Then, before I had reached the trailhead, I noticed my rear tire was significantly low. I felt like I was riding through mud – on the pavement! Remembering a gas station with an air pump on my way to the trailhead, I figured I could easily pump up my tire without a wasted trip back to my house.
But, when I tried to inflate my mountain bike tire… AAACK! Foiled! The gas station had a standard car pump and, new biker that I was, I forgot my bike tires have a presta valve. A week of hungering for a mountain bike ride… RUINED! All because of a puny little valve. Oh, the angst. Do NOT let this happen to YOU!
Unless you grew up biking, most of us are so familiar with car tire valves, we assume it’s the only type of valve. In truth, car tires use what’s called a Schrader valve. It’s about the diameter of a pencil and has a tiny “button” in the center that, when pressed, allows air in or out, but holds air pressure relatively steady when not compressed.
Presta valves, on the other hand, are significantly skinnier than Schrader valves. They don’t have a button in the center of the valve and instead have an attached screw mechanism at the tip. When screwed closed, it holds air pressure in the tire. When unscrewed, you can pump air in or release air out.
Presta ValveCurrently, presta valves are the most common type of valve on high-end mountain bikes. Racers and high performance cyclists prefer them. They’re becoming increasingly common – even on mountain bikes on the low-end of the price spectrum.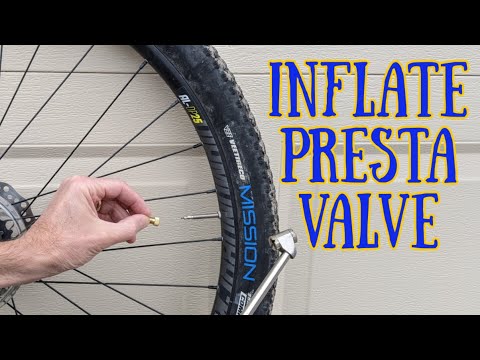
Why, you ask. (Perhaps with a significant number of swear words as you kick your flat mountain bike tire or throw your useless Schrader pump.) Why use an uncommon, obscure valve that doesn’t fit a standard pump? Is it just to make mountain bike newbies suffer? Why? Why?
No, it’s not just to frustrate you.
Presta valves are generally more reliable and allow pumping your tires to a more precise pressure. By virtue of design, all Schrader valves release tiny amounts of air over time, requiring occasional “topping off”. Having a cap on the valve can significantly decrease the air loss, but it still means, at any given moment, your tire may not have the pressure you pumped it to.
A casual mountain bike rider may not know what pressure they should be riding or even notice when the pressure is off. But for high-speed riders, tire pressure can have a significant impact on speed, race performance and riding safety.
The screw on the tip of the presta valve allows a rider to close off the tube at the desired pressure and not require a cap. Barring an unnoticed leak or a puncture during a ride, the tire will now reliably hold the pressure you want.
You can inflate a presta valve with a common air pump, such as at a gas station or portable air compressor. However, you need an adaptor that’s ridiculously small in size but huge in importance: a presta valve adaptor.
Presta valve adaptorHere are the steps to inflate a presta valve with a standard pump:
Since more and more mountain bike tires use presta valves, most bike pumps are either universal (meaning one hole works on both presta and Schrader valves) or they have two separate holes, one for each valve type. However, you should always carry a valve adaptor when you ride for situations when a standard pump is the only option. Some cyclists do this by keeping a valve adaptor screwed on their tire valve all the time. Just make sure the valve is screwed closed before putting the adapter on!
Presta valve adapters are extremely tiny and portable. This also means they’re easy to lose. The good news is they’re fairly cheap. I usually buy a handful at a time and keep one in my garage bike tools and one in my portable tool kit for rides. Having one in your glove box isn’t a bad idea, either!
All bike shops sell valve adapters and some general sporting goods shops and hardware stores carry them as well. You can also buy valve adapters online easily and cheaply.
This simple question actually does not have a straightforward answer. The simple rule is to refer to the tire manufacturer’s specs on tire pressure that are printed on the sidewall of your tires.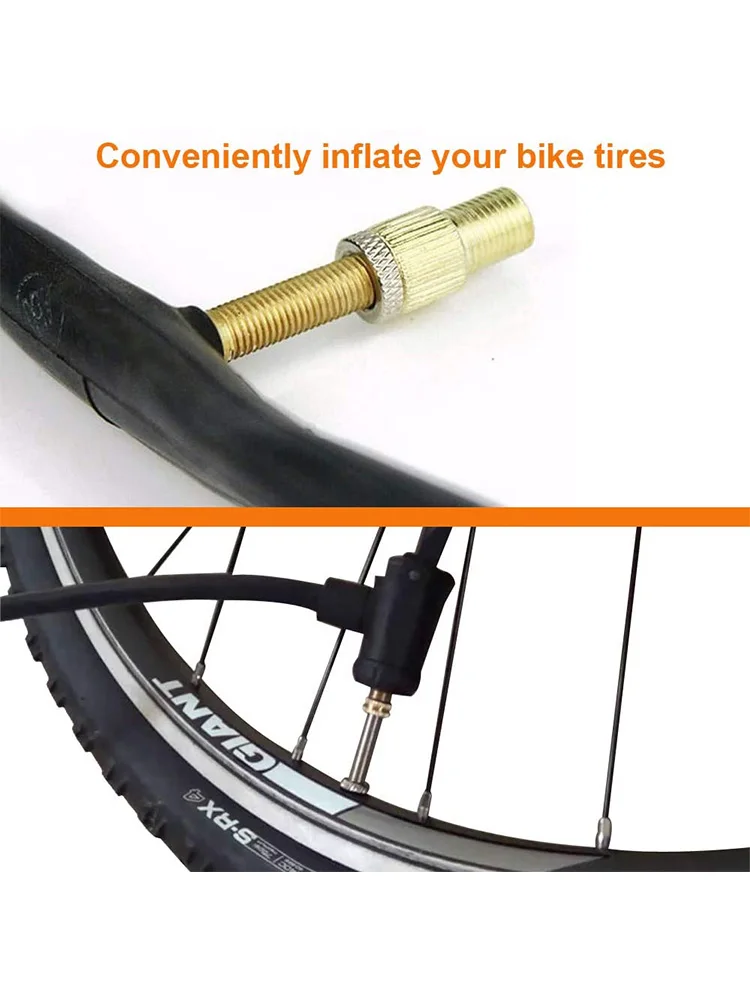 Consensus of riders is that mountain bike pressure should be 30 psi on the front tire and 33 psi for the rear tire. This information should serve you well if you have only a casual interest in mountain biking and are doing entry-level to intermediate trails two or three times a month.
However, if you spend a significant amount of time on your bike (and an equally significant amount of time dealing with pinch flats, blowouts or skidding out on corners), you’ll want to dive deeper into the science of bike tire pressure. DIY Mountain Bike has a fabulous, in-depth article and survey results examining appropriate bike tire pressure.
The fastest and easiest (and cheapest) way to check your tire is with your hand. When you squeeze it, it should be hard in the center with only a tiny bit of give farther out on the tire near the treads. A hand test, however, is – not surprisingly – not very accurate!
If you want to be precise, a tire pressure gauge will be necessary.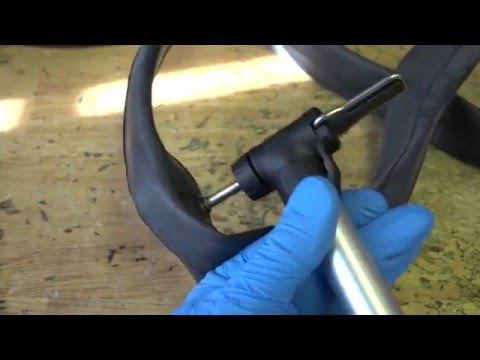 But be warned: tire pressure gauges are notoriously unreliable and the sensitive sensors are easily broken. For my recommendation, read my tire pressure gauge product review.
If you’re in a pinch (perhaps literally!), and you don’t have a universal pump or a valve adapter, you can modify a tube cap to create a functional adapter using a presta valve CAP.
Remember to screw the tire valve shut after inflating! I know you’re tired of hearing that, but it’s important.
Now that you know everything you need to about how to inflate a presta mountain bike tire, you’ll never find yourself hungering for a ride and find yourself deterred by a standard tire pump!
And don’t forget to screw the presta valve closed…
Professional writer Kat Jahnigen was 2 miles from the nearest village – and roughly 2,310 miles – from the nearest English-speaking town – when her bike tire burst. At that time, she was a college student on a bike trip across the desolate, rocky island of Crete. It suddenly occurred to her that it would’ve been good to learn some basic bike repairs before setting off on a solo bike trip.
Check out Kat’s website WriteHire at writehire.net.
90,000 COOLADO TPUMP Model P Air pump Air pump Air pump Installation Instructions
User Guide
CLASS P
High -pressure air pump for tires 9000 Please read this guide before using 66
Please read this manual carefully before using this product for the first time. nine0007 It will help you to use it correctly and remind you of the appropriate precautions.
This pump is a professional tool, not a toy.
This product is a portable intelligent air pump suitable for inflating bicycle tires, balls, motorcycle tires and other high pressure inflatable products.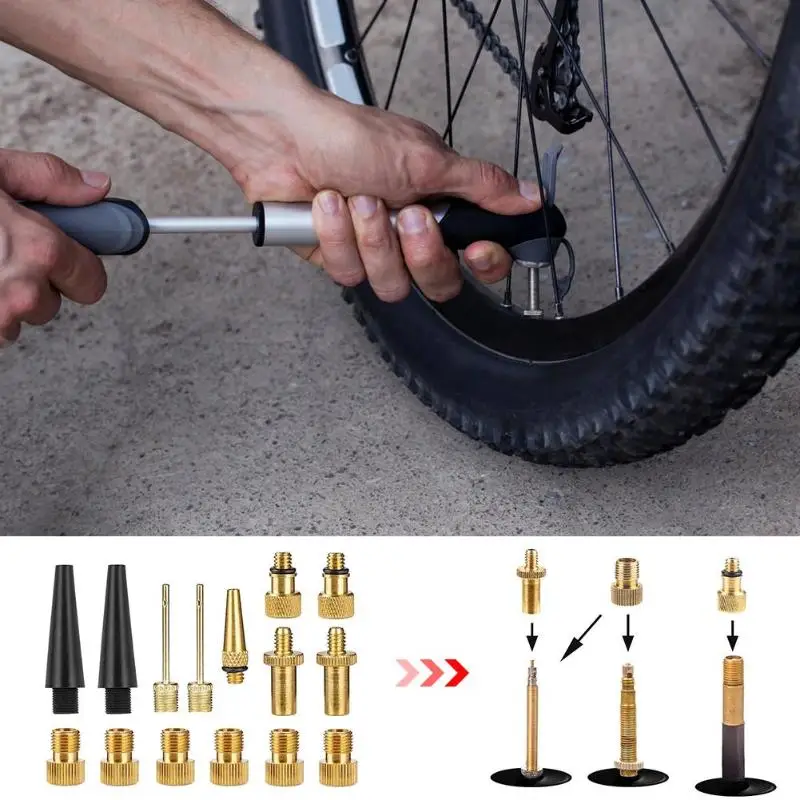
Product and tube become hot after prolonged use (> 10 minutes). After prolonged use, allow the pump to cool down for at least 10 minutes before continuing. Keep away from children. nine0007 Red light: charging
Green light: Completely charged
Schradeer valve
The tube is standardly equipped with a shredder valve, suitable for
- mountain bicycles
- electric bicycles,
- motorcycles
- machines. just plug it in directly.
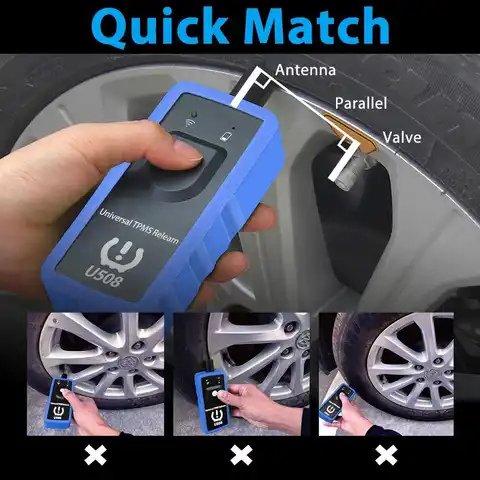
PRESTA VALVE
Connect the Presta adapter first to the pump tube, then connect the tube to the Presta valve suitable for:
- Road bikes
- Individual mountain bikes
BALL NEEDLE
Connect the ball needle adapter to the pump tube, dampen the needle slightly and insert it into the ball valve. Suitable for
- basketball,
- football
- other types of balls.
START INFLATION
 nine0033
 LIGHT START FUNCTION
Press the light button to turn on the light. Click again to turn off the light.
BATTERY AND BATTERY LIFE

| Inflatable pressure range | 0.210.3 bar / 3150 psi Inch |
| The size of the product | 032x230 mm (Metal size without a hose) |
| CLIMATIC | charging: 0 ° C 45 |
| Storage temperature | -10°C – 45°C |
| Trachea size | 175 ± 5 mm including air nozzle |
| coolado tPump Model P Battery High Pressure Tire Air Pump [pdf] Instruction Manual tire pressure |
 Brief educational program
 In a store, one often hears such dialogues between the buyer (P) and the seller (Pr):
P: Do you have bike tubes?
Pr: Yes. Which?
P: Well, what kind!? Ordinary. nine0003
But there are many sizes and standards. This review will help you figure out what the incomprehensible symbols on the camera or tire mean and what kind of camera you need. So...
Nipples. There are three types of bicycle nipples - Dunlop, Shrader and Presta. Dunlop is an obsolete type of nipple that is becoming less and less common on bicycles. But still, nipples of this type are still installed on children's and road bikes. Shrader (AV - American Valve or automotive) is the most common type of nipple. It has the form of a threaded cylinder with a diameter of 8 mm. Its advantage is its prevalence. In the absence of a pump, you can always pump up the wheels at a car gas station, tire fitting, service station, or by agreement with the driver. Presta (FV - French Valve, French or sports) nipple - is becoming more and more popular. Recently, Presta cameras are equipped not only with racing and sports bikes, but also with mid-level models. At just 6mm wide, the FV valve is the thinnest bicycle valve. Its weight is 4-5 grams less than the Shrader type nipple. The problem of incompatibility of nipples was solved by pump manufacturers. nine5% of these devices on the cycling market are universal. In order to inflate the Presta chamber, you need to unscrew the pump nut and turn the rubber bushing over. Presta / Shrader adapters are also available, thanks to which you can use a regular car pump.
Chamber markings. What camera to choose? This question will be answered by the marking applied to the tire. For example, you see. 26x1.95 (559x50). The first group of numbers indicates the size of the tire in inches, while the size in centimeters is indicated in brackets. The number 26 is the tire diameter in inches, 1. 95 - its width. Accordingly, 559 is the bore diameter, 50 is the tire width in millimeters
Now you can safely answer the seller's question that you need a bicycle tube for a 26x1.95 tire with a Presta nipple. However, that's not all! There are cameras with different characteristics and for different uses. Consider the possible options using the example of Maxxis bicycle cameras.
Maxxis Welter Weight. This is the "regular" camera that most buyers talk about. Its wall thickness is 0.9mm, which is the best compromise between weight and puncture resistance. Maxxis Welter Weight has the widest range of sizes and can be installed on almost any type of bike - from BMX and 20" kids bikes to road bikes and 29er bikes. Tubes are available with Shrader and Presta nipples in 45 and 60 mm lengths.
Maxxis Ultra Light. Competition bikes are much lighter than their extreme, touring and city counterparts, so the Ultra Light tubes were designed to reduce the weight of the wheels. with virtually no loss in strength.Because weight reduction is limited to a limited number of cyclists, the model is produced in a less rich assortment, but sufficient for the main range of tire sizes.0003
Maxxis Flyweight. Extremely lightweight inner tube for professionals designed to minimize wheel weight as much as possible. The Maxxis Flyweight bladder is only 0.45mm thick, making it the lightest butyl bladder on the market. You also get an ultra-light flipper with the camera, which will also save a few grams. The tube is only available in sizes 26X1.90/2.125 and 700X18/25C and only with Presta type nipples
Maxxis Freeride. For fans of extreme skiing, we recommend paying attention to the Maxxis Freeride bike tube with a wall thickness increased to 1.2 mm. The camera is designed for increased loads and is installed in tires with a width of 2.2 to 2.5 inches. Naturally, there can be no talk of any weight loss.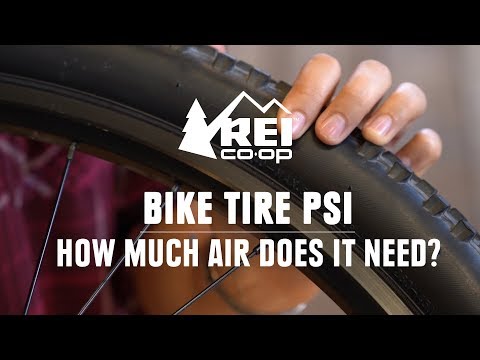


 nine0033