Architecture
View 3 Images
View gallery - 3 imagesAustralian researchers have analyzed the structural properties of walls made from end-of-life car tires packed with dirt, giving engineers some figures to work with and making a well-known upcycling technique available to the construction industry.
Car tires are an environmental nightmare. Ubiquitous, consumable, filthy to burn and they take hundreds of years to decompose in landfill, where an awful lot of them end up. Any project that can recycle them, like grinding them up for use as asphalt filler or insulation, or using them as swings and bumpers in kids' playgrounds, is an environmental boon.
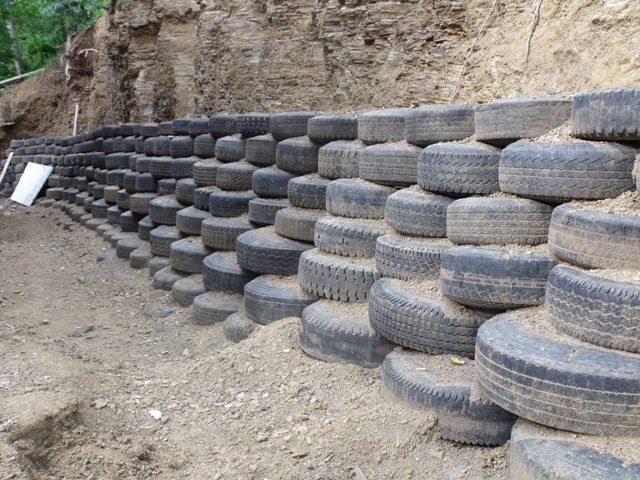
For decades, people have been recycling yesterday's rubber donuts into tomorrow's tire walls, stacking them in staggered formations and packing them with dirt. You'd have seen this kind of thing plenty at motor racing facilities – indeed, some tires have been unusually keen to get involved. The Earthship movement takes the idea further, creating retaining walls and entire buildings out of tire walls, sometimes filling them with concrete rubble and broken bricks to allow for drainage, or even rendering over the top for a smoother appearance.
Earthship-style construction makes use of recycled materials like old tiresDepositphotos
These kinds of projects, though, are pretty niche. And researchers at the University of South Australia saw an opportunity in the 55 million tires the country disposes of every year.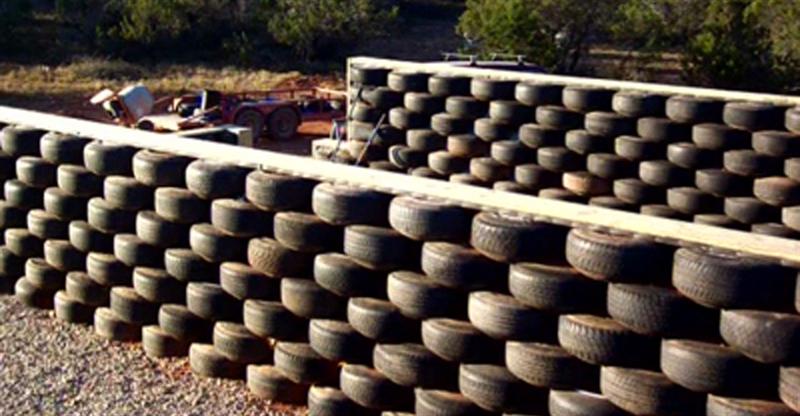 This 450,000-odd tonnes of toxic garbage could become free building materials for use in all sorts of mainstream construction projects if it was studied and documented to the point where engineers can use it.
"The lack of supporting data has prevented wider uptake of tire walls by engineers and architects, and we’re hoping this study will change that and expand the range of projects in which these walls are used," said Dr. Martin Freney, co-author of a new study that submits these tire walls to a full structural analysis. "The wall we tested was the first of its kind to be scientifically tested in this fashion, and all the data indicates tire walls can be extremely strong and safe structures.”
"Not only are the tire walls as structurally sound as concrete or wood sleeper retaining walls, they are also extremely resilient," he continued. "Unlike a concrete wall, we found these walls have the ability to ‘bounce back into shape’ following impact, such as from an earthquake. And if a drainage material such as recycled concrete rubble or crushed bricks is used to fill the tires, they also offer excellent drainage, which can be a major consideration in many retaining wall scenarios. Furthermore, the use of recycled fill materials reduces the environmental impact of the wall."
University of South Australia
The researchers hope the data they've generated, as well as associated software models, will be used to create certified design guidelines and building code provisions to encourage the wider adoption of this environmentally-friendly – if labor-intensive – construction method.
“We really believe this research provides a strong evidence base for the expanded use of tire walls in housing and other applications, and the next step will be to engage with an industry partner to develop a range of real-world applications for tire walls,” Dr Freney said.
The study is published in the journal Engineering Structures.
Source: University of South Australia
View gallery - 3 imagesLoz Blain
Loz has been one of our most versatile contributors since 2007, and has since proven himself as a photographer, videographer, presenter, producer and podcast engineer, as well as a senior features writer.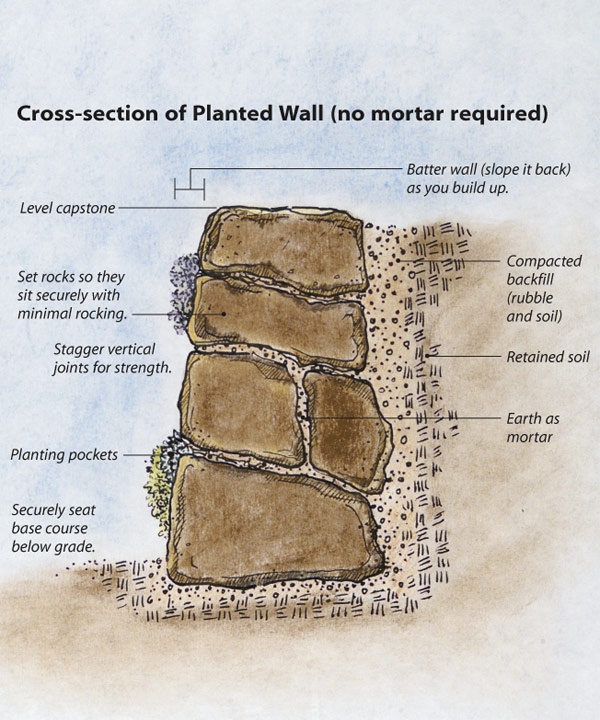 Joining the team as a motorcycle specialist, he's covered just about everything for New Atlas, concentrating lately on eVTOLs, hydrogen, energy, aviation, audiovisual, weird stuff and things that go fast.
"I like the breadth of your HVAC courses; not just green or energy savings
courses."
Russell Bailey, P.E.
New York
"It reinforced my current knowledge and taught me a few new things in addition
to exposing me to new sources
of information."
Stephen Deduck, P.E.
New Jersey
"The material was very informative and organized. I learned a lot and they were
very quick to respond to questions.
It was top notch. Will use
again. Thanks."
Blair Hayward, P.E.
Alberta, Canada
"Easy to use website.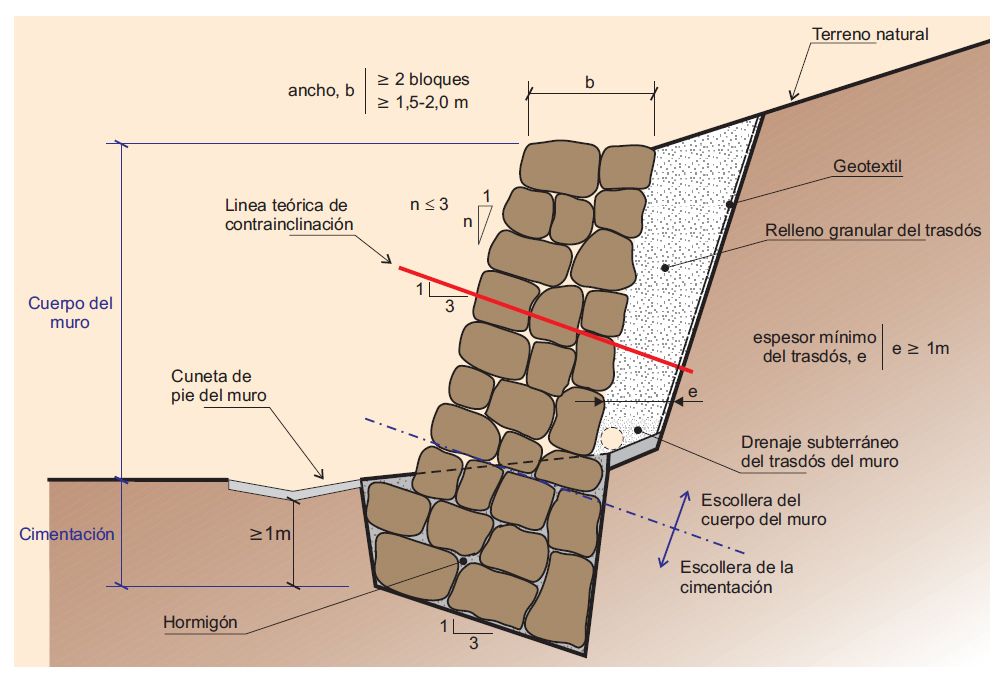 Well organized. I will indeed be using your services again.
I will pass along your company
name to others at work."
Roy Pfleiderer, P.E.
New York
"The reference material was excellent, and the course was very illuminating especially since I thought I was already familiar
with the details of the Kansas
City Hyatt accident."
Michael Morgan, P.E.
Texas
"I really like your business model. I like being able to view the text before purchasing. I found the class
informative and useful
in my job."
William Senkevich, P.E.
Florida
"You have a great selection of courses and the articles are very informative. You
are the best I've found."
Russell Smith, P.E.
Pennsylvania
"I believe that the approach makes it easy for a working engineer to earn PDH by allowing the time to review
the material.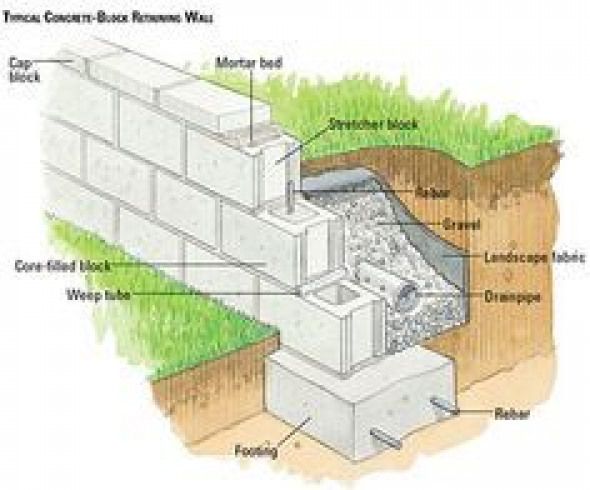 "
"
Jesus Sierra, P.E.
California
"Thanks for allowing me to view the incorrect answers. In reality, a
person learns more
from failures."
John Scondras, P.E.
Pennsylvania
"The course was well put together and the use of case studies is an effective
way of teaching."
Jack Lundberg, P.E.
Wisconsin
"I am very impressed with the way you present the courses; i.e., allowing the
student to review the course
material before paying and
receiving the quiz."
Arvin Swanger, P.E.
Virginia
"Thanks for offering all these great courses. I certainly learned and
enjoyed a lot."
Mehdi Rahimi, P.E.
New York
"I am very pleased with the course offerings, the quality of material content, and the ease of locating and
taking your on-line
courses.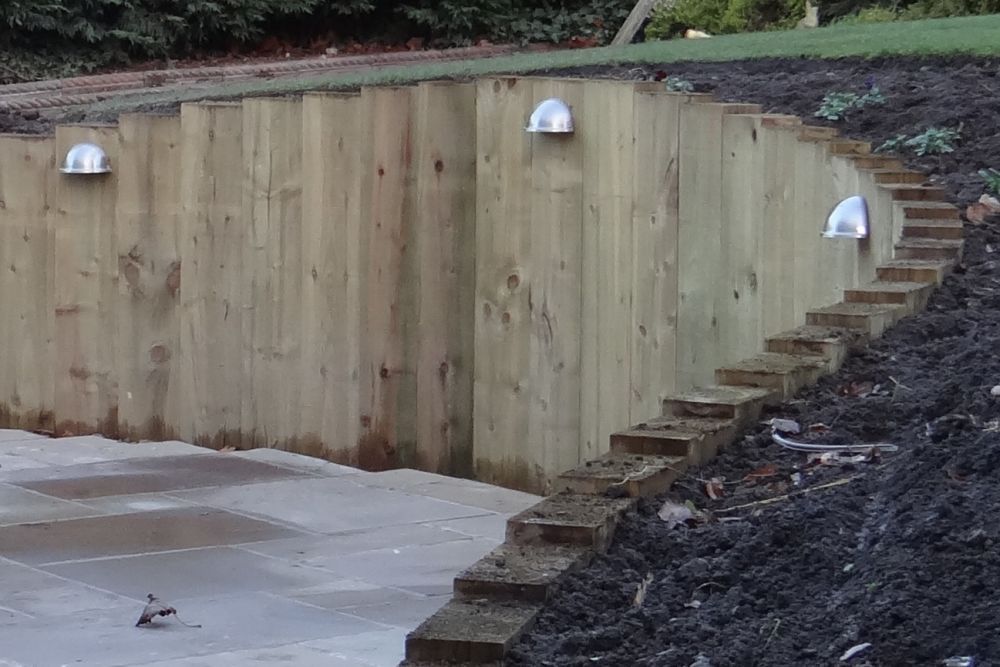 "
"
William Valerioti, P.E.
Texas
"This material largely met my expectations. The course was easy to follow. The photos mostly provided a good visual of
the topics being discussed."
Michael Ryan, P.E.
Pennsylvania
"Exactly what I was looking for. Needed 1 credit in Ethics and found it here."
Gerald Notte, P.E.
New Jersey
"This was my first online experience in obtaining my required PDH credits. It was
informative, beneficial and economical.
I would highly recommend it
to all engineers."
James Shurell, P.E.
Ohio
"I appreciate the questions are "real world" and are relevant to my practice, and are
not based on some obscure section
of the laws that don’t apply
to "normal" practice. "
"
Mark Kanonik, P.E.
New York
"Great experience! I learned a lot to take back to my medical device
organization."
Ivan Harlan, P.E.
Tennessee
"Course material had good content, not too mathematical, good emphasis on practical applications of technology."
Eugene Boyle, P.E.
California
"This was a very pleasant experience. The topic was interesting and well presented,
and the online format was very
accessible and easy to
use. Many thanks."
Patricia Adams, P.E.
Kansas
"Excellent way to achieve compliance with PE Continuing Education within the licensee’s time constraints."
Joseph Frissora, P.E.
New Jersey
"I must admit, I actually learned a lot. It helps to have the printed quiz during
the review of the text material.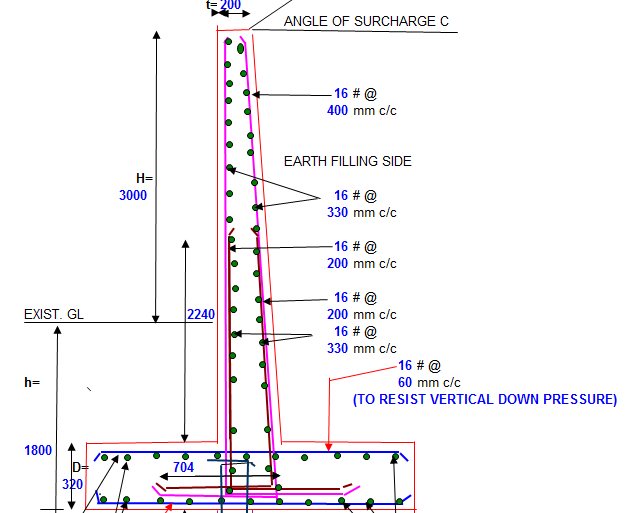 I
I
also appreciated viewing the
actual cases provided."
Jacquelyn Brooks, P.E.
Florida
"The document Common ADA Errors in Facilities Design is very useful. The
test did require research in the
document but answers were
readily available."
Harold Cutler, P.E.
Massachusetts
"This was an efficient use of my time. Thank you for having a variety of selections
in traffic engineering, which I need
to fulfill the requirements of
PTOE certification."
Joseph Gilroy, P.E.
Illinois
"A very convenient and affordable way to earn CEU''s for my Delaware PG requirements."
Richard Rhoads, P.E.
Maryland
"Learned a lot with Protective Grounding. So far all courses I took were great.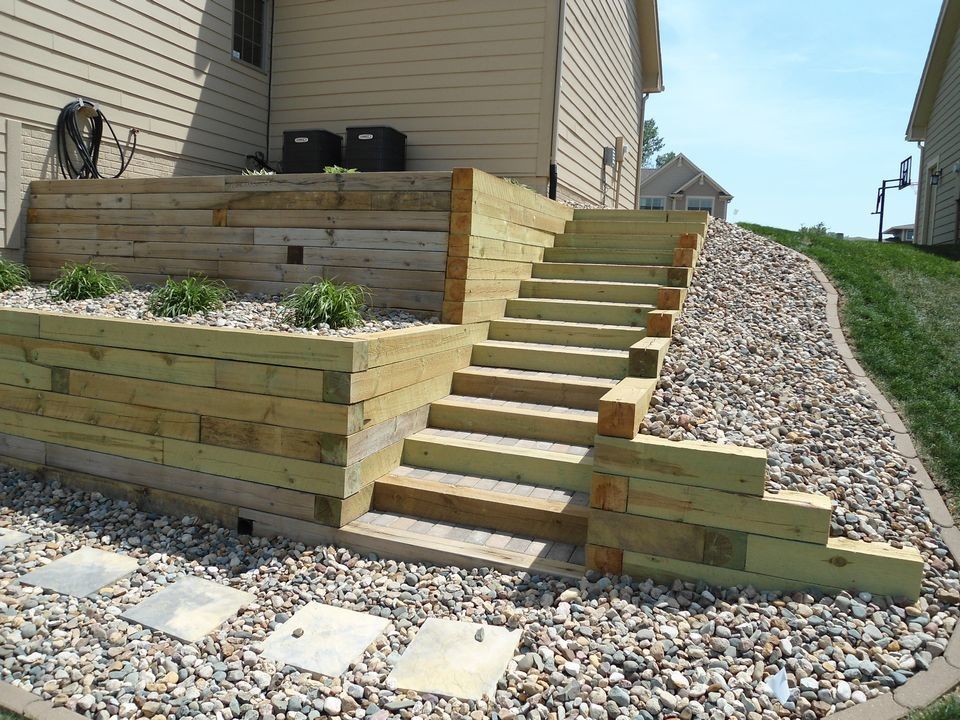
Hope to see more 40%
discounted courses."
Christina Nickolas, P.E.
New York
"Just completed the Radiological Standards exam and look forward to taking additional
courses. The process is easy, and
much more efficient than
having to travel."
Dennis Meier, P.E.
Idaho
"The services provided by CEDengineering are very helpful for Professional
Engineers to gain PDH units
anytime. Very convenient."
Paul Abella, P.E.
Arizona
"So far it has been great! With being a full time mother of two I don’t have much
time to be researching where to
attain my credits from."
Kristen Farrell, P.E.
Wisconsin
"It was very informative and educational. Easy to understand with illustrations
and graphs; definitely makes it
easier to absorb all the
theories.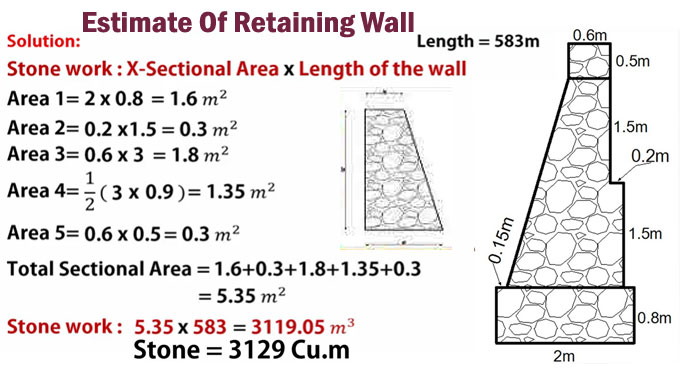 "
"
Victor Ocampo, P.Eng.
Alberta, Canada
"A good review of semiconductor principles. I enjoyed going through the course at
my own pace during my morning
subway commute
to work."
Clifford Greenblatt, P.E.
Maryland
"Simple to locate interesting courses, download documents and take the
quiz. I would highly recommend
you to any PE needing
CE units."
Mark Hardcastle, P.E.
Missouri
"Very good selection of topics in numerous fields of engineering."
Randall Dreiling, P.E.
Missouri
"I have re-learned things I have forgotten. I am also happy to benefit financially
by your promo email which
reduced the price
by 40%.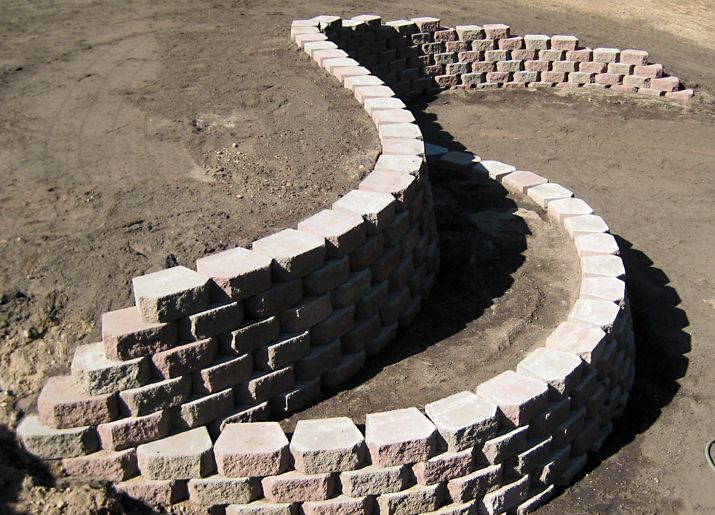 "
"
Conrado Casem, P.E.
Tennessee
"Excellent course at a reasonable price. I will use your service in the future."
Charles Fleischer, P.E.
New York
"This was a good test and did in fact test that I had read the professional ethics
codes and New Mexico
regulations."
Brun Hilbert, P.E.
California
"I enjoyed the classes very much. They were worth the time & effort."
David Reynolds, P.E.
Kansas
"Very satisfied with the quality of the test documents. Will use CEDengineerng
when needing additional
certification."
Thomas Cappellin, P.E.
Illinois
"I had a course expire and yet you still honored the commitment and gave
me what I paid for - much
appreciated!"
Jeff Hanslik, P.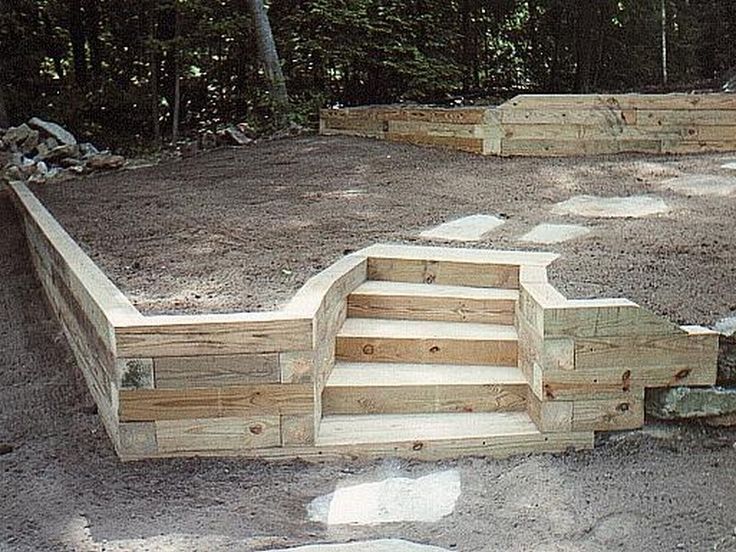 E.
E.
Oklahoma
"CEDengineering provides convenient, economical and relevant courses
for the engineer."
Mike Seidl, P.E.
Nebraska
"Course was reasonably priced and the material was concise and
well arranged."
Glen Schwartz, P.E.
New Jersey
"Questions were appropriate for the lessons, and lesson material is
good reference material
for wood design."
Bryan Adams, P.E.
Minnesota
"Excellent and was able to receive helpful guidance via a simple phone call."
Robert Welner, P.E.
New York
"I had a great experience taking the Coastal Construction – Designing
the Building course and
highly recommend it."
Denis Solano, P.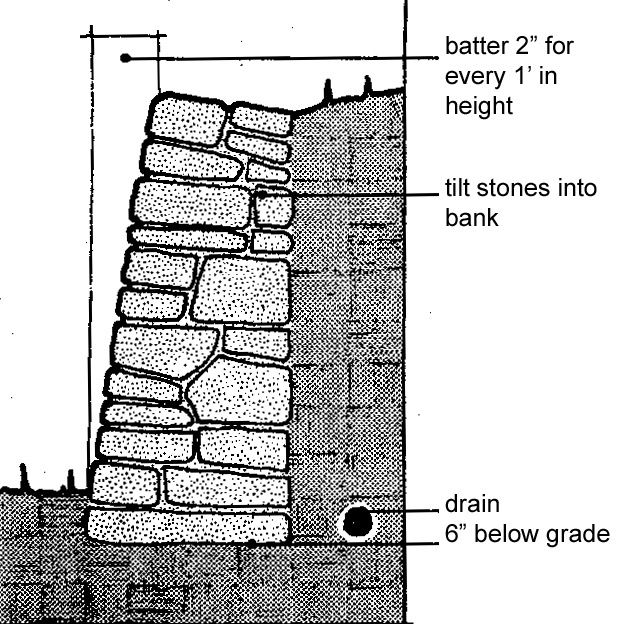 E.
E.
Florida
"Very clear, well organized website. NJ ethics course material was very
nicely prepared."
Eugene Brackbill, P.E.
Connecticut
"Very good experience. I like the ability to download the study material to
review wherever and
whenever."
Tim Chiddix, P.E.
Colorado
"Excellent! Maintain the wide selection of topics to choose from."
William Barattino, P.E.
Virginia
"The process is direct, no nonsense. Good Experience."
Tyrone Baasch, P.E.
Illinois
"The questions on the exam were probing and demonstrated understanding
of the material. Thorough
and comprehensive."
Michael Tobin, P.E.
Arizona
"This is my second course and I liked what the course offered to me that
would help in my line
of work.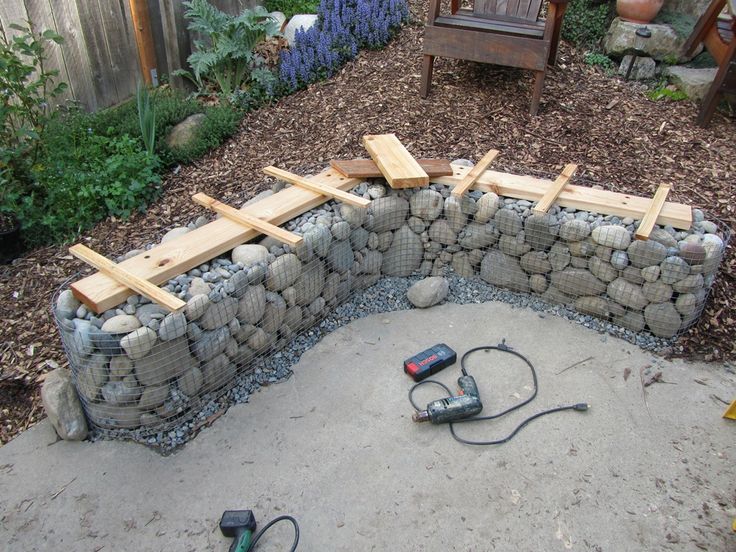 "
"
Ricky Heflin, P.E.
Oklahoma
"Very quick and easy to navigate. I would definitely use this site again."
Angela Watson, P.E.
Montana
"Easy to execute. No confusion on approach to take test or record certificate."
Kenneth Page, P.E.
Maryland
"It was a great source of info pertaining to solar water heating. Informative
and great refresher."
Luan Mane, P.E.
Conneticut
"I like the approach to sign up and be able to read materials off line and then
come back to take the quiz."
Alex Mlsna, P.E.
Indiana
"I appreciated the amount of information that was provided for the class. I know
this is all information that I can
use in real life situations. "
"
Natalie Deringer, P.E.
South Dakota
"The review materials and sample test were in sufficient detail to allow me to
successfully complete
the course."
Ira Brodsky, P.E.
New Jersey
"Website is easy to use, you can download the material to study, then come back
and take the quiz. Very
convenient and on my
own schedule."
Michael Gladd, P.E.
Georgia
"Thank you for the good courses over many years."
Dennis Fundzak, P.E.
Ohio
"Very easy to register, access the course, take the test, and print the PDH
certificate. Thanks for making
the process simple."
Fred Schaejbe, P.E.
Wisconsin
"Positive experience. Found a course that fit my needs quickly and completed
the one hour PDH in
one hour.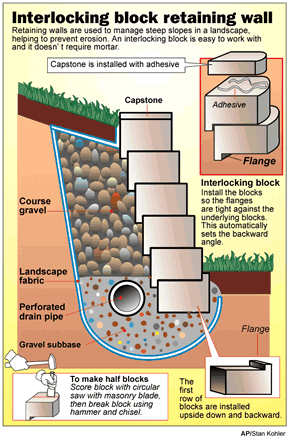 "
"
Steve Torkildson, P.E.
South Carolina
"I liked being able to download the documents for review of content
and suitability, before
having to pay for
the material."
Richard Wymelenberg, P.E.
Maryland
"This is a good refresher on EE for non-electrical engineers."
Douglas Stafford, P.E.
Texas
"There is always room for improvement but I cannot think of anything in your
process that needs
improvement."
Thomas Stalcup, P.E.
Arkansas
"I really like the convenience of taking the quiz online and receiving an immediate
certificate."
Marlene Delaney, P.E.
Illinois
"CEDengineering teaching modules is a very convenient way to access information on
many different technical areas outside
one’s own specialization without
having to travel.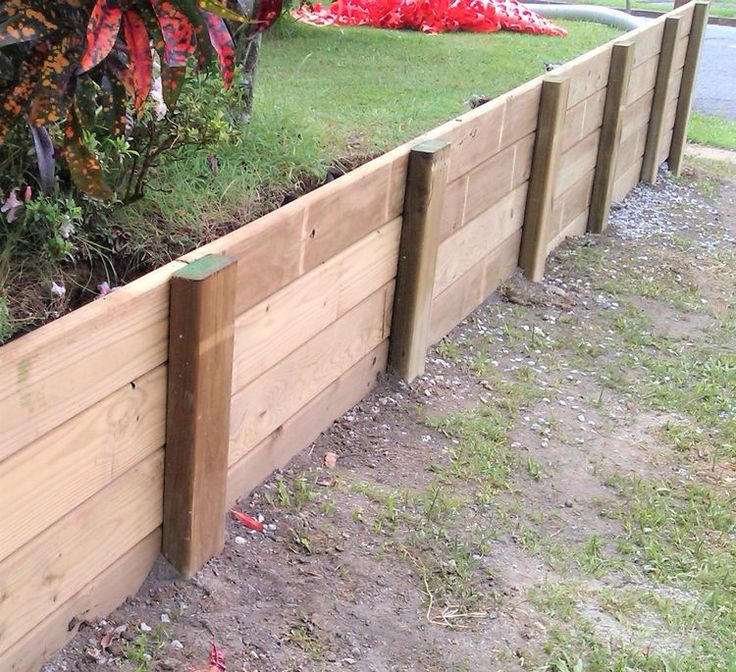 "
"
Hector Guerrero, P.E.
Georgia
I remember the summer with pleasure and with a feeling of deep dissatisfaction. After all, how many different great ideas can be brought to life, but the trouble is, as soon as you start some kind of grandiose restructuring, winter rolls in your eyes ...
You have to freeze everything and wait until the next season to continue what you started, unless, of course, there are other worries will not appear.
What would you like me to do during the long winter months? It remains only to sit back, but in the depths of the soul to envy the inhabitants of warmer regions, who have the opportunity, if not year-round, then at least most of the time, to devote themselves to the affairs of the day.
We can't do anything without haste, we are constantly waiting for something, and then, if we're lucky with the weather, we quickly turn on the emergency mode, and then choke on the accumulated work.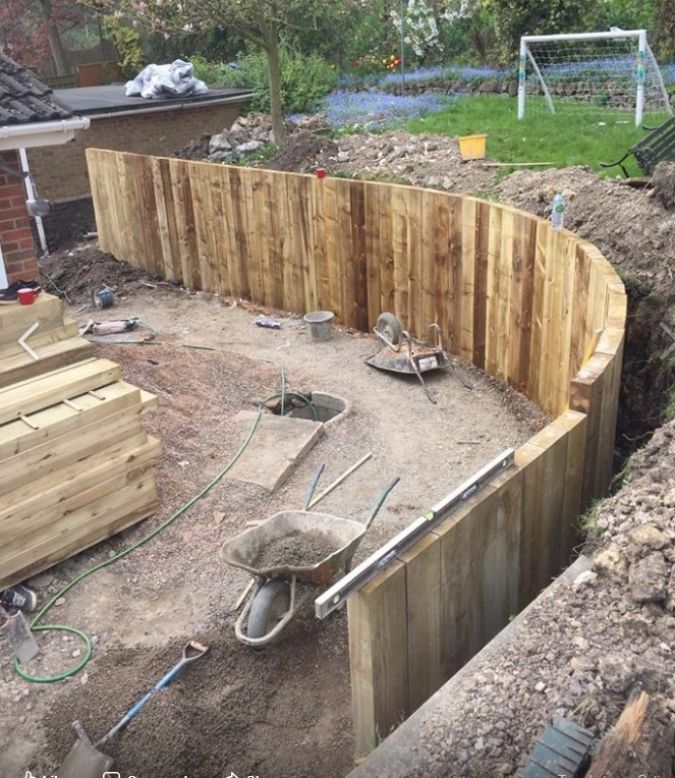
Today I would like to share a little experience that I received in the process of solving an existing problem.
And the problem was this: from the previous tenants, I got a lot of dilapidated and dilapidated adjoining buildings as a load. To destroy an old barn and build a new one in its place does not require much intelligence. But what if this same shed or part of the yard stands on imported soil made of sand, which crumbles all the time, crawls somewhere, and with it threatens to run away from the house and all other real estate?
There are many options for solving such problems through the construction of various engineering structures, ranging from wooden to stone or monolithic reinforced concrete structures. Each of the methods has significant drawbacks: laboriousness of execution, fragility, complexity, high cost of construction, etc.
Through a deep analysis of the situation and long reflections, I found the only and, I think, the right way to solve the problem.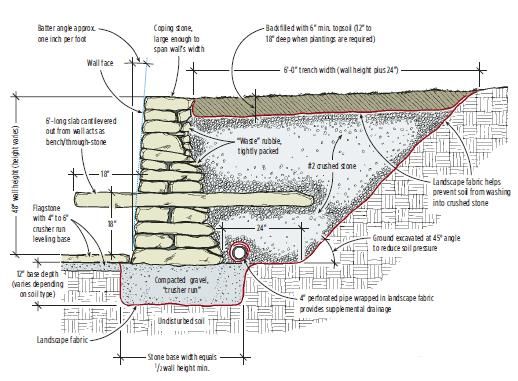
I will build a retaining wall from used tires!
1.
The advantages of this method are as follows: ease of execution, reliability and durability, rich opportunities in terms of design approach, waste-free production, and most importantly, availability and meager cost of construction, ultimately tending to zero.
I'll start with the fact that our house is built quite soundly, it stands on a good foundation, but most of the adjacent territory is based on imported soil. It is mainly sandy loam with a high proportion of sand content.
For some reason, the builders put the houses very close to each other, probably because in Russia there is not enough land for everyone. As a result, each house turned out to be slightly higher than the previous one, each on its own step.
2.
This stepped structure is easily eroded by rain and other precipitation, over time the soil settles and crumbles, and with it the buildings and part of the yard slide down to the neighbors.
I looked at this disgrace for a long time and wondered how best to proceed. The previous summer, the garage had to be demolished, which was about to fall on the neighbor's yard. Hastily strengthened the crumbling slope and took out a couple of dozen wheelbarrows of soil. A future path has been outlined along the fence, which I plan to pave with something in the future. In the place freed from the garage, a small free space has formed, from which, if desired, you can create something original, for example, a cozy courtyard and a flower garden with decorative flower beds.
3.
Before starting construction, I outlined the desired width of the future path, such that a wheelbarrow or bicycle could pass freely along it. I decided not to touch the rickety firewood for the time being, in the future it will be demolished, and a new one will be built in its place.
Therefore, we will start building the wall from the barn wall. Here is the highest point of the slope, then the level difference decreases and after about 30 meters, it completely disappears.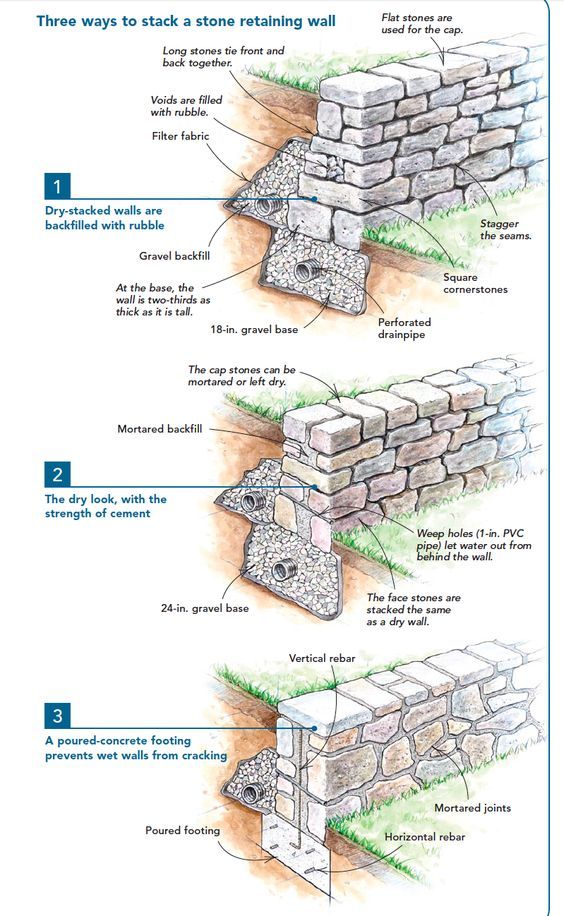
So, the height of my future retaining wall will be approximately 80 cm, plus a depth of another 20 centimeters relative to the track. And that: 1 m in the highest part and 20 cm in the lowest.
Of the tools, only a shovel, a wheelbarrow and a level were useful.
We use used car tires as the main building material, which can be filled with soil, crushed stone or broken bricks, even construction debris will do.
For the reliability of the bundle, it is desirable to fasten the tires together, so a screwdriver and self-tapping screws will come in handy.
4.
The uniqueness of this method lies in the fact that the released soil does not need to be removed. Everything that we dig out of the ground, including household waste that has accumulated here over the years, broken glass and stones, this entire cultural and cultureless layer will also not require additional disposal and can be used in construction.
The most difficult thing: to get enough tires, in my case, they will need about a hundred pieces.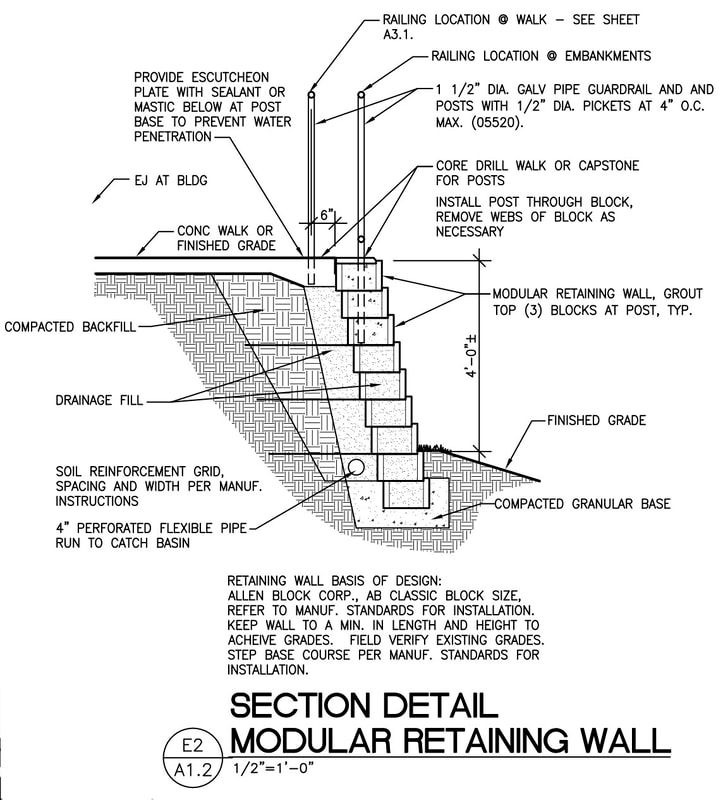
5.
To search for material, I had to go around a dozen tire shops, where, with varying success, I managed to get from five to twenty tires at once. Tire fitters gave away this rubbish with joy, though there was some shortage - as it turned out, tires are in great demand among gardeners and summer residents.
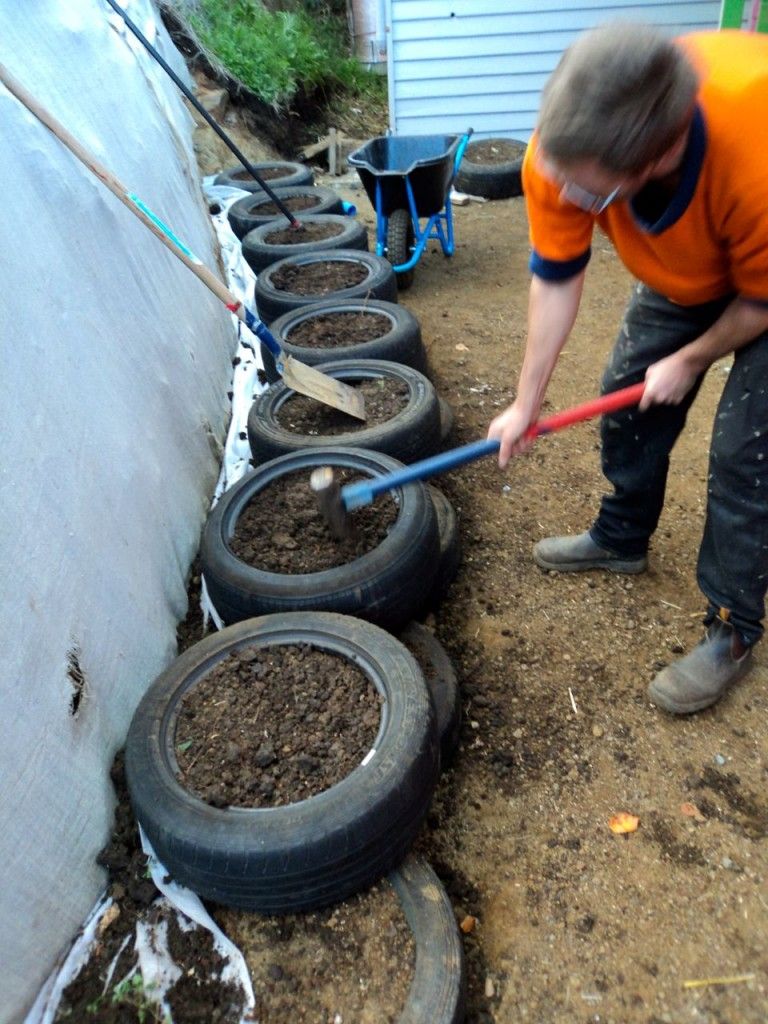
The whole construction process is as follows: we dig a trench to the required depth, in my case the depth is equal to the height of the tire. Since I had to take everything that they give, I came across tires of different diameters and 13 and even 19therefore, I laid the largest on the bottom, and the smallest on the upper tiers.
While the tires are empty, for additional structural strength we fasten them together with self-tapping screws, if desired, you can tighten them with bolts.
7.
To make our wall even, we lay each next row of tires on a level.
I cut off the upper rim of the tire with an ordinary knife, mainly so that later my wall could be used as a hedge.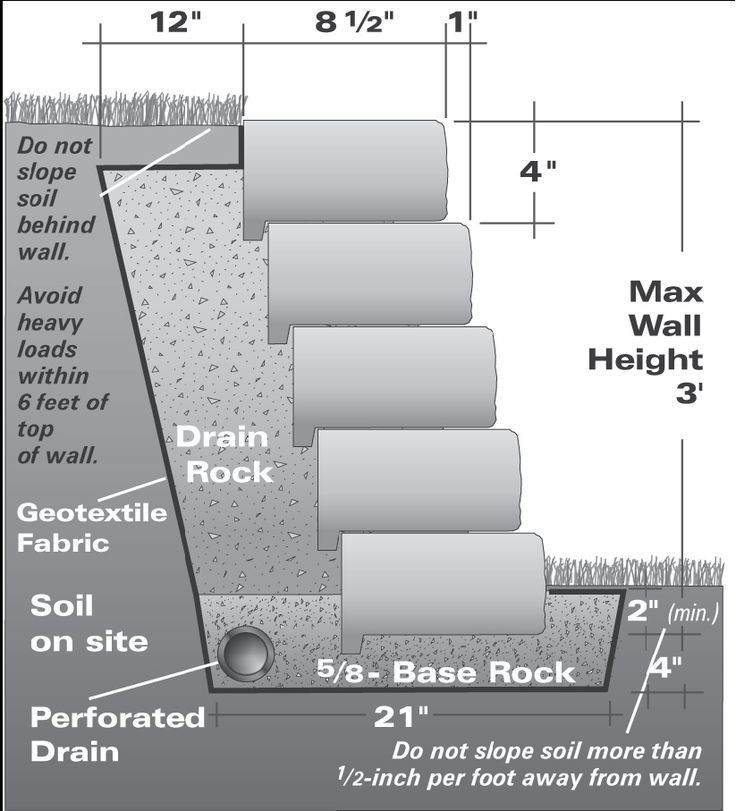 Depending on the task assigned to you, you can not do this.
The inside of the tire is partially filled with any construction debris that you were able to dig up while working. In my case, these were whole deposits of household waste that had been accumulating here for years, I even managed to dig up a broken TV. The previous owners did not bother going to the landfill and limited themselves to burying in their own barn everything fireproof and not amenable to natural decomposition.
The next layer is broken brick or gravel, acting as a drainage.
We fill the rest of the space with the soil released after the excavations and carefully tamp the whole cake.
In other words, we put everything that was taken out of the ground in the same place, but in the correct order.
8.
For the next row we use tires of a smaller diameter and lay them in a checkerboard pattern with an offset to the inside of the structure. The result is a slightly sloping hill, where the lower rows slightly peek out from under the upper ones.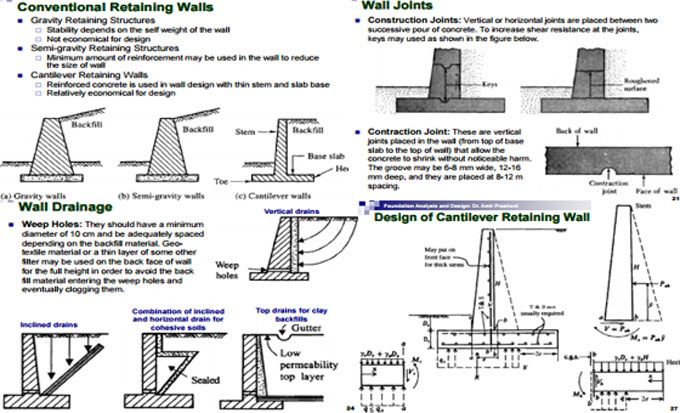
To keep my wall from crumbling during work, I laid the tires in small sections, gradually moving from right to left, from the side with the lower slope to the higher.
It turned out completely waste-free production, the soil removed for laying the next row was thrown into the already prepared formwork from the wheels.
Carefully ramming, I noticed that after these manipulations, the earth leaves much more than we take it out of the same place. The broken brick came in handy, it compensated for the missing volumes.
Since the wheels in subsequent tiers have different diameters, our strict staggered stacking order is gradually broken. This can affect the strength of the structure, especially in those places where the positions of the upper and lower tires coincide and they will be strictly on top of each other.
To prevent this from happening, I decided to break the wall and make an impromptu ladder out of the same tires. To do this, in the center of the structure, I began to lay tires at the bottom with a large offset outward, and at the top with an offset inward.
9.
This ladder is convenient because it is easy to go down to the lower path, it visually breaks the monotonous structure, thereby performing a decorative function, and due to the resulting deformation, it removes the excess pressure of the soil mass on the retaining wall. The resulting steps can be poured with concrete, filled with gravel, etc. I fell asleep with gravel.
Fill the top row of tires with turf and garden soil. We fill the pockets formed between the tiers with the same earth.
Next summer we will plant some climbing plants in this structure, which will densely tighten the tires over time.
10.
Further decoration of such a design depends entirely on your ideas, imagination and desire to experiment.
It should be noted that using tires in this way, we can find many uses for them, from decorative to quite practical. Baths, sheds and other fairly massive structures are placed on the foundations of tires. Retaining walls, terraces and even entire houses are built from tires.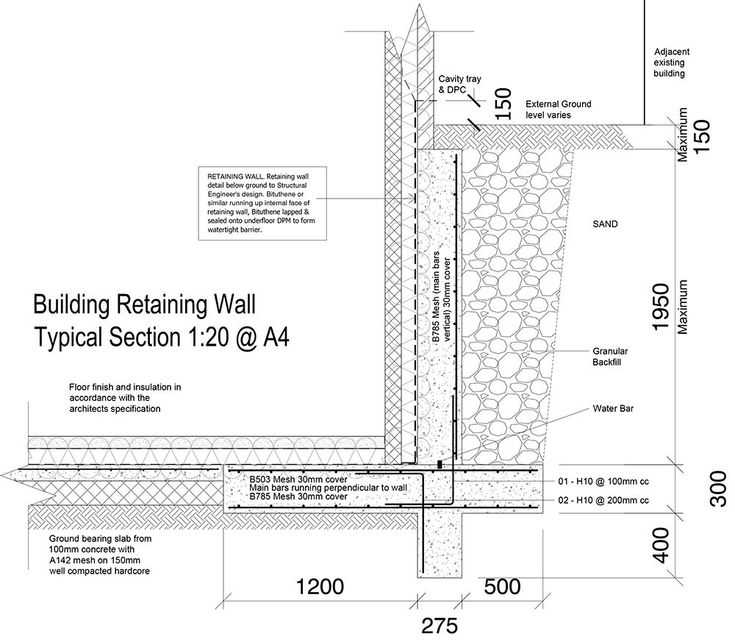 Some people manage to strengthen problem areas of the road with the help of tires, and some use them in their own dachas as a variety of useful devices.
It took me several days off to make the retaining wall, a lot of effort and patience, 80 tires and a couple of hundred self-tapping screws.
Tags: Crazy hands
The construction of a retaining structure on a hilly site is not only a decoration of the landscape, but also an opportunity to protect your yard from soil slipping after rain. If someone thinks that such a building is easy to do with his own hands, he is deeply mistaken. A retaining wall is a complex engineering structure that requires compliance with all construction rules. Today we will take a closer look at how to make a retaining wall from available materials.
Content
 3 Procedure for the construction of wall
 Walls made of natural stone – buta – are a good decoration for a cottage. The large mass of the structure does not require alignment with the hill. After erection, the wall does not need special care and will last a long time. The laying of stones can be done dry, filling the voids with fertile soil. In the future, climbing plants are planted between the seams. But this option requires great skills in laying stone. The best option for building a stone wall in a country house with your own hands is the wet masonry method. It consists in laying stones on a cement mortar.
Each stone can weigh up to 30 kg or more. Sizes and shapes are also varied. Therefore, before laying the wall, it must be sorted:
During the laying process, the stones will have to be chipped down to smaller sizes. For these purposes, use a 5-kilogram hammer and chisel. After trying on the stone, a mark is made on it with a wax pencil. Then, according to the mark, a chisel is set at an angle towards the chip and is sharply beaten with a hammer.
Bandaging of joints of uneven rubble must be observed in all directions: between rubble in each row and between adjacent rows:
When laying out a wall with your own hands, you should not make the structure larger than 1-1.2 m. Without a certain skill, the wall will turn out to be unstable.
Construction of a retaining wall of stones
Construction work must be carried out at a temperature of at least +5 o C.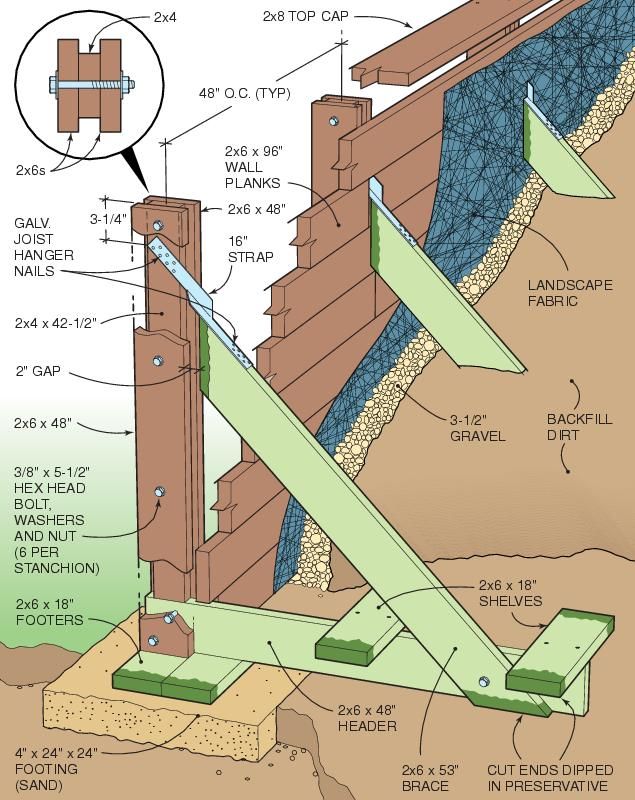 To seal the voids between the stones, separately prepare a liquid mortar. Then proceed to work according to the instructions:
 Fill wide voids with rubble. Next, fill all the small voids with cement mortar. The base is ready for the construction of the retaining structure.
  As the mortar dries, moisten the seams with water so that they gain strength.
 It is more affordable to build a monolithic concrete wall in the country house with your own hands even for an inexperienced owner, although this is a laborious process:
Formwork filled with concrete
Decorative concrete retaining wall with cladding
Do-it-yourself brick support is no different from ordinary wall construction. If a decision is made to lay an ordinary red brick, then the front side will have to be faced. Laying decorative bricks will help to avoid this procedure. You just have to do the stitching.
Particular attention should be paid to the thickness of the masonry:
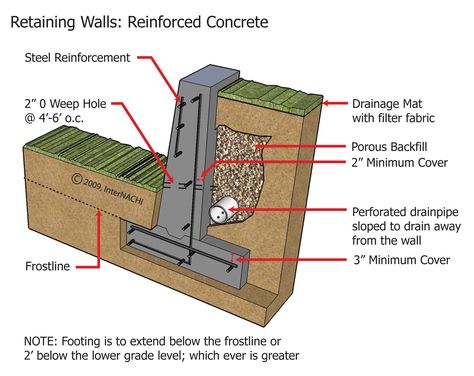
A concrete base is poured under the structure 30 cm wider than the wall itself. The depth is determined by the composition and degree of freezing of the soil, as well as the height of the aerial part.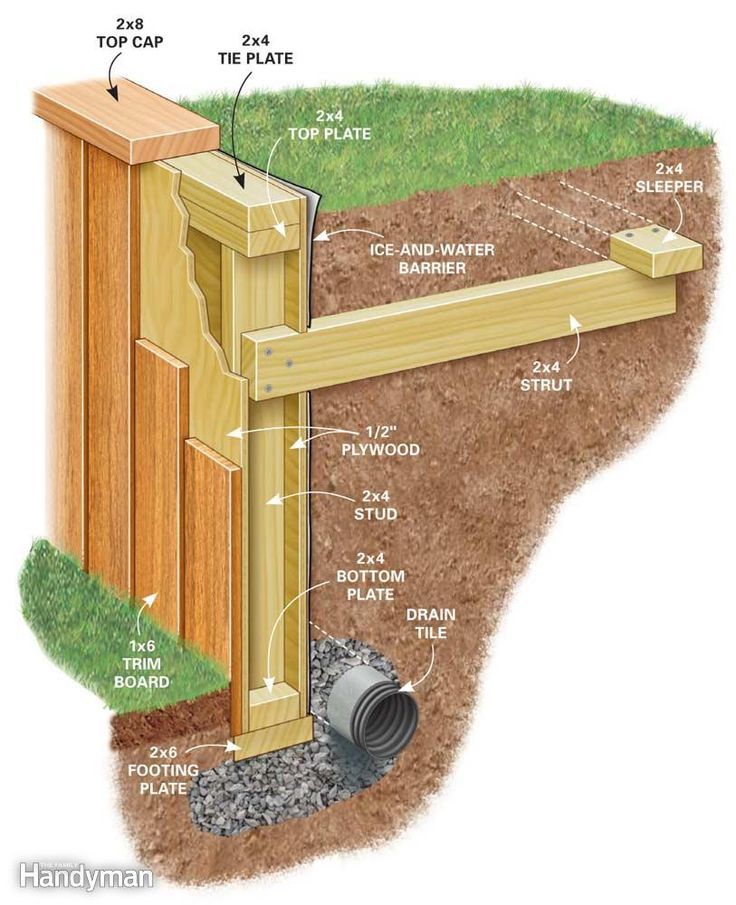 The higher these indicators, the deeper the foundation is needed:
A rather simple retaining wall is obtained from gabions. These prefabricated boxes are made of stainless steel wire mesh. Gabions are produced in different sizes and shapes.
To build a wall with your own hands, it is better to use a box-type gabion:
Gabion structure can deform under high ground pressure, but will never collapse.
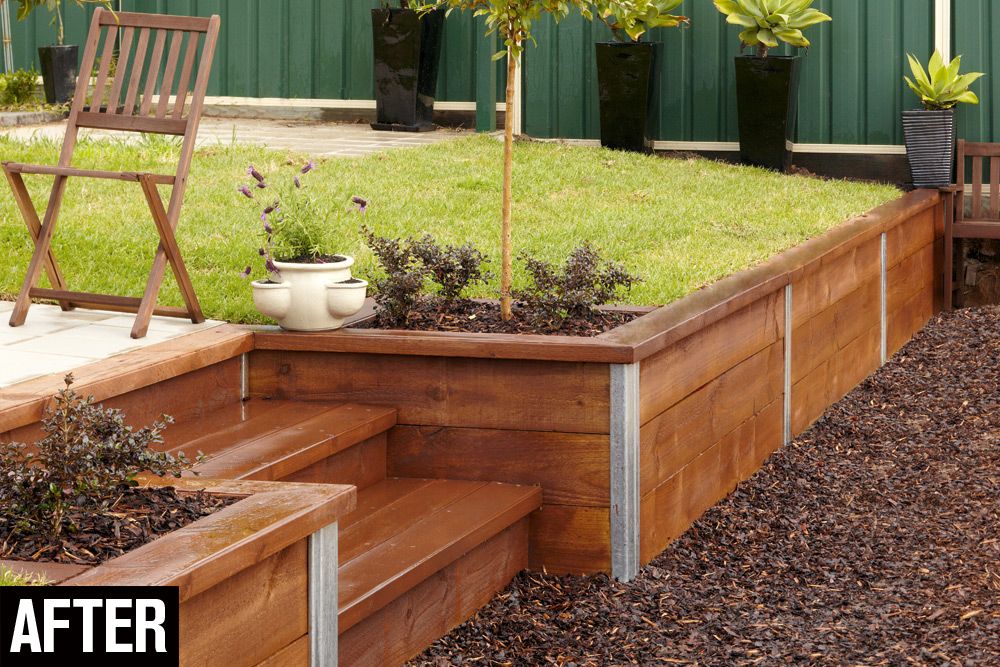
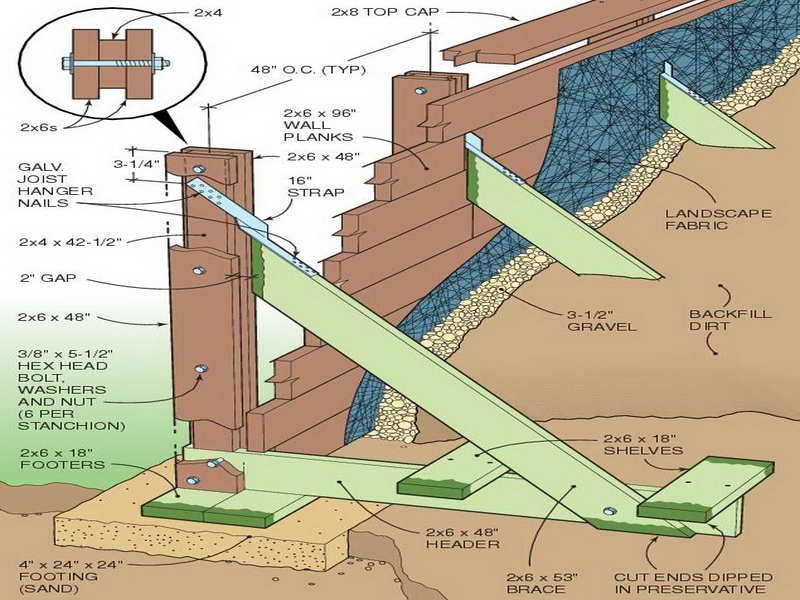
Wood is not the best material for such buildings due to its fragility. But still, this is a good option, especially if the site is located near the forest. From pre-prepared logs, you can build a beautiful support for the ground with your own hands:
 To increase the life of wood, impregnate the logs with an anti-rotting compound.
Wood is a material to experiment with. Having skills in working with wood, it is easy to build a small fence-support from logs of different thicknesses with your own hands. A wall of horizontally laid logs will elegantly decorate the landscape in the country house. This design consists of vertically concreted logs at a certain distance. The spans between the supports are covered with logs, laying them horizontally on top of each other.
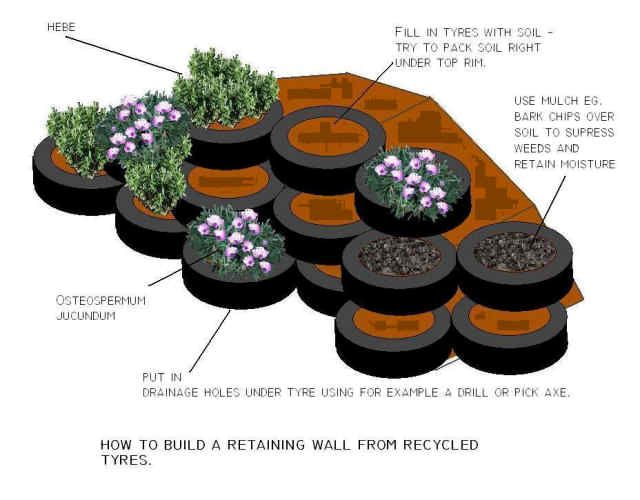
The simplest and cheapest retaining wall made from old car tires.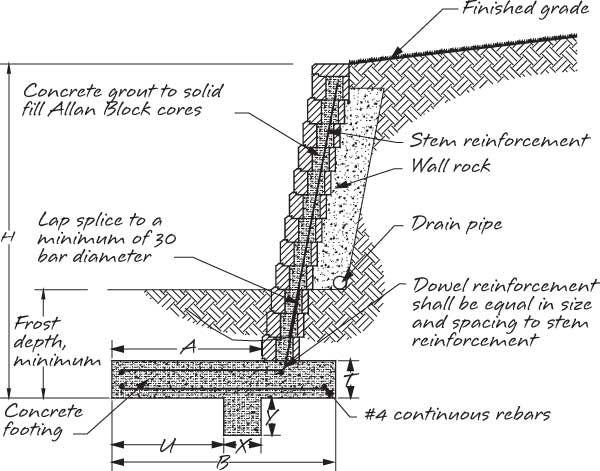 They are laid in rows in the form of columns with a stepped offset towards the hill. Hammer the anchor pile in the middle of the column. Fasten the tires to each other and to the pile with clamps made independently from a conveyor belt. Fill the inside of the tires with fertile soil. You can plant climbing plants in them to decorate the wall.
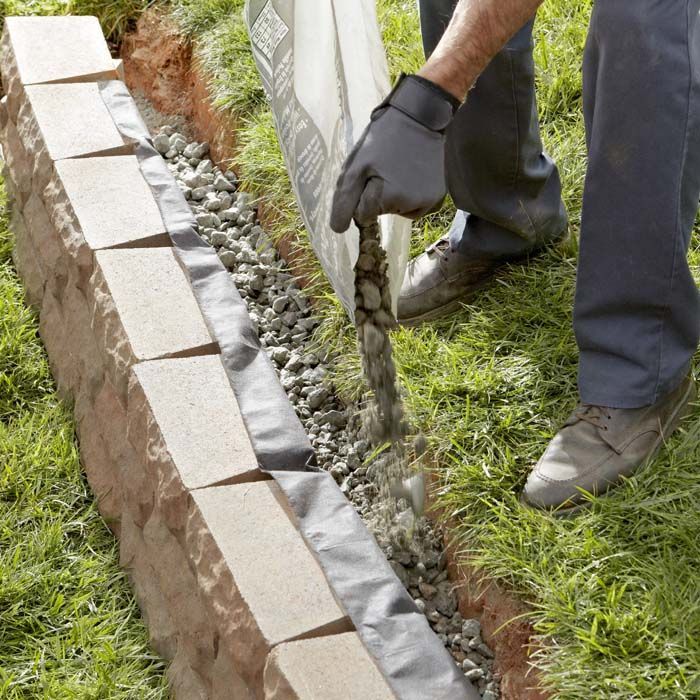
Before backfilling the soil between the wall and the hill, a number of measures must be taken:
Longitudinal drainage: 1 - wall, 2 - foundation, 3 - drainage, 4 - crushed stone, 5 - geotextile, 6 - sand, 7 - soil.