This step by step diy project is about 12×16 ATV shed plans. I have designed this 12×16 shed with a roll up front door and a side door, so you can shelter an atv or a bike. You can build this shed in about one week if you have all the materials at hand and if you have an extra pair of hands to help you. Don’t forget to check PART 2 of the project, so you learn how to frame the roof. Take a look over the rest of my woodworking plans, if you want to get more building inspiration.
When buying the lumber, you should select the planks with great care, making sure they are straight and without any visible flaws (cracks, knots, twists, decay). Investing in cedar or other weather resistant lumber is a good idea, as it will pay off on the long run. Use a spirit level to plumb and align the components, before inserting the galvanized screws, otherwise the project won’t have a symmetrical look. If you have all the materials and tools required for the project, you could get the job done in about a day.
See all my Premium Plans HERE.
Building-an-atv-shed
[tabs tab1=”Materials” tab2=”Tools” tab3=”Time” tab4=”Related Plans”] [tab id=1]
[/tab] [tab id=2]
Hammer, Tape measure, Framing square, Level
Miter saw, Drill machinery, Screwdriver, Sander
Safety Gloves, Safety Glasses
[/tab] [tab id=3]
One day
[/tab][tab id=4]
[/tab][/tabs]
Make sure you follow me on Facebook to be the first that gets our latest plans and for some other exclusive content.
 Also, follow me on Pinterest to get many ideas for your backyard from all the internet! Check out our YouTube channel! See how you can Support Me with no extra costs to you.
Assembling-the-floor-frame
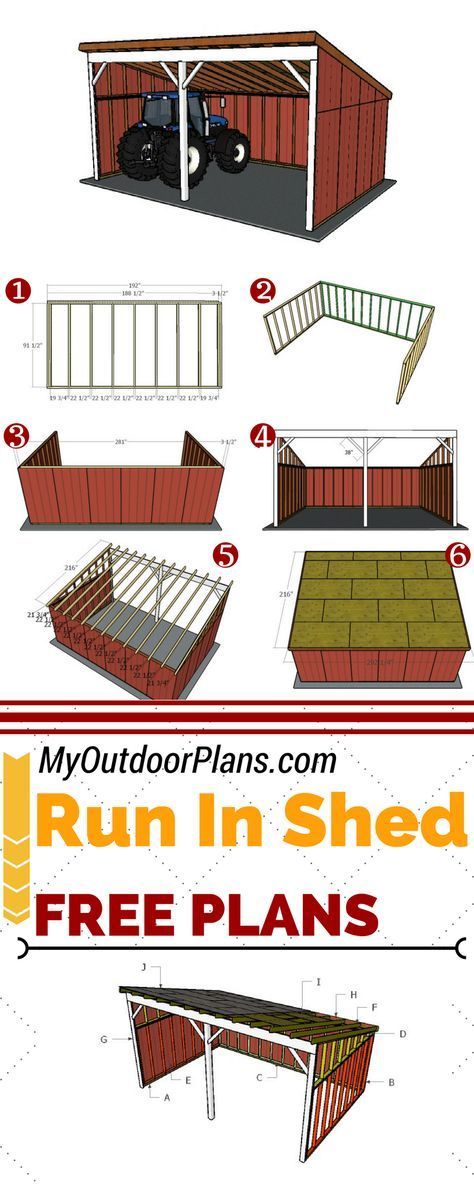
The first step of the project is to build the floor for the atv shed. Use 2x6s or 2x8s for the joists. Take accurate measurements and then cut the joists to size. Drill pilot holes through the rim joists and insert 3 1/2″ screws into the perpendicular components. Make sure the edges are flush and check if the corners are square.
Attaching-the-floor-sheets
Attach the 3/4″ plywood sheets to the floor joists. Align the edges flush, leaving no gaps between the sheets. Insert 1 5/8″ screws every 8″ along the joists, so you secure the panels into place tightly.
Side-wall
Continue the project by assembling the side walls. Cut the components for the plain wall from 2×4 lumber. Work on a level surface, making sure you align the edges flush.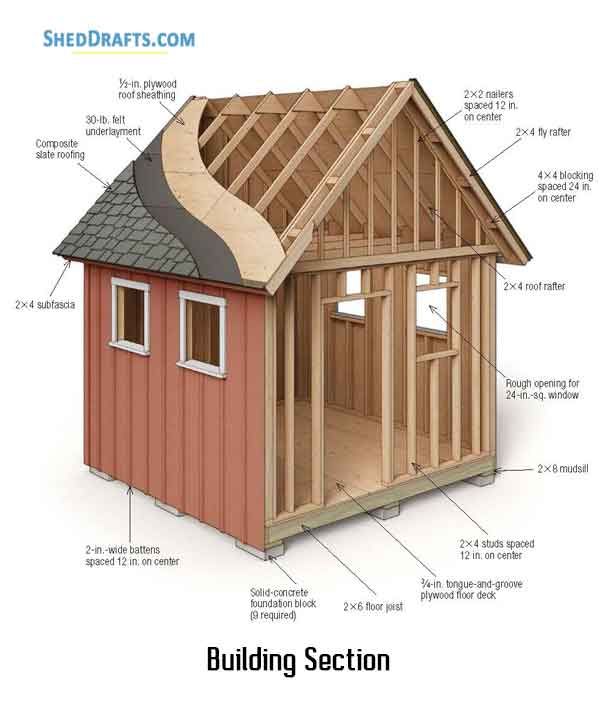 Drill pilot holes through the plates and then insert 2 1/2″ screws into the wall studs. As you can notice in the diagram, you need to attach triple studs at both ends of the walls.
Side-wall-with-door-frame-plans
Assemble the opposite side wall. This time you need to frame the opening for a 36″ door. Align the edges with attention and make sure you adjust the opening to suit your needs. The double studs for the door and the header will give more strength to your structure.
Fitting-the-side-walls
Attach the side walls to the floor of the 12×16 shed. Use a spirit level to plumb the side walls and use 2×4 braces to lock them into place temporarily. Drill pilot holes through the bottom plates and insert 3 1/2″ screws into the floor.
Building-the-back-wall-frame
Assemble the back wall from 2×4 lumber. Attach the double top plates to the wall, so you enhance the rigidity of the structure.
Front-wall-frame
Build the front wall for the atv shed. In order to enhance the access to the 12×16 shed, you need to leave enough space for a roll up door.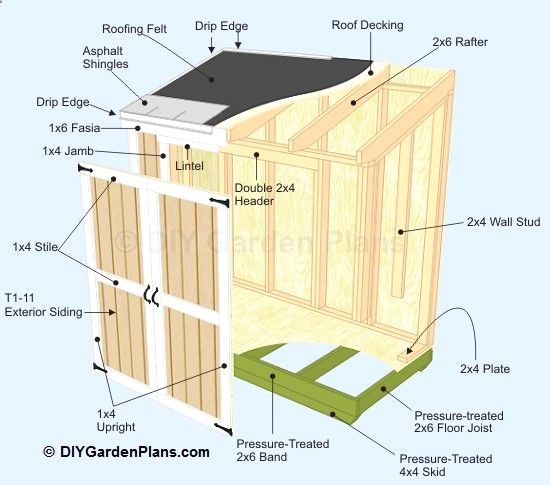 The opening is 8’x7′ so it shouldn’t be hard to find a door that matches. In this manner, you can store an atv or bikes in this small shelter.
Assembling-the-frame-of-the-shed
Attach the front and back walls to the floor of the shed. Align the edges flush and lock the adjacent walls together by inserting 3 1/2″ screws, after drilling pilot holes. In addition, insert 3 1/2″ screws to lock the bottom plates to the floor.
Attaching-the-back-panels
Attach 5/8″ T1-11 siding to the back wall frame. Align the sheets to the top edge of the wall frame. Use 4d nails to secure the panels to the framing, every 8″.
Side-wall-with-door
Attach the siding to the side walls. Make sure you cut out the door opening, so the sheets fits into place easily.
Side-wall
Attach the siding to the opposite side walls.
Front-wall-panels
Attach the 5/8″ T1-11 siding panels to the front wall of the ATV shed. Cut the panels at the right size and shape and then attach them to the wall frames with 4d nails.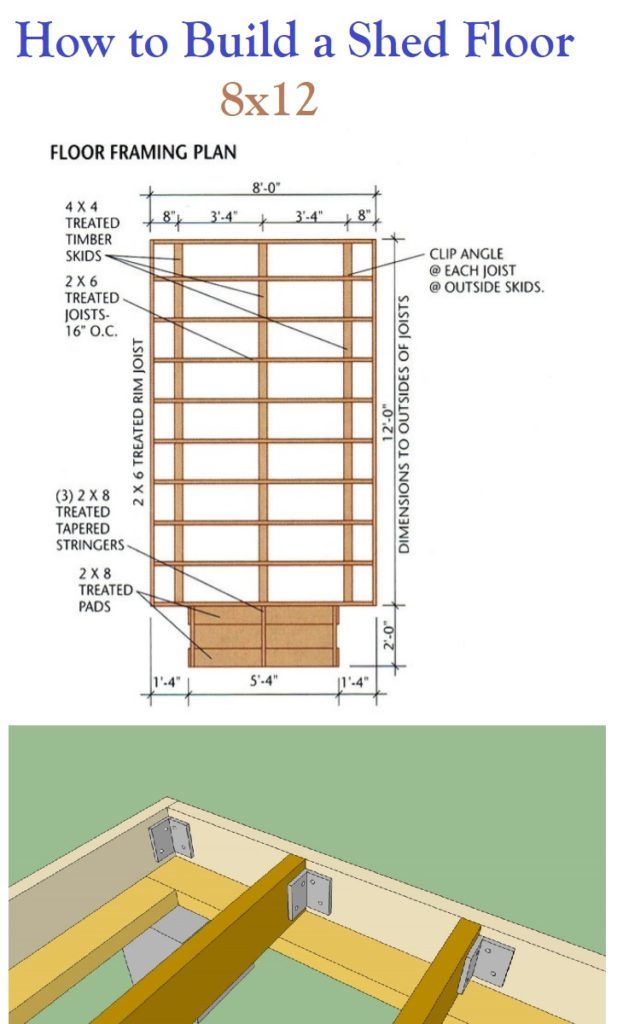 Align the edges flush.
ATV-shelter-plans
This is a simple project you should be able to build in a few days without much effort. This 12×16 shed is a multi purpose shelter. You can use this run in shed for storing tools, equipment or your favorite ATV. Check out PART 2 of the project to learn more on how to build the roof for the shed.
This woodworking project was about atv shed plans free. If you want to see more outdoor plans, check out the rest of our step by step projects and follow the instructions to obtain a professional result.
If you own an ATV or several ATVs, then you fully understand the importance of keeping this valuable and expensive investment safe and looking its best!
Now the question is how?
This article offers you some effective ways to properly protect your ATV against bad weather and unwanted “admirers”. Plus, tips for how to store your ATV in an ATV shed during its off-season.
Let’s get started!
Table of Contents
Absolutely. In fact, an ATV shed provides one of the most economical and effective ways of keeping your prized joy ride safe and well-maintained. A shed’s floor is strong and fully capable of housing multiple ATVs. Plus, ATV sheds come with a lock and key for maximum protection against burglars.
If there is not enough room in your garage or you cannot afford to invest in a garage, then an ATV storage shed provides you with an immediate and budget-friendly solution.
The smallest ATV shed size that you should go with is a 10×10. A 10×10 provides just enough space for storing one ATV. For a bit more room, choose a 12×10 shed. If you are wishing for storage space for two ATVs, go with a 12×20 shed.
Since there is a size limit for your ATV shed, certain sheds, like plastic resin sheds, are a lot harder to find since their sizes tend to stay below 8×10.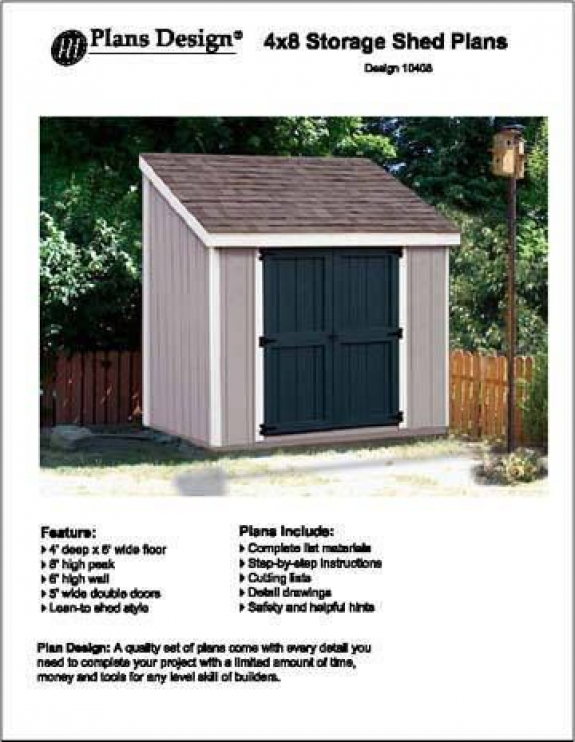
Now that you have an idea of the ideal sizes for an ATV shed, let’s discuss available ATV shed ideas and discover your top pick!
The following offers you 5 different types of ATV storage sheds starting with the least expensive. Plus, the pros and cons of each option.
Photo Credit: Amazon
A heavy-duty plastic tarp ATV storage shed is a built-in, shed-like canopy with heavy-duty steel framing and no flooring. It is secured to the ground with heavy-duty pegs. This type of ATV shed is ideal for one ATV.
Pros:
Cons:
Check out the following heavy-duty plastic ATV shed and see if this ATV storage shed is the right fit for you.
View Heavy Duty Plastic Tarp ATV “Shed”
Photo Credit: TMG Industrial
Higher quality metal ATV sheds are built entirely out of galvanized steel. This type of ATV storage shed comes in second for being the most budget-friendly.
Pros:
Cons:
If you are wishing for a metal ATV shed for one ATV, check out the following ATV storage shed.
View Metal ATV Shed
Wood ATV sheds are built with wood framing and either natural wood or engineered wood siding. They are very structurally sound and able to be easily customized. Wood sheds are a bit more expensive than the previous two ATV storage shed types.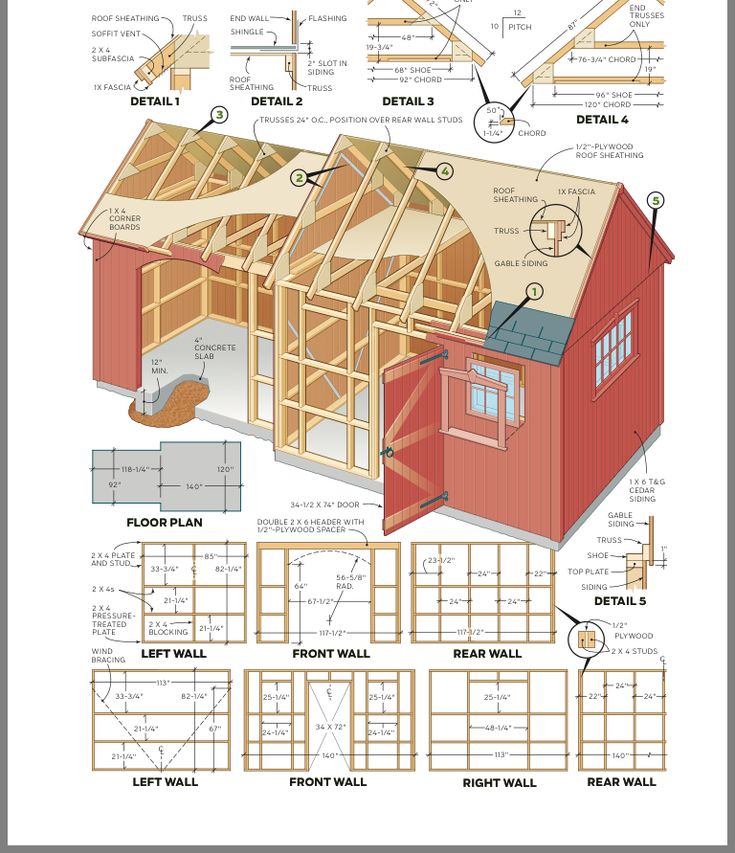
Pros:
Cons:
Check out the following wooden ATV shed if you prefer the quality and natural beauty of wood.
If you want more headspace inside your ATV storage shed, the Maxibarn offers an excellent interior space and height.
Vinyl ATV sheds are usually wood framed with vinyl siding. This combination creates an extremely durable structure with a low-maintenance exterior. Vinyl sheds are the most expensive option for protecting a single ATV or UTV.
Pros:
Cons:
Check out the following vinyl ATV shed and see if this is the type of ATV storage shed that fits your desired criteria.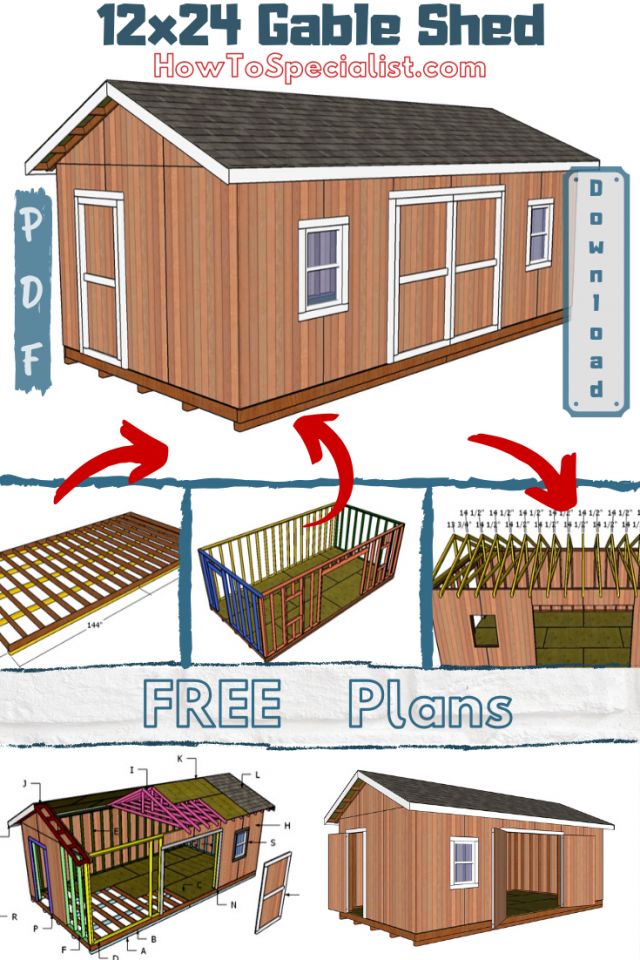
The garage ATV shed is a much larger-sized shed with an overhead garage door. Typically, a garage shed’s size starts at 12×20. This type of ATV shed is ideal for storing more than one ATV and/or space for additional storage. Thus, due to its larger size and space capacity, this type of ATV shed is the most expensive.
Typically, this type of ATV shed is either wooden, vinyl or metal.
Pros:
Cons:
NOTE: * For reference of the cons of either a vinyl, wood, or metal ATV garage shed, review the lists above.
Once you finally have a secure and weather-safe place for your ATV, here are some tips for how to prepare your ATV for extended storage during its off-season.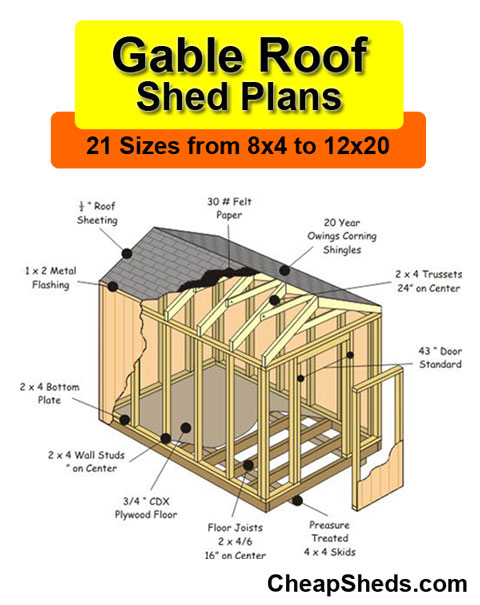
Usually, an ATV’s off-season is during the winter and one of the problems that arise with storing your ATV away for long periods at a time is that the life of the ATV’s battery decreases.
To help maintain a healthy battery lifespan (and to be able to easily start your ATV again in the spring) hook your battery up to a battery tender. Without stealing too much energy, a battery tender can keep your ATV’s battery charged and fresh even if you do not drive your ATV for 3 or 4 months.
Here is a highly-rated battery tender to consider.
Right before storing your ATV(s) away, give them a good washing. Leaving mud and dirt on your ATV can cause corrosion. So, grab a hose, some safe soap (if needed), and a soft rag and give the needed areas of your ATV a thorough cleanse.
Rinse, pat dry, and use WD-40 on the metal pieces, especially the exhaust pipe. If you wish, you can add a protectant to any of the plastic parts on your ATV.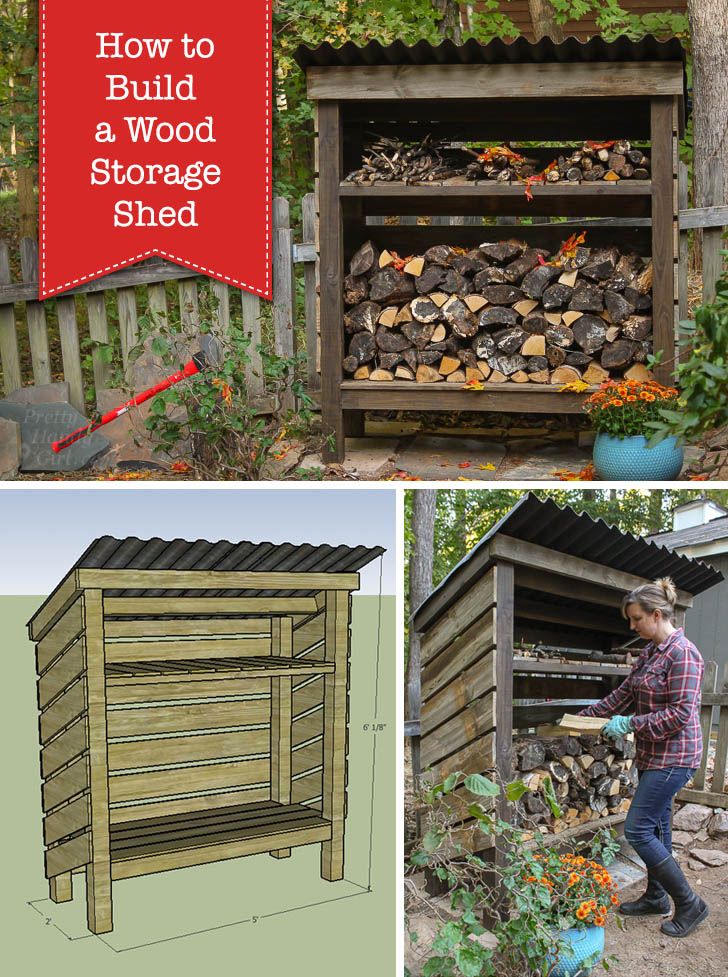
It is wise to make sure to change the oil inside your ATV to avoid the old oil from solidifying.
Also, you should change or clean the oil filters.
Gas left inside the tank for an extended amount of time needs special attention. Depending on whether your ATV has a metal or plastic gas tank, this attention will differ.
If your ATV has a metal gas tank, then fill the tank full of fresh gas and add some fuel stabilizer.
If your ATV has a plastic gas tank, then empty the tank entirely.
Lastly, make sure your ATV’s tires are filled with air.
Tires lose air over time and ensuring your ATV tires are full will help keep them from being flat when you finally decide to go riding again.
For more details and tips on proper storage of your ATV(s) check out this super helpful article, ATV/UTV/SXS Storage Tips.
Hopefully, the above information helped you nail down the right ATV shed for your prized ATV(s).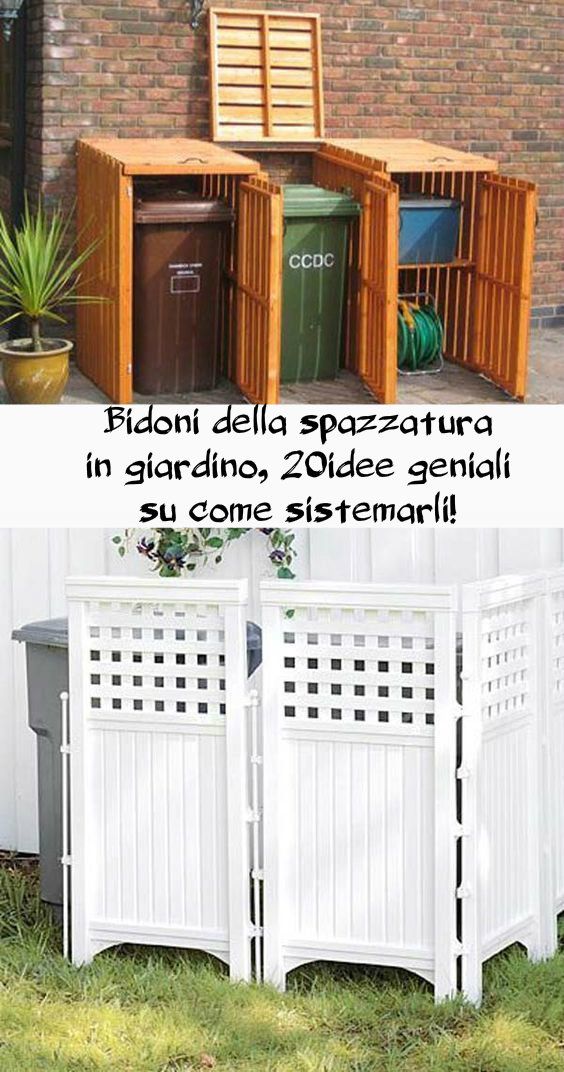 Proper storage of your ATV is SO worth it.
Here’s a fun fact. Once you have an ATV storage shed of your own, you will never look back! If you have any questions, just contact us!
If you are in the northeastern part of the USA, check out our company, Sheds Unlimited. We offer a wide range of sheds for sale and many of them make great ATV/UTV sheds. Delivery of your shed is free for the first 20 miles. We will bring your selected shed directly to your home and place it in your desired location.
We welcome you to visit our shed building facility in Lancaster County and get a first-hand view of the ATV sheds, prefab one-car garages, and other storage buildings in our lineup. We also offer double-wide modular garages. If you’re interested in learning more about double-wide garages, click here.
Wishing you many happy joyriding moments ahead!
Regardless of the area of the house and the bathhouse on the site, you can’t do without a shed.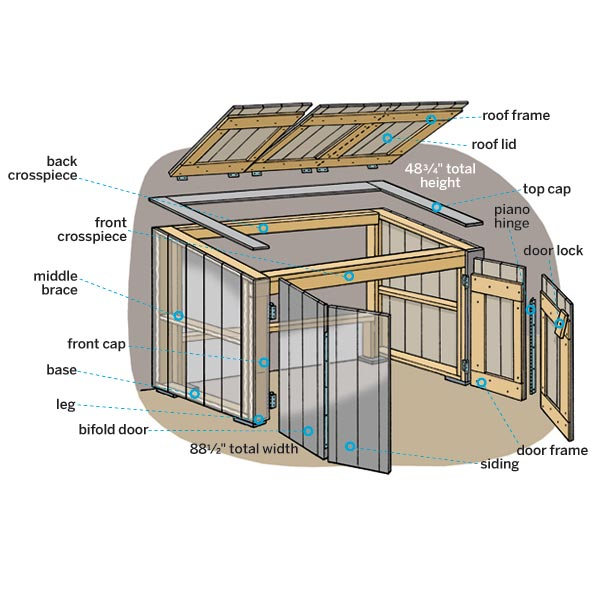 As such, it will not work to store and bring everything into the house, even if there is a place where to place things, and if there is no place, then even more so - therefore, an outbuilding is simply necessary. This may even be the first experience in the independent construction of such a building, and even without special skills and experience.
Contents
The choice of in the first place is based on the tasks that the barn should perform, what will be stored in it and what work will be done in it, at what time of the year and in what place of the site. If the construction work will be done by hand, then this factor also reduces the choice of options for outbuildings. nine0003
First, it is worth deciding where the site will be equipped with a barn, and how important the aesthetic component will be - if your task is to build at the lowest cost and the financial component is in the first place, then you should not spend money on expensive finishing, especially if the barn is located on the edge of the site or area where it is not visible at all. Also, a barn can be combined with a garage to store a vehicle, ATV, snowmobile or some other equipment there. In this case, you will have to pay attention to the possibility of access from the street. nine0003
If it is possible to perform any plumbing or carpentry work indoors, then for full-fledged work, any minimum comfortable conditions are arranged inside. The room should definitely be planned into small sections - for more rational storage of inventory, and any materials, in order to provide more comfortable and quick access. If the shed is provided for in terms of small area, but a large volume is required, then in this case you can resort to a two-story building. Also, do not forget about the possibility of organizing a cellar for storing products from the garden. nine0003
It is better to choose a roof based on ease of installation and price, also do not forget about seasonal features and rainfall for the winter period. A shed roof with a low pitch and a roofing material that does not promote snowmelt will not be satisfactory in areas where there is an increased level of snowfall. A gable roof with a sharp ridge will be optimal for buildings with two floors, but in this case, half of the ceiling volume of the second floor will be sloping by the roof, since the ceiling of the second floor will be the roof. nine0003
Insulation and heating installation also directly depends on the required parameters inside the building, if you are going to grow plants or keep animals there, then this will be a mandatory requirement, as well as installing electricity.
The foundation should be chosen first of all depending on climatic conditions and soil type. But all parameters satisfy the pile foundation, the exception is if a garage is planned. Under the platform for the equipment, you will have to make a dense base with the possibility of water flow into the ground.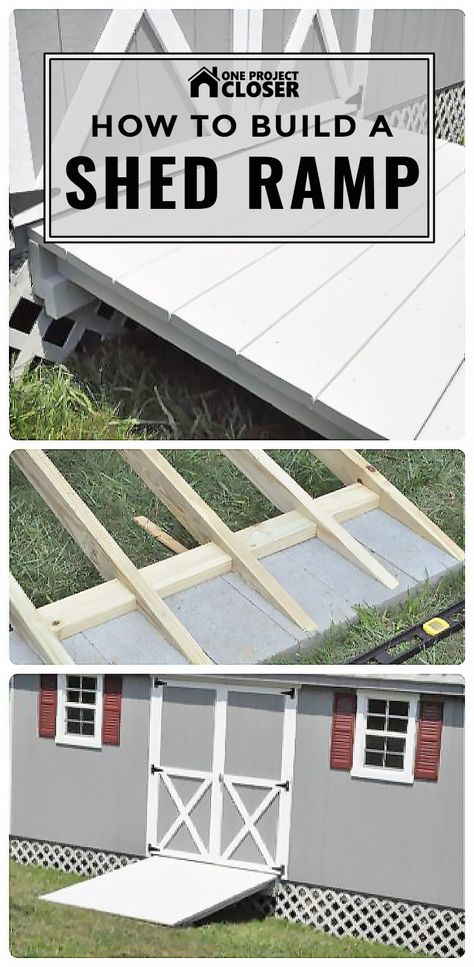 nine0003
Due to the fact that the barn is an outbuilding, it does not require architectural excesses, but against the background of the site and other buildings, it should not be conspicuous and attract attention. You can select the most rational options:
The correct choice will come from the following considerations:
 nine0008
 To build a barn with your own hands, you will need a list of building materials first. Based on that option. which one you decide to do, you need to decide on what technology, according to the instructions, and from what materials the work will be done. As a matter of fact, a barn is a non-residential building, in exceptional cases with heating, therefore, in legal terms, only small town-planning and SanPiN requirements remain.
Continuing the conversation about papers, it is correct to start all work with the project: it should include at least floor plans with axes and dimensions, foundations, facade sheets with elevations, as well as roof structure, specification and estimate of materials. Based on practice, even the majority of quickly downloaded simple projects from the Internet are approved without any verification of the fact that this building is and for what purpose it will be operated. nine0003
But what calls for special attention is the layout of the building on your site, including the layouts of the neighbors' plots and their consent to build a barn. It is worth collecting these papers immediately, before the start of any work, and they are valid for three years.
What is better to choose for the construction of households.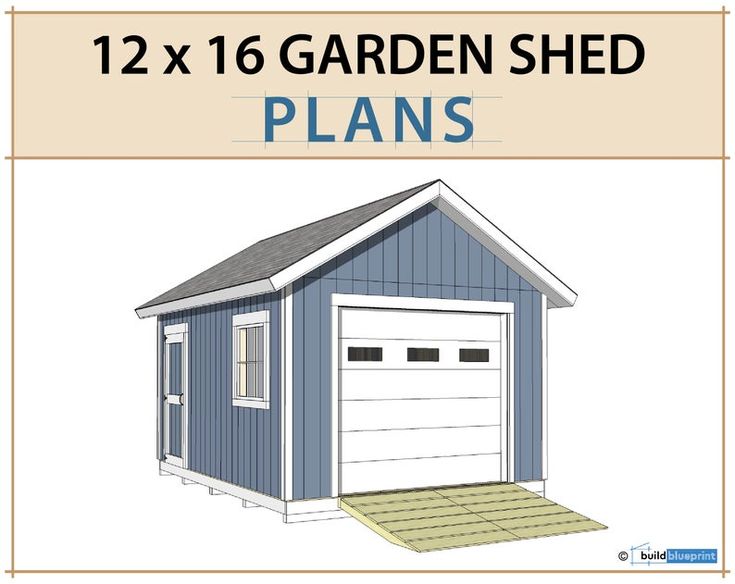 6 × 3 buildings? What are cheap, easy to work, deliver and inexpensive materials to choose? Of course, softwood lumber. nine0023 In the central and eastern part of Russia there will be no problems with purchasing a board. In the steppe and desert regions, the price will be higher due to the long distance delivery. At the same time, this option combines an external aesthetic appearance even without painting.
 It is based on the construction of a supporting frame made of timber, and sheathed with OSB sheets or similar. But they will require additional processing from the external environment, at least by priming, and ideally by sheathing with cheap siding or polycarbonate. The floor is made of plank.
 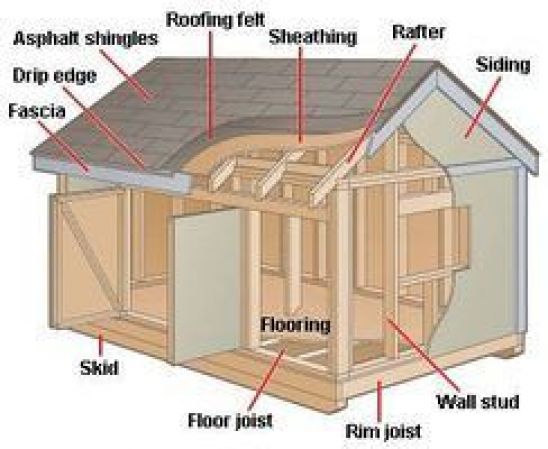 Given its low weight, it can also be built on a columnar foundation on a crown of timber.
 What type of roof to cover the barn? Single or double slope? To build a frame shed with a shed roof with your own hands will be quite within the power of any person, even without special skills. Technically, for a shed, the difference will be only in aesthetics, there will be no functional and technical differences other than a difference in construction, except for a small difference in ventilation of the internal space. A shed roof without additional factors provides full ventilation for a 6 × 3 room. nine0003
Below we describe how the work is done step by step.
If you are making a temporary barn without a foundation, then you need to put it on a pillow, for example, from crushed stone 20-50 cm thick, it is poured into a pre-dug pit at the desired level so that the pillow ends up flush with the ground. Durable barn will require a full foundation, but simpler than that of a house or other residential building. Large residential sheds for animals are built on a strip or column foundation. nine0003
The best option for a personal shed would be to equip a columnar, based on rough-filled piles. They are hammered or installed in a small round well at a specified depth, at the bottom of which a pillow is made of ASG, and the volume around the pile is poured with concrete.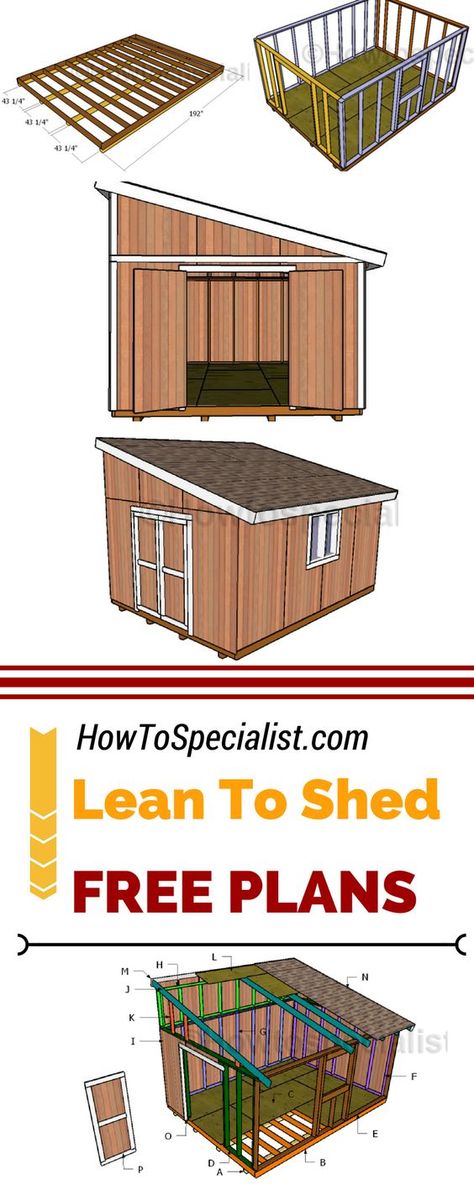 To do this, we need a sand-gravel mixture and M400 cement, depending on the number of piles, at the rate of 1 bag of cement per 9 bags of ASG: , as a result, we get concrete grade M150 .
To transfer the plan from paper to the site, a perimeter of pegs and rope is stretched along which the piles will be installed. Next, we drill wells for piles, pour equal layers of sand and gravel there separately, in this case, ASG cannot be used. We turn off the sleeves from the roofing material, install it on a pillow in the well and gradually fill in the cement in layers of 15–20 cm. After 7 days with a positive temperature regime, it will be possible to proceed to the next stage. nine0003
Take as an example frame shed . We begin work with the production of a frame from a bar, according to SNiP, such a structure cannot be called a building, but the standards require the use of metal fasteners at least 4 mm thick, but in practice this is not necessary. When fastening according to the method in a paw and a spike, it is not necessary, due to the complexity of execution, as well as uselessness. All beam connections can be made on special metal brackets, which are purchased ready-made to fit. nine0003
To strengthen the frame, you can install braces 40-60 cm long at the corners. The sheathing of the frame is best - plank, covered according to the herringbone method, that is, in a cover, one face lies on the plane of the previous board. As well as an option, you can consider covering the lanterns or sheets of OSB, chipboard with additional processing.
The next option would be corrugated board, but from the minuses it can be distinguished that even in summer it will be cooler there than on the street, but in economic terms it may turn out to be cheaper than sheathing with wood sheets with sheathing. nine0003
About the minuses and pluses of the roof has already been said . To build a barn with a shed roof, rafters with suspension will be enough, without crossbars - a board that connects the rafters under the ridge.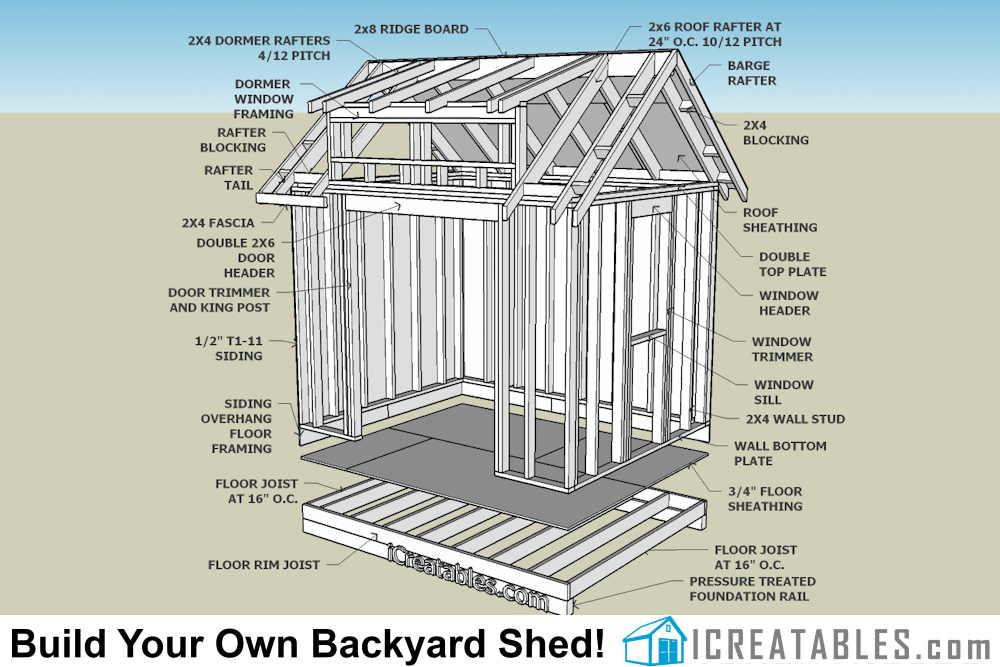 Material 100 mm high and 40 to 60 mm thick will suffice.
Mauerlat - not required. Farms - rafters fastened together with a rack - are attached along the perimeter of the frame with an equivalent step to stamped metal fasteners without cutting into the timber. Further, a crate and roofing material are laid on top of the trusses - for example, the same corrugated board, or a crate with a plywood backing with roofing material. nine0023 Optionally, drains are placed along the perimeter of the slope .
Do-it-yourself barn
Spring is the time when bicycles, balls, scooters, tents, shovels, rakes and wheelbarrows are taken out of pantries and sheds at their dacha, and skis, sleds, skates and snowboards take their place until December. It is generally accepted that this is the time to restore cleanliness and order after the long and cold winter months, the time of general cleaning and landscaping the garden. Here, the house and the garden have changed, but, out of nowhere, a bunch of unnecessary things are taken, which have nowhere to store, and they, as usual, either stick out in the corners, or hide in a closet or garage, where they don’t belong at all, just so as not to spoil overall picture of order. But it happens that they stand all summer on the porch, outside the door, everyone stumbles about them. nine0003
But solving the problem is much easier than it seems...
LT series installation and assembly video:
. GarazhTek has foreseen this as well. A plastic shed will help unload mezzanines, balconies and garages from seasonal items. Here, a lawn mower, and jars of jam, and a barbecue set with a smokehouse, and an inflatable mattress, and sacks of potatoes, and many, many other things that now will not get in the way under your feet, but neatly laid out on shelves, on their places, in your new "garden closet". nine0003
Hozblok on a pre-prepared base
Hozblok from GarageTek does not spoil the landscape of the cottage or suburban area. On the contrary, it blends harmoniously with the facade of the house and complements the garage storage system.
.
Expandable hozblok 305x244 cm. If you need to increase the area, just use the expansion module.
GarazhTek plastic shed is a ventilated warehouse that can be equipped with a storage system: grid shelves, baskets, cabinets of any size, sports equipment storage brackets, plastic shelves, workbench. The plastic hozblok does not fade in the sun, endures the harsh Russian climate with dignity, is resistant to humidity, easy to clean, and, if desired, moves and expands by inserting an additional module. A plastic shed from GarazhTek can be placed both at a distance from the house, and adjoin the cottage with the back or side walls. nine0003
Storage blocks 244x76cm in the back yard as a storage room adjacent to the house.