After you’ve been riding a quad for some time, you start building experience and confidence. It only makes sense to want to build some jumps in the backyard. Sure, a full on motocross track would be great, but not everyone has the time or space for that. Besides, you’d be surprised what you can do with just a little space, and how much fun you can have riding on a small track.
The topics I go over in this article can be used for any size space you have available, and you can make your track as big or as small as you’d like. But, the first step is planning.
When you start planning your ATV riding track, there are a lot of things to consider. Before you even start designing the layout, there is planning to do. First, you need to pick the site. This is important, and you don’t want to end up with legal problems later on down the road.
If you have neighbors close by, be prepared for noise complaints. I know, I thought everyone loved the sound ripping engines all day too. I can’t for the life of me figure out why, but they don’t. If you get dry seasons where you live, then you have to worry about dust kicking up too. A fence could help with the noise and dust, but you’ll need to check with your local building department about any setback requirements, and putting in a fence adds to the cost of the track. If you can, find a place with plenty of room where it bother the neighbors.
Water will always find its way to the lowest point, and will cause erosion on its way there. If you can find a naturally sloped area to build your track, then great. Otherwise you may end up putting in drainage pipes or sloping the terrain yourself. Take care to think about erosion control while you choose your location and start your planning. If you do install drainage pipes, keep in mind that they need to be covered with a fair amount of dirt. The ATV’s you plan on riding on the track will destroy most drain pipes over time.
You don’t want to get sued. You will probably want to allow people over to ride on your track at some point. Having it all to yourself is great, but sooner or later, you’ll want to ride with other people. Talk with your insurance agent to find out what your policy covers. Your insurance might go up if you want to allow visitors to ride ATV’s on your property. Accidents happen, talk with a lawyer to find out what would happen if someone got hurt on your property. In some cases, even a trespasser could sue you for damages if your track wasn’t properly fenced off. I’ve even been to places where I had to sign a waiver, basically saying I won’t sue if I get hurt.
If you can avoid having to buy dirt to build your track, you’re already ahead of the game. Buying dirt can be expensive, try to only buy dirt if you have to. I recommend working with the natural terrain. This will be done differently for every piece of land, but try to locate any hills and use them to your advantage.
It may be a good idea, if you have the space, to dig a pond near the track, and use the dirt from that to build the track with. You could dig out the side of a hill, use the hillside as a berm, and use the dirt for some tabletops or jump ramps. You have to get creative here if you want to save yourself from buying dirt. If you do end up needing to buy dirt, loamy soil works best but is the most expensive. Clay based soil holds its shape better, but sandy soil drains better. Loamy soil is a good medium between the two. I lean more towards clay based soil because I like the track to hold up over time.
Once you have all the approvals and a good spot picked out, its time to start designing the track.
For me, this is the fun part. I just love planning out what’s going to go on the track, to me, it’s exciting. The first step here, is decide what type of track you want to build. Maybe you want more of a supercross style track as opposed to motocross. Or maybe you just want a few whoops and jumps with a more natural feel to the track.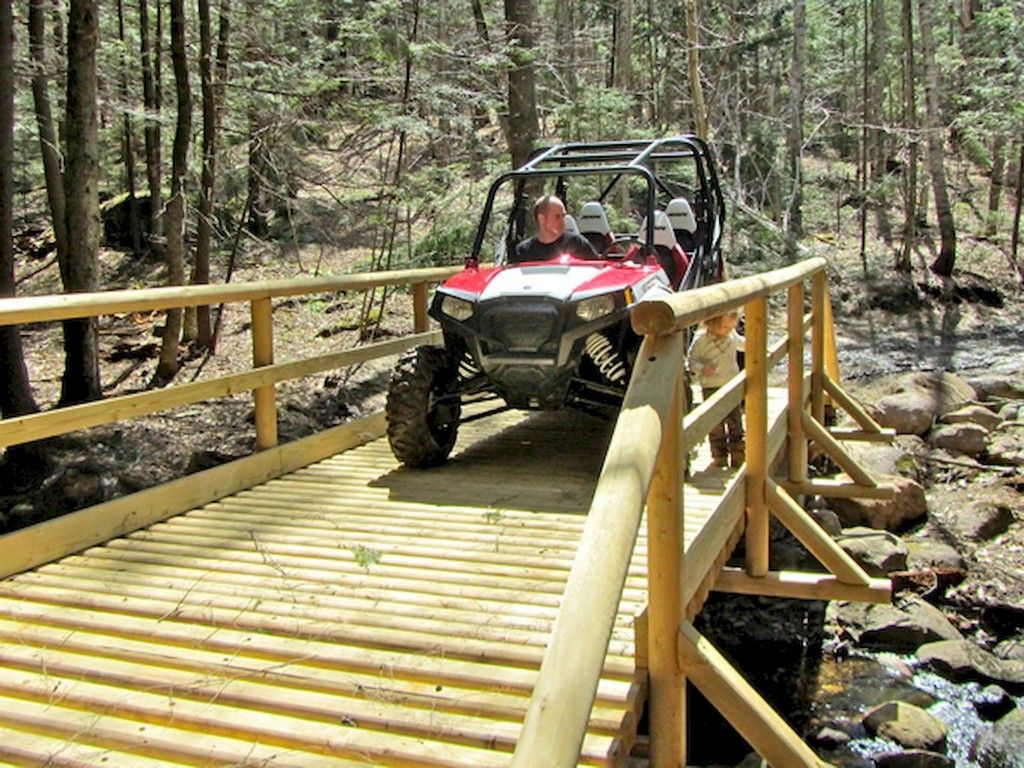
The type of terrain you have to work with might affect your decision too. If you have a super flat piece of land you might consider a supercross track, if you don’t mind bringing in a lot of dirt. If you have more hilly terrain, I would go with a more natural track or a motocross style track.
Also keep in mind why you’re building the track in the first place. What skills do you want to improve on and what type of riding do you enjoy the most? If you want to work on speed and cornering, I would go for motocross or a natural terrain track. If you can’t get enough of the jumping, level an area and build jumps, supercross style. If you’re building this for fun, I would go with a bit of a combination. Mostly natural terrain, but with enough obstacles to keep it fun.
Actually starting the design is very different depending on which type of track you chose to go with. If you want a more supercross style track, you will need very accurate drawn up plans of every obstacle and where they will go.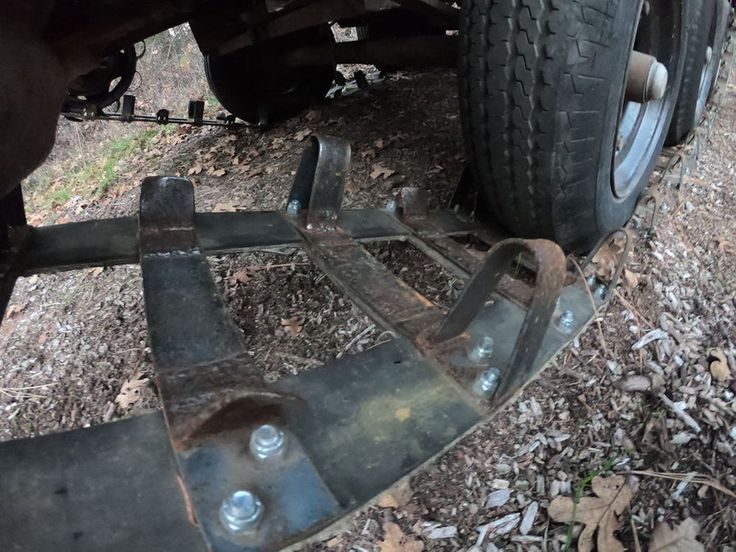 A more natural motocross style track, you can basically wing it, I wouldn’t even worry about drawing up plans.
To start with a supercross track, create a scale drawing to work with. Supercross is entirely man made, you will need to flatten a good portion of land to make one of these. Try to design long straight lanes, that way you can put bigger obstacles in your track. Keep it simple with complete 180 degree turn arounds back to back. It would look like a series of parallel straight aways at first. Then add your obstacle in. You will need a lot more dirt to build this type of track.
If you want to go with a natural terrain track, there’s no need for planning or drawing. You could simply scout out your area on your ATV and sort of free ball it. Try to make the most of the land you have to use. Hills are great spots to create banks, step-ups, step-downs, berms, jumps, and so on. Avoid sharp turns, and plan using areas with available dirt. Avoid large rocks and trees that will get in the way, but keep in mind you can rent machinery to help scrape up the terrain.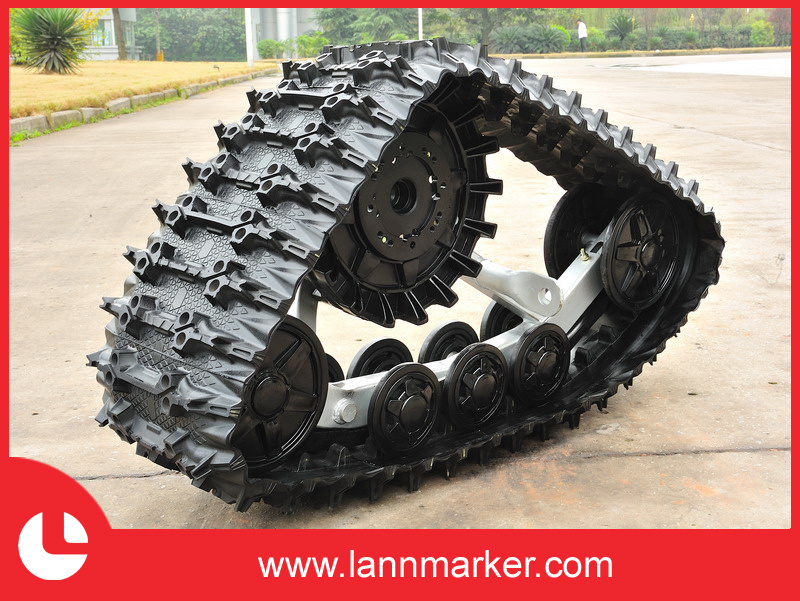 Creating jumps out of hills, and building upon existing features will help you. The very first tracks ever made were made out of the natural terrain, for me, that’s the way to go.
If you don’t want to spend hours shoveling, you may want to rent some heavy machinery. A small bulldozer could handle most of what you’re trying to do, you shouldn’t need much more than that for a small backyard ATV track. If your plan is simple enough you shouldn’t need to be carrying the dirt all that far. You will mostly be focusing on grading and shaping the existing terrain.
The bigger machines will work better and push more dirt, but they will cost more to rent. This one’s up to you, if you want to get it done fast, get a bigger dozer. You may need a water truck, or a way to get water to your track to pack the dirt down. It depends on what kind of dirt you’re dealing with, but dry dirt usually doesn’t pack very well.
If you plan on building a supercross style track, you will probably need a bucket loader or an excavator.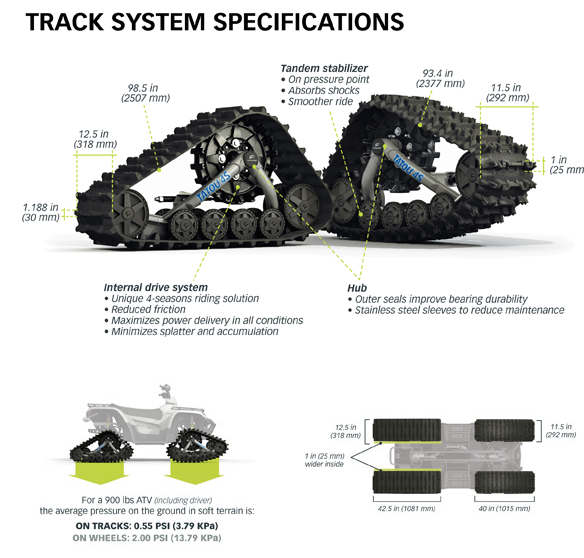 You will need to move a lot of dirt to where it needs to go and shape the track. You probably won’t get much use out of a bulldozer though. Supercross tracks are a lot more detailed finish work, the dozer wouldn’t be useful for that.
There are some obstacle you have in mind that you just need to have. I get it, but make sure you leave yourself room for improvement later on down the road. You’ll be a lot happier with your track if you can upgrade sections as you become a better rider. You don’t want all your obstacles jumbled together anyway, it will ruin the flow of the track.
Some ideas to get you started:
Don’t make a track you’re scared to drive on, you need to ride a lot to get better. You can always upgrade the track as your skills improve.
For a supercross track you will need some long measuring tapes, and some stakes and flags. Measure out the jump peaks and place your stakes before you start piling dirt on. Use your scale drawing and map out the entire track before hand. If you can, mark the stakes at the heights you want your obstacles to be.
For a natural terrain track you don’t really need to do any of that. I find it useful to place down a couple flags to remind me of where I planned certain obstacle. I also mark where I want to scuff up the terrain to make actual lanes to ride in around the property. Doing this also helps you to confirm if your plan for the track will actually work out or not.
You have a game plan down, you have the equipment, and everything marked out. Now comes the hard work, actually building the track. The best place to start is at the end, working your way back to the start. I suggest doing this because that way you’re not ruining the faces of the jumps with the equipment. In fact, you will always be working on the faces of the jumps if you build the track in reverse order.
You can do this per straight away, or work in reverse on the entire track as a whole. You can also work from the middle of a straight away outwards in both directions, especially if you build a larger obstacle in the middle of that lane. Either way, you would finish the lane and build the turns last, so you avoid ruining any berms or bowls you have planned for your corners.
This is more for a supercross track where everything is tight together. If you have a more open natural course, just do what makes sense to you. I would still recommend building any jumps or obstacles from the end to the front to keep the take off area nice.
It’s time to start piling the dirt where your obstacles are going to be. If you have a loader, grab a full bucket of dirt. Keep in mind that you will want to try grabbing the same amount of dirt every time. Get yourself into the area you will be working and line yourself up straight with the obstacle. If you can get yourself head on with the jump, it will make the rest of this process a lot easier. Just try to imagine at which angle you will be approaching the jump on your quad. Dump the dirt starting at the back of the obstacle.
Keep adding bucket loads of dirt until you’ve created the basic shape of the obstacle. You will want to add a little more dirt to the top to compensate for packing it down. If you marked your stakes for the correct height you wanted, this part will be a lot easier. I would start by doing the sides of the jump first, then filling in the middle. Make sure your obstacle is wide enough, having everything pre-marked makes this simple, just fill the areas you staked off.
This is where a bulldozer comes in handy. To start with the bulldozer, drive over the jump with the tracks to pack everything down. It’s ok to go back and forth, make sure the entire obstacle is packed down nicely. Now use the blade of the dozer to level off the jump and smooth out the areas that the tracks ruffed up.
Be sure to get rid of any bumps or indents on the jump. This is the fine tuning stage, you want to end with a nicely finished obstacle. You could also finish up the surface using the dozer. If you want better traction for your quad, leave it as is, you’re done. Fair warning though, it will be a lot more maintenance.
To pack the surface down, simply roll over the front of the jump with the tires of the loader. There will be less maintenance, and the jump will be more consistent, you will know what to expect every time you hit it. You can use the bucket of the loader to smooth out the tire tracks after you’re happy with how packed down the front of the jump is.
For a nice lane that flows well, I would consider a distance of about 30 feet between jumps. You can do a lot more than this though and still enjoy the track. Especially on a more natural track that flows with the landscape. Make your jumps where it makes sense to, but keep in mind not to have too many obstacles close together. Unless you plan on using them together, like for take off and landing purposes.
A good pitch for quad jumping is around 3:1. That means for every three feet your ramp is length wise, it will be one foot high. When you just naturally dump a pile of dirt, the ratio is more like 1:1, which is way too steep for a four wheeler. Of course, make the track to your liking and skill level, you can always change things later on as you improve.
Take care to keep the jump consistent all the way to the top, and side to side. If there is an indent or a hump, it could prevent the rider from leaving the jump at the top, which can be dangerous. Avoid creating any lips at the top, this could kick the rear tires up as you leave the jump.
After you’ve got the pitch you want, you will want to curve the jump a bit. Leaving it at an exact 3:1 ratio won’t give you that much lift. If you curve the face of the jump slightly, it will allow your suspension to compress into the ramp, and decompress on take off, giving you some nice lift.
Take your time and make sure the ramp faces are right. Make sure your jump is lined up with the track. Double check for kickers, swells, and indents. Make sure the top edge is level. Always do a slow pass around the track to make sure everything feels right before going full throttle. It’s always best to slowly get used to a track you’ve never ridden on before, especially a newly built track.
Always wear proper safety riding gear, to check out some quality gear I put through some tough testing myself, visit the Recommended Gear section of this site. The only thing left to do is enjoy all your hard work. Be careful, it can get addicting, before you know it you’ll be building all different kinds of obstacles.
Sharing is caring!
Several of my riding buddies have invested in rubber track kits for their ATVs. The thrill of extreme performance and traction in the worst possible conditions is what got their attention and eventually led to them opening their wallets.
The tracks offer great all-year performance, making them great for utility work such as hauling moose game over wet forest grounds, pulling firewood in the winter, and playing in the snow.
In this post, we look at the technical aspect of how ATV tracks work and how well they perform in various riding conditions and riding applications.
ATV tracks work by replacing the wheels with a rubber track fitted to a sturdy frame assembly. The main sprocket that drives each belt is connected directly to the ATVs wheel hub. Installing tracks greatly improves traction and provides a bigger footprint for better overall flotation.
Page Contents
The design and build quality of these kits have improved vastly through the years they’ve been around. Initially, the design was inspired by snowmobiles and has been continuously tweaked to fit ATV use.
The rubber tracks are the most important part of the track kit. They need to be wide- and long enough to give you the best flotation possible. In deep snow, better flotation is always better.
They also need to have an aggressive tread pattern for optimal grip in all conditions. Be aware that some track kits are sole as pure snow kits. The tracks on these are not well suited for the warmer seasons.
The front tracks on Tatou 4S are angled slightly on the edges for easier steering.But it’s not as easy as just making the tracks huge with enormous lugs. The front tracks need to be built to grip and float well, but the bike still needs to be manageable to steer.
The track size also needs to be matched to fit the bike’s power output. An underpowered ATV will still be able to turn a full-sized track-kit, but it would impact speed and put a lot of strain on the bike.
The tracks are built with quality rubber, laminated to handle impact from sharp rocks and so they won’t stretch too much over time.
As with car tires, the manufacturers constantly tweak the rubber recipe for the optimal balance between grip and wear-resistance. A softer rubber gives a much better grip but will also wear much faster.
The track frame is what holds everything together. It needs to be very strong to withstand the continuous beating but still has to be lightweight and open to shed snow, ice, mud, and debris from within the track.
The frame is angled upwards on the front tracks so that the tracks will pass objects and float better on soft surfaces like snow and mud.
Notice that the front belt is angled upwards in the front for better flotation.On top of that, the whole frame articulates so that you’ll be able to climb up and over objects that you need to pass.
The rear tracks are extended to the back for increased footprint and better flotation.
You can get tracks for almost any ATV on the market today. There is no need to make modifications to the bike, but you need a special installation kit to install them.
Most bikes are built differently so you will need a kit that is specifically made to fit your bikes make and model.
The kit consists of specially made bars, brackets, and adapters that keeps the tracks securely in place.
Installation brackets for a Tatou 4S track kit, fitted on a Polaris Sportsman XP 1000.As I mentioned, the whole track frame articulates when you drive over rocks and other objects. To prevent the track from rotating too much, the installation kit includes anti-rotation bars installed between the track frame and the bike’s A-arms. The bars have dampening springs to make for a smoother ride.
Here you can see the anti-rotation bar on a Tatou 4S track. Also, notice the wire that prevents the track from over-turning.The tracks usually come with just one installation kit when you buy them new.
This means you need to buy another installation kit if you later upgrade to a new bike, and wish to use your tracks on the new bike.
These kits are about 1/10th of the cost of the complete track kit. Buying the tracks used can save you a lot of money if you find a set that includes a kit that fits your bike. If you don’t, you need to consider the added cost of getting a new installation kit.
This added cost will sometimes make buying used tracks less attractive than just getting new ones from the getgo.
A drivewheel shaped like a big sprocket is connected directly to your bike’s wheel hub and is what drives the belts back and forward. It works with the same principle as on tanks, excavators almost any other tracked vehicle.
Drive sprocket, connected directly to the ATVs wheel hub.On the bottom part of the track frame, you’ll find a row of idler wheels that allows the track to turn freely. On earlier models, these were known to be a weak link.
Idler wheels seen on the rear belts. Notice that the belt is extended to the back for better flotation.Over the years, however, they have been improved with stronger bearings, rubberized wheels and built using strong materials that can withstand quite a bit of beating without breaking.
Installing a track kit is actually pretty straightforward but does take some time compared to installing tires. If you know how to change a wheel, you should be able to install tracks.
The first time you install them, you should expect to use a couple of hours, unless you run into any fitting issues. But if you leave the installation kit on the bike when you switch back to tires, installing the tracks again will be much faster.
The manufacturers claim that the installation time is similar to installing tires after the initial installation. But from our experience should set aside a good hour to get the job done.
So how well do ATV tracks work? A set of ATV tracks will outperform any ATV tire in almost any technical riding situation. But on the flat, smooth areas, they lack the speed to keep up with the tires.
Let’s have a closer look at how well ATV tracks perform on different surfaces.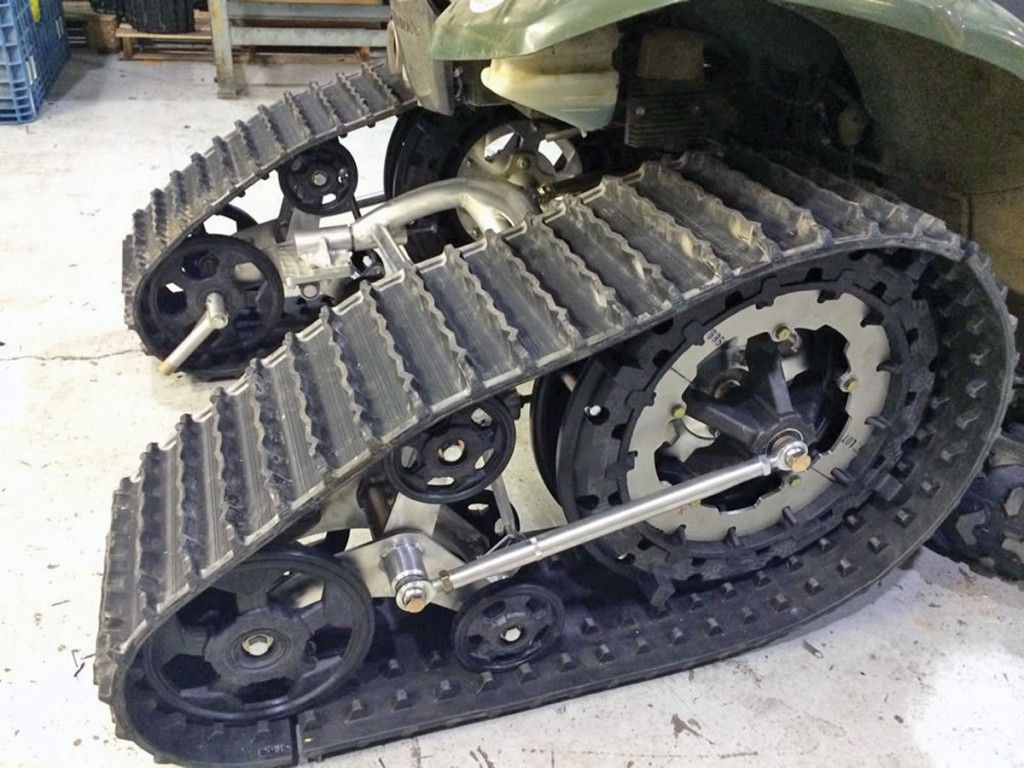
Obviously, there will be quite a bit of variation between the different brands of how well each model performs, but this summary should give you a general idea of what to expect.
Many think of ATV tracks as “snow tracks” you can put on the quad.
This is maybe not so strange because many of the commercials you’ve seen display the tracks as a way of transforming your ATV into a winter machine.
From a marketing standpoint, this is only common sense because it’s in the snow the difference between tires and tracks is the biggest.
As soon snow depths start exceeding your bike’s ground clearance, you’ll find that the wheels will just dig in, and you’ll be left hanging on the snow.
With tracks, you will float on top and only in the most extreme snow conditions will the bike find any real challenge.
If you plan on doing utility work or hauling heavy goods up steep hills, it may be a good idea to drive over the hardest parts some hours in advance for the snow to set a bit. Because of compacted snow, there is almost no stopping these things.
Pure pulling force on a hard snowy surface is are over twice than what you ger with wheels.
In very deep powdery snow, however, you may struggle to get up the steepest hills due to lack of speed.
This is another arena where tracks really come to shine. For heavy utility work in soft and muddy conditions, they work really great. The flotation and traction allow you to reduce speed as much as you need to do the job safely without the risk of getting stuck.
For pure mudding purposes in deep liquid mud, however, the story is a bit different. In this scene, there are no beating tires. Have a look at this article for more on how well tracks work in different mud-conditions.
On hard, smooth surfaces, the tracks will obviously have no traction issues. But they do however struggle a bit with speed.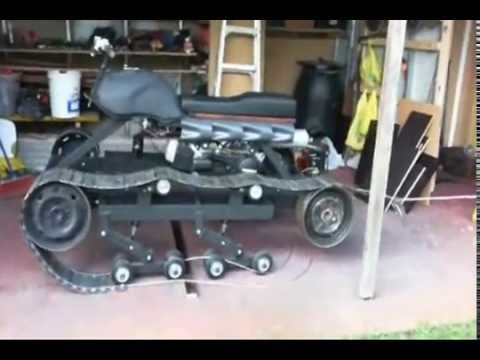
The gear ratio difference will result in a much slower speed when riding in the same gear and RPMs compared to tires. As a general rule of thumb, you may expect the speed to drop about 50%.
This means the bike’s internals need to run twice as fast to keep the same speed as with tires. This will undoubtfully wear a lot more on the bike, making tracks less desirable for trail riding.
On asphalt, you should also expect premature wear of the tracks, as well as reduced comfort and handling compared to tires.
The combination of great traction, low ground pressure, and aggressive threaded pattern in the tracks makes them perform well on sharp or slippery rocks.
Ensure that the brand you choose will guarantee that their track is built to handle these kinds of conditions without breaking or delaminating.
A softer, more sticky rubber mixture will ensure a better grip on the slippery parts and wear faster when riding on dry surfaces.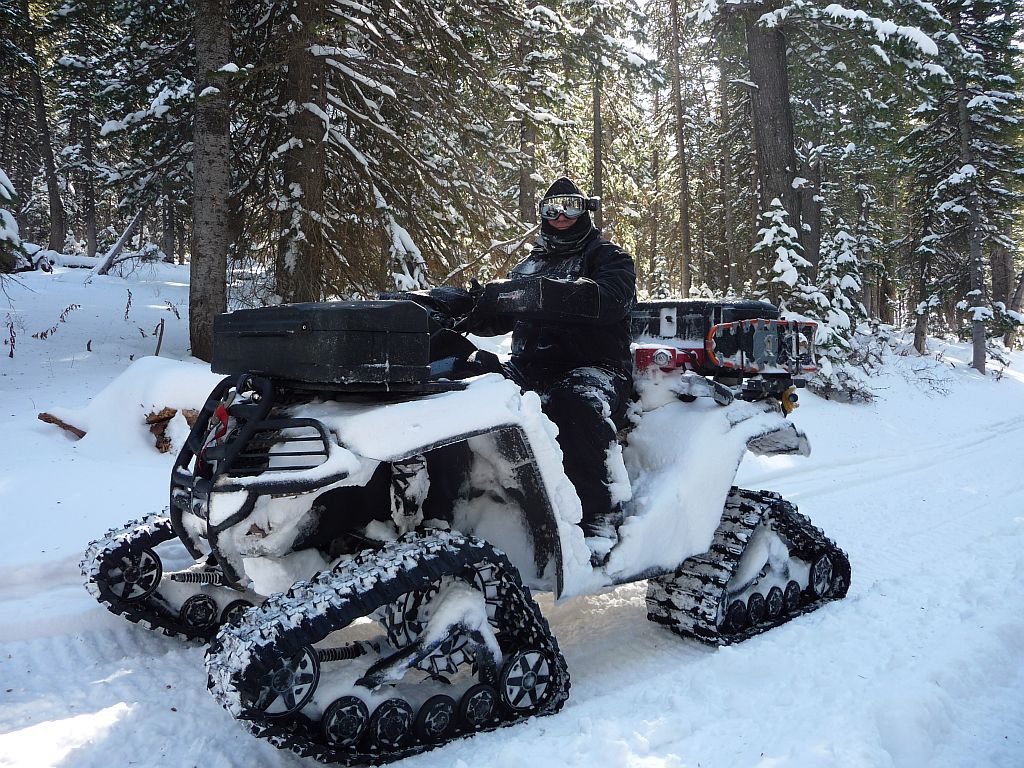 The trick is finding the optimal balance, and some manufacturers do a better job at this than others.
To give you a better idea of whether ATV tracks are the right choice for you or not, it’s helpful to compare them with the natural alternatives that they are up against.
ATV tracks will outperform any ATV tire when it comes to traction and flotation performance; there is no doubt about it. But then why doesn’t everyone run to the store and change their tires for a set of tracks then?
Well, there are other important aspects that make a set of wheels the better option in many situations.
 The great traction you get with tracks allows you to keep speeds low in any situation that requires full control, wherewith wheels; you rely much more on speed to make it through.
 Others actually require less power than wheels because of the power to drive ratio you get with the smaller drive sprocket.
The main difference between an ATV with tracks is speed and bodywork design. An ATV will also overall have a lot better traction, making it perfect for heavy utility work. It is also a lot easier to maneuver in tight spots than a snowmobile, especially for beginners.
But an ATV with tracks is not able to pick up the same speed as a snowmobile, often leaving the snowmobile alone on top of the steepest hills with the deepest most powdery snow.
You also get the benefit of better being able to start and stop halfway up a hill with the ATV. With a snowmobile, this will often lead to getting stuck.
While it is very fun to ride an ATV, even in deep snow, you cannot play around the same way as you can on a snowmobile.
Another issue with riding in deep powdery snow with an ATV is that it will pack up everywhere on the bike.
Snowmobiles are built to slide through the snow almost like a boat in the water, but the bodywork on an ATV is full of holes, gaps, and openings that will get packed with snow.
As you can see, these things get quite packed when riding in really deep snow.This contributes to the fact that ATVs with tracks have a higher fuel consumption than a similarly sized snowmobile.
With a tracked quad, you do have the benefit of being able to cross larger areas with little or no snow, as with the snowmobile doing so will wear or even damaging the skies.
Here in Scandinavia, the “iron horse” has been the moose hunter’s favorite for several decades. It’s also great for hauling firewood and other utility tasks.
But this was before ATV rubber tracks entered the scene. While the iron horse is strong and features great off-road performance, it does require you to walk alongside the machine and moves a lot slower than an ATV with tracks.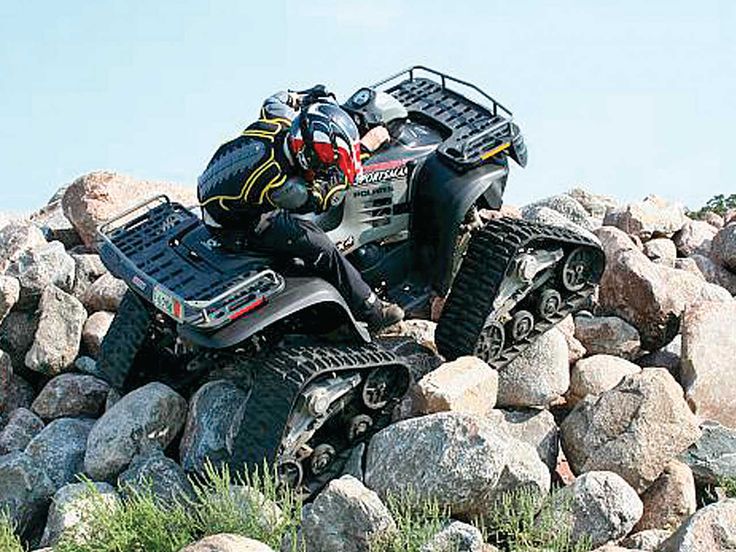 They also cost more than a set of tracks do, so if you already have an ATV, the choice will often be quite easy.
It’s a common misconception that you need a large and powerful ATV to use tracks.
ATV tracks require less power to operate than tires and can be used with almost any size ATV. While the track-assembly does not rotate as easily as a tire, this doesn’t mean you can’t use tracks on a small or medium-sized ATV.
The undercarriage drive sprockets are only about one third the size of a tire, effectively gearing down the power to drive ratio. The ATV will run slower with tracks than with tires, but that is by design. ATV tracks are not meant to be used at higher speeds for extended periods. This leaves enough power to effectively run tracks on a small ATV, as long as you only ride at slower speeds.
Related questionsOn average, a set of quality ATV tracks cost about 4000 – 5000 dollars, including the installation kit. Buying them used will often save you some money, as long as you find a kit that suits your specific bike’s make and model.
A complete kit of ATV tracks weighs from 60-110 lbs. The market-leading brand averages at about 80 lbs.
A set of ATV tracks will last for many years if you maintain them and store them in a dark and dry place when not in use. Riding on asphalt, concrete, or on sharp rocks will wear them faster than riding on snow and mud.
ATV tracks will not work on a UTV, and UTV tracks will not work on an ATV; they are not interchangeable. However, your ATV tracks will likely fit other ATVs if you get a model-specific installation kit for the new machine. Make sure the drive sprockets are geared correctly for both machines.
The actual tire contact area is slightly larger than the size of your palm. So the entire weight of your ATV or UTV rests on those four small contact patches. Therefore, when it is necessary to make a real all-terrain vehicle out of an ATV, tracks are installed on it instead of wheels. Track systems have large footprints and therefore spread the weight of your machine over a much wider area. This helps the rover to move on the surface of the swamp or deep snow, and not dig in, and still have maximum traction. At first glance, it may seem that your ATV has turned into a monster, however, as soon as you start the engine and go out into the real off-road, you will have a car under you that you could only dream of before. The only “but” is that by installing tracks, you will lose up to 45% in speed.
Below are five of the most well-known makes/models of ATV tracks that you can install on your ATV or UTV.
Each Kimpex WS4 track with 25mm front and 32mm rear grouser has three track rollers that keep the drive in constant contact with the ground.
Kimpex Commander WS4 (manufacturer's website: kimpex.com)
The Kimpex team has developed a range of tracks for Commander WS4 ATVs that give most ATV and UTV models consistent traction all year round. A heavy duty sprocket is used to provide four season compatibility and reduce vibration. Each track, with a 25mm front and 32mm rear grouser height, has three track rollers that keep the drive in constant contact with the ground or snow. WS4 kit with 29 width2mm front and 330mm rear is easy to install and maneuver, and gives you full control of your ATV. The weight of the kit is 32 kg front and 34 kg rear.
Camso X4S (manufacturer's website: camso.co)
Camso, formerly Camoplast, has been building tracks for snowmobiles of all makes for decades, and in recent years for all models of ATVs.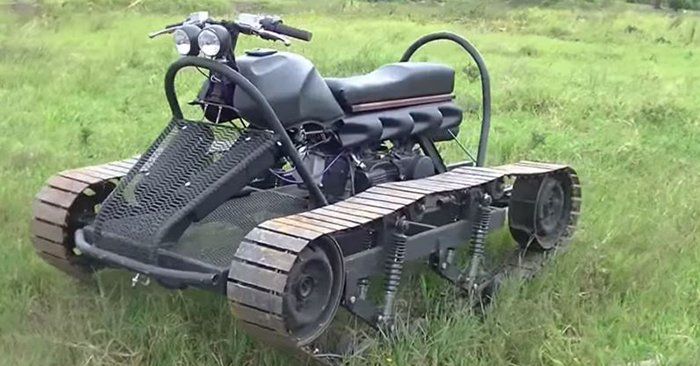 So Camso knows a thing or two about ATV track development. The new X4S series tracks are a relatively inexpensive alternative that can be fitted to most ATV manufacturers. According to the developer, it provides maximum versatility, stability and controllability of the all-terrain vehicle on any terrain all year round.
The Camso X4S ATV tracks also offer excellent weight distribution so your ATV can actually float through deep snow while plowing through winter terrain. Rubber tracks 292mm wide front and 318mm rear with 32mm lug height front and rear are specially designed for ATVs to provide the best traction, no matter the weight. Each element is built around a rigid frame to ensure a smooth ride and maximum stability. The front of the system weighs 33 kg and the rear 36 kg.
Mattracks M3 (manufacturer's website: mattracks.co)
Although ATV tracks have always been quite expensive and despite the fact that a number of companies began to develop and offer budget models, there is still a market for more complex all-terrain systems.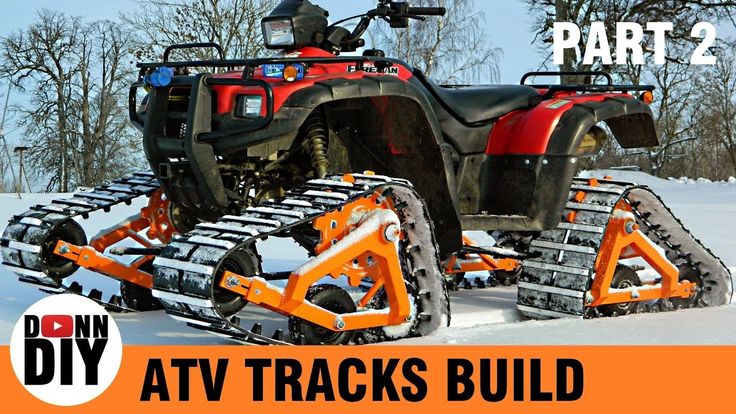 Mattracks is a leader in professional crawler systems for all types of vehicles and, with its M3 model, is number one in cross-country ability. The M3 system has internal suspension and a very wide track system to give the rover more control and traction.
Specifically designed for high flotation in soft terrain, the XT and M3 models use LiteFoot's exclusive Shape Changing Suspension (SCS) system to best match the shape of the terrain. The SCS provides adjustable suspension for vehicles of different weights, making it easier to steer on all types of terrain. Adjusting the track system is simple, giving you the ability to change your ATV's suspension functions to suit the weather or terrain.
M3 ATV Track Kit comes fully assembled with an adapter kit already installed for your chosen ATV or UTV model. The frame, drive sprocket and suspension parts are made of high strength aluminium.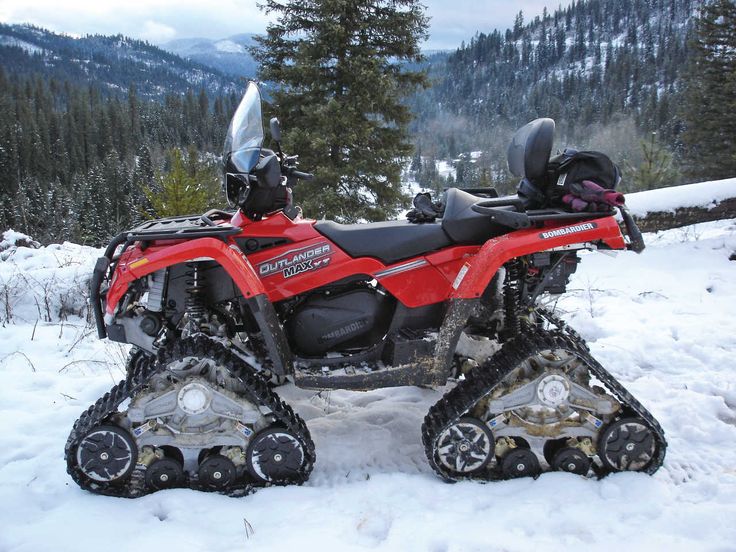
Can-Am Apache (manufacturer's website: can-am.brp.com)
One way to make sure a track system is guaranteed to fit your BRP ATV is to buy it directly from the manufacturer. Can-Am has developed its own track system for its machines. Apache tracks for ATVs and UTVs provide vibration suppression and excellent handling. Once set up, you can swap tracks for tires in about 20 minutes.
The footprint of the Apache ATV tracks is so large that the owner of such a Can-Am ATV can climb hills that he would never dream of climbing with tires. That's the beauty of a track system with 25mm front and 32mm rear lugs in the winter: you can ride in places you'd never go in the summer. If you want to tackle extreme hills and soft, thick snow, the 41 cm ground clearance Apache kit is just what you need.
Polaris Prospector (manufacturer's website: atv.polaris.com)
As with Can-Am, Polaris engineers have developed their own track system that only works on their machines.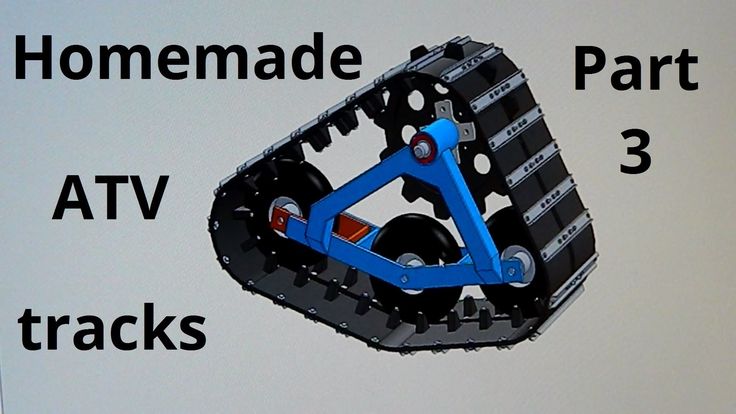 The best part about the Polaris and Can-Am systems is that if you buy a new machine and install it at the same time, then your ATV track system is covered by the overall warranty.
Polaris Prospector track systems are designed specifically for the Ranger and RZR models, so they provide the best performance and reliability of the entire system at any time of the year. The triangular geometry does a good job of distributing the load optimally. Extra-wide, rubber-coated idler rollers with double-sealed bearings resist ice build-up on the drives during the winter, evenly distributing the load on the ATV while also increasing its all-terrain capability. The rubber compound used and the track structure itself resist flexing, realizing a stable footprint on the ground, ice or snow.
The video below shows the difference between a snowmobile and an ATV equipped with tracks when driving in deep snow.
To date, it is customary to call an ATV an all-terrain vehicle that has four wheels on its board.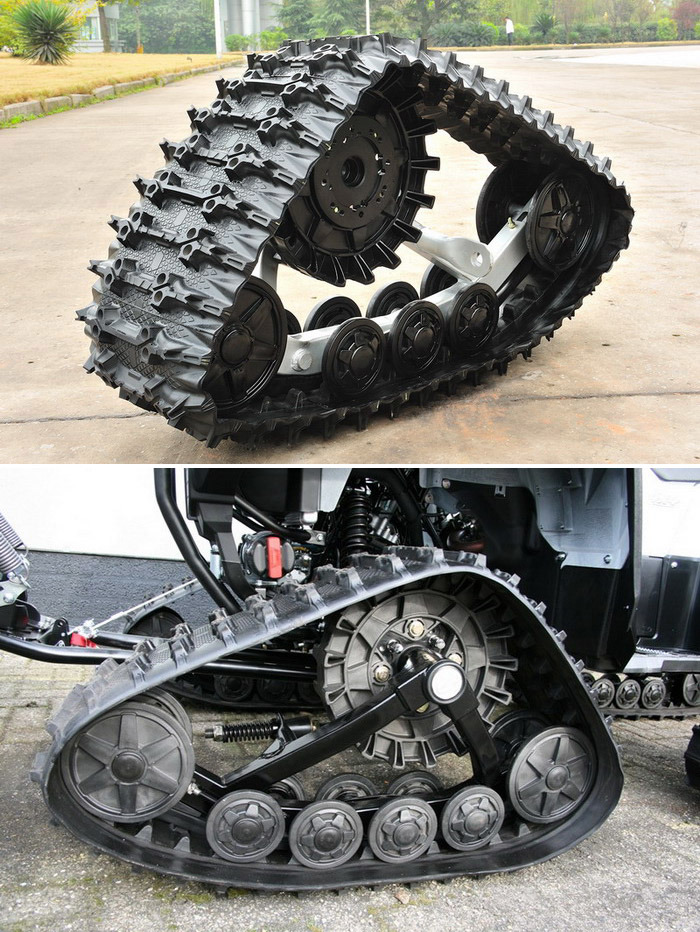 The first such transport appeared in 1970.
It was released by Honda under the name US90. The resulting transport from the car inherited practicality and stability, and from the motorcycle he got amazing maneuverability.
Since the model had large wheels installed, with massive lugs, the US90 had a very high cross-country ability. Since then, manufacturers have begun mass-producing ATVs.
Since wheels are not suitable for every load, many ATV owners store their vehicles for the winter. This is due to the fact that even a deep wheel tread on the snow becomes useless, as the snow gets into the wheels very quickly, as a result of which the vehicle simply starts to slip.
In addition, the wheels have a small area of contact with the ground, as a result of the fact that the transport falls through the snow and it is impossible to drive through deep snowdrifts.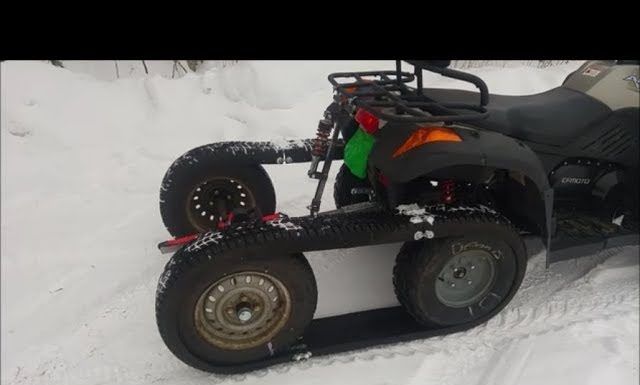
An ATV on a caterpillar track has an increased cross-country ability, due to which it can easily overcome mud, swamps, large snowdrifts and loose sand.
In order to help owners use their favorite ATV all year round, the developers came up with special caterpillar tracks that have increased cross-country ability.
To date, caterpillars are made directly for winter and an all-weather version. At first, the question may arise, why use caterpillars in the summer?
But do not forget that use of tracks significantly increases the traction power of the ATV . As a result, heavier loads can be transported than stated in the documentation. Also, when using caterpillars, the ability to drag heavy objects by dragging is significantly increased.
The average weight of an ATV is about 400 kg. Since the wheels have a smaller area of contact with the surface, in this case a pressure of 140 g/cm2 is exerted on the ground by each wheel individually.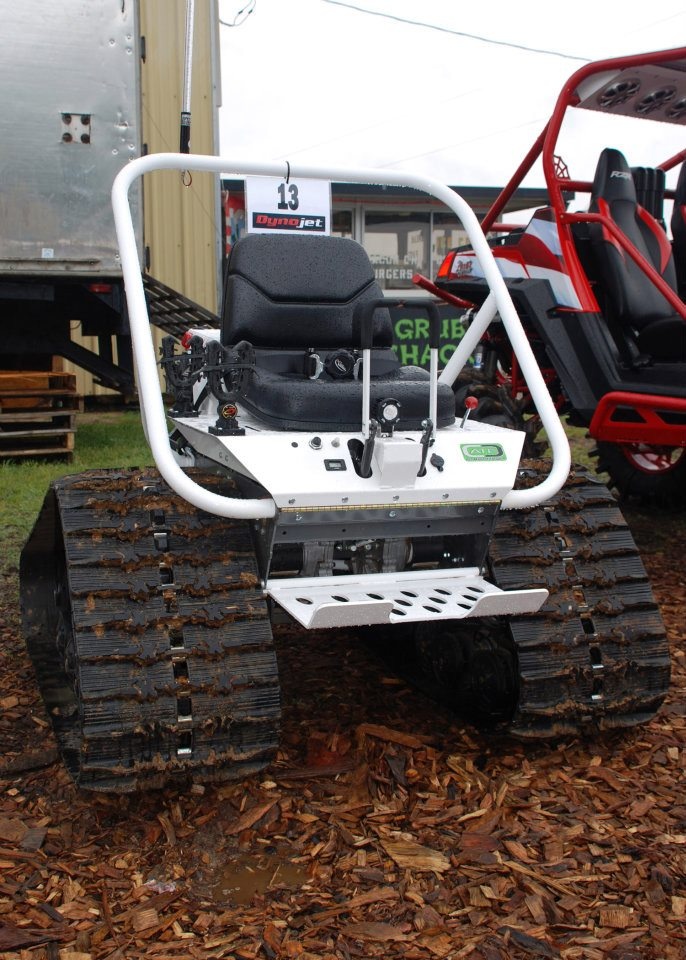
When using caterpillars, the area of contact with the surface is much larger than that of a wheel. Thus, the pressure will be at least 3 times less, which allows the ATV to stay on the snow without falling through.
Also, due to the increased area of the tracks , the area of adhesion to the ground surface is significantly increased, which is manifested in an increase in the power of . But, as you know, you have to pay for everything.
In our case, due to the fact that the tracks are much heavier than the wheels, there is a huge fuel consumption.
Also, the disadvantages include the fact that when using caterpillars, the speed of is significantly reduced.
Despite the fact that on flat terrain the tracks significantly increase the cross-country ability, however, when using tracks, there is some problem in overcoming obstacles such as fallen trees, stumps and much more, since in this case the rear tracks simply rest against the obstacle.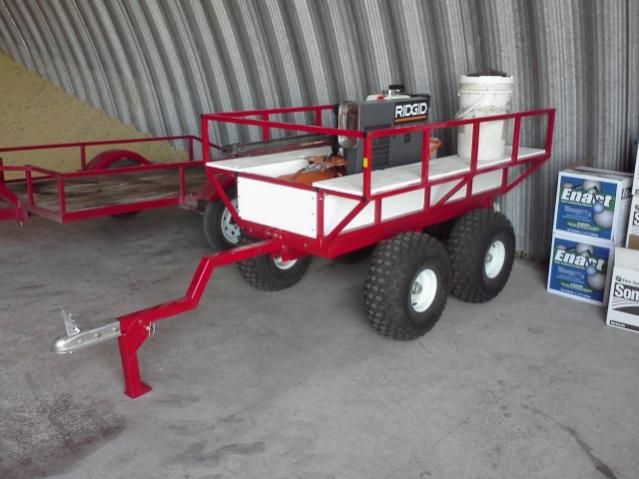 To solve this problem, it is necessary to resort to counter-weighting methods.
There are such types of additional equipment that are simply indispensable in the economy. A prime example is a motorcycle trailer. Types and characteristics in our article.
And in Russia they produce excellent ATVs. See for yourself in our review.
to table of contents ↑
The technical characteristics of the tracks include all overall dimensions of the track, side and front overhangs, as well as the mass of adapters.
The most important characteristics that you should first pay attention to will be the contact area (contact with the ground), the increase in ground clearance and the reduction in maximum speed, which is usually indicated as a percentage.
The type of wheels and rollers, the material from which they are made, as well as additional units in the form of gears, hubs and bearings, a stabilizer, a guide skid are also referred to as technical characteristics.
Often, manufacturers indicate the duration of the initial installation of caterpillar tracks on an ATV, which is very convenient.
Today there is a huge variety of caterpillars for ATVs. When choosing your caterpillar models, you should consider the following nuances:
Track kits are available for both winter use only and year round use . In order not to make a mistake when buying, there is a corresponding marking on them. So, in winter, depending on the manufacturer, “winter” or “snow” is indicated. While all seasons are labeled "4 seasons";
They can be of regular width, or they can have enlarged rear tracks;
Some options can be additionally equipped with spikes, which further increases traction.
In order to put your pet on a caterpillar, you need to purchase a special kit, which consists of several boxes, where 4 caterpillars are stored in a disassembled state, one for each wheel.
Before proceeding with mounting them on an ATV, it is necessary to fully assemble each track separately, and only then proceed with installing the tracks on an ATV.
According to the manufacturers, at first, it will take about two hours for to assemble the entire kit if there are two people. Over time, assembly can be done much faster.
Since ATVs are often stored outside the city, it can sometimes be very expensive and problematic to deliver it to a service center, and sometimes it’s simply impossible. In this case, you can use improvised means and to independently replace the wheel with caterpillars with your own hands.
To do this, you need to raise the front or rear with a jack or winch. Next, remove the wheel and change the lower bolt to a longer one that comes with the tracks.
It is very difficult to put the track pinion on the studs from the wheel. This is due to the fact that the tracks are very heavy, about 20-30 kilograms each. Then it should be fixed with the help of special nuts with which the wheel itself was clamped. When it is finished with one axis, it is necessary to repeat all the steps with the remaining axis.
If you are going to transport it on a trailer after installation, it should be borne in mind that after installing the tracks in their place, the size of the vehicle increases significantly, both in width and in length.
to contents ↑
Since there is a huge range of tracks for ATVs on the market today, I would like to dwell on the most popular models in more detail:
According to statistics, one of the leaders in sales can be safely called the truck Tatau , which produces the Canadian company Camoplast . Popularity in the market allowed them to win a low price, as well as their versatility.
They can be used on almost any ATV. The only requirements for the car itself are that it has four-wheel drive and an engine capacity of at least 300 cubic centimeters;
No less popular are Kimpex tracks, which are used by exclusively on Commander ATVs. Under this brand, the company produces two WTX tracks - for winter and Trek - all-weather.
A distinctive feature of these caterpillars is a lightweight alloy, which is not inferior in quality to analogues, but the weight of the caterpillar is significantly lower. The contact area of each track is 1.2 meters. This model has the same belt width on both the front and rear wheels, which is 29.2 cm;
Chinese manufacturers who released STELS (Stealth) caterpillars also do not lag behind their Canadian counterparts. This option proves that Chinese ATV tracks can be used on a par with Canadian ones. At the same time, their cost is significantly lower. In this model, the tracks on the rear wheel have a wider canvas than the front ones.
On the market, buyers are also presented with models in which the front part is not flat, but raised at an angle of 45 degrees. This makes it much easier to overcome obstacles in the form of fallen trees.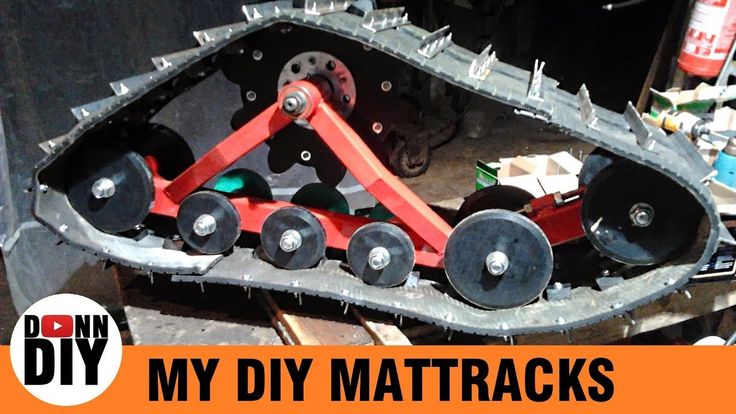
Among these models are the X-Gen STS4, in which the frame is made of plastic and aluminum, the width of each track is 29 cm. Its advantages include a slight loss in speed, as well as an increase in ground clearance by 12.5 cm.
to contents ↑
If we talk about the cost of caterpillars for an ATV, first of all, should be clearly understood which manufacturers are talking about . So, for example, a Chinese manufacturer is significantly cheaper than a Canadian counterpart.
If you look at the prices for all products, it becomes clear that Canadian-made tracks cost as much as a whole ATV from a Chinese manufacturer. The truck of the previously described model X-Gen STS4 costs almost $5,000.
In comparison, the price of ATV tracks from the Chinese manufacturer Kumoto will be approximately $400-500. Thus, in order to “change shoes” for your pet, you should clearly understand how much money you have and what model you have.