The CV joint, the half-axle, the half-shaft, the axle, or even the drive shaft are some of the many names of this mechanical part. It is a very important part in a motor vehicle, but it is also, in fact, a very simple mechanism. Let’s demystify this mechanical assembly.
First thing first, let’s agree on a name. In reality, we are talking about a half-wheel axle. A few joint variants are used in the assembly of a half-axle. Two mechanical principles are the most often used: the universal joints and the constant velocity joints.
The universal joint (U-joint)
The universal joint is extremely simple and is an excellent economical choice. The Italian inventor M. Cardano perfected this technique to couple two rotating shafts that are not aligned or when the angular positions relative to each other vary. In the ATV industry, it is mainly used on drive shafts and more rarely on half-axles.
Composed of a cross-section and yokes that are very economical to replace, this mechanism also has a downside. Its operation results from a non-linearity of rotation. To counter this phenomenon, a second U-joint must be installed on the same shaft, at the same angle, and synchronized by a quarter turn. Another dark facet is its vulnerability to water which will disintegrate it.
Example of non-linearity of the universal joint
The constant velocity joint (CV joint)
The constant velocity joint is a much more advanced mechanism. Its linearity is almost perfect, which results in smoother operation. As it is more complex, it is also much more expensive. Its design requires grease to lubricate it as well as to dissipate heat. A simple intrusion of water or sand into the assembly will contaminate the grease and inflict fatal punishment on the joint. As it is protected by a flexible bellow or boot, you can easily guess the importance of it being kept in good condition.
Periodic check of your half-axle boots
A simple visual inspection of the CV joint boots can tell you if you need to take action. The presence of grease outside the boot indicates that immediate repair is needed. Traces of wear or cracks on the bellows are signs of repair intervention in a near future.
Choice of replacement boots
There are four choices of replacement CV boots on the market. That of the manufacturer of your ATV (OEM), the replacement “jobber” boot (aftermarket), the universal boot, and the replacement kit sold in two parts to be bonded together.
The latter is a real joke and I don’t recommend it. This replacement boot is split into two parts which must be assembled around the constant velocity joint and then bonded with glue. Cleanliness and very good dexterity are a must in this case. Repairing a CV boot with this kit is, indeed, really not as easy as it seems.
The third solution, the universal boot, can be interesting. This bellow does not require disassembly of the constant velocity joints. You have to stretch the boot and pass it over the joint. The boot composition is usually very flexible, but is also more fragile to the impact of branches and other objects encountered on the trails
The OEM and aftermarket replacement boots are, in my opinion, the best choices. Those are the ones I recommend.
Replacement boot assembly
Replacing a half-axle boot
ATV used: CFMoto CForce 1000
Required tools
Removal of the wheel and disassembly of the brake caliper will be necessary. Unscrew the nut from the end of the half axle. Remove the retaining bolts from the ball joint suspension links on the steering knuckle. Release the assembly and set aside the knuckle.
Remove the half axle from the differential by pulling it firmly. It may be necessary to use a lever between the differential and the half-axle. Take care not to damage the differential seal.
Remove the clamps from the boot to be replaced using sharp wire cutters. Cut the old boot and set it aside. Inspect the grease in the CV joint. If the grease is not contaminated with water, sand, or dust, that is good news: the CV joint may still be in good condition. If, on the other hand, the grease is discolored or contaminated, the joint is likely damaged. In other words, even if the boot is replaced, a premature CV joint failure is to be expected.
To separate the CV joint from the half-axle, it will be necessary to use a hammer to hit it with a few light strokes. Use a brass punch and strike only in the central part near the half-axle. Note its installation position, it should not be reversed. Once the parts are separated, remove as much of the old grease as possible. Inspect the condition of the CV joint. If there are scratches or traces of abrasion, unfortunately, the joint will have to be replaced.
Damaged CV joint
Reassembly of the CV joint
First, put the small clamp on the half-axle. Then slip the CV boot. Pour some of the grease supplied with the replacement boot onto the constant velocity joint. Now reinstall the joint on the half axle. Make sure that it is properly locked in place. Pour the rest of the grease into the boot and put it in place over the CV joint. Install both clamps and tighten them using the boot clamp pliers.
CV Boot clamp pliers
Now you just have to reinstall the half-axle by reversing the procedure. Position the C-lock in the center of the half-axle, this will facilitate its insertion into the differential. If some oil has leaked out of the differential during repair, simply fill up the oil level. Make sure to respect the tightening torque of the wheel bearing nut.
In conclusion, a CV boot repair is a relatively simple operation. If there is any doubt as to the condition of your CV joint, it is possible to get a replacement unit without replacing the whole half-axle. However, in most cases, the cost of both parts (boot and CV joint), will exceed that of a full replacement half-axle assembly. Check the two options.
 This site requires JavaScript.
Delivery options and delivery speeds may vary for different locations
Sign In
or enter a zip code
Email * Password *
REPAIR & HOW TO
MAINTENANCE
TROUBLESHOOTING
GUIDES
TIPS & TRICKS
ALL ARTICLES WATCH VIDEOS ABOUT US SHOP PARTS CONTACT US
The CV boots on ATVs and UTVs can be easily damaged by an assortment of trail and track debris such as rocks and tree stumps. Unless CV boots are replaced when they’re damaged or worn, dirt will get into the CV joints and wreck them in no time.
Watch the video above and follow the steps below and to do an ATV or side-by-side CV boot replacement
NOTE: We used Polaris Ranger parts, but the process will be almost identical for CV joints on all makes and models of ATV and side-by-side.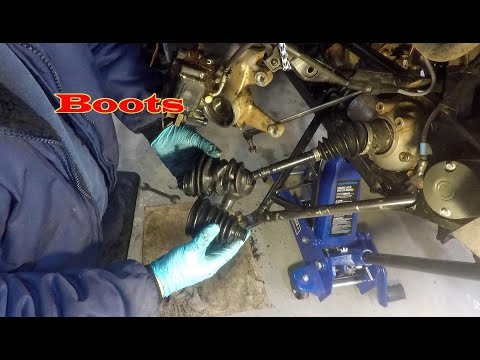
PRO TIP: We recommend you purchase a CV boot kit rather than individual parts. The kits are cheaper and include the CV boot, clamps and grease you’ll need. Find the CV boot kits for your machine by selecting its make, year and model.
Removing ATV or Side-By-Side CV BootsStep 1. Remove the CV boot retaining clamps using a side jaw pincher tool.
Step 2. Cut off the old CV boots and discard them, then clean off as much of the old grease from the CV joints as possible.
Step 3. Position a drift punch against the innermost part of the outer CV joint, and carefully tap the CV joint off the driveshaft splines.
Step 4. Install the new CV boots and clamps onto the driveshaft in the following order:
1. Inner CV boot
2. Inner CV boot small clamp
3. Outer CV boot small clamp
4. Outer CV boot
Step 5. Put the outer CV joint back over the driveshaft splines, and tap it back onto the driveshaft with a soft-blow hammer.
Step 6. Pack the CV joints and the new CV boots with the grease included in the CV boot kits.
Step 7. Slide the CV boots over the CV joints so the lip of each boot slots into the channel in each CV joint.
PRO TIP: Make sure the lip of the CV boot and the channel in the CV joint are both clean and free of grease, because you want a tight seal. Any grease will prevent a seal, and can result in the boot slipping off the CV joint.
Step 8. Position each of the CV boot clamps over the CV boot, secure each clamp using a CV joint clamp tool and you’re done.
Want a more in-depth look at replacing the CV boots on a Polaris side by side? Watch the videos below to see how to replace the front and rear CV boots on a Polaris Ranger 900XP.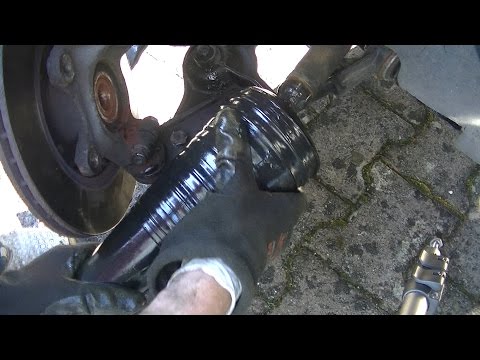
Polaris Ranger Front CV Boots Replacement
Polaris Ranger Rear CV Boots Replacement
body
A constant velocity joint, that is, a CV joint or a grenade, is one of the components of the chassis of the car. Through the CV joint, torque is transmitted to the wheels. Accordingly, the failure of this part will lead to the fact that the car will not be able to continue moving.
It goes without saying that a CV joint does not break in one second. First, there are signs indicating that the grenade's "life" time has begun to count down.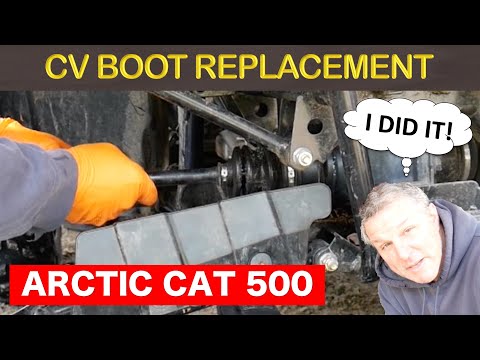 They can go unnoticed only if the driver is extremely inattentive and always drives with loud music turned on. In all other cases, the attention of the car owner is certainly attracted by a characteristic crunch, which intensifies when accelerating, passing obstacles and cornering.
Another thing is that not all drivers rush to a car service, as soon as they diagnose a CV joint breakdown by ear. Someone pretends not to notice an unpleasant sound and postpones the replacement of the part (namely, the replacement, since the CV joint repair is impossible) until better times, someone looks at the tachometer and waits for it to show 100 thousand kilometers. Why? Because theoretically, the grenade replacement schedule falls exactly at this mark, but in fact the replacement time may come up even after six months of operation of the car and even the next day after its purchase, because a manufacturing defect of a part or an error made during assembly of the unit is always possible.
In addition to warranty failures, the service life of the CV joint is affected by driving habits.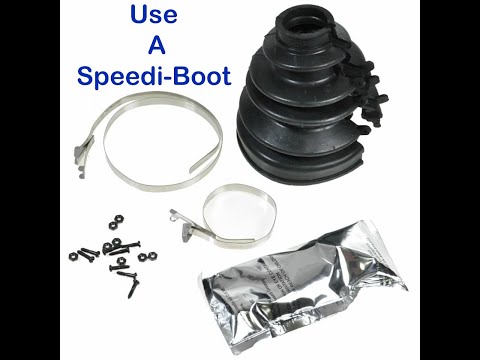 Aggressive driving with constant acceleration and emergency braking, sharp cornering and frequent off-road driving (as, in fact, on Russian roads) literally kill a grenade before our eyes. Many drivers are forced to change the CV joint two or three times a year.
Another factor that determines the life span of a constant velocity joint is the integrity of its anthers. Many car owners do not consider the boot to be too important a spare part, and in vain. Anthers are a kind of hoods that cover especially vulnerable mechanisms, in particular, CV joints, from dust, dirt, reagents and debris flying from the road. If the anther is rubbed or torn - and this happens quite often - the mechanism is defenseless. Small particles that get into it become abrasive, and moisture exacerbates the failure process. Therefore, replacing the anther is the most correct thing to do if you notice its damage - it will cost much less to replace the CV joint.
What will happen if, at your own peril and risk, you continue to drive with a crispy grenade? Roller bearing needles may fall off.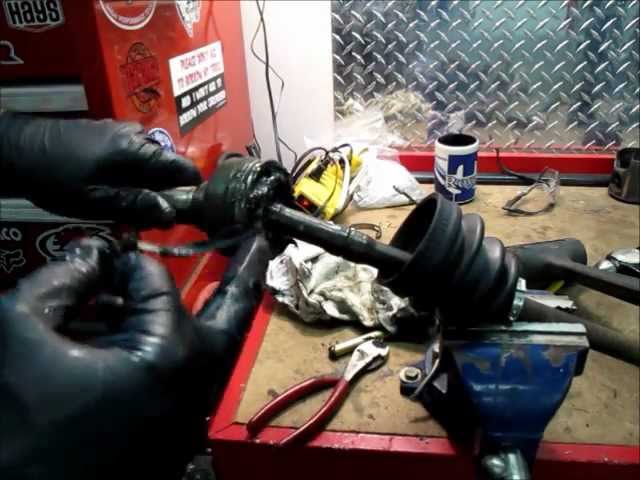 This is dangerous because they will fall into the box body, and from there, together with oil, under pressure, they will rise to the gears and disable the unit. Then you will have to change not only the CV joint, but also the box, which is much more expensive, longer and more difficult.
An even worse scenario when driving with a crunchy CV joint: sudden jamming. This is a very common consequence of driver frivolity, which can occur at any speed and in any place. Imagine for yourself what will happen to cars, the driver, passengers and other road users if the wheel of the car jams at a speed of 80, 100, 150 km / h?
There can be only one conclusion: monitor the condition of the grenade - check and change the anthers in a timely manner, listen to the sounds coming from the wheels and do not delay replacing the CV joint if such a need declares itself.
Breaks or holes in the component occur regularly due to high loads.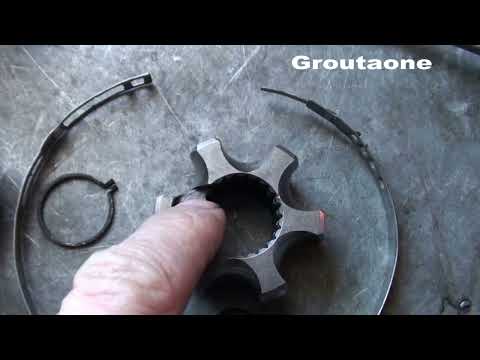 Therefore, gasoline-powered ATVs should be checked regularly for damage to the anthers. If this is not done, dirt, moisture or dust may enter the CV joint. This, in turn, will lead to its breakdown and increase the cost of servicing the four-wheeler. Therefore, let's figure out how the ATV boot is replaced and when it should be done.
Since ATVs are used to drive on difficult tracks (mud, sand, snow, puddles, etc.), its components must have increased protection. And it is especially important to secure the constant velocity joint (CV joint), which transmits torque at angles of rotation.
ATV boots should be replaced if:
It is this component that protects the CV joint from dirt, moisture, dust and other foreign objects. Damage to the anther can lead to the complete destruction of the assembly. So you need to inspect it at least once a month (with the active operation of the equipment).
If you notice that the rubber element of the CV joint is damaged, you should purchase a new consumable. But before that, make sure that the node itself is in working order. That is, when driving, there should be no knocks in the swivel area.
ATV boot must:
Brand also plays a key role in choosing a consumable. The products of SKF, Maruichi, GKN, Spidan, RBI have proven themselves well. To select the right component, you only need to know the part number.
Important : Only buy dust boots from trusted brands. Non-original consumables often come off, tear or leak moisture.
Before starting the procedure, the ATV must be washed well. This is necessary so that dirt or debris does not get into the CV joint. After that, the rider needs:
In fact, replacing the CV joint boot of an ATV is a rather complicated and time-consuming task that requires a lot of experience.