How to Install a Tire Inner Tube Properly
Because you don’t want your tire inner tube to split and fail before its time, it is important to complete your inner tube installation in the proper manner, without any wrinkling, twisting or pinching. Whether you’re installing tractor inner tubes, ATV tire inner tubes, industrial tubes, trailer tire tubes or inner tubes for farm implements, light trucks, trucks and buses, OTR or low tractor trailers, the process is essentially the same.
First, Consider These Quick Hits about Inner Tubes
*Inner Tube Sizing: To find the size inner tube you want, check the size information on the sidewall of the tire. Tubes, because they’re made of rubber with a range of stretch, will generally fit several tire sizes that have the same, or near the same, space for an inner tube.
*Radial Tubes vs. Bias Tubes: Because bias tires and radial tires are manufactured differently, you cannot use a bias inner tube in a radial tire without risking heat build-up and blow-out. Radial tubes, which are made from a rubber compound that has more flex, can be safely installed in both radial tires and bias tires.
*The New Tube Is Smaller than the Old Tube because the old tube has been stretched and relaxed and has taken on the tire’s shape. New tubes start out smaller than the tire.
*Tools You Will Need to Remove and Install an Inner Tube: It’s always helpful to have all the tools you’ll be using at hand before you start your inner tube removal and installation. You’ll need pliers, a tire iron or other pry tool, a rubber mallet, a valve core removal tool and an air pump.
Step by Step Inner Tube Removal and Installation
Getting the Old Inner Tube Out of the Tire
Before Installing the New Inner Tube
Installing the New Inner Tube

Unlike cheap tire tubes that can blow out and fail quickly, RubberMaster Inner Tubes and Flaps are made from premium rubber and are factory-tested for top air tightness, aging resistance and high temperature resistance for longer service life.
Posted by Nicole Wakelin Know How
Knowing how to replace a tire tube comes in handy when you need to fix a flat on a wheelbarrow, snow blower or lawn mower. It’s not hard to do, and it’s something even a novice can manage. Here are the steps you’ll need to replace a tire tube, as well as some additional tips.
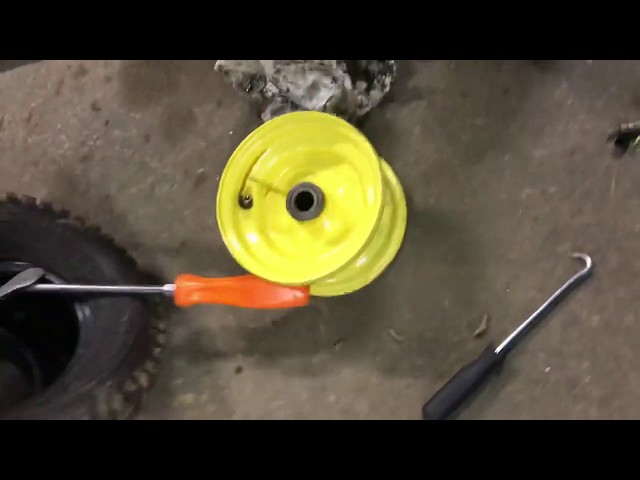
Make sure you’re in a well-lit area with a level surface and you have eye and hand protection. When you’re dealing with a piece of inflated rubber it’s possible for items to go airborne as you work, and there might also be dirt or other debris stuck in the treads that could scratch your hands. Once you’re ready, remove the tire. Next let any remaining air out of the tube by either removing the valve stem core, or simply pressing on the valve core until the tube is completely deflated.
How to Remove the Tire from The RimYou’ll need oil and two tire bars for the job. Start by spraying the rim and seal with oil, and then let it stand for a few minutes. Next, slide one tire bar between the rim and the tire near the stem. Use the second tire bar to slowly pry the tire over the rim, going around the circumference. You don’t have to remove it completely. You just need one side free so you can reach in and remove the damaged tire tube.
To insert the new tube, carefully slip the stem through the hole in the rim so you don’t damage the stem. Put the stem nut on the stem, which should help keep it from slipping as you slide the tire back into place.
Now it’s time to break out the tire bars again. Use one tire bar to pull the tire back over the edge of the rim, and then use the other tire bar to slowly, and carefully, slip the tire into place. Make sure that it’s lined up correctly, and double check that you haven’t snagged the tube in the process. Take your time to avoid damaging the tube.
Once the tire is back in place, all you need to do is inflate it, and you’re ready to go. Replacing a tire tube is something anyone can do with only a few tools, some oil and a little effort.
Check out all tire tube repair products available on NAPA Online or trust one of our 17,000 NAPA AutoCare locations for routine maintenance and repairs.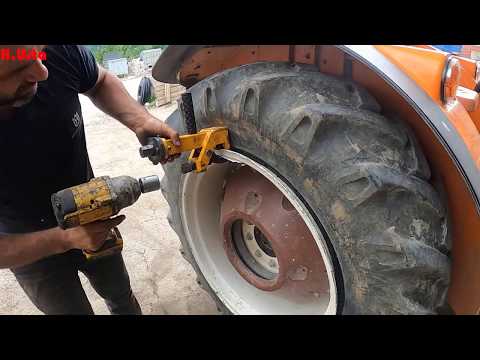 For more information about tire tube repair, chat with a knowledgeable expert at your local NAPA AUTO PARTS store.
Categories
Know How
Tags
flat tire, flat tire repair, lawn tractor, riding mower, snow blower, tire care, tire maintenance, tube, valve stem
Nicole Wakelin covers the automotive industry as a freelance journalist for a variety of outlets. Her work includes news pieces, podcasts, radio, written reviews, and video reviews. She can be found in The Boston Globe, CarGurus, BestRide, US News and World Report, and AAA along with lifestyle blogs like Be Car Chic, The Other PTA, and She Buys Cars. She is active on social media with a large following on both Twitter and Instagram and currently serves as Vice President of the New England Motor Press Association.
Another season of changing shoes is approaching. And you may remember that on one of the tires after the last winter/summer there is a jamb - a small bump.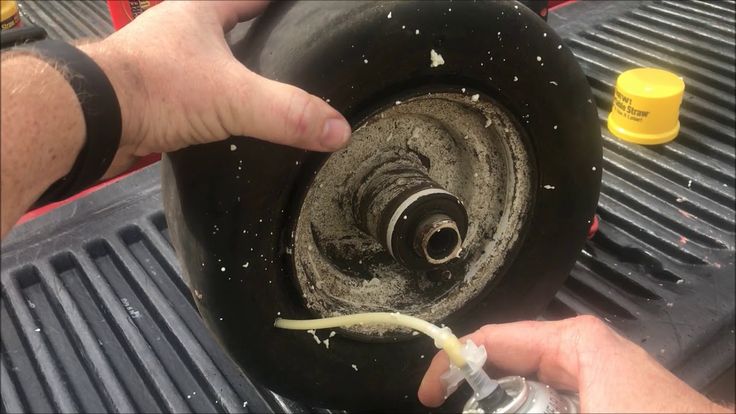 I don’t want to run to the store for the sake of one new tire. We understand. Or maybe it looks even better if repaired?
Yes, not every wheel that has met with a nail, rebar sticking out of the ground or a sharp stone on the road is considered damaged. Everything, of course, depends on the scale of the damage and its location on the tire itself. Some are easily repaired, while others are simply impossible to do - the tire can only be sent to the trash.
A bulge on a wheel, referred to by drivers as a bump or bulge, is the most common tire sidewall defect. It appears due to a collision with an obstacle or after falling into a pit, more often at high speed. The threads of the sidewall carcass are easily damaged by impact, and the tire at this point can no longer hold the load and air pressure - swelling appears. A small bump sooner or later turns into a big one, and driving with such a defect is dangerous - the wheel can shoot at any moment. At high speed, this is fraught with loss of control, departure from the road and a rollover.
The quality of roads in Kazakhstan contributes to the appearance of bulges on tires
Some types of bulges are repairable, although this is a temporary measure. Not a single patch can restore the factory rigidity. Ideally, change the tire.
Special cord patches can extend the life of a tire with a herniation, even if the swelling has appeared on the tread. The sidewall is a different story. If the swelling appeared at a distance of more than 40 mm from the side, it can be repaired. If not, then the wheel needs to be replaced. Blisters on low profile tires are most often non-repairable.
For maximum safety when riding with a repaired bump, insert the tube. This is an inexpensive and reliable solution. On our market, you can find cameras made in China and Russia, the latter are slightly more expensive, but also of better quality.
The elimination of a side cut is a serious operation, therefore, as in the case of a bump, you will have to go to the professionals.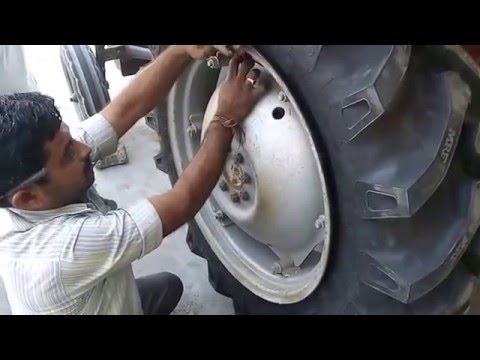 We need cord patches, fortunately in our time they are of different sizes and with a different number of layers. And if you do it wisely, then you can't do without special tools and vulcanization.
A cut, by the way, cannot be healed in all cases. If the gap is in the shoulder area of the tire, it is unlikely that anyone will undertake to repair it, since no guarantees can be given here. However, our Kulibins take on even the most difficult cases, cutting out parts of the sidewalls from the tires and even weaving the cord on their own.
Tire overhaul. We would not put such a wheel on ourselves
Low profile tires can be repaired, but more difficult. A tear in the sidewall is easier to seal on tires with a medium or high profile.
Sometimes a cut is confused with a pluck. This is when the outer layer of the sidewall caught on something sharp, a tear formed, but the frame itself remained intact. There is nothing wrong with that, although the drivers at the tire fitting company successfully repair the cut, for which they take it accordingly.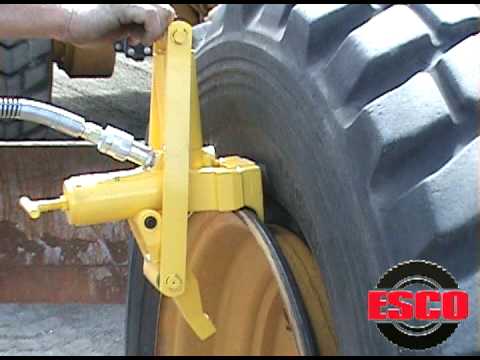
If a piece of rubber remains on the sidewall, then glue it with ordinary superglue (101st). If it came off, then it is better to cover it with raw rubber and vulcanize. Leaving the pluck bare is not recommended, because the tire carcass, often consisting of a metal cord, will quickly corrode.
In Europe, defective or used tires are perforated before being sent for scrap to prevent their resale and possible operation. But they don’t know that we have such holes on the sidewall patched once or twice
Cuts and hernias are not the only possible damage to the side of the tire. You can also spoil the side ring, in the process of changing shoes, for example. If it’s for garlic, then such a tire is already dangerous. Sooner or later, the tire pressure and the load in motion will start to squeeze the rubber off the rim - a wheel explosion can occur.
This ailment is repaired if the wire ring - the base - is intact. There are no special technologies and materials to correct this particular problem, but most often craftsmen use a two-component composition for chemical (also called cold) vulcanization. After mixing, the mass is pressed into a fat-free damage. Compound manufacturers recommend waiting 72 hours before mounting a tire. Of course, our masters do not pay attention to this condition - they put the tire right away. And it’s good if the wheel is flat because of this at night in the parking lot, and not on the road.
If the side ring tears are barely noticeable, but the wheel is still flat, then you can use a special liquid - a bead seal designed to seal a tubeless tire.
These seals have been used in motorsport for some time. In particular, in the American Formula D Drift Series, drivers used compounds to keep the tire on the rim even with minimal tire pressure. Now they are banned.
Pay attention to the left rear wheel of the Nissan Silvia S13. Due to too low pressure, it was literally taken off the disk under load
Every schoolchild has faced this problem when patching the inner tube of his bike after hitting something sharp. Repairing a car tire puncture with your own hands will also not be difficult even on the road. But for this you will need a pump (or compressor) and a universal tire repair kit with harnesses. All this is sold at any car market or gas station.
Repairing a tire on the side of the road with harnesses
The process is simple. If we are talking about the front wheels, then in most cases the wheel can not even be removed, it is enough to turn the steering wheel in the right direction, find the puncture site and carry out repairs. First, the hole is cleaned with a helical awl from the set. The tourniquet itself is smeared with glue and tucked into the eye of the awl, after which it is inserted into the tire hole. With a sharp movement, the tool is removed, and the tourniquet remains in place and clogs the hole. The tails are cut with a knife, but not at the root, it is recommended to leave about 20 mm. The tire is inflated and checked.
Sometimes a nail or self-tapping screw clogs the hole itself, remaining in it.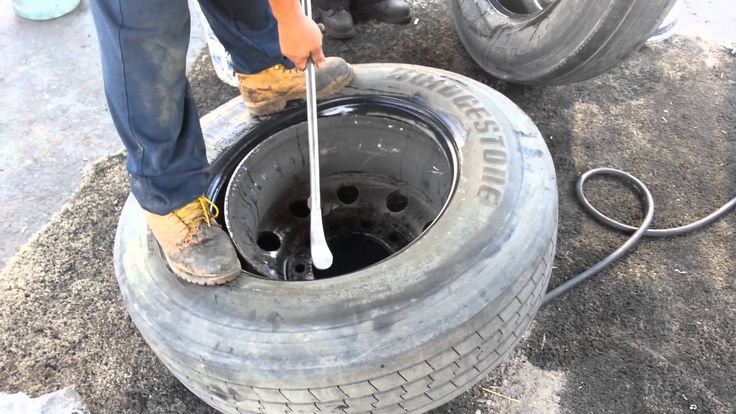 If you see a hat in a tread, do not rush to pull it out. While the pressure is holding, move to vulcanize. And sometimes they drive with a screw in a tire for weeks.
Repair of a puncture at a tire shop
Punctures are also repaired with harnesses at a specialized service, although among professionals such repairs are not considered long-term. After a few months, the flagella dry out and can let air through. There are more advanced methods like cold and hot vulcanization. The latter is more reliable. In this case, the hole is sealed with an elastic plaster, and the funnel from a foreign object is filled with a special compound. After that, a vulcanizer is put on the tire, it heats up the rubber and solders it.
In addition to the plaster, the puncture is also repaired with special cord fungi. Craftsmen process the puncture site: drill it and treat the surface with a tool to roughen it. Then the repair area is lubricated with glue (it is also called cement) and a fungus is introduced. This is done from the inside of the tire. The cap of the fungus is rolled, and the excess legs are simply cut off from the outside.
Puncture repair with sealant
With the advent of tubeless wheels, and later run flat tires, many automakers began to abandon spare wheels. Instead, repair kits with compressors are supplied with the machines. A repair kit is essentially a bottle of pressurized sealant. Later, such spray cans began to appear on the shelves of ordinary car dealerships.
This method has not taken root in the CIS, because the condition of the roads makes it necessary to have at least a stowaway in the kit, but it can also be considered as a method of repair on the road.
Jack up the car and pump sealant through the nipple into the damaged wheel. Next, you should spin the wheel, then pump it up, lower the car and drive a few hundred meters.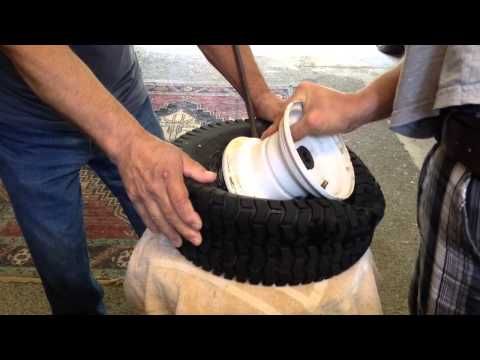 If the tire tightness has not been restored, repeat the procedure.
For commercial vehicles, cutting the tread with a special device (regrower) is a common thing. Moreover, such tire retreading is provided by the factory (marked REGROOVABLE on the sidewall) to increase the service life. But there are entrepreneurs who undertake to deepen the grooves in tires for passenger cars. But they are not intended for such an operation. Often used tires for sale are “refreshed” in this way. Be careful!
What is the threat?
The worst option is that the retreaded tire will shoot out on the road, as the master can damage the undertread layer when deepening the grooves. Such a tire will not be able to hold pressure at some point. There will be a boom! At best, the tire will indeed last a little longer, but is the game worth the candle? We think it's not worth it.
How is cutting done?
A regrower is used to cut the tread.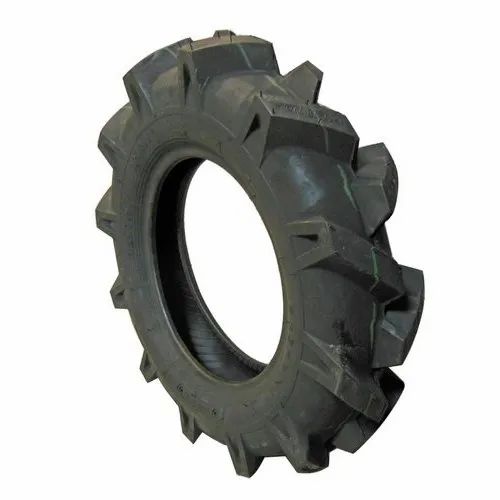 Roughly speaking, this is a large soldering iron with interchangeable tips of various shapes. It goes through rubber like a knife through butter.
If the tire is for passenger cars, then it is worth taking on a regrower only in one case - when part of the tread pattern was welded with "new" rubber during repair. This is where threading comes in handy in order to restore the grooves and symmetry of the tread.
Vehicle operation is prohibited if:
- tires have a residual tread height of less than 1.6 mm;
- tires have punctures, cuts, ruptures that expose the cord, as well as delamination of the carcass, delamination of the tread and sidewall;
- tires in size or load capacity do not match the car model;
- tires of various sizes, designs (radial, diagonal, chamber, tubeless), models, with different tread patterns, winter and summer, studded and non-studded, new and restored, are installed on one axle of the car;
- Tires retreaded according to the second repair class are installed on the front axle.
What is a second class repair?
This is the case when the carcass of the tire has been restored after serious damage. A side cut (or tear) is a serious damage to the tire carcass.
LADA
UAZ
Kia
Hyundai
Renault
TOYOTA
Volkswagen
9000 2 SkodaNissan 9000 Nisan 9000 Nisan 9000 2 NISANOSAN Mercedes-Benz
Mitsubishi
Mazda
Ford
All brands
Most often, we ourselves are to blame for the fact that tires become unusable. But this can be avoided.
Related materials
You have never seen such tires: even the police were surprised
In the process of using a tire, a variety of damages can occur, most of which are the fault of the driver. As a result, rubber is wasted, and since the law prohibits the use of different tire models on the same axle, you have to spend money on replacing the second tire.
The most common damage is puncture . This is the most harmless type of damage, but only if you notice it in time and repair it right away. It is absolutely impossible to drive on a flat tire, even a couple of meters! The damage caused by running on a flat tire or with low pressure is catastrophic. This causes the sidewalls to deform more than they should, which causes the tire to overheat, delaminate, and the carcass becomes unusable due to broken cords. As a result, the tire will have to be thrown away. In addition, the edge of the rim can also be damaged.
Punctures are of two types: with and without cord damage. To determine this, it is necessary to remove what pierced it. If the edges of the puncture tightly converge, then the cord is not damaged and it will be possible to repair the tire without removing it from the disk.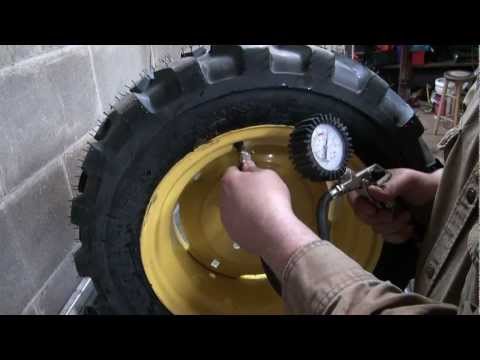 Otherwise, if the edges do not converge, you will have to disassemble the wheel and make repairs with strengthening the frame from the inside. Alternatively, in the field and in the absence of a spare wheel, such a puncture can be repaired without removing the tire from the rim, after which you can carefully drive to a tire fitting or garage and make a full repair.
Related materials
Is it possible to pump up a wheel without a compressor - the experiment "Behind the wheel"
When repairing, the puncture site should be cleaned and marked. Further, it all depends on what kind of repair kit you have - as a rule, instructions are attached to them. There are sealants that are poured into the tire through the nipple, after which the wheel turns with the puncture down and the substance seals the hole. Repair using a tourniquet or insert is somewhat more complicated, but also more durable: the edges of the hole are polished with a special tool, after which the tourniquet treated with a special compound must be inserted into the tire through a puncture with a special awl, pulled out (not completely) out and cut flush with the surface.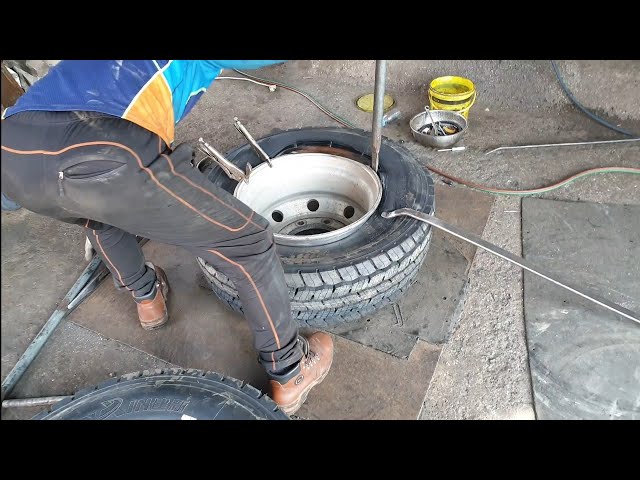
In case of damage to the cord due to a puncture, the tire must be removed from the rim in order to install a reinforced patch with an additional cord on its inner surface. One of the sides of such patches has an adhesive layer that promotes cold vulcanization. After such a repair, wheel balancing will be required. To seal punctures from the inside, patches in the form of a mushroom are also used, with a leg that goes into the puncture. Such patches are also covered with a special adhesive for cold vulcanization.
Cuts or holes , unlike punctures, are not repairable, as they violate the integrity of the frame, which can no longer be strengthened. In addition, breakdowns are always sudden and occur on the go: the tire abruptly loses pressure and before the car comes to a complete stop it has time to make several revolutions “on the rims”, which breaks the cord and destroys the layers. It is not recommended to use such a weakened tire, even if it was possible to repair and strengthen the place of the rupture or cut, in the future.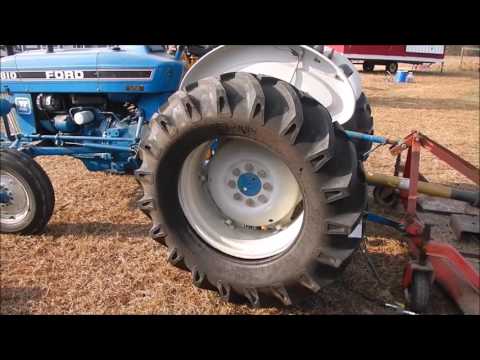
Related materials
8 tire storage rules - do you follow them all?
Incorrect storage of tires can cause cracks . The danger of such damage is that moisture enters the cord through cracks, which renders the frame unusable. In addition, air can escape through cracks. Unfortunately, cracks are not repairable, and tires with them will not last long: sooner or later they will deform, become covered with swellings due to rusted and torn cord or because of driving with pressure below the recommended one.
Blisters or bulges can appear on a tire for a variety of reasons - it always happens due to a broken cord or delamination in the carcass. In the first case, an obstacle was hit and the impact broke the cord or the cord was cut through with a sharp object. In the second case, there is no damage on or near the hernia, which means that it appeared either due to a factory defect, or due to frequent driving with pressure below the recommended one.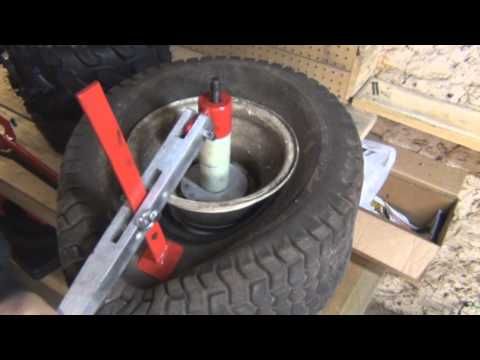 The danger of hernias is that they can explode at any moment and provoke a skid, which will lead to an accident. If there is nothing to replace a tire with a hernia, then it is better to rearrange it to the rear axle and drive very carefully. Like cracks, a hernia cannot be repaired. Sometimes small blisters resulting from impacts or cuts are reinforced with reinforced patches, but there is no guarantee that the tire will not explode. Therefore, tires with hernias are recommended to be replaced immediately.
Related materials
Tire blackening - 6 ways to polish. Inexpensive!
Tire sidewalls can be damaged by rubbing against curbs or the asphalt edge when pulling over. If you are prone to such a driving style, then it is recommended to inspect the inner and outer sidewalls from time to time and, if abrasion is found, swap the wheels in order to prevent the cord from being exposed - the rubber thickness on the sidewalls is small (1.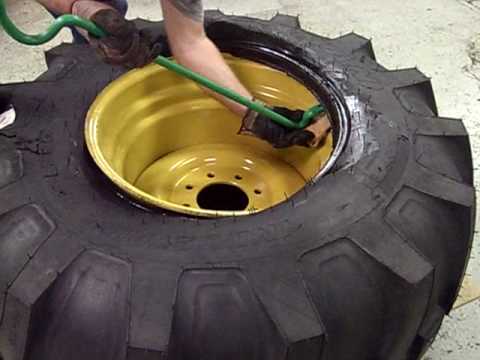 5–3 mm), and it can be rubbed to the frame very quickly.
Often the cause of tire damage can be poor-quality tire fitting , during which the bead ring was damaged. In this case, the tire loses its geometry and “sits” crookedly on the disk - it writes out “eights” during rotation, and lateral vibration appears during the ride. It is impossible to repair such a tire - you need to replace it with a serviceable one as soon as possible before it damages the suspension: rods, hubs and bearings.
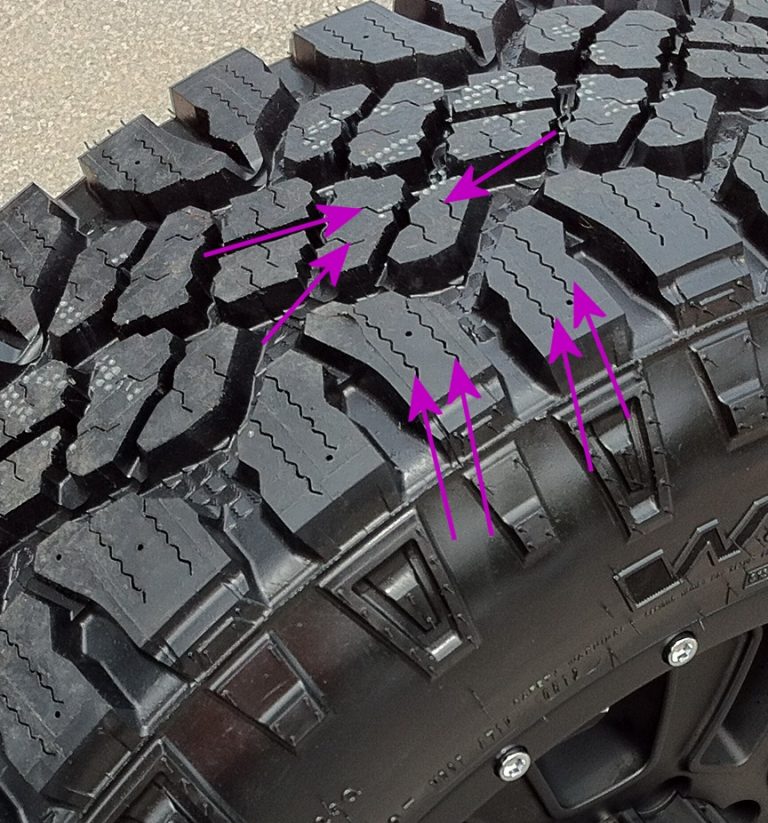
You can find out whether you are using tires correctly and what invisible damage they have received by the characteristic wear of the tread, the varieties of which are collected in the table for convenience:
Double sided shoulder wear
Driving with less than recommended tire pressure.
Inflate the tires to the pressure recommended by the automaker (a plate with recommendations is attached in the driver's door opening) and find the cause of the fall: puncture, cracks, hernia, nipple, rust on the rim of the disc in the place where the tire fits, etc.