by Kyle McBride
fixing tire image by Joann Cooper from Fotolia.com
Dodge equipped its Caravan minivans with a spare tire stowed underneath the vehicle. A cable winch under the floorboards drops the spare tire down to the ground so it can be retrieved. Stowing the spare tire under the vehicle allows for maximum cargo and passenger space in the passenger compartment. With Stow 'n Go seating (second and third row of seats can be folded into the floor), the tire is under the center of the vehicle. Without Stow 'n Go seating, the spare tire is stowed underneath the rear of the Caravan.
Open the lift gate of the Caravan. Pull up on the release lever on the left-side storage compartment. Remove the storage compartment cover. Remove the tool pouch from the compartment.
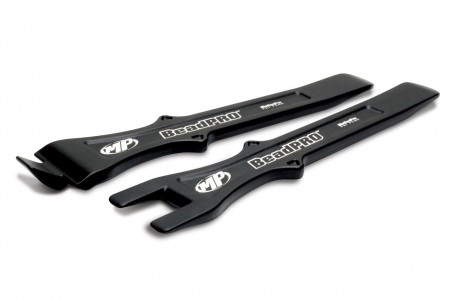
Open the tool pouch and remove the three bars. One bar looks like a tall "L. " One bar has a spring-loaded notch at one end. Insert the spring-loaded notched end of the second bar into the slot in the middle of the "L"-shaped bar. Insert the end of the third bar into the other end of the notched bar. The bars form a long "T" handle.
Remove the cap on the spare-tire winch's drive nut on the floor of the Caravan between the two front seats. Insert the long end of the "T" handle onto the drive nut and rotate the nut counterclockwise until it resists being turned.
Disassemble the "T" handle. Reassemble the bars to form a long hook. Insert the end of the third bar into the notched end of the second bar. Insert the other end of the second bar into the top of the "L"-shaped bar to form the spare tire hook.
Reach under the caravan with the spare tire hook and use the bottom leg of the "L" bar to hook the edge of the spare tire rim and pull it out from under the car.
Open the lift gate of the Caravan.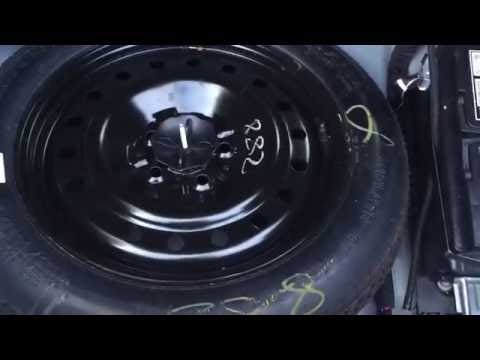 Pull up on the release lever on the left-side storage compartment. Remove the storage compartment cover. Remove the jack handle from the compartment.
Remove the cap on the spare-tire winch's drive nut in the center of the cargo floor just inside the lift gate opening. Insert the jack handle onto the drive nut and rotate the nut counterclockwise until it resists being turned.
Pull the spare tire out from under the Caravan.
References
Tips
Warnings
There are two configurations when it comes to Dodge Caravans and spare wheels.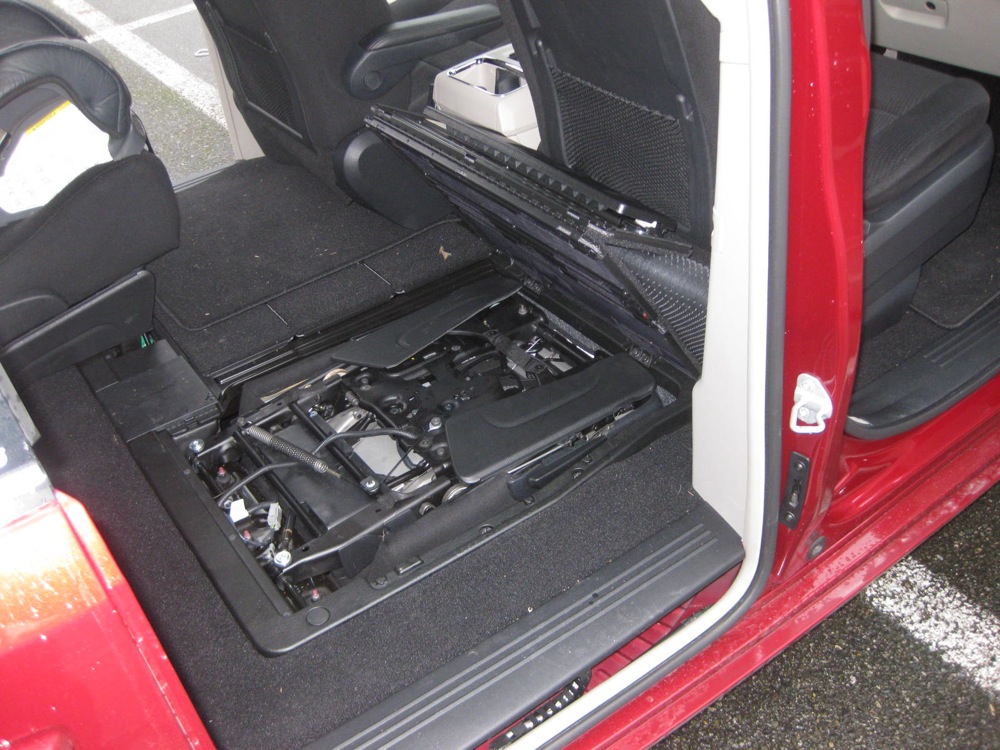 The “Stow ‘n Go Seating” and the “Non-Stow ‘n Go Seating.” With both configurations, the spare tire is found underneath the vehicle. The placement of the spare, however, is different for each configuration so let’s take a look and find your spare wheel.
The Dodge Caravan Stow ‘n Go is named so because the second and third row of seats can be folded into the floor. Because of the extra floor space needed the spare tire has to be moved forward, closer to the center of the vehicle.
In fact, the tire is underneath the driver and front passenger seats, allowing for an interesting layout. Let’s go through all the steps to changing a tire on the Dodge Caravan Stow ‘n Go:
Step 1 – Find the Tools KitFirst things first, you’ll want to open up the rear liftgate. To the left, you will find a small compartment containing two tool pouches and you might also have an owner’s manual in there. For now, all you’ll need is the tool pouch that doesn’t have a jack.
In the tool pouch, you should find three bars of different designs. One of the bars is more like a rectangular T with a very short vertical stem. Alternatively, the “T” bar may look like an “L” depending on the model. The other two bars should be identical.
There is a square hole in the middle of the rectangular bar with which you can insert one of the other bars. Connect the last bar to the end of its twin to form a large T shape with all three bars.
Step 3 – Finding the Spare tire winchThis is where things are very different compared to most other vehicles. The winch which is used to lower the spare tire is found between the driver’s seat and the front passenger’s seat in the center console.
The access the winch the first thing you’ll need to do is pull the rear center console drawer out.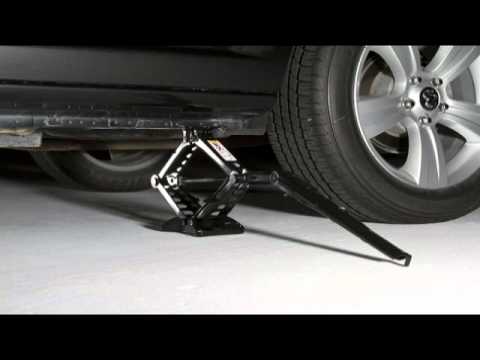 Then open up the forward most storage compartment for the center console. It should be Infront of the cup holders.
The bottom of this compartment can be taken out quite easily and you should now see the winch nut at the bottom. If you have not pulled the rear center console drawer out, then all you will see is the inside of the drawer.
Step 4 – Lowering the Spare TireNow that you have access to the winch nut, you’ll want to insert the “T” tool and start turning the nut in the counterclockwise direction. The nut might be tight at first, but it will loosen up as you go. Once the spare wheel touches the ground the winch will become significantly easier to turn.
This does not mean that you are done, however. Keep turning the winch until you cannot turn it anymore. You have to do this because you will need enough slack in the cable to pull the tire out from the underside of the vehicle.
Step 5- Removing the Wheel from the winch systemNow that the tire is on the ground and there is enough slack on the cable, you can proceed to pull the tire out.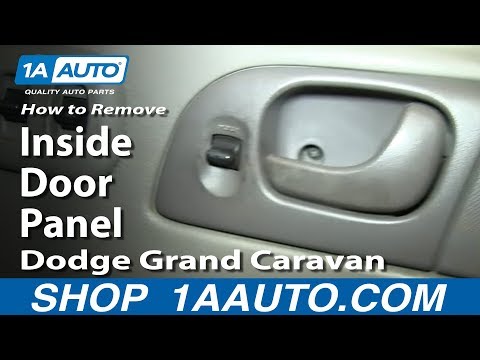 Remember to do this from the driver’s side of the vehicle though, as the exhaust is in the way on the passenger’s side.
You might be wondering how you are going to reach the tire and if you need to crawl on the ground to get to it. Have no fear, for this is where your tool comes into play again. The rectangular bar has a different insert on the end.
Reinserting the long bar into the end will make your tool into a hook so that you can pull the tire out. Once the tire is out from the underside of the vehicle you can remove the cable. The tire sits in a plastic “bucket” which is attached by a spring-loaded clasp.
To remove the tire from the bucket, you need to push the edges down on the clasp and slide it through the center of the wheel and bucket. Now your spare wheel is free and ready to use. Just change the tire like any other vehicle.
The Non-Stow ‘N Go Seating ConfigurationThe Non-Stow ‘N Go seating configuration is a little simpler than the Stow ‘N Go. Because the Non-Stow ‘N Go is less concerned about storage space the spare tire is at the back under the rear storage compartment, removing a lot of the steps.
Step one is almost the same. Remove the tool kit from the left of the storage compartment. From this tool kit all you will need is the jack’s handle, no special tool is required.
Step 2 – Finding the Spare Tire Winch and Lowering the TireThis time the winch cover is just inside the cargo area right in the center. No extra steps, just remove the cover and insert the jack handle and start turning in a counterclockwise direction. Expect some resistance at the start and remember to keep turning even after the wheel has touched the ground so that you have ample slack in the cable.
Step 3This step is the same as step 5 above. With both configurations just reverse the steps to put the spare tire back.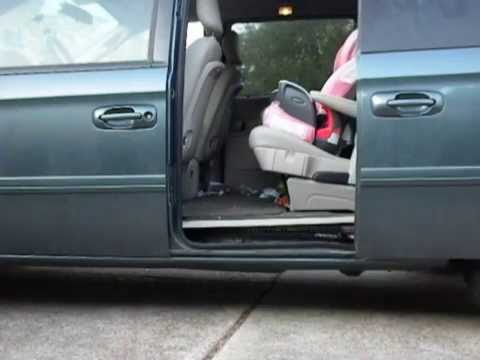
The first real step in finding your spare tire for your Dodge Caravan is to figure out whether you have a “Stow ‘n Go Seating” or the “Non-Stow ‘n Go Seating” configuration. Once you have that information you can follow the steps above and get back on the road!
Comments on the topic Replacing the glove box Dodge Neon
Baltai
Oh gods) Finally, Oleg removed and mantiroval
Set
Is there a spare wheel and a place for it? A friend on neon and without a glove compartment has a lot of things to fix :)
Pharaoh
Wow, everything works! Already myself ...)
Wolfe
and if the bushing is broken there, what are the dimensions of the left bushing?
Gilyan Dezhurina
I'm going to try right now, but I thought I should pick where the button is,
Natela
useful video for inexperienced people!
Vili
Another question, I have in this application where to remove the pillow error, writes that it is fake) but it works in Turki, the check is thrown off without problems.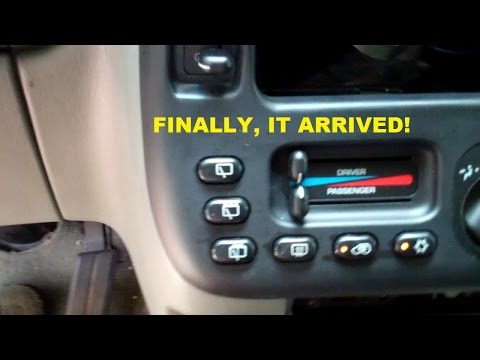
Zhemerdev Alesey
Easy and simple! Last year, I was asked for 25,000 tenge for this procedure. (5,000 rubles). I did the same as in the video for 30-40 minutes! Costs - 0! A friend told me on neon with a glove compartment so far everything is fine.
Hornet
This car is the best
Hadassah
Can you see how the power window buttons are embedded in the door handle?
Sol
Lehsus is the most comfortable budget car in the world. Periodic problems with the glove compartment completely got)))
Engel
It was necessary to put a tachometer from the VAZ 2106)
Rawley
Informative! Thank you! Difficulties with the glove box all the way)
Panitkina Athena
Great review.
Erzat
how best to clean the drain? Condensate in the salary is
Dmitry
I need such a bunch on the lawn :)
Meyer
Civic is better than
Nauman ABC ⚠ Destruction for Capslock
left -hand drive is a shit of
9000grade>)) neon and without a glove box a lot of things came up,
Juro
The LED will die in the car.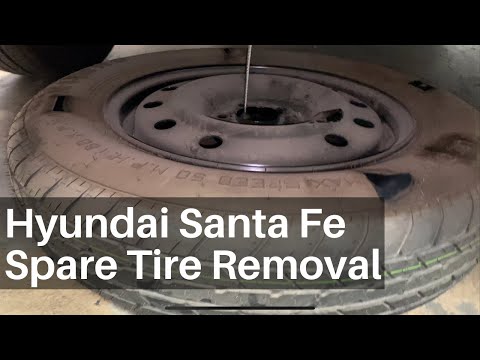 He needs voltage stabilization. I do not think that stubs are shoved into them.
Zaur
I've been dreaming of a tachometer since I was 11!!!) I still can't get it together!
Kagarmin Germes
Michael, such a question about the brakes. I had my discs and pads changed yesterday. I get into the car, it does not go. The master says that the pads and discs should get used. Do you think it's true?
Pierre
... you are American ... condoms so damn you sawed ...;!! You ... arrive and stupidly pipe ... the whole salon of a bitch !! ... do not leave for the Russians ...!! Why...couldn't you have carefully removed the carpet?! What are you American!!! Because of you, we ... don't have ...!! Go...drink some of your shit, you bastard...and see your complete shit, you freak...let that Jay's impeller fly out to you and your whole head...what the hell are you...!!! Such machines are worth their weight in gold, and you shit it like that and cut it like a tin! Goat .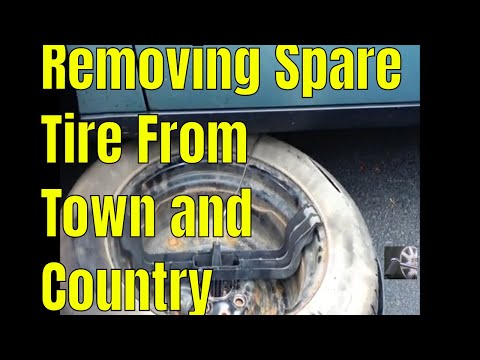 ..!! America... so that the goats don't let you into the yapa at all... in the ass...!
Danila
Napshikal, but do you need to turn on the air conditioner?
Ole
Handsome. Thanks a lot.
Bol
It would be desirable to show in detail the glove compartment on the Dodge))) Agony Is it possible to apply ceramics immediately after painting?
Sener
Thanks for the video. Today was a Grand Caravan with a similar problem. The fans did not turn on at T=106C. Machine 2005 The PCM is different, stands under the bumper, on the left wheel side. To get to it, you need to partially unscrew the fender liner. The fan controller is basically a PWM controller. minus controlled. When ‘’-‘’ is applied to the 4th pin (blue with a purple stripe), the fans rotate at 100%. That is, to check the fan regulator, we bridge contacts 3 and 4 - with a good regulator, the fans spin. This is true in the presence of + 12V on the first contact. The problem resolved itself and all wiring was good.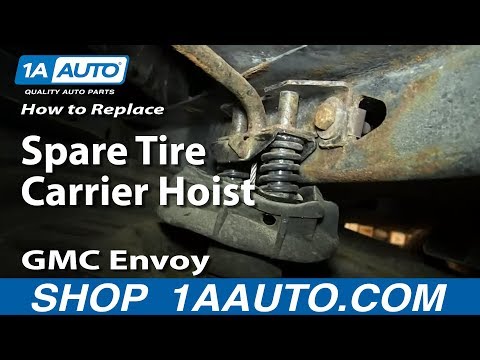 After reassembly, the fans work.
Leave a comment
Similar repair videos
Dodge stratus Antifreeze replacement
Checking the radiator fan relay Chrysler Voyager, Town Country, Dodge Caravan.
Replacing the stabilizer bushings on the DOGE INTREPID
How to tighten the power steering belt on the Dodge Caravan. Dv. EDZ
Workshop manual DODGE NEON NEON
How to remove the side mirror! Chrysler Voyager, Town Country, Dodge Caravan.
Disabling the DODGE CARAVAN immobilizer at three in the morning
How To Open Chrysler Dodge Keyless Doors open doors without a key Chrysler Dodge
Restoring ball dodge
How to install a neon cord in a Ford Focus 2 (Kolkhozim)
Replacing a fuel pump using the Dodge Avenger as an example
Dodge Service Manual: DODGE JOURNEY gasoline since 2008, repair, operation, maintenance
Owner's manual Dodge : DODGE DURANGO / DAKOTA from 2007 onwards, exploitation, then, ser.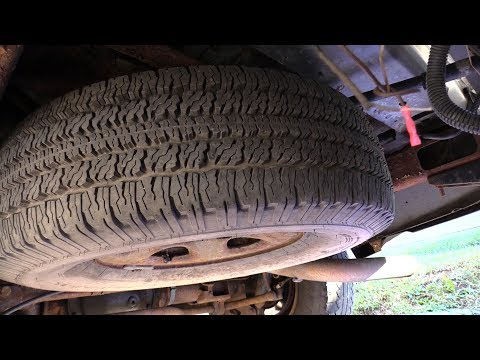 ZAP.
ZAP.
Operation and Maintenance Manual for Dodge Durango/Dakota since 2007. This book is a detailed instruction manual for the operation and maintenance of the Dodge Durango / Dakota.
Dodge Owner's Manual : DODGE CALIBER gasoline since 2006, repair, operation, maintenance
A detailed guide for professionals on the repair and maintenance of a Dodge Caliber car since 2006 with 1.8, 2.0 and 2.4 liter gasoline engines.
Dodge Service Manual: DODGE CALIBER gasoline since 2006, repair, operation, maintenance SRT4MT.
Dodge Owner's Manual: DODGE NITRO gasoline since 2006, operation, maintenance
Operation and maintenance manual for Dodge Nitro vehicles since 2006, equipped with engines with a displacement of 3.7 and 4.0 liters.
Dodge Service Manual: DODGE DURANGO / DAKOTA (b) since 2004, rep. working volume of 3.7, 4.7 and 5.7 liters.
Dodge Service Manual: CHRYSLER 300C / DODGE MAGNUM gasoline since 2004, repair, operation, maintenance , 5.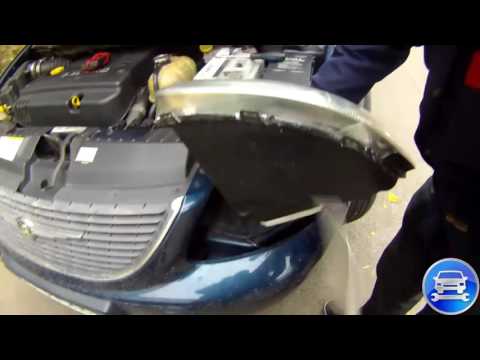 7 and 6.1 l., equipped with 4- or 5-speed AT.
Dodge Owner's Manual: CHRYSLER SEBRING / DODGE STRATUS / GAZ SIBER since 2004, operation, maintenance This book is a detailed instruction for the operation and maintenance of the car Chrysler Sebring / Dodge Stratus / Gaz Cyber.
Dodge Owner's Manual: DODGE CARAVAN / GRAND CARAVAN since 2004, operation, maintenance
This book is a detailed instruction manual for the operation and maintenance of Dodge Caravan / Grand Caravan since 2004 release.
Dodge Service Manual : DODGE CARAVAN CHRYSLER VOYAGER TOWN / COUNTRY gasoline 2003-2006 onwards, repair, operation, maintenance to 2006 release, with gasoline engines.
Dodge Owner's Manual: DODGE CARAVAN / GRAND CARAVAN / CHRYSLER VOYAGER / GRAND VOYAGER / TOWN / COUNTRY gasoline since 2001 / 2004 onwards, repair, operation, maintenance
Dodge Caravan repair, operation and maintenance manual / Grand Caravan / Chrysler Voyager / Grand Voyager / Town & Country from 2001 / 2004, with 2. 4 petrol engines; 3.3; 3.8 l.
Dodge Owner's Manual : CHRYSLER VOYAGER / GRAND VOYAGER / TOWN / COUNTRY / DODGE CARAVAN / GRAND CARAVAN petrol / diesel 2000-2007
Manual for the repair, operation and maintenance of cars Chrysler Voyager / Grand Voyager / Town / Country / Dodge Caravan / Grand Caravan 2000-2007 model years with gasoline and diesel engines gasoline repair, operation, maintenance
Repair and maintenance manual for Chrysler Sebring 2000-2006 model years, as well as GAZ Siber since 2008 model year, with gasoline engines with a working volume of 2.0, 2.4, 2.7 liters.
Dodge Service Manual : DODGE NEON / PLYMOUTH NEON (b) 2000-2005 onwards, rep. with petrol engines with a working volume of 2.0 liters.
Dodge Service Manual: DODGE DURANGO / DAKOTA 2000-2003 onwards, repair, maintenance, then
Repair, maintenance and operation manual for Dodge Durango / Dakota 2000-2003 years of release.
Dodge Owner's Manual: CHRYSLER LHS CONCORDE 300M DODGE INTREPID gasoline 1998-2001 onwards, repair, operation, maintenance -2001 years of production, with petrol engines with a working volume of 2.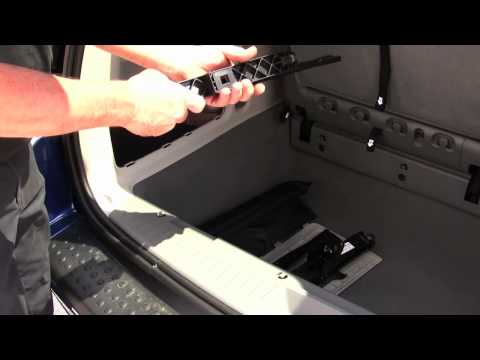 7, 3.2, 3.5 liters.
Dodge Service Manual : DODGE CARAVAN PLYMOUTH VOYAGER CHRYSLER TOWN / COUNTRY petrol 1996-2002 onwards, repair, operation, maintenance
Manual for the repair, maintenance and operation of Dodge Caravan, Plymouth Voyager, Chrysler Town / Country. Mini-vans of models 1996-2002 with petrol engines of 2.4, 3.0, 3.3 and 3.8 liters.
Dodge Owner's Manual: DODGE CARAVAN / GRAND CARAVAN / CHRYSLER VOYAGER / TOWN&COUNTRY / PLYMOUTH VOYAGER / GRAND VOYAGER gasoline 1995-2001, repair, operation, maintenance
Detailed photo repair manual for Dodge Caravan, Grand Caravan, Chrysler Voyages, Town&Country, Plymouth Voyager, Grand Voyager 1995-2001, with petrol engines: 2.0, 2.4, 3.0, 3.3, 3.8 l.
Dodge Owner's Manual: CHRYSLER CIRRUS / DODGE STRATUS / PLYMOUTH BREEZE gasoline 1995-2000 onwards, repair, maintenance95-2000 years of release.
Dodge Owner's Manual: CHRYSLER VOYAGER / DODGE CARAVAN / PLYMOUTH TOWN / COUNTRY gasoline / diesel 1996-2005 onwards, repair, operation, maintenance
Manual for the repair, maintenance and operation of Chrysler Town / Country, Dodge Caravan, Plymouth Voyager, 1996-2005, with 2.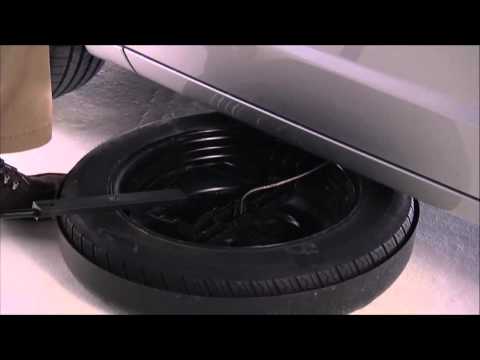 4L 4-cylinder petrol engines, 3.0L 6-cylinder petrol engines; 3.3; 3.8 liters, as well as 4-cylinder engines with a working volume of 2.5; 2.8 l.
Dodge Service Manual: DODGE СARAVAN PLYMOUTH VOYAGER CHRYSLER TOWN / COUNTRY gasoline 1983-1996 onwards, repair, operation, maintenance Voyager, Dodge Caravan, Plymouth Voyager, Dodge Grand Caravan, Plymouth Grand Voyager (T-115) 1983-1996, with petrol engines.
Dodge Owner's Manual : CHRYSLER LEBARON / DODGE 400 / 600 / LANCER / PLYMOUTH CARAVELLE petrol 1982-1995 onwards, repair, maintenance
Manual for the repair, maintenance and operation of Chrysler LeBaron / Dodge 400 / 600 / Lancer / Plymouth Caravelle with gasoline engines, 1982-1995 release.
Dodge Service Manual: CHRYSLER VOYAGER and GRAND VOYAGER / DODGE CARAVAN and RAM VAN diesel 2001-2007 onwards, repair, operation, maintenance 2001-2007 years of production, equipped with CRDI diesel engines with a working volume of 2.5 and 2.8 liters.
Dodge Owner's Manual: CHRYSLER LHS CONCORDE 300M DODGE INTERPID gasoline 1998-2001 onwards, repair, operation, maintenance -2001 years of production, with petrol engines with a working volume of 2.![]()