Delivery options and delivery speeds may vary for different locations
Sign In
or enter a zip code
Email * Password *
REPAIR & HOW TO
MAINTENANCE
TROUBLESHOOTING
GUIDES
TIPS & TRICKS
ALL ARTICLES WATCH VIDEOS ABOUT US SHOP PARTS CONTACT US
Replacing the brake pads on a Polaris Sportsman 850XP is a quick "do-it-yourself" maintenance task. No special tools needed, just a few basic tools and a little time to spare.
Watch the video above and follow the steps below to replace the brake pads on a Polaris Sportsman 850 ATV.
NOTE: The Polaris brake pad kits contains 2 brake pads, and you'll need a separate kit for each wheel. The front and rear brake pads are identical on the Sportsman 850XP, so this Polaris brake pad kit is compatible with either wheel.
Replacing Polaris Sportsman 850XP Front Brake PadsStep 1. Remove the wheel.
Step 2. Compress the brake piston back into the caliper by inserting a flathead screwdriver between the caliper and the outer brake pad, and levering against the caliper.
NOTE: The piston must be compressed into the caliper so there is enough room to fit the new brake pads over the brake disc.
Step 3. Remove the 5mm Allen cap at the rear of the caliper, followed by the two 15mm brake caliper mounting bolts, and then slide the caliper assembly off the brake disc.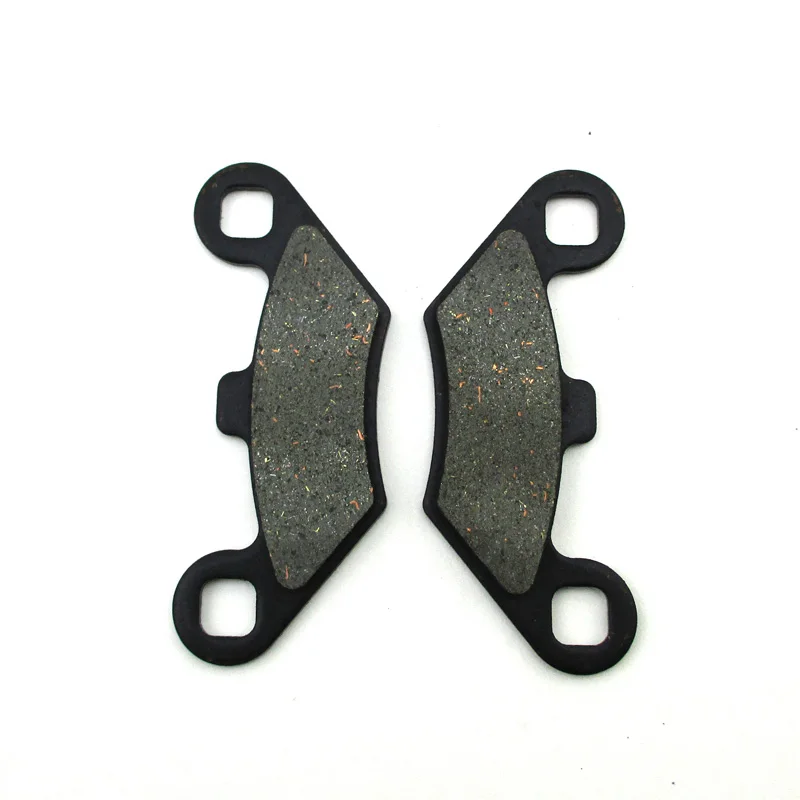
Step 4. Pull the caliper mount from the caliper body. Inspect the two rubber boots and replace them if they are split or worn. Clean the caliper mount, then grease the mount's slide pins and reinstall the mount into the caliper body.
Step 6. Slide the caliper assembly back over the brake disc, then reinstall the two caliper mounting bolts and the 5mm Allen cap.
Step 7. Reinstall the wheel.
Replacing the rear brake pads on a Polaris Sportsman 850XP is an almost identical process to replacing the front brake pads. The main difference is that the Sportsman only has a rear brake on the right side.
Replacing Polaris Sportsman 850XP Rear Brake PadsStep 1. Remove the wheel.
Step 2. Compress the brake piston back into the caliper using a flathead screwdriver.
Step 3. Remove the 5mm Allen cap and the 15mm brake caliper mounting bolts, and slide the caliper assembly off the brake disc.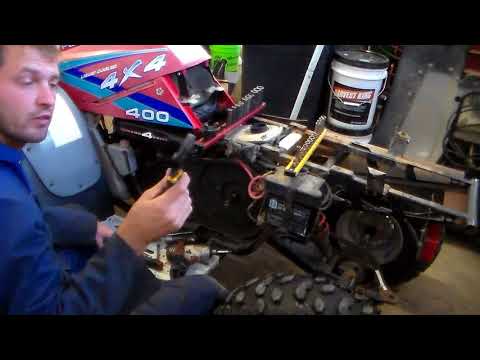
Step 4. Pull the caliper mount from the caliper body, inspect the rubber boots, clean and grease the mount's slide pins, and reinstall the mount into the caliper body.
Step 5. Install the new brake pads.
Step 6. Slide the caliper assembly back over the brake disc, then reinstall the two caliper mounting bolts and the 5mm Allen cap.
Step 7. Reinstall the wheel and you're done.
body
Keeping your brakes in good condition is critical for ATV maintenance. Once your brakes start to wear out, you could be putting yourself into dangerous situations. You need to be able to stop quickly and successfully at all times on an ATV.
Mud and moisture is the main killer of ATV brake pads, as well as excessive use. Brake pads do their job best under dry conditions. I’m not saying avoid mud, that’s the best part of off-roading, but it’s just something to be aware of.
To complete a successful brake pad swap out, the first thing you need to be aware of is if you have disk brakes or drum brakes.
Most newer quads you will see with disk brakes for every tire. Hydraulic disk brakes are the norm now a days, but you still see drum brakes here and there, and more on older four wheelers. The hydraulic disk brakes are so popular because they stop so much more effectively, limiting the amount of ATV accidents and injuries.
You will be able to easily tell if your brakes are disk or drum brakes by looking for the brake system behind the tire or on the axle. Here are some examples:
ATV Disk BrakesYou will notice where the ATV disk brakes got their name, there’s an actual disk that the brake pads press against to slow the machine down.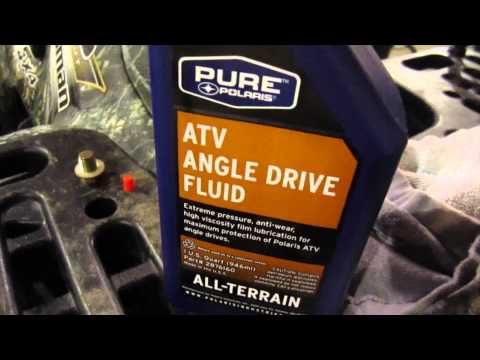
These are very common for sport or racing quads. The front disk brakes will very similar except they will most likely be behind the front tire, usually on both sides of the front wheels.
This is because the front brakes are used more often and are so much more critical to slowing the machine down quickly.
ATV Drum BrakesThe drum brakes will look like this picture, they are enclosed with the brake shoes being pressed onto the the wall of the drum inside the drum itself.
These are more often found on older quads or on utility ATVs on the rear wheels. Since the front brakes are most important, it’s usually fine for the the back brakes to be the less effective drum style brake system.
After you figure out which brake system you have, drum or disk, you can get the parts and do a brake pad change.
If you do have drum brakes but want disk brakes, they sell pretty good Disk Brake Conversion Kits on Amazon, just make sure to get the right kit for your make and model.
But what type of pads will you want to get? Let’s talk about the different brake pad materials.
There are three common types of brake pad material to choose from. Ceramic, Metallic, and Organic. Ceramic are usually the most expensive but run a lot cleaner. They create less brake dust which in turn causes less wear and tear to your other brake system components.
Metallic brake pads are popular for sport quads because of the high temperatures they can withstand. But they tend to be noisy and rough on the rotors. Semi-Metallic brake pads are optimal for an everyday rider.
Organic brake pads are the cheapest option of the three. They are easy on the rotors, and contain no metallic material. The down side is they offer the least performance and slowest braking time.
Semi-Metallic brake pads are the most common and best for everyday use. Here is a link to Semi-Metallic ATV Brake Pads on Amazon to help get your search started.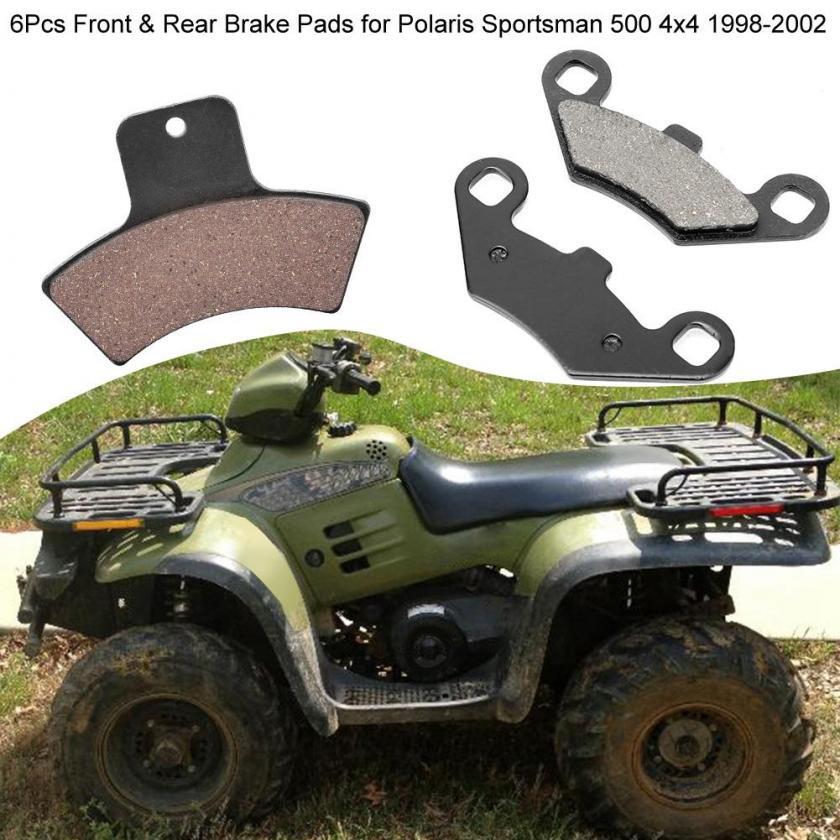 Make sure you get the right set for your make and model.
First step is to make sure you have all the tools you need to complete the job. Unless you like running out to the parts store in the middle of a job. Most of these tools are very common and already in most garages.
 Eyes are important.
Once you have all your tools and parts ready, it’s time to replace the brake pads. This is a pretty easy straight forward process.
First remove the ATV tire and wheel assembly from the machine. It’s best practice to loosen the lugs while the ATV is on the ground. Then lift the quad and remove the lugs and wheel.
This is usually done with a socket set, sometimes with an allen wrench. Look on the back of the caliper and you will notice two bolts that hold the brake assembly on.
Remove these bolts and the whole assembly comes off the rotor. The pads may still be on the caliper held there by two pins.
You will need to suppress the pins on the caliper to remove the brake pads. This is where you’ll use the vice grips or clamp. Once suppressed the brake pads will easily fall right out of the caliper housing.
This part can be a bit of a pain, but if you get the vice grips on just right you won’t have any problems.
You will need to compress the caliper piston with a c clamp or something to get the new brake pads in the caliper.
Once you compress the caliper piston you can remove the clamp and insert the new brake pads.
Remember to set the pads back on the caliper pins just the way the old ones were installed. You will need the vice grips again to compress the pins to put the new pads on.
Simply put the brake assembly back onto the machine by bolting the caliper back into place. There you have it, you just changed your brake pads. Not that difficult of a job, and can be easily done in less than an hour once you know what you’re doing.
Put the wheel and tire back onto the machine and lower the jack. It’s best to loosely put the lugs on while the machine is jacked up, and then firmly tighten the lugs after you’ve lower the quad back to the ground.
Press the brake down to be sure that your brake is working properly. The first or first two pumps on the pedal are soft as the piston started at a new point on the backside the brake pad.
This might be a good time to check your brake fluid and replace or add any if needed. If you want to bleed the brakes and get all new fluid in there check out this article on How To Bleed Your Brake Fluid On An ATV.
The average rider can go a few years before needing new brake pads. It’s not a good idea to judge if you need pads by how long it’s been since last replacement though. Since everyone rides their machine differently and with differing frequency, there are better ways to check of you need to do a replacement.
The best way to tell if you need to replace your ATV brake pads is by looking at the thickness of the pads. You could always measure them by hand, but a quick look is enough to tell if they’re worn out.
In this picture the pads on the right are worn and the pads on the left are new.
Another way to tell is if you hear a scraping noise while using your brakes when you’re riding. If you press down hard on the brakes and notice a jittery feeling in your handle bars, that’s another sign you should check out your brake pads.
Sharing is caring!
Published Updated ATVs0
As with any vehicle, the brakes on an ATV must work properly, as the safety of the driver depends on it. Chinese spare parts, from which almost every ATV is assembled, are not of high quality. Some ATV models require service immediately after purchase. Therefore, the question of how to pump the brakes on an ATV is very relevant.
Contents
Bleeding the brakes on the ATV is required if it becomes noticeable that the efficiency of the discs has begun to decrease significantly. In this case, it is necessary to immediately check the integrity of all elements of the system, check the condition of the pads, discs, hoses, etc. If all components are in good condition, in this case it will be necessary to bleed the brakes of the ATV.
This procedure is quite simple, even an inexperienced driver who has recently purchased an ATV can handle it. However, in the process of work, you will need to show care, patience and some professionalism. It is recommended to bleed the brakes with a partner.
This work must be treated responsibly. The safety of the driver of the ATV, as well as his passengers (if any) depends on the correctness and sequence of all actions.
If you are interested in how to bleed the brakes on the ZF Moto 500, Stels leopard 500, Stealth 500 GT or other models, it is enough to consider the general principles of modification. The process is identical for most ATV models. Bleeding the front and rear brakes is not much different.
Note that the brake circuits on ATVs are separate. The system has two brake reservoirs that are not connected to each other. They are responsible for stopping the rear or front wheels, respectively. On some models, the brake reservoir is responsible for all four wheels of the ATV.
If there are two tanks, the first one is on the steering wheel. He is responsible for the front wheels. The second brake reservoir is located on the frame. He, accordingly, stops the rear wheels.
To bleed the brake system, you will need to prepare the necessary tools. Required for work:
To bleed the brakes, you must first unscrew the cap that closes the brake reservoir. Next, you need to evaluate how much brake fluid is inside. Most often, it needs to be topped up. Pour brake fluid into the reservoir up to its very edges.
There must be no air bubbles inside the system. Therefore, periodically you need to control the liquid in the tank. If necessary, the composition is added.
Fit the prepared drain tube onto the fitting. The second end is lowered into a previously prepared container. Next, you need to ask your partner to squeeze the brake lever. It is not recommended to release it until the work is completed. Some models of ATVs will require you to depress the pedal. The fitting must be unscrewed 1/8 turn (sometimes more, depending on the model), and the key must be prepared in advance by 8.
Next, the brake lever is pressed, and at this moment the fitting is twisted. The handle is released, and then the procedure is carried out again. In this case, the amount of liquid inside the tank is constantly monitored. If necessary, a new composition is added to the system.
After some time, the partner will say that the handle (or pedal) has completely failed in its seat. However, at this moment, you can not let her go. After the information received from the partner, you will need to tighten the drain fitting.
The procedure is performed several times. This must be done until clean (new) brake fluid is poured into the prepared container. It should not contain air bubbles. If they are, the new composition was not filled to the very top of the tank. This must be taken into account when changing the brake fluid in the system.
If the brake fluid needs to be replaced, it will be enough to purchase 0.5 liters of the product, which is enough for both circuits. However, it is worth noting that such an amount of brake fluid allows you to replace the composition with “jewelry” accuracy.
More often than not, the volume of the product is not enough, so it is better to purchase brake fluid with a margin. 1 liter is enough. If air bubbles need to be removed from the brake system, a liter is the minimum amount. Sometimes, to carry out such work, you need even more funds. Two liters of liquid may not be enough to find and drive out all the bubbles.
When the brake fluid is drained from the system, it will be necessary to bleed each of the existing calipers. When this procedure is completed, you need to put the tank cover in its original place. Before that, you need to assess the condition of the rubber gasket. If it is worn, the seal will need to be replaced.
There must be no brake fluid left in the system at all. After the procedure, you will need to pour a new agent into the tank. This will take several hours. The liquid is poured into the tank, and then wait until it reaches the caliper. At this time, the fitting must be open.
If done correctly, there will be little resistance to the lever when applying the brake. If air gets into the system, it will fall through a little.
In this case, you will need to unscrew the fastener that secures the brake hose. You should try to bleed air out of the system. Next, you need to press the brake again, which should be moderately firm. If so, then the procedure was successful.
Maxim Rogov / author of the article
Back in 2011, I got on a motorcycle for the first time and since then I have been addicted to motorsport.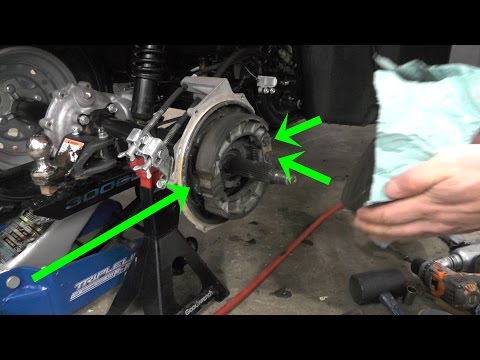 I love trying new bikes. I dream of a BMW F800GT and a motorcycle tour of Peru.
Articles
02 Dec
Any wheeled vehicle - from a bicycle to a multi-ton truck - has a transmission in its device: a system that transmits rotation from the engine to the wheels. The operation of the transmission - and therefore the speed of driving - can be controlled by shifting gears.
Gear shifting is organized differently in each mode of transport. In the article below, we will tell you exactly how to shift gears on ATVs, and what gearboxes are found on such equipment.
Gearboxes for ATVs can be of two types:
 They have a foot clutch or clutch with a lever on the steering wheel (in most cases it is), and a foot shifter. Manual transmission usually has 4 “forward” gears, neutral and reverse.
 Rare and mostly found in older models, but other variations can be found. For example - "automatic" with the ability to manually shift gears.
Manual ATVs are a little more difficult to drive (at least at first, until you get used to it), but you can more accurately select the appropriate mode. And vice versa: CVT "boxes" are much easier to operate, they are easy to master for a beginner who gets behind the wheel of an ATV for the first time. But on the other hand, with active driving along a route with variable difficulty, riding a CVT will be a little less convenient.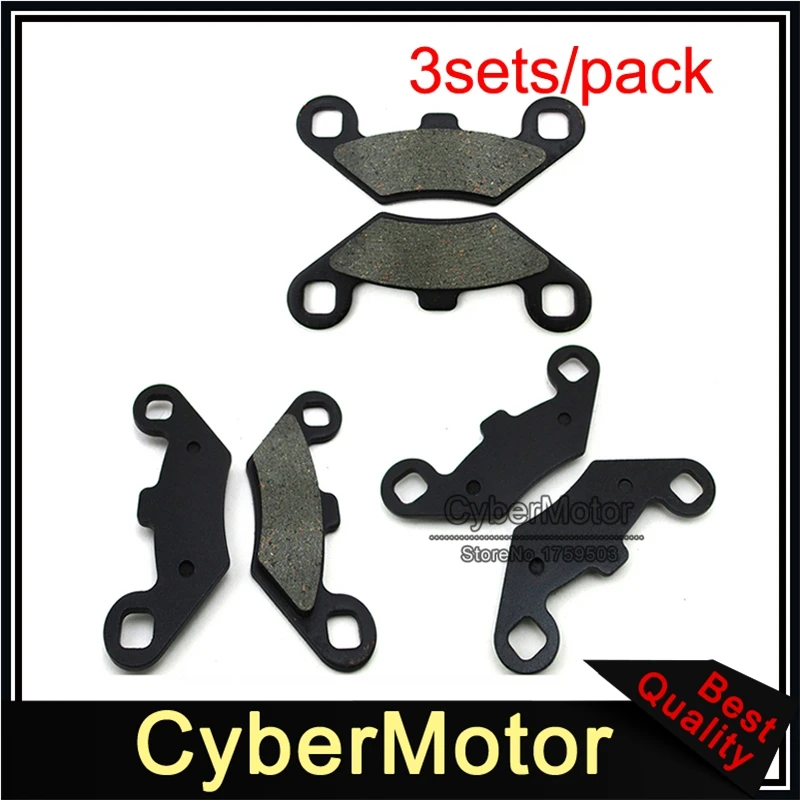
For example: you are driving on a flat packed dirt road on H and you see a large stretch of muddy road ahead with deep mud (or a steep hill, or bumps, or stones). You have to come to a complete stop and shift to L, drive through mud, and come back to a dry road, come to a complete stop again and shift back to H. , like motorcycles, and a manual clutch lever on the handlebar on the left.
The foot lever device can be of two types:
The shift itself is carried out in the same way as on motorcycles: