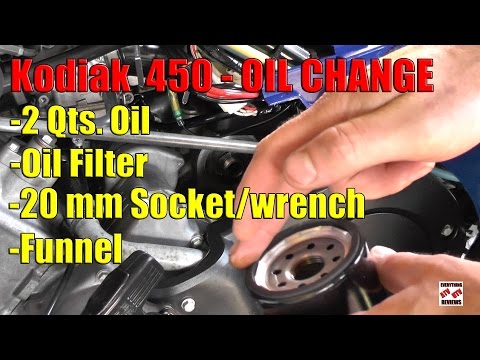
If you have an ATV, you’re going to have to change the oil at some point so you can keep it running properly. But what if you’re not adept at ATV maintenance? Luckily, this task is pretty simple. It’s much like a car oil change, but even easier, so you should be able to do it yourself. Just consider these ATV oil change steps before you get started.
The first question you might have is how often you need to change the oil. The answer is that it depends on your ATV. In general, you’re supposed to perform an ATV oil change about every 100 hours of use, or at least once per year. But be sure to check your owner’s manual to find out what it says about your specific ATV. While you’re reading the manual, take note of which type of oil and filter to use, and buy those. It’s important to use the correct ATV oil change supplies if you want to keep your vehicle running properly, so don’t simply make assumptions on what you should buy.
Let your owner’s manual guide you on this decision.
Now that you have the supplies you need, start your ATV’s engine up and let it run for about ten minutes. This warms up the oil so it comes out of the drain easier. Then check your owner’s manual to find out which panels you need to remove so you can access the oil filter. You’ll likely find you have to remove the seat of the ATV first, and then you might have to pull a latch to unfasten the tabs nearby. For most ATVs, you’ll also have to snap off the panel on the right side of the vehicle, which will reveal a cover that has bolts you’ll also need to remove. After you remove the cover, you’ll see the oil filter and dipstick. Take out the dipstick and clean around it to reduce the chance that grit and dirt will end up in the engine. Then check your owner’s manual to find out where the drain plug is.
Once you find the drain plug—which should be at the bottom of the ATV’s engine—check the skid plate to ensure the hole is clear before you start draining the old oil.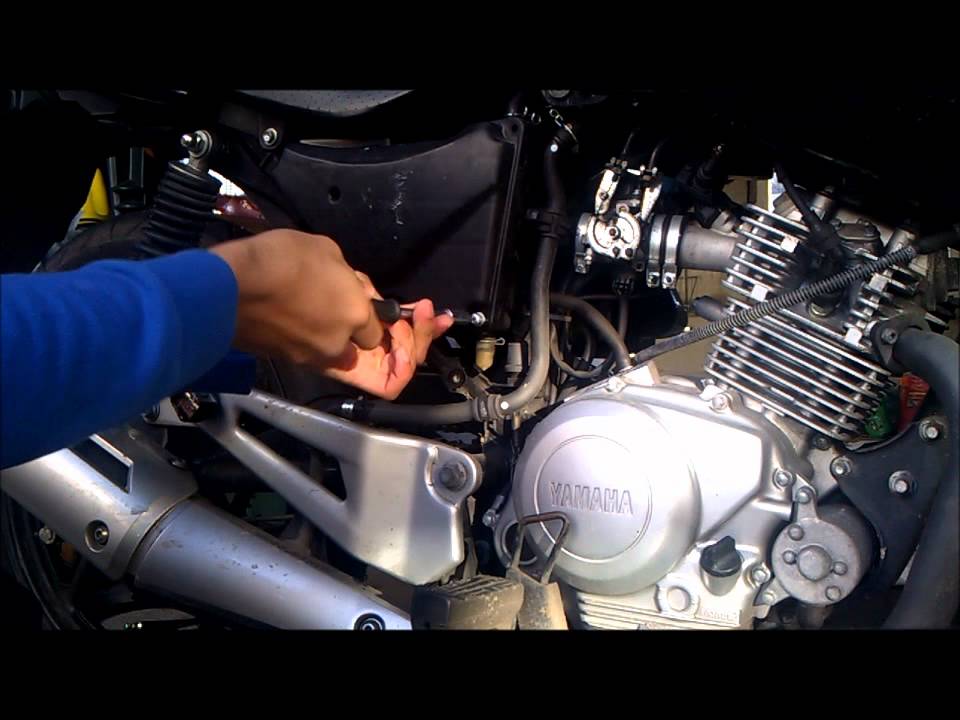 Then put a drain pan under it. Your next step in the ATV oil change should be to loosen the drain plug with a socket, and then allow the old oil to drip into the pan underneath. After all the old oil is gone, you can remove the filter.
Now you can put the drain plug back into place, making sure not to tighten it too much during this step. Take the new oil filter and put some oil on the O-ring, and then screw it in by hand, using a wrench to fully tighten it—but not too tight. At that point, you’re ready to add two quarts of new oil, which you can do by placing a funnel on top of the new filter and pouring the oil through that. Once this is done, turn on the ATV’s engine and let it run for about ten seconds. This will help the fresh oil begin flowing through the engine. Then check the oil level using the dipstick to determine if you have to add even more oil before the job is done. If the level is right, you’re ready to put the cover, panel, and seat back on.
The ATV oil change is just one part of keeping your vehicle maintained before you ride.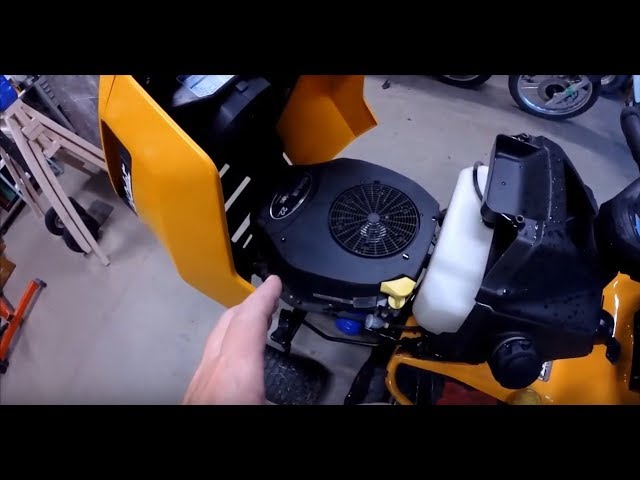 For more tips on taking care of your ATV, check out our guide here: Getting Your ATV Ready for Springtime Fun.
Proper maintenance is a major aspect of the smooth running of your ATV. You can’t expect to have an ATV in good condition without proper maintenance. The better you take care of your ATV the longer it will last and less money you have to spend on repairs in the long run. The same applies to both the two-stroke and four stroke engines.
When it comes to the proper maintenance of an ATV, the timely changing of oil is one of the most important aspects. If the oil is changed on time and as per the manufacturer’s manual, you can enjoy hassle-free rides all year round.
The engine will have more life and it runs to its fullest potential. You don’t need to spend
much on repairs. However, some people don’t give much importance to this crucial maintenance task. They will go for the oil change either at the last moment or only when
the ATV starts giving them trouble.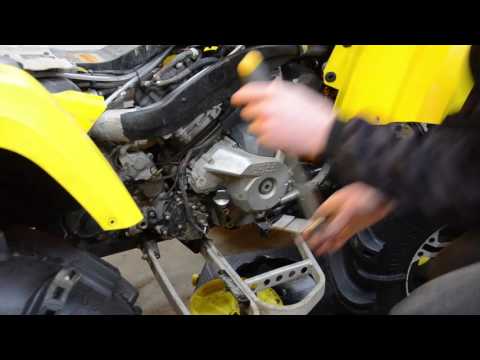 By then, you could have done more serious damage to the engine.
If you wish to change the oil for your ATV 2 stroke or your 4 strokes, you can either go to the mechanic or you can do it on your own. In fact, this oil changing is not a very difficult task. If you follow a proper process with a bit of care and bit of patience, you can do it easily on your own. However, you need to have the right tools to get it done.
You also need to use the right brand of oil recommended by the manufacturer. If you don’t use the recommended brand of oil, there is a possibility that more damage to engine will occur.
So, to change the oil in your ATV 2 stroke or your 4 stroke, you have to follow a process. Also, note that there is a bit of difference in changing the oil in the 2 stroke and the 4 stroke engines. We will first discuss the oil change for the 4 stoke engine and later, we will cover the process for the 2 stroke engine.
Changing oil in an ATV 4 strokeThe process of oil change includes three aspects, which includes knowing the frequency of oil change, keeping the tools required to change the oil, and following a series of steps.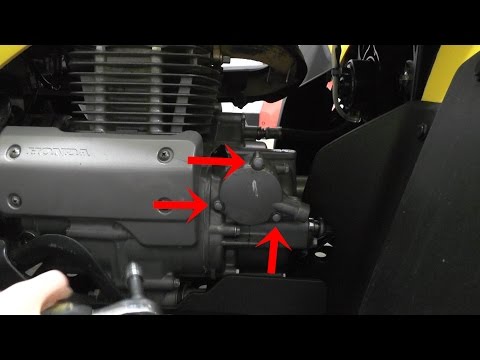
Knowing how often the oil has to be changed is one of the very important things in the maintenance of an ATV. However, the frequency of oil change is not the same for all four wheelers. It depends on the manufacturing company and it varies from one ATV to another.
Generally, it’s a good idea to change the oil at least once a year. I usually do this at the beginning of the riding season as part of my yearly maintenance of the machine. However, it is always advisable to refer to the manufacturer’s manual, which gives you helpful information on when and how often you need to change the oil.
Tools requiredThe following are the tools required for changing the oil in your ATV 4 stroke
I like to get an entire oil change kit or maintenance kit every year to do the yearly maintenance on my ATV.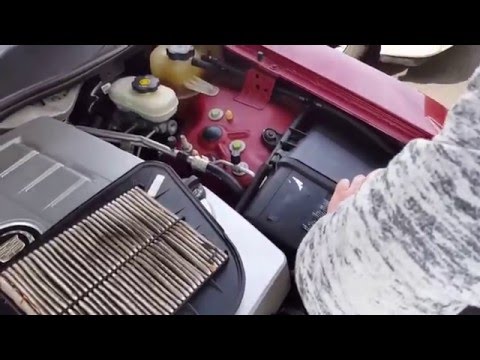 Here is an example of an ATV Maintenance Kit found on Amazon. This probably wont be the exact model you have but it gives you an idea of what to look for.
These steps are the actual process of changing the oil in your ATV 4 stroke. If you follow these steps, you will find it very easy to change the oil.
Run the engineTo begin with, you need to run the engine. Let the oil get warm. The reason for this is – when you run the engine, the remaining oil that is there in the engine becomes hotter, flowing seamlessly, and all the impurities will come out. Do not let the oil get hot though. Just run it enough to get things moving around a bit. Once this is done, you can go to the next
step i.e. draining the oil.
Note: If required, you can use your bike stand at this stage.
Drain the oilStart by putting the oil pan under the the quad to catch all the oil as it drains out the ATV. Remove the drain plug and wait for all the oil to drain completely out of the engine.
Once the oil is drained completely, you need to do the following tasks:
Note:
Before replacing, try using some new oil around the rubber edge of the filter. This makes a better seal and helps with removing it next time. In case, the oil filter is a reusable metal type, just wash it properly and let it dry properly. If possible, you can use compressed air for drying it.
So, with this, you have drained the residue oil and replaced the oil filter and ready for the final step i.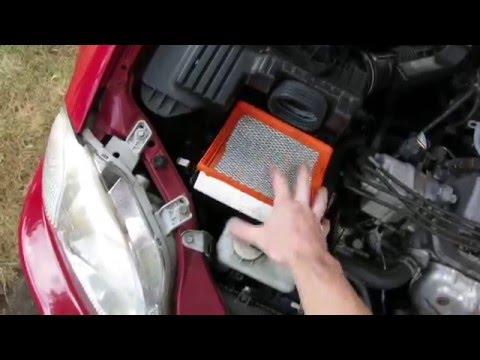 e. adding new oil.
Before getting into adding new oil, you need to double-check whether the entire residue is drained out completely. Once you are ready to change the oil, have a look at the guidelines mentioned below:
Just fill the engine back up with oil and you are good to go. Make sure you don’t overfill or underfill. There is usually a marking that will tell you the right amount of oil to put in.
That’s all. You now know how to change the oil. You will certainly agree with us that the process of changing the oil is not a very big task and you can do it on your own too.
Now let us see how to change the oil in your ATV 2 stroke engine.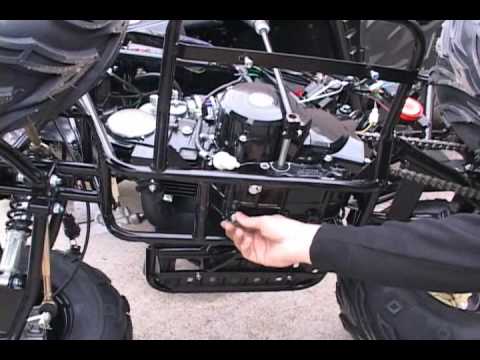
Changing oil in ATV 2 stroke
Usually in my two stroke engines I never change the oil. The oil gets mixed with the gas and and just needs to be refilled every so often. Kind of like refilling the gas tank, you should keep an eye on your oil level in a two stroke and refill when needed.
I can see wanting to change the oil out anyway if the ATV has been sitting for a long time. If that’s the case, the steps are very similar to a four stroke engine, except your filter may be different. If there is a filter at all. Also, make sure you get 2 stroke engine oil. It’s different from 4 stroke oil and you can’t mix the two or it will cause you problems.
That’s all the process of changing an ATV 4 stroke and 2 stroke engines oil.
To sum upMaintenance plays a vital role in keeping your ATV 4 stroke or 2 stroke vehicles in good condition. As part of maintaining your vehicle, you need to first know when to change the oil and then change it as per the recommendation is given in the manufacturer’s manual.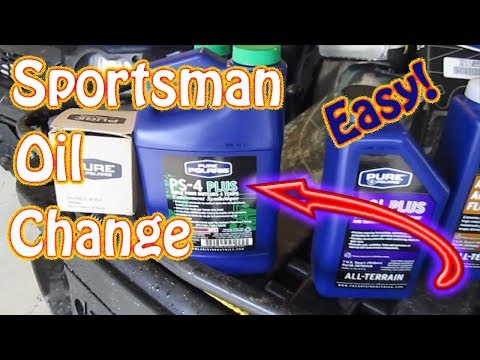
You can change the oil on your own. In order to change it properly, you need to follow a process, which includes a series of steps. As part of this oil change process steps, you need to first run the engine to make the oil warm thereby the impurities will come out in the residue.
Once this is done, you need to drain the oil completely. As a next step, you have to
replace the oil filter, and finally replace the oil with a recommended brand.
Sharing is caring!
All ATVs have their own "term" of life. This applies even to expensive branded devices that cost tens of thousands of dollars. There is nothing to be done about the fact that key components of equipment gradually wear out and fail. But you can increase the life of the components by using quality oil. Even if you decide to buy an inexpensive ATV, you need to find the right lubricants for it. Therefore, let's figure out which oil is better to choose for an ATV.
It should be noted right away that a special oil is used for each of the units of the apparatus. The lubricant composition is poured into:
It is not recommended to save on oil, as it not only reduces friction, but also removes excess heat. Due to this, the mechanisms work correctly, do not overheat and “live” an order of magnitude longer.
Refer to your ATV documentation for information on lubricant formulations. Each device has its own requirements, so be sure to study them.
Although it is worth following the manufacturer's recommendations, this does not mean that you need to buy the first suitable composition. All oils consist of a base and special additives. And it is on the basis that their operational features depend. There are 3 types of oil:
It is up to the rider to decide which oil to put in the ATV. However, experienced motorists are advised not to save on lubricants, since repairing an engine or gearbox will cost many times more.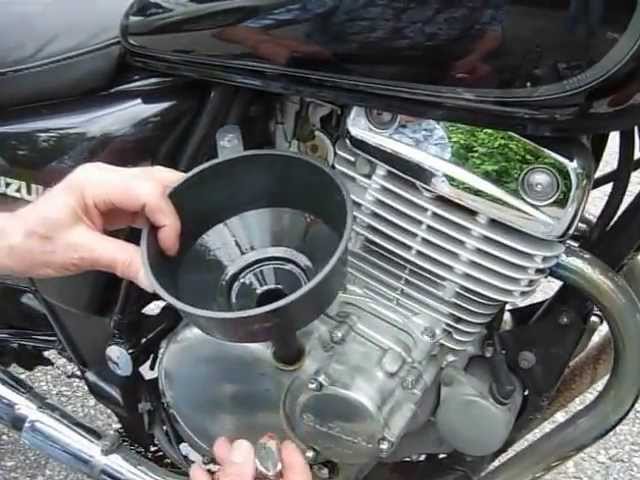
There are several oil characteristics that a rider should pay attention to. The first step is to determine the viscosity of the liquid. To do this, look at the label. If it has the letter W (winter), then the liquid is designed for low temperatures. The following numbers show what weather conditions the composition is intended for (0 - mild winter, 25 - severe frost).
The situation is similar with summer liquids. There are 5 classes of compositions (by viscosity) from 20 to 60. There are also universal oils that are used both in winter and in summer. You can recognize them by special markings, for example: "20W40"
You also need to pay attention to:
The API system is used to classify oil by quality. The marking looks like this: S (common name) + A, B, C, D, etc. The lowest quality is marked with the letters "SA", and the highest quality is marked with "SL".
When deciding which oil to fill in an ATV engine, you need to take into account the characteristics of the vehicle itself. Because the ATV is subjected to considerable stress, the engine becomes very hot. This means that the oil must be resistant to high temperatures and conduct heat well.
Plays the role and basis of the composition. Ideally, you should use only synthetic or semi-synthetic fluid. You need to pay attention to the labeling: the country of origin, season, quality standard.
Important: For gearboxes and gearboxes, you need to use special compounds that differ from engine oil in a set of additives.
The first thing a rider needs to figure out is how often to change the oil in an ATV. Each manufacturer has its own recommendations, but experienced motorists advise filling in new fluid every 160 hours. In this case, the first replacement is performed during the break-in, after the device has worked for 20 hours.
To change the oil you need:
You also need to know how to check the oil level after adding new fluid. To do this, warm up the engine, wait 10 minutes, unscrew the oil tank cap, remove and wipe the dipstick.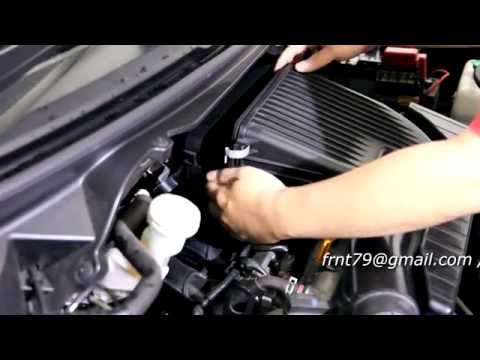 After that, the rod is lowered into the crankcase and removed after 3-5 seconds. The oil level on the dipstick determines the fluid level.
06/16/2020 6428
Chain Maintenance
A ATV chain on a chain drive is one of the most important elements that must be groomed and cherished and thoroughly cleaned. At the same time, you need to do this regularly, then your ATV will serve you much longer. Lubricate the chain only after you clean it, otherwise the grease mixed with dirt will interfere with the operation of the system.
When it comes time to change the chain, change it along with the sprockets, because putting a new chain on the old sprockets will kill it very quickly. When changing the chain, pay attention to what kind of chain you need - they exist in two types - standard and o-shaped, and you cannot replace one with the other, so choose the one that fits your ATV, you can read about it in the user manual.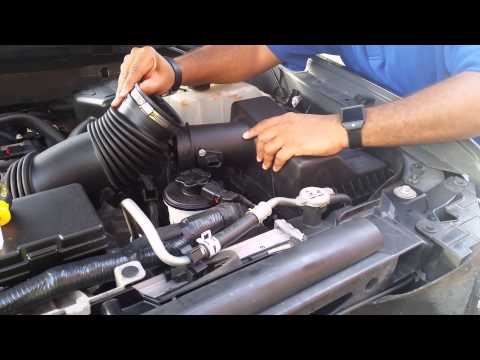
Carburetor cleaning
Kazuma ATVs require periodic cleaning of all important parts, and some of this work can be done on your own. A clean carburetor is the key to the proper operation of the entire ATV engine, so do not put it off indefinitely. First, unscrew all the fasteners that secure the carburetor and remove it from the ATV. Don't forget to collect all the screws and nuts so you can reattach the carburetor.
Using a wrench, unscrew the bottom of the carburettor. Use a WD-40 type cleaner to treat all holes, then blow them out with a pump. Now you just have to fix the carburetor in place and connect all the necessary wires and hoses to it.
To make sure everything went smoothly, start the ATV, if it won't start, pull the throttle and keep trying until the ATV starts.
Oil change
Oil and oil filter changes are an important part of ATV maintenance. If you are going to change the oil filter, why not change the oil in the quad bike as well? This is not difficult to do and you can easily cope with this task yourself, without resorting to the help of a mechanic.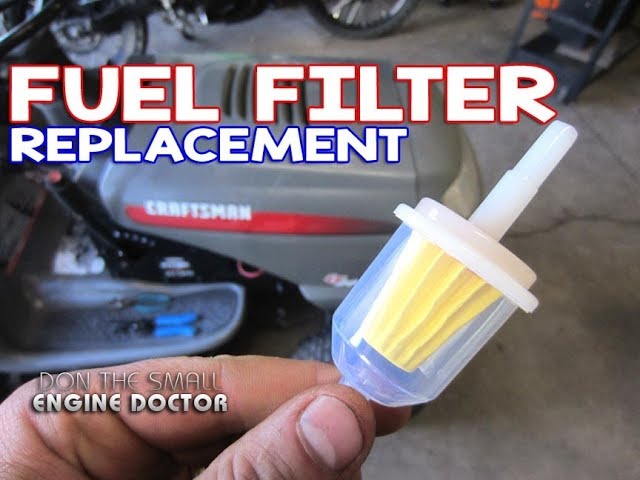
Do not forget, of course, that ATVs can vary in design and it is best to study the process of changing the oil in the instructions for your ATV. There you will also find out how often it is worth changing the oil and how many kilometers the ATV can travel between oil changes and cleaning the oil filter.
In order not to run later, prepare all the tools you need for the job.
Find a spot for your ATV where you can easily turn around. Not in the sense of an ATV, but just approach him from all sides. It is better to change the oil with warm oil, so start it up and let the ATV warm up first. Remove the plastic that hides the filter and the oil fill hole. Locate the oil drain hole at the bottom of the ATV and, using a pan, drain the used oil.
While the oil is being drained, you can remove the oil filter. Before installing a new oil filter, thoroughly clean all surfaces that touch it from dirt. Lubricate the new filter with oil and put it in place, it remains only to tighten all the nuts that hold the filter and tighten them well with a wrench.
When the oil is completely drained, close the drain plug and discard the used oil. According to the rules, it should be disposed of in a specially designated place. Now pour the right amount of oil into the ATV, for this it is better to use a funnel so as not to pour everything around. Check that oil does not leak from the filter and from the bottom of the drain hole.
Start the ATV and let it idle for a while. Let the ATV cool down a bit and check the oil level, if you don't have an oil gauge on the dashboard you can use a dipstick. Some of the oil has already been distributed throughout the ATV system, so you will have to top up a little. It remains to fix in place all the shields that were removed in order to get the filter.
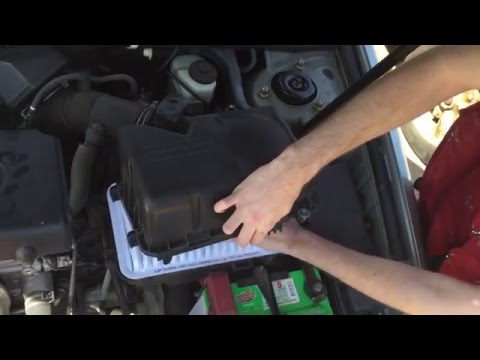
Clean the air filter
A clogged and dirty air filter does not allow air to enter the engine in the right amount and the ATV cannot burn fuel with the required efficiency. But moving on dusty and dirty roads on our ATV, we pollute the air filter especially quickly.