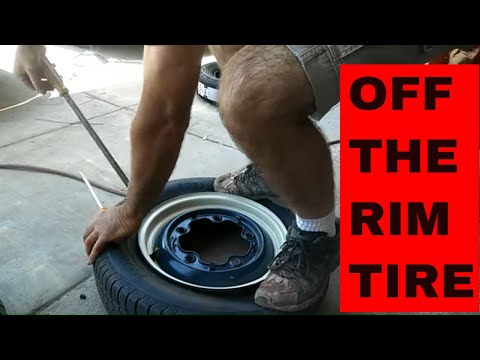
Having a stuck wheel on your car can be really frustrating, especially when you got a flat tire by the side of the road. Here are a few tips on how to remove a stuck wheel easily
You have a flat tire, and you jack up the wheel, but it refuses to come off. What could have happened?
Changing a wheel should not be this hard, but a wheel can get stuck due to rust accumulation. This corrosion appears in the area between the wheel and the hub.
This makes it hard to remove the wheel because it feels permanently welded to the hub.
If you are changing the wheel alone and there is no one to give you that necessary muscle, consider some of the following tire removal tips.
If you leave your car in an area exposed to snow and road salt, then these elements can get into your aluminum alloy rims and into the hub, where they cause corrosion. These corrosive elements tightly glue your wheel to the hub, making it almost impossible to replace a worn-out tire.
It is not only aluminum wheels with this problem but also steel wheels, which can happen in any climate conditions after some time.
We recommend purchasing some synthetic grease to apply to the wheel hub and rim to prevent this problem from happening. Do this the moment you purchase a new car or during the first wheel replacement.
So let’s find out the best methods of removing a stuck wheel.
RELATED: What is Cross-Threading a Wheel Nut/Stud?
Here are a few tips from me which I’m usually using myself to remove stuck wheels. Remember always to use safety equipment and get help from a professional mechanic if you are not sure about how to do it. Follow these steps to remove a stuck wheel:
Total Time: 10 minutes
If you are near a service station or a garage, you can use this simple trick to remove a wheel stuck on your car. Loosen the wheel nuts but do not remove them altogether.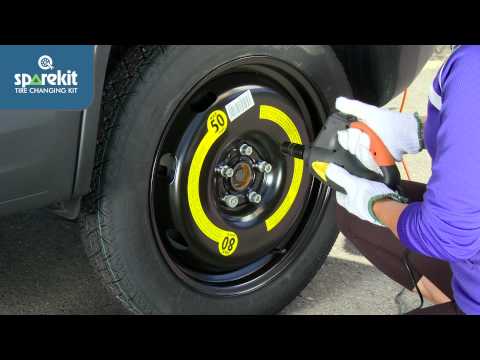 Lower the car and drive a few feet forward and backward. Repeat this process on level ground. Jack up the car and remove the nuts.
The wheel should have loosened, and you should now be able to remove it. Ensure that when driving the car, that the nuts are not so loose that they fall off and drive super slowly, not to risk any accidents.
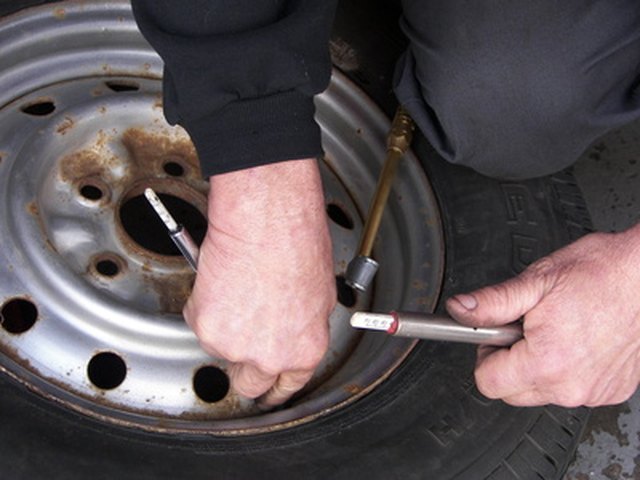
If you have aluminum alloys or steel wheels, then the likelihood of rust/corrosion developing on the hub is high. You can use a rust removal lubricant to loosen the wheel. In the procedure, first, remove the wheel cap and spray the wheel studs. You can use lubricants like PB Blazer or Liquid Wrench.
After spraying the studs, do the same in the area where the wheel intersects with the central hub. Give the spray around 15 minutes, and then try to get the wheel loose again by giving it a slight punch or kick.
After jacking up the car, remove all wheel bolts or nuts except one. Use your foot to hit the tire while it is off the ground. Check that your car is standing on the jack stands safely. Rotate the wheel and hit it with a kick again. With continuous effort, the wheel should separate from the hub, and you can then comfortably remove it after unscrewing the last bolt.
This method of removing a wheel stuck on the car is better than using a hammer to hit the stuck wheel. The force from a hammer will destroy the wheel rim and bolts. Once you have removed your tire, use some sandpaper to remove any rust on the hub. The next time you re-install the wheel, apply some anti-seize.
While this technique is not safe, you can try it out when you have run out of options with a wheel stuck on the car. The first stage is to jack up the car. Before proceeding, ensure that the car is secure on the jack stands. Find lumber measuring 2X4 inches and place it in the space between wheel and tire.
Identify a heavy-duty hammer and then get under the car.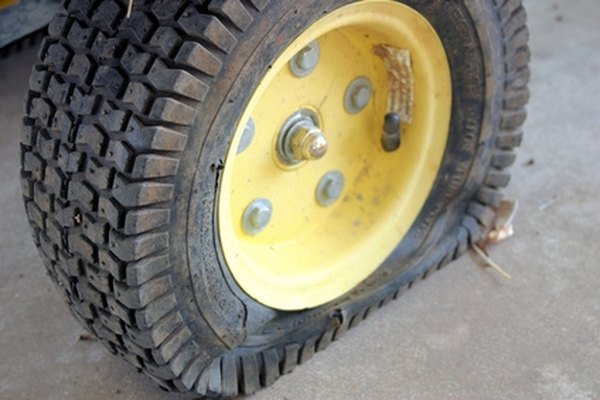 Place the lumber across the wheel and tire and use your hammer to hit the lumber. This will free up the wheel and enable you to remove it from the hub carefully. You need to note this method can be dangerous because you are under the car. If your jack stands fail, the car will collapse on you, causing instant death. You also need to be beefy to operate the hammer.
This is the method I’m using myself and has solved this problem thousands of times. Spray some lubricant around the wheel hub and bolts if possible. Then place some protection on the rim at the point where you put the crowbar.
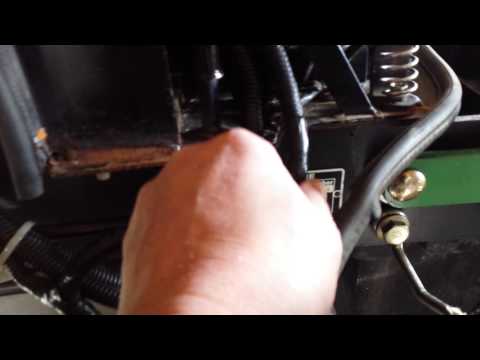
Get a long crowbar and put it between the rim and wheel spindle or control arm, depending on where you can find a good location. Check the image above.
You need to be a little bit careful with this technique, though it may damage the rim. However, it is a super-effective method that works every time.
If you have tried all the techniques mentioned above and your wheel is still stuck, you may be forced to take it to a tire service station. This is better than hitting the wheel with a hammer and destroying your bolts, hub, and rims. Just be honest and tell them that the wheel is stuck before giving you a price for the job.
Having a wheel stuck on the tire is not a pleasant affair – especially when you are in a hurry. The main cause of a wheel stuck on the tire is when corrosion forms in the area between the rim and hub. This corrosive element acts like strong glue and can cause problems removing the wheel from the hub. There have been various solutions proposed to remove the tire, each with its set of pros and cons.
The easiest technique to remove a stuck tire is to find a lubricant and spray it into the spaces in the rim against the hub. This lubricant is effective in dissolving the rust formed.
You can also jack up the car and leave one bolt on the wheel. Use your leg to hit the wheel until it comes loose. Some people use a heavy hammer or torch to dislodge a stuck tire, but this can cause damage to the rims.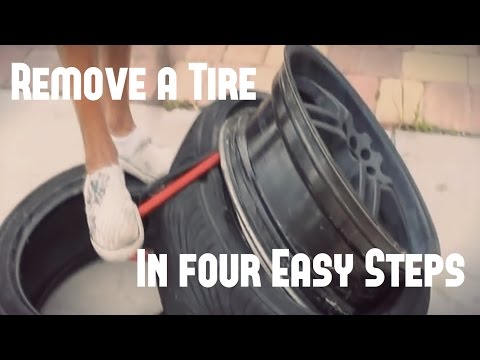 It also requires some muscle.
Learn more:
Was this article helpful?
YesNo
Categories: Tires, Guides
1A Auto Team 1A Auto Blog Home
If the tire won’t come off after the lug nuts have been removed, there are a few steps you can take to get the wheel off. This post and video reviews how to remove a stuck tire yourself with a few simple tools and how to keep this problem from reoccurring.
In these examples the tire has an aluminum rim and corrosion is sealing the wheel to the brake disc.
4 Different Methods to Remove a Stuck Tire
With the vehicle well supported, tighten one lug nut and pull the tire off. The lug nut may prevent the tire from pulling off unexpectedly.
See this in the video above at 0:24.
If the above method does not work and the tire is still stuck, tighten the lug nuts on loosely by hand and lower the car to the ground. Lowering the vehicle and putting weight back on the wheel might pop it loose.
See this in the video above at 0:39.
At this point, if the tire doesn’t loosen, shake the vehicle from side-to-side.
See this in the video above at 0:59.
If the above methods don’t work, place a long pry bar to the back of the rim and try to jostle it free without hitting any brake lines or other parts.
See this in the video above at 1:26.
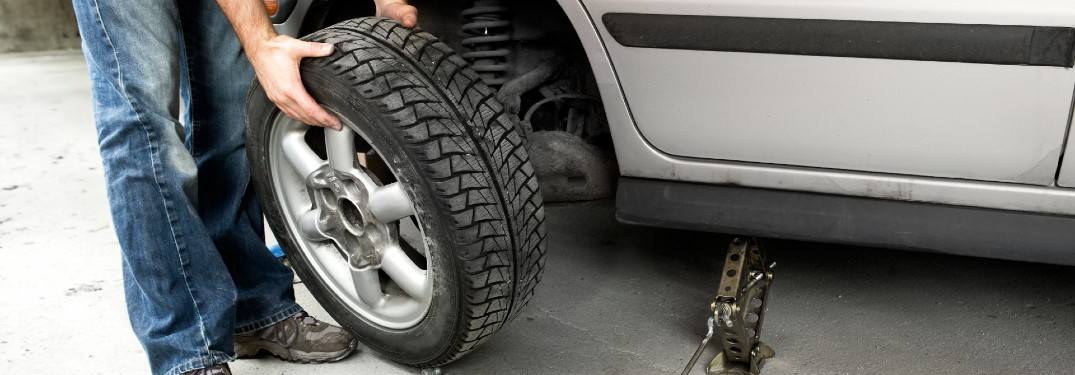
Once the wheel moves and breaks free, remove the remaining lug nuts and remove the wheel.
To prevent a tire from sticking, apply a dab of anti-seize compound and lightly coat the back of the rim. Spread and remove the compound with a paper towel.
If you do not have anti-seize compound, dip a paper towl into the motor oil and apply a thin coat to the back of the rim with the paper towel. Don’t apply too much so motor oil doesn’t leak onto the brakes.
Once the back of the wheel is coated, put the wheel in place.
Summary
 What to do when the wheel sticks to the hub
 Most often, the sticking of the rim to the hub, brake disc or drum is the result of errors when installing it . The problem is exacerbated by rare wheel changes and driving on roads covered with reagents. The layer of oxides formed between the seating surfaces "glues" them, complicating dismantling.
In this article we will tell you what to do so that the disc does not stick to the hub, how to remove the stuck wheel from the car, we will analyze the most effective dismantling methods and common mistakes.
How to remove a wheel rim that has stuck to the hub depends on the specific situation and the nature of the problem. If difficulties arise at the stage of breaking the fastener, it is important to unscrew it correctly without damaging the threads of and without tearing off the heads. When separating a disc that has stuck to the hub, must avoid the risk of damage to the wheel . The table below provides tips on how to remove a stuck wheel from the hub and drum, how to loosen jammed wheel bolts and nuts, and describes methods that should not be used.
Removing the cooked wheel on the car: Problems and methods of solving
| Problem | What to do | How not needed |
|---|---|---|
| Wheel of the wheel of |
| |
| The wheel is stuck to the brake drum |
|
|
| Studs or bolts stuck and broken when removing |
|
|
| Nuts stuck to the wheel tightly |
|
|
| At the service station, all fasteners were tightened with an air gun or a long wrench |
|
|
| Nuts or bolts flattened |
|
|
After forceful dismantling of the wheel, caused by improper tightening or sticking of the fasteners, it is better to change the bolts/studs to new ones made of stainless alloy or steel with anti-corrosion coating. Once tightened, bolts and studs lengthen, lose strength, and are unsafe to ride.
In order to avoid damage to the wrench or head when unscrewing stuck or overtightened nuts and bolts, it is advisable to use a stop in the form of a jack.
Using a stop to avoid breaking the key
How to unscrew a stuck bolt, a simple solution: video
In the next section, we will consider all working methods for dismantling a stuck disk from a car hub.
There are over a dozen proven ways to remove a stuck wheel from a car.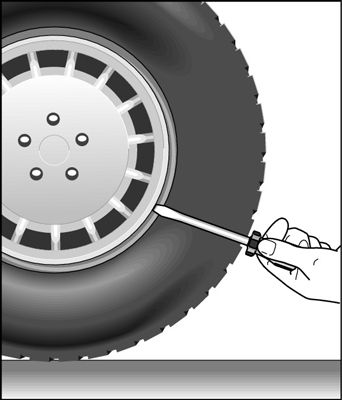 Some are available in the field as they only require a jack, wheel wrench and penetrating lubricant, while others are only suitable for garage use as they require more sophisticated tools and require access to mains power.
Working methods to remove a stuck tire on a car are listed below in order of increasing difficulty or equipment requirements.
The first thing to do to remove stuck fasteners and wheels from the hub in any way is to treat the contact points of with penetrating grease and wait 5-10 minutes. The composition dissolves rust and deposits, after which the disc will be removed, and the nuts and bolts will be unscrewed much easier.
Removing the wheel by pressing the drum
Drum spin . It is possible to remove a stuck rear wheel with a steel disc on vehicles with drum brakes using the standard drum studs. At VAZ, two studs under the head for 7 are also guides for the rim. They need to be unscrewed and then screwed into the empty holes of the drum, which will allow you to remove it along with the disk. On the dismantled wheel, it will be easier to separate the parts.
 When a stuck wheel breaks off while driving, do not completely unscrew the bolts or nuts. In this case, it can completely fly off in the process, damaging the car!
 An open flame for warming up should not be used, as this can damage the paintwork or tire! The method is most effective for alloy wheels, since the coefficients of thermal expansion for aluminum, titanium and magnesium (the main components of "casting" and "forging") are higher than for steel.
 If the wheel is not flat, you can warm it up in the field by braking. To do this, subject the brakes to a stress load, alternately accelerating sharply and stopping. From this, the brake disc will heat up, and from the disc - the hub with the wheel.

Removing the wheel with a screw puller
 You can pull the wheel off with a rough pull. To do this, you need a sling or chain, a winch or lanyard and stops. The machine must be fixed with stops so that it is not dragged to the side, then thread the sling or chain through the wheel, forming a loop. You need to hook onto this loop with a winch or a chain with a turnbuckle, fixing the second end motionless, and then pull it in the direction away from the car.
 If a special tool in the form of a screw extractor is not available, a conventional diamond jack and chain can be used. To do this, you need to attach it with a chain to the wheel and rest it on the hub. Thus, acting on the jack lever, the wheel will smoothly move away from the hub.
Homemade device for removing a stuck wheel: video
0003 removal method together with hub . It will also help if bolts or studs are stripped. Indeed, in this case, you still have to remove the hub or drum to replace or remove the remnants of fasteners.
On many cars and trucks, the hub can be removed with the wheel. Usually, to do this, you need to unscrew the central nut, remove the drive and unscrew the bolts securing the hub to the suspension. On an already removed wheel, a stuck hub can be squeezed out, for example, with a hydraulic press, using a suitable mandrel to press the center.
The main reason for the wheel sticking to the hubs is metal corrosion . The oxide layer formed on the mating surfaces acts as a sealant and binder.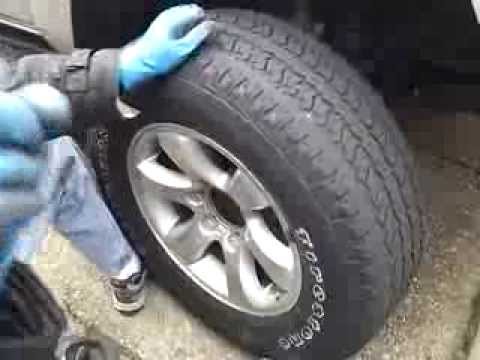 Combining this process with heat results in the rim being literally welded to the hub, brake disc and drum. A similar process occurs in threaded connections. The answer to the question “What to do so that the wheel does not stick?” obvious - eliminate the cause of corrosion by taking preventive measures during seasonal wheel changes:
It is not worth priming or painting the contact surfaces of the disc and the hub, because of the heat the paint will sinter and act as a "glue". An exception is the use of special heat-resistant paints. Clean steel surfaces can be further treated with an orthophosphoric rust converter which will create a protective phosphate film.

Surface treatment with popular copper grease is undesirable when using aluminum rims. Copper with aluminum or iron form a galvanic couple that provokes corrosion. Litol-24, grease and similar lubricants are also not suitable - when heated, they quickly leak out.
Surface treatment with copper grease
Non-compliance with the fastener tightening rules aggravates the sticking of rims. Craftsmen at tire shops often neglect the torque wrench , screwing the wheels with a pneumatic wrench or an elongated balloon wrench “by eye”.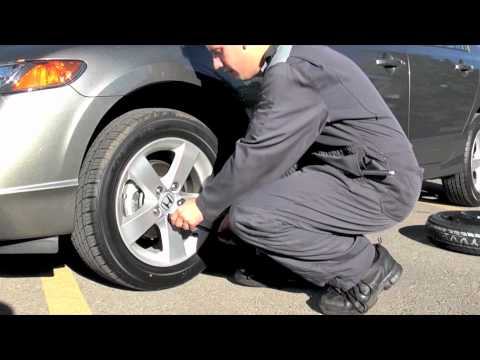 In such cases, require compliance with technical recommendations and do not neglect them when changing wheels yourself.
When tightening wheel fasteners without a torque wrench, do not put pipe cutters or other extensions on the wrench, press on it with all your weight or step on with your foot! These methods are relevant for disruption, but not for installation.
Typically, the wheel wrench supplied with the car has a lever length at which the average person will hand-tighten the bolt or nut with approximately the right torque.
To break and tighten the wheel fasteners, it is better to use a cross-shaped wheel wrench or a straight wrench with a minimum shoulder on the side of the head!
Most cars can be removed with the drum.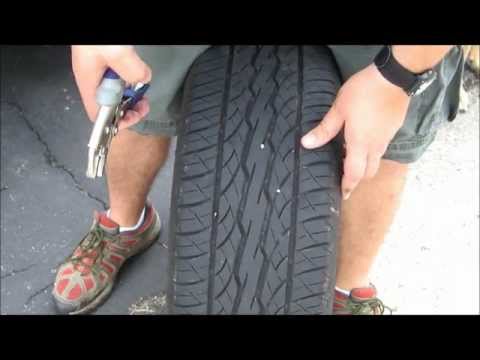 When the wheel together with the drum is removed, you can separate them in several ways:
A stuck inner wheel in a twin can be unscrewed by spinning the wheel and braking in place or in motion. If you have a mount, you can try to wring out the rim with it. Another method involves the use of a jack, which with one end rests against the frame through a plank, and with the other end against the inner sidewall of the tire or against a piece of board attached to the wheel.
You can remove a stuck wheel with improvised means by loosening its fasteners and making several starts-braking (on a suspended wheel or in motion).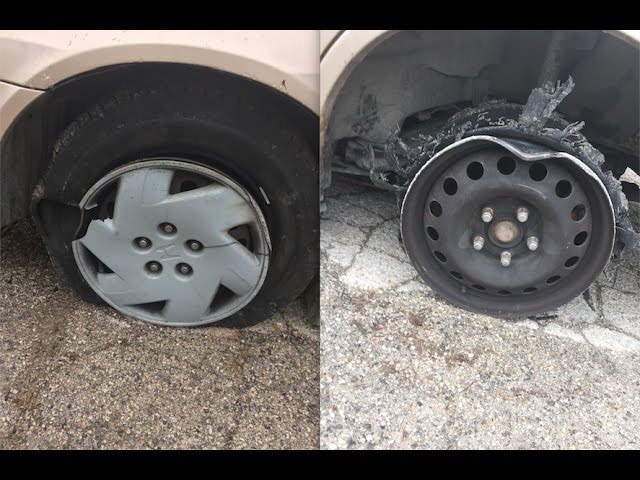 The front wheel can also be "wiggled" by turning the steering wheel sideways while stationary (wheel touching the ground).
The wheels on trucks are heavy, so the method with a sharp start and braking works effectively. You can also try to wring it out with a jack, placing it between the frame and the tire or disc through a wooden spacer.
Contents:
A flat tire on a car is always a nuisance, especially if the loss of pressure caught the driver not in the garage, but on an empty highway. And it's not always a puncture, because the bleeding of air can occur along the disk. Why the wheel is lowering along the rim and what to do about it, we will analyze in the article.
This problem is quite common with tubeless tires, where the rubber adheres to the disc due to internal pressure. At the junction of the disk and tire, the seal is sometimes broken and air is bled, which ultimately leads to a complete loss of pressure. In chamber tires, the situation is more unambiguous: if the wheel is flat, then look for a puncture.
Deformation is the main reason. Disc geometry is an extremely important thing for full-fledged work, sometimes even a dent in an insignificant place can be fatal. The car drove into the pit - the disk bent, the tightness of the cord was broken and all the air came out. Low temperatures outside the car, which causes the rubber to harden, is a common cause, especially if tightened with a tire change. Also, due to poor maintenance, improper storage of the prefabricated kit, or constant driving on roads sprinkled with reagents, the disc begins to rust, as a result of which corrosion eats away the metal, forming micro-holes through which air will be gradually etched. Blowing off the wheel can also occur through a faulty nipple.
In the end, the reason that the wheel is going down is the most banal - the rubber is already old and deformed over time, which means it is physically unable to provide the desired density at the point of contact. There is nothing to prevaricate here: the tire urgently needs to be replaced.
It would seem that since such a disaster does not happen with chamber tires, isn’t it better to give preference to them? Maybe in this sense this is true, but in fact, tubeless has more than one advantage. Here they are:
They have no friction between the tube and rubber, which means that the tire heats up less during long rides.
It is lighter and more reliable, since the chamber version can burst at high speed.
It balances better and holds pressure longer after a puncture.
A hole in the tread may not interfere with the ride at all - a stuck nail will simply not allow air to escape. With a chamber tire, this is impossible, it will be blown away pretty quickly.
Damage to the tread can be urgently repaired with a repair harness. This is quite enough to get to the nearest tire center and change tires.
First, make sure that you do not have a puncture in the wheel or that the cause of the trouble is not in the nipple. It is elementary to notice a protruding nail, but it is not always necessary to pull it out immediately and immediately. As we wrote above, a foreign object can simply get stuck in the tread and the air will have nowhere to go. An open puncture is repaired with a tourniquet.
The valve must be smeared with soapy water or simply slobbered - if there are no bubbles anywhere, then it has nothing to do with it. A defective nipple will have to be replaced with a new one.
If the valve is in order, fully inflate the tire and smear the edges of the cord with soapy water. You can do this with a brush or use a sprayer.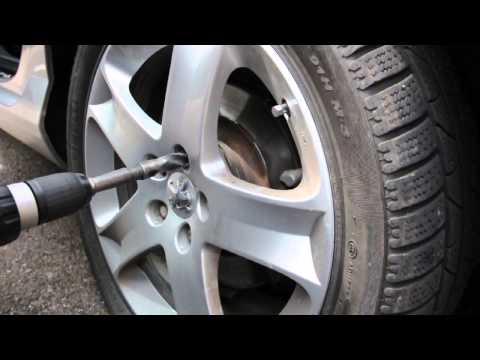 Air bubbles will tell you that the source of the trouble is in the detachment of the cord from the disk surface, i.e. in violation of the tightness of the tire seat. Metal edges should also be carefully examined - any cracks and welding defects can be the cause of a pressure drop.
You can eliminate the descent from under the rim like this:
We poison all the air and remove the wheel from the car.
It is best to disassemble it, so it will be much more reliable to fix the problem. In order not to do the balancing again after the procedure, it’s a good idea to mark the position of the nipple with chalk first.
The disk edges will have to be properly sanded with fine sandpaper in places of rust damage and covered with a new layer of paint.
After the paintwork has dried, we put the tire back on and spread the rubber on the places where the cord touches the disk with a special sealant or mastic. Or you can use the soap solution again, but this time cook it much thicker so that it resembles glue in viscosity.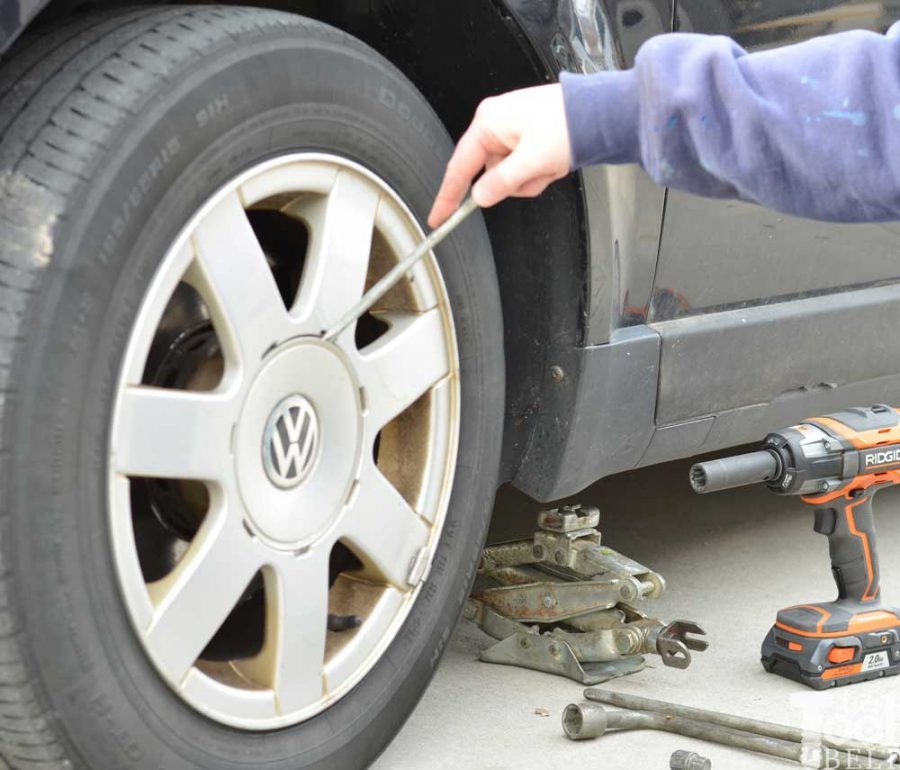 And with the help of a simple brush, we go around the entire circumference of the cord on both sides of the wheel.
We inflate the tire with a compressor, pressing the cord against the disk.
So we will eliminate the damage and provide a tighter fit on the seat. The sealing compound must penetrate all micropores and prevent new bleeding of air.
If there is absolutely no time to remove the wheel, and trouble overtook you on the road, it is enough to bend the edge of the cord and also smear the rubber with sealant or soap. This is quite enough to reach the garage or car service.
The described methods are suitable if there was no serious deformation and there are no cracks in places near the mounting holes or there is no damage to the tire cord. In the worst case, you can’t do without rolling a disk in a tire fitting or replacing it. If you have an alloy wheel, then you can fix it, but this is an extremely expensive business, comparable to buying a new one.