If your ATV engine is not getting enough fuel, it won’t run properly. You’ll notice it bogging down and just not having the power it used too. If you’re not getting fuel to the engine at all, it won’t even start for you.
The most common reason an ATV engine is not getting fuel usually has to do with the carburetor. Either a stuck needle valve or a loose or cracked vacuum hose are the most common issues. Don’t worry, there are pretty straight forward things you can do to check where your problem is.
There are a few different reasons you may not be getting fuel to your engine. It’s not that hard to check the parts to see if their working properly. I recommend going step by step checking one thing at a time, eliminating possible issues as you go.
If you have a fuel injected engine, you can skip this next part and jump straight to the fuel injectors, fuel pump, and compression check sections.
I would first check the carburetor to help narrow down where you should start your investigation. All you need to do is spray a little carb cleaner or ether down the carb and see if your engine will fire up with that. Or you could pour a little gas in the carb and try to start it up.
If it does start, and then dies right away, at least we know now it’s a problem getting fuel to the carb. We know that now because, when the carb has fuel, the engine will run. You should check to make sure fuel is getting to the carb now.
If it still doesn’t start at all, you may have a problem getting fuel from the carb to the engine. That is telling us the problem is further down the line. It could be an issue with compression if that’s the case.The engine doesn’t have enough compression to pull in the fuel it needs and stay running. I will go over how to do a compression check later in this article.
Another check to do with the carburetor is to adjust the idle mixture screw. I know it sounds too good to be true, but a lot of times this adjustment isn’t set right so the engine isn’t getting the right air/fuel mixture to run properly.
Ok, you sprayed something into the carb and the engine started up for a few seconds. Great, now we need to make sure the carb is getting the fuel it needs for the engine to run. Disconnect the fuel line going into the carb and put that end into a bucket or something to catch the fuel.
You may need to take out any spark plug, or just unplug them, just in case. And try to start the engine and look to see if fuel is coming out of that fuel line. If there is, then you have no problems getting fuel from the gas tank and it is probably a needle valve or float problem.
If there’s no fuel coming from the tank down that fuel line, then you’re problem may be an issue with the fuel pump, if you have one, or an obstruction in the fuel line or shut off valve. I will go over how to diagnose the fuel pump later in this article.
If the needle valve in your carb is corroded, it will not allow fuel to flow to the engine properly. Same thing will happen if your float is getting stuck. You’re going to need to clean the carburetor and possibly replace those parts if they’ve gone bad.
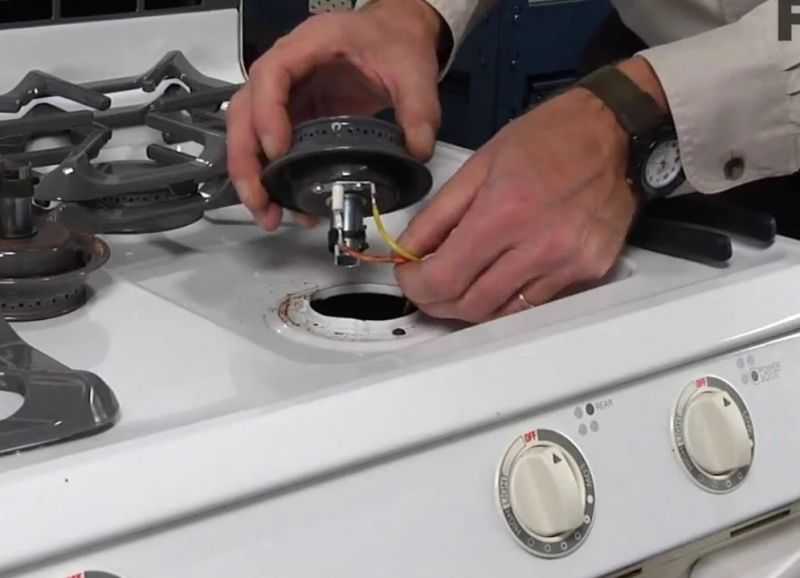
First remove the float bowl to gain access to the carburetor insides. Then you can remove the pin holding the float in place. Before you do that, you can try moving the float up and down with your hands, the float should move freely and have no resistance feeling when moving it.
The needle valve will be attached to the under side of the float, here is a picture of what you’re looking for. You can try cleaning the needle valve using carb cleaner. Just soak the thing and let it sit in carb cleaner for a few hours.
If that didn’t help, or you just don’t want to do it, no big deal. Needle valve are pretty cheap online. Here’s an example of a Carburetor Float Valve Needle on Amazon to give you an idea of what you’re looking for.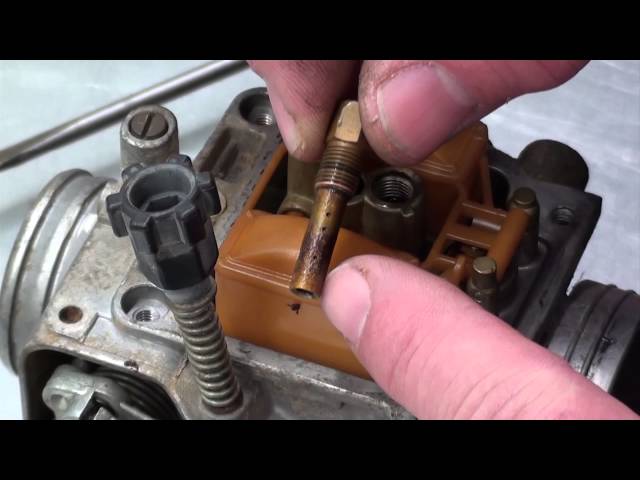
You can also replace the float if you want to, usually you don’t have to but i would give it a good cleaning. Double check all the seals and everything since you’ve got the carb open, and clean out everything really good.
Remove Needle Valve SealCheck the bowl gasket, if this was bad, you would have noticed the carb leaking fuel before. To check and replace the valve seal, you’ll need a pick or something to pull it from the carburetor. I’ve used a sheet rock screw before. Just thread the screw in a little and pull out the seal.
Check out the picture for an idea of what you’re looking at. Once you’ve removed the old seal, insert the new one and make sure it’s seated all the way.
You can do that with a metal punch or something, just make sure you don’t hit too hard because you could break the aluminum frame of the carb. Reassemble with new needle valve and you should be good to go.
Fuel injectors can get gummed up after a while if they aren’t cleaned regularly. The end of the fuel injector has small holes in it that the fuel passes through, creating a spray that enters the cylinder. If those holes get gummed up, the spray will be off, and you’re engine won’t run.
If you think it could be a problem with your fuel injector, I’d recommend trying to clean them first before buying new ones because they can be pretty expensive. First, you’ll have to remove the fuel lines that hook to the fuel injectors.
You could always remove the fuel injectors completely and let them soak in some fuel injector cleaner. I use this B-12 Chemtool Thru-Rail Fuel Injector Cleaner but you can use any carb cleaner / fuel injector cleaner you want to.
If you don’t want to remove the fuel injectors completely you can try another method. You will still need to remove the fuel lines and let all the gas drain out of them. You will then fill the fuel line with fuel injector cleaner, and then reconnect the fuel lines.
Try starting the engine for at least 20 seconds.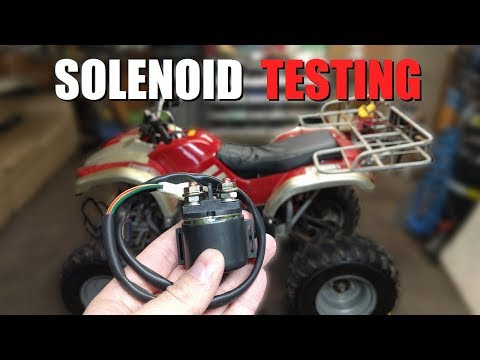 If it does start, don’t let it run for longer than 20 seconds. Then you want to sit and wait about 10 minutes or so. You need to give the fuel injector cleaner time to do its work. Repeat the process five more times, but only try to start for 10 seconds, and then let sit for ten minutes.
I know it’s not the official way to clean the injectors, but I’ve seen it work, and it can save you from all the work of removing the injectors. Once you get the quad running, you’re going to want to add a fuel additive to your gas to keep the injectors clean.
You should be doing this at least once a year anyway. I do it with my maintenance checks before spring begins every year. I usually just add some of this Gumout Complete Fuel System Cleaner to the gas tank before I start it up for the season.
I would say to try blowing air through the fuel pump to make sure fuel will be able to flow freely through it. But if you have a vacuum operated pump, you won’t be able to do that. There are diaphragms in there that could get damaged.
To make sure you’re vacuum operated fuel pump is working correctly, pull the vacuum line to the fuel pump off and crank the engine. You should feel a good amount of suction at the mouth of the carb.
The engine crates a vacuum pulse to the fuel pump, which in turn creates an amount of pressure that pushes fuel into the carburetor. If you’re not getting good suction, try replacing the diaphragms in your fuel pump and make sure your vacuum lines aren’t cracked.
If you can, try cleaning the fuel line out and replacing the fuel filter to make sure you’re getting fuel to the carburetor. Inspect the fuel pump for wear and loose or cracked hoses. If there is no vacuum in the hose, you’re carb won’t get any fuel. This is most likely caused by a crack in the vacuum fuel lines or a bad fuel pump.
You may find it easier to just replace the fuel pump all together since they aren’t usually very expensive.
The compression check is pretty straight forward, you’re trying to see if you’re engine can handle the right compression to run properly.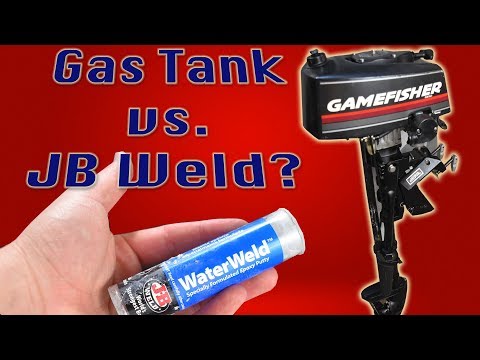 Without compression, you won’t get fuel and your ATV won’t start.
The steps are pretty simple if you have a compression tester kit. Basically, you remove the spark plug, hook up the compression tester and run the test. You just have to make sure your engine is at the down stroke in the compression cycle.
I go over this process in a lot more detail and explain step by step how to perform this test in my article, Top 7 Reasons An ATV Smells Like Burning Oil. If you weren’t getting good compression, but enough that the quad still ran, you would leak oil into the cylinder. Go to that article and scroll down to the leak down test section for a step by step guide on checking for compression.
Sharing is caring!
If your ATV is leaking gas, you need to identify and fix the issue before you continue riding. Not only do you pollute the woods by ignoring the leak, but you also waste money by spilling precious gas. Gas leaks are also associated with a potential fire hazard.
Usually, when an ATV is leaking gas, the fuel comes from the carburetor or its vent tubes. Other times, the fuel shutoff valve (also known as the petcock valve) breaks, or a fuel line may crack due to old age. These types of leaks are usually easier to identify and repair.
When a carburetor is leaking gas, quite a few possible issues could be causing the problem:
Several of these issues display identical symptoms, such as gas seeping out the carb overflow tube. Further investigation is required to identify the culprit of your problem.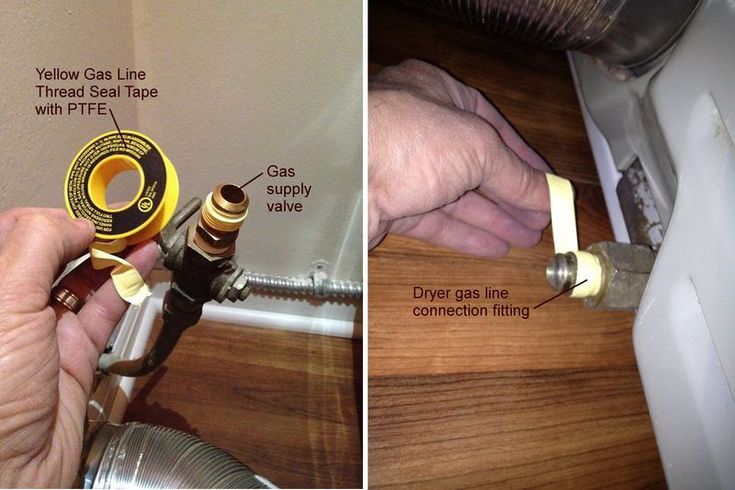
Page Contents
Note: This troubleshooting guide is made for home mechanics that like to repair their vehicles and machinery. If you have no idea how a carburetor looks, the steps that require disassembling the carburetor may be better left to a professional or someone more experienced.
Sometimes, it’s pretty obvious where the leak is located, but that is not the case more often than not.
Begin your search by the bottom of the gas tank. If your bike has a fuel shutoff valve (not all ATVs have), and it’s wet, wipe it clean with a paper towel to better see from where the fuel comes.
Work your way along the fuel lines if the valve is dry, both the main feed and the reserve. You may need to remove a few plastic panels for access. Inspect gas line, check for splits or cracks.
If the fuel lines are dry on the outside, they are not what’s causing the leak. Also, make sure all gas lines are hooked up correctly, all the way onto the nipple, and tightened with a hose clamp.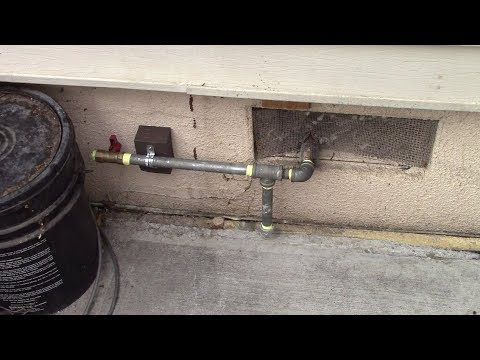
Next, inspect the carb itself. If the bottom half of the carb is wet with gas (also known as the carb bowl), it likely has a bad seal. Just make sure the drain plug is tightened and sealing properly before you go ahead and order a new seal.
All carbs have a fuel overflow pipe that drains the fuel if it exceeds a certain level inside the carb. Many gas leaks are discovered when fuel begins seeping out of this drain pipe and onto the ground. If that’s the case, you need to do some more troubleshooting to identify the root cause.
After your initial inspection, you may already have identified where the leak is coming from, or you may need to continue your troubleshooting a bit further.
Some of the steps in this guide are fast and easy to go through, while others are more time-consuming and require some patience and fiddling.
We will begin with the quick and easy steps to rule those out.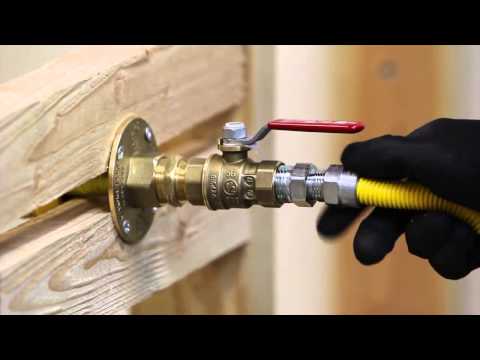 Then we’ll work our way through the most common issues in the order where they are most likely to occur.
If you’ve already identified that the leak is coming from a leaky valve or a split fuel line, you simply have to replace the damaged component with a new one.
Make sure you get the correct part for your bike. Your dealer should have these parts at hand. You can get fuel lines at most auto supply stores.
Before replacing the fuel valve or replacing fuel lines that do not have a shutoff valve, you need to drain the tank. Learn how in this post.
When gas is coming out of the carburetor overflow tube, you need to work your way through a list of possible issues that could be causing this.
All fuel tanks have an air vent that allows air to enter the tank as the fuel level drops. This ven also lets out air when the air inside the tank expands due to an increased temperature.
The venting mechanism is either integrated into the gas cap or built as a separate air vent with a hose from the top of the tank.
If the vent is blocked, air pressure will build up in the tank and force fuel into the carb until it starts seeping out the overflow tube.
To test if a blocked tank vent is causing the leak on your bike, remove the gas cap and let it sit for about 5 minutes.
If the leak stops, you’ve likely found the issue, and you need to investigate further what is causing the blockage. Often, the easiest fix is replacing the gas cap.
However, if the leak persists, you need to continue your troubleshooting a bit further.
Inside the carburetor, there is an air-filled float that, which when working properly, regulates fuel flow into the carb bowl.
When the fuel level inside the carb bowl drops, the float drops, releasing pressure on the needle valve (also known as the float valve), allowing more fuel into the carb bowl. The valve stays open until the float rises past a given level and closes the needle valve again.
If the float gets stuck with the fuel valve in an open position, fuel will continue to pour into the carb bowl until it reaches a level where it drains out the carb overflow pipe.
Here are a few things to try before disassembling the carb.
Clean the carb by adding carb cleaner to the fuel. Over time, the inside of a carb tends to gum up from old gas, especially if the ATV sits a lot between each time it’s used.
The best way to fix this is by completely disassembling the carb and thoroughly cleaning them using tools such as a carb cleaner, a brush, and compressed air. However, this process is quite time-consuming, and there is an alternative I recommend your try first.
Running a tank or two using a fuel additive such as seafoam or a similar product will dissolve some of the deposits stuck to the components inside the carb. Hopefully, this will release the carb bowl so that it moves freely again.
Related: How to Know if the Gas in Your ATV Is Bad or Not
Gently tap the carb bowl with the handle of a screwdriver. Sometimes, the float gets hung up on itself and only needs a gentle tap on the side of the carb bowl, using the rubber or plastic handle of a screwdriver.
Do not hit too hard tho, the aluminum alloy used in the carb bowl cracks quite easily.
With youth ATVs, try bouncing one end of the ATV up and down to shake the float loose. Full-size ATVs are usually too heavy for this method to be effective.
Use compressed air to free up the carb float. Another trick worth trying before disassembling the carb is blowing compressed air through the carb bowl drain hole. This may be all the float needs to fall back in place.
 A few quick bursts of air should be enough.
 If none of the above steps has helped stop the leak, the next step requires removing and disassembling the carb.
By doing so, you will be able to examine and further test which internal component of the carb is acting up. The most likely culprits are:
This is how you do it:
 Note: This tube can be delicate, so be careful. Also, double-check that this tube is put back on before starting the ATV. A two-stroke engine will soon seize up if run without two-stroke oil mixed with the fuel.
 Be very careful if you decide to use a vice to hold the carburetor in place as the aluminum alloy cracks easily. Place the vice around the meatiest portion of the carb and only apply light pressure.
With the float bowl off, it’s time to inspect and test the various components.
Make sure the float is not damaged.
Now is an excellent time to look for cracks in the float walls. If there is fuel inside the float, it needs to be replaced.
Make sure the float and needle valve moves freely.
The bowl should pivot freely on the pin holding it in place, and the needle valve should slide up and down with no drag. If that’s not the case, you need to disassemble and clean or replace the affected components.
 Use a hammer and a small punch and gently tap the smallest end of the pin. The two brackets that hold the pin in place are incredibly delicate, so be careful. Some carbs use a spring clip to keep the float in place.
 Test if the float valve and float valve o-ring seal properly.
When the float valve or float valve o-ring does not seal properly, fuel will continue to enter the carb bowl even when the valve is in its closed position.

 The o-ring is located between the brass fitting and the aluminum casting.
 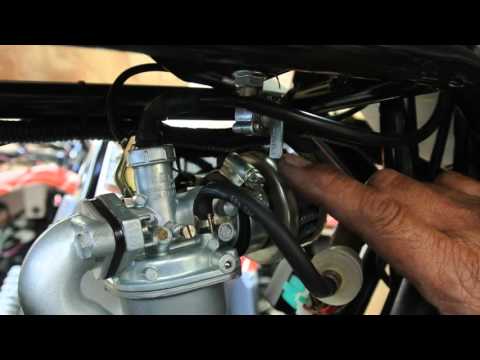 When installed, the o-ring will stretch, effectively reducing the cross-section of the rubber. Your goal is to find an o-ring that is just the right size to make a snug fit without having to force the sleeve in place. Use some silicone grease on the o-ring to aid installation.
Between the carb bowl and carb housing, a seal prevents fuel from leaking through the joint. This gasket may dry up or go bad over time. The gaskets may also have gotten damaged from previously opening the carb bowl.
Replacing the casket requires removing and disassembling the carb as described above. Your dealer should have new gaskets at hand, and they do not cost much. Aftermarket options are available for most ATVs as well.
Be careful not to damage the cast aluminum when cramping off the old gasket, as this may prevent a proper seal.
If all else fails, make sure the float height is set correctly. While checking the float height is relatively straightforward, it’s unlikely to be the cause of your leak unless someone has been meddling with the carburetor previously.
The float height determines at what fuel level the needle valve closes. If set incorrectly, the valve may not close until fuel begins pouring out the overflow.
To measure the float height, open the drain valve where the drain pipe exits the float bowl, bend the rubber pipe around and hold it against the side of the float bowl. Measure the distance between the top of the float bowl flange and down to the fuel level you see in the see-through drain pipe.
Please refer to your user manual to find the correct float height for your ATV and how to adjust it if necessary.
Also, note that the float bowl should be as level as you can get it. If the carb is installed at an angle, fuel may spill out the carb overflow pipe.
It's no secret to anyone that nothing lasts forever, everything eventually fails and breaks. Motor vehicles are no exception.
HUNDRED "NEWTON" has been repairing outboard motors, ATVs, snowmobiles for many years and allows you to keep your equipment in excellent technical condition.
HUNDRED "NEWTON" repairs motor vehicles of any complexity. This is done only by highly qualified, certified masters.
The equipment is quite serious and requires appropriate maintenance and repair at the proper level. Therefore, when problems arise with your equipment, you need to contact only competent professionals with many years of experience in this field of services, who, during maintenance, will carry out all the work correctly, in a timely manner, without further costs for more expensive repairs. They will detect a malfunction in the equipment, apply all their knowledge and skills in order to eliminate the breakdown at the initial level of its occurrence, repair snowmobiles, ATVs and outboard motors efficiently, quickly and as soon as possible.
If you take something specific from the brands of equipment, then you need to remember about its uniqueness, therefore, in repair and maintenance, the specifics and individual characteristics are primarily taken into account.
Particular attention in the repair of motorcycles is given to the engine, this component plays an important role. In order to make driving equipment safe, comfortable and give maximum pleasure, it is necessary first of all to determine the cause of the engine breakdown and eliminate it.
Our vehicle repair professionals can also provide you with seasonal maintenance and winterization services for snowmobiles, ATVs, outboard motors for boats and boats.
Here's another mistake!
It is not necessary to neglect the preservation of equipment and its preparation for storage or operation. This is a very important factor.
If you take into account all the recommendations that we have described above, then you will do the right thing by contacting the “NEWTON” service station to repair and service outboard motors, ATVs, snowmobiles and other equipment.
Consult only specialists.
It is necessary to do preventive maintenance in time, and then the equipment will serve you for many years, delighting and not bringing problems.
Outboard motor repair
Outboard motor repair is a very important undertaking, and it must be approached with all seriousness and knowledge of the matter.
Quad bike repair
Quad bike repair is a responsible, difficult, at the same time interesting, creative work. It is difficult to find specialists in such a narrow-profile repair. They can be literally counted on the fingers.
Snowmobile repair
We offer repair of both domestic and foreign-made snowmobiles, service and repair of snowmobile engines of any complexity.
Repair of gasoline generatorsNEWTON service station performs repair of electric generators of all types of domestic and foreign production. The vast experience of specialists allows us to carry out repairs as soon as possible.
Scooter repair A scooter is a set of components and mechanisms that fail over time and require additional participation in diagnostics and repair. STO NEWTON offers a full range of services regarding the repair, diagnostics and maintenance of scooters.
Chainsaw Repair Despite the relatively simple design of the chainsaw, as a tool with a high level of danger, it requires professional repair with the participation of competent experienced specialists.
Repair of diesel heat gunsNEWTON service station performs high-quality and prompt repairs of diesel heat guns of any brands.
Sometimes there may be difficulties when paying with Visa / MasterCard bank cards. The most common of them:
In order to solve these problems, you need to call or write to the technical support of the bank where you are served. Bank specialists will help to solve them and make payment.
That's basically it. The whole process of paying for a book in PDF format on car repair on our website takes 1-2 minutes.
If you have any questions, you can ask them using the feedback form or write us an email at [email protected].
You can scold China, the seller, and anyone else for a long time, but the statistics are merciless. Service centers most often encounter not manufacturing defects and assembler errors, and not even poorly soldered boards. The bulk of the breakdowns on the conscience of the owners themselves.
People don't even want to spend five minutes reading instructions that most decent companies translate into Russian or English.
Accuracy of driving is worth talking about separately. After all, you are not buying an ATV or a rally car, but equipment for driving on a relatively flat road.
Often there are situations when the power button responds to pressing, but the scooter does not move. What should be done in such circumstances? There is no need to panic, because it is quite possible that everything is in order.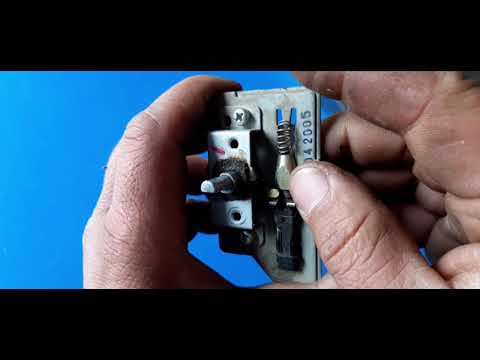
Take a look at the indicators:
As soon as the charge level falls below a certain level, the battery indicator lights up red. There is still a minimum charge, but the electronics block movement to avoid deep discharge. If you see a red indication, just charge the battery.
The status indicator is more complicated. As in cars, other equipment, there are error codes in the electronics of gyrocycles. The specialist counts the number of flickering light bulbs and checks them against the list:
 Usually turns on when the platform is turned over.
 You will need
Manual
If the engine does not start, check that the key in the ignition switch is turned to the desired position, and that the lever of one of the brakes is not pressed. Check the brake light bulb or its electrical circuit. Check and replace if necessary the fuse in the main electric starter circuit. Check the terminals on the battery. Strip them of oxides, measure the battery voltage and charge if necessary. You can temporarily start the scooter with a kickstarter.
Check the electric starter circuit. Strip the contacts on the relay and starter, ring the relay, starter windings and scooter wiring. If the kickstarter spins, check and replace the defective kickstarter or ratchet gears. Loosen the carburetor float chamber drain screw. If there is no gasoline in it, clean the filter of the gas valve and blow out the fuel line, check the serviceability of the gas valve itself, the tightness of the vacuum hose of its control. If the carburetor fuel valve is sticking, remove the float chamber cap and clean the valve seat. If this does not help, replace the valve. Unscrew the candle. If it is covered with a layer of unburned fuel, disassemble the carburetor, check the fuel level in the float chamber and clean the air filter. Check the automatic starting enrichment and the spark at the spark plug. If it is missing, clean the spark plug electrodes with sandpaper or replace. If this does not help, check the health of other elements of the ignition system.
If the engine is unstable, check the carburetor inlet pipe for leaks and replace the gasket. Replace crankshaft seals. Unscrew the drain screw of the float chamber, get rid of the water in it. Blow out jets and carburetor passages. Change the petrol in the tank. Remove the spark plug. If there is water on the insulator and electrodes, get rid of it in the carburetor float chamber by unscrewing the drain screw.
If there is black oily deposits on the insulator and electrodes of the spark plug, replace it with a similar one with a lower glow number. Check and clean the vent hole in the fuel tank cap. Check compression with a compression gauge. If it is out of specification, replace the piston, cylinder and piston rings. If there are oily traces on the head and cylinder, replace the gasket under the cylinder head or tighten the nuts of its fastening with force and in the order recommended by the repair manual.
If there are extraneous sounds on a running engine, adjust the thermal clearances in the valve actuator of four-stroke engines. Check the tension and adjust the valve drive chain. Replace worn pulleys, rollers and other parts of the variator with new ones. If the engine stalls when the throttle is suddenly opened, check that the engine warms up sufficiently, check the carburetor settings and its main metering system, and the correct operation of the variator.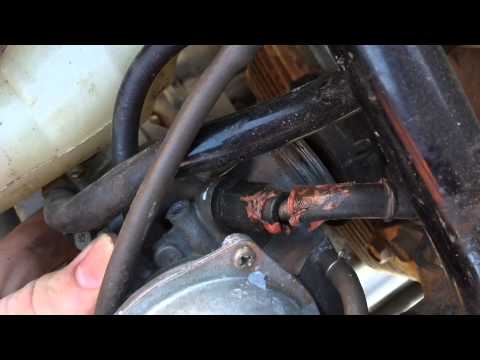 If the engine does not pick up speed, smokes, consumes a lot of fuel, and a black deposit has formed on the spark plug electrode, adjust the carburetor or install a smaller main fuel jet. If there is detonation and white coating on the candle, also adjust the carburetor or install a larger main fuel jet. In addition, check the muffler, channels and cylinder windows for clogging. Clean them up. If the muffler cannot be cleaned, replace it. If the engine starts to lose power while driving, check the fan blades and shrouds on the air-cooled engine. Replace damaged, broken or split. On a liquid-cooled engine, check for coolant leakage by changing the level in the reservoir. If necessary, replace the water pump, thermostat, radiator.
www.kakprosto.ru
What to do if the hoverboard is not charging? Here are some simple tips for troubleshooting:
To remove the bottom panel, use a screwdriver or screwdriver with the appropriate bit. This way you can get to the inside of the vehicle and try to find the poor charging problem.
The charging port side of the scooter is exactly the area you need to work on.
Be careful during disassembly. Do not lose screws or washers, do not use a drill to remove non-loosening self-tapping screws or bolts.
There will be some wires directly on the inside of the plastic cover you just unscrewed.
They are responsible for charging the hoverboard: they connect the charger ports and the lithium-ion battery. Another wire line goes to the motherboard. You can temporarily disconnect it to avoid an unexpected power surge (only if the board is disconnected by a connector). If the wires are soldered, it is better not to touch them.
Blackening of the wire or oxidation of the contacts, is there a lot of dust? This may well be the reason for the incorrect operation of the device. Accumulations of dust must be removed, damaged wires replaced, contacts cleaned to a metallic sheen.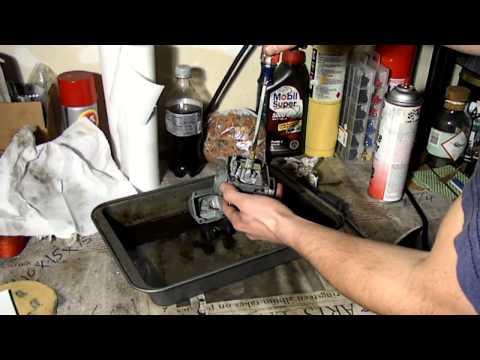
After completing this impromptu diagnosis, screw the cover back onto the scooter, tightening all the removed bolts one by one.
They will help you diagnose more efficiently and without risk to your scooter. True, it is no longer free.
If, despite all this, your scooter continues to malfunction, you will need to contact the manufacturer and request a repair manual. In the worst case, the hoverboard will have to be sent under warranty to the manufacturer. It may be that the device was initially faulty, and you will have it replaced under warranty. It often happens that a new purchased hoverboard does not charge.
After successful completion of the payment (by any method) and return to the KrutilVertel store from the payment system website, you will be taken to the successful payment page:
The book you bought will be in your personal account, from where you can always download it.
Please note that after making the payment, you need to go back from the payment system website to the KrutilVertel website.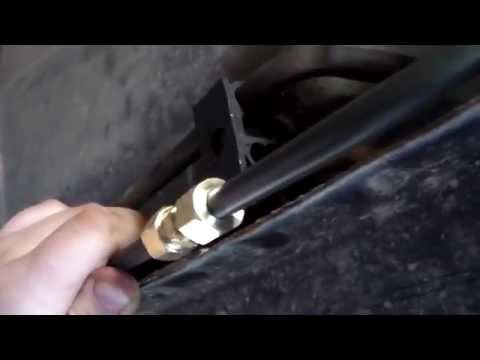 If for some reason you did not return back to the site and closed the tab of the payment system with a message about the successful completion of the payment, please let us know - we will send you a letter in which you will be given access to download the book
If for some reason you did not return back to the site and closed the payment system tab with a message about the successful completion of the payment, let us know about it - we will send you a letter in which you will be given access to download the book.
The first and main sign that the equipment needs repair is the inability to start the engine. Scooter repair begins with the identification of a malfunction, and then its elimination. In this case, a breakdown must be sought starting from the place where the thermal energy of the burnt fuel is converted into mechanical energy of the rotating crankshaft of the engine. So let's get started:
- determine whether fuel enters the combustion chamber,
- whether there is a spark between the contacts of the spark plug.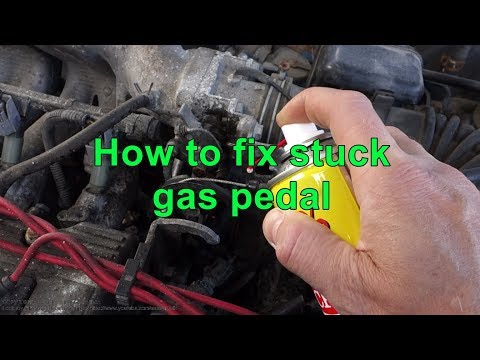
If all of the above factors are present, then the following malfunction options are possible:
1. A breakdown of the spark plug insulator has occurred. To do this, simply replace the candle.
2. Ignition timing is off and the fuel mixture does not ignite when the piston is almost at its top dead center (TDC). Here you can no longer do without an indicator, with the help of which the position of the piston in the cylinder relative to TDC is determined, and at what moment a spark appears on the spark plug, igniting the fuel mixture. In this case, the repair of the scooter will consist in setting the correct ignition timing recommended for this type of engine.
If there is no spark on the spark plug, then there may be the following problems:
1. Faulty spark plug.
2. Candlestick defective.
3. Broken armored wire.
4. Ignition coil burned out.
5. If the ignition is electronic, then either the ignition unit or only the Hall sensor may be damaged.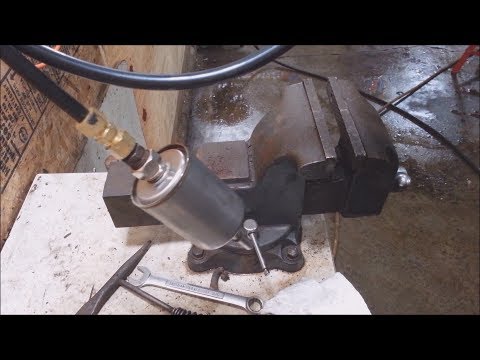
In the event that the combustion chamber is not getting the fuel mixture, the reason for this may be such problems.
If the scooter is two-stroke:
1. clogged fuel filter;
2. clogged or broken carburetor.
If it is four-stroke, then a malfunction of the gas distribution system (burnouts or bending of valves) can be added to the breakdowns.
For more than a decade, two-wheeled scooters (colloquially referred to as scooters) have become a common, cheap, affordable, inexpensive and, accordingly, mass means of transportation in both cities and rural areas.
Their owners, however, like any other two-wheeled vehicles, regularly face such an unpleasant need as scooter repair. The reasons why you may need to repair your vehicle can be very diverse, ranging from factory defects or poor quality of components and assemblies to breakdowns caused by accidents or natural wear and tear of parts during operation, since nothing is eternal in nature simply does not exist.
If you intend to repair the scooter with your own hands, and not use the services of special workshops, then you need to understand that all faults can be divided into several large categories, namely:
- electrical equipment;
- fuel system;
- running gear;
- engine;
- transmissions.
Each category also includes several subcategories. The most frequent are malfunctions associated with electrical equipment and the engine power system. Therefore, we will consider them in more detail, since the repair of a scooter often consists precisely in their elimination.
The first and main sign that the equipment needs repair is the inability to start the engine. Scooter repair begins with the identification of a malfunction, and then its elimination. In this case, a breakdown must be sought starting from the place where the thermal energy of the burnt fuel is converted into mechanical energy of the rotating crankshaft of the engine. So let's get started:
- determine whether fuel enters the combustion chamber,
- whether there is a spark between the contacts of the spark plug.
If all of the above factors are present, then the following malfunction options are possible:
1. A breakdown of the spark plug insulator has occurred. To do this, simply replace the candle.
2. Ignition timing is off and the fuel mixture does not ignite when the piston is almost at its top dead center (TDC). Here you can no longer do without an indicator, with the help of which the position of the piston in the cylinder relative to TDC is determined, and at what moment a spark appears on the spark plug, igniting the fuel mixture. In this case, the repair of the scooter will consist in setting the correct ignition timing recommended for this type of engine.
If there is no spark on the spark plug, then there may be the following problems:
1. Faulty spark plug.
2. Candlestick defective.
3. Broken armored wire.
4. Ignition coil burned out.
5. If the ignition is electronic, then either the ignition unit or only the Hall sensor may be damaged.
In the event that the combustion chamber is not getting the fuel mixture, the reason for this may be such problems.
If the scooter is two-stroke:
1. clogged fuel filter;
2. clogged or broken carburetor.
If it is four-stroke, then a malfunction of the gas distribution system (burnouts or bending of valves) can be added to the breakdowns.
Today it is very common to encounter the problem of water in the fuel. In some cases, it gets there quite by accident, but more often it is added at the gas stations themselves in order to fraudulently earn more money.
Be that as it may, the presence of water in the gas tank in any case greatly harms the car. This is especially true of injection and diesel engines, which are now the majority. More precisely, the engine will not suffer much from water, but the fuel injection system or the fuel pump may fail. Even more deplorable consequences can be caused by water entering the fuel tank during frost. So, due to the difference in density, water always accumulates at the bottom, not mixing with gasoline. If the tank is more than 50% full, then nothing terrible will happen, but many drivers refuel only when the tank is almost completely empty. Consequently, the accumulated water enters the gas pipeline, where it can simply freeze in frost. As a result, the car will not be able to start until the resulting ice has melted. But few people will be able to guess that this is the problem. Most motorists will sin on anything but water.
Absolutely no one is immune from moisture getting into the fuel tank.
Of course, refueling only at proven gas stations gives a certain guarantee, but anything can happen. This means that absolutely every car has a certain amount of water in its tank. It may be quite a bit (less than a hundred grams), but still.
And in order to protect your machine from breakdowns, moisture should be periodically disposed of. This is especially true before the onset of autumn frosts and winters. Moreover, this is done quite simply.
1st way
We know that water is not miscible with either gasoline or diesel fuel, but alcohol is a different matter. It can be of any type, but must be undiluted. To a full tank of fuel, you need to add a couple of hundred grams of alcohol. You should not overdo it either - you should not pour more than 500 ml. As a result, water mixes with alcohol and a mixture is formed that not only does not freeze, but also burns like gasoline during engine operation. There will be no harm, but the absence of water in the tank will guarantee that even in the most severe frost the fuel paths will not freeze, and the machine will work well.