Generally speaking you will want to replace the spark plug(s) after each 100 hours of use. This assumes of course that your engine is running normally and you are not experiencing problems like a "rough engine" or an engine that fails to catch while the ignition is turning over. If these occur it's time to pull the plug and determine if it is the problem or some other component is the cause.
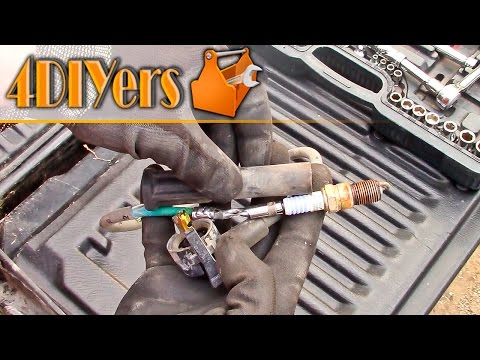
Actually pulling the plug, inspecting and replacing it only takes 5 to 10 minutes. However, unlike a car you can't pull a handle and pop the hood to get to the spark plug. On an ATV you have to remove plastic (exterior panels) to expose the plug and depending on your brand that could be a lot of plastic. Pulling off parts is the real time consumer for this task.
Because it takes a bit of work to "open up" your ATV it's a good idea to check a couple of items while they are easily accessible. Make certain that the bolts on the battery cables are firmly attached to the battery posts. A common "won't start" problem is often the result of hard riding loosening the bolts from the battery terminals.
Your exhaust system is another component that is accessible in most models when you have sufficient exterior panels removed to get to the spark plug. Check the bolts holding the pipe to the engine to ensure a secure fit.
The steps we provide below are general in nature and are not meant to replace the instructions found in your OEM owner's manual. Obviously different brands have different engine mounting configurations meaning the location of the spark plug and how easy it is to access will vary. When in doubt, follow the OEM instructions. Our tips are intended to show you that this repair can be done as a DIY project saving you professional labor costs and a more enjoyable ATV experience.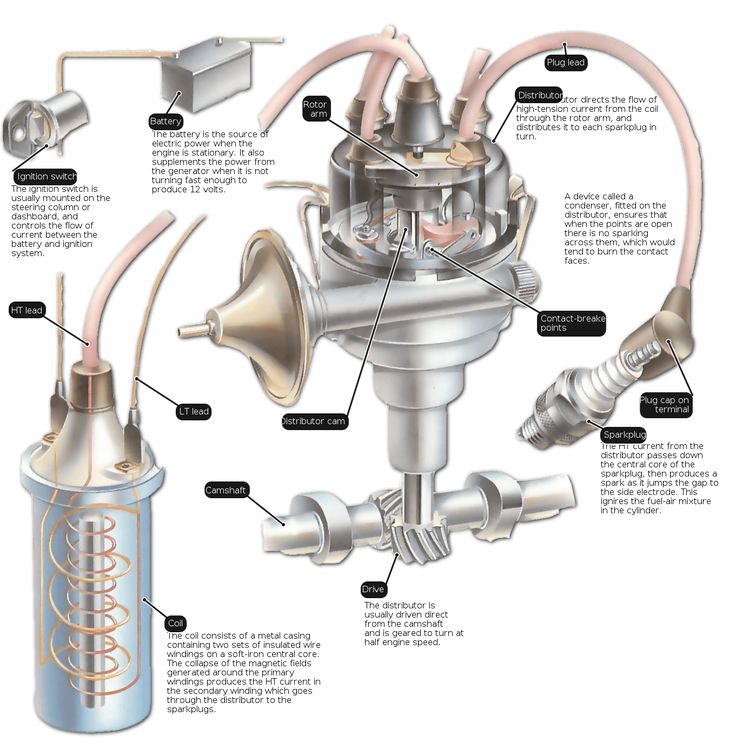
 The last thing you need is debris falling into the engine once you have pulled the plug.
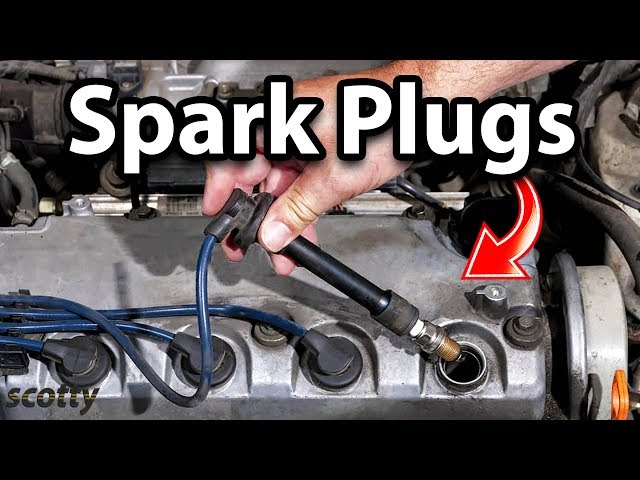
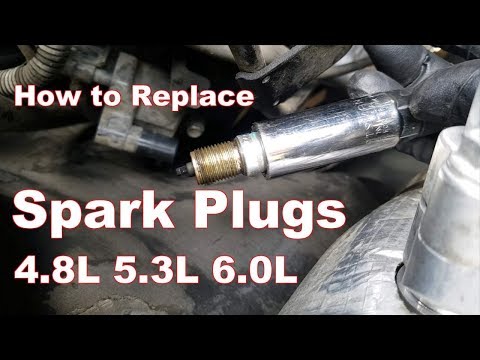 Use the gap gauge to set the gap and then reinstall.
 Place the boot over the plug and push down until you hear it snap into position.
Replacing the spark plug is a simple DIY task that almost anyone can accomplish in a minimal amount of time.
- End of Procedure -
Return to all Repair & Install Guides
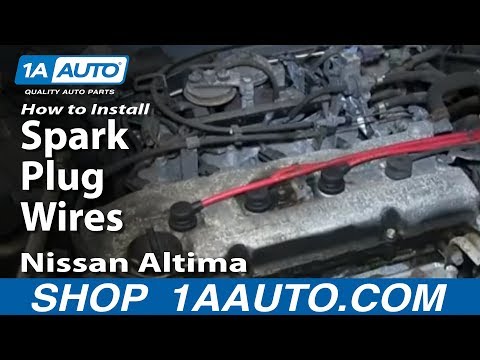
The best spark plugs in the world won’t deliver if the sparkplug wires connecting them to your distributor cap aren’t up to par. Good spark plug wires are essential for reliable ignition performance. Bad ones will cause spark plug misfiring, hard starting (especially during rainy, cold or snowy weather), rough idle, hesitation when accelerating, poor fuel economy and increased hydrocarbon (HC) emissions. On 1995 and newer vehicles with OBD II Onboard Diagnostics, a bad wire-prompted misfiring may set a fault code and light up your “Check Engine” signal.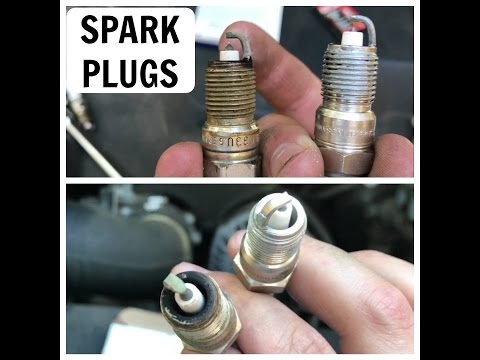
Good spark plug wires are just as essential to ignition performance as your spark plugs themselves.
If you’ve got any of these problems going on with your ride, inspect the sparkplug wires and look for burns, cracked insulation, chaffing, visible arching and loose plugs or terminals. If you see any of those, it’s time for new wiring. Luckily, replacing your spark plug wires is fairly easy and typically requires no tools. But get it wrong and your hot rod won’t leave your garage until you fix it. To make sure you get it right the first time, E3 Spark Plugs offers step-by-step instructions on replacing your spark plug wires.
 Note that in some vehicles, this end of the spark plug wire is permanently attached to the distributor cap. You know what that means – You’ll have to replace the entire distributor cap. Sorry ’bout your luck.
DO NOT be tempted to pop off all the wires at once. Even if your spark plug wires are numbered, it’s too easy to get them mixed up and connect your spark plugs to the distributor cap in the wrong order. Do this and you’ll have changed the firing order. Your car will run like a racehorse with a bum leg or might not run at all.
Also, don’t assume that new spark plug wires will be part of your 30,000-mile tune-up. Most shops don’t include this service because it bumps up the cost of your tune up. A new set of wires can cost anywhere from $20 to more than $100 depending on the type of vehicle and the quality of the wires. Don’t skimp here. Cheap spark plug wires won’t save you a dime in the long run.
| Expensive option: At a fairly high cost, however, these wires very successfully solve the problem of "triple" of the engine when water gets on them, or the engine is immersed in water fully. The material from which they are made perfectly protects the ignition system and prevents breakdowns in the most difficult conditions, and platinum or iridium candles provide a more confident engine start and more confident and smooth operation, especially in the first minutes after starting. Cheap option: High voltage wires NGK RC-LD302 or NGK 7104 so enough for two ATVs. The price of a set of 4 wires at the time of adding this material is 473 rubles on Exist.ru, against the price of 1,036.87 rubles for one wire NGK 8035 But I must say that these are completely different wires, although they are also from NGK. Other materials, other execution. However, they also eliminate the problem of "triple" in the water, and are much better than regular wires. Quote: My quad had a problem, as you drive through a puddle, one of the cylinders began to work intermittently. The problem turned out to be dead high-voltage wires. Well, as always, we turn to the dealer "as it often happens to laugh at prices," we laugh at the inadequate price of 600 rubles. for one china posting and let's go dig the CFMoto CF800-X8 forum in the hope of finding alternatives. But surprisingly, I found an offer here to exchange for NGK 8035 wires, which naturally surprised me, because the price of this wire is even more inadequate 1100 for one posting, and they need 2! I decided to go to an auto parts store for Russian cars, and here it is our salvation, a set of four wires for a VAZ 2106. Four wires of excellent quality manufactured by NGK for only 483 rubles. The part number for these wires is RC-LD302.
From the other end of the old wire, remove the boot and put it on the new wire, cut off the new wire so that it is the same length as the native one. Here is a photo of the box with wires: After replacing the wires, swimming in puddles no longer affects the operation of the engine, I consider the experiment successful. Collective farms for health, because the more we collective farm, the faster prices will adjust to us. Which option to choose, everyone must decide for himself. Thanks for the material, Mikhas, Hab! Thank you Mikish for the clarification on the type of candles! For material on NGK wires for VAZ, thanks to lexus5! Top of page |
IN THIS COIL, THERE IS A BREAKDOWN INSIDE THE COIL AND THE INTERTURN SHORT CAN APPEAR!!! THE PRESENCE OF INTERTURN SHORT ON SIMPLE SYSTEMS WITHOUT PROTECTION AGAINST SHORT CLOCK DOES NOT INTERFERE TO WORK AND THE SPARK IS PRESENT, BUT NOT FOR LONG - AT THE END OF THE END THE COIL DIES AT ALL.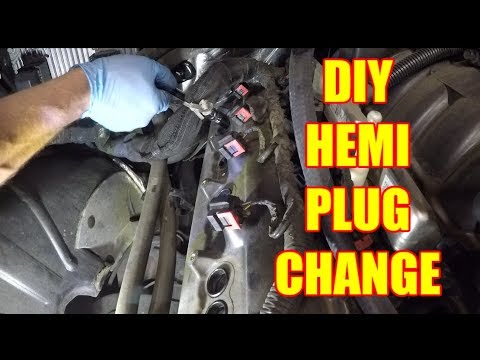 MY SYSTEM HAS BUILT-IN SHORT PROTECTION AND WILL NOT WORK WITH PUNCHED COILS!!!
To connect the ignition control unit (BUZ) to the ATV's on-board network (only connector 1 is used), disconnect the standard CDI unit from its connector (or disconnect the DPK connector) and disconnect the BB wire of the standard ignition coil from the spark plug to the "signal" wire ( most often it is a blue or white-blue wire) DPK connect the BUZ input (blue wire), make sure that the second DPK wire (most often green) is connected to ground (sometimes it is connected to ground only in the CDI unit, sometimes directly in the generator)
Black wire BUZ to ground, the second black wire to the "-" DPK, yellow wire BUZ to + battery (battery) after the ignition switch (it is convenient to connect it to the "+" terminal of the cigarette lighter), white wire to the terminal of the ignition coil, Terminal " + "ignition coils through a 15 amp fuse !!! on + battery, BB wire to the coil and spark plug. Increase the gap on the electrodes of the candle to 1 mm (If you are not sure that you can correctly increase the gap so that the contact surfaces of the candle remain strictly parallel, then you will have to learn how to do it :). Securely fix the ignition coil and BUZ on the quadra frame (the unit is fastened with self-tapping screws or M4 screws through the holes that are accessible when the cover is removed).
We strongly recommend that the block body be securely connected (electrically) to the quadra frame, if the body is attached to plastic - with an additional thick wire (to the wire terminal, terminal for the block mounting screw) connect it to the "-" battery or frame!
If this is not done, then in most cases nothing terrible will happen and everything will work fine anyway :o)
That's it, you can start it. As wound up, you should reduce the speed of the twentieth - most likely they will increase to 2000 - 2500 rpm.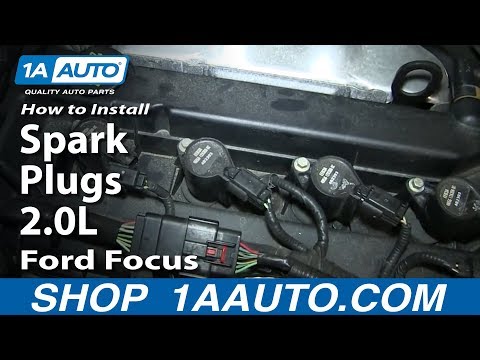
To return to the standard ignition system: disconnect connector 1 BUZ, the standard CDI unit into place in its connector, the BB wire from the standard coil to the spark plug.
Connector number 2 is up to you :o)
There are several points to pay attention to when installing and starting the system. Here is a list of what caused the ignition to work poorly on different quadrics:
 (Better just buy a new NGK spark plug)
 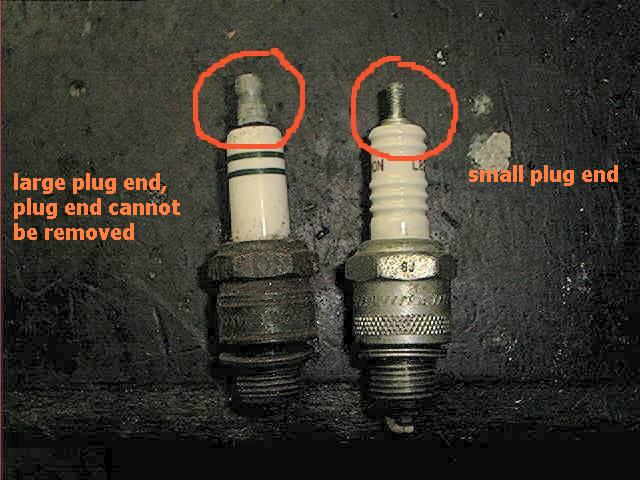 (once they forgot to connect the second wire from the inductive sensor to ground - of course, nothing worked and the blue LED did not light up ... not in all quadrics it is shorted to ground directly in the generator ...)

 The metal tip itself, which is inserted into the ignition coil, is simply crimped on the old wire, we take it and gently unclench it with improvised means, such as side cutters and a screwdriver. We clean very carefully the tip of the new wire about a centimeter, so that the central black vein remains, we clean it very carefully, the wire is very easy to cut and you can accidentally cut off the conductive central vein we need. We bend this vein as it was done on the old wire, and put on and crimp the old tip on the new wire with pliers. That's all, the wire is ready. Issue price 483r. for both wires, and besides, there will be 2 more wires from the kit for a friend or for yourself in reserve.