Here's a tire and rim from a wrecked 2000 mercury grand marquis
This tire is junk because of a couple unrepairable gouges in the sidewall. So some destructive cutting tools were used to pull the tire off the rim
Here's the tire after it was cut in half.
On the surface, this may look like a nice 1999 crownvic wheel
But under different lighting, rust is visible around the rim flange where the tire bead normally sits.
Here's the rim with half of the tire sitting next to it
And the rim with the tire cross-section installed on it
Here's a diagram of how a steel belted radial tire is constructed
Here's an actual cooper tire cut in half showing how the tire seats against the rim flange
When the rim flange rusts like this, air can escape through the rust pits.
Closeup pictures of the rust around the rim flange
Crevice corrosion happens in this area because water gets trapped in between the tire and rim with no place to drain out.
Now that we've seen the rusty rim flange, lets try an experiment to remove all the corrosion.
First, use an electric drill with a wire wheel to remove the loose rust scale.
And start dissolving the rust with a phosphoric acid solution
The pink colored stuff on the rim is the naval jelly solution of phosphoric acid. The small bubbles in the gel tell you that the acid is doing it's job etching away the rust.
Here's the rim flange after several applications of naval jelly. The rust is gone for the most part, but there are deep pits in the metal where the rust pores used to be. Rust never sleeps and you want to get rid of it all to make sure it doesn't come back.
The active ingredient in naval jelly is phosphoric acid.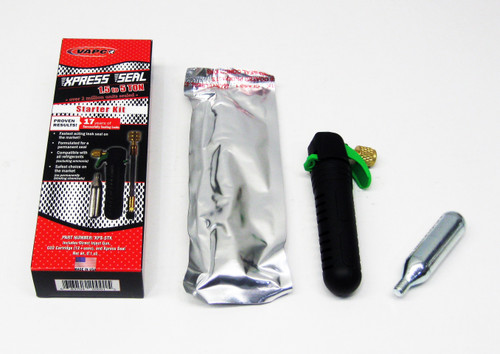 Unlike other acids that eat away rust, this stuff for the most part leaves the uncorroded metal behind untouched.
For cleaning up rust, sandblasting also works nicely. It is a lot faster than etching rust with acid. But it does remove more "good metal" than the naval jelly method.
The big problem now is going to be figuring out what substance to use to fill in craters where the rust used to be. A coat of paint with some tire bead sealant on top might work.
On rare classic cars with rim flange rust this bad, you'll sometimes see restoration shops weld metal back to the rim flange and then turn the rim on a lathe. But this rim is from a high volume production car and replacement rims are plentiful at the junkyards. New replacement steel wheels are also still avaliable for the 1998-2002 crownvics from ford motor company too.
There was quite a bit of rust around the rim flange, but the steel is still reasonably thick in this area. So the wheel still has a good amount of mechanical strength left to it in the rim flange area. Sometimes, you'll encounter rims that are so severly corroded that the flange area has the strength of tin foil.
Getting all the rust off this rim took a few days, the process I used was:
-Apply naval jelly to rusty metal
-Let rim sit overnight with acid solution on rusty metal
-In the morning after the naval jelly had dried, use a wire wheel on an electric drill to remove the rust that the naval jelly had loosened up
-Then reapply the naval jelly to start the process all over again
Here's the back of naval jelly bottle
Despite what naval jelly's material safety data sheet (MSDS) may imply, the substance is relatively safe to handle. But it would still be a good idea to use the substance outdoors or in a well ventilated area to prevent the buildup of irritating fumes.
Wheel Balance Weights
Here is a wheel balance weight on the rim
The clips on these do not get deep enough into the flange area to cause any leaks
Valve Stem
Sometimes, you'll encounter leaks around the tire valve stem.
Here's a 2000 grand marquis wheel with the valve stem installed
A closeup of the rim from back showing the rear of the valve stem
The rim with the valve stem removed. Notice the new circular hole that didn't used to be there?
Here's the rim from the back showing where the valve stem would normally insert
There are some abrasion marks on the valve stem from where the hubcap was rubbing against it. The hubcap weighs a lot less than a steel wheel, so the two items don't always want to rotate at the same speed.
Tire Shop Air Leak Sealing Methods
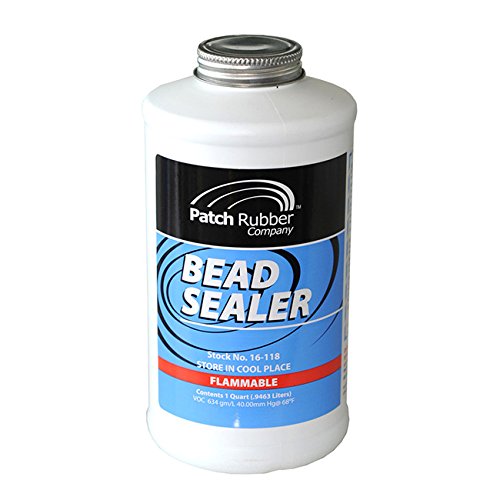
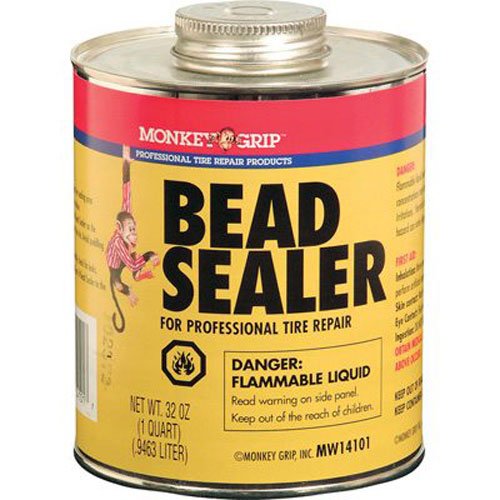
Bead Sealer
Bead sealer is a black rubbery glue substance that is used to help the rubber tire seal to the metal rim. It will also fill in minor imperfections in the rim. And will help keep small debris like stones from getting in between the tire bead and the rim flange. It does however make the tire a little more difficult to get off the rim during service.
Air drill
An air drill with a variety of attachments are used to clean up the tire bead and the rim flange area
Wire Wheel
On steel wheels, a wire wheel is usually used to clean up corrosion.
Scotch Brite Pads
On aluminum wheels, scotch brite pads are usually used to clean up corrosion. Aluminum is softer than steel and scratches relatively easy. These scotchbrite discs are also sometimes used to clean up the rubber surface of the tire bead too.
Wire Brush
Without power tools, you could use a wirebrush on the steel wheels instead. Rust cleanup will take a little longer with this tool.
Bead sealer + Rusty Rim
A common practice to seal up tire air leaks on steel wheels around the bead area is to remove the loose rust scale with a wire wheel. Then coat the polished rust with bead sealer and install the tire. This method did get the really rusted rim pictured above to hold air reliably for over a year. Unfortunetly, rust never sleeps and that wheel developed air leaks again requiring the tire to be removed from the rim to "clean up" the bead area yet again. There's no perfect solution besides replacing a rim with a new one once the flange is rusted this badly.
Do It Yourself Tire Leak Repairs
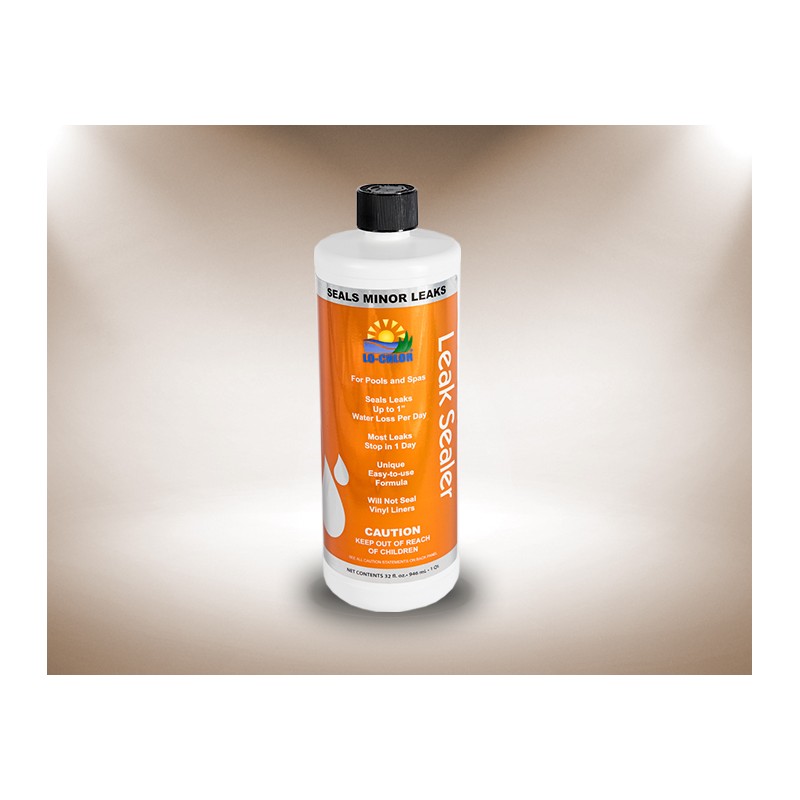
You'll sometimes see the do-it-yourself crowd install large quantities of tire sealer via the valve stem in an attempt to stop bead leaks. This stuff has a poor success rate at repairing air leaks around the tire bead. It does however make a real mess in between the tire and rim. And it will also throw off your wheel balance.
Other Notes:
 But when you've got a mysterious tire air leak, it's still useful to have background information about how a tire seals onto the rim so that you can have a more productive discussion with the technicans at your local tire shop.
Welcome to the Thomas guide to the best tire sealants 2022. Thomas has been connecting North American industrial buyers and suppliers for more than 120 years. When you purchase products through our independent recommendations, we may earn an affiliate commission.
Tire sealants are nifty products to have around in case of a flat tire or slow leak and should be part of an emergency tool kit for mountain bikers, ATVs, or any vehicle with off-road tires. Keep in mind that the centrifugal force can become off balance when the sealer is added to the tire until it's evenly distributed. To do this, simply allow the wheel to turn for several minutes slowly.
Image credit: Shutterstock/Mon Ster
Most sealers are not intended for highway use, although some brands can be used as soon as the sealer is properly distributed inside the tire to reduce any wobble. Certain factors such as location, which affect surface temperature and the tire quality of the vehicle, also affect intended usage. If unsure exactly how to distribute the sealer inside the tire, search the web for videos explaining this critical step.
Most car tire sealers are designed for emergency use and will last long enough to get drivers to the nearest mechanic. Keeping a sealer and air compressor handy in your car to plug a hole can save time spent changing a spare tire. On the other hand, bike sealers can be used as a shield to help prevent thorns or other sharp items from puncturing tires. Below is a list of different sealers and their specific uses.
Intended as a short-term solution for a slow leak to get you to the nearest gas station, aerosols are not as durable as other sealants. These sealants are highly flammable and also should not be stored in areas that have a temperature of over 120°F. Most have carcinogens and ingredients that deplete the ozone layer and are recommended only for a quick fix to a punctured tire.
Any sealer that comes in liquid form is a liquid sealer. Some common materials used in liquid sealers are latex or rubber, aramid, or kevlar fibers. They are inserted into the tire using an injector and special valves.
This is one of the most commonly used sealers for bike wheels due to its quality and performance. This sealant is injected into a wheel in liquid form to fill holes and punctures. Once the holes are sealed, the liquid plugs the space between the tire and the rim.
A type of liquid sealer, latex simply refers to the primary material used in the sealant. People who are allergic to rubber should either avoid this type of sealer or use gloves to prevent skin contact.
Secure a hole in a car, truck, or bike tire with one of these tried and true tire sealers.
Best Non-Toxic Tire Sealant: Slime 10011 Tire Sealants | Buy Now Best Tubeless Tire Sealant: Stan’s NoTubes Tubeless Sealant | Buy Now Best Liquid Tire Sealant: TireJect Car Liquid Sealants Kit | Buy Now Best Aerosol Tire Sealant: Fix-A-Flat S60420 Aerosol Sealants | Buy Now Best Heavy-Duty Vehicle Tire Sealant: TireJect Truck Sealants | Buy Now Best Non-Corrosive Tire Sealant: Slime Sealant | Buy Now Best Latex Tire Sealant: Truckerco Sealant | Buy Now Best Performance Tire Sealant: ORANGE Seal Sealer | Buy Now Best Compound Tire Sealant: Berryman Sealant | Buy Now Best Contact Tire Sealant: FlatOut 20110 Sealant | Buy NowReview our list of the best sealants to balance air pressure in an emergency for bikes, cars, or larger automobiles.
*Prices listed in this article were as shown in US$ on Amazon.com (USA) as of January 2022
Instantly seal leaks with this Slime repair quality sealant. One bottle should work as a tire patch for 20 bicycle tires. It can be used on cars or small SUVs for up to 100 miles before needing repair. It also has effectiveness in cold weather. Some customers noted that the included valve core removal tool wasn’t the best, but the sealant itself was excellent value for money.
“This sealed a nail hole in my tire,” explained one shopper. “This is the first time in decades of experience, and through countless flat tires, I have ever seen an over-the-counter tire repair sealant work.”
At the first sign of a puncture or low pressure, this bottle of Stan’s sealer liquid works on contact.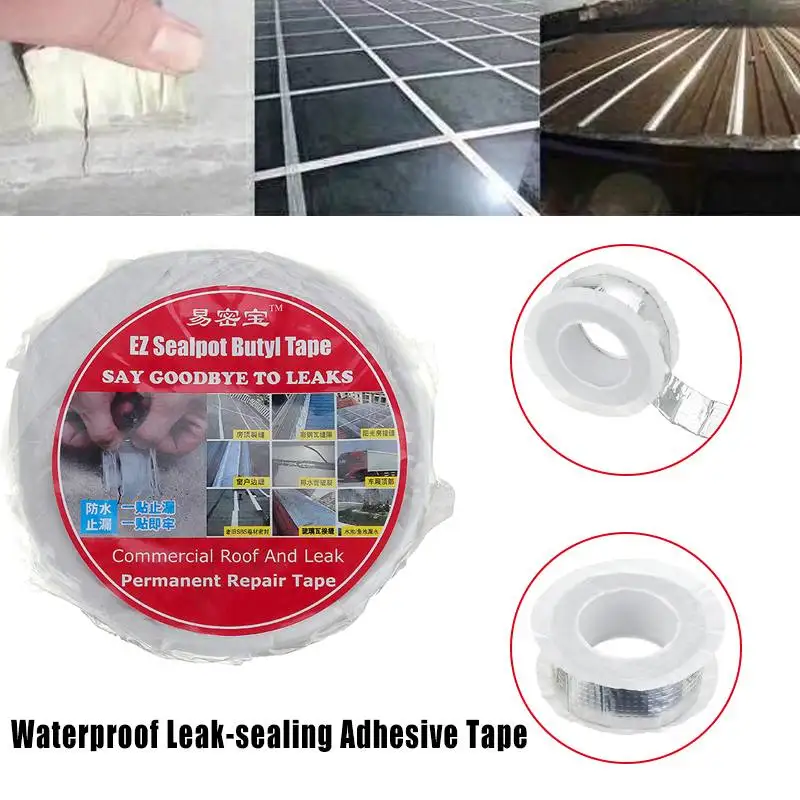 Injected into bike tires ahead of time, it works very well for tires that go over sharp objects like rocks or cacti when off-road. Additional features include working on high or low-pressure tires, on the highway, or even in cold weather.
If in doubt about exact tire specs, be sure to check Stan’s website. “Love Stan’s no tubes sealant,” raved one buyer. “I have been using it with my tubeless application for two years with no flats to report.”
Designed for use in cars or smaller SUVs, this TireJect sealer will come in handy in an emergency and can be used for drills that are ¼-inch or smaller. The manufacturer suggests that customers connect the valve stem to the bottom of the tire and gently inject the product into the tire for best results.
All tools needed to remove the tire valve are included with the package.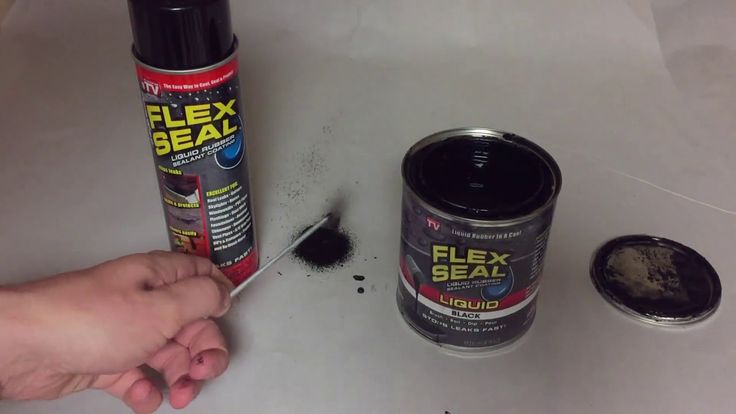 One purchaser described, “TireJect worked fantastic on three cars that [had] leaking tires. After insertion of TireJect into each, [there were] no air leaks whatsoever.”
Intended for emergency use, this spray from Fix-A-Flat works on contact with holes that are less than ¼-inch long. The ecological formula is less toxic than the standard aerosol tire sealants, which is good news for both you and the environment. This sealer lasts up to 100 miles after application.
Be sure to check the company’s website to see which of the four sizes is appropriate for specific car sizes. “It really works,” expressed one consumer. “I keep one in my car and one in my wife’s car at all times. This will get you off the side of the road and to a service station. Super easy to use.”
 39), Amazon
 Suitable for a truck with thicker tires, this liquid rubber TireJect sealer can replace the need to install a spare tire in emergency conditions. Tools included are a dispensing cap, metal valve remover, and stem cap. Use only the recommended amount to cover small beads or tread punctures to ensure the correct pressure.
One happy customer reported, “I knew it worked great in my UTVs, and it worked equally as well in my ½-ton truck tire. One pouch sealed up the leak, and it hasn't budged since, through both hot and cold weather.”
Useful to plug nails or other punctures in tires, this Slime sealant was one of the highest-rated sealers for its ability to seal tires for up to two years. It even works well on alloys or rust, whether in a hot or cold area that reaches -35°F. If in doubt about how to connect the valve, Youtube has several helpful video instructions.
One shopper who mows over the thorns of water locust trees and has used many other unsuccessful sealers on their mowers, explained, “Since putting this stuff in all my mowing and bush-hog equipment, I have not had to even add air to any of their tires, and that has been two years now.”
Customers who live in areas that experience extreme cold or hot temperatures and drive over rough terrain will appreciate the usefulness of this Truckerco sealer. The cream formula won’t freeze in temperatures of up to 10°F and won’t dry out either.
It can be used for smaller tires such as those on bicycles, UTVs, ATVs, or lawnmowers. One customer expressed, “The cool thing is that it has a ton of latex in the solution, so when punctures occur, it has quickly sealed what would be considered ride-ending punctures if using other brands.”
Over 96% of Amazon customers loved the performance and endurance of this Orange Seal tubeless sealer. Available in three different sizes, from four to 16 ounces, this rubber-based formula works quickly to plug holes and lasts for 120 days.
Their website has a complete listing of correct dosages for different tire sizes and how to connect valves properly. One cyclist reviewed, “What I like best about Orange Seal is the bond at the bead which is so solid, it makes re-inflation simple. I find that invaluable on the trail.”
This Berryman sealer is top-notch for pneumatic tires and tubes that regularly ride over rough terrain full of sharp objects. Even in extreme weather conditions, it remains liquid and works on even sensitive aluminum wheels.
Simply connect the included pump to the tire and pour the liquid slowly into the tube. One reviewer who had a steady leak on their ATV used this and, six months later, wrote, “Amazing! I still have not had to put air in tires that I sealed with this.”
The performance of this kevlar enforced formula from FlatOut is highly rated and easy to use, even for larger holes. It can seal punctures up to ½-inch wide and should only be used for off-road applications. It is suitable for smaller vehicles like bikes, ATV/UTVs, dirt bikes, riding lawn mowers, golf carts, and boat trailers, and not for cars or trucks.
Able to work in temperatures of -30°F and over 104°F, this is a versatile and robust rubber-free sealer. One reviewer commented, “This stuff seals up some pretty large holes and stops slow leaks instantly. Better than tire liners, better than the ‘other’ slimy stuff, and maybe even better than the super-expensive tire ‘armor’ products.”
Slime’s non-toxic tire sealer (US$8.97, Amazon) received consistently high reviews for cars or small trucks and works well in emergencies. For bikes, ATVs, or other off-road only applications, the kevlar enforced FlatOut tire sealer that is also rubber-free was the most versatile in extreme temperatures and is incredibly long-lasting (US$14.97, Amazon).
We hope our review of the best tire sealant has been helpful. For more suppliers of related products, including tire repair, foam sealants, mounting lubricants, and eco-sealants, consult our additional guides, or visit the Thomas Supplier Discovery Platform.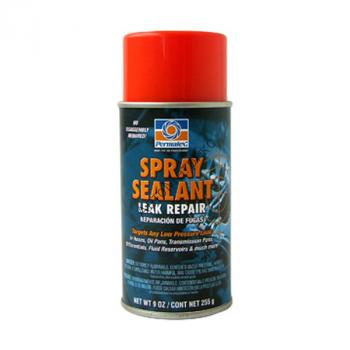
 S.A
S.Apublished: 09/16/2019
Content of Article
 1 Preparation
 “Water will find its way,” says the proverb. So that splashes on the walls do not become a stream from the neighbors, the corners of the finish are not chosen by mold - waterproofing is necessary. Installing a waterproof border protects the joints between the bathroom and the partitions. Consider the technology of installing a profile from different raw materials, analyze the pros and cons.
The self-adhesive profile makes it possible to close the gap cheaply and quickly. To glue the border on the bath you will need:

Important:
Haste at the preliminary stage will easily ruin the next step. Adhere to the following algorithm:
Installing the corner and curly skirting boards differs in the sequence of actions. The first one is recommended to be glued in this way:
 Often they are glued without cutting into pieces, bending around corners, but the edging can lag behind in the fold.
 Cut off pieces of the desired length.
Bend.
Remove the protective film.
Applicator
Or only the lower part is trimmed.
 The strip is butt-glued to the connector identically to the previous type. Corner under a figured plinth.
 Curly ribbon.
Available in versions without adhesive backing. Mounted according to the described scheme, using neoprene construction adhesive applied in a continuous path to the inside of the roll. Excess squeezed out with tight pressure is removed with a wet cloth. Facilitates the task of masking tape, pre-attached around the perimeter at a distance of a couple of millimeters above the edge.
Useful Videos:
Polyvinyl chloride (PVC) border allows large gaps, but is sensitive to uneven panels. Differences between tiles of more than 1 mm per 50 cm cannot be compensated by the flexibility of the plank, the tension that has arisen will cause separation. A rigid profile should be used, and the gap should be filled with adhesive.
The technical process is determined by the adopted approach, the type of edge, the features of design solutions. There are two fundamental disagreements:
Proponents of sealing the gap argue that water is likely to seep under the plastic, especially as it ages, damages. However, significant volumes of liquid can get into the gap only with intentional watering, detached edge.
Opponents of sealing argue: accidental moisture under the baseboard dries quickly with an open gap, sufficient ventilation. Overlapping the gap prevents air flow, water stagnates, blooms, an unpleasant smell, mold appears.
The principle of ventilation of the space under the bath.If the bathtub is blindly clad in the front, which interferes with ventilation, the first option is acceptable. This finish is undesirable for reasons of hygiene, maintenance.
Adherents of total insulation fasten the curb to the side and the wall at the same time. This solution gives satisfactory results with a rigid cast iron bath. Steel, and even more so acrylic samples are deformed, the rim begins to move away. It is preferable to fasten only to the wall, the flexible border will not let water through, it compensates for movements.
A number of external skirting boards have one plane suitable for fastening, which confirms the correct fixation to the wall. Prefabricated varieties snap into place on a bar attached to the partition. Internal modifications are mounted by leading the shelf under the tile or into the gap, the latter is not feasible when the gap is filled.
Flange fixing. Composite version for outdoor installation. Indoor version. Ceramic installation.Check out the indicative list of what you need:
Follow the standard procedures:
General rules: rigid skirting board is chosen for a wide gap, smooth wall; PVC structures with rubber edges are functional on relief tiles.
Controversial statement says: installing a skirting board on a bathtub requires sealing the gap, therefore:
Sealant
 Consider a threefold increase in volume after polymerization.
 Mounting foam.
The natural desire to immediately glue the plastic plinth onto the foam is a mistake: polyurethane, expanding, can squeeze out the profile, it will not work to fix it closely. In all cases, stop work until the filler has completely solidified. Cut off the foam that comes out after 24 hours with a knife.
The above applies to the "swallow" profile. A gap is left for constructs that are led by a shelf over the side, a strong fastening is guaranteed by the width of the latter more than three gaps.
Alternative process eliminates gap filling operations. The rest of the preparation is the same.
Practitioners advise to attach along the walls below the side a wooden bar (galvanized profile) treated with hydrophobic, antiseptic impregnations, which serves as a support for the tank, formwork for the filler. The solution is reinforced with a nylon mesh.
Beam under the side of the cast-iron model. Wooden frame for an acrylic tank. Consoles from shaped steel. Filling with mortar with mesh reinforcement. Significant distances require a frame sewn up with GVL sheets.
 Read more: how to fix a large gap between the bathroom and the wall.
After measuring, cut the workpiece with a small allowance for fitting. Factory corner links allow you to get by with straight cuts, otherwise a miter box that sets the slope of the ends will come in handy. Burrs are removed with sandpaper.
Pruning in the miter box.Trying on the elements, placing them in their places, finally adjusting the length, pairing. With a complex pallet configuration, the plastic is bent by heating with a hairdryer.
FittingThe type of skirting board and the method of installation determine the nuances:

Assembly sequence:
Video tutorials:
The aesthetics, durability, hygiene of the option are excellent, but without experience in tiling you risk ruining expensive components. The work is painstaking, you need the skills of working as a "Bulgarian". You will need equipment:
Prepare clean rags, mineral spirits, gloves. In addition to sealant, tile adhesive, do not forget to buy spacer crosses that match the size of the tile joints.
Flexible acrylic tanks are mounted on a rigid frame, otherwise the ceramic will fall off, crack, and the seams will start to leak. Cast iron plumbing is devoid of such shortcomings.
Making borders from facing tiles is a matter for professionals, you should not take up the matter without practice. Ready-made connectors will save you the hassle of forming joints.
Homemade plinth.Fence with factory bevels.Kits. The number of fragments is determined by dividing the perimeter by the length of the purchased sample, the value is rounded up to a larger integer, 3-4 pieces are added for errors, breakage, chips. Try to pick up links with a length that excludes short finishes.
Start, as always, with surface preparation, then two installation scenarios are possible:
Let's consider the second situation:
You can cut it off without chips by sticking adhesive tape on the right side or by soaking the ceramic in water. With a slight inclination to the part, chips will be on the way out. Thin discs cut cleaner, at lower speeds (machines with adjustment) breakouts more often.
Apply glue.
 The distances between the fragments are maintained with the help of crosses. Control the geometry with a level.
 Glue
Finished result.
Tips:
Tip! If you need a bathroom remodeler, there is a very convenient service for the selection of specialists from PROFI.
RU. Just fill in the details of the order, the masters themselves will respond and you can choose with whom to cooperate. Each specialist in the system has a rating, reviews and examples of work that will help with the choice. Looks like a mini tender. Submitting an application is FREE and there is no obligation. Works in almost all cities of Russia.
If you are a master, then follow this link, register in the system and be able to take orders.
to elementary simple, self-adhesive ones with a budget cost, the installation of which even girls can do.
In order to correctly navigate and choose the appropriate option, you need to familiarize yourself with the characteristics of the currently existing types of borders presented in retail chains.
The border, in addition to its attractive appearance, has many advantages.
The gap that forms between the wall and the bathroom is not only unaesthetic and inconvenient. This is a rather serious problem with all the ensuing consequences: the spread of fungus or mold, which not only spoils the appearance, but also negatively affects health, causes an unpleasant smell and dampness in the room.
To eliminate and mask an unaesthetic gap, bathroom borders are used, which are made of special wear-resistant materials, have an attractive appearance and are a reliable protection against leaks.
The gap between a wall and a bathtub, shower tray or sink can be a problem.
The reason for the appearance of a gap and a leak can be a violation of the stages of finishing the bathroom. To avoid this problem, you should follow a certain sequence of repairing the bathroom:

This scheme of work allows you to completely eliminate the distance between the bath and the wall. As a result of violation of the order, a gap is formed, which, in the presence of curved walls, can reach a width of several centimeters. It is for such cases that the best solution is to use a ceramic or plastic bathroom border, which will not only hide the gap, but also become a reliable barrier to water penetration.
Using a border, you can correctly and aesthetically seal the formed joint.
The bathroom border is a rectangular even plank 5cm wide and 30-35cm long. It is used for sealing joints between the bathroom and the wall, as well as for other plumbing items.
Such a corner is made of special materials that are resistant to mechanical stress, temperature extremes, withstand contact with water and household chemicals.
The following types of sanitary corners are available:
Modern borders are produced in several design variations, they can have all sorts of colors and be made from different raw materials.
Considered to be the most durable and most adapted to the climatic conditions of the bathroom. Ceramic plinth will provide complete protection against water ingress outside the bath. They can be made of marble, granite or ceramics.
Products made from mineral raw materials are distinguished not only by high quality, but also by high prices. Therefore, it is advisable to install such a border if the decoration of the walls and floor of the room is also decorated in marble or ceramics.
This model can be a strip or a corner, which is mounted with epoxy resin or moisture resistant mortar.
Acrylic waterproofing border is much cheaper than ceramic, but also reliably protects against water ingress into the joint. The main advantages of this model are ease of installation, durability. Acrylic is a safe and environmentally friendly material.
Visually, an acrylic bathtub with an acrylic skirting board looks like a single unit, and at the same time, such a skirting board is mainly suitable only for acrylic bathtubs.
Available as a flexible rubber strip up to 10 cm wide or as a soft rubber corner. The profile is very elastic, sold in rolls, made of polyurethane with a high rubber content.
Soft plinth or plinth tape is attached with a special adhesive. A layer of glue has already been applied to most of the products; for their installation on the bathroom, it is enough to remove the protective film and press it well to the surface.
Flexible plinth used for finishing non-standard shapes.
This item may hold securely for some time, but is not durable. The main advantage is budget prices.
Seal the gap with silicone sealant before installing it. After it dries, you can mount the self-adhesive corner. To do this, just remove the protective tape and firmly press one part against the wall and the other against the bathroom.
Quick and easy installation and low cost. Not durable.
Plastic edging for the bathtub can be either conventional or self-adhesive. Most often they are used in cases of facing the walls of the bathroom with PVC panels. They can be in the form of a corner or a ribbon 3-6 cm wide and 1.8-3 m long.
There are several types:
 Such a model is mounted in several stages. The mounting plate is installed on the wall during tiling. Then the bathtub is mounted, and after that the decorative corner is attached.
 Products are distinguished by a variety of colors and low prices.
Self-adhesive Flexible Curb Tape is the fastest, most convenient and inexpensive way to close the gap between the tub and the tile. The protective film is removed from the adhesive layer, and the border is tightly pressed against the surface of the wall and the bath at the same time.
This tape is mounted on a dry, clean and degreased solid surface.
Please note that this model can hide small gaps and its service life is only 1.5-2 years.
The easiest way to make your own bathtub rim is to use white or transparent sealant and fill the gap between the tile and the bathtub with it. It can be used as a temporary.
This option does not look very aesthetically pleasing and will not last long.
A strong and durable border can be made from leftover tiles. Just try to cut it evenly, otherwise it will not look very neat. It is better to mount a home-made ceramic border on special glue or liquid nails. In the presence of evenly cut parts of the same color with the entire wall cladding, this option is not only reliable and practical, but also looks very aesthetically pleasing. However, some consider it yesterday, now it is no longer in vogue.
Pencil borders are usually 15mm wide and 20cm long. Dimensions of a standard tiled baguette: 5.5 cm - height and depth, length - 20 cm.
Baguette can be supplied with a set of facing tiles.
Quite often, when trying on a bathtub edging, you have to cut the details both around the bathtub perimeter and in the corners. So, for example, flexible and elastic edging can be cut with a special construction knife. A sharp construction knife is also quite suitable for trimming plastic or silicone.
However, for ceramic or porcelain stoneware versions, a special ceramic cutter or grinder with a diamond blade is required.
For correct and precise cutting in corners, a special tool is used - a miter box, which allows you to accurately cut even workpieces at an angle of 45 degrees.
Different cutting corners require different tools.
Most often, masters advise laying moldings on sealants with silicone. However, any sealant darkens from water and after a couple of years lags behind the wall. For these purposes, it is necessary to use sealants intended for aquariums. Thanks to special additives, they do not darken and are not affected by fungus and mold. Especially if the composition includes MS-polymers (Moment, Crystal).
It is better to use white or transparent ones with high water repellency.
The ceramic border can be glued with epoxy resin or special moisture resistant mortar.
If sealant is not available, liquid nails or tile adhesive will do. It is possible to mount the skirting board only on a dry, clean and fat-free surface.
To install any type of plastic tub trim you will need the following tools:
Clean, degrease and dry the surface to which the bracket is to be mounted prior to installation. Next, you need to use a construction gun to fill all the cracks with sealant. While the sealant dries, you can stick masking tape around the tile and bathroom around the perimeter - this will protect them from glue.
The plastic corner itself must be cut into the required number of pieces of the appropriate dimensions.
Then apply glue to the inside of the corner, preferably evenly spreading over the entire surface. Next, the corner is installed on the bath and pressed until adhesion occurs. In the corners of the bathroom, the border is cut at an angle of 45 degrees, and special plugs are attached to the ends for a pleasant appearance and completeness of the canvas. After a day, you can use the bath and not be afraid of leakage.
After the glue has dried, you can proceed to the final stage - covering the joints of the corner border with a transparent sealant.
Before painting, the curb must be thoroughly washed, especially the seams. After drying, a layer of primer with high adhesion is applied to it.
After the primer has dried, you can start painting. For this purpose, it is better to use epoxy or acrylic compounds.
Satin finishes look great. It gives objects a unique velvety effect.
It is very important to choose paints marked "wet room".
It is advisable to apply several layers of paint for saturation and stability. If desired, you can make a stencil with a pattern or ornament from cardboard and apply a pattern through the stencil with a soft sponge. After drying, the paint is covered with two layers of varnish. It is better to choose water-based varnishes.
This version of the renovation of the skirting board deserves attention due to its simplicity, lightness, speed and low cost.
In order not to make a mistake when choosing a bathroom border, you need to take into account some points:
 For example, ceramic plinth is ideal for marble or ceramic coatings. For a bathroom with a plastic panel finish, a plastic, silicone or acrylic border would be appropriate.
 Decorative ceramic edging allows you to add some chic, sophistication and originality to your bathroom design.
Currently, the corner can be purchased at the construction markets, in huge construction stores and, of course, in online stores.
In the online store there is no way to examine the goods well in order to determine the quality and make sure that the desired pattern or shade is correct. In the construction markets, goods are often stored in the wrong conditions, which in the future may affect the quality and service life. This is especially true for self-adhesive models that must be stored in dry and warm rooms. It turns out that large hardware stores are most convenient in this regard. Here you can see the goods, check the quality, consult with a specialist and buy additional items if necessary. The storage conditions of the goods are decent and you can change the goods if necessary. Most importantly, you do not need to wait days and weeks for delivery of goods.
Polymeric materials are used for the production of self-adhesive border tape.
Today, popular manufacturers of skirting boards are both foreign and domestic brands and companies.
Leroy Merlin is a famous French hypermarket chain that sells building materials, home and garden products. There is a wide selection of finishing materials, including all kinds of skirting boards for the bathroom.
Favorable prices and the possibility of delivery make the purchase even more pleasant and profitable.
BNV online store in 2017 took a leading position in the market of bathroom borders. The quality of the goods was appreciated by customers, and the high growth rates of sales indicate the popularity of the company. The production is equipped with modern equipment and creates universal acrylic bathroom borders. Available in 16 models with different sizes and designs. A convenient way to get in any corner of Russia.
Borders and moldings are made to order according to individual measurements.
The Polish company Makro-Plast is the world's leading brand in the production and sale of innovative plastic profiles.