| Afraid to take off your rear wheel to fix a flat tire (or when taking off both wheels to put a bike in a car trunk)? Worried that you'll mess up the chain or shifting; or that you'll get all greasy? Think you'll never get the rear wheel back on right? We have good news: Anyone can remove and install a rear wheel and it won't affect the shifting or the chain. And if you work carefully, you won't have to touch that greasy drivetrain either. Here's how it's done on any bicycle with derailleurs, from road bikes, to mountain bikes and any 2-wheelers in between. Watch the videos and review the step-by-step photos and text. We're also happy to demonstrate in person, too, so please let us know if you'd like a quick lesson. We've covered all the tips and tricks, so you'll be an expert in no time! |
WHEEL REMOVAL 1, 2, 3!
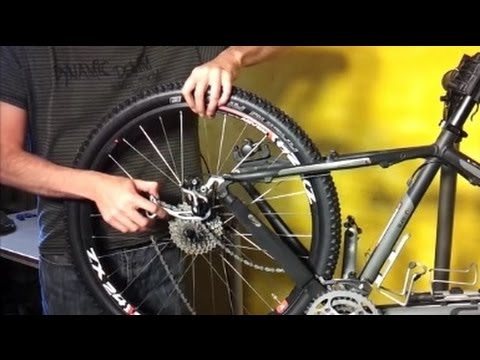
1. Shift onto the small cog and small chainring.
Shifting the chain down onto the smallest cog on the rear wheel and the smallest chainring on the crankset, creates slack in the chain, which makes rear wheel removal much easier. It also makes wheel installation easier because it gives you an accurate way to line up the wheel (on the smallest cog) so that it slips right into the bicycle frame.
If you're riding and feel the rear tire becoming soft slowly from a puncture, you may have time to make the shifts to the smallest cog and ring as you're slowing to a stop.
If you're not riding, or have already stopped, operate the right shift lever, lift the bike by the seat and pedal by hand and the chain will move down the cogs in the back. Depending on the type of shift lever, you may need to move the lever a couple of times to move the chain onto the smallest cog.
Now, do the same with the left shift lever and pedal by hand and get the chain onto the smallest chainring in front, too.
2. Open the brake
Note: If you're fixing a flat tire, you needn't worry about this step because when the air is all out of the tire it will fit through the brake easily. Also, if your bike has disc brakes, you too can skip this step because you don't need to touch disc brakes to remove wheels.
On most bikes with rim brakes, when you try to remove the wheel, the tire bumps into the brake pads. This is because the brake needs to be adjusted close to the rim, while the fully inflated tire is significantly wider than the rim.
To prevent the tire bumping into the brake pads, you can open sidepull brakes by fully rotating the little lever on the brake upwards (photo a). This little lever is called the brake quick release for the way it lets you quickly release (open) the brake pads. For linear-pulls (also called "direct-pulls," and "V-brakes") lift/pull the end of the "noodle" out of its holder (photo b).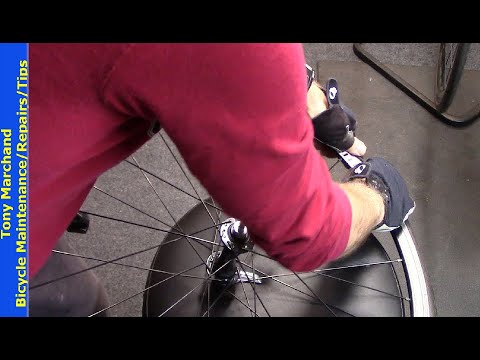
Some sidepulls are opened by pressing a button on the lever. Look for this if there's no lever on the brake.
Open cantilever brakes (these feature a cable that runs over the top of the tire) by lifting the cable end on one side out of its holder.
Workarounds: If you can't find a way to open a brake, you can also let air out of the tire until you can pinch it enough to squeeze it through the brake pads. Another trick - though it requires tools and time - is to remove one brake pad which will often provide sufficient clearance. If not, you can remove both pads. Just be sure to remount them carefully so that they contact the rim squarely and don't touch any part of the tire.
3. Pull the derailleur back and remove the wheel
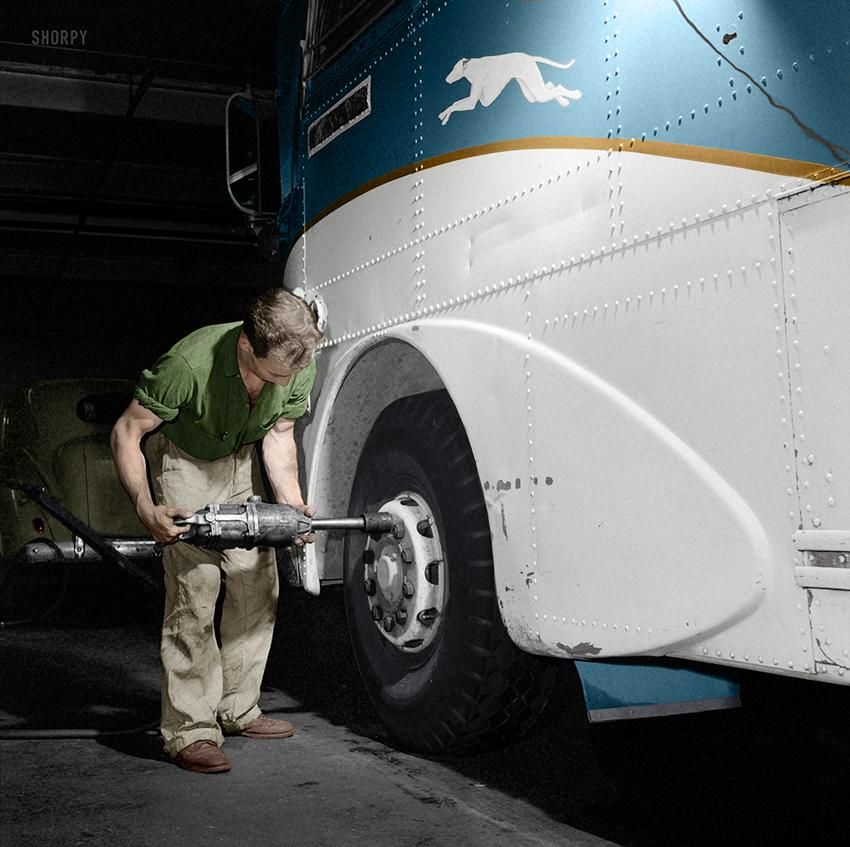
Now you're ready to remove the wheel. Most bicycle wheels have quick releases holding them in the frame (the red parts in the photo). To open the quick release and loosen the wheel, simply pull and fully open the lever, which is usually on the opposite side of the chain.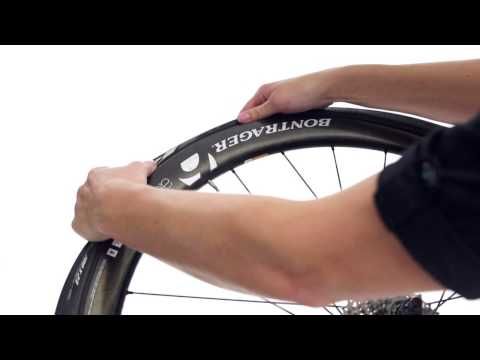 Don't twist the lever. Just pull it out/away from the frame.
When the quick release is open, the wheel is ready to come out. To remove it, lift the bike by the seat so that gravity will help you. On some bikes the wheel will drop right out at this point (don't let it roll down the road and escape!). Or, if it doesn't fall out on its own, give it a slight blow with your hand and that might knock it right out.
Don't force anything though. If the wheel doesn't come out right away, it's because the derailleur and chain are blocking it. To get them out of the way, keep holding the rear end of your bike off the ground by lifting the bike by the seat. Reach down with your free hand and pull back the derailleur with your hand to get it, and the chain, out of the way.
Now, the wheel should fall out or drop out if you shake the bike. If the chain gets in the way still, just grip the wheel and shake it so that it's free of the chain and fully off the bike (that way you never touch the chain and stay clean).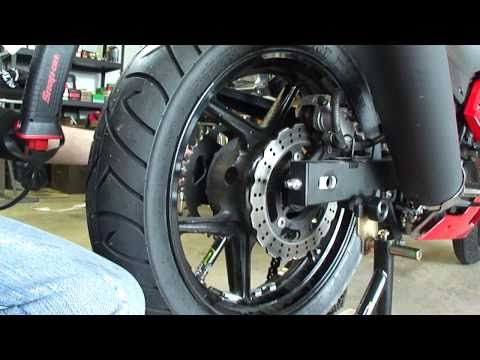 Good job!
Note: To clearly show the desired derailleur position, we locked it in place. You must pull it back by hand when removing wheels because it won't stay in place on its own.
How to put the rear wheel back on
| As you guessed, installing the rear wheel is the same as removal only in the reverse order! You just place the wheel back in the frame being careful to get the chain on the right cog, close the quick release to lock the wheel in, and close the brake so your brakes are working again. The video shows front and rear wheel installation in that order. We go over the step-by-step below and explain some of the things that can go wrong and how to deal with them. It can be frustrating if the wheel won't go in easily. But there's always a mechanical reason. So, look at what you're doing carefully and read our instructions a few times and you should be able to find the problem and address it so that the rear wheels goes right back where it belongs. |
If your wheel won't go in easily, check these things:
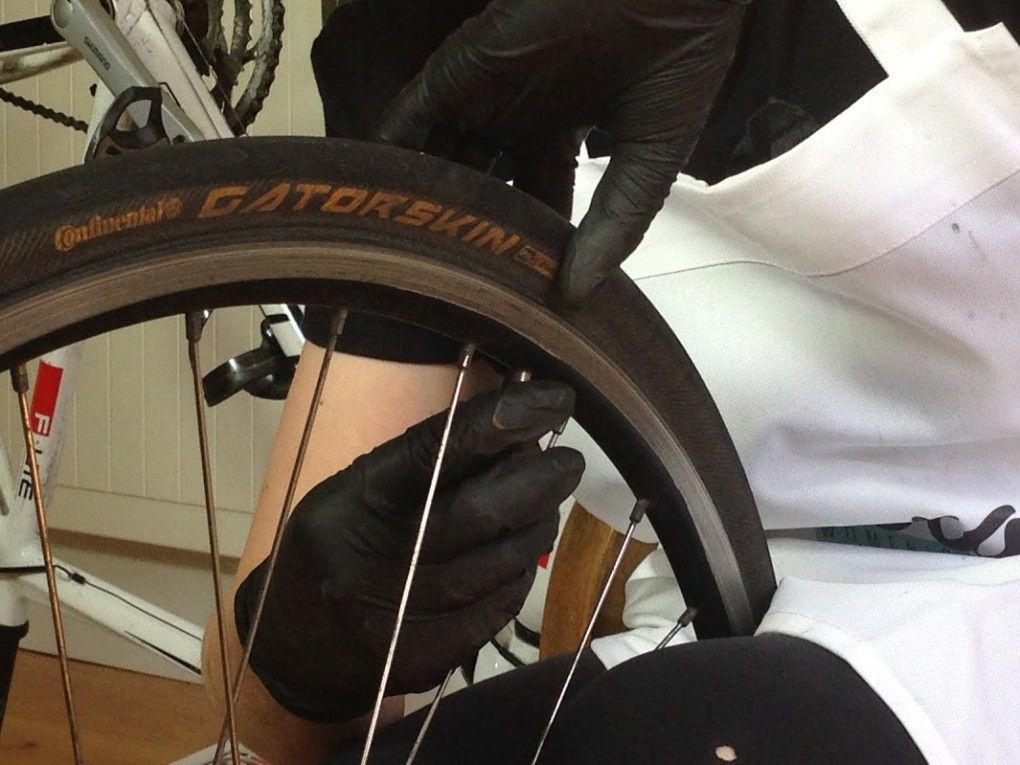
Did you get the chain on the cog right? Remember that you shifted the chain onto the smallest rear cog before you removed the wheel. So, you must put the wheel back on by first lining that smallest cog up just right so that the chain is on it. Also, pay attention to how the chain rests on the cog. The chain is a closed loop. The cog should be inside the loop (see the photo in Step 3).
Note: If the wheel has been off the bicycle for some time, it's possible that someone might operate the shift levers. This can move the derailleur so that when you line up the wheel with the smallest cog the wheel won't go into the frame. Instead it bumps into the frame. To remedy this and get the wheel in, simply operate the shift lever as if you're shifting onto the smallest cog. This will move the rear derailleur back where it needs to be so that the wheel will line up right with the frame and go in.
Did the chain come off the derailleur pulley? Another glitch that can prevent the wheel going right into the frame is if the chain happens to come off the top pulley on the derailleur (photo). This is hard to see but it has a similar effect to someone shifting the derailleur into the wrong position and it makes the wheel run into the frame and not want to go in. To fix it, just push the chain back onto the pulley and make sure it stays there as you install the wheel. Tip: Use a stick to push it on or wrap your finger in a rag and you'll stay grease-free.
Is your quick release still open? Sometimes when the wheel is separate from the bike, the quick release lever gets bumped and flipped over and closed. When this happens the wheel won't fit in the frame anymore because the quick release is closed and in the way. Open it and the wheel will fit.
Now that you know how it's done, you may want to practice removing and installing your rear wheel a few times to become expert at it so that when you have to do it, it's a breeze. And, so you can dazzle your friends by helping them remove/install their wheels! Have fun and let us know if you'd like a demo.
istockphoto.com
Experienced cyclists know punctures occur frequently, so it’s important to learn how to change a bike tire even if you are a more casual cyclist. When your bike tire is punctured, you may be able to repair it yourself. But if the damage is too extensive, or the tire is already severely worn, then replacing the tire may be necessary.
Typically, bike owners cannot repair large breaks, splits, or punctures with a tire patch kit. Similarly, any significant signs of tire wear, strain, or cracks should indicate it’s time to replace a bike tire. Most cyclists learn how to fix a bike tire to deal with minor punctures and replace one after more severe damage has occurred.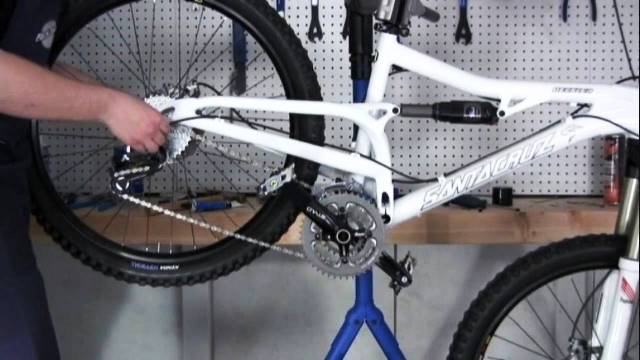 If you need a refresher, are new to cycling, or are getting into bike maintenance, then follow the steps below to learn how to change a bicycle tire.
To access the bike tire, either put the bike on its side or stand it upside down, resting on the handlebars. However, some cyclists avoid placing the bicycle upside down because this position could damage the handlebars or seat. Choose the position with which you feel the most comfortable. Another option is to invest in an upright bike stand that can position the bicycle off the ground while you work. If you are laying the bike on its side, make sure the chain side faces up.
Advertisement
If you are replacing the back tire, then it’s important to adjust the gears to the smallest ring beforehand to make it easier to remove the tire. The smallest ring is the outer gear of the bike.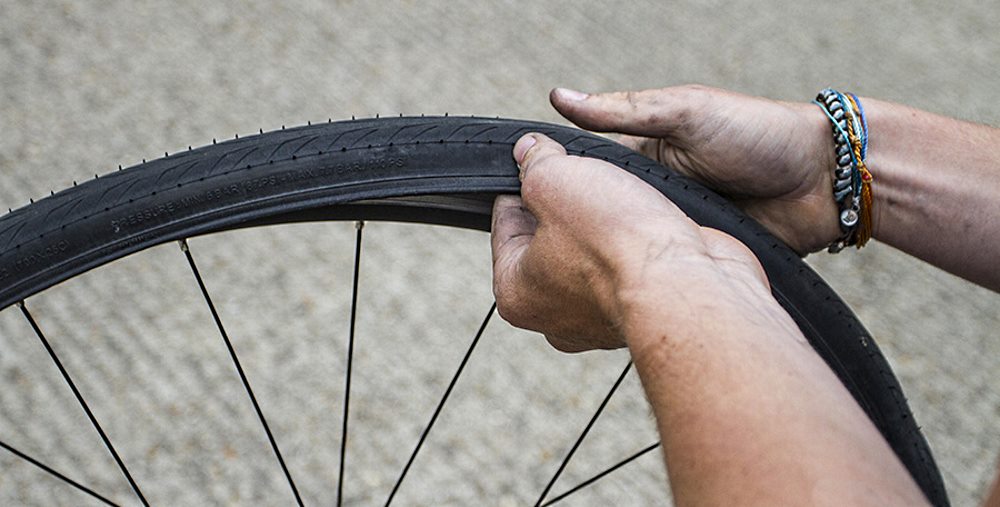
If the bike includes a quick-release lever, it will be located in the center of the bicycle wheel. Loosen and remove the lever by pulling up and turning the lever 180 degrees. Then set it aside for reinstallation. This should free the wheel to allow the damaged tire to be replaced. However, many bikes don’t come with a quick-release lever. If this is the case, then a wrench is needed to loosen the nut in the center of the wheel.
Typically, a 15 millimeter wrench will be the correct size to loosen and remove the wheel nut. Keep in mind that you can also check the bicycle manual or the manufacturer’s website for details on how to remove your specific bicycle tire. Additionally, if the nut is seized, WD-40 or a similar lubricant can be used to help loosen the threads and remove the nut.
RELATED: How to Change a Car Tire Like a Pro
istockphoto.com

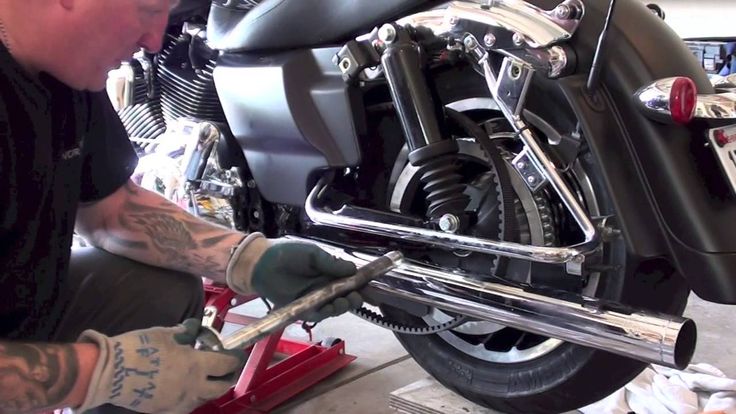
If you attempt to remove the wheel without detaching the brake cables, the force can damage the cables. On some bikes, the brake cables will disconnect automatically when the quick-release lever is removed, but the brake calipers must be squeezed in order to release the cables in most cases.
Don’t forget to lift the chain off of the gears when replacing the rear wheel on a bike. Once the chain and brake cables are disconnected and the wheel nut or quick-release lever has been removed, you can lift or pull the tire out of the forked slot where it usually sits on a bicycle.
Advertisement
To remove the rubber tire from the metal wheel, the tire needs to be deflated completely. Take off the air valve cap and set it aside for reinstallation. Release the air from the tire with a wrench by pressing down on the plunger inside the air valve. Alternatively, your bike may have a Presta valve or a Dunlop valve; these need to be pulled up to release the air.
If the air valve has a retaining nut or lock ring securing it to the wheel’s rim, then loosen and remove the part, placing it with the air valve cap for reinstallation at a later stage in the process.
The deflated tire will still be difficult to remove from the rim of the wheel. First slide a tire lever between the rim and the tire, then use leverage to pop the edge of the tire up out of the rim. Secure the tire lever to the spokes of the wheel and use a second tire lever on another section of the tire. Work the second tire lever around the rim of the wheel until the entire side is free. This should give you enough space to reach inside the tire and pull out the inner tube.
Once you have removed the inner tube, you should be able to take the tire off the metal wheel by rolling or twisting the tire over the edge of the rim with your hands. Work your way around the outside of the wheel until the tire is free, and inspect it for any serious damage.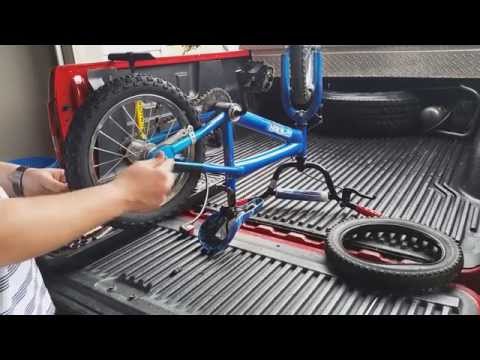 In many cases, only the inner tube needs replacing, but if there is severe damage to the outer tire, then it will also need to be changed.
Advertisement
RELATED: 15 Clever Bicycle Storage Ideas for Any Space
Take the new tube out of the packaging, making sure to remove the dust cap, lock ring, and valve cover. Unfold the tube and check to make sure it has no pre-existing damage, then connect it to a bike pump or tire inflator to add air to the new tire tube. Do not fill the tube all the way just yet.
The purpose of adding air at this stage is to help the tube hold its shape and avoid damage caused by pinching, bending, or twisting the tube while reinstalling it. Put any small parts in a safe spot to make sure that they are not misplaced.
istockphoto.com
Whether installing a new tire or refitting an old tire with a new inner tube, it’s recommended to inspect the inside and outside walls of the tire for any existing damage, severe wear and tear, or sharp objects that could cause additional damage before installing the inner tube.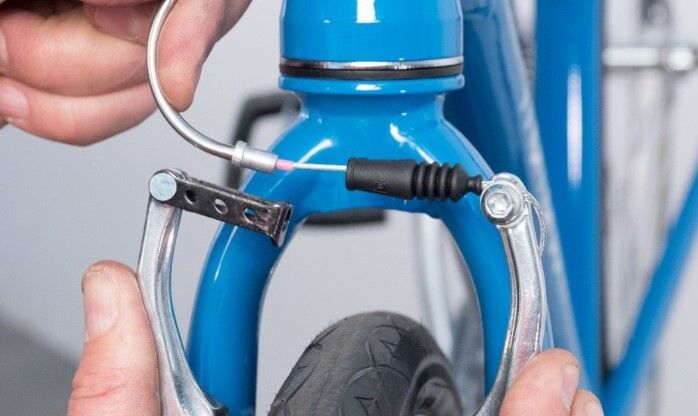 Refit one side of the tire on the rim of the wheel, ensuring the tread is pointed in the correct direction.
Slide the air valve through the valve hole and feed the inner tube into the hollow space inside the tire and wheel rim. With the tube in place, twist the outer edge of the tire so that it slips into the wheel rim. Try to start near the valve and finish across from it—the tire will be looser in this position. If the tire resists too much, you may need to let some air out of the inner tube or use a tire lever to help position the last section, where the tire is the tightest. Also, remember to reinstall the lock ring or valve retaining nut if your bike has one.
Advertisement
RELATED: 5 Bike Racks to DIY on the Cheap
Use a bike pump or home air compressor to fully inflate the inner tube. If the PSI is not written on the tire, you can refer to the bicycle manual or manufacturer’s website for the appropriate air pressure.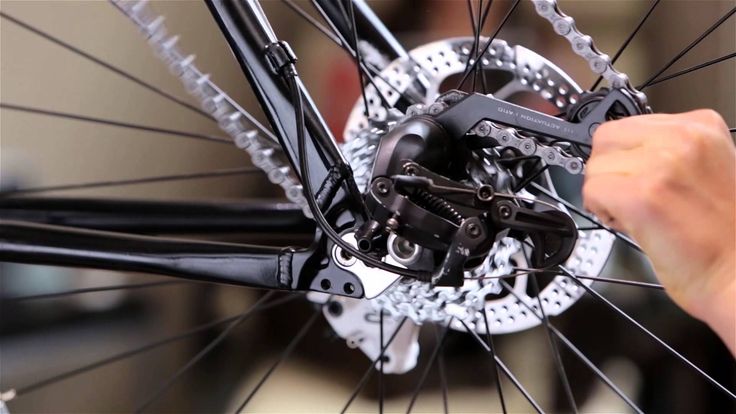 Don’t forget to put the cap back on the air valve to prevent accidental tire deflation during use.
Slide the wheel back onto the bike and secure it with the quick-release lever or wheel nut, as applicable. Reattach the brake cables and lift the chain back onto the gears if you replaced the rear tire. Rotate the wheel to ensure it spins freely, then place the bicycle upright and test the repair with a short ride. Make sure to clean up any old parts and dispose of old tires through local recycling facilities. Some bike and car shops also have programs for accepting old tubes and bike tires.
istockphoto.com
Regular bicycle maintenance and proper storage can help keep a bike in top condition over years of ownership. Always replace or repair any tire damage as soon as possible to avoid bending a bike’s wheel. Also, during the repair or replacement process, make sure to keep track of all small parts, like nuts, lock rings, or valve caps. While small in size, their purpose is essential to the bicycle’s function, and losing one during a repair can create another problem needing to be resolved before the bike can be used again.
Advertisement
90,000 how to change the camera on a bicycle (remove and insert a new camera)Content
Causes of the wheel replacement can be very different - from the frequent fraction of the tape or “ snakebite” with the edge of the rim before updating the wheel and transferring the old proven camera to it. There is no difficulty in how to change the camera on a bicycle. Consider how to do this, and what you may need in the process.
If we change the camera in "ideal" conditions, we already have a garage ready, a tool kit, a repair kit and a new camera. Unfortunately, not everything is always so “successful”. It may turn out that the camera burst on the street during a long race or even in competitions.
The easiest option is to carry the chamber and pump with you. Not every damage can be sealed, and the easiest way is to change the whole camera. The only negative of this kit is the weight and volume. The sealing kit is a small box, but the “spare tire” is already a serious piece of rubber that can get in the way in a small bag, if you have one at all.
Unfortunately, the condition of the roads and the general susceptibility of modern bikes to damage means that you can't go further than the city center without a spare bike tube or repair kit. What will be needed to replace in the minimum version?
With these tools, you can easily disassemble the rear wheel, remove the camera and install a new one in its place.
The repair kit is worth considering separately. Many never open it from the moment of purchase, but in fact you can assemble it yourself. Homemade repair kit comes out several times cheaper.
What is in the repair kit?
 In modern industrial kits, patches are made of synthetic rubber, smooth on one side and rough on the other. On the smooth side, they are sealed with foil or plastic film to stay clean.
 Actually, all parts of the repair kit can be assembled by yourself. Old cameras are used for patches, cleaning is done with ordinary sandpaper, glue is sold in any store, and ordinary alcohol is a degreaser.
Recently, some people use anti-puncture gels, and it is enough to pour sealant into a new chamber before pumping it up and carefully “disperse” it over the inner cavity of the chamber.
Repair kit with breakouts but no glue
Those who have changed the tube with their own hands know, perhaps, the main problem is the bending of the tire bead. Modern tires adhere so well to the rim and are so stiff that it is not always possible to do this by hand.
That's why many multi-tools or kits include a break-down. These are small plastic or metal "spoons" that are inserted between the tire and rim, allowing you to pry and bend the tire, and then put it back on.
So, what steps do you need to take to change the camera. Everything is simple, the main thing is accuracy and a small amount of physical strength.
So, the camera is removed, you can repair it or print a new one. Install everything back:
That's it, the replacement is done! As you can see, there is nothing complicated in this process.
Tube replacement is a simple process that every cyclist should be prepared for. A puncture on the road, damage to the camera in the forest, or just updating a bicycle wheel - it's always nice to deal with the problem yourself and quickly, and not carry the bike on yourself to the workshop.
Every serious cyclist already carries a repair kit and a pump, ready for any eventuality.
There is nowhere without a bicycle in the country. In the truest sense of the word, there is nowhere to go. Not for bread, not for screws, not for matches. Also, if you don't have a car. And if there is a car, and the driver tasted fragrant apple calvados in the morning? You have to walk, which takes a lot of time. And if there is a bicycle, he jumped on it, and in a few minutes there would be bread, and screws bought, and matches mined. Therefore, not only must bicycle transport be at your disposal, but besides, it must always be in good order, ready at any time to deliver you on urgent matters.
While conducting a spring revision of my old high-speed bike, we found an "eight" on the rear wheel - a change in its geometry.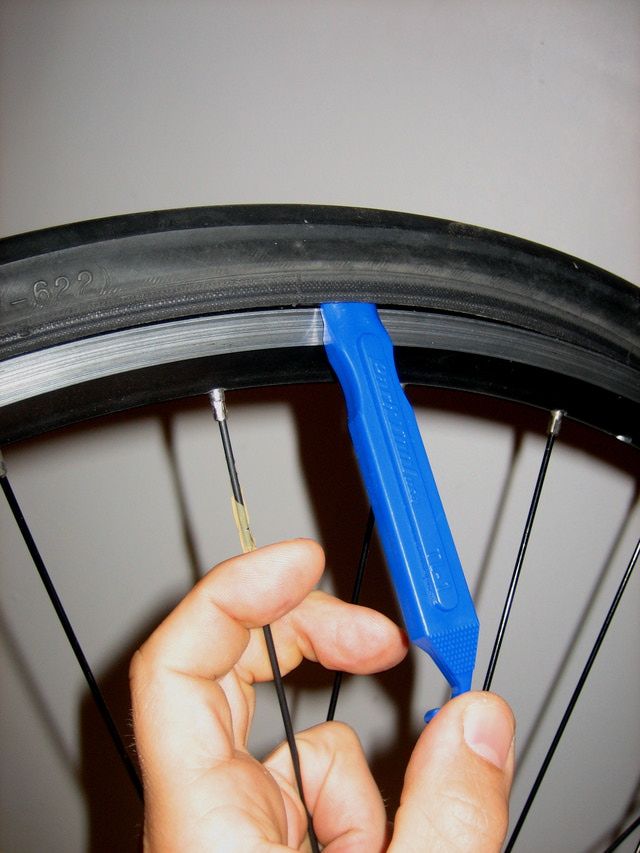 The rim was bent so much that it constantly brushed against the brake pads, making it impossible to drive safely.
First, we decided to tighten the spokes. There are special ways to do this at home. For those who are interested, it is enough to search the Internet for how to fix the G8. Upon closer inspection, it was found that a pair of spokes was missing. The plastic protection of the spokes installed on the wheel makes it difficult to install new ones, so it must be completely disassembled.
Turn the bicycle upside down, unscrew the eccentric clamp nut, remove the eccentric itself from the hole in the axle, release the footrest, remove the chain and wheel. In this case, you need to loosen the brake pads and release air from the wheel so that the tire does not cling to them.
Unscrew the nipple, pull out one side of the tire, carefully prying it with a flat screwdriver, without tearing the chamber. Get the camera, then remove the tire.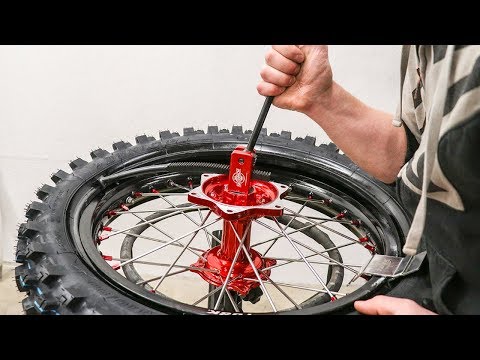
Now you need to remove the asterisk. It is impossible to do this without a special puller, so we took care of buying it in advance.
Insert the puller inside the sprocket and unscrew it with a gas wrench. By the way, any key for 24 can be suitable for these purposes.
Here another trouble was discovered - the rim was worn to the hole. Repair it was impossible, so I had to go to the store for a new one.
Our speed bike had a single rim wheel. Almost all modern cycle bikes are equipped with double rim wheels. It is believed that they are stronger and more reliable. The price difference is not very big, so we listened to the seller and bought a copy with a double rim.
At first, the plan for replacing a rear wheel on a speed bike seemed simple: screw the sprocket onto a new one, insert the tube, tire and install on the bike. But upon closer inspection, it turned out that the axles of the wheels are different. The old one has a hole inside for the eccentric, and the new one does not.
Therefore, I had to rearrange the axle from the old wheel to the new one. This requires 2 keys. We hold the locknut with one, and unscrew the second with the other. Having unscrewed, remove the washer and unscrew the lock nut, which is the bearing boot. While loosening the nut, watch out for balls that may fall out of the resulting gap. Now you can take out the axle.
In the same way, remove the axle from the new wheel. The grease in it is fresh, thick, so the bearing balls, having stuck to it, were in their place.
Carefully, adding fresh grease, insert the axle with the eccentric hole onto the new wheel and tighten the nuts in reverse order.
Tighten the bearing cone nuts until there is no play in the carriage, but at the same time the wheel rotates freely. On both sides of the axle, at the edges, we leave a space equal to 1 cm so that it fits into the lugs of the rear fork of the bicycle. This distance is adjusted by a washer in the form of a sleeve.