Disclosure: This post contains affiliate links. Please read our full disclaimer.
As we were driving down a sandy road to our boondocking site, no more than 500 feet away from it, I heard a strange “thump…thump…thump” sound outside. I turned to Jerud and asked if he heard it too. He did, but also wasn’t sure where it was coming from. I stuck my head out the window to trying to hear it better, but instead saw a puff of sand getting pushed out from underneath one of the Toaster tires. “Jerud, stop the truck.” I got out to check out our tires and saw this -
Yep, we just experienced our first RV flat tire. While we had an idea of how to change an RV flat tire and it seemed pretty easy in our heads. Turns out it was as easy as we thought.
Of course there was a sand storm happening and the threat of rain as we got out of the truck to change the flat.
You may be wondering why the heck you would want to change your own flat tire when you have roadside assistance. Good point. We usually prefer using our roadside assistance if our rig is in trouble. We paid for it so we might as well use it. But sometimes it makes sense to just do it yourself:
You don't want to wait a long time.
You're somewhere without any cell service.
You're not on a publicly maintained road (where roadside assistance won't respond).
Since we were on a sandy doubletrack just yards away from our intended campsite, two of those reasons applied to us. Besides, it’s always good to know how to change a flat.
I’m going to show you how to use a ramp to change a flat tire on a trailer with 2 or more axles.
Spare tire: Make sure it’s in good condition and holds air – no point changing a flat with another flat.
Lug wrench: Be sure it fits the lug nuts on your RV wheels. A breaker bar is a convenient alternative to the typical cross-shaped lug wrench.
Socket: If you’re using a breaker bar, make sure you also have a socket that fits both the bar and the lugs on your RV wheels.
Tire pressure gauge
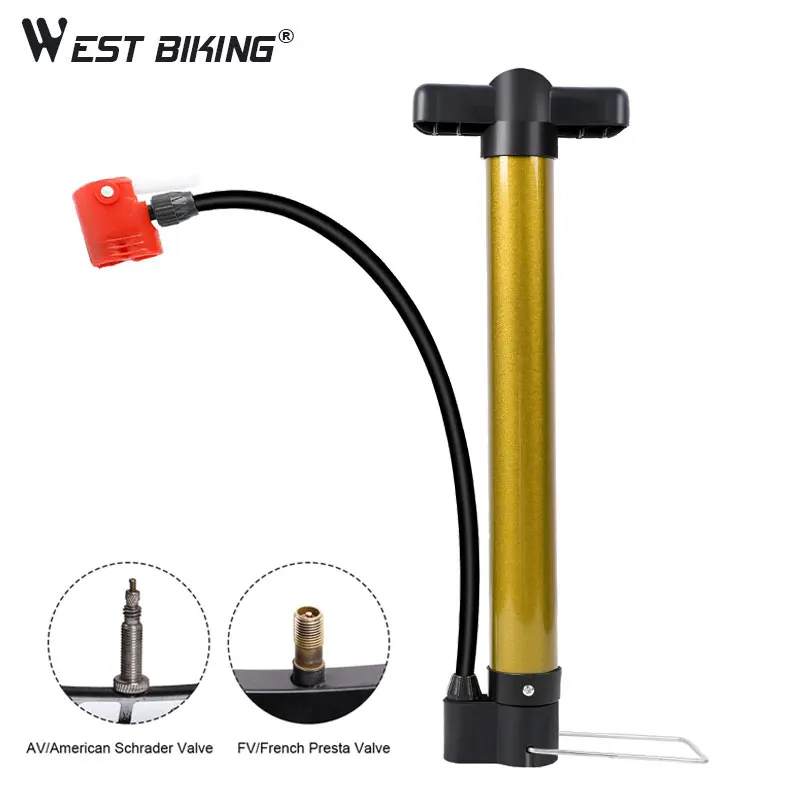
Portable air compressor with air chuck
Chocks
Ramp – only one is needed
Wrench: A wrench may be needed to remove your spare tire depending on how it’s attached to your RV.
Lubrication: Any light machine oil. WD-40 would work.
Shovel: This is optional.
We carry all these and more tools in the truck. You’re welcome to borrow any of these if you’re camped by us!
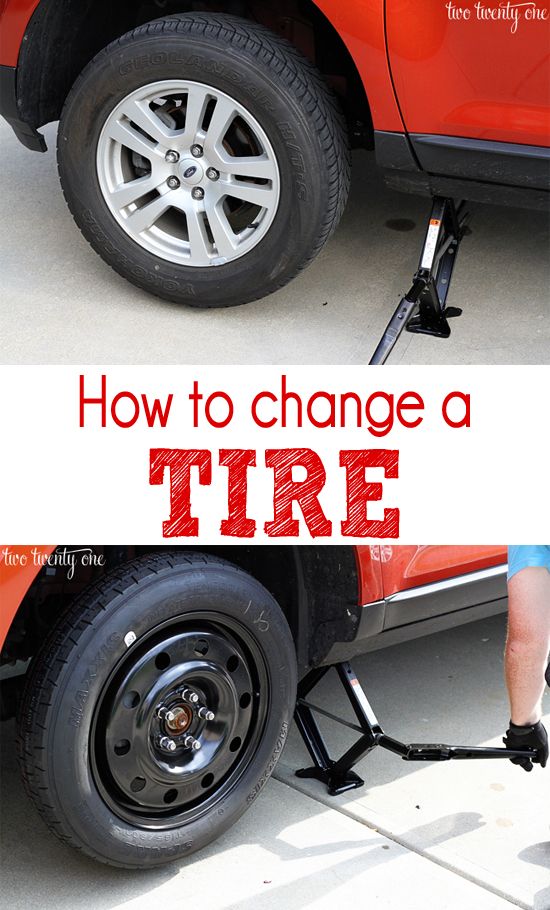
 a bottle jack?
A trailer is raised for wheel removal differently than a car/truck. While a car/truck is jacked up at the axle, a trailer is jacked up at the frame rail. We prefer ramps to a jack because the space between the ground and the bottom of an RV frame rail is around two feet. It would take a very large bottle jack to even reach the frame rail, and it’s not very safe or stable to have an RV lifted that high on a bottle jack. Adding blocks to make the jack taller would be even more unstable and risky.
Even though they’re kind of bulky to carry around, we like having ramps because:
RVs remain very stable on them, even if it’s windy.
Ramps won’t sink into soft (sandy) ground.
Ramps can be used for other vehicle maintenance.
In a pinch, ramps could be used for traction if stuck in deep sand.
Sure the ramps may take up a bit more room than a large bottle jack (although a lot lighter), but being useful in multiple ways and being safer always gets bonus points in our book. The ramps we have separate into two pieces each so we can store them around our fifth-wheel hitch in space that is otherwise mostly unusable, anyway.
The ramps we have come apart into two pieces, making it easier to store.
The steps to changing a flat RV tireHere’s step-by-step guide to changing a flat RV tire:
Pull over to a safe place, away from traffic.
Gather all the tools you’ll need.
Use the lug wrench to break loose (about ½ turn) the lug nuts on the wheel to be changed. (Easier to break them loose when the wheel can't spin freely.)
Drive your good tire that’s on the same side as the flat tire onto the ramp (may require backing onto the ramp).
Make sure the wheel that needs to be changed can spin freely. If not, increase the height of the ramp by adding blocks under the ramp -- or you can dig out from beneath the flat tire).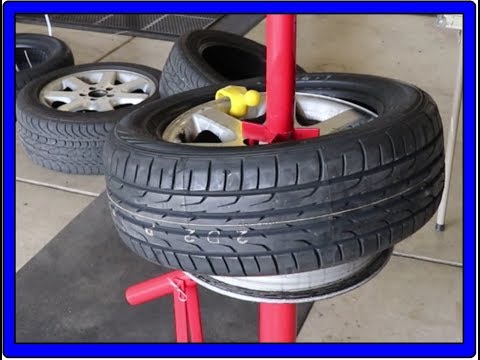
Chock your tires on the side that you won’t be working on, and set the tow vehicle’s parking brake.
Use your lug wrench to remove the lug nuts on the flat tire.
Remove the flat tire from the hub.
Install the spare tire onto the hub.
Lubricate the studs before placing lug nuts back on. Lubrication will let you torque the lug nuts all the way.
Tighten the lug nuts in a “star” pattern
Reinstall your flat tire where your spare tire was.
Drive off the ramp.
Now that the tire can’t spin (because it’s on the ground), torque the lug nuts until tight.
Check the air pressure in your other tires.
Step #4: Driving onto the ramp.
Step #6: Chock the tires on the side you're not working on.
Step #8: Remove the flat tire.
Step #9: Remove and install the spare tire onto the hub.
Optional: We had to dig the sand out from under where the flat tire was so we could put the new tire back on the hub.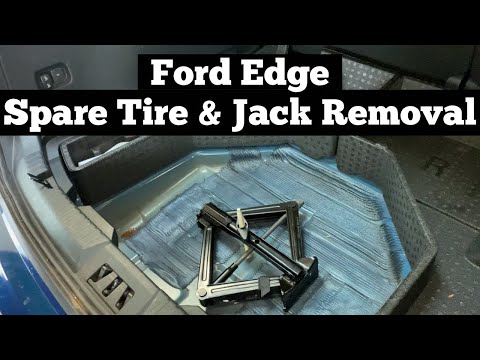
This is our nifty foldable shovel. Super useful to have one around!
Step #10: Lube the studs before placing the lug nuts back on.
Step #11: Tighten the lug nuts.
Step #15: Double check the air pressure in the newly installed tire along with your other tires.
Remember to bookmark this page in case when the time comes and you can’t remember what to do!
The RigChingFlat Tire, RV Repair, DIY
Camper Upgrades, Travel TrailerCamco Trailer Aid Plus, Changing a trailer tireNick Gatel
To properly review a product it needs to be put to extensive use over a period of time.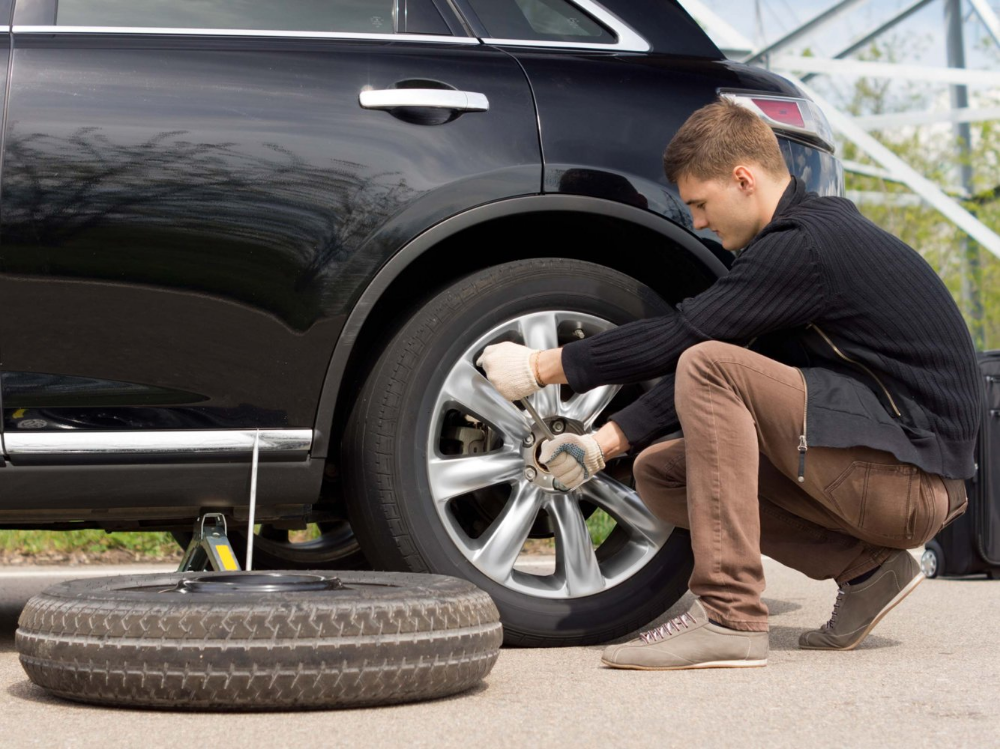 Perhaps a couple of years. Twenty-five or forty-five years would be better such as my camping chairs or some of my older backpacking gear. Based on a limited test, I recommend it.
This item is something you don’t want to use frequently. Actually you would hope you never have to use it. But when it comes to trailer tires, Murphy’s Law applies:
when something can go wrong, it will.
I can’t recall ever having a car or truck tire blow out when driving and I have driven over a million miles in my lifetime. But over the past 25 years I have had around a half-dozen blown tires on my trailers, one of which lead to the demise of our awesome Niagara Tent Trailer. We now have AAA towing coverage for our current rig. So how does Murphy’s Law work with a trailer tire?
So, let’s call this a first impression of the Camco Trailer Aid Plus.
When we bought our 2014 Milan three years ago, it became the only trailer with more than one axle I have ever towed.
Once we got the trailer home, I ordered all the stuff for our Solar System Installation and a bunch of other goodies to replace what had been stolen. Of course my first stop was Amazon. While surfing Amazon, I found the Trailer Aid, but you can also purchase one from Camping World and other fine RV part retailers. I bought it from Amazon for just under $43. The Trailer Aid Plus only works on trailers with dual axles, but there is a possibility it could work on a triple axle set up. Camco says the Trailer Aid Plus can support 15,000 pounds.
Now, I usually distrust or am very wary of customer reviews, but both Amazon and Camping World had a large number of customers reviewing the product and both sites had a rating close to a perfect 5. So I bought one and stuck it inside the trailer and forgot about it. Every once in a while while digging for something in the storage compartment under our sofa, I would remember we had it and make a mental note to try it out before I actually needed to use it.
A couple months ago it was time to clean, inspect, and repack our wheel bearings. Remembering I owned this thing, it seemed like the perfect time to test it out. And it really, really was awesome! You just drive one wheel up on the Trailer Aid and the other wheel hangs free an inch or two above the ground. It does what Camco says it does.
I didn’t have to go find the instructions, because it is simple to use, but instructions for use are also on a label attached to the unit.
The Trailer Aid is narrow and on soft ground, it will probably sink into the ground and not raising the other wheel high enough to clear the ground. Something the user won’t notice because the flat tire will be easy to remove, but the axle will not be high enough to install a fully inflated tire.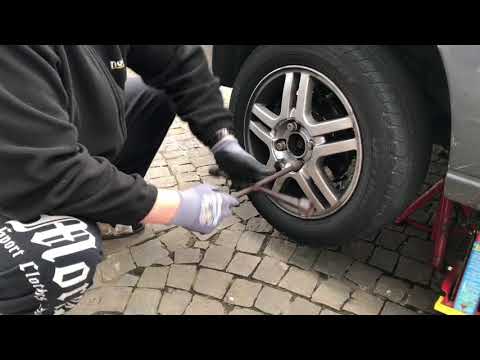 So I recommend carrying something wider than the Trailer Aid and at least an inch thick to help keep it stable and minimize any sinking.
To test this, I parked our trailer with one axle in the street gutter at a bit of an angle, basically an indentation. As expected when I drove onto the Trailer Aid, the other tire was not high enough to spin freely due to how our leaf springs are set up. The good news is I didn’t need to jack up the frame to get it higher. The wheel I wanted to remove was not bearing much of a load. Normally you don’t want to place a jack under a travel trailer axle, because it is a hollow tube and can easily be damaged. In this case, I used a jack under the axle U-bolts and it was easy to lift the axle higher because it wasn’t carrying any weight.
Camco also makes the Trailer Aid, which is about an inch shorter. Since most travel trailers have leaf springs or are torsion axles, you want to buy the Plus model.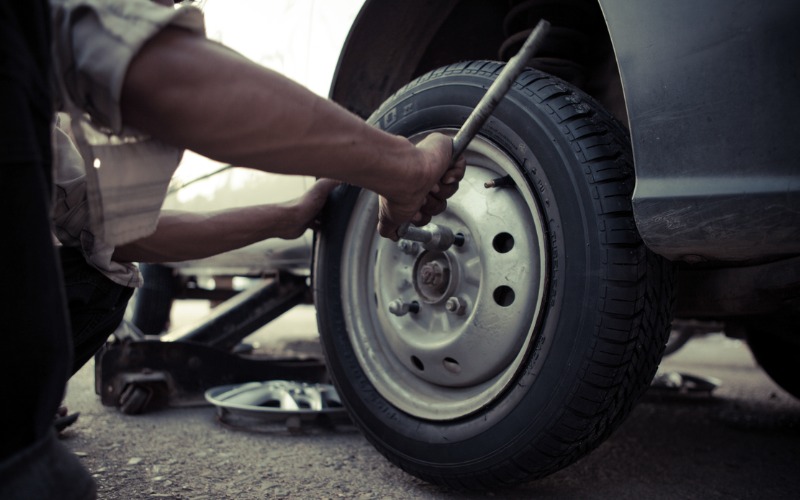
Overall I am very pleased with the purchase and used it to remove 4 tires.
It saved me a lot of time to remove each wheel and gain access to the wheel bearings.
Here’s a video from Camco
Disclosure: This post contains links to websites to may compensate this site to help defray the costs of operating it
Changing the wheel
How to change the wheel in the trailer yourself?
Need to know:
Operating sequence:
 Install the bolts and tighten them by hand.
 Important
Use only suitable bolts to attach the wheel. Otherwise, the next time your trailer moves, you may lose the wheels. Also, before putting the wheel, it is worth getting rid of traces of corrosion. In no case should the bolts be lubricated with oil. When changing a wheel, the trailer should not be disconnected from the machine. Although, opinions differ on this issue. Since the trailer is single-axle, only the jack will become the fulcrum for it. It turns out that if you disconnect it from the car, no one knows about its further actions. Definitely, being attached to the car, the trailer will become more stable. By the way, on the Internet you can even find articles on this. So, experiments were carried out when the trailer was with and without a car. So, in the first case, after the trailer was put on the jack, it did not move. But the detached trailer was not so stable. Therefore, the support wheel should be reinforced with additional stops. They will prevent the trailer from moving. It is believed that if the trailer is on supports, you can disconnect the car. After all, when the trailer is raised, the suspension springs will expand. Accordingly, it will be more difficult to raise the trailer from this. It happens that if you first raise the trailer, and then try to disconnect it from the car, then the hitch will completely jam. It is possible for the vehicle to move. If the trouble happened on the way, then the trailer is not disconnected from the car. Whether it is easy to replace the wheel yourself is up to you. You know how to do it.
fourwheeler.com
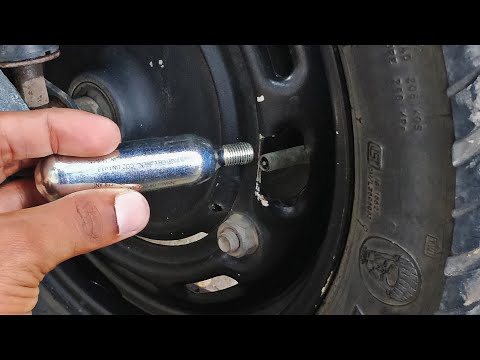
A jack in a car is taken for granted. And the situation becomes all the more difficult when, at the most inopportune moment, it turns out that it is out of order (or missing), and somehow you need to change the wheel.
Maxim Stroker
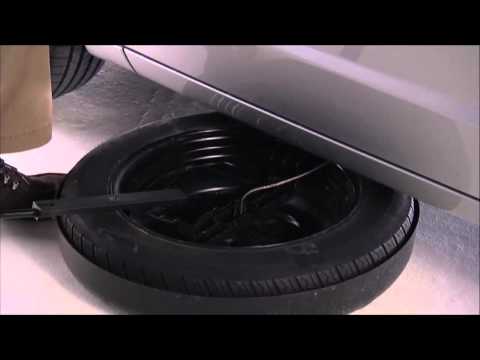
Anything happens in life. The author of these lines, for example, once bought a used car from a wildly stingy man: he even quietly pulled a jack and a balloon wrench out of the trunk before closing the deal. It's good that this nuance was discovered before the wheel puncture that happened a week later, but what if not?! The best way to do without your own jack is to stop a passing car and take advantage of the kindness of its driver. But now go stop someone, and it is quite possible to puncture a wheel not on the asphalt of the federal highway, but also somewhere on a forest path, on which cars only appear every few days. But if necessary, you can change a punctured wheel without using a jack. The first way is as follows. You need to build or find a small hill - for example, a mound of earth, a log or a small stone. Next, we quickly pump up the wheel and drive it onto our improvised "flyover". After that, the experts of the AutoVzglyad portal recommend placing some kind of reliable stop under the body of the car so that after removing our “flyover” the car remains with the wheel hanging in the air.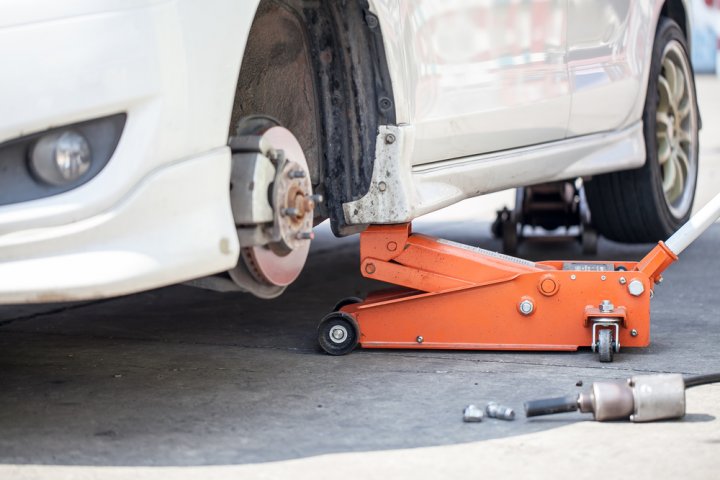
nttsbreakdown.ca
And it is absolutely necessary to insure the car against rolling in one way or another. Now, in order to replace the wheel, we remove the "flyover", dismantle it and replace it with a previously deflated "spare tire". After that, it remains to pump up the newly installed wheel and remove the stand from under the car, on which it hung during the replacement process. On soft ground, if you have some kind of entrenching tool at hand, something similar can be depicted by inflating the punctured wheel to the maximum, slipping a long log under the hull next to it. After that, we blow off the damaged tire and dig under it a hole of such depth and size that we can dismantle the affected wheel. We replace it with a deflated spare tire, pump it up and move on.
You can, of course, lift the car with the help of a lever, for example, a long pole slipped under the bottom, resting on, again, a large stone or log. But in this case, you need to remember that without consequences for the integrity of the body, only a frame SUV can be lifted by this method.