While we’d all rather be out riding than wrenching on our machines, occasionally things break and need to be fixed or replaced. That’s just the cost of ATV and UTV ownership. If your machine has a damaged or worn out u-joint, it’s best nip it in the bud and replace it straight away, as it can lead to much bigger and more expensive problems. The good news is learning how to replace a u-joint on your ATV or UTV is pretty straightforward.
How Do You Replace a Damaged U-Joint?
Check out the video from Rocky Mountain ATV/MC below to see exactly how to replace a damaged or worn out u-joint. There’s lots of great information here that could save you a lot of money and aggravation in the future.
How To Tell If You Have A Damaged U-Joint?
Before you break out the tools and buy the parts, you need to make to figure out what’s wrong. A damaged or worn out u-joint often results in squeaking when your machine starts moving. You might also hear a “clunk” when you put the ATV or UTV into gear or some extra vibration while riding down the trail.
What Happens If You Don’t Replace A Damaged U-Joint?
I’ve been known to let things slide a time or two when it comes to vehicle maintenance, but this is not a problem to mess with. If you don’t address this issue in time, it could lead to damage to the bearings on the differential and the transmission. If the u-joint breaks, it can damage driveshaft and yokes.
Motion Pro U-Joint Press Tool
If you are going to replace the u-joint in your machine, you should pick the a Pro U-Joint Press Tool. It will make your job a whole lot easier and help prevent damage to the driveshaft. A good kit will include a wide variety of adapters to fit most any size you need.
Buy Now
Tusk U-Joint Kit
Tusk makes a direct OE replacement u-joint kit, which is currently up to 17% off (depending on your machine). It is made of SCM-415 cold forged steel with precision journals that are case hardened to HRC 58-61. Joints come pre-greased with hi-temp Lithium Complex 3 grease.
Buy Now
Complete Drive Shafts
If your problems are a little bigger, you can also pick up a compete drive shaft. A host of options are available, though the All Balls Stealth Drive Front Pro Shaft is currently on sale.
Buy Now
Other Tools
Should your garage or workshop not be completely loaded up with tools and related products, here are a few worth thinking about.
We are committed to finding, researching, and recommending the best products. We earn commissions from purchases you make using the retail links in our product reviews. Learn more about how this works.
by Contributing WriterUpdated June 12, 2017
U-joints are important to your Vehicles. Without them, the drive shaft could not spin and move up and down with the suspension Vehicles the same time. Replacing a U-joint is important if you notice clucking noises coming from the rear when shifting into gear or stepping on the gas or if you notice a vibration coming from the rear end. If the U-joint is not spinning true, it will eventually fail. The joint will wear and bind until it finally breaks and the potential Vehicles it to damage the drive shaft, differential or transmission is high.
Raise the rear of the vehicle with a jack and support it on a set of jack stands.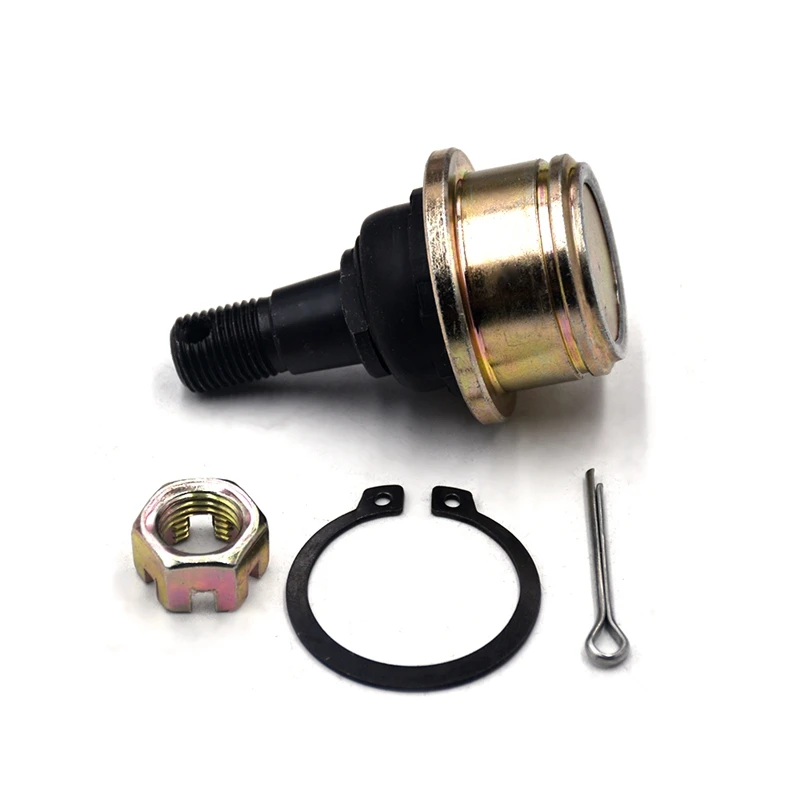 Be sure to use jack stands that are rated high enough for an Expedition, which are big and heavy vehicles.
Place the transmission in neutral. Mark the position of the drive shaft and yokes with a paint marker so they can be reassembled in the same position. The shafts are balanced, and if the orientation is changed, vibrations could result.
Remove the four retaining bolts at the differential end of the drive shaft with a wrench. You may need to turn the drive shaft to access all four bolts. Drop the drive shaft down and slide it out of the rear of the transmission.
Locate the retaining clips on the U-joint caps and remove them with a pair of pliers. Squeezing the tabs on the spring clip together will allow it to be removed from the drive shaft yoke.
Remove the U-joint from both ends of the drive shaft using a U-joint press. If you do not have a U-joint press, you can rent one at many auto parts stores. There are several styles of U-joint presses available, so be sure to read the directions that come with the press to correctly use it.
Install new U-joints in both ends of the drive shaft and press the caps into place with the U-joint press. Replace the retaining clips with the new ones that came with your U-joints and be sure that they snap into the groove in the yoke.
Align the mark you made on the transmission with the mark on the drive shaft. Insert the slip yoke into the transmission, being careful not to damage the splines on the shaft as you slide it into the case.
Raise the rear of the drive shaft and align the mark you made on it with the mark you made on the rear differential. Install the four mounting bolts and tighten them evenly with a crisscross pattern. Torque the bolts to 83 foot-pounds with a torque wrench.
Raise the rear of the truck off the jack stands using your jack. Remove the jack stands and lower the truck to the ground. Test drive the truck to verify that there are no vibrations in the rear end.
Jack
Jack stands
Paint marker
Socket set
Wrench set
Pliers
U-joint press
Lift the rear axle of the truck with the jack, and put jack stands underneath the axle.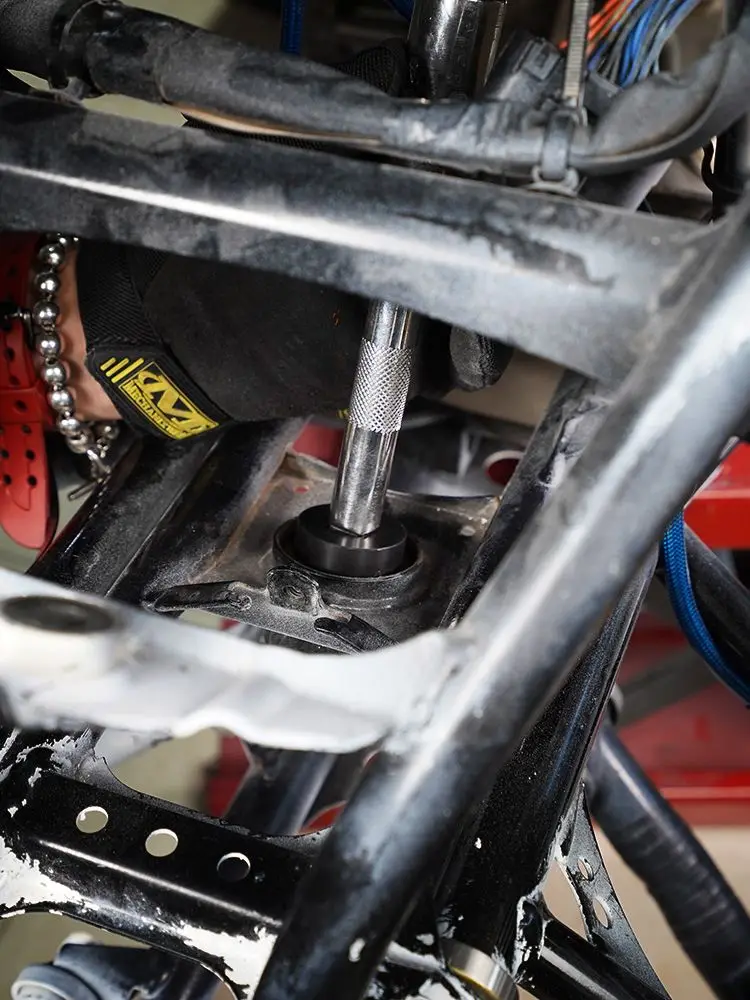 Place wheel blocks around the front tires. Put the drain pan beneath the transmission.
Unbolt the driveline from the axle using an open-end wrench. Pull the driveline from the axle using the pry bar, then pull the driveline out of the transmission with both hands.
Remove the clip on the u-joint at the end of the driveline using the pliers. Set a socket on the end of the u-joint that's the same outer diameter as the inner diameter on the u-joint. Strike the socket with the hammer until you can grab one of the u-joint caps with the pliers. Pull the cap off, then remove the u-joint from the driveline.
Insert the replacement u-joint in the driveline. Install the caps on the u-joint with the hammer and socket.
Install the driveline into the rear of the transmission, then install the other end into the axle housing using an open-end wrench. Lower the Silverado off the jack stands using the jack.
Jack
Jack stands
Wheel blocks
Open-end wrench set
24-inch pry bar
Drain pan
Hammer
1/2-inch socket set
Pliers
Raise the rear of the vehicle with a floor jack.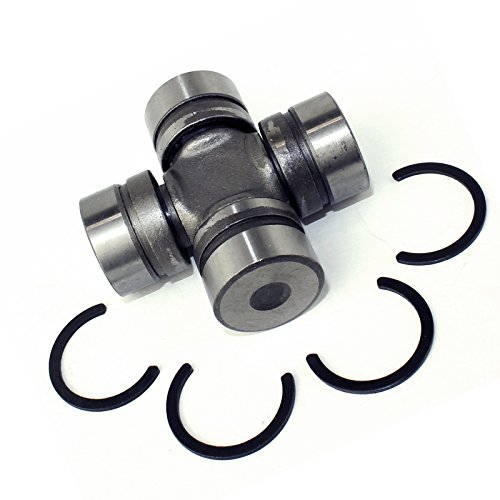 Place jack stands under each side of the rear axle. Lower the floor jack.
Crawl under the rear of the vehicle and remove the nuts on the rear drive shaft clamps with a socket and ratchet. Hold the drive shaft up with one hand while sliding the clamps out of their mounting holes. Lower the rear of the drive shaft to the ground. Slide the drive shaft to the rear of the vehicle until it clears the transmission tail shaft. Lower the front end of the drive shaft to the ground and remove it from under the vehicle.
Place the drive shaft on a work bench or other suitable work area. Remove the snap ring clips from the bearing caps on the universal joint you wish to replace, using a pair of snap ring pliers. Discard the old clips--a replacement universal joint comes with new hardware.
Place the jaws of a universal joint removal tool over the bearing caps of the joint where it attaches to the drive shaft. Turn the handle of the tool in a clockwise direction until the universal joint has been pressed from the drive shaft. Remove the tool.
Place a new universal joint in between the mounting holes on the end of the drive shaft. Place the jaws of the removal tool over the bearing caps of the U-joint and turn the handle in a clockwise direction until it is fully seated into the drive shaft. Remove the tool. Insert new snap ring clips over the bearing caps using a pair of snap ring pliers.
Repeat the above two steps to replace the universal joint at the other end of the drive shaft, if necessary.
Place the drive shaft under the vehicle.
Crawl under the vehicle. Raise the front of the drive shaft and insert it into the transmission tail shaft. Raise the rear of the drive shaft and hold it into position with one hand. Insert the bearing cap clamps back into their mounting holes. Thread the nuts back onto the ends of the clamps and tighten them with a socket and ratchet. Wipe up any transmission fluid that may have leaked out of the tail shaft. Remove the jack stands and lower the vehicle.
Raise the front of the truck with a jack, and let the truck rest on jack stands. Set the truck in neutral, release the parking brake, then climb under the truck near the rear differential and the transfer case, and unbolt the eight bolts which connect the driveshaft to the frame with a ratchet and socket.
Remove the U-joint cap straps with your hands, pull the U-joint and driveshaft from the yoke, and pull the driveshaft away from the transfer case. Be sure to place a drain pan beneath the transfer case to catch any oil.
Remove the U-joint retaining clips by squeezing them with pliers, then pulling them out with the pliers. Place the U-joint press over the U-joint caps, with the U-joint press screw over one of the caps and the open end of the U-joint on the other cap. Then turn the screw with a ratchet and socket until the cap with the open end on it pops from the yoke. Reverse the press so that the open end is now on top of the other cap, and repeat the process. Repeat this process on the new U-joint in order to remove its caps.
Place the new U-joint up to the yoke, then insert the new caps into their holes on the yoke, and lightly tap them with a hammer until they are firmly in place. Install the new retaining clips on top of the caps in their slots on the yoke. Place the grease fitting into the new U-joint, cover it in grease, and realign the yoke and driveshaft. Place the driveshaft into the transfer case, then move the end of the driveshaft into the yoke, while being careful to align the driveshaft splines with the yoke notches.
Reinstall the driveshaft retaining bolts and retaining straps with a racthet and socket, remove the jack stands, lower the truck with the jack, and repeat the previous steps to replace the rear U-joint.
Ratchet and socket
Jack
Pliers
U-joint press
Jack stands
Hammer
U-joint kit
Grease
Drain pan
Pull the rubber caps off of the rear axle, positioned in the center of the wheels' hubs. Loosen the rear wheels' lug nuts and the hubs' center nut, using a 17 mm and a 22 mm socket and a socket wrench, respectively.
Lift the rear end of the ATV off of the ground with an ATV jack. Unscrew the rear wheel's lug nuts with your 17 mm socket, then pull the wheels off of the rear axle. Unscrew the hubs' center nuts with your 22 mm socket, then slide the hubs off of the rear axle.
Unscrew the rear brake caliper's mounting bolts, positioned on the left side of the rear axle, using a 12 mm socket. Slide the caliper off of the rear brake disc and hang it from the ATV's frame, using a bungee cord.
Slide the rear brake disc off of the left side of the rear axle. Pull the rear axle out from the right side of the rear swingarm. Unbolt the trailer hitch bracket from the swingarm, if equipped, using a 10 mm socket.
Place a jack under the swingarm's final drive gear, to large assembly that the rear axle was housed in. Unscrew the final drive gear's mounting nuts with a 14 mm socket. Pull the final drive gear away from the swingarm and the drive shaft. Set the final drive gear aside.
Pull the drive shaft and the U-joint out from the swingarm. Loosen the hose clamps securing the drive shaft's boot to the motor and the swingarm, using a flat screwdriver. Pull the boot away from the ATV and inspect it for cracks or tears. If no damage is visible, reinstall it onto the motor and the ATV. If the boot is damaged in any way, replace the boot with a new one.
Pull the U-joint off of the end of the drive shaft. Clean the drive shaft with a parts cleaning spray, then coat the shaft's male and female ends with a lithium soap-based grease. Place a new U-joint over the male end of the drive shaft. Coat the motor-end of the U-joint with a lithium soap-based grease. Insert the U-joint and drive shaft into the swingarm and onto the motor.
Lift the final drive gear into place against the swingarm, using a jack. Slip the female end of the drive shaft onto the splined shaft on the back of the final drive gear.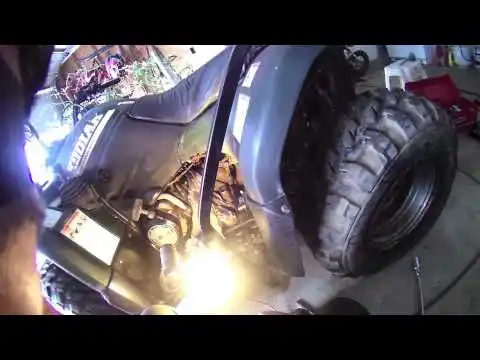 Screw the gear's mounting nuts into place with your 14 mm socket. Reattach the trailer hitch bracket to the rear swingarm, using a 10 mm socket.
Push the rear axle through the right side of the swingarm. Slide the rear brake disc onto the left side of the rear axle. Slip the rear brake caliper over the brake disc, then bolt it into place with a 12 mm socket.
Slip the rear wheel's hubs onto both ends of the rear axle. Screw the hubs' center nuts loosely into place with a 22 mm socket. Mount the rear wheels onto both hubs and loosely screw the wheels' lug nuts into place with a 17 mm socket. Remove the ATV from your jack. Tighten the rear hubs' center nuts completely, followed by the rear wheels' lug nuts.
10, 12, 14 17 and 22 mm sockets
Socket wrench
Jacks
Flat screwdriver
Parts cleaning spray
Lithium soap-based grease
Buying a quadric is a simple matter. However, this technique requires special attention and regular maintenance of all nodes and elements. This is especially true for the ball joint.
The ball joint of an ATV is an extremely important element of the suspension of this motorcycle, on the serviceability and stability of which even the life of a rider can directly depend. Therefore, timely maintenance and repair of this component must be given maximum attention.
Due to the extreme operating conditions of an ATV, the ball joint may fail more often than on other types of motorcycles. The impact on it of abrasive substances of the road surface also plays a role in the wear of this element.
Ball joint on ATV stealth consists of the following components:
Since the ball joint undergoes significant dynamic loads during the operation of the ATV, the presence of too much clearance between the parts, which is most often found in Chinese motorcycles, can significantly reduce its service life. Please note that the ball joint is present on both full-size and children's models of ATVs. In both cases, it is very important to monitor its condition by performing timely repairs and maintenance.
When this element of the vehicle suspension is worn out, during its movement, the driver begins to hear suspicious sounds, such as knocking or crackling. There is also a noticeable wobble in the steering wheel.
Before repairing a 150cc ATV ball, it must be disassembled. On some models of such motorcycles, the hinge has a collapsible design, making it easy to get to worn parts and replace them. Most often, motorists need to replace the anther, liner and lubricant.
ATV ball joint repair with a one-piece joint is carried out as follows:
 At this stage, you can turn to the turner for help. Solid types of plastic, such as caprolon or tekamide, are perfect as a material;
 After performing this repair with a partial redesign of the ball joint, you can significantly improve the factory performance of this functional ATV component. Now, in case of wear, it will be enough to slightly tighten the liner, thereby significantly extending the life of the ball vehicle.
We recommend that you lubricate the hinge in a timely manner using high-quality oil, and do not save on buying a good silicone boot. Therefore, if you decide to purchase adult motorcycles or buy an ATV for a child, be prepared for the fact that you will have to pretty delve into its insides.
The replacement of the ball joint on the ATV is necessary when it is not possible to repair it. This component of the motorbike breaks down both due to wear and tear over a long period of operation, and as a result of liquid and dirt getting inside the boot. That is why it is required to lubricate the ball components from time to time, and change some of them as needed.
As soon as it became clear that something was wrong with the ATV ball, it is recommended to solve this problem as soon as possible, since its malfunction can cause many other more serious breakdowns of motorcycles.
Replace the ball motorbike as follows:
 After that, this part will also need to be removed;
 When assembling a motorcycle, pay special attention to the integrity of its rubber cuffs, as well as the presence of abundant lubricant on all functional units.
Both repair and replacement of ATV ball joints, with certain skills, can be done on your own. If you doubt that you can perform such manipulations with your own hands, then the best solution would be to contact a service center for help.
05/29/2021 1275
Podolsk,
15 km Simferopol highway To contacts
#service #ATV #stars
7 years ago
Replacing the chain and sprockets on an ATV from a motorcycle is fundamentally no different. If you follow the correct sequence of actions, then this can be done quickly and easily. In the video, we showed the process using the Yamaha Raprot 700 ATV as an example. The article shows the main points that you should pay attention to.
It happens that the nut of the front sprocket sticks and is hard to unscrew, the rear brake may not be enough to block. In this case, it is necessary to spray it with penetrating grease, additionally block the axle with a rod through the eccentric, and use a wrench with a long lever to unscrew it.
If a standard set of sprockets is installed, the chain length is determined by the manual. If Non-standard, then it is better to determine the length in place with minimal tension. If the chain is closed on different plates (external and internal), you have to add another link to install the lock. It is desirable to increase or decrease the rear sprocket by an even number of teeth, and not change the front one. Stock on yamaha raptor 700 chain 98 links, sprockets 14 and 38 teeth. One sprocket tooth corresponds to half of the chain link, so it is better to increase (decrease) the sprocket by an even number of teeth.
the new chain stretches a little. Chain free play is measured with no load when the ATV is on a level surface with four wheels.
The axle fixing bolts are tightened in a certain sequence with a certain force gradually.
When tightening all bolts and nuts, it is advisable to observe the torques specified in the manual. This is necessary so as not to disrupt anything and securely fix it. The wheel and star nuts are tightened gradually according to the principle "each next opposite the previous one". If the thread is clogged, it must be cleaned! If a torque wrench is not available, it can be tightened by hand with short lever wrenches (with a long lever wrench, the threads can be stripped unnoticed).