If you’re having an issue with your ATV, there is a good chance that the starter solenoid will be to blame. However, it can be tricky to know for certain where the problem is and how to best deal with it.
Check out the information below to understand more about your ATV and how to detect an issue with the starter solenoid. Hopefully, after reading this, your ATV will be back in working order in no time!
Contents
A starter solenoid is a switch that creates a point of contact between the starter and the battery. Once the starter button is pressed, the coil is energized. In turn, this completes the circuit by pushing a contactor, which transfers DC current from the battery to the starter. The starter solenoid also helps to ensure that start-up is stable.
On an ATV, the starter solenoid is generally located on the frame. Usually, it is found next to or under the battery, near the wiring harness, placed on the outside of the plastic. Though their size and shape can vary, you are generally looking for a round or square mechanism, with two small and two large wires attached.
How To Tell If Starter Solenoid Is Bad On ATV?As an ATV owner, it’s likely that at one point or another, you’ve had a problem with your starter. If you haven’t yet, we’re sorry to let you know that you almost definitely will at some point!
As such, it’s best to educate yourself on how to detect a bad starter solenoid to ensure that as soon as something goes wrong, you know how to handle it.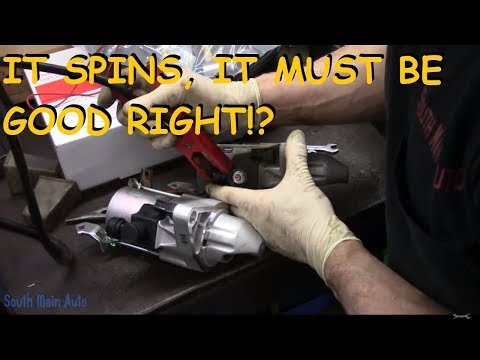 This is super important for your safety and peace of mind. There are a number of ways to test whether the starter solenoid is bad on your ATV. Check them out below!
First, even if you’re fairly certain that your battery is good, it’s always necessary to check! If you haven’t done this before, you should definitely learn how to, as regularly checking your battery is a necessity.
Here are some visible signs that your battery is the issue and should be replaced immediately:
You may also want to test your battery for further confidence. If you are confident that your battery is definitely not the problem, you should now begin to look into the starter solenoid.
Signs Of A Bad Starter Solenoid On ATVThere are some easily noticeable symptoms of a bad starter solenoid.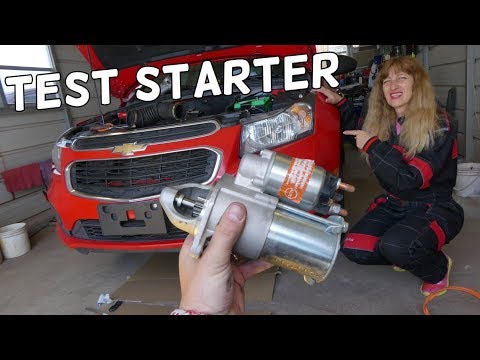 Here are some signs that the issue with your ATV is due to a bad starter solenoid:
This is the most common sign which implies an issue with the starter solenoid. If your vehicle doesn’t turn on after engaging the ignition, it may be that your starter solenoid is faulty.
There Is A Clicking Sound Coming From The starterThis is a sign that the starter solenoid isn’t working properly. However, this is also a common issue caused by a battery that is low on amps. Therefore, if this is the only symptom, it may be worth checking the battery more thoroughly.
Starter Doesn’t Turn Off After The Engine Has StartedOnce you have started your ATV engine and let go of the starter button, the circuit should close. This should then disconnect power to the starter motor. However, if your starter remains on after the engine has turned on, there might be an issue with the main contacts in the starter solenoid.
It is probably that the main contacts have welded together in the closed position.
Intermittent Issue When Starting The ATVIf a starter isn’t working as it should, it might result in a sporadic difficulty in starting the ATV. This may be due to damage caused by dirt, debris, or excessive heat. The starter should activate immediately after starting your ATV.
If you find that it takes a few times to get your ATV started, there is likely a problem with the starter solenoid. This might also be the case if you manage to start the ATV, move the vehicle a bit, but then find that the ATV stops working.
The Starter Keeps SpinningThis is a sign of a particularly dangerous issue with the starter. Bad cases will result in system damage or even explosion. Ensure that you disable and exit your ATV as soon as possible.
Testing an ATV Starter SolenoidOnce you know for sure that the issue with your ATV is likely a result of a bad starter solenoid, you will need to either purchase a new starter or attempt to fix yours yourself. However, before spending unnecessary money, you should try to detect the problem first, as it is likely that the issue is fixable.
Before testing your solenoid, as we detail below, we recommend that you understand the electronic components of your ATV well.
Understanding these, in addition to being confident in your knowledge of where the starter solenoid is and the location of its connections, is a necessity before testing the starter solenoid.
If you don’t have time to learn these, we recommend hiring an expert to ensure that the work is done as safely and correctly as possible.
If you are confident in your understanding, you can move on to testing your starter solenoid. To do this, you will need two things:
A multimeter is a device that is used to measure a number of values, such as, but not limited to, electrical voltage, current, and resistance.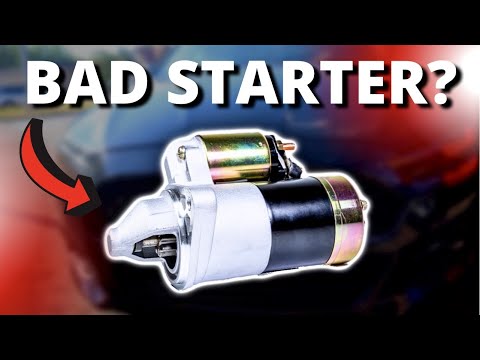 They are very useful when you need to carry out simple tests or even if you need to detect complex faults.
They are a great tool for troubleshooting electrical issues on motors. There are two types of multimeter: analog and digital.
Analog multimeters are less costly than digital multimeters and so are preferred by some people. They are preferred in very specific situations, such as when you want to detect slow voltage changes or if you need to set the multimeter to an ammeter.
Although, they can be difficult to read accurately and must be handled with care. If they are dropped or not handled gently, they can easily become damaged. Also, they aren’t generally as accurate as digital multimeters, especially when you are measuring the general voltage.
Digital multimeters are more commonly used and are preferable for this task. You can purchase different types of digital multimeters, from very simple ones to very advanced ones. They are also easier to read than analog multimeters because they provide the readings on an LCD screen.
Digital multimeters are also better than their analog counterparts for measuring voltage.
They are, however, more costly than analog multimeters. Although, if you opt for a more basic version, the difference in price will be negligible. On the other hand, advanced digital multimeters can be very expensive.
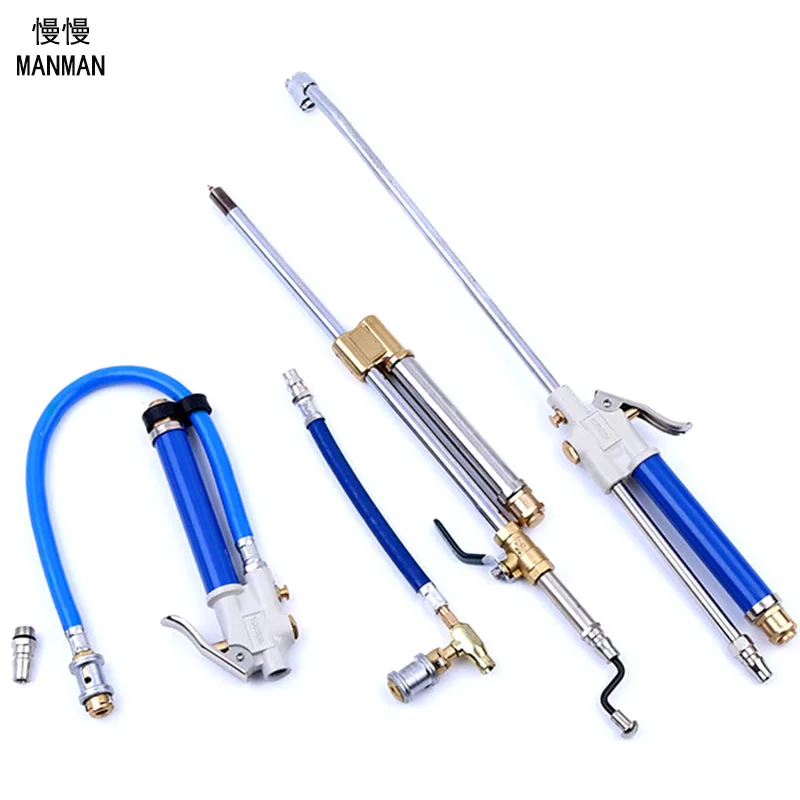
What is a Back Probe Kit?Often it is necessary to check the current without separating a connector, and you can do this using a method called back-probing. Essentially, it is the method of voltage drop testing, which measures the resistance in a circuit under a load by touching the probe to the electrical contact in the back of the connection.
To be able to do this, you will need a back probe kit. These kits are widely available online.
Testing Your Starter SolenoidThere are two tests you need to do to see if your solenoid is faulty.
Test 1The first test is to see whether the starter and the solenoid are making the necessary connection. To perform this test, carry out the following steps.
1. Using the back probes, connect one of the solenoid wires that connect to the starter button to the battery. Begin with the negative side of the battery.
2. Next, again, using the back probe, connect the other solenoid wire to the positive side of the battery.
3. Once making these connections, there should be a ‘click’ sound. This sound tells you that the solenoid is working.
4. If you don’t hear the click, try the next test.
Test 2If you did not hear the click sound, you would need to follow the steps below, to perform the second test.
1. As you did in the first test, connect one of the solenoid wires to the battery’s negative terminal.
2. For this step, you will need your digital multimeter. To perform a resistance test, connect your digital multimeter to the solenoid’s main connections.
3. Once you have set the multimeter to resistance test, an ‘OL’ should appear, which implies an open circuit.
4. Next, connect the back probe connection from step one to the positive battery terminal. This will complete the circuit, and as such, ‘Closed Circuit’ should appear. If this happens, the starter solenoid is in working order and is not faulty. If the circuit doesn’t close, the solenoid is faulty, and you need to purchase a new one.
Frequently Asked Questions How Do I start My ATV By Bypassing The Starter Solenoid?If you have to start your ATV with a faulty starter solenoid, you will need to locate the starter solenoid and the two main wires protruding from the starter. Then, to short circuit the starter connections, jump these two wires.
Once this is done, give your ATV ignition in combination to this short circuit. This should start your ATV.
Is It Safe To Bypass The Faulty Starter Solenoid?While you can do this if it is necessary, doing it consistently may cause problems. It is safest to get the issue fixed properly straight away if possible, as bypassing the faulty starter solenoid will likely cause more faults than you originally began with.
Yes. If you have tested your starter solenoid, and it has shown up as faulty, you may want to check for these other problems too.
By educating yourself on the electrical components of your vehicle and learning how to test the battery and starter solenoid, issues with your ATV can be easily pinpointed. To prevent further problems from arising, it is important to get these issues fixed properly as soon as possible.
If you don’t feel confident troubleshooting or fixing the issues yourself, it is always a good idea to hire an expert to do so for you to ensure your vehicle remains in good condition and you are safe while you use it.
Patrick Johnson
Hey there! I’m Patrick, and I’m the guy behind ATV Legion. I created this site to share everything I know about ATVs – from repairs and upgrades to riding tips and tricks.
Latest posts by Patrick Johnson (see all)
Delivery options and delivery speeds may vary for different locations
Sign In
or enter a zip code
Email * Password *
REPAIR & HOW TO
MAINTENANCE
TROUBLESHOOTING
GUIDES
TIPS & TRICKS
ALL ARTICLES WATCH VIDEOS ABOUT US SHOP PARTS CONTACT US
There are three types of starters fitted to motorcycles, ATVs and side-by-sides, and the steps below detail how to test each one of them.
Before bench testing a starter, make sure to:
The first type of starter has a starter motor and a solenoid incorporated into a single unit. The starter features a Bendix gear that engages with the flywheel in order to start the engine. This type of starter is commonly found on side-by-sides, utility vehicles and automobiles.
The second type of starter has a separate starter motor and solenoid, but still features the Bendix gear that engages with the flywheel to start the engine. This type of starter is generally found on larger motorcycles and ATVs.
The third type of starter also has a separate starter motor and starter solenoid, but this starter engages with a reduction gear and one-way clutch to start the engine. It doesn’t use a Bendix gear. This type of starter is generally found on sports motorcycles and ATVs.
Testing a Bendix Gear Starter/Solenoid UnitThere are two nuts on the solenoid. The one furthest from the starter motor secures the wire coming from the battery, and the one closest to the starter motor secures the wire going from the solenoid to the starter motor. There’s also a spade terminal on the solenoid that connects to the wire from the ignition switch or push button, which triggers the solenoid to engage the Bendix gear.
1. Connect a negative jumper cable to the negative terminal of the battery and the body of the starter motor.
2. Connect a positive jumper cable to the positive terminal of the battery.
NOTE: The positive jumper cable is now live, so be careful not to touch the other end against a ground surface.
3. Touch the free end of the positive jumper to the spade terminal on the solenoid. You should hear a clicking sound from the solenoid, and the solenoid should force the Bendix gear out of the starter motor. If the solenoid makes no sound and doesn’t force out the Bendix gear, the starter/solenoid unit must be replaced.
Testing Only the Starter Motor1. Connect a negative jumper cable to the body of the starter motor.
2. Connect a positive jumper cable to the positive terminal of the battery, and the other end to the nut on the solenoid furthest from the starter motor that secures the wire from the battery to the starter motor.
3. Touch the free end of the negative jumper cable against the negative terminal of the battery. You should hear the starter motor spin but the Bendix gear will not engage. If the starter motor fails to spin, it must be replaced.
Testing the Solenoid and Starter Motor Together1. Connect a negative jumper cable to the negative terminal of the battery and the body of the starter motor.
2. Connect a positive jumper cable to the positive terminal of the battery.
3. Connect the free end of the positive jumper cable to the nut on the solenoid from the starter motor that secures the wire from the battery to the starter motor.
4. Connect one end of a test lead to the positive jumper cable attached to the solenoid.
5. Touch the free end of the test lead to the spade terminal on the solenoid. The starter motor should spin and the solenoid should force the Bendix gear out of the starter motor.
Testing a Bendix Gear Starter with Separate SolenoidThe starter has a single wire connecting to it from the solenoid. The solenoid has two terminals at one end, and a pair of wires leading out from the other end. The starter motor features a Bendix gear.
1. Connect a negative jumper cable to the negative terminal of the battery, and the other end to the body of the starter motor.
2. Connect a positive jumper cable to the positive terminal of the battery.
3. Touch the free end of the positive jumper cable to the positive wire coming from the starter. The starter motor should spin and the Bendix gear should be forced out of the starter. If it doesn’t, the starter motor is faulty and must be replaced.
Testing Only the Solenoid1. Connect a negative test lead to the negative wire coming from the solenoid, and a positive test lead to the positive wire coming from the solenoid.
2. Connect a positive jumper cable to the positive test lead, and the other end to the positive terminal of the battery.
3. Connect a negative jumper cable to the negative test lead.
4. Touch the free end of the negative jumper cable to the negative battery terminal. The solenoid should make a clicking sound, indicating that it's working.
5. Connect a multimeter to the two terminals on the solenoid.
6. Set the multimeter to resistance. The multimeter should show an open circuit.
7. Touch the free end of the negative jumper cable to the negative battery terminal. The multimeter should show an open circuit, proving the solenoid is working. If the solenoid makes no sound and doesn’t make a closed circuit, it’s faulty and must be replaced.
Testing a Starter with Separate SolenoidThe starter has a single wire connecting to it from the solenoid. The solenoid has two terminals at one end and a pair of wires leading out from the other end. There is no Bendix gear, but there’s a splined shaft coming from the starter motor.
1. Connect a positive jumper cable to the positive terminal of the battery, and the other end to the nut on the starter motor that secures the positive wire from the solenoid.
2. Connect a negative jumper cable to the negative terminal of the battery.
3. Touch the free end of the negative jumper cable to the negative battery terminal. The starter motor should spin. If the starter motor fails to spin, it’s faulty and must be replaced.
Testing Only the Solenoid1 -7. Repeat the steps for testing only the solenoid, as outlined in the previous section.
body
Posted by by MotoDoctor
One of the problems with starting the engine on an ATV is found in the electrical system. To start the engine, we need to turn on the ignition and press the "Start" button (if the ATV is in gear, you need to additionally press the brake pedal). All ATV owners are familiar with this startup process. But here is the problem itself, after the actions performed, your ATV does not even make any sounds. Of course, first of all, we check whether the battery is holding a charge. If the battery is good, we proceed to check the wiring connections. Sometimes at the factory, when installing electrical equipment, the connecting chips are turned on, but not fixed with a lock. So sometimes, due to unscrupulous assemblers, these chips are disconnected and the contact naturally disappears. It is not very difficult to identify such a malfunction; it is enough to inspect the entire electrical wiring circuit and determine where there is no reliable connection. True, for this it is often necessary to dismantle plastic elements, so that there would be access to all electrical equipment connections.
 If it's plastic on a Chinese ATV, be extra careful as he is very fragile. nine0005
 For example, you have determined that the power is not going to the relay, then we recommend that you check the start button for serviceability. But as we said, the first thing to check is all electrical wiring connections. And now let's consider the option if power comes to the starter power relay and the relay itself works but the electric starter is silent, then here it seems to be faulty. In this case, you need to unscrew the mounting bolts and remove the starter from the ATV launcher. In this state, turn on the button (start), if the electric starter does not start working, then the malfunction is in it. In this article, we examined the problem of an electric start malfunction on an ATV, which is directly related to the operation of electrical equipment, but in some cases the engine cannot be started from an electric starter due to a malfunction of the mechanical start system, this is the so-called electric starter overrunning clutch. If it fails, only the hum of the electric starter will be heard at the time of launch.
 In this case, this part must be replaced. nine0009 This entry was posted in Motorcycle Repair Tips by MotoDoctor. Bookmark the permalink.
 ATV won't start? Don't know where to start troubleshooting? Then let's try to find out the main reasons why an ATV may refuse to start.
Unfortunately, the equipment of any manufacturer sooner or later starts to act up, no one is safe from this, but finding a malfunction and starting an ATV that refuses to start is not so easy, especially if you are far from a service station. nine0005
No matter how trite it may sound, the first step is to check the presence of gasoline in the gas tank: believe me, very often a person tries to start an ATV with a dry tank.
Check if the engine power button is disconnected, it is usually located on the handlebar on the left side, and also pay attention to the fuses, one of them may have blown.
Next, take a multimeter and measure the ATV battery charge level: a charged battery should produce from 12. 6 to 12.8 volts and confidently turn the starter, if the battery is low, charge it. nine0005
It is also necessary to pay attention to the battery terminals, they must be clean and not oxidized, and the clamping bolts must be tightened.
If, when trying to start the ATV, you notice that the starter does not turn, you must first check and, if necessary, replace the starter relay. To check if the starter itself is working, you need to make sure that the engine mass is in good condition (oxides, no contact, wire damage) and apply positive to it directly from the battery (observing the polarity), if the starter spins, look for a problem in the wiring. If there is no reaction to your actions, most likely the starter is out of order. nine0005
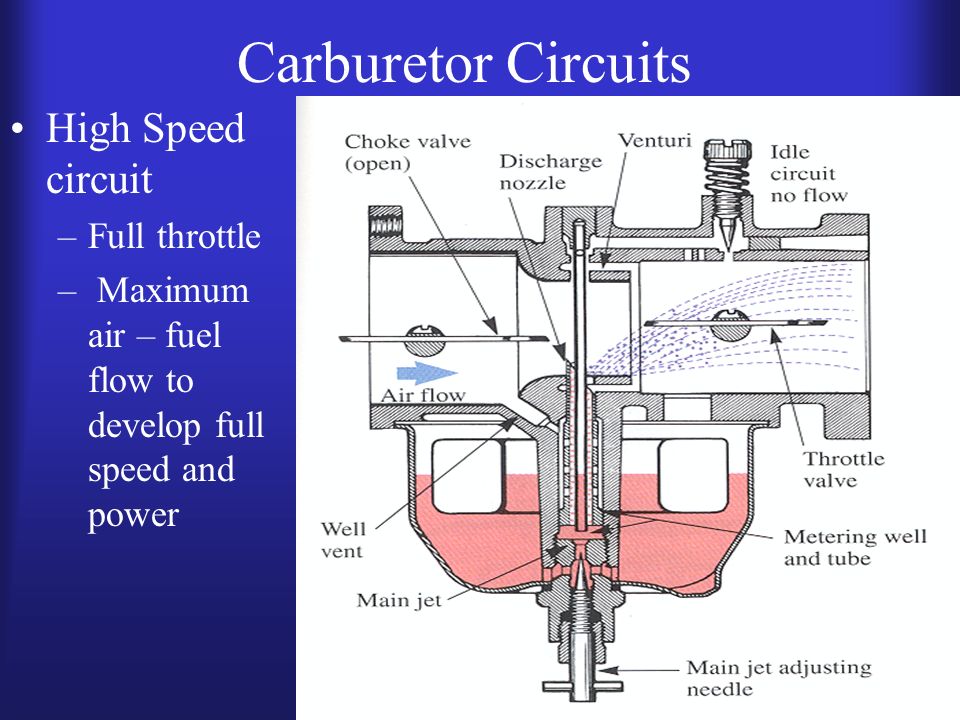
Check spark plug condition and spark. This is what a spark plug looks like when installed in a serviceable and tuned engine:
If you notice a significant deviation in the color of the spark plug, you may need to tune the ATV carburetor.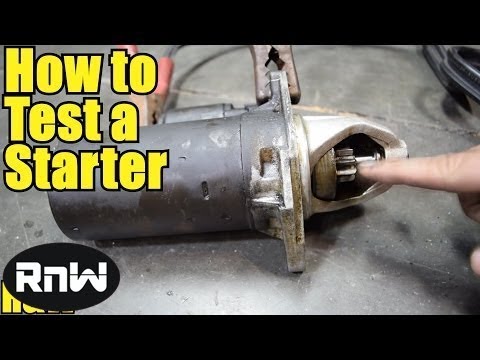
In order to check the presence of a spark, you need to unscrew the spark plug, insert it into the candle cap, lean it against any metal part of the ATV (do not forget about safety precautions: there should be no gasoline smudges nearby) and turn the starter, the spark should be sure and distinct noticeable. If there is no spark, it is necessary to replace the spark plug, if there is no spark, look at the wiring, and also replace the ignition coil. nine0005
Make sure your ATV's air filter is clean and saturated and that the air pipe from the filter to the carburetor is free of damage or blockage.
Determine if fuel is entering the carburetor, if the fuel filter is clean, if the fuel pipes are intact, clean the carburetor with cleaning fluids and blow out the passages.
Determine if the fuel pump is OK. After turning on the ignition, you should hear the sound of turning on the fuel pump and pumping gasoline into the fuel system. It is also necessary to check the operation of the fuel pump relay.