The wheel hub bearings on your ATV or UTV will no doubt need to be changed out at some point. It’s not that hard of a job to do yourself with basic hand tools you probably already have. They do make specialty tools to make the job easier, but I’ve done this with ordinary tools everyone already has in their garage.
The steps I’m going to go over are universal steps for all pre 2010 ATV and UTV wheel hub bearing replacements. For ATVs or UTVs made after 2010 the steps will be similar and you may to also read the alternate wheel bearing replacement section at the bottom of this article.
There may be slight differences from machine to machine. But you’ll get the idea of what to do, and should be able to handle any slight differences your quad has. Having your service manual handy will help. And with all maintenance projects, it’s best to wear eye protection and gloves.
Here are the steps to replace your wheel hub bearings (I explain each step in more detail below)
Before I go into more detail about each of these steps, lets make sure you really do need to replace your wheel hub bearings. It’s not an extremely difficult job, but can take a bit of time and requires you remove a lot of parts from your quad. So lets make sure it’s necessary.
You’ll be able to tell if your wheel hub bearings are bad by the way your ATV or UTV is handling. One of the most common symptoms is a grinding sound and feeling when riding. You may also hear some clanking or banging type sounds coming from the wheel hub.
If they get bad enough, you could even feel vibrations and wobbling when riding. A wobbling feeling could also mean other things like you need to Balance Your ATV Or UTV Tires. If you notice the machine pulls left or right when braking, that could be a sign of bad wheel hub bearings as well.
If it’s been a while since you’ve last replaced them, or you have an older machine, it’s a good idea to do the replacement if your sure the problem isn’t your brakes or tires.
To do a manual check, jack up the wheel in question and try to move it back and forth. If the wheel is bolted on tightly but still wobbles back and forth, you probably need to replace the wheel hub bearings.
Most bearings come sealed, but over time, water and dirt will still find its way in there. There are ways to make the bearings last longer, which I’ll talk about later on. But eventually, they need to be replaced. Now on to the steps.
This goes without saying I suppose, but the ATV needs to be jacked up and remain so during this entire process. It’s a good idea to put in on jack stands as this can take a while and you don’t want your jack to fail.
Another safety measure you can take, after you take the tire off, put it under the quad near the jack stand. This is good to do just in case the machine falls off the jack or jack stands somehow. If you have a leg under there, it could save you a lot of pain.
I always start by loosening the lugs before I jack it up. That way it’s easier to remove when the ATV is lifted.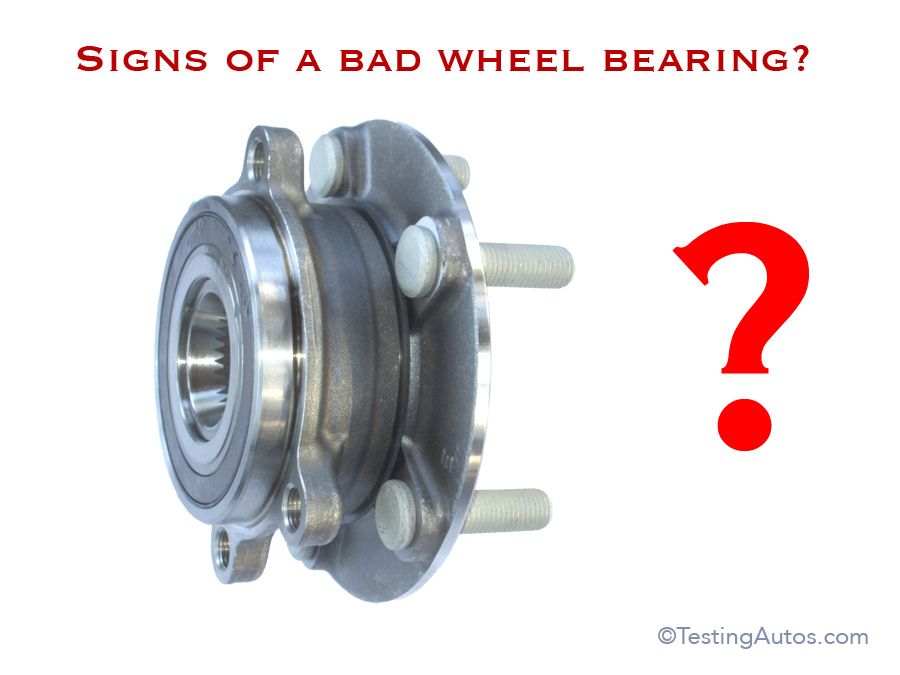 You don’t have to worry about rocking the machine while its raised up if you get a stubborn lug nut.
The caliper will typically be bolted on with two bolts, either an allen head bolt or a 12mm bolt.
Remove both bolts and the caliper should come off easily.
This may be a good time to Change The Brake Pads On Your ATV if they need to be done.
The caliper may have a line going into it, that’s ok you don’t need to remove that or do anything else with the caliper. Just move it and let it sit somewhere out of the way the best you can.
Remove Axle NutAfter you’ve got the caliper off, it’s time to remove the castle nut holding the hub in place. Usually there will be a cotter pin holding the castle nut in place.
This is to prevent the nut from loosening while you ride. The cotter pin is easy to remove with a pair of pliers. Some machines will have a stake nut here instead of a castle nut.
I found it easiest to remove the castle nut with an impact wrench. Sometimes they can stuck on there pretty good, and if you don’t have a breaker bar, doing it by hand can be tough.
Once the castle nut is off, you can remove the hub, which will usually have the brake rotor attached to it. Some machines will have a guard mounted on the knuckle behind the brake rotor. Remove the guard, this is easy to remove and is usually only held in place by a few bolts.
The upper and lower ball joints will be held on to the knuckle by nuts usually with cotter pins in them.
Remove the cotter pins and take the nuts off, you should be able to slip the ball joint out of the knuckle after that.
They sometimes take a little persuading, but usually come out pretty easily with a little hit from a hammer.
Do this for both the top and bottom ball joint connections to the knuckle.
Remove Tie Rod Ends From KnuckleTo remove the tie rid ends, you will typically need two wrenches. Most of the time they are about one size apart, that’s helpful if you only have one of each size wrench.
The bolts for the tie rod ends will most likely be held in with cotter pins too. Remove the cotter pins and bolts holding the tie rod end into place.
Once the bolts are off the tie rod end should easily lift up. Just pull it up out of the knuckle and move it out of the way. There is no need to take the tie rod end apart any further than this, you can just rotate it out of your way.
Remove Shock Absorber BoltYou only need to remove the bottom shock absorber nut and bolt. You will need two wrenches for this part as well.
The shock absorber is held in by a bolt and nut set up connecting to the swing arm.
I found it easier to hold the bolt in place with a wrench and use an impact wrench to remove the nut.
Once the bolt and nut are removed, you should be able to move the shock absorber up and out of your way.
On some models of ATV or UTV, it will help make this whole job easier to do this step right after you’ve removed the wheel. You will notice a better range of motion in the whole shock and swing arm assembly after you remove the shock absorber.
It can give you easier access to the other parts you need to remove in the previous steps. I’ve just always done it this way and never had any issues, it depends on your machine and how you want to go about it.
Remove Knuckle From SuspensionAfter you’ve removed the shock absorber bolts and got it out of the way, you should be able to just pull the steering knuckle assembly off the axle. Sometimes it can be a bit stubborn and you’ll have wiggle it to get it started.
Remove Outer Seal And BearingsNow you’ll need to remove the seal and bearings from the steering knuckle. The seal will need to come out first.
They do make a special tool to make this easier like this Jecr Bearing and Seal Puller Tool from Amazon.
But I’ve got it done with just a screw driver before. Don’t get me wrong the seal puller tool makes the job a whole lot easier, and is useful for other projects as well. But you can get the seal out with a screw driver if your persistent enough.
To get the bearing out you’ll need a long center punch. Keep tapping around the bearing to keep it centered as you knock it out. You will most likely not be able to push the bearing clear through from one side of the knuckle to the other, so the bearings will need to removed from both sides separately from the inside out.
Clean Knuckle And Install New BearingsOnce you’ve got the seal and bearing out of the knuckle, it’s a good idea to clean the knuckle of any dirt and debris that might make installing the new bearing more difficult.
As for the bearings you use, it’s up to you. There are plenty of options out there, just make sure you get the right ones to fit your machine. I like using the All Balls bearings and seals, I’ve had good luck with them in the past.
Here’s a link to an All Balls 25-1404 Wheel Bearing Kit on Amazon, the kit comes with the bearing and seals.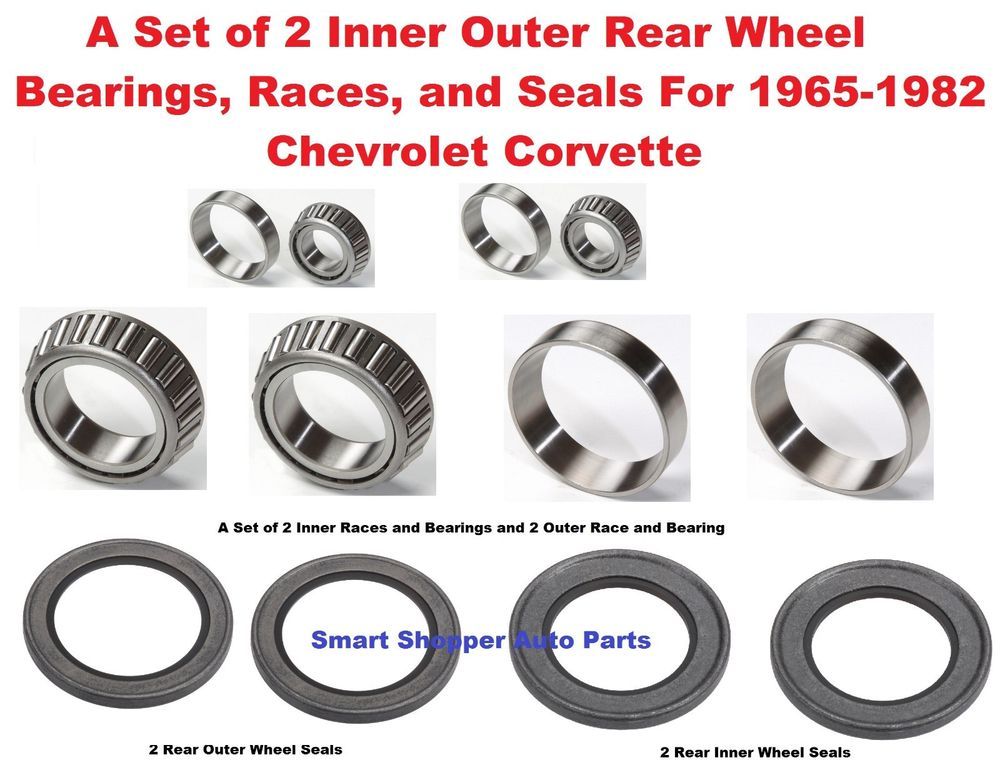 That’s a good place to start looking for the bearings and seals to fit your quad.
Once you have the bearings you need to install them in the knuckle assembly just as they were when you took them out. There is a sprecial bearing press you can use to press the bearings back in.
But I’ve always just used a large socket that is about the same size as the bearings and hammered them back in. Be careful not to hit the inner part of the bearings assembly because that will damage them. Use the right size socket that lines up with the outer edge of the bearings assembly. You could also try using the old bearings if they’re still intact, they should be the same size after all.
The bearing seal will go back on the outside of the bearings after you’ve got them installed. They should seat nicely on the outer edge of the knuckle like they were when you removed the old ones.
Make sure you don’t forget the spacer between the bearings if your model has that.
That’s it, you’re done replacing the wheel hub bearings on your ATV or UTV, now it’s time to put it all back together.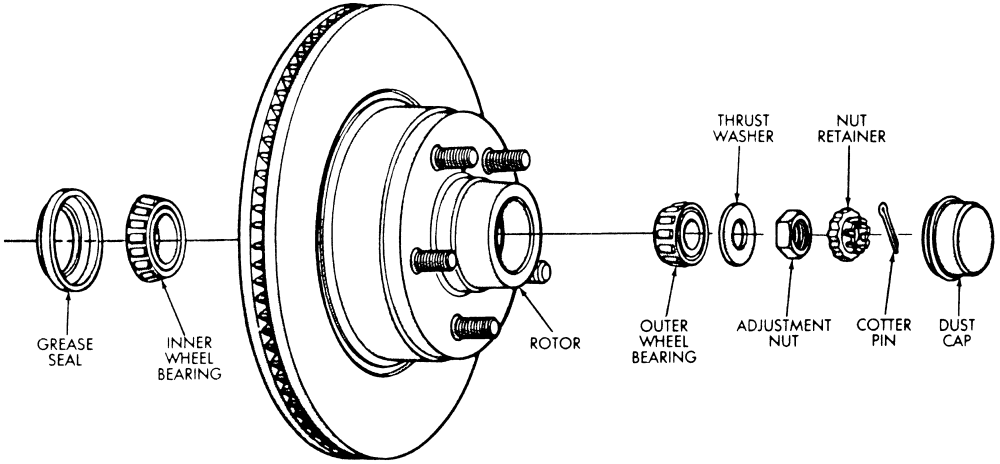 Everything will go back together the same way took it apart just follow the steps above in reverse.
I do recommend you use all new cotter pins. People will say you can re-use them, and I’ve seen people re-use them successfully. But they’re just so cheap, and it’s recommended you use new cotter pins every time so that’s what I do.
Here’s a link to a 555 Assorted Piece Set Of Cotter Pins for around 12 bucks on Amazon. I also recommend using a new stake nut instead of re-using the old one. This only applies if you have a stake nut instead of a castle nut from the remove axle nut step.
The wheel bearings on your ATV or UTV will just go bad over time. The best thing to do is make sure you’re installing the bearing seal the right way. Riding through mud and water is one the best parts about off-roading, so eventually water and dirt will get in there. But a good seal can help them last longer.
Also, avoid pressure washing the hub assembly. It’s ok to pressure wash your machine to clean it after a muddy ride. Just be careful around the bearing seal and hub assembly area. The pressure washer can push water into the bearing making them wear out faster.
Most of these steps will be the same, except you will be dealing with the hub assembly to replace the bearings. Also, you will want to freeze the new bearings before replacing them in the hub.
To remove the old ones the process will be the same also. Use a long punch or other tool to remove the old wheel bearings.
Some models will have a snap ring clip holding the bearing in place. You can easily remove this though with a pair of snap ring pliers.
Use a heat gun to warm up the hub assembly where the new bearings need to go.
Take the new bearings out of the freezer and press them into the hub. You can use the old bearings or a large socket and hammer to help push the bearings in.
Put everything back together the same way you took them apart and you’re good to go. Remember to use all new cotter pins to keep things tightened down the way they’re supposed to be.
Sharing is caring!
Drive
On an independent suspension, wheel bearings are located inside the spindle or steering knuckle. Each steering knuckle connects the wheel hub to the upper and lower A-Arms, with the CV shaft passing through the bearings inside the knuckle and into the wheel hub. On units with a solid rear axle; i.e, a 2001 Yamaha Warrior 350, the rear wheel bearings sit inside a single rear wheel hub. The solid axle connects to the wheel collar (which is bolted to the wheel), passes through the bearings located inside the wheel hub, through the sprocket collar (which holds the rear sprocket), and connects to the wheel collar on the opposite wheel.
The powersports industry uses many types of wheel bearings, but the most common is a round stainless steel ring with ball bearings sealed on the inside. Many (but not all) aftermarket wheel bearing kits include oil seals. Oil seals can also vary in appearance. The most common is a thick round rubber seal. Certain aftermarket kits may provide oil seals that appear different than OEM oil seals; i.e., a round metal base with a flanged rubber flap. While these seals may exhibit a different appearance, they often perform the same function at OEM or better quality.
The wheels on the vehicle are brought to movement by forces generated by the engine. The engine passes these forces to the transmission, which passes them to either a differential or a sprocket. In either case, the end result is that this force is transferred to the axle which results in axle rotation. This rotation is the first visible sign of the force which causes the wheels to turn.
To turn the wheels, the axle must pass through the stationary steering knuckle or rear wheel hub assembly. It is important to note that neither the steering knuckle nor the rear wheel hub assembly have any relevance on whether or not the wheels turn.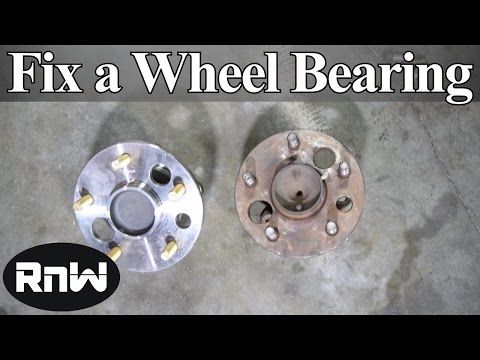 In this instance, these parts are only relevant as a carrier for the wheel bearings.
Because the carrier is incapable of rotation, wheel bearings are pressed inside a hub, allowing the rotation from the axle to transfer to the wheel hub and thus the wheel. During axle rotation, the outer ring of the wheel bearing remains stationary, as it maintains contact with the inner hub of the carrier. The inner ring, which is in contact with the axle, is free to rotate with the axle. This movement is made possible by the bearings sandwiched between the inner and outer rings.
The short service life of wheel bearings is due in part to the enormous pressure placed on the bearing. Note that wheel bearings are used to transfer rotational force through a carrier; this position causes the entire weight of the vehicle to be distributed among the wheel bearings. The constant pressure caused by the weight of the vehicle combined with the rotational movement of the bearing and the intense impacts sustained by off-road vehicles all contribute to shortening the service life of a wheel bearing.
While dust and debris can significantly shorten the service life of a wheel bearing, the oil seals included with many wheel bearing kits have no impact on transfer of motion.
Wheel bearings are a very common wear item and should be checked often. Due to the location inside the steering knuckle, worn wheel bearings can cause significant damage to nearby parts such as the steering knuckle, wheel bearing spacers, wheel hubs, and in some cases even rotors.
It is not recommended to replace wheel bearings with previously used bearings. Fortunately, wheel bearings are easy to inspect. With the wheel lifted off the ground, the wheel bearings can be examined by grabbing the tire on both sides and attempting to pull the tire with one hand while simultaneously pushing with the other. Any free play observed during this motion suggests wheel bearings that are at the end of the service life.
Replacement wheel bearing kits are relatively inexpensive - because wheel bearing kits vary by make and model as well as bearing manufacturer’s, they are available in a wide price range. An acceptable price for an aftermarket wheel bearing replacement kit falls anywhere between $15 for a single wheel bearing with no oil seal capable of replacing wheel bearings on a single wheel to $45 for a dual wheel bearing kit with oil seals capable of replacing both front or rear wheel bearings.
08/27/2021
When driving a passenger car for a long time, a hum often occurs, which indicates damage to the chassis part. Car enthusiasts with many years of driving experience quickly determine by the sound which part is out of order. Low-frequency noise or whistling in the car interior while driving indicates that the bearing in the car has flown.
Loud sound drowns out words during a conversation with a passenger and makes the driver uncomfortable. These are the first heralds of complex problems. If no action is taken, then a crack will begin coming from the wheels, after which the bearing will disintegrate. This is fraught with unpredictable movement of the car, and subsequently - engine damage. The bearing buzzed - you need to seek help from the mechanics of the service station. nine0004
The hub bearing is designed for approx. 100,000 km on a perfectly level road. An uneven track with humps and potholes provokes an increase in the dynamic load on a part that fails ahead of time. Bearing integrity is compromised due to natural wear, improper mounting and untimely lubrication. After the occurrence of an incomprehensible noise, the driver must find out why the wheel bearing is buzzing. A trip to the service station for car diagnostics is a reasonable decision, thanks to which specialists will quickly detect a breakdown and correct the situation by replacing the spare part. nine0004
How long the life of the wheel bearings will be depends on many factors, depending on the brand of car. Manufacturer-installed parts last much longer. Accordingly, the owner of the car will hear the rumble of the bearing only after passing the mileage of 90-150 thousand km. analog parts purchased at a car dealership wear out much faster - at about the moment when the speedometer needle measures the next 50-70 thousand km after replacement. The hub elements mounted on the rear axle of the vehicle have a long service life compared to the front parts. nine0004
Hub bearings hum due to destruction, which occurs for the following reasons:
water or dirt got into the seals or anthers;
expired;
chips from damaged parts have fallen on the work surface;
insufficient lubrication in separator;
mechanical damage;
defective part; nine0004
high dynamic load rating.
Postponing a visit to the service station after hearing the noise of the bearing leads to wheel stall and further destruction of the vehicle's chassis.
Wheel bearing hum appears when the vehicle accelerates to 40-60 km/h. The more the car accelerates, the louder the sound becomes, and as the speed decreases, it disappears. How does the hub bearing buzz when turning the car? Most often, the hum intensifies and turns into a whistle. Typical breakdowns are associated with the load on the wheels at this moment, so the pressure also applies to the hub bearings, which vibrate and make a certain noise. If nothing is done, then later metal grinding will be added to the unpleasant sound. nine0004
The more the vehicle speed increases, the louder the bearing makes noise. Dual rollers allow the wheel bearings to work with minor failures, but the restoration of spare parts cannot be put off for a long time.
The noise of the wheel bearing is provoked by incorrect operating conditions of the vehicle:
vehicle mileage reached by driving at high speed; nine0004
car operation at low and high temperatures on country roads;
brake problem;
camber-toe angles of the front wheels are violated;
The hub nut that adjusts the gap between the roller mechanisms and the side cage is too carefully tightened/loosened.
the driver's passion for tuning and the discrepancy in the weight of the wheels.
If the driver finds that the hub bearing is noisy, a timely replacement will ensure a long service life of other parts of the suspension.
How to tell which wheel bearing is humming? You need to carefully listen to the noise that has appeared and draw the right conclusions regarding the breakdown. A sound heard when the steering wheel is turned to the left means that it is time to replace the left front bearing. The buzzing caused by the movement of the steering wheel to the right indicates the need for repair of the right front element. nine0004
Hub bearing hum signals the need for immediate detection of a defective element. To do this, you need to perform diagnostic measures.
Turn off the engine and put the gearbox in neutral.
Hang the axle of the car and turn the wheels.
The squeak that appears should alert the owner of the car.
After driving, check both wheels by applying your hand. The damaged part is characterized by a significant increase in temperature. nine0004
If the driver has already heard the wheel bearing buzzing, determined its exact location, it is worth using the services of a mechanic at the service station. In order not to have to change the entire suspension, experienced motorists recommend contacting specialists who will conduct a comprehensive vehicle diagnostics and replace a pair of bearings.
This is a frequently asked question from drivers to professional mechanics. There is no definite answer, since the general condition of the car plays a big role: how often it is used, when was the last diagnostic, what consumables are used and other nuances. Some car owners drive on a deformed bearing for 3 months, while others - no more than 1 month. Experts do not recommend drivers to drive after they heard that the hub bearing buzzed. nine0004
To understand the full responsibility for the technical condition of the car, the driver must realize what will happen if the spare part is not replaced in time: impossible;
front wheel stuck;
during a turn, a wheel may fall off, resulting in an inevitable accident. nine0004
Right side front hub bearing hum comes first. This is due to the peculiarity of driving - the conquest of roadsides and curbs.
If the wheel bearing makes noise, what is the risk of ignoring the problem? If you follow all the rules, if a howl, hum and whistle is detected from the side of the wheels, the driver must stop the vehicle and call a tow truck that will deliver the car to a service station for diagnostics. Consciously driving a faulty car leads to significant damage to adjacent mechanical parts. A full inspection of the transport is possible after the identification of the breakdown. Signs of a failed wheel bearing:
When turning the steering wheel, a whistle is heard in the area of the front axle (it is difficult to determine the exact location due to the nature of the sound wave).
Whistling and creaking sounds are heard at an average speed of traffic.
When the car accelerates, the brake pedal starts to vibrate.
The described symptoms are not yet a sentence for the bearing. The suspension is formed by many articulated joints, where such elements are used, therefore, a long diagnostics at the service station and the replacement of damaged mechanical parts are necessary. If the wheel bearing is buzzing, the consequences can be dire. The driver is advised to contact the mechanics of the service station and put his car in order. nine0004
If you find hub bearing noise, contact Oiler Technical Service in Kyiv. Our mechanics quickly and efficiently replace damaged parts. Our warehouse has all the necessary spare parts for automotive repairs of any complexity. STO Oiler sells spare parts for cars of different brands. Delivery to any region of Ukraine by the transport company New mail is possible.
| Kawasaki (bearing OEM code): 92045-0123 Teryx 750 front (08 & 09). 93305-00602-00, 93305-00602, 93305-00602-00 (YFM550 Grizzly 4×4, front, (09) YFM660F Grizzly, front, (03-08) YFM700F Grizzly, front, (07-12)). Suzuki (bearing OEM code): 51259-31G00 King Quad. Stels (bearing OEM code): A010080-04, 56713-058-0000, 57711-058-0000 400H nine0002 CF-Moto (bearing OEM code):30499-03080 500A (500 2A front and rear, X6 front and rear). Russian Mechanics Gamax AX 600 - front / rear BALTMOTORS 700 JUMBO/700 JUMBO MAX - front / rear KAWASAKI 2008 - 2013 Kawasaki Teryx 750 - front KYMKO MAXXER 450i - Front / Rear YAMAHA 2007 - 2012 Yamaha Big Bear 400 4X4 IRS - front / rear | STELS Stels ATV 400H HiSun - front / rear CF-Moto ATV X5 - front / rear SYM Sym QuadRaider 400 SUZUKI 2008 - 2009 Suzuki LT-A 450 King Quad AXI Analogs Yamaha: 93305-00602-00 Kawasaki: 92045-0123 92045-0123 92045-0800 93305-00602 1402027 933050060200 920450123 577110580000 A01008004 | Arctic Cat (bearing OEM code): 1402-027 , WE301320, 1402809, 413538, 933050060200, 1402809 250 4×4. 400 4x4 - FIS Automatic, front, (05-08) | 9 - 2006 ATV 650 2006 - 2012 Arctic Cat ATV 650 h2 2006 - 2013 Arctic CAT ATV 700 2008 - 2013 Arctic CAT ATV 700 H2 2009 - 2013 Arctic Cat Prowler 1000 2009 - 2013 Arctic Cat Prowler 550 2006 Arctic 650 2009 Arctic Cat PROW - 2013 Arctic Cat PROWLER 700 HDX 2008 - 2010 Arctic Cat THUNDER CAT 2012 - 2013 Arctic Cat WILIDCAT 2011 - 2013 Arctic Cat XC 450 Arctic Cat 2015 XC 450 EFT F/R TRV 20179 Arctic Cat 2015 XC 450 EFT F/R TRV 20175 Arctic Cat 2015 TRV 700 XT EFT Front/Rear Arctic Cat 2015 TRV 700 T3S Front/Rear Arctic Cat 2015 TRV 700 LTD Front/Rear Arctic Cat 2015 TRV 550 XT Front/Rear Arctic Cat 2015 TRV 550 XT EFT Front/Rear Arctic Cat 2015 TRV 550 LTD - Front /Rear Arctic Cat 2015 TRV 500 - Front/Rear Analogs JWB-3208 SF 30499-03080 |