I know why you’re here.
You’re tired of replacing fuel filters, cleaning your carb, or you’re putting a neglected bike back on the road. You’re searching for the solution. I know this, of course, because I learned how to do this moons ago because I was in a pickle just like you. I had a a fuel tank that was deteriorating from the inside out, and it was a problem for my tank, my fuel filter, my carb, and my engine. Your service manual probably won’t tell you much about how to deal with a rusted fuel tank (“Remove and replace,” I’m sure, if it even mentions such a thing), but given how expensive and/or unobtainable tanks can be (and how costly that colorful stuff on the outside of ‘em usually is!), you’re doing the right thing by rejuvenating yours.
So as a motorcyclist who has rescued a tank or two throughout my career, allow me to give you some things to think about, a process, and a few photos that you may find useful. You'll probably want to read through the whole thing before you get started.
How to clean a fuel tank
- Plan your work
- Assess commercial options
- Prepare the tank
- Add chemical and mechanical descaler
- Agitate (Shake it!)
- Flush and neutralize
- Seal (optional)
Every tank differs in terms of its level of degradation. I’ve seen some tanks with light surface rust and a concerned owner, and I’ve also seen (and owned!) some fuel vessels that had more barnacles and scale than the hull of the Queen Mary. The course of action one would take may differ wildly in those scenarios — or they may be exactly the same.
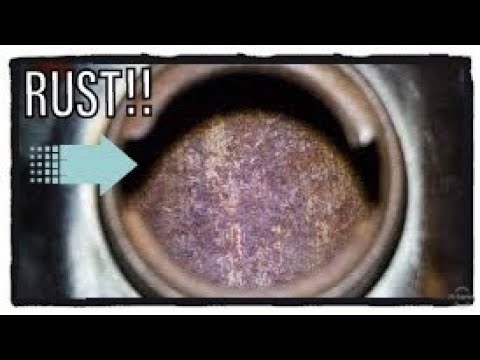
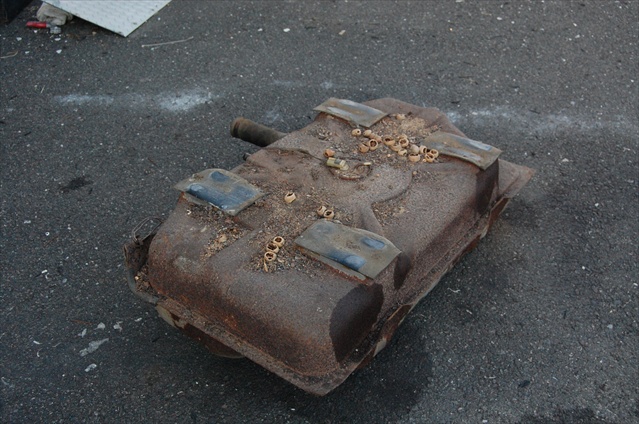
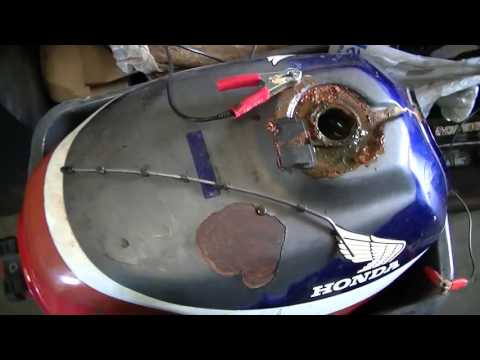
The object of my labor is this tank from a 1964 Yamaha YG1 belonging to Johnny Greaser, our New Guy's brother. Chrome! Neat! Photo by Lemmy.
First, removal and replacement is sumpin’ to think about. I mention this because this is a very viable option nowadays, especially with so many online avenues for replacement. Simply spending a hundred or two hundred bucks on a brand-new aftermarket tank that could just essentially bolt up and function correctly once again may be the most prudent course of action. Also consider used tanks that may be in better shape than your own. And if your bike’s not too old, heck, a dealer might have a new one sitting on a shelf somewhere.
Old fatbobs tend to stay in service for a while simply because they were built to last. They ain't light, but to get a set to rust through you almost have to drop 'em in the ocean for a few decades. Generally, the newer a bike is, the thinner the sheet metal tends to be in the interest of saving weight — and forming more complicated tank shapes. Photo by Lemmy.
Consider, too, the tank’s construction.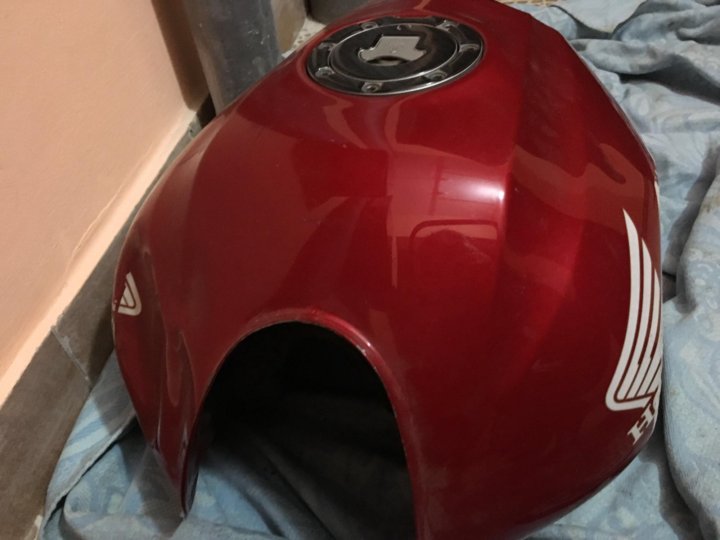 Old Harley-Davidson fatbob tanks, for instance, have excellent survival rates simply due to the insanely thick steel used in their construction. Generally, though, newer bikes have tanks that are made of lighter gauge metal. If your tank is made of thin steel and the rust and scaling within is heavy, rectifying the problem will be more difficult and time-consuming. If your tank has rusted through in any areas, that too may be an indicator that the tank is beyond saving, depending on your time and finances budgeted to the task.
Obviously, rarity comes into play; a tank of a given condition that may be considered refuse for a high-production bike may be the holy grail for one of lower production. Factoring into this is also the outside of the tank: Original paint certainly helps an original bike retain value. A motorcycle tank still in its original livery may very well be worth putting some effort into simply because of the value that component brings to the whole bike. Similarly, even a repaint that cannot be easily reproduced to match other items on the motorcycle may be costly to duplicate.
Once you’ve determined that a particular tank project is worth your time, money, and effort, it’s time to quantify the damage. A flashlight, mirror, cell phone, and bore scope may all come in handy at this time. Mild rusting or scale issues are usually not too complicated to deal with. Heavy pitting, pinholes, and/or missing metal will generally require both metal fabrication and body work to remediate. We’ll assume in this article that the structural integrity of your tank is uncompromised, but if it is, further surgery may be required — up to and including cutting open the tank for further inspection and repair.
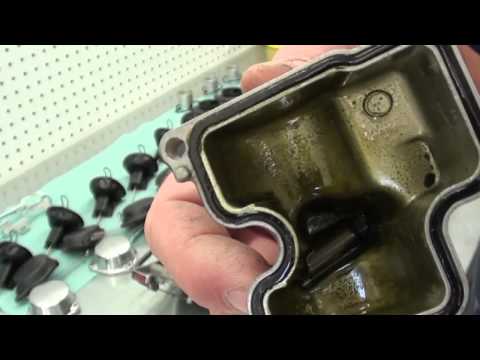
Here's what we start with. This is definitely not the worst I have seen, but make no mistake, this tank needed help a long time ago. Photo by Lemmy.
Johnny Greaser’s YG1 tank you see here had about 50 years of neglect and scale for me to contend with. It was bad. Real bad. Not rotted through, but definitely one of the more problematic tanks I’ve wrestled with.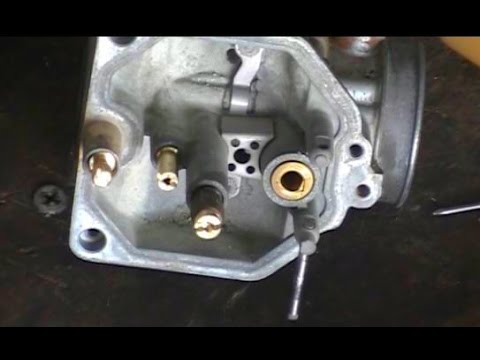
Most fuel tanks require a two-pronged fork of treatment. The first prong deals with removing the heaviest rust deposits, and the second involves rejuvenating the finish, possibly in preparation for the installation of a tank sealer. It has been my experience that heavy deposit removal is best handled mechanically, and finish restoration is usually tackled chemically — though that’s not always the case. (If you have your own methods, please feel free to add them!)
I shoved a borescope into the tank to see the extent of the rust. This was about average, though there were a few spots with some thick scaling and deposits. Photo by Lemmy.
For the mechanical rust removal, I’ll normally choose an abrasive element, something that can be put inside the tank to help strip the scale manually. Nuts and bolts are a popular agitator, and I know some people who use plain ol’ gravel. I’ve used BBs with success before, and often use those in tanks that have crevices where something larger may not reach, or become lodged. Because they’re round, they’re not very likely to get caught in a tank that may have very pronounced “lobes” with sharply tapering walls. I’ll tell you my secret weapon a little later on.
And when it comes to the chemical aspect of things, generally an acid will help clear the rust away through etching action. I like to start with a mild acid (white vinegar), and work my way up to something stronger if necessary.
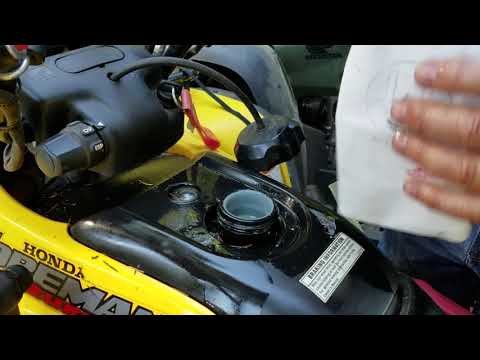
Remove the tank and empty it of fuel first, of course. At a minimum, you’ll want to seal the holes in the tank. Most tanks will have a filler cap and a petcock outlet, but others may have crossover tubes, like dual-tank Harleys and dirt bikes with two big lobes that overhang the engine.
Plugs, stoppers, vacuum caps, threaded fittings — I have all this stuff, but that's because I've done this a time or two. Order the right equipment to do the job correctly, and your results will be indicative of your diligence. Photo by Lemmy.
You have a few options here. I’ve had good luck with silicone plugs and rubber or vinyl vacuum caps for small holes and bungs. If you are working on a modern motorcycle, you may find you need to pull your fuel pump plate out. Those can be tricky to seal up because they’re so dang big! A gasket teamed up with a block-off plate you purchase or fabricate is usually the order of the day here. If you’re using vinegar, you can seal the filler with the cap, with the understanding that you may need to buy a fresh cap or replacement seal for it after the cleaning.
Holy moly? The best way to deal with a hole like this is probably to make a block-off plate, acquire a gasket, and install it just like you would the fuel pump. Photo by Lemmy.
Leave the fuel filler open for now.
You need to do this in a well ventilated area, and as the acid can splash about, you don’t want to be near anything it could damage. Even if you’re using comparatively gentle acid like vinegar, you don’t want the acidic fumes building up indoors. They may not be that harmful, the smell can be objectionable, and having acid vapor near items that you don’t need stripped is probably a bad idea.
Personally, I like to set my tanks up with a catch basin underneath them containing all possible leak points. That means a plug or cap failing and leaking is just a day lost of soak time. Vinegar can be recaptured, and if the tank is elevated above the basin (rather than in it), the paint is never put in harm’s way.
If you’re using something stronger, you’ll be working very quickly, so don’t stress this part too much.
Before you start loading your agitating substance into your fuel tank, you may want to place a few test pieces in a glass or ceramic bowl and make sure your acid does not have an adverse reaction. The odds are low if you're using vinegar, but you don’t want to ruin anything, make a mess of your tank innards, or poison yourself.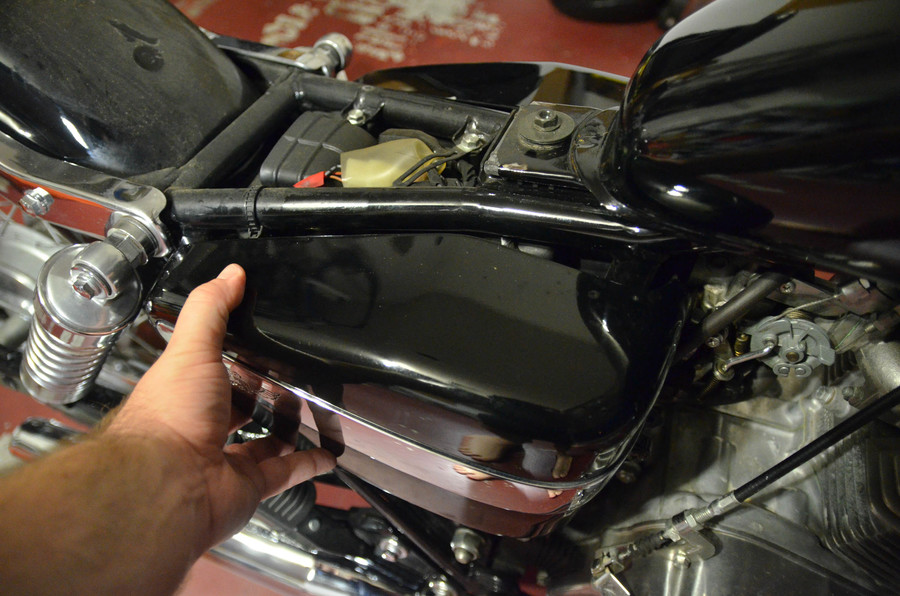 And if you're using something stronger, it's a possibility the item(s) may react violently and turn to dust.
I’d recommend not using a stronger acid than vinegar for a few reasons. It’s possible to eat directly through the metal, and it’s also really easy to damage paint with such a strong acid. Disposal requires extreme dilution, and the risk of personal injury is quite high. It’s an effort I would consider last-ditch. The highly dilute acetic acid dissolved in household vinegar is not particularly fast-acting, but that is the point. It removes rust and metal alike rather gently.
Petcocks are often made of pot metal. I'd remove them even if using vinegar, but this is a must if you are using something stronger. If you don't, they might disintegrate by the time your tank's innards are sparkling. Photo by Lemmy.
If you do use something stronger, you may want to think about protecting the paint, and you definitely want to protect yourself. Have a garden hose nearby, and a base to neutralize any acid should you see it on the paint or other delicate item… or you! With all those warnings in place, on some tanks, something like vinegar ain’t gonna cut it.
Note that with something fairly weak like vinegar, you may need to let your tank sit for some time; a few days is not uncommon. Top it up and let it chill out. If you’re using something like phosphoric or muriatic acid, it’s a different story: you’ll want to start churning the brew through the tank as soon as you get the agitator in. Those work much faster than vinegar and will begin etching the tank almost immediately.
After you’re convinced your chosen mechanical abrasive is somewhat inert in your chosen acid, add your sheet metal screws, hardware, or BBs. Use some common sense here. Enormous bolts are likely to dent a tank. Smaller is better, to a point.
Here's a handful of hardware plucked from the bin to de-scale this tank. (My poor kid got stuck sorting the nuts from the bolts when I was done!) Photo by Lemmy.
You’re not trying to pack the tank full. Instead, you want a handful or two to knock off the rust and fling your acid about the tank into nooks, crannies, and crevices. If you’re particularly paranoid, you can count the items you’re using so you can take a count when you empty them back out. Oh, and remember that secret I told you about before? It’s a length of chain. Use that, and you don’t have to worry about keeping count of your rust looseners!
Now cover it up.
Like a Polaroid picture, for those readers old enough to remember both the song I am referencing and the actual act of shaking a Polaroid snap. I use my arms. I got two of ‘em, so I pick the tank up and shake until I run out of breath, open the filler up, and see how things look. I repeat this process whenever the urge strikes me (a few times a day, perhaps?) until I see bright bare metal under that filler cap.
After I give it a good shakin’, then set the tank on its receptacle, and go into the shop and sip beer. Note: do not leave your tank outside if it is freezing outside, or you risk rupturing it.
You can try other methods of agitation. I knew of a fellow who’d wrap the whole affair in heavy moving blankets, duct tape them in place, and stick ‘em in an old clothes dryer with no heat for a while. I also heard of a guy who’d jack up the rear of his riding mower and use bungee straps to attach the tank to the rear wheel, then pop it into gear to slowly roll the tank ‘round and ‘round. I’m not telling you do to that (I never have), but I can understand why someone might try it. It probably works fine if you use your noodle.
Repeat until you’re satisfied with the cleanliness level of the tank. Depending on the level of scale and rust in your tank, this process may take as long as a few weeks. Greaser’s tank you’ll see in the photos sat for eight days, and probably could have gone longer with no ill effect.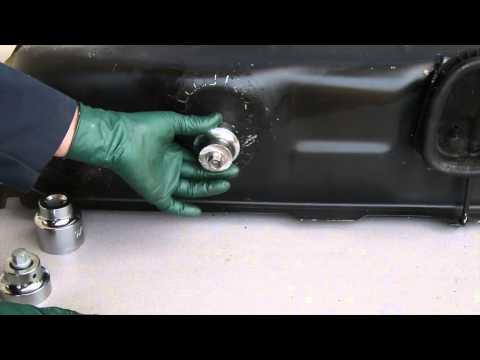
Since it’s highly likely you’ll be doing this on a different day, before you go to flush, put a five-gallon pot of water on a stove or hotplate in the shop and get it hot. It doesn’t need to be boiling, but it does need to be uncomfortably hot to the touch. We’ll get back to that in a bit.
Once you’re done and everything looks bright and shiny clean, remove your plugs/caps/filler cap and dump your acid into that waiting bucket you had (that won’t be damaged by the acid!). Empty the mechanical scrubber you used (the nuts and bolts) and get that garden hose flowing. You want to get all the acid out, of course. Pick it up, shake it, get that water all around, even with the hose hanging out of it. Prepare to get wet.
Here you can see our tank prepped correctly, with all ports on the bottom side of the tank securely blocked off. Photo by Lemmy.
Finally, plug the tank once more and drop some dish soap in there to neutralize the acid. Then add the hot water you pulled off the hotplate. The idea here is to neutralize any vinegar left with the dish soap. You’re using hot water because it will quickly transfer heat into the metal of the tank. Once you drain it all out, the resultant heat will help to drive moisture off quickly.
Strip off all the items you used to seal the tank and empty it for the final time.
Get air flowing through the tank. The best thing I have found for this is a heat gun or hair dryer. Be careful! Heat guns can get hot enough to locally damage paint. Use low heat, keep the gun moving, and use your fingers to feel parts of the tank to make sure nothing is getting too hot. If you’re doing this on your winter project, make a little stand and go set it on your woodstove.
You may see rust quickly reappear if you don’t work quickly and/or the moisture content in the air is high enough. This is known as “flash rust,” and we are trying to avoid it, which is why it’s important to work reasonably quickly at this stage. A little is OK; don’t make yourself crazy. Flash rust is usually fine enough and collects in such a thin layer that a fuel filter will catch it — and what it misses will probably run through your carb with no problems.
Not too bad, if I do say so myself. Photo by Lemmy.
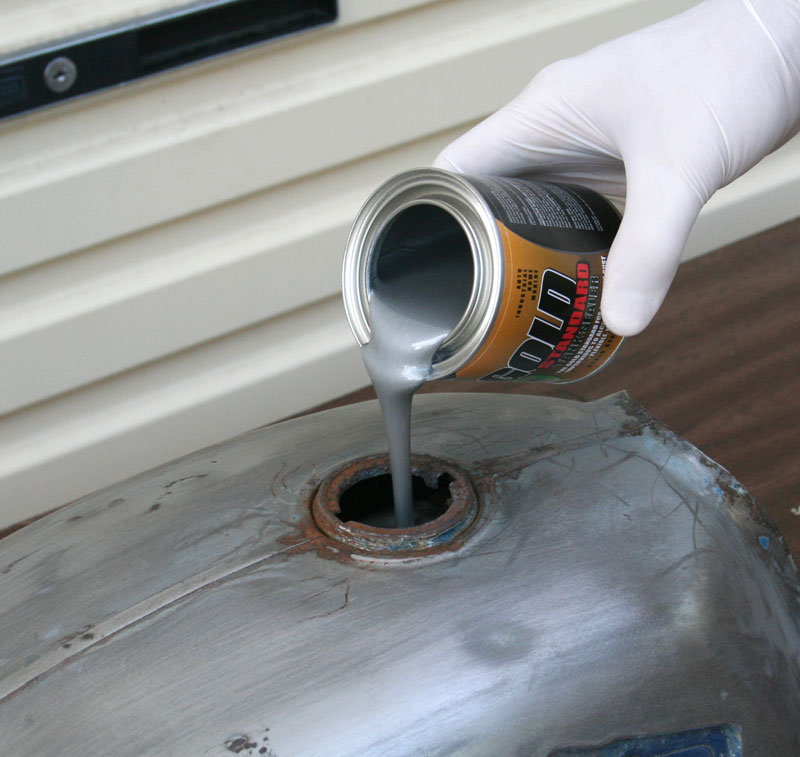
Some people like commercial tank sealers. Kreem, Redkote, and Caswell come to mind as products that have enjoyed a good reputation over the years. Me? I hate ‘em, and will only use them in super-specific scenarios, like when a replacement item cannot be sourced or made reasonably. I’ve had too many go bad and soft and then wind up clogging my carb(s). In my eyes, a tank that needs sealer needs replacement. There are plenty of people who will disagree with me, and that’s OK: there’s more than one way to skin a cat. If you want to use one, now is the time.
If not, I would recommend sealing up the metal a different way: with a fuel-soluble sealer. If you are going to reinstall the tank immediately, toss a little kerosene in there, seal it back up, and swish it around, coating the tank’s innards completely. That will prevent the formation of that flash rust we talked about. If you are building a bike and the tank is likely to sit on the shelf for a bit, I’d recommend something a touch thicker, like some motor oil, or nice, tacky two-stroke oil.
I have an admission. Greaser’s YG1 tank here is actually the first tank I’ve ever cleaned using vinegar. (I have cleaned many other steel items this way, but this is the first fuel tank I’ve tackled in this fashion.)
Over the years, I’ve actually used much stronger acids to clean tanks. Phosphoric is said to work well, and my go-to has always been muriatic acid cut 50/50 with water. (You can get this at your local hardware store.) This stuff is nasty, but it works, very, very quickly. It etches in almost no time flat. Fifteen minutes usually does wonders on even deeply damaged tanks.
As such, there are a number of caveats you need to be aware of should you choose to go down this path. First, that stuff will chew through solder quickly, so if you have a valuable old tank that’s been soldered in either manufacture or repair, avoid muriatic acid. You’ll also want to find a different method of sealing the filler; muriatic acid can and will damage caps, which can have elements that will not stand up to the corrosion. (Or get a junk cap and fresh seal.) Remember that fuel caps are vented, so even if it seems to seal up well, it still may not be liquid-proof, which brings me to my next point.
The acid doesn’t care about what it corrodes: paint, human flesh, clothing, surroundings… it doesn’t matter. As such, you need to be extra careful about protecting yourself, protecting the paint, protecting people and property around your agitation zone, and about neutralizing and disposing of the acid responsibly.
It works well, but consider that the pro-level option, as well as the one of last resort. I often used it to get customer bikes turned over quickly, but starting with weaker acid and repeating only if that’s not working makes a lot of sense: think of how much material you’re stripping away. The acid will eat the rust, but it’s also going to eat through some of the raw steel it reveals, too, and that steel has already been made thinner by the portions that have oxidized to rust and scale. If preservation is the goal, leave as much meat on the carcass as you can in case another rider has to repeat the process decades down the line.
Ready to run. And to think some folks would have replaced this tank. Pity. Photo by Lemmy.
We’ve shown you the grocery-store way of doing this. There are other products designed to do this that are awesome. EvapoRust comes to mind, as does Metal Rescue. Generally, they convert iron oxide (rust) to ferrite, which is a bit more stable and moisture-resistant. They work really well, albeit at higher cost. Especially if you’re trying to save something valuable, the cost of specialty products may be a good expenditure.
Don’t forget to replace your fuel cap gasket. That’s probably shot by now, or dang close. Heck, if the tank was in poor shape, it was probably toast before you started.
Here's a shot from the borescope after it was all said and done. Not bad at all. Photo by Lemmy.
If you are using it immediately, here’s a word of advice. I have some very, very old fuel tanks, and they don’t rust because I keep them full of fuel, and I use the bikes! Full tanks displace air, which is needed for rust to form. Frequent use keeps the moisture from the air that modern ethanol-laced fuel will pull into the tank from getting a hold. It gets the fuel inside sloshing around, helping to knock naturally forming condensation off the very top of the tank, and the use also burns off that stuff, letting you refill it with fresh fuel. If you should need to store your bike with a repaired tank for an extended period (years), drain the the tank and repeat the oiling process. I’ve known some folks to fill a tank with oil specifically for this purpose. If you don’t mind draining it down the road, it can be a great way to keep the rust gone.
Another gratuitious "this came out acceptably" shot. No more, I promise. Photo by Lemmy.
There are other ways to do this, of course, for nearly two decades I’ve been rescuing tanks that seemed beyond repair. This way will get you where you want to go — and so will many others.
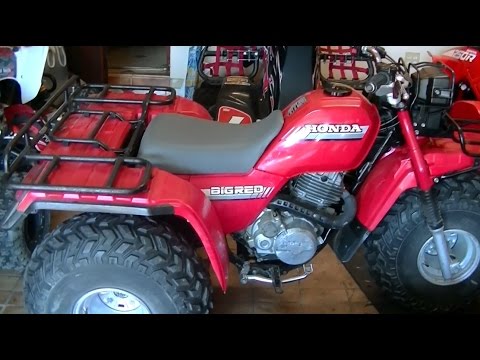
If you have an old ATV that has been sitting for years, it can be difficult to decide what you need to do to get it running again. Let this article act as a guide for you to follow to get your machine out on the trail again.
After a quad has been sitting for a while the oil in the engine, and the gas in the tank will start to separate. Your tires will go flat, and the battery will die. If it’s been sitting out in the weather, you could have worse problems like rust and corrosion.
Here’s a quick list of the things you should be looking to check on. And then I will go into more detail about each, and how to get your ATV running again.
Assuming your ATV doesn’t look like this one below, these steps should get you up and running again. If not, I have some trouble shooting steps to follow later on. But first, lets go over these steps in more detail.
If the ATV has been sitting for more than 6 months, you will need to get fresh gas in it. Over time fuel will degrade, become less combustible, and start to gum up. Also, water can condense and collect inside a fuel tank that has been sitting for too long, especially fuel with ethanol in it.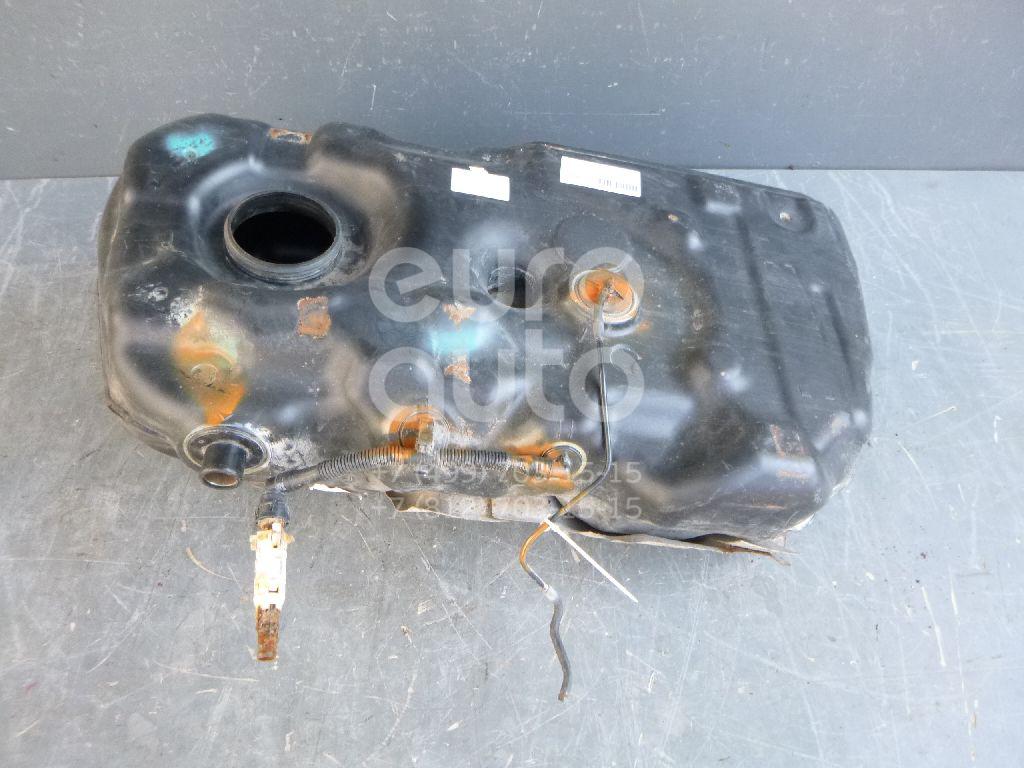
It’s best to drain the gas tank completely and clean out any gelled or gummed up gas. This gel like gas residue could also be affecting your fuel lines and other parts in your ATVs fuel system.
Check the fuel filter, and replace it or clean it out if you have to. Also make sure the petcock valve or fuel on/off valves are all working properly. Turn them to make sure they move nicely and aren’t leaking.
If you have a metal fuel tank, the water condensation over time may have rusted out the inside of the fuel tank. I have had good luck emptying the tank and putting a little diesel gas and some small metal BB’s in the tank and shaking it around. The metal BB’s will knock off most of the rust from the inside the tank with the help of the diesel fuel.
Clean The CarburetorIf your ATV has a carburetor, you will want to clean that out completely. You may want to just get a carburetor rebuild kit since you will have the carb already taken apart. Just spraying some carb cleaner in there may not be enough, you will probably need a rebuild kit.
They are pretty cheap and it’s recommended you rebuild the carburetor on a quad that has been sitting anyway. Here’s the link to a Carburetor Repair And Rebuild Kit on Amazon to give you an idea of you can expect to pay.
Check the fuel line coming from the tank and going to the carb. If you can get fuel to flow through the fuel line, then great. If you don’t have a nice continuous flow of fuel, will will need to clean out or replace the fuel lines.
If you are still having problems with the fuel system on the machine, check out this ATV Not Getting Fuel, Common Reasons And How To Fix article where I go into a lot more detail about the fuel system. But if you can at least clean the tank and the carburetor, you’ll probably be fine.
Change The Air FilterIf the air filter is in pretty good shape you might be able to re-use it. But for the most part, I would say it’s best to just replace the air filter altogether.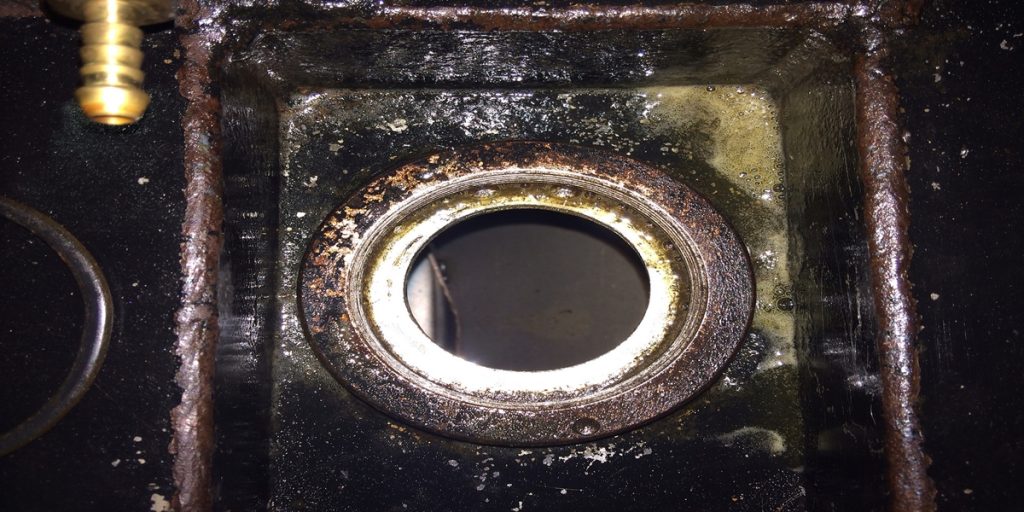 Unless you have one of the re-usable type air filters like a K&N.
Getting a new air filter isn’t going to brake the bank, I recommend just replacing it. But if you do want to try salvaging the existing air filter, or you want to clean a re-usable air filter, check out my How To Clean The Air Filter On An ATV article, where I go through step by step how to get your existing air filter up to snuff on your machine.
Either way you need to make sure the engine is not going to be pulling in dirt, dust, or debris through the air intake. Even small amounts of sand can scratch the cylinder walls and cause you major problems with the engine. Since most ATVs that have been sitting tend to have dust, sand, and dirt collected, you have to sort out the air filter.
Change The OilThe oil in the engine will usually take longer to go bad than the fuel in the gas tank will, but the additives in the oil will eventually degrade over time. Since you’re supposed to regularly change the oil in the engine anyway, it’s a good idea to do an oil change before trying to start an ATV that has been sitting.
I suggest trying a synthetic blend or a full synthetic oil like this Castrol Power1 10W-40 Full Synthetic 4-Stroke Motor Oil. The reason I would choose synthetic oil is because it was made for older engines. The synthetic oil has additives that will help swell your gaskets, which will help prevent leaks and loss of compression in the engine.
Also, change the oil filter. A lot of people over look this simple step. Every time I do an oil change I change the oil filter out too. The filter could be holding gunk and other things that will contaminate your fresh oil change.
This is a good time to make sure the pistons aren’t rusted into place and the engine isn’t seized up. I like to add a little penetrating oil or deep sea foam into the cylinder head and let it sit in there a while. Simply remove the spark plug to spray a little sea foam into the cylinder head through the spark plug hole.
After letting it sit a couple hours (overnight if it’s real bad looking), I will try to turn it over with the spark plugs out to make sure everything moves the way it should. Since this is easiest done with the spark plugs out, lets talk about that next.
The spark plugs on the ATV may be fine and not need to be changed. I know I change spark plugs all the time, and on a quad that sat for a while I would change the plugs out. But this step is really about making sure you are getting spark to the engine.
To do a quick check, simply remove the spark plug from the engine, insert it back into the spark plug wire, hold the electrode on the plug close to the engine or frame, and try to start the quad. If you’re seeing spark jump from the electrodes on the spark plug, you’re probably good to go.
If you aren’t getting spark, try a new plug. If still no spark, you should check out my ATV Not Getting Spark, How To Fix article, where I go more in depth about the spark plugs and the electrical system troubleshooting on the ATV. Also, make sure you get the right spark plugs for your year, make, and model and that they are gapped correctly.
This step is only needed for 4X4 ATVs, and even then you may not need to do this. I usually do it just because I’m already changing all the other fluids anyway, so why not. Besides it’s just as easy as doing an oil change.
You will have a front and a rear differential, you’ll want to change the oil in both. The important thing for differential oil is to use the one that is recommended for your machine. You’ll have to look through your service manual or call the dealer to find out.
There are a few different types and different manufacturers recommend using different oils. Using the wrong one might cause damage to your differential. Once you have the right diff oil, all you need is some socket wrenches and a drain pan.
There will be a drain plug and an inspection plug for both front and rear differentials. First remove the drain plug and let all the diff oil drain. If you notice metal shavings in the oil, you could have a gearing problem. If you notice water or mud in the oil, you may have problem with the seals.
Once the oil has drained put the drain plug back in and remove the inspection plug. This is where you fill the differential with new diff oil. If the oil bottle doesn’t have a fill spout, you may need a funnel for this part.
Fill the differential with oil until it starts coming out of the inspection hole. Let it drain out until it is barely trickling, then replace the inspection plug. That’s it, follow those steps for both front and rear and you should be good to go.
Charge Or Replace BatteryDepending on how long the ATV has been sitting, you may be able to use the existing battery, it will just need to be charged. But if it sat for anything over a year, you’ll probably need to replace the battery all together.
If you need some tips on what charger to use or how to charge an ATV battery, check out my How To Charge An ATV Battery article. But most likely, this won’t help you all that much and you’ll end up needing to get a new battery.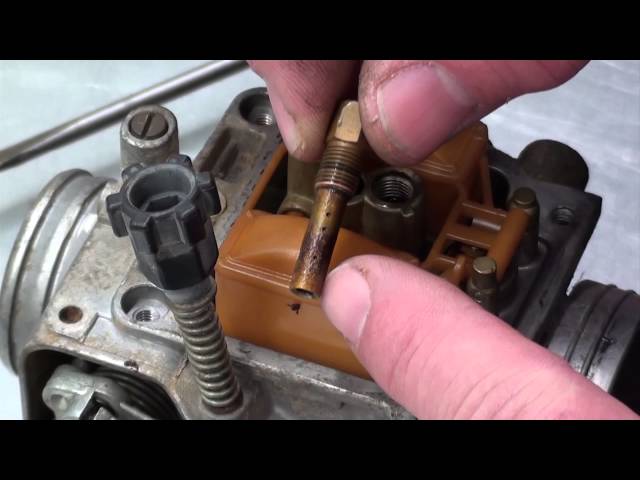
You can usually get an ATV battery at your local auto parts store or at an ATV dealer. But I’ve been able to get batteries online for cheaper than they charge in the store. If you can wait for shipping, just get an ATV Battery On Amazon.
Alright, you’ve done the tune up, now it’s time to try starting up the ATV. Put some fresh fuel in the tank, make sure the kill switch is on run, the key is on, and give it a go.
ATVs that have been sitting may be a little harder to start, especially older models. Give it some time and be patient, but not so much that you kill the battery trying to start it.
If you do get it running, I suggest putting some fuel system cleaner in with the gas and letting it run with that in it for a little bit. That way it can really clean out the rest of the engine. I use this Gumout Complete Fuel System Cleaner in my quads about once a year, and it works great.
If you still can’t get the ATV running, you may have bigger problems you need to dive into. Most likely you have a problem with spark, fuel, or compression. Those are the most common reasons an ATV fails to start up.
To get more in depth step by step instruction to troubleshoot why your ATV still won’t start up, check out my ATV Won’t Start, Common Problems And How To Fix article. That article will solve 90 percent of the reasons an ATV won’t start.
Sharing is caring!
Cleaning the gas tank is usually not among the standard service procedures. This question remains on the conscience of motorists, and many of them turn a blind eye to it in vain, especially considering the specifics of automotive life in our country. Let's try to figure out what contaminants need to be cleaned from the fuel tank, how best to do it, and whether it is possible to keep the tank clean without resorting to flushing.
Content
1 Sources of pollution and their control
1. 1 Water
1.1.1 Dewatering with alcohol
1.1.2 Draining and drying
1.1.3 Dehumidifiers
1.2 Mud, suspended matter, precipitation
1.2.1 Step-by-step instructions for cleaning the gas tank from dirt and mists
1.3 Rust
1.3.1 Cleaning with water, shot and chemicals
1.3.2 Video: Creative Mechanical Cleaning
1.3.3 Tank cleaning by electrolysis
1.3.4 Video: Cleaning a gas tank by electrolysis using the example of a motorcycle tank
2 Fuel Tank Contamination Prevention
2.1 Anti-rust epoxy
2.2 Anti-corrosion additives
2.3 Reasonable vehicle use
The gas tank is the starting point for the movement of fuel through the vehicle's systems.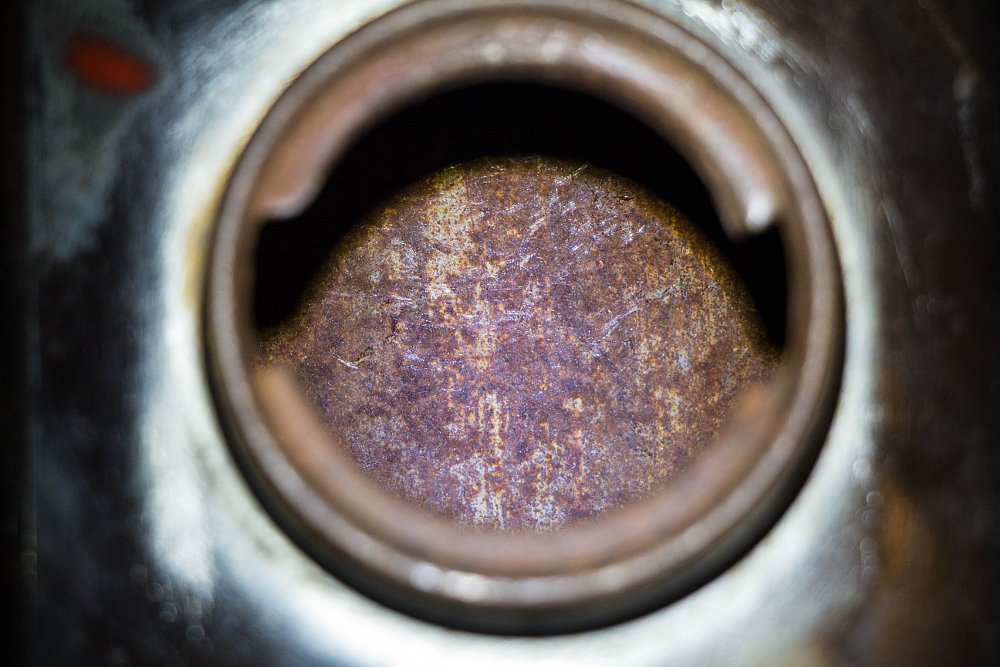 However, in its bowels, in addition to gasoline, you can sometimes find something that should not be there. A contaminated tank can lead to the entry of unclean fuel into the engine, and sometimes no fuel at all, and this is fraught with serious damage. Signs of contamination of the gas tank are:
One of the main threats to the fuel system of a car in general and the gas tank in particular is water. It gets into the gas tank with diluted gasoline at dubious gas stations, but even if you fill your car with exceptionally high-quality fuel, you are not immune from water in the tank.
It's no secret that the air contains moisture. If the tank is not completely filled with gasoline, then the rest of it is filled with air. When the temperature changes, condensation occurs, and moisture from the air collects into water droplets.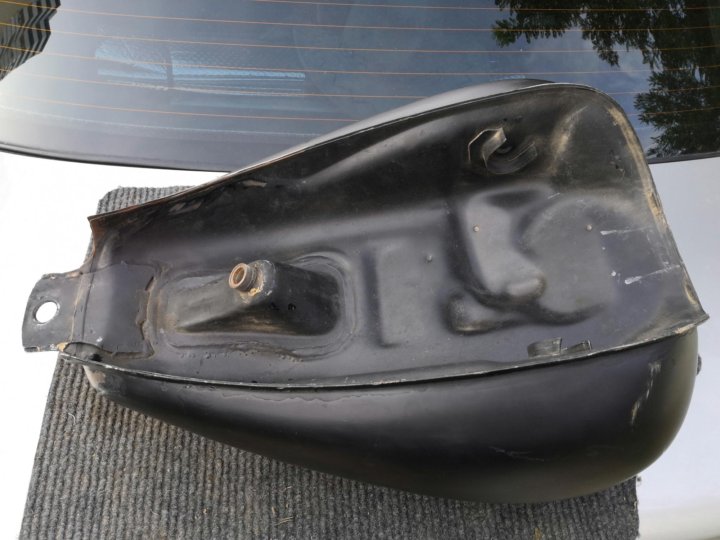 Do not forget that water is heavier than gasoline, so when it enters the fuel, it settles to the bottom of the tank, from where it enters the fuel pump.
Water can cause serious damage to the vehicle, especially in winter when it freezes and interferes with the supply of gasoline to the engine. Both the fuel line and the injection system may be under attack. In addition, the accumulation of water in the gas tank leads to corrosion of the internal surface of the gas tank.
Due to the greater density, water settles to the bottom of the vessel, and gasoline rises to the top
To remove water from gasoline, you need to add half a liter of pure alcohol to a whole tank of gasoline. Alcohol can be ethyl, methyl, isopropyl. It is important that it is pure, not diluted. When alcohol is dissolved in water, a mixture that burns in the engine is formed without problems. If the engine on your car is diesel, instead of alcohol, you need to add 500 ml of engine oil to 50 liters of diesel fuel. It should be understood that this is a one-time measure, and it is best to add alcohol or oil to the gas tank once before the onset of cold weather.
If there is a drain hole at the bottom of the gas tank, the water can be drained with the fuel. After that, the gas tank can be washed from dirt and dried with a building hair dryer. Thorough drying is extremely important.
Water can also be drained through the fuel rail. To do this:
On most vehicles, the fuel rail is attached to the intake manifold
Automotive supply stores always have a whole range of dehumidifiers for gas tank dehumidification. Most of them work on the same principle as alcohol. However, some contain aggressive reagents that can accelerate the corrosion of the tank walls. It is worth choosing a tool very carefully.
In addition to water, a cloudy sediment, which is the remnants of gasoline impurities, as well as dirt can be found in the gas tank. Fuel tank contamination leads to rapid clogging of the fuel filters and wear of the fuel line as a whole. To clean the tank from dirt and suspensions, it must be washed with soapy water or a cleaning agent.
Dust, dirt and impurities from low-quality fuel are collected in a cloudy sediment at the bottom of the tank
Clean the gas tank in the following sequence:
The presence of water and dirt in the fuel tank causes rust to form on the inside walls of the tank. Corrosion is also promoted by an abundance of additives that increase the octane number of fuel, as well as the use of aggressive dehumidifiers and other chemicals. Cleaning the gas tank from rust is necessary not only to maintain the cleanliness and proper operation of the fuel supply system. In especially severe cases, corrosion of the walls of the gas tank can lead to the formation of leaks and holes with all the ensuing consequences.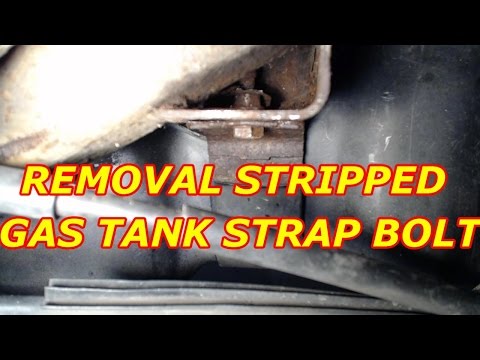 There are two proven ways to deal with rust:
Rust on the inside of the tank can damage the entire fuel system
Let's take a closer look at each of them.
Rust flakes and light deposits can be partially washed off with high pressure water. To enhance the effect, experienced motorists are advised to place shot or small nuts in the gas tank. Mechanical cleaning is usually not sufficient to completely remove rust, so chemical treatment is used in combination with it. Special rust converters are sold in stores, but acetone and acids can also be used for processing. The most commonly used is phosphoric acid.
Phosphoric acid reacts with rust and separates it from the surface of the tank
Before handling reagents, make sure that the room is well ventilated and that you have thick rubber gloves.
A respirator and goggles will be useful.
Then proceed in the following order:
Cleaning with water and reagents is quite effective. It does not cost much and does not take much time. However, in the case of advanced corrosion, this method is fraught with the appearance of holes and leaks. Therefore, if you want to clean the gas tank of a rare or just an old car from rust, it is better to do it through electrolysis.
Electrolysis is the process of breaking down a substance into its constituent parts by passing an electric current through a solution. To clean the gas tank in this way you will need:
Electrolysis produces oxygen and hydrogen in gaseous form. A mixture of these gases can be explosive. Therefore, cleaning should be carried out in a well-ventilated area or outdoors.
Some auto mechanics recommend evaporating the gas tank before cleaning. This procedure is also necessary if you are going to weld a leak in the tank. Even after the tank is completely drained, there may still be some gasoline left in it, as well as flammable gasoline fumes. This can be done using a steam generator, but not every motorist has it. It is possible to evaporate the tank with exhaust gases. To do this, connect the exhaust pipe of the running car to the tank neck with a hose. Fill the tank with gases for 15-20 minutes at idle.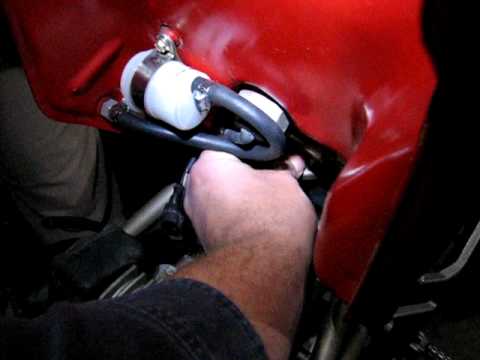
Before proceeding with the cleaning of the tank by electrolysis, stock up on a container of clean cold water and rubber gloves. Try to avoid getting the solution on exposed areas of the body. Caustic soda is a strong alkali and skin contact can cause burns. If this does happen, promptly rinse the affected skin area with cold water.
Battery charger can be used to clean the gas tank by electrolysis
Step-by-step instructions for cleaning a gas tank by electrolysis:
This process is not laborious, but it takes quite a lot of time. However, gentle rust removal, even in difficult corrosion cases, is well worth the days spent. In order not to waste your time cleaning the tank, it is worth preventing its contamination.
Do-it-yourself cleaning of the tank from water, dirt and rust is quite simple. However, not every motorist wants to do this. You can, of course, turn to professionals, but it costs money.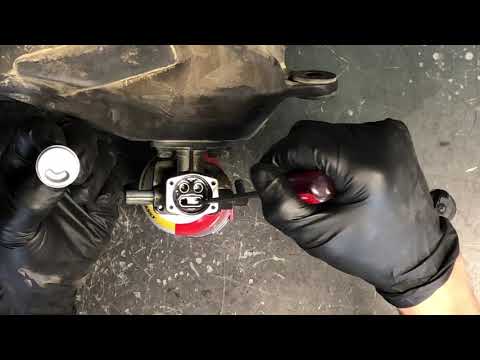 It is much easier to prevent contamination of the tank and corrosion of its walls.
Epoxy resins are used for anti-corrosion treatment of the inside of the gas tank. This coating is insoluble in water and gasoline, so it is excellent for rust protection. To evenly apply the resin to all walls of the tank, it must be poured through the neck, and then rotate the tank for a long time. When the epoxy spreads over all the walls of the tank, you can begin to dry.
Anti-corrosion additives for fuel are sold in car chemical stores. Among them there are very effective ones, but it is not uncommon for additives to not protect the gas tank from rust properly. Before choosing one of them, we recommend reading reviews on the Internet.
The best way to prevent contamination and corrosion of your gas tank is to maintain your vehicle properly. A set of simple rules, the observance of which will save you from having to clean the gas tank:
 Refuel only at approved gas stations.
 If a car's engine is its fiery heart, then the gas tank is its stomach, so it is very important for the health of the car to monitor its condition. Keep the tank clean and fill it with only quality gasoline, and the car will repay you with a smooth ride and long service life.
Rate this article:
(21 votes, average: 4.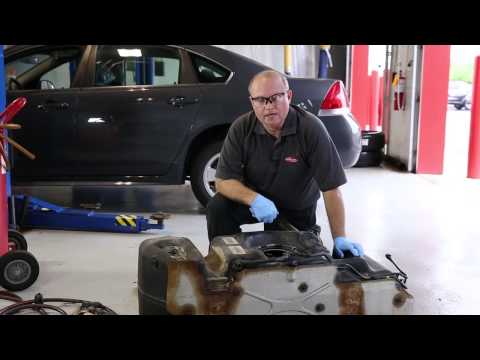 5 out of 5)
Share with friends!
Adblock
detector
In order for the vehicle to work properly, it must be filled with high-quality fuel. But even the most highly refined gasoline will not save you from rust in the gas tank if it has already appeared.
To prevent its smallest particles from leaking through the filter and damaging the engine, you need to regularly clean the fuel storage from corrosion.
How to clean the rust inside the gas tank, read the article.
Clean the gas tank regularly to keep rust from accumulating. Professionals advise doing this at least 3 times a year.
 It should not contain gasoline. It must either be developed or merged.
 Even preparatory work should be carried out in a well-ventilated area. Gasoline tends to evaporate, and its vapors are toxic to humans.
Carbonated drinks are great for removing limescale and rust. Coca-Cola, Pepsi, Sprite and just sparkling water are suitable for this procedure.
Coca-Cola is better. It contains phosphoric acid, which will clean the tank in minutes.
How to flush the gas tank:
 Warm Coca-Cola effectively removes rust.
 Finally drain the sweet drink and rinse the tank.
The use of abrasives or hard metal objects may simply cause a hole to appear in the tank. For the same reason, high concentration acids should not be used to remove metal oxide.
Nuts, washers or bolts must not be placed in the container . When shaking, along with rust, undamaged metal will be beaten off, because of which the tank will quickly become unusable.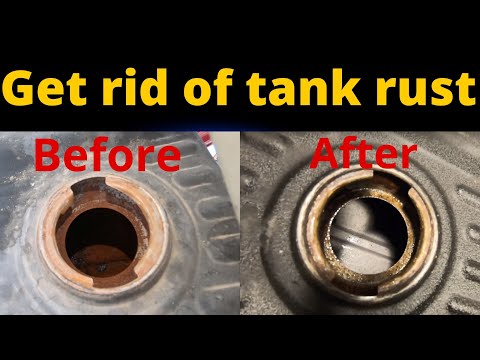
Different brands of vehicles have different fuel tanks. The easiest way to clean it will be on those models that have a drain hole in the gas tanks. That is, draining the fuel and flushing can be done without dismantling the tank.
However, this option is not available to most motorists, so you will have to dismantle the tank from the car and wash it separately.
The best time to flush the gas tank is outdoors or in a well ventilated area. Working with combustible and strong-smelling substances can affect the well-being of a person.
The fuel tank must be removed from the vehicle body. As a rule, this procedure does not take much time. The main thing is to work out the entire volume of fuel in the tank in advance so that you do not have to drain gasoline. However, in any case, several liters of fuel will remain in the system - both in the tank itself and in the fuel lines. Therefore, you will need to disconnect the connectors from the fuel pump, as well as remove the hoses from the tank itself. Under all connection points, you can substitute containers for draining fuel so that the fuel does not go into the ground or half a garage.
After the gas tank is removed from the car, you need to open all its openings and drain the remaining fuel.
A wide variety of cleaners are used to flush gas tanks. All of them are freely available and are inexpensive. Depending on the cleaner used, the cleaning method will also vary.
To flush a standard 43–50 liter tank, 2–3 liters of acetone will be required. The procedure is as follows:
The main advantage of acetic acid is that it perfectly dissolves rust deposits and old dirt in the gas tank cavity. However, there is also a minus: a lot of vinegar will be required, since they need to fill the tank to the brim:
It is advisable to use household detergents in cases where there is obviously a small amount of dirt and rust in the tank. Ordinary dishwashing detergents will clean the cavity of the tank well, but will not remove rust, so they are best used for the initial rinse or as an additional after washing with acids:
Acids do a good job of cleaning metal surfaces from rust and sediment.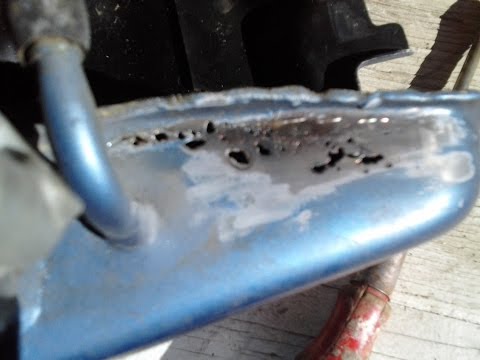 However, care must be taken, as a single drop of acid can cause severe burns. It is recommended to wear thick rubberized gloves and goggles to protect the eyes from fumes:
Flushing with gasoline (diesel) is a mandatory step in all cleaning procedures. The fact is that after any, even the most thorough washing, a small amount of acid, acetone or washing powder inevitably remains in the gas tank. It is impossible to install such a tank on a car, because all this precipitation will fall into the fuel system, and from it into the engine.
Before pouring gasoline, it is recommended to dry the tank with a hair dryer - warm air will quickly dry all corners of the gas tank cavity. The container will dry out on its own for a day or more.
Therefore, after completing all cleaning procedures, it is necessary to carry out the last one - flush the tank with fuel:
It is very important to fill the tank full immediately, and it is not recommended to use fresh gasoline for this purpose. It is better to prepare fuel canisters in advance so that the existing sediment remains at the bottom.
Many motorists do not even think that the inside of the gas tank may need to be flushed or cleaned. Indeed, this is a completely closed container, where does dirt or dust come from in it?
However, the older the car, the more clogged the fuel tank. And this can be attributed to several factors at once:0003
Gas tank cap allows you to safely pour fuel through the filler pipe into the tank container
The main sign of fuel tank contamination can be considered jerks in the engine at low speeds. Water and impurities in gasoline prevent the engine from using all the power it has, so at low speeds the car starts to twitch.
Cleaning and flushing the fuel tank is a must for reliable operation. However, washing it too often is not recommended.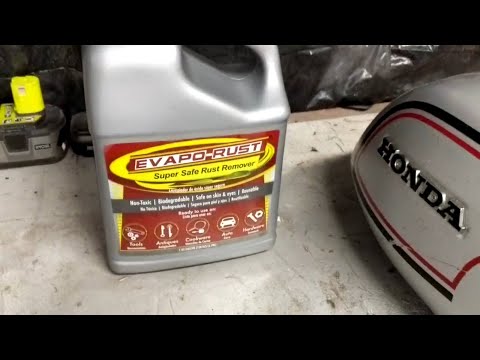 The procedure can be performed once every two or three years, it all depends on the operating conditions and the quality of the fuel being poured.
In the event that the car is constantly refueled at questionable gas stations on the highway, it is recommended to clean the tank capacity once a year. This will save the fuel filters from running out quickly and eliminate the possibility of clogging the lines with dirt and impurities.
The appearance of rust in the bath stove tank is a common thing for tanks with an open volume. This is especially true for home-made containers, for the creation of which a steel or metal sheet or large-diameter pipe sections are used.