Tubular, or sew-up, tires used for road, track, and cyclocross racing consist of an inner tube enclosed in a casing, which is then taped to the rim or glued on with a special contact cement. This bond is critical because if a tubular comes off the rim, a crash is almost guaranteed. Here's our four-step guide for securely gluing a tubular—plus a primer on how to repair one after a flat.
RELATED: It's Time for Tubulars
1. Pre-Stretch
For a new tubular, it's best to first put it on a rim without cement, inflate it, and let it sit. This stretches the tire and makes mounting easier when you're gluing it on. Start by putting a bit of air in the tire so it has a shape, but no extra tire pressure. Then set the wheel vertically on the ground in front of you, with the valve hole on top for easy access. Insert the valve through the hole and grasp the tire on either side with your hands.
Place each section onto the rim and advance down the sides, lifting each section of the tire onto the rim.
Bending over the wheel, continue to mount the tire while watching the valve to see that it remains straight. If it becomes crooked, pull the tire harder with one hand to correct. As your hands near the bottom of the wheel, the tire will become tight. Use your body weight to stretch the tire into place. Pop on the last difficult section by lifting the wheel off the ground and rolling that tire section away and then onto the rim with your thumbs.
Move your hands around the wheel, straightening the tire, and then add full tire pressure. Let the tire sit for a while—preferably overnight, but at least 10 or 15 minutes—to give it time to stretch. (The longer you wait, the easier it'll be to mount after gluing.)
2. Prepare the Rim
Sand the rim lightly with emery cloth to scuff up the surface and give the glue a little more purchase.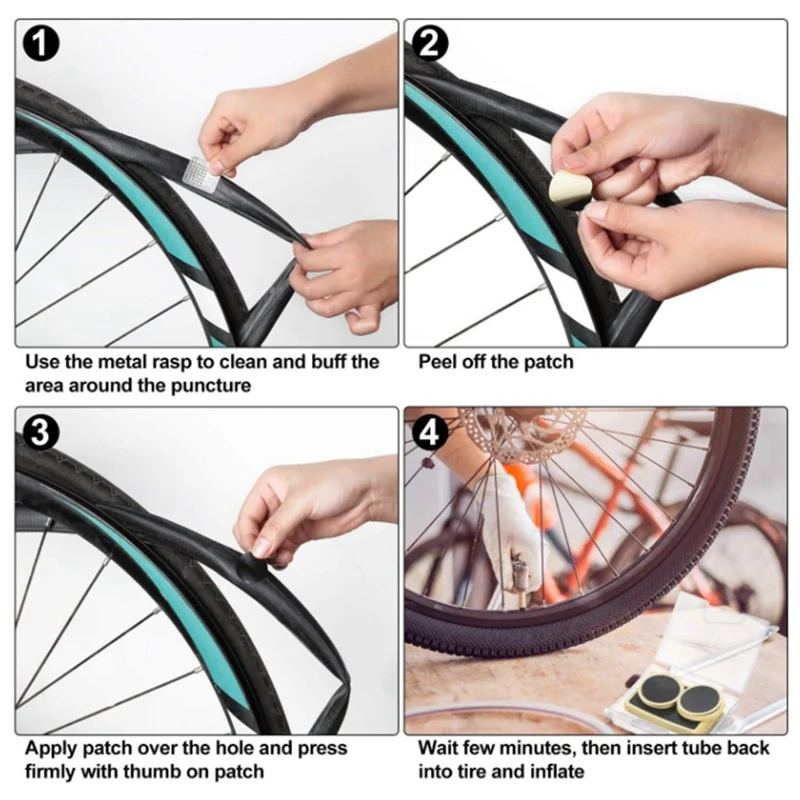 Using acetone or alcohol, clean the rim of any oil or other contaminants.
Working with a used bike rim? It's not necessary to remove the old glue, but it's important to have a smooth surface for the tire, or it won't sit properly when installed. You also don't want any loose bits of dried glue that can prevent the new glue from holding the tire to the rim.
To prepare the rim, place the wheel in the bike frame (the tire should already be removed) and turn it while scraping with a tool that fits the shape of the tire seat on the rim. Cone wrenches often fit nicely here, but anything that fits the rim's shape and has a good scraping edge will work. Spin the wheel while you hold the scraper's edge against the rim to chip off the loose glue and smooth the rim's surface. It doesn't have to be perfect, just smooth and flat enough for a good glue purchase and for the tire to sit properly on the rim. When the rim is prepared, glue it as directed and mount the tire.
3. Smear the Glue
When the tire has stretched, remove it from the rim. Place the wheel in the bike, suspend the bike, and dab the tubular cement between each spoke hole on the rim. Put your index finger inside a plastic Baggie, then hold it on the rim as you slowly turn the wheel with your free hand and smear the glue to create an even coat that reaches from sidewall to sidewall. Then apply a bead of glue to the centerline of the tire's base tape. Spread this glue to cover the entire base tape, using an old toothbrush or an inexpensive acid brush (found in almost any hardware store)—something that you don't mind tossing out afterward.
4. Remount the Tire
Allow the first glue coat to dry for an hour, and then add a second coat. Wait about 15 minutes for this coat to get tacky. Then mount the tire exactly as before. Work carefully so you don't get glue all over the sidewalls of the tires. You'll know you did a good job of gluing if, when eventually punctured, the tire is nearly impossible to remove from the rim.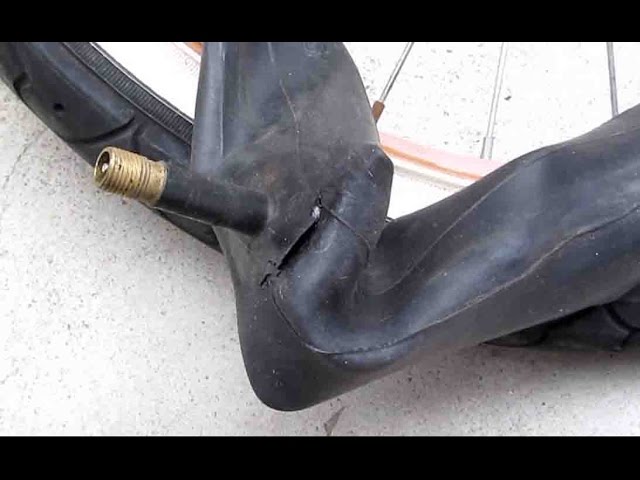
RELATED: Do You Need to Replace Your Carbon Rims?
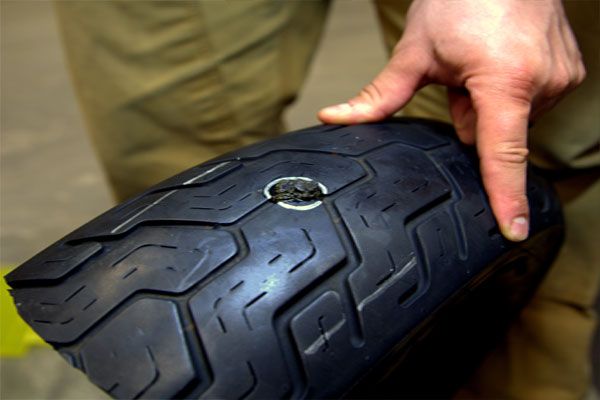
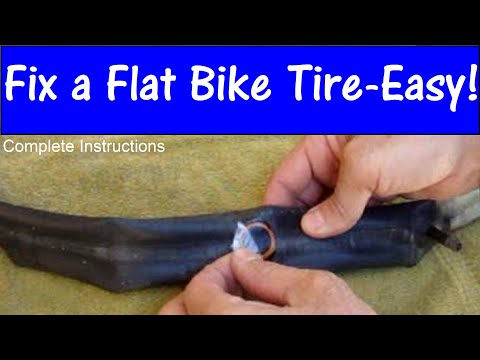
Patching Tubulars
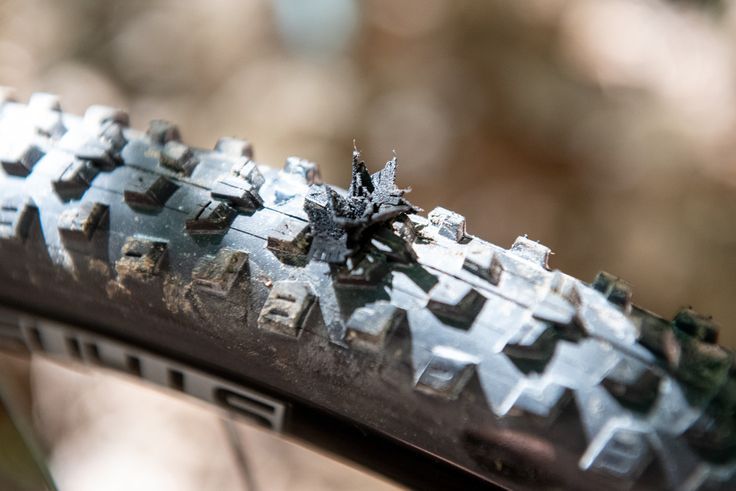
Repairing tubulars is slow but fairly easy work. When possible, locate the puncture while the tire is still on the rim. Inflate the tire and listen for leaks. If you don't hear air escaping, hold the tire near your face and turn it, trying to feel the air (this sounds nutty, but the skin on your face is very sensitive). Look closely for a hole or cut in the casing that is the point of the puncture. Once you locate it, mark the spot so you can find it again quickly after you get the tire off the rim.
Unfortunately, some leaks are difficult to pinpoint. If you can't locate the precise point of the problem by one of the above methods, pull the tire off the rim and try another method.
If you have a slow leak, try pumping up the tire and immersing it in water, watching for bubbles.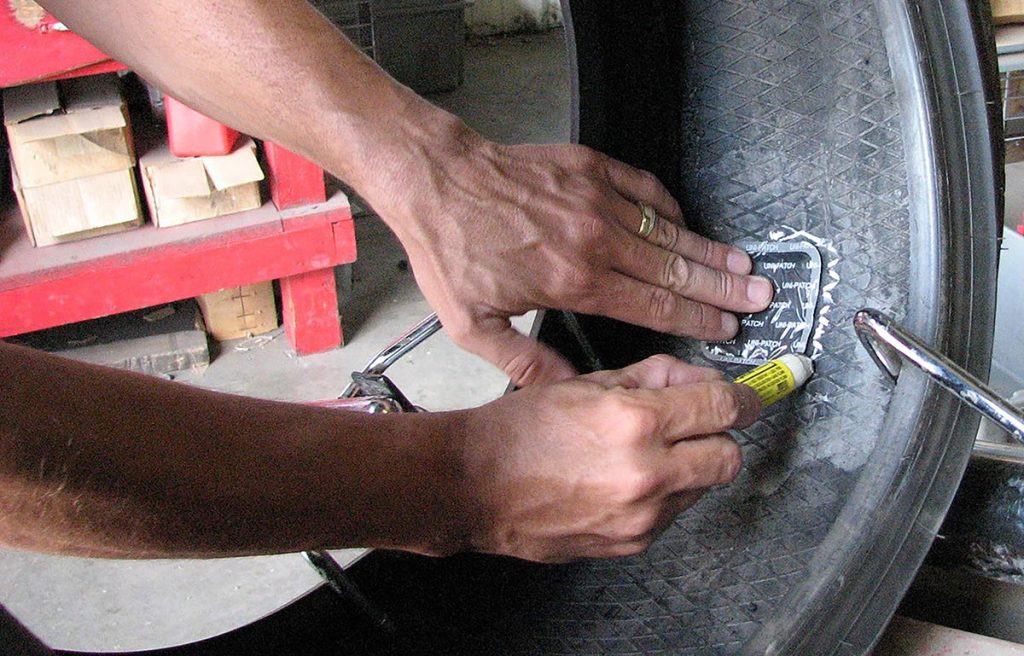 Unfortunately, air bubbles sometimes travel inside the tire casing before emerging into the water, so this method isn't foolproof.
The most certain way of pinpointing the tire leak is to isolate one section of the tire at a time and see if any air escapes from the rest of the tire. If not, the problem lies in the isolated section. Try blocking off a section of tire by squeezing it between your hands. A more elaborate method is to clamp a couple of short two-by-four-inch blocks around the tire, section by section. Once you've located the source of the problem, begin your repair.
RELATED: Five Tricks for Preventing a Flat Tire
1. A tubular tire has protective tape called base tape over the stitching that holds it together. This tape is bonded to the tire with liquid latex, not rim cement. Cut the tape and pull it back to expose about six inches of stitching at the location of the puncture. Mark the stitches with a permanent marker so you can tell which holes line up across from each other after the thread has been removed.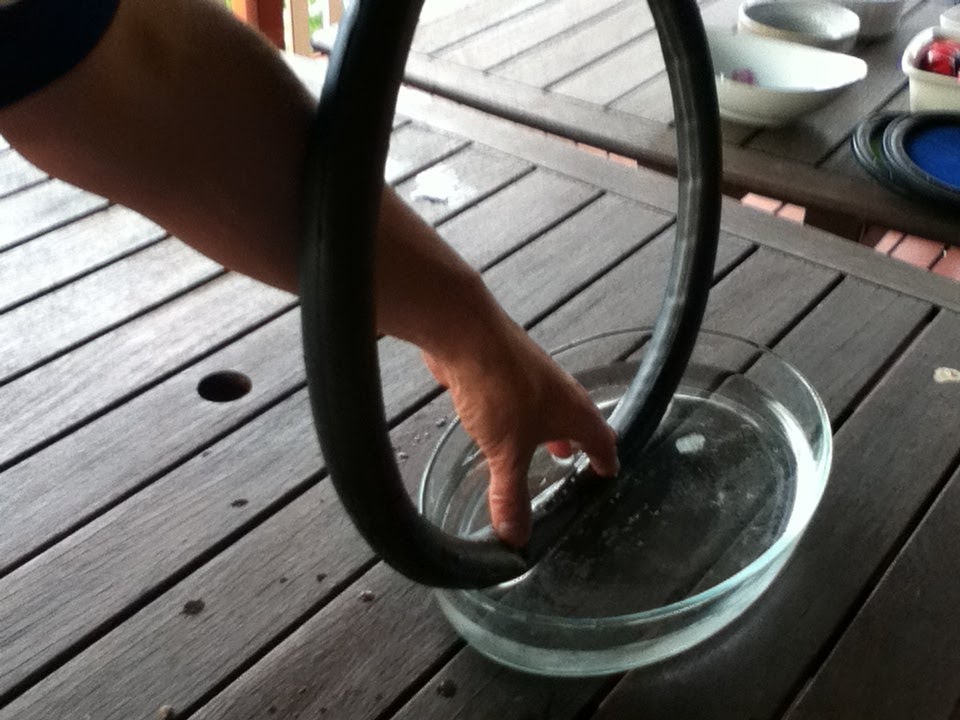
2. Use a sewing seam ripper or a knife to cut the stitching threads. Pull the tire open and remove the thread remnants. Carefully pull aside any protective gauze or tape to expose the tube. Lift out the tube and look for the leak.
3. Patch the leak using the same methods used for ordinary bike tubes. If it's a latex tube (very thin and pale brown), it's possible to patch it with a piece of latex cut from a discarded tubular tube. Just apply glue to both the tube and the patch, wait for the glue to dry, and press them together.
RELATED: Effetto Mariposa’s Carogna Tubular Gluing Tape Makes Regular Glue Look Bad
4. While you have the tire open, look inside to see if any pieces of the object that caused the puncture are embedded in the casing. Remove any offending material. Usually there'll be a visible black mark if an object has penetrated the casing, and it's easy to see because the casing is light-colored.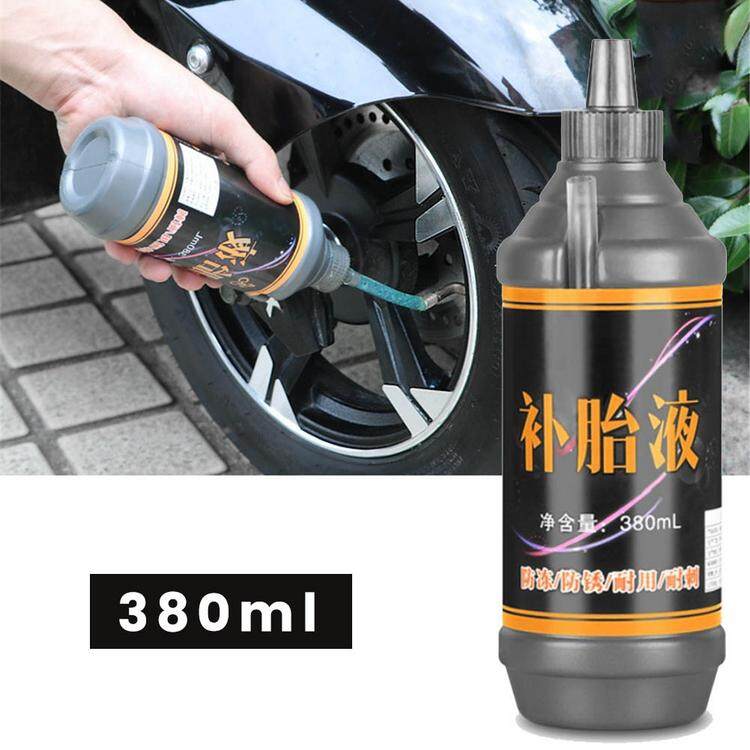 Also check to see if any casing threads are cut. Reinforce any damage with a casing patch. Cut your own patch out of a piece of old tire or strong canvas or nylon. A generous size is best; overlaps of two inches or more are suitable. Sheer tire pressure will keep the casing patch (or "boot") in place, so there is no need to cement it.
RELATED: The Definitive Guide to Pumping Your Tires
5. Sprinkle a little talc into the casing to help the tube slide back into place. If necessary, wiggle the tire to help the tube position itself properly, then straighten the inner gauze or tape. You're now ready to restitch the tire around the tube, but take special care to use the exact same holes as were originally used for this. You don't want to weaken the casing by poking new holes through it. A simple overhand stitch works fine, or use a sewing awl of the type used by leather workers to reconstruct the original cross pattern. Use strong thread or, in a pinch, dental floss, overlapping generously at the ends to prevent unraveling.
It's very important not to pull the thread too tight as you stitch. Doing so can pinch the two edges of the tire casing together, creating a ridge on the bottom of the tire, which causes a problem. The bottom of the tire must retain a flat profile so the base tape will stick and the tire will sit flat when reinstalled on the rim. If the casing edges are pinched, they will form a ridge that prevents the tire from sitting flat on the rim. To ensure this doesn't happen, while stitching pull the thread just tight enough to bring the two edges of the casing together. Check the tire while stitching occasionally to make sure the finished seam will lie flat when you're done.
Another common problem is stitching the tire using the wrong holes. This is possible even if you mark the holes and are very careful. If you make this mistake, you'll end up with an S-shape in the tread of the tire, so check for this after resewing tubulars. If you find that the tread now has an S in it, cut the threads you just put in and restitch the tire using the correct holes. Anytime you cut a tire for surgery, mark the holes in such a way that you can't possibly stitch the tire back up with the wrong ones.
RELATED: Favorite Tools of Tour de France Mechanics
6. Glue the rim strip back in place with liquid latex. This is the same material used to coat and protect the tire's sidewalls after extended use dries them out. Now you have a perfect spare tire.
Repaired vs. Brand-New
The residue of rim cement left on the tire means it will achieve a decent bond with the rim when installed on the road. A brand-new, never-cemented spare tire is dangerous, so use a repaired tire as your spare. Or, if you must use a new tire as a spare, put a proper layer of glue on the base tape first. It's best to fold the spare four or five times and keep it in a simple pouch or old sock to protect it from wear and tear and exposure.
This article originally appeared in The Bicycling Guide to Complete Bicycle Maintenance and Repair.
This content is imported from OpenWeb. You may be able to find the same content in another format, or you may be able to find more information, at their web site.
Advertisement
Repairing a tubular tire can be tricky, but it can save you a lot of money in the long run.
by Molly Hurford
When you invest in a set of tubular tires, you pray they never flat. Because let’s face it, repairing tubulars is a whole lot of trouble. However, while it’s tempting to just chuck flatted tubulars, there are a few options worth exploring first. The most obvious one is fixing the tire yourself, and it can be done if you’re a little handy with a sewing needle and a patch kit.
The basic gist of repairing a tubular tire is that inside every tubular (except for Tufo tires), there’s a latex or butyl tube, and if you flatted, then that tube needs to be patched. However, the tire is sewn around the inner tube, with the stitching covered in base tape. So, the first thing you need to assess is the damage: is the tire all right, or is it gashed to the point where a tube will pop out of it? If that’s the case, it’s probably time for a new tire. But if it’s a small puncture, it should be fixable. Pump it up and inspect it. (If it’s a super-slow leak, you might even try to inject some sealant briefly to see if you can plug the hole, but that’s for another article.)
The first thing you need to do, once you’ve figured out where the puncture is, is peel back the tape that’s covering the stitching, but don’t rip it. Then, very carefully, remove some of the stitches around the area. Once you can access the tube, treat it like you would any other flat, taking note whether it’s latex or butyl, clean the surface and patch it up! Once it’s been patched, the tricky part begins. Sew the tire back up, trying to keep the stitching similar to that already on the tire. After that, it’s a simple matter of reapplying the tape by gluing it back with latex (for example, Velo Guard Tire Saver Liquid Latex) and regluing your tire.
We asked a few mechanics for their tips and tricks regarding repairing tubulars, and they had a lot to say about the matter.
Expert #1
Jason Gardner of Jinji Bicycles had the following tips:
 A clean tire is easier to grip and you won’t run the risk of dirt falling in your patch glue.
Expert #2
This racer should probably ride home and repair his flat tire using our tips and tricks. © Dave Haygarth
Jeremy Chinn of Journeymen Racing adds that, “For small punctures, sealants really cannot be beat. [Sealant] is available at any shop that caters to mountain bikers, quick to ‘install’ and capable of repairing pin pricks and small punctures.” Sealant is always worth trying before taking out the stitching and re-sewing the tire.
Expert #3
Finally, Todd Schoeni of Pro Bikes adds a few tips of his own:
 Based on what type of tube it is (butyl or latex) you can use a standard patch repair kit, or use a section of latex tube to repair a latex tube. Once repaired, the hard part begins: gently put the tube back in the tire casing and begin the restitching process. You might have to get some specific thread to do this, but I have seen a good dental floss work well in a pinch.
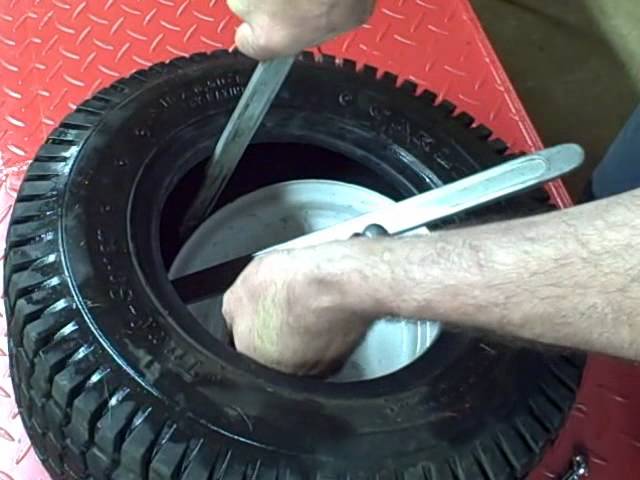 it’s a pretty simple process. Remove valve core, use an injector to spray some sealant into the tube/tire. Inflate to about 30-40 psi and then rotate and shake. This will get the sealant to most of the nooks and crannies that might be responsible for the leak. If it seals, great! Continue to inflate it up to about 60 PSI or so and let it sit overnight. That will really show if it plugged the leaks. This can also be a great way to “puncture-proof” your tubulars. If there is still some sealant left in the tire, it could save you in a race if you happen to get another puncture. However, if #2 and #3 fail to work, refer to #1.
When Fixing Fails:
Prevention is the best medicine: tubular inspection can save your day! © Dave Drumm
Another option, if you’re willing to shell out a few bucks to have your tire repaired rather than buying a full new tire, is to send them away to a place that repairs tubulars. Tire Alert in Clearwater, Florida is highly recommended by Jeremy Chinn, and owner Ron Murawksy gave us a few tips of his own:
Cyclocross Magazine: At what point should people try to repair their tubulars, and when should they get rid of them?
Ron Murawsky: In most cases a bad cut does them in, say 8mm or larger. Other than that, worn out tread or weak worn out side walls are cause for getting rid of tires.
CXM: Any tips for do-it-yourself repairs?
RM: If you have a latex tube, just forget in, usually it does not work. Butyl tube, you have a chance, so try to sew the the tire back up as accurately as possible.
CXM: Any favorite tires you like to repair?
RM: I like FMB or Challenge.
CXM: How did you get into the business of repairing tubulars?
RM: I rode a new sewup 100 yards in a triathlon and flatted, and then I kept trying to find a way to fix it and eventually found a guy that sells sewing machines that can sew tires.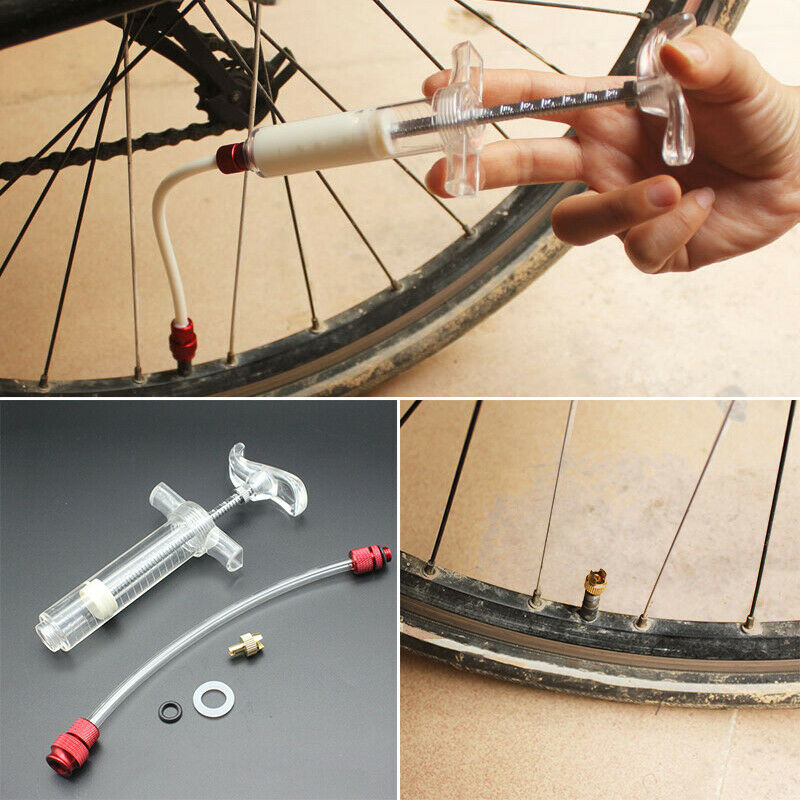 After that, I put an ad in VeloNews, and the rest is history.
CXM: Anything different between repairing cyclocross tired versus road tires?
RM: They’re basically the same, but cyclocross tires are a little harder to sew straight.
Don’t want anything to do with your old tires? Consider recycling them! Places like Totally Tubular Design make bags, purses, wallets and other eco-friendly accessories from old tires, and they’re a super-stylish way of avoiding throwing out tires.
For a video on tubular tire repair, check this out:
Of course, some people would argue that it’s never worth repairing a tubular tire.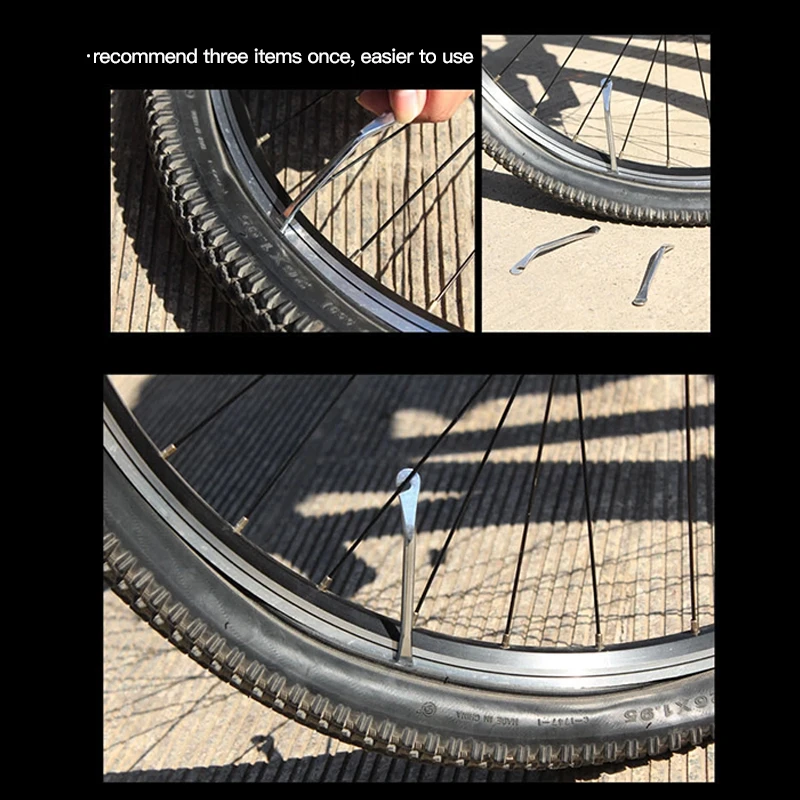 Dave Sommerville of Ifixbyx has this to say:
Tubular tire repair, in my professional opinion, is not cost effective to offer as a service. Why? The time it takes to repair a tubular would cost between $40-60 in labor costs in a shop and between $4-10 in materials. Even then, the repair usually isn’t anywhere as good as the original. So, unless you flatted your really expensive tubular early in its lifespan, it’s just not worth it.
In cyclocross, many flats are caused by “pinch flats” due to the low tire pressure. A repair would require 2 or more patches on that section of tube. Many times this area then rides “lumpy” once repaired. To replace a whole inner tube requires so much work and really a special sewing machine.
If you are going to try to repair your tire, great care must be made to re-glue the base tape, especially if replacing the whole tube. Many times you can roll the whole tire or portion of tire with the base tape repair section still attached to the rim!
Additionally, some tires, like Vittoria, are practically impossible to repair as the base tape manufacturing method used requires such sensitive work that you can easily destroy the tire just to get to the needed area.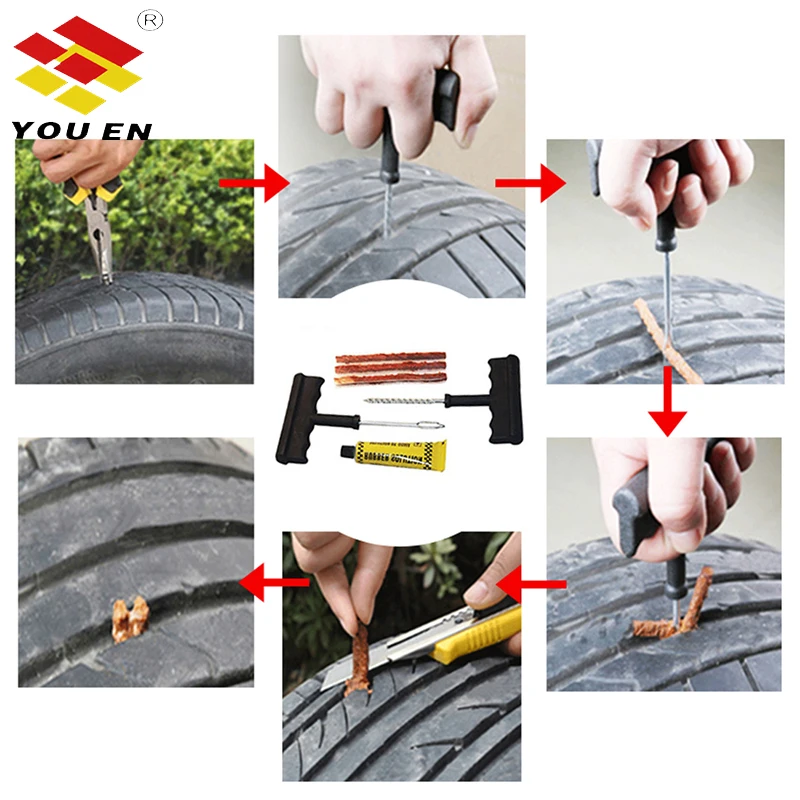 It’s pretty much impossible to remove the whole base tape on these tires without ripping it to shreds.
Share this article with a friend, and we’d love a comment below with your experience flatting or repairing tubulars.
| “With Law hours Nick R EMON T U led with IPENO V”
Bicycle tires The tire is one of the most vulnerable spots on a bike. I strongly recommend that you carry a spare tube, tire and tire repair kit with you when traveling long distances, as well as, of course, a pump. Bicycles use two types of tires: separate, consisting of a tire and tube, and tubular. Size
The rim must fit the tire. The narrow rim of a racing bike is fitted with a tubular tire. Endrik's rims come in a variety of diameters and widths, and so do the tires.
Wider, denser tires are used for driving on bad roads. Until the 1980s, the usual tire size was 27x1¼ inches (in fact, most rims are considerably narrower, and tires are made narrower accordingly).
French 700C tires are now fitted on many drop bar bikes. If rims with a diameter of 630mm are fitted with size 27 tires, a 700C tire will fit a 622mm tire. For mountain bikes, the popular 26x2.125 and 26x1.75-inch tires fit best on rims with a tire saddle diameter of 55.9mm. British 26-inch tires are much narrower and not interchangeable with American tires; they are mounted on rims with a tire saddle diameter of 584 mm. French brand 650B tires are somewhat similar to 28-inch tires, but they are slightly narrower, although thicker than English 26-inch tires, and are mounted on rims with a tire saddle diameter of 671 mm.
This is probably enough for readers to get acquainted with tire sizes in general terms, since my task is not to inform you about tire sizes, but to teach you how to handle and repair them. In the rest of this chapter, we will consider the repair technique for tires of all types - both separate and tubular. °°° Seal the hole
Unfortunately, this is the most common type of tire and tube repair, not very difficult, so every self-respecting cyclist should be able to do it. What you prefer to do if a tire is punctured, sealing it or installing a new one is up to you, but it is not excluded that you either forget to take a spare tire on a trip, or take only one, and both tires will get punctures at once. It is impossible to insure against tire repair. Despite the fact that the description of the repair takes several pages of a book, this work is not difficult and takes no more than ten minutes for a more or less experienced cyclist. Running time is significantly reduced if tire and rim are the same size. The tire can be removed from a mountain bike by hand, without the use of special levers.
Tools and accessories: • Puncture patch kit Procedure: 1 Check valve operation. Inflate the tire as much as possible and see if air comes out of it. Sometimes air comes out of the valve. Such damage is easily repaired - screw the inside of the valve with a small screwdriver (if it is a Schrader valve). Presta valves allow air to pass unless the top nut is screwed onto them. Note If you prefer not to seal the punctured tube on the road, but immediately replace it with a new one, do not throw it away - tape it at home, and it will still serve as a spare for you. °°° Tube or tire change If the camera cannot be repaired (the puncture is on the seam, it is too big, or you don't want to mess with it at all, or for some other reason), replace the camera, following the instructions in steps 2-10 and 25-29 above. °°° Seal the puncture on the tire A punctured tire can also be repaired, after which it will not last long, but it will last. To do this, follow the above instructions ("We seal the puncture"). The tire is sealed from the inside, the patch for it is called a “shoe” and has a size of 2.5x5 cm. As a shoe, you can use pipe sealing tape, a piece of light rubber, or, if you don’t have anything worthwhile at hand, a piece of thin plastic.
Lift the edge of the tire, fold it over and push the valve out of the hole. °°° Seals and other tricks Every few years, a manufacturer announces that they have made flat tires. Usually the solution comes down to the following: relatively strong tires, tire seals or a reinforced tire casing are produced. All these measures have their positive effect, but this is not quite a solution. °°° Valve replacement When a puncture occurs near the valve, or the valve itself breaks, most cyclists prefer to change the tube, although it can be repaired, unless, of course, the valve itself is not vulcanized, soldered into the tube, not made with the tube, but screwed in. Nowadays, valves are usually vulcanized, but even then the valve can be replaced, provided, of course, that you have a spare valve. As a rule, the valve is screwed into solid tubular tires, it is much easier to replace the valve on them. So if your bike has tubular tires, don't throw away the old ones when you replace them - you may need a valve. °°° Tubular tires Now these tires - they are installed on racing bikes - are used quite rarely. In fact, the tire is a rubber sewn and glued into a tube. Although split tires are as light as tubular tires and have low surface resistance, some cyclists still prefer tubular tires on their bikes. The reason for this is simple - the tubular tire does not need to be mounted on a deep rim, it has no edges and is therefore insensitive to side punctures, which, by the way, mostly inexperienced cyclists suffer from. °°° How to remove the tubular bar If you manage to puncture the tubular tire as well, remove it. To do this, you first need to remove the wheel from the bike. Then, starting from the place opposite the valve, begin to bend the tire over the rim in two directions - both to the right and to the left. After removing the tire, pull the valve out of the valve hole. When removing a tire, make sure that its sticky part, with which the tire is glued to the rim, does not stick together.
Make sure nothing is holding the tube, pull out the tire and put it on the rim. °°° Tubular bar installation If a tubular tire is punctured during a trip, it is best to immediately put a spare (if you are a prudent person and take it with you). Tools and accessories: • tube of adhesive mixture or tape for repairing tubular tires Procedure: 1 Remove the old adhesive layer with acetone; if not using a sticky layer, but an adhesive tape, remove it. °°° Tubular tire repair
This assumes that you have removed the punctured tire from the wheel by now.
Tubular tire and sprint rim Tools and accessories: • Tubular tire sealing kit (includes patch kit, liquid rubber, fine sandpaper, twine, needle, thimble and talcum powder or lump)
Procedure: 1 Inflate the tire and locate the puncture - listen or, if no whistle is heard, hold the tire to your face. If you still can't locate the puncture, immerse the tire parts in water and see where the air bubbles come from. Mark the location of the leak.
Note Store spare tires in a cool, dry place, preferably ventilated. It is preferable to install them on spare rims, but do not inflate. And don't forget to bring a spare tire with you. When you get home, immediately remove the folded spare tire and put it on the rim. °°° <—— Back ♦♦♦♦♦ Forward ——> *************************************************** ******************************************************* ***************************************************
|
5/5 - (1 vote)
An explanation of the two different types of tire systems and why some cyclists prefer one over the other.
Tires have been around for as long as bicycles. In fact, it is impossible to ride a bicycle without them. Back in the early 20th century, tires were thick, heavy pieces of tread designed to overcome gravel, mud, and everything else that was common on the uneven roads of the time.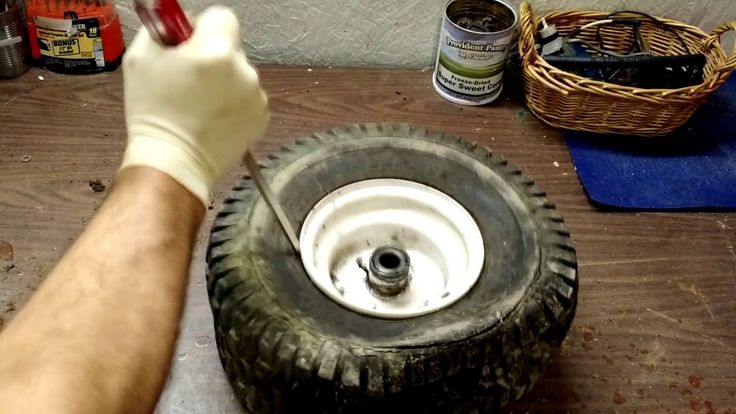
Contents
Most of the early tires were clincher tires, which is what we grew up with. But it was often difficult to get clinchers to stick to the rim, so the tubular tire was invented—a self-contained tire glued directly to the wheel rim.
For everyday use, road bike tires are classified as clincher or tubeless, but are there any other arguments in favor of tubeless? Before we dive into the characteristics of each tire type, let's take a closer look at how they actually perform.
The clincher is a casing that attaches to the wheel rim and a tube that holds the air inside the tire. The tire is attached to the rim and you pump air into a tube which is then inflated inside the tire.
Clincher tires have a hard rubber ball around the edges that "cling" to the rim, hence the name. That is why clincher tires are only suitable for clincher wheels. Because of the way they are attached to the rim, there must be a sidewall inside the rim that the tire puck will rest against.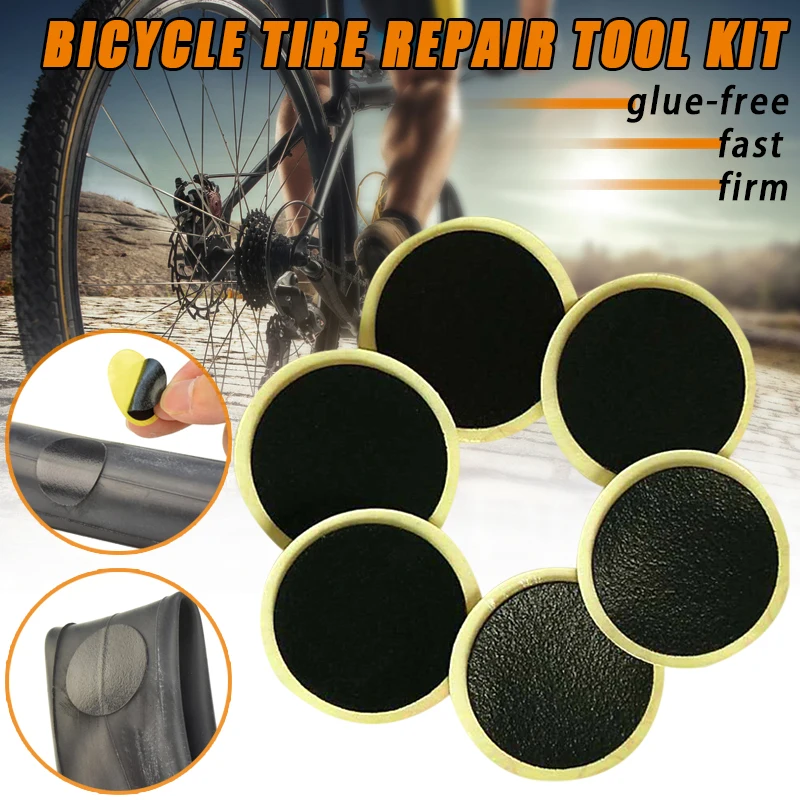
In contrast, the tubular tire is glued directly to the rim where there is no need for a mounting sidewall. Tubular tires do not use a separate replacement tube; instead, all of the air is contained in an inner tube built into the tire itself. These tires are also round and do not have a thick bead like clincher tires. You can technically ride on non-glued tubular tires, but this is very dangerous as there is a good chance the tire will come off the rim, especially when cornering.
Professional mechanics come up with new solutions for applying tubular glue to rims, here someone uses a water bottle as a tube instead of a brush
Once inflated, it's hard to tell if a clincher or tubular tire is just by looking at it . In the inflated state, both designs look almost the same. The differences lie internally, in how and where the air is contained within the tire (or pipe). This means that you need to mount these tires in different ways. You can change a clincher tire on the side of the road with a couple of levers and a pump, but changing a tubular tire takes a lot more time and money. In fact, it's completely impractical to change a tubular tire outside of a garage or bike shop.
Before we help you decide which type of tire is best for you, let's look at the importance of tires and why they are so important to cyclists.
Cyclists need tires that are light, fast, puncture-resistant, durable and comfortable. If that wish list isn't long enough, we also want a tire that grips well in corners and is inexpensive. Although there is no tire in the world that can meet all these requirements, there are several different clincher and tubular tires that meet most of these requirements.
The elasticity of a tire is another of the most important characteristics of a tire, that is, the ability of the tire to change and bounce when the wheel moves on the ground.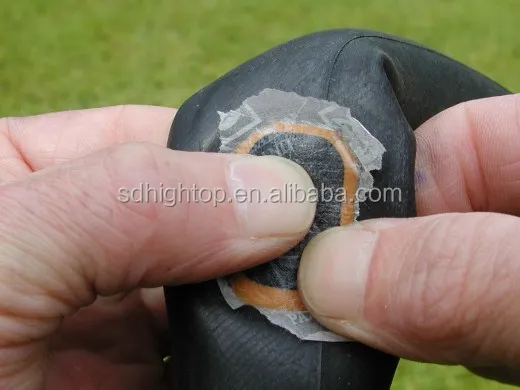 The better the elasticity of the tire, the better its cornering grip, the better the rolling resistance and the better it feels to the driver. Although the material is the main factor that determines the elasticity of a tire, its design also plays a big role.
With that said, let's look at the differences between clincher and tubular tires and why one might be better than the other for certain riders.
One of the main reasons cyclists choose clinchers over other tires is that a puncture is much easier to repair. If you accidentally puncture a tubular tire, you have very few options other than to stop and hail a taxi home.
Clincher tires are (relatively) easy to remove from the rim, giving you access to the tube in seconds. Experienced cyclists can repair a puncture on a clincher tire in just a few minutes. That is why many choose clinchers for long training trips.
While performance can be a concern with these heavier, slower tires, the performance of a tire is better determined by the tire itself rather than by tire type.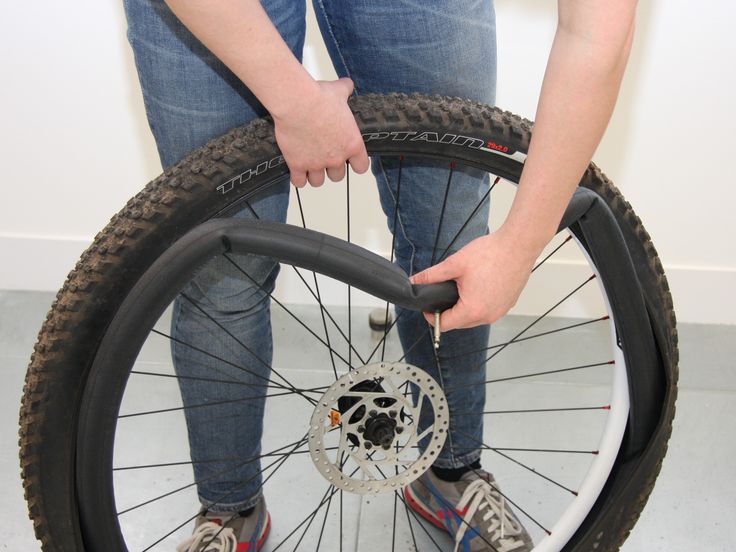 In other words, you can still find plenty of lightweight, fast and grippy race tires.
Tubular on a Bahrain-Victorious bike
Tubular tires are more often focused on performance than normal riding. You won't be able to find a tire designed for commuter travel or a tire designed for children's bikes. Tubular tires are too expensive and difficult to repair, and this customer category is not performance oriented anyway.
The racing public loves tubular tires because they are light and flexible. Speaking from personal experience, tubular tires have excellent road feel. They are light and agile, while also providing cornering grip and overall comfort. However, they are expensive, require unique wheels, and are difficult to install, but that's a topic for another paragraph.
In terms of puncture resistance, tubular tires are also better than clincher tires, which are prone to punctures. However, a single paperclip, nail, or piece of glass can be the end of your tubular tire, while a punctured clincher can be reused with a new inner tube.
Tubular tires can also be driven safely when flat. Of course, this is not recommended, but if you puncture a tire during a descent, the very fact that it is glued to the rim will keep the rubber between the rim and the road. A clincher tire can quickly come off the rim if you ride on a flat surface.
Tubular tires and wheels are lighter than similar clinchers because they do not have the sidewall inside the rim to seat the tire puck and there is no inner tube to keep air in the clincher. This makes tubular tires ideal for racing, especially on trails with a lot of climbs. If you are a racer who is looking for a light and fast tire to use only on race day, then tubular tires are the way to go.
Clincher tires are the world's most popular tire type, although tubeless tires have exploded in popularity in recent years. As mentioned above, clinchers are cheaper, simpler, and less labor intensive than similar tubular clinchers. The cycling industry is rife with clincher tires, from fat commuter tires to ultra-light racing tires. No matter what type of clincher you're looking for, there's a tire to suit you.
Clinker tires are much more comfortable in case of an accident. If you're heading out for a long workout 30 miles from home, you don't want to be stuck with a permanent puncture - with a tubular tire, that's exactly what you'll get, which is why tubular tires are rarely the best road bike winter tires. But with a clincher, you can be back on the road with a fully functional tire in less than five minutes.
Clincher tires are also cheaper than tubular tires, although the former are usually heavier and slower. Mounting clincher tires is a relatively simple task that can be mastered at home with a few YouTube videos. Fitting tubular tires, on the other hand, can be a tedious and time-consuming process that most people save for the local shop mechanic. If you're paying someone else for it, it doesn't matter.

 Separate tires are put on almost all bicycles, excluding racing ones.
  Hybrids are finally getting 700B tires that fit wider 622mm rims.
 If the brakes interfere, squeeze the camera or press the brake lever.
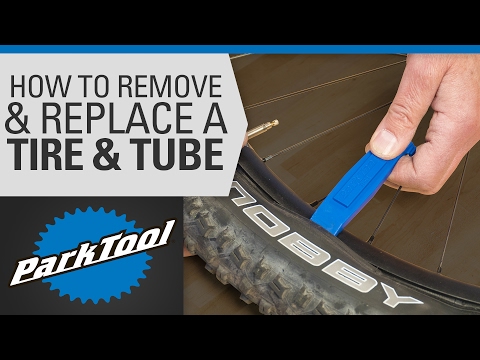
 When checking, lightly press the camera.
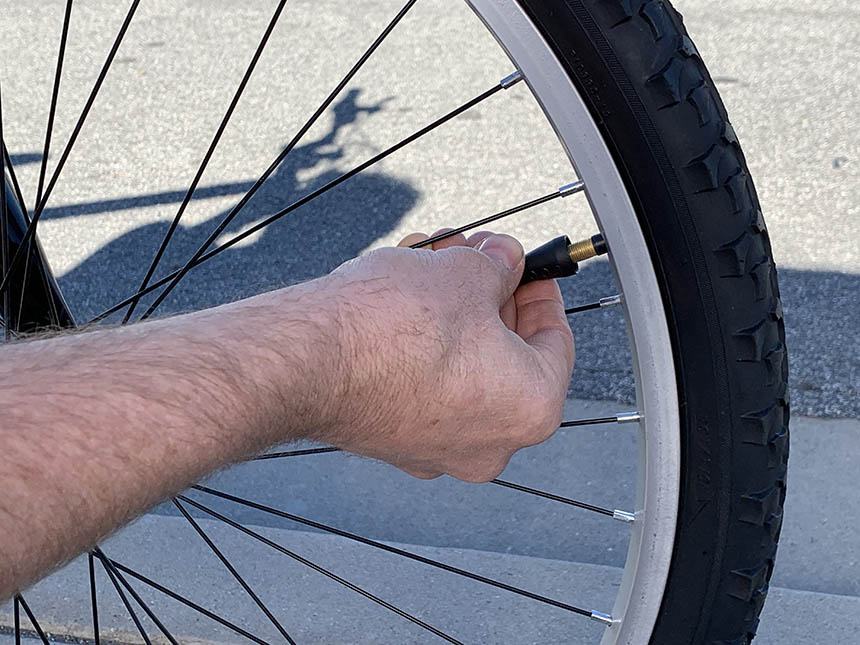

 Wipe the inside of the tire and apply a layer of solvent to it at the puncture site.
  Personally, I do not need such tires, I drive carefully, trying to avoid dangerous places. If you are a desperate person, then I recommend that you invest in a bottle of sealant and pour it into the tire during its inflation.
  Thus, there is only one remedy for punctures - drive carefully and carefully.
  Insert the valve base into the hole, press it with a washer and screw on a regular hex nut. Inflate the chamber, check for air leakage. If you did everything carefully, it will not be.
  I don't recommend spending money on a new tubular tire either. I advise you to get rid of the problem once and for all - install separate tires. This is the best, painless way out.
 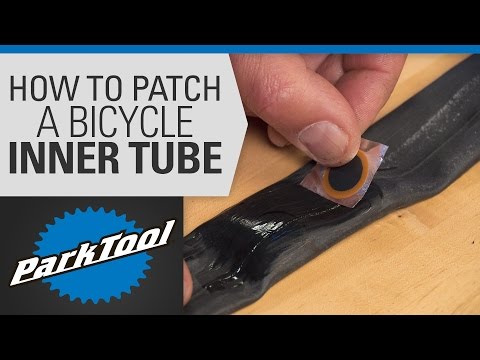 If the rim is slightly deformed, try to install the tire carefully so that it does not fly off while riding. Install the tire as follows:
 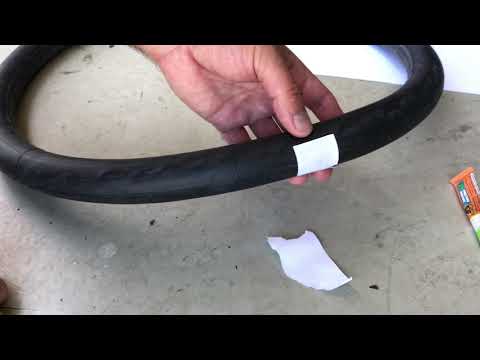 Place a piece of paper opposite the valve hole so you can remove the tire more easily if it punctures again.
 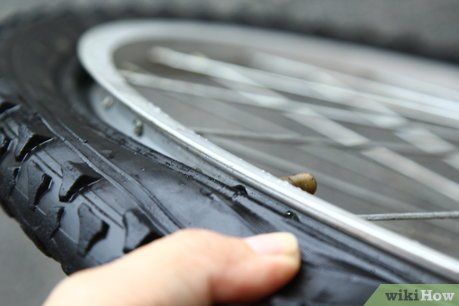 I’ll make a reservation right away that sealing a tire on the road is an almost unrealistic task. This type of work is done only at home.
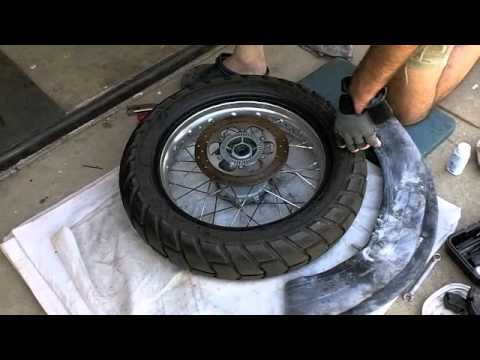
 A.
A.