While making the usual provisions and getting protected with car insurance are important, knowing how to find the exact source of the leak is a vital skill.
Tires are inherently designed to take a lot of abuse. After all, even the best-maintained highway will have potentially sharp debris around. As a driver, it's likely that you'll have to deal with a punctured tire at one point or another.
So, here's how to find a slow leak, with a little help from car insurance comparison and broker app Jerry.
RECOMMENDED
No spam or unwanted phone calls · No long forms · No fees, ever
ZIP Code
ZIP Code
Find insurance savings (100% Free)
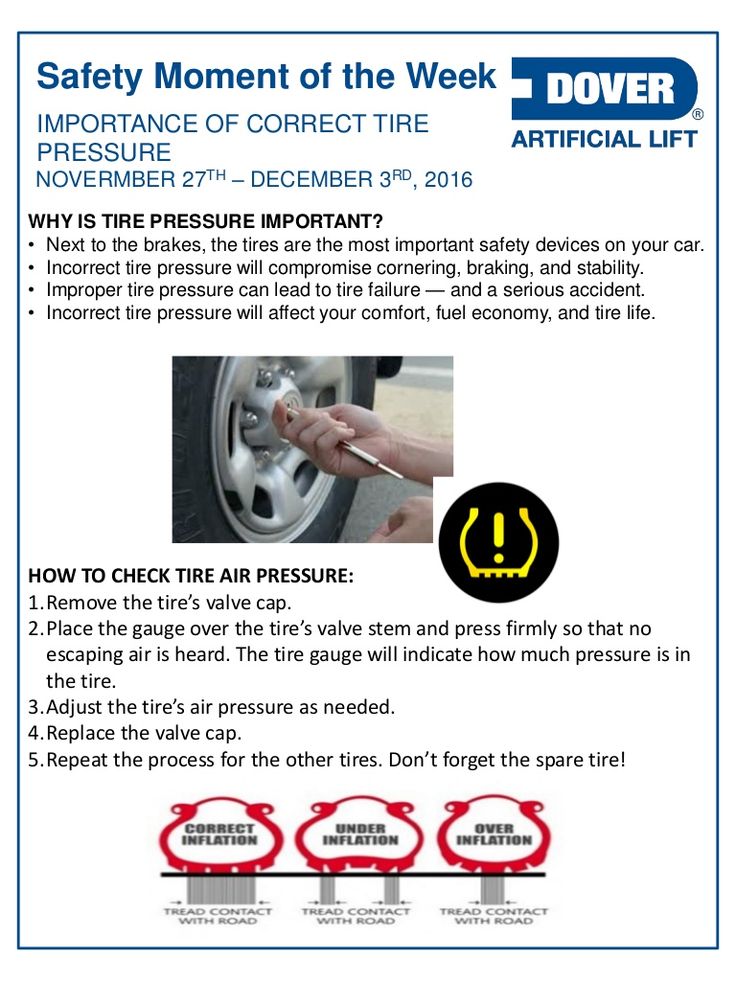
Check your tire pressure regularly, at least once per month. A gauge pen is remarkably quick and easy to use, and checking all four tires should never take more than five minutes at a time.
Giving your tires a regular visual inspection is worthwhile as well. You never know if there are any shards embedded in a tire, and it's far safer to deal with when the car is parked as opposed to risking the tire blowing while out on the road.
Do this on a monthly basis; it barely takes any time and could nip a problem at the root before it's allowed to grow.
It should be noted that tires will naturally lose their pressure over time, punctures or not. This is especially true during the colder months when air contracts. If you are regularly gauging the pressure, you should pump up the tires whenever they drop below the recommended threshold.
It's important to keep tire sealant, a gauge pen, and an air pump in the vehicle with you. They may be easy to overlook before problems occur, but you'll miss them dearly if they're ever needed.
MORE: How to fix a flat
First off, you should check to see that the pressure valves have been shut tightly enough.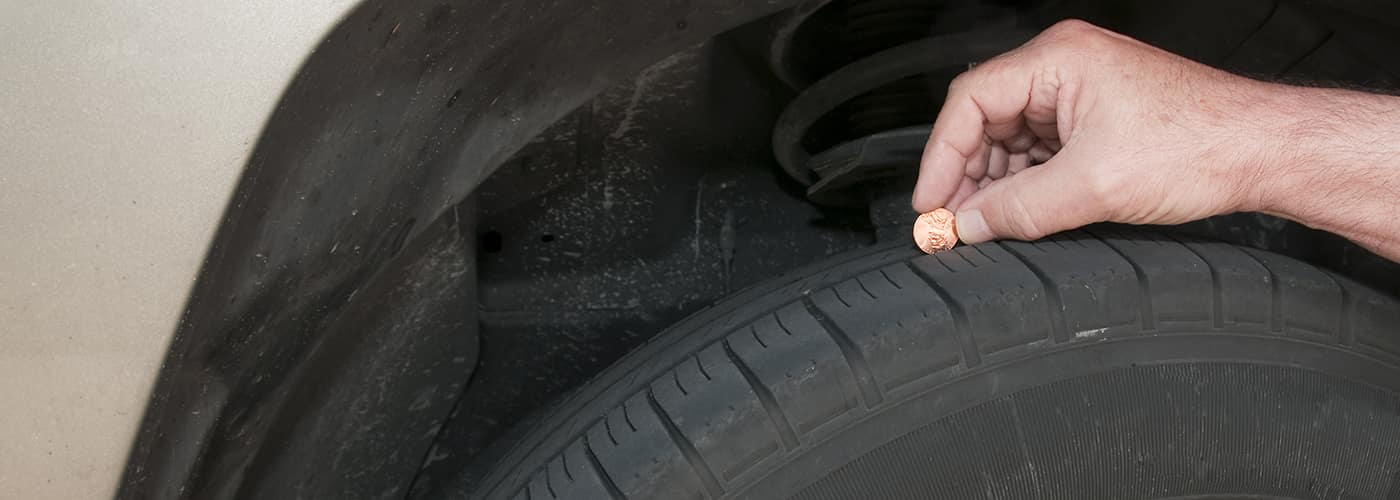 Air may be escaping because the valve wasn't put back on tightly enough after the last time the pressure was checked. If you are still sure there's a leak, you should pump up the tire again.
Having a full set of air to work with will make it considerably easier to spot the leak.
Tire leaks fortunately give off several signs that reveal their whereabouts. The distinctive hissing whistle of leaking air is arguably the biggest tell, and you may be able to pinpoint it by ears alone.
Giving the affected tire a visual glance over with a flashlight can help reveal visible damage or objects embedded in the tire. Lastly, by running your hand closely over the tire, you may be able to feel the gentle gust of air on your hand.
MORE: Low tire pressure in cold weather
The "Bubble Test" is a neat trick if the regular cues aren't helping much. Create a solution of water and soap, with enough soap to give the mix a bubbly froth.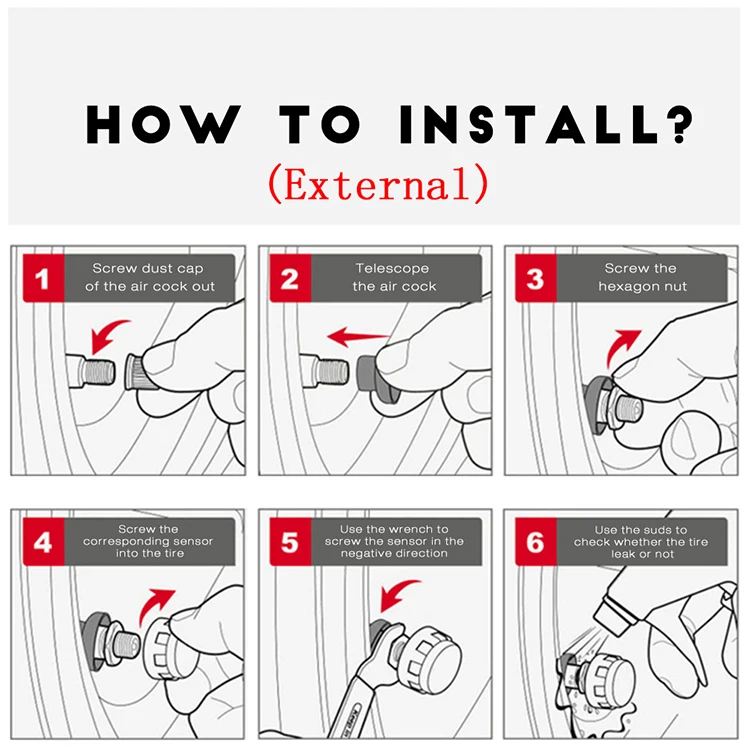 Apply the soapy mix all over the leaking tire, so that it's covered in soap bubbles. If there is a leak, it should be disturbing the bubbles around it, making the leak far more apparent than it would have been before.
In terms of soaps, using a 20% detergent ratio is recommended for the fact that it is very bubbly. Needless to say, the Bubble Test is suited for a home environment, and may be difficult to pull off in a highway situation.
Once you have properly identified where the source of the tire leakage is, you should make a quick appraisal whether or not it is severe enough to forego self-repair. As a general rule of thumb, a puncture that is any greater than 1/4" across in diameter is probably going to be too much for you to fix yourself on the road.
In the event you have found the leak before it got too big, you can use a tire sealant spray to effectively fill in the puncture. Applying a spray is a temporary solution at best, but you can at least extend the tire's life long enough to attend the matter on your own time within reason. This quick fix is a far cry from needing to change tires or enlist the help of roadside assistance.
In the case that the leak is bigger, roadside assistance can come to repair or replace the tire for you. Although this can be quite costly out of pocket, many insurance policies will include this service. To find the one that will cover roadside assistance the best, try using the Jerry app. A licensed broker, Jerry does all the hard work of finding cheap quotes from the top name-brand insurance companies and buying new car insurance. Jerry will even help you cancel your old policy.
And to ensure you always have the lowest rate, Jerry will send you new quotes every time your policy comes up for renewal, so you’re always getting the coverage you want at the best price.
RECOMMENDED
Judith switched to Progressive
Saved $
725
annually
Alexander switched to Travelers
Saved $
834
annually
Annie switched to Nationwide
Saved $
668
annually
Checking and adjusting your tire pressure is key to proper vehicle maintenance. If your tire pressure is dropping between your tire pressure checks, you have a slow tire leak. A puncture in a tire’s rubber can cause a slow leak. Faulty valve stems also cause slow tire leaks. Finally, a tire that is not sealing against the rim properly will leak. Lucky for you, you can easily diagnose your slow tire leak at home.
RELATED: 3 Tricks To Save Money On Winter Tires
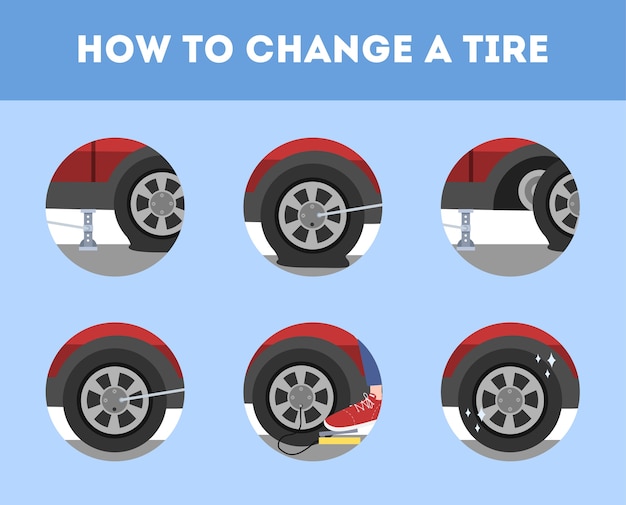
Jack up your vehicle, being careful to support it safely on jack stands as well as your jack. Then remove your tire.
Next, mix a little dish sope in water. If you have an empty spray bottle, pour your mixture into the spray bottle. Then simple spray the mixture on your leaking tire. If you don’t have a spray bottle, you can pour a thin layer of the solution over your tire.
Don’t miss the edge of your tire, where it seals against the rim. You will need to slowly roll your tire to pour water over its entire surface. As you do this, look for rapidly forming bubbles that indicate escaping air.
Finally, pour a little of the solution over the valve stem. The valve stem is where you fill the tire and check your tire pressure. Make certain to pour the soapy water over the seam where the stem enters the metal rim’s metal. Read more on finding a tire leak.
If you find air escaping between the tire and the rim, you know the tire is not sealing. This may be because the edge of the tire is damaged. A dirty or rusty rim sealing surface can also cause a slow leak. Finally, if tire was improperly mounted it will leak.
The “bead,” or sealing surface of the tire, should pressed against the rim by the air pressure in the tire. To set the bead, a mechanic stretches the tire onto the rim, then inflates it to maximum PSI. Finally, the technician strikes the tire tread or bounces the tire on the ground like a basketball. This impact seals the rubber against the metal.
If air is escaping through the tire rubber, it has a puncture or tear. If the air is escaping through the sidewall, the tire is unsafe for highway use. Driving and cornering places more strain on the tire’s sidewall than a patch can support. If you try to patch the sidewall, you risk a dangerous blowout.
If air is escaping through the tread of the tire (the part of the tire that contacts the road), it might be repairable. Most tire shops or auto repair shops will be able to patch a tire with a tread puncture cheaply. Many tire technicians prefer removing a punctured tire from the rim and patching it from the inside, instead of plugging it.
If you would like to fix the tire yourself, you only need a tire repair kit. A basic kit with plugs will set you back $15-$25. First deflate the leaking tire completely. Then remove any debris still inside the puncture. Next, use a round file to turn the puncture into a larger, uniform hole. Finally, press a sticky rubber plug through the hole, and cut off the end of the plug. It is a simple process you can complete in an hour if you are a dedicated DIYer. Learn more about plugging a leaking tire.
If you find air escaping from the cap on the valve stem, then your valve mechanism is damaged. Many tire repair kits include replacement valves. With a new valve, you will be able to replace your malfunctioning valve in minutes.
To replace your valve, you first deflate your tire. Then, use your kit’s valve tool to screw out the old valve and screw in a new one. Finally, reinflate your tire and make certain it holds air. Learn more about valve stems with a tire pressure monitoring system attached.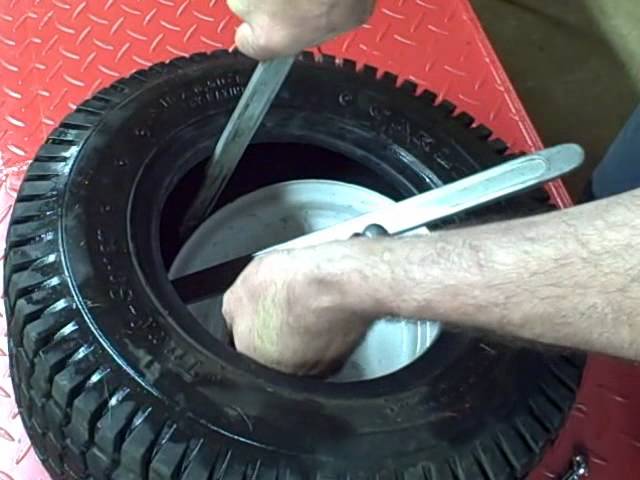
If air is escaping between the valve stem and rim, your tire must be removed before the valve stem can be replaced. The good news is that the professionals at an auto shop can replace your valve stem quickly and cheaply.
RELATED: 5 Car Hacks: Use Household Items To Repair Your Vehicle
Slow leaks occur when a tire punctures after driving over a sharp object that is stuck in your car's tire. Common culprits include nails and screws. Air slowly leaks out at the puncture site, reducing pressure and causing your tire to lose performance.
Contents
Determine which tire has a slow leak.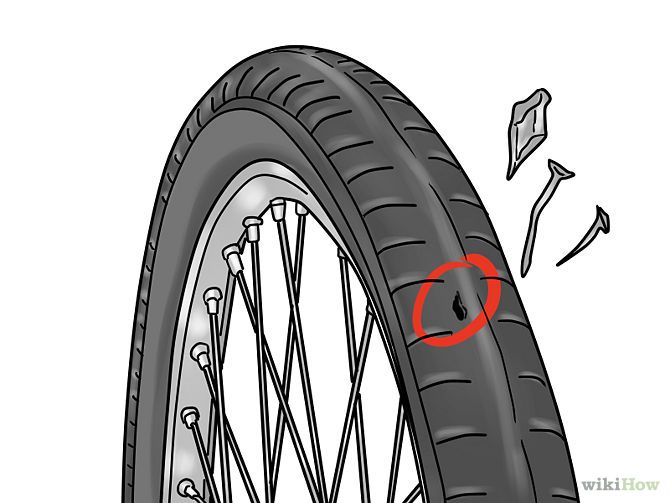 The tire may be noticeably smaller or softer to the touch due to the reduction in the amount of air inside. Use a pressure gauge to determine if the tire pressure is lower than the other tires, if necessary.
Break a vehicle tire that is diagonally across from a slowly leaking tire by placing a wood block or wedge behind it. Blocking or stabilization prevents the vehicle from moving. If you have a manual transmission vehicle, apply the emergency brake for added protection.
Try to find the object causing the slow leak. If you can see it and can reach it safely, you don't need to lift the car. If you cannot see the object, read your owner's manual and raise the vehicle.
Inspect the wheel for foreign objects or puncture marks. If you can't see anything, spray the tire with the soapy water you made by adding liquid soap or cleaning spray to the water. You should see visible bubbling at the site of the slow leak.
Remove the source of the leak, such as a nail or screw, with pliers or a screwdriver. If you find the puncture site but the sharp object is not removed, the object may have fallen out while driving. Continue your renovation.
Insert a plug into the end of the insertion tool included in the repair kit. The cork is a thin rubber cylinder, and the insertion tool is similar to a screwdriver with a "T"-shaped handle.
Grasp the T-handle and align the plug with the puncture site. Insert the plug into the puncture site by pressing down on the T-handle, leaving about half an inch of the plug protruding from the tread.
Carefully pull the T-shaped insertion tool out of the tire. Now the fork is in place.
Add air to your tire using an air pump such as the pump at a gas station and fill to the recommended pressure. Find the recommended pressure inside your car's door jamb, if you're not sure - look for a number followed by "psi" which means pounds per square inch.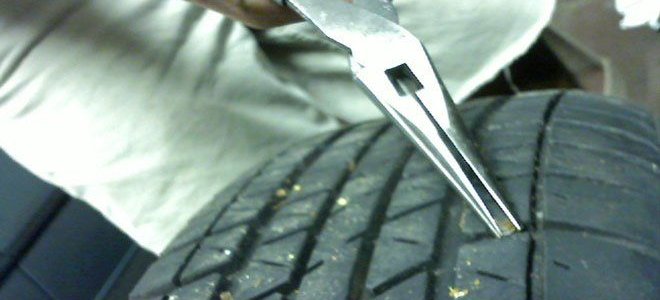 Pay special attention when adding air in extreme weather conditions, but never over- or under-inflate tires depending on temperature.
Lower the vehicle carefully if you raised it and remove the jack.
Check the tire pressure again using a pressure gauge. If the pressure is held at the desired level, you have successfully fixed the wheel. Cut off any excess cork protruding from the tire using a razor blade.
Car Drivers > Useful Information > Auto Devices > Batteries > How to find current leakage in a car with a multimeter
Current leakage in a car is a common fault.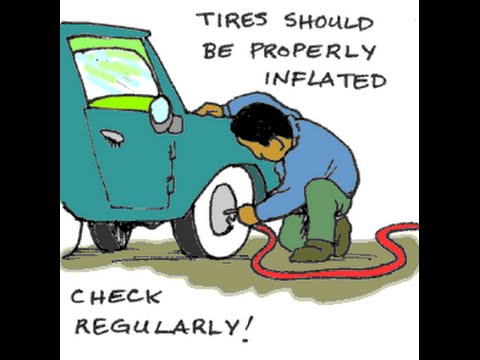
It is found even in new cars, in which, when stuffed with electronic means, it is extremely difficult to detect and eliminate a leak.
In a general sense, leakage current refers to the presence and amount of current that flows from a particular power rail to ground or a common wire in an undamaged electrical circuit. This definition applies more to industrial and domestic electrical circuits. In this case, the leakage is determined by the quality of the insulation.
In a car under current leakage, the presence and magnitude of the current are taken with the ignition off and the electrical equipment completely turned off using the car's standard switches.
Now in a more understandable language. The car has two power rails. It has traditionally developed that they are designated by bus 30 and bus 15.
Bus 30 receives voltage from the positive terminal of the battery directly through a powerful fuse (sometimes without it). Voltage is supplied to bus 15 through the contact group of the ignition switch.
That is, when the ignition is turned off, the bus 15 is de-energized (at least it should be with a good contact group of the ignition switch). Thus, turning off the ignition, turning off all electrical equipment, the bus 30 still remains connected to the battery.
Video - how to determine the current leakage in the car:
In most cases, it is on bus 30 that the current leakage occurs. It is not considered a current leakage to leave the car's electrical equipment switched on during the parking time by inattention or intentionally (radio tape recorder, dimensions, etc.).
Car equipment that is powered by bus 30 and can be a source of leakage current:
Most likely cause. To maintain volatile memory (storage of individual settings, timing), most car radios are powered via bus 30.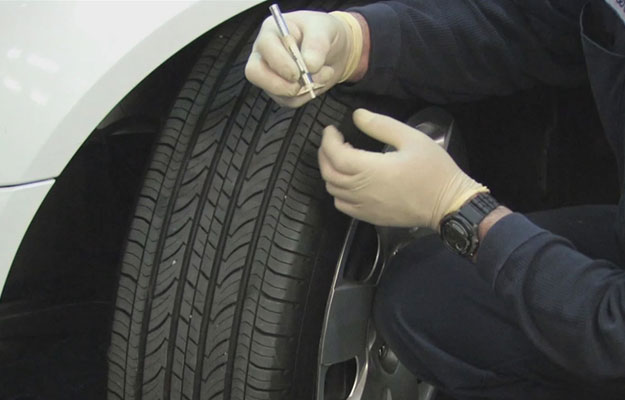 If the radio is faulty, current may leak through it. There is also a current leakage on a working radio tape recorder, it usually does not exceed 10 milliamps.
The car's security device must work when all other units are at rest. Alarming is also often the cause of this phenomenon. In its normal state, it can consume up to 200 milliamps of current, this is also included in the leakage.
Good feedback alarms have a transceiver that can periodically communicate with the keyfob, geolocation systems, GSM, etc. Now manufacturers of car alarms (for example, PANDORA) aim to minimize the current consumption of car alarms in armed mode. There are models where such a current is less than 20 milliamps.
This unit is always energized via bus 30, but with a good unit, this current does not exceed a few milliamps.
The total consumption of these blocks (serviceable) is not more than 10 milliamps.
It always receives voltage from the positive terminal of the battery. If the rectifier diodes in the generator are broken, it can discharge the battery in half an hour. A healthy alternator consumes microamps.
A good starter motor draws no current when it is stopped, although it is also supplied with power at all times.
In real conditions of car operation, especially in the cold season, moisture with various impurities gets on current-carrying conductors, contacts, connectors. Electrolysis currents appear.
The presence of this parasitic process is evidenced by a greenish and white coating on contacts, wires, terminals, connectors, in a word, where salt, acid, alkali and moisture have reached.
Electrolysis is not possible without current. Sometimes leakage currents for this reason reach 0.5 Amperes (500 milliamps) or more.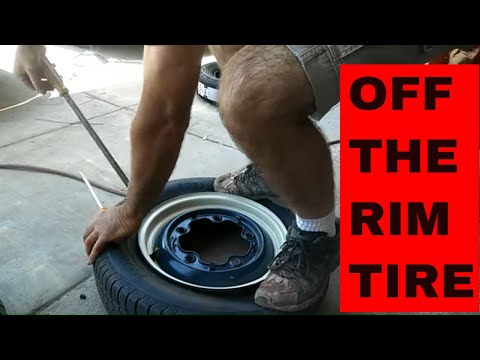 If the wiring is well maintained, treated with special compounds, then the leakage for this reason usually does not exceed 5 milliamps.
In principle, this is also a leakage current. Many have noticed that a plaque forms near the battery terminal. This is also electrolysis. It causes the battery to drain. There is also an internal self-discharge caused by a violation of the integrity of the plates, the quality of the electrolyte. For older batteries, it can exceed the leakage currents of a car.
If you sum up all the listed causes in normal operation, it turns out that the total leakage current in the car can be up to 250 milliamps.
If the leakage current in the vehicle does not exceed 0.2 Amp (200 milliamps) , it can be considered normal.
Here the opinions of many experts differ. Some auto electricians refuse to look for current leakage up to 0.
5 Amperes. Others believe that allowable leakage should not exceed 100 milliamps.
But all experts are unanimous in their opinion: if the leakage current is more than the critical value of 500 milliamers (0.5 Amperes), it is necessary to eliminate the causes of this, because. the consequences may be irreparable.
Video - how to measure the leakage current in a car with a multimeter:
One of the most common and non-dangerous consequences of a current leakage in a car is the discharge of the battery while parking.
It is easy to calculate. With a value of 0.5 amperes for 10 hours of parking, the leakage will “eat” 5 ampere-hours of battery charge, for 100 hours - 50 ampere-hours. Thus, for 4 days of parking, the leak "eats" the entire battery charge.
Therefore, leaving the car for a long parking, you can approximately calculate how long the battery charge will last by measuring the leakage current of the car. The lower the value, the longer the battery will hold a charge. Therefore, many motorists, to be sure, remove the battery terminal while parking.
A more serious consequence may be the failure of individual units. At a current of 0.5 amperes, the power dissipation will be 0.5 x 12 = 6 watts. If it dissipates on any one element, such as a transistor or a control unit microcircuit, it will heat up and fail over time.
The most serious consequence is the ignition of electrical wiring. For example, with a leakage current through any conductor of 1 Ampere, 12 watts of power is dissipated on it.
By itself, this power will not cause ignition, but the insulation of the conductor will begin to melt, which can lead to a short circuit in the electrical wiring, extreme currents will enter into the processes, which will cause ignition. Therefore, cases of spontaneous combustion of the car during parking are not uncommon.
If a multimeter is not at hand, the presence of current leakage can be visually assessed at night.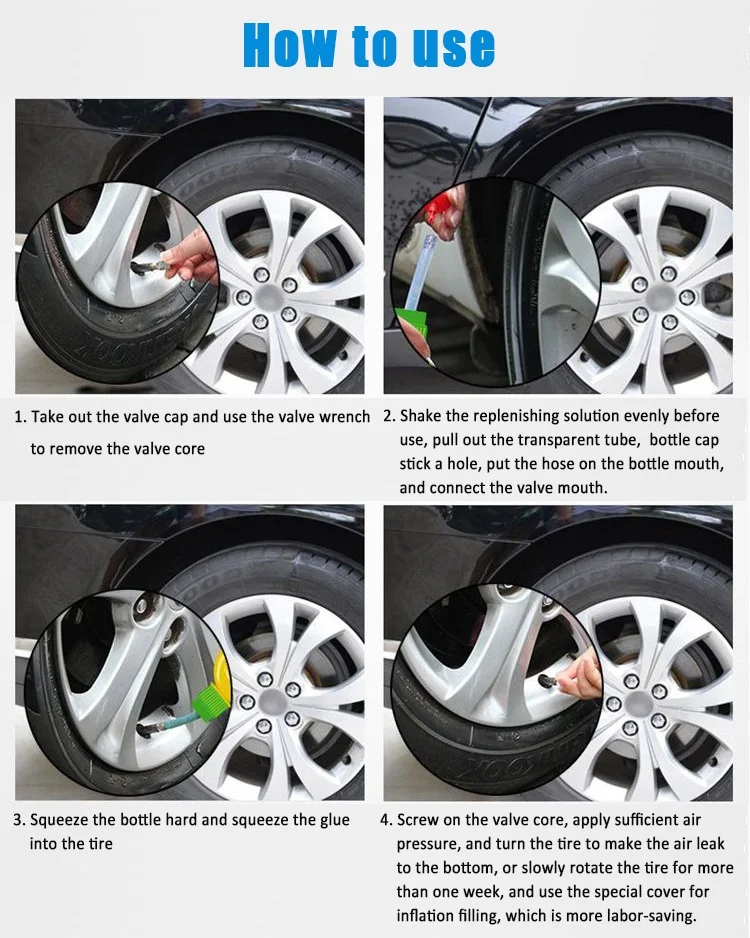 To do this, you must turn off the ignition, all electrical equipment, open the hood, close the car, not turning on the car alarm.
Next, you need to disconnect the positive terminal of the battery, wait five minutes. After that, you need to connect the battery terminal. If a large spark forms when the terminal is connected, there is most likely a leak.
Note: there will be a spark in any case, since during the connection of the terminal, the emergency lighting and alarm may temporarily turn on.
This check can be done if there is a main sign of current leakage: battery discharge after a short stop. It is considered critical if a sufficiently fresh battery is discharged after one week of parking. It is not always possible to check this, since the car is in constant operation.
Video - how to measure the leakage current in a car with a multimeter:
Another sign is the presence of extraneous noise, crackling, buzzing, sparking in the car when the electrical equipment is turned off.
The presence of foreign odors with a taste of smoke when getting into the car in the morning after parking is a serious sign of a malfunction. If there is a large current leakage in the car, then according to the laws of conservation of energy, it can manifest itself in the form of mechanical, thermal or light energy.
Unfortunately, it is almost impossible to find the true cause with such methods. You need to use a multimeter. Auto electricians identify the causes and eliminate current leakage in a car as a complex repair work.
When the first signs of such a malfunction appear, it is necessary to check the current leakage in the car using the device.
For this, a conventional multimeter with a current measurement mode of 10 amperes or more is suitable.
Test sequence:
1. Before performing work, you must find the car's fuse layout. This can be done by downloading the owner's manual for the car by asking the appropriate query in the search engine.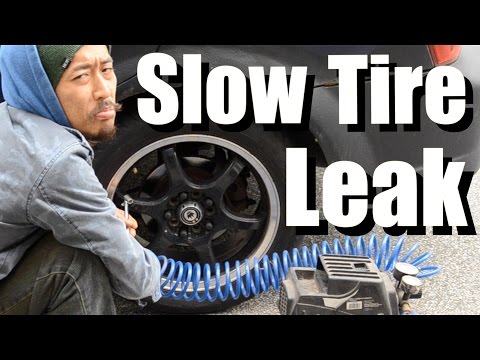 In some vehicles, the fuses are located on the cover of the fuse box. You need to find all the places where there are fuses in the car.
2. Remove the positive battery terminal. The ignition and all electrical equipment of the car must be turned off. Some experts recommend monitoring the negative terminal. There are no fundamental differences, the chain is still the same. When monitoring on the positive terminal, it is easier to search for a specific leak.
3. The multimeter switches to 10 Amp DC current measurement mode, the probes are installed in the appropriate sockets. It is better to put crocodile tips on the probes.
4. Next, the positive (red) probe is carefully fixed on the positive terminal of the battery, the negative one - on the removed terminal going to the vehicle equipment. The place of this connection must be protected from accidental contact with the car body (you can simply temporarily insulate it with rags) so that there is no short circuit.
5. The digital display of the multimeter will show the leakage current. If its value is less than 0.2 Amperes, further control can be omitted. If the current is more than 0.5 Amperes, that is, a critical value, it is necessary to proceed to further operations.
In the case when its value is in the range from 0.2 to 0.5 Amperes, the decision on the advisability of further actions is taken independently. If the current exceeds the upper measurement limit (as shown in the following photo), you should immediately stop measuring and invite a specialist.
6. If the leakage current in the car is more than a critical value, start looking for a specific cause and its source.
An assistant is needed for this. He will consistently remove and insert the fuses into their original places. At this time, the "operator" of the multimeter must control the change in the readings of the device.
If, when the fuse is removed, the readings do not change significantly (by more than 5%), then there is practically no leakage current through this fuse.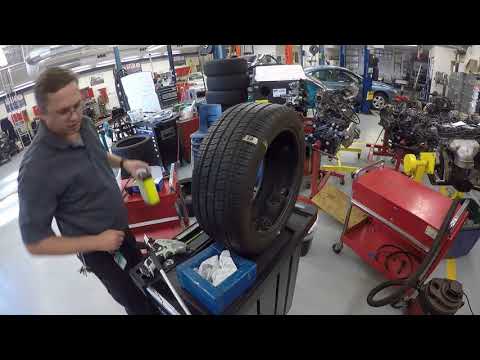
It is more correct to start switching off - switching on with powerful fuses designed for high currents. This can speed up the search process. Usually there are several smaller fuses along the chain of fuses of a large rating.
If, for example, when dismantling the fuse responsible for the body control unit, the leakage current has significantly decreased, it is necessary to go to the control of small fuses responsible for lighting equipment, wipers, washer and other elements of body equipment.
Video - search for current leakage in a car:
It is best to go through all the fuses in this way. Car alarm fuses are usually not installed in regular places, they can “hang” next to the main alarm unit.
Some auto electricians use a sophisticated control method. It does not require an assistant.
7. Complicated method. In this case, the positive battery terminal is thrown back. The fuses are in sequence. The multimeter probes are installed in the connectors of the removed fuse, controlling the current through a particular circuit. This method is more laborious, but accurate.
8. Having deciphered all the circuits through which the current flows according to the fuse layout, proceed to establish the specific cause of the leakage in these circuits. This requires experience with vehicle electrical circuits. The most common causes:
9. To temporarily eliminate the problem of current leakage, you can leave the fuse that is leaking in place. For example, if the cause of the leak is in a malfunction of the car radio, you can turn off the corresponding fuse while parking.
If there are signs of current leakage in the car, it is necessary to measure its value with a multimeter.