This guide will help you troubleshoot the most common causes for an ATV that won’t start. Some issues are easy to fix at home, while others require assistance from a mechanic.
These are the main reason why an ATV will not start:
To identify what is causing your ATV’s starting issues, you need to notice how it behaves when yore trying to start it. Choose the topic below that describes your bikes behavior best to begin your troubleshooting.
Page Contents
If your ATV doesn’t crank at all when you’re trying to start it, there are a few basic things to look into.
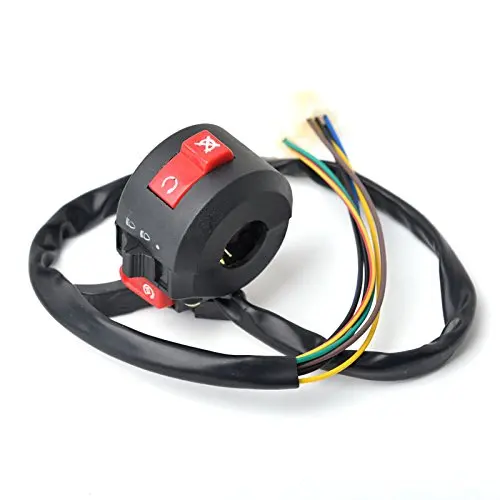
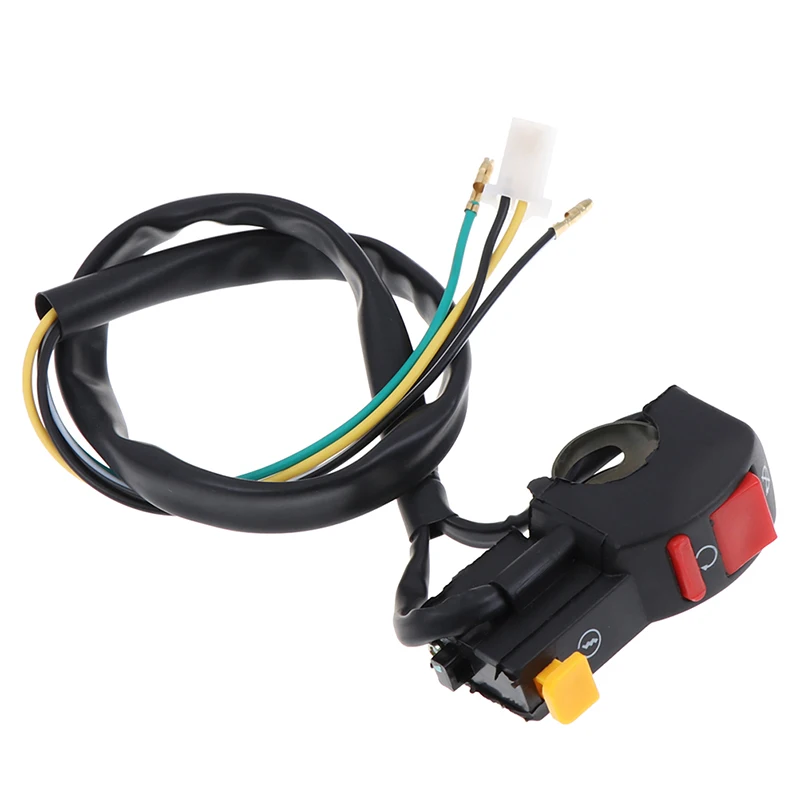
You’d be surprised how often the solution to an ATV that won’t start is forgetting to turn on the kill switch.
Also, if your ATV has a tether pull cord style kill switch, make sure it is connected properly.
Many ATVs are designed not to start when in gear as a safety precaution.
The battery should read 12,6 – 12,8V. Use a multimeter or a voltmeter to check the voltage.
If the voltage drops too low, the battery won’t have enough charge to start the bike.
Charge the battery or replace it if it’s dead. Am easy way to test your battery is by checking the voltage-drop with a multimeter as you try starting the bike. If your fully charged battery drops below 11,5 volts under load (while you crank the starter), it needs to be replaced.
Most ATVs have a main fuse.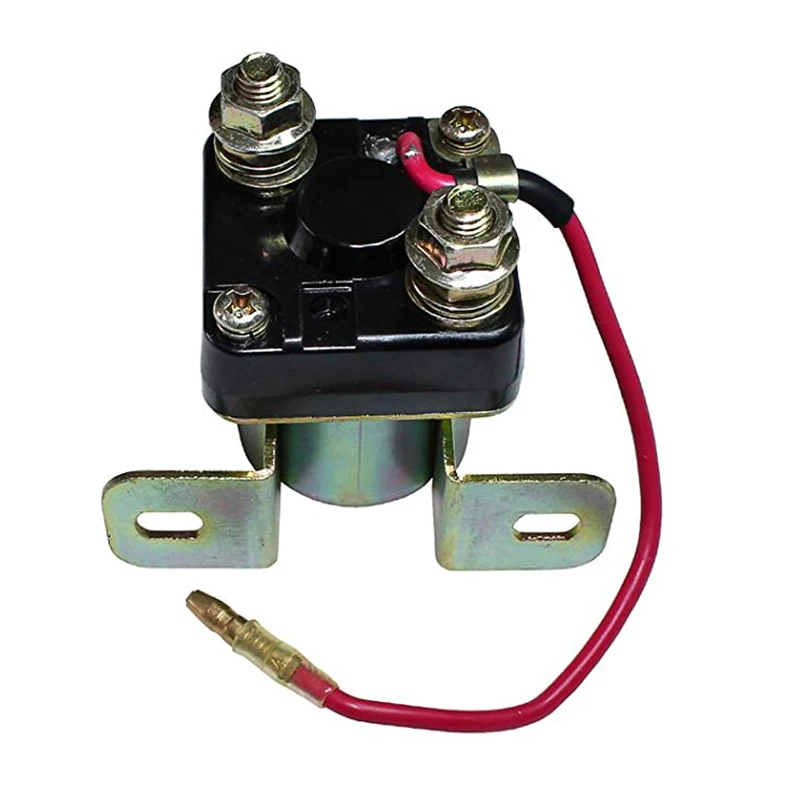 Your user manual will help you locate it.
If your battery is charged, but you still get nothing when turning the key, you may have a blown main fuse. Replace it with the right size fuse and try starting again.
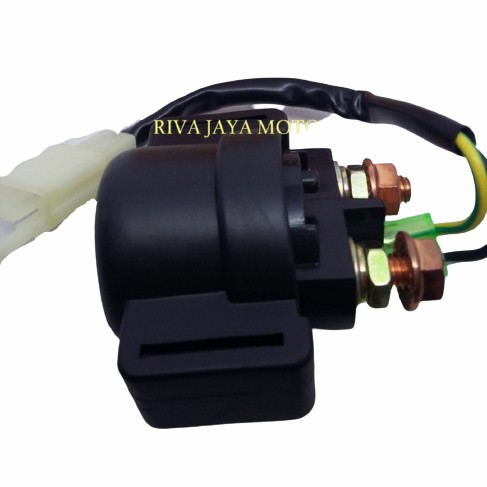
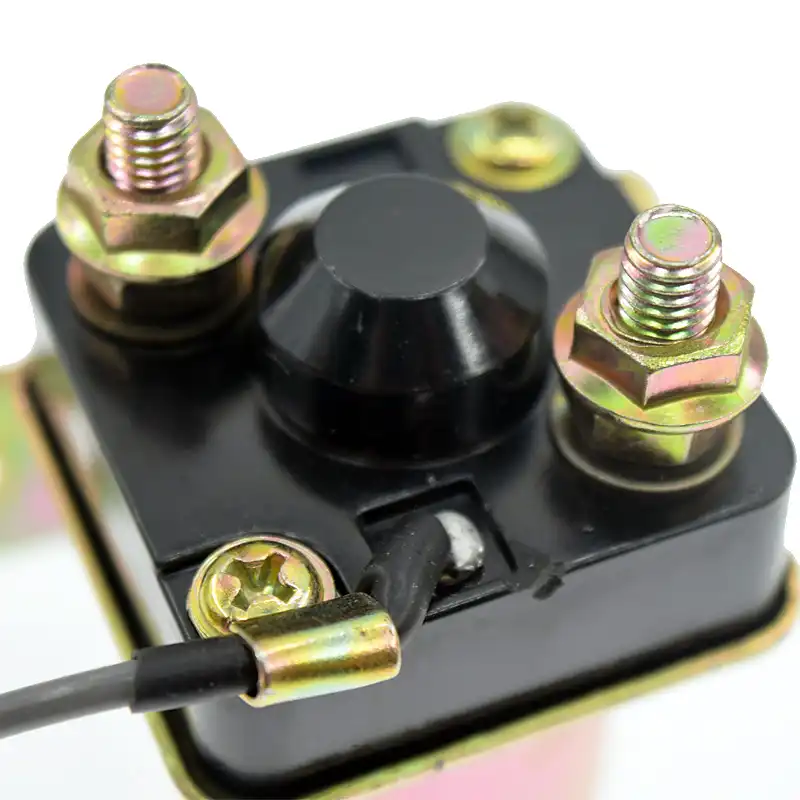
The solenoid works as a switch that sends a high current to your starter when you push the start button or turn the key. For it to work, you need to make sure it is getting power from the battery.
The solenoid should make an audible “clicking” sound each time you hit the starter. If it does, you know it is getting power, and the problem is likely with the solenoid itself or possibly the starter. Solenoid and starter issues will be covered later in the post.
If you do NOT hear a clicking sound, you can use a multimeter or voltmeter to verify that the solenoid is, in fact, not getting power.
The solenoid is usually located near or on the starter.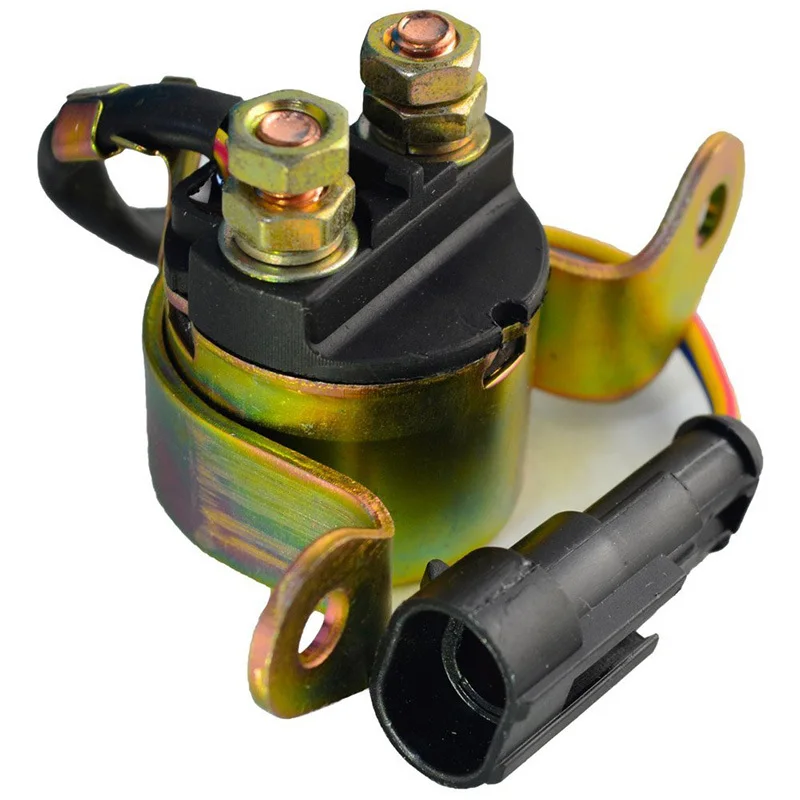
If you don’t get a reading, you need to trace the wiring back to your battery to wind where the connection is broken. Look for loose or corroded terminals or shorts from damaged cables.
A gasoline engine needs three essential components to start and run:
If the plug is dry, the bike is not getting fuel and you need to continue the troubleshooting as described below.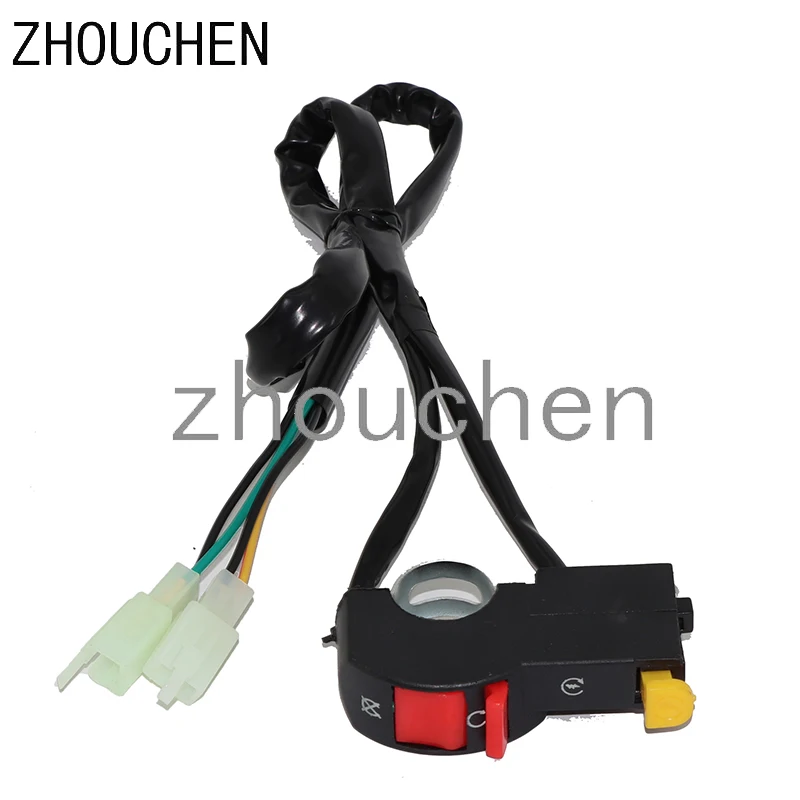
Alternative method: If you don’t have a spark tester tool, you can do a visual test to check for spark. Please note that this method may cause electric shock if done incorrectly.
You will find the proper steps for troubleshooting an ATV that is not getting a spark further down this post.
If the spark plug is still dry after cranking the engine for a few seconds, you know that fuel, for some reason, is not getting to the cylinder.
It’s often either an issue with the fuel-pump or that the fuel supply line is clogged up somewhere between the gas tank and the carburetor.
Old or unstabilized gas tends to gum up over time and may create a clog. Dirt and debris getting inside the tank is another common culprit for a clogged-up fuel supply.
The easiest way to identify the cause is through a process of elimination.
Note that if you find contamination such as dirt or gummed-up fuel at one spot, the whole system is likely dirty and needs a complete clean for the best result.
The steps involved are slightly different depending on whether your ATV has EFI (electronic fuel injection) or a traditional carburetor system.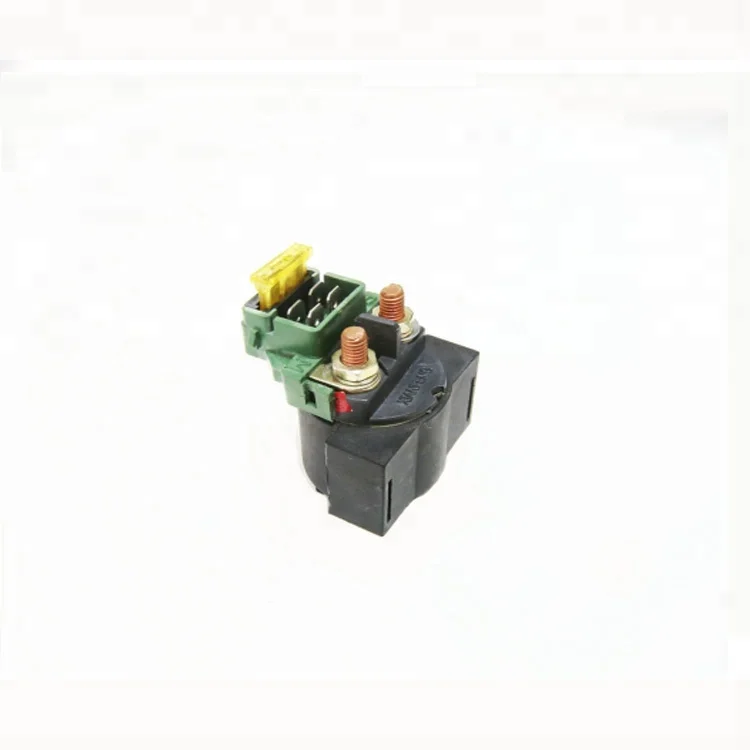
There is either a vent in the gas cap or a separate gas tank vent tube. Make sure neither is clogged and allows air to flow freely.
Fuel needs to be replaced with air as it gets pumped out and used. If the vent is blocked, the fuel pump may not be able to suck fuel out of the tank.
Older ATVs, and some of the cheaper models still today are designed with a traditional carburetor fuel-system.
There should be a shut off valve at the lowest part of the fuel tank. Make sure it is turned on.
This step will help you narrow down the possible causes of why fuel is not reaching the cylinder.
With the fuel valve open, disconnect the fuel line from the fuel inlet of the carburetor. Turn over the engine to see if gas is coming through the fuel line.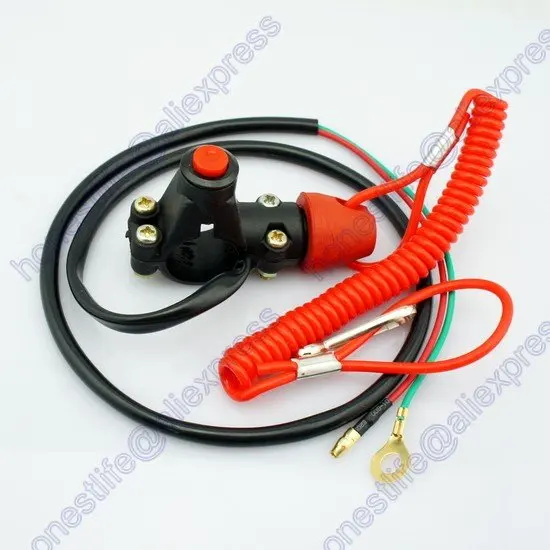
If it is very little or no fuel coming from the fuel line, you likely have either:
If there is a steady or pulsating stream of fuel you know that
Continue your troubleshooting based on the results of this initial test.
Fuel exits the fuel tank through a shut-off valve at the lowest part of the tank. Inside this valve, a mesh screen is supposed to stop dirt and debris from entering the fuel lines.
Disconnect the fuel line from the valve to see if gas comes through. If fuel does not flow freely, you need to remove the valve to clean it.
All of the fuel left in the tank will drain as you remove the valve. Use a bucket to collect the fuel.
Use carb cleaner, some fresh gas, and a toothbrush to clean the valve and mesh screen. Pour some fresh gas in the tank to flush out any remaining gummed-up old fuel or debris before installing the valve.
If the gas in the tank is old or contaminated, you should not put it back in the tank after cleaning the valve.
Not all ATVs have serviceable fuel filters, but some do. Trace the fuel line all the way from the fuel tank to the carburetor. Look for a cylindrical canister unstalled in-line anywhere on the fuel line.
Fuel filters are cheap and easy to replace, so it’s worth doing if you suspect that something disrupts fuel flow.
ATVs with traditional carburetors usually have a vacuum-operated fuel pump. They are run by vacuum/pressure pulses created in the crankcase. The negative pressure pulls fuel in, while positive pressure pushes fuel out.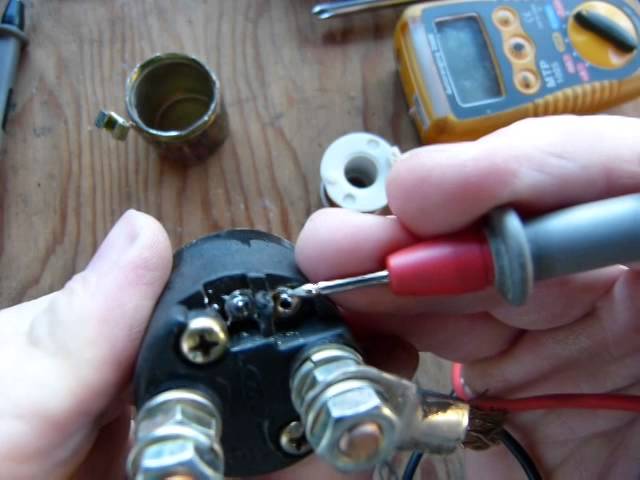
If the pump is still not working, you may need to replace it.
Alternatively, you can pull it apart to give it proper cleaning and a rebuild. Inside there are check-valves that may get suck if dirt enters the pump. There is also a rubber diaphragm that may stretch or crack over time.
Some ATVs have a vacuum-operated shut-off valve that is designed to open only when the engine is running.
Identify the vacuum line that goes to one of the inlet ports. Disconnect the line and draw a vacuum to the disconnected port. The valve should now open and allow fuel to flow.
Inspect the vacuum line to make sure it is correctly connected at both ends and has no cracks that will draw false air.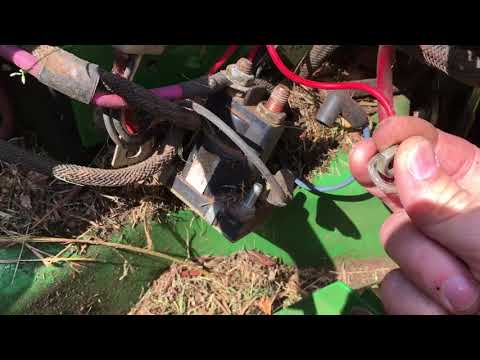
If you suspect that the valve is not working, put it in “prime” as this will override the vacuum-operated valve. This will tell you if the valve is working or not.
Old unstabilized fuel and debris from the gas tank may completely gum up the carburetor or block the jets so that the engine is not getting any fuel.
I recommend using a product like Seafoam or similar to see if it will dissolve the gummed-up fuel before embarking on a more thorough cleanse. Leave the choke wide open to allow maximum flow.
Click this link for instructions: https://seafoamsales.com/uploads/2018/12/HOW2_Gummed-Up-Carburetor.pdf
If Seafoam doesn’t work, your best bet will be to remove and disassemble the carb to clean it properly. This job may not be for everyone. Consider asking a mechanic if disassembling the carb seems intimidating.
 You do not want to be missing any parts when reassembling the carb.
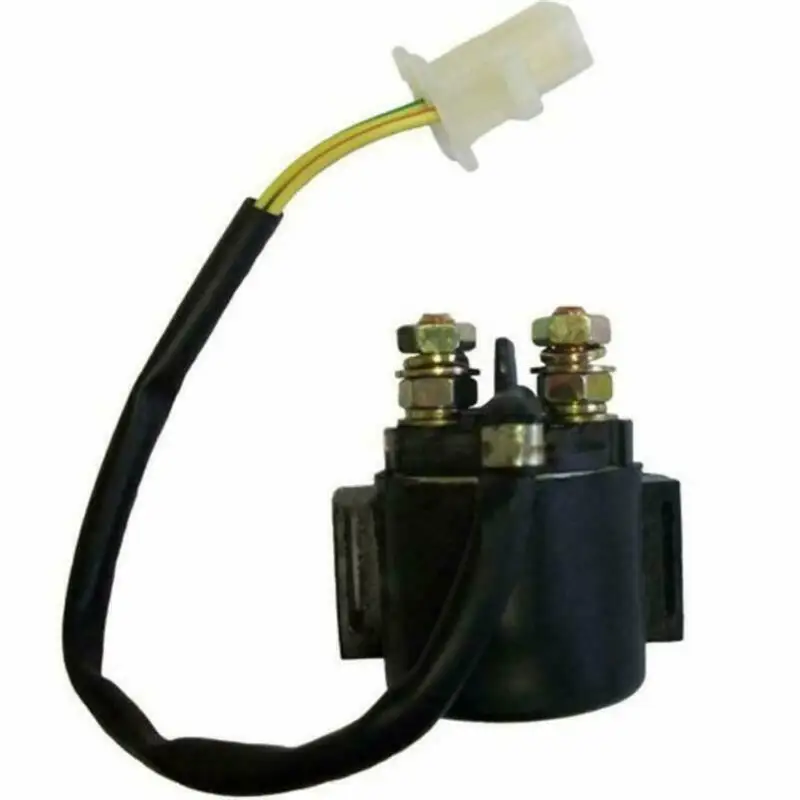 This will dissolve any gummed-up fuel still trapped in the system. Follow the manufacturer’s instructions, depending on which cleaner product you choose to use.
 I recommend these links for a more detailed and illustrated guide on how to disassemble and clean a carburetor (external links):
How to disassemble and properly clean a carburetor:
https://www.rockymountainatvmc.com/rm-rider-exchange/clean-carburetor-motorcycle-atv/
Clean a carburetor by using chemical carb cleaner:
Fuel-injected engines use an electronic pump to feed pressurized fuel through fuel injectors and into the engine.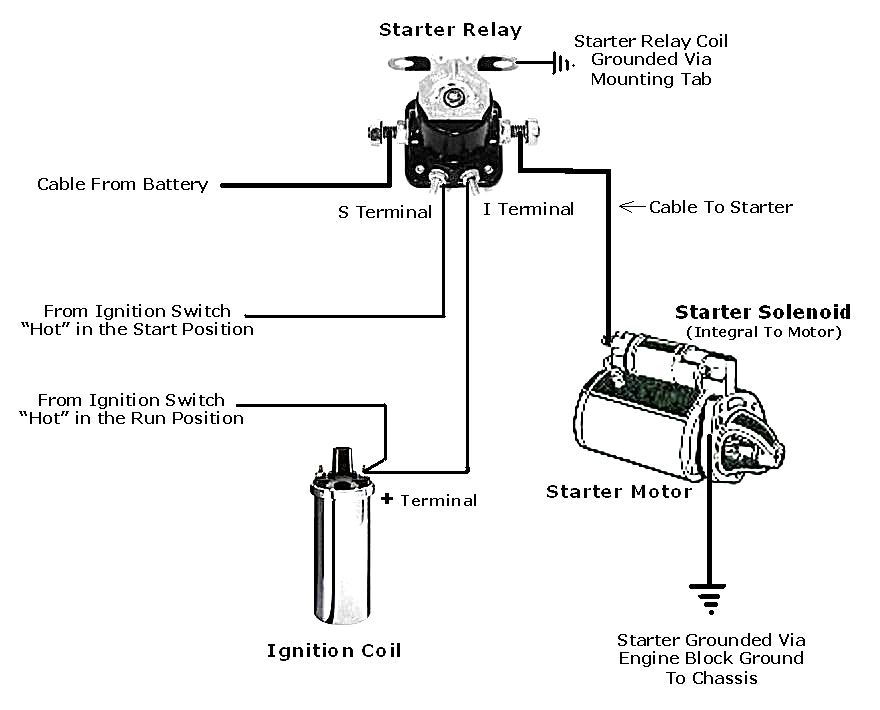
Troubleshooting a fuel-injected ATV is a bit trickier than carbureted ATVs, but it’s possible:
Most fuel-injected ATVs do not have a serviceable fuel filter.
Instead, they have a non-serviceable screen or a sump-filter located inside the gas tank. Note that some EFI ATVs also have an inline external fuel filter.
The screen or filter is one component of the complete full fuel pump assembly located inside the tank. These filters are not meant to be serviced but may still clog up.
You need to remove the whole fuel pump assembly to access the filter.
Begin by removing any plastic covers to access the top of your gas tank. There you will find a large plastic locking-ring that connects the entire fuel filter assembly to the fuel tank. You may need a set of large pliers to remove the ring as they tend to bind.
Be careful so that you don’t damage any fragile plastic components as you remove the pump assembly.
The filter will be at the very bottom of the assembly. You will generally need to replace the whole assembly to replace the filter.
If you want to save some money, consider looking up a suitable replacement filter on-line.
Electric fuel pumps tend to fail for no apparent reason from time to time. Before they break completely, they may be getting weaker gradually due to wear.
A worn fuel pump may not create a high enough fuel pressure for the injection system to mist the fuel properly, which may prevent the ATV from starting. Aftermarket fuel pumps are available for most ATVs, but replacing them is not for everyone.
Also, you have possible fuel pressure regulator issues or bad o-ring seals.
The best way to test an electric fuel pump is by measuring the fuel pressure at the fuel rail. This will, however, require a specialist tool that the average home mechanic does not have.
A clogged fuel filter or clogged fuel lines may cause too low fuel pressure as-well.
Before replacing the fuel pump assembly, it’s worth making sure the bike is charging correctly, as a low voltage will negatively impact fuel pump performance.
Modern EFI ATVs may provide an error code indicating fuel injector issues. Troubleshooting fuel injector problems, however, is a task that often gives even seasoned mechanics a headache. I recommend you save this job for a dealer.
Here are a few things to try out if your ATV is not getting a spark:
When you try to start the ATV, the engine seems to crank just as normal. But the engine will not start. All you get is one or several loud bangs coming from the exhaust.
These bangs are known as the ATV backfiring, usually caused by the air/fuel ratio being too rich or too lean.
If you forget to engage the kill switch before trying to start the bike, it will pull gas into the carburetor, but there is no spark to ignite the fuel.
When too much gas enters the carburetor, there won’t be enough space left to mix the required air/fuel ratio for the bike to start and run.
If you have the time, let the bike sit for a couple of hours before trying to start it again.
Alternatively, you can remove the spark plug while turning the engine over for a few seconds. Any excess gas will escape through the spark plug hole. Wipe the plug clean and put it back in. Then try starting the ATV as usual.
Spark plugs are considered consumables that may need replacing from time to time. A spark plug that has gone bad may prevent the ATV from starting and only cause it to backfire.
Replace the plug with a new one according to the manufacturer’s specifications.
A clogged air filter will restrict airflow and, therefore, significantly impact how rich your ATV engine operates. Too little air will cause an overly rich mixture, resulting in symptoms like the ones you experience.
Clean or replace the air filter with a new one before trying to start the bike again.
Another possible cause of these symptoms is that your valve clearance is incorrect. As the engine gets some hours to it, the valves may seat deeper in valve seats and may need adjusting.
Checking and adjusting the valve clearance on an ATV is not that hard to learn, but it is recommended that you ask for guidance from someone more experienced the first time you do this job. If you do it incorrectly, you risk causing permanent damage to your engine.
Your bike’s timing is what tells the bike when to pull air and fuel into the cylinder, when to ignite the fuel and when to discard exhaust gasses out the exhaust. If one cam is off by just one tooth, you may run into starting issues accompanied by the occasional backfire.
If you’ve been working on or removing some of the timing components, you need to make sure that everything is reassembled correctly. Lookup a timing diagram for your specific ATV and make sure all the timing marks line up.
If the task of aligning the timing marks sounds intimidating, you are probably better off leaving the job to a mechanic.
The timing might be off even if you did not work on any of the timing components. What often happens is that the timing advance key, also known as a rocket key, has sheared and needs replacing.
The timing key plays a crucial role in timing your bike’s ignition as it locks the flywheel in the right position on the crankshaft. If it breaks, your bike’s timing will be off immediately.
This little metal part is designed to break to protect other engine components. From time to time, it may break even if there is nothing else wrong.
Luckily they are not that expensive or time-consuming to replace. It is not a job everyone will be comfortable doing for themselves. Still, nothing an averagely skilled home-mechanic can’t manage after watching a couple of youtube videos for their specific brand and model.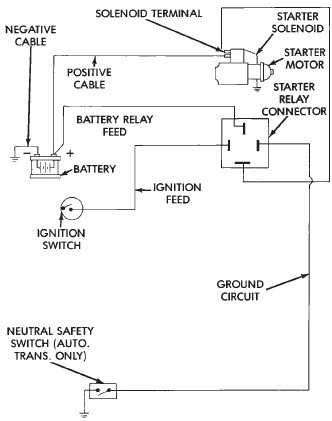
The key is located on the crankshaft. You need to unbolt and remove both the flywheel-cover and flywheel (the flywheel on an ATV is actually called a generator) to access it. A flywheel puller may be required.
If the key is sheared, remove all pieces from the old timing key and install a new one according to factory spec. Ask your dealer to make sure you get the right one. Install the flywheel and flywheel cover before trying to start the bike.
Make sure the timing marks are lined up correctly. The timing mark layout will be different from model to model. Please refer to your service manual.
A dirty carburetor may prevent enough fuel from getting to the cylinder, causing a lean backfire.
Due to the backfire, you know that at least some fuel is getting through. Please refer to step 3 on how to clean the carb.
Before spending money on a mechanic, it may be worth draining your gas tank and adding fresh gas. Gas may go bad if it sits too long, or it may get contaminated with water due to condensation.
Most gas tanks will have a removable drain plug or on/off switch at the bottom. Your next best option is to pump or siphon the fuel out of the tank.
If a valve has stuck open, the compression will be too low, and the bike will not start. Repairing a stuck valve is usually a task for a trained mechanic.
If all you hear when turning the key is a buzzing sound, it is usually because your battery is dead or needs charging.
The buzzing sound you hear comes from the starter solenoid relay that won’t kick in due to low voltage.
The solution is usually quite simple. Charge the battery or replace it if it is dead.
Also, make sure all of the power wires going from the battery to the solenoid are correctly connected and not corroded. Put a test light across the connection you are testing as you activate the starter.
If the problem is not battery-related, you may have a bad starter or even a seized engine, preventing the starter from engaging. After ruling out a bad battery, it’s recommended to have further troubleshooting done by a mechanic.
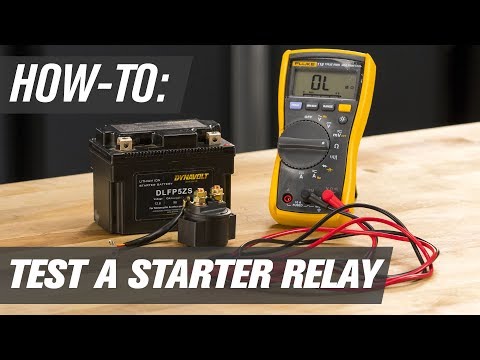
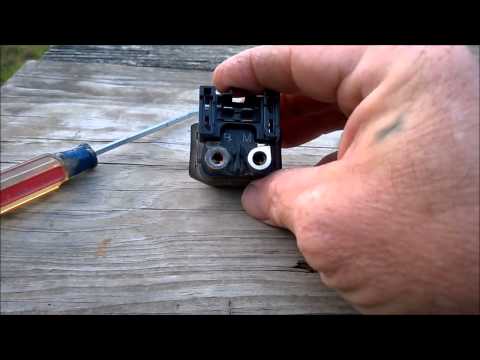
When activating the starter, the engine won’t turn. All you can hear is a clicking sound each time you press the starter button. The clicking sound is coming from the starter solenoid.
A solenoid that is working correctly will provide an audible click as you activate the starter. But the solenoid may be bad even if it clicks due to internal corrosion.
Use a multimeter to test if the solenoid closes the circuit as you try activating the starter.
Put your multimeter to DC Voltage. The red lead goes to the starter side of the solenoid. The black lead goes to ground. There should be no reading when not pressing the starter button. But when you activate the starter, you should get a voltage reading of 12V or more.
If you don’t, your solenoid is probably bad and needs replacing.
As an alternative method, you can use a piece of cable to jump your solenoid. Make sure the cable you use can handle the high current. If the ATV starts when jumping the solenoid, you know that the solenoid is bad and needs replacing.
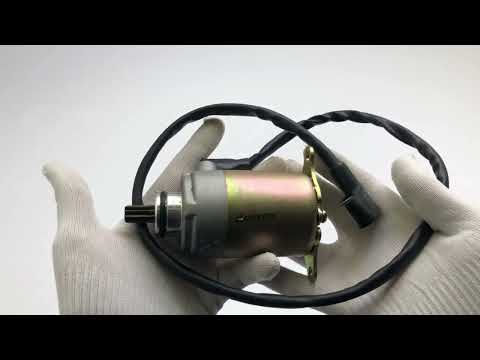
If your solenoid is good, the problem is likely with the starter. Starters may wear out due to old age, or they may go bad from a busted seal that will allow oil or water to get inside of the starter.
To test the starter, you need to remove it from the ATV. It’s connected with a few bolts. You will also need to remove the cable coming from the solenoid.
Use a fully charged battery and a set of jumper cables to test if the starter will spin as it’s supposed to. First, you should use the positive lead to connect the positive battery terminal with the positive (red) starter cable. Then attach the negative lead to the negative battery terminal.
Hold the starter firmly in place and complete the circuit by connecting the negative lead to where your starter ground to the engine.
The starter engine shaft should start spinning freely with no signs of drag or scraping. Replace the starter if it is bad.
After running your ATV completely dry, you may find that it won’t start even after filling it up with fresh gas.
If it was running fine before you ran it dry, your problem is likely fuel-related as running the bike dry will not cause damage.
The fuel pump will need some time to suck up fuel after the bike has run completely dry. Fuel-injected ATVs, in particular, can be extra tricky.
Not all ATVs have one, but if yours has a primer pump, you should use it to pump fuel back into the carb manually.
Look for a button on the side of the carb that may look like a choke knob. You will need to pump it several times for it to have any effect.
Switching to “Reserve” and letting the bike run completely dry may allow dirt and gummed-up fuel that has set on the bottom of your gas tank to be sucked into the carburetor.
The same applies to gas contaminated with water, which is heavier than gasoline and will fall to the tank’s bottom.
Clean the carburetor, as described in step three.
Remove the spark plugs and pour a dash of gas into the spark plug holes. Reinstall the plugs and try starting the bike.
This will provide enough fuel so that the ATV starts and begin sucking fuel on its own. You may need to do this 2-3 times before you succeed.
Blowing with a steady pressure into the gas tank vent tube while running the starter may help the fuel to start flowing.
Running the bike dry won’t harm the spark plug per se, but contaminated fuel may. You may need to replace your spark plug to get going again.
Some ATV fuel pumps cant take being run dry. When run dry, the RPMs will go up, and the pump will burn out due to a lack of cooling and lubrication from the fuel.
Try removing the pump and check for internal resistance with an ohm-meter. If there is no resistance, the pump is likely bad.
First of all, it is not really recommended that you use starter fluid on your ATV in the first place. Starter fluid evaporates very easily, and the vapor is highly flammable. Both you and the ATV can catch fire from a spark caused by a short.
It’s much safer and just as effective to carefully pour or spray some gas straight into the cylinder through the plughole. A couple of ounces should be enough before installing the spark plugs and starting the bike.
As long as the spark plug provides a bright blue spark and fuel is entering the cylinder, you may suspect that your compression is not good enough. Use a compression gauge and check if the bike’s compression matches factory spec. If it doesn’t, the engine might need an overhaul.
If the spark seems weak, the problem may be with the pick-up coil. Look for cracks or any other visible damage. If the coil is damaged, replace it with a new one. Note that the coil may be bad even if you’re getting a spark.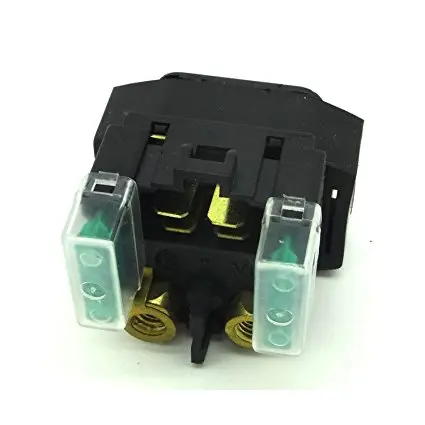
Most ATV manufacturers recommend that you not use a pressure washer to clean your ATV, which may damage electrical components. Instead, it would be best if you washed the ATV by hand using only a garden hose and mild soap.
Here are a few tips to try if your ATV won’t start after washing it:
I’ve dedicated an entire post on how to repair an ATV that’s been submerged in water.
You’ve just installed a new battery, but the ATV still won’t start.
Then, refer to the other topics in this post according to how your ATV is behaving. Does the engine turn over? Does it make clicking or buzzing sounds? Start from the top and work your way down if you are not sure where to begin.
If you cannot jump-start your ATV, it may not be a dead battery that is causing your starting issues. Make sure you are following the proper procedure for jump-starting an ATV.
If the ATV starts with the electric starter, it should start with a pull starter as-well. I recommend that you begin troubleshooting as if the turns over but won’t start.
When you try to start your ATV and you hear a click instead of the engine roaring to life, it’s more than annoying. Instead of joining your friends as they go mudding, you now need to figure out how to make your quad start. So, what can you do when your ATV doesn’t start?
Your ATV most likely clicks when you try to start it because of the battery. The reasons for this are numerous, from loose connections to a current draw that drains the battery. If the battery is not the cause, the ATV probably has a faulty starter solenoid.
Your ATV is meant to be ridden, not sitting in the driveway, so let’s get to troubleshooting.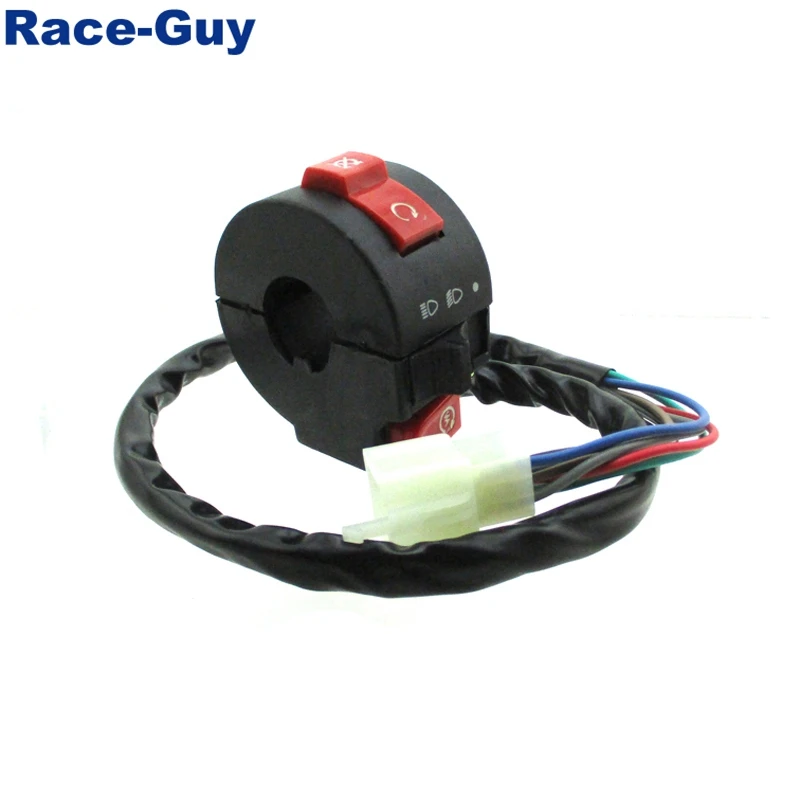
This is an easy solution to check for and fix. Examine the connections to the battery and the starter. Sometimes the connections get knocked loose, especially if you’ve ridden some rough trails. Also, check for corrosion on the battery terminals, and if you find some, clean it off.
If the connections are clean and tight, then it’s time to move on to the next possible problem.
Battery problems are the number one reason ATV owners hear the dreaded click when trying to start their quads. ATVs give batteries a workout, so it’s not uncommon for one to go bad after a couple of years.
Your climate, how well you maintain it, and the quality of the battery affect its longevity. If you bought a cheap battery, do not expect it to last for more than a year or two.
One sign that the battery doesn’t have enough of a charge is multiple clicks in rapid succession. If there is a single click, then you may have another problem with your ATV—the starter solenoid. We will talk about that in a bit. For now, we’ll assume the battery is the issue.
Here are a few reasons this could be happening:
To test for this, unplug the battery and charge it completely. Then measure the voltage using a multimeter. Let the battery sit unused for a day or two and recheck the voltage. Significant loss of voltage means you most likely it is time to replace your battery.
Before you go out and buy a new one, you might want to do some additional troubleshooting. Check out, How To Keep an ATV Battery Lasting for more info.
Let’s say you charged up your battery. After riding for a couple of hours, you stopped. When you tried to start your ATV, you heard the click (or silence).
If your battery can’t hold enough of a charge, then you should do a load test. For this, you need a multimeter and a load-tester if you want the most accurate results.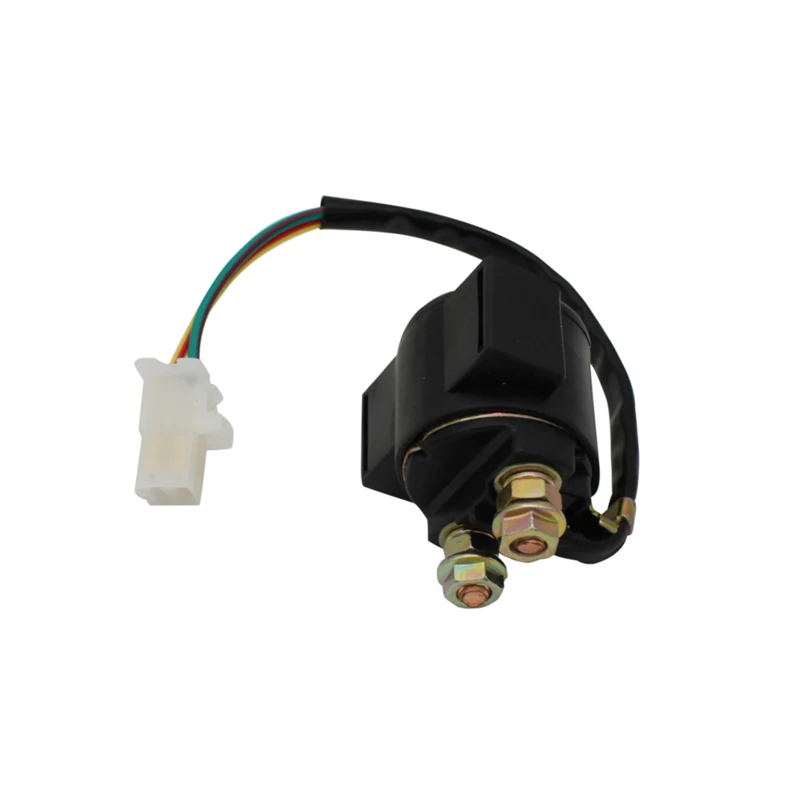
First, charge your battery to at least 75% (typically 12.4 volts). Use a multimeter to check the levels.
Reconnect your battery. Try to start your quad and check the battery’s voltage. A number below 9.6 volts means your battery doesn’t hold a charge.
Perhaps you made sure your battery was charged in the evening, but it is dead the next morning. Something in your ATV is using current. Parasitic amperage draw is the term for when a vehicle’s component is drawing electricity when it shouldn’t (i.e., the engine is off.) Typically this is due to a bad relay or fuse.
This used to be a more common problem when most ATVs had lead-acid batteries. If your quad has one of those batteries, then a fluid check is required. However, most ATVs come with an AGM (absorbed glass mat) or SLA (sealed lead-acid) battery, which cannot be topped off.
If you need to check fluid levels, clean the outside of the battery first to keep crud and dirt from falling into the battery.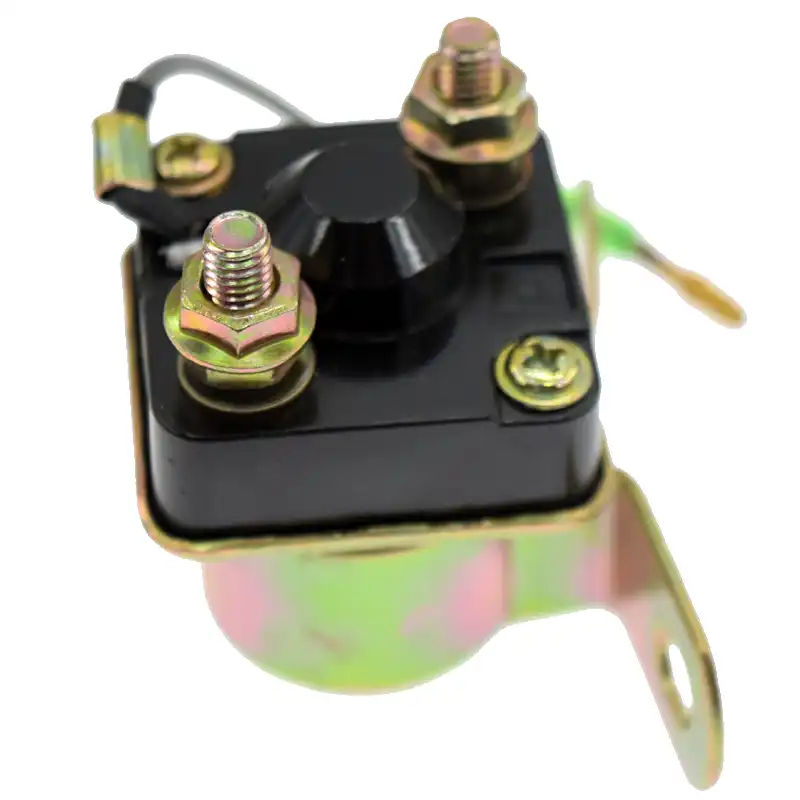
Open the covers and check for the fluid levels then fill the battery cells so that the plates are covered and replace the cover.
Charge the battery and see if it can hold its charge. If not, buy a new one. And when you do, buy a higher quality AGM or SLA.
Another problem with lead-acid batteries is they suffer from poor performance in cold weather. Since you can’t do much about the weather, once your lead acid battery no longer performs well, you have to replace it.
Here’s a helpful video showing how to test an ATV electrical system:
Have you left your four-wheeler sitting idle too long? Cars use an alternator that charges the battery while it is running.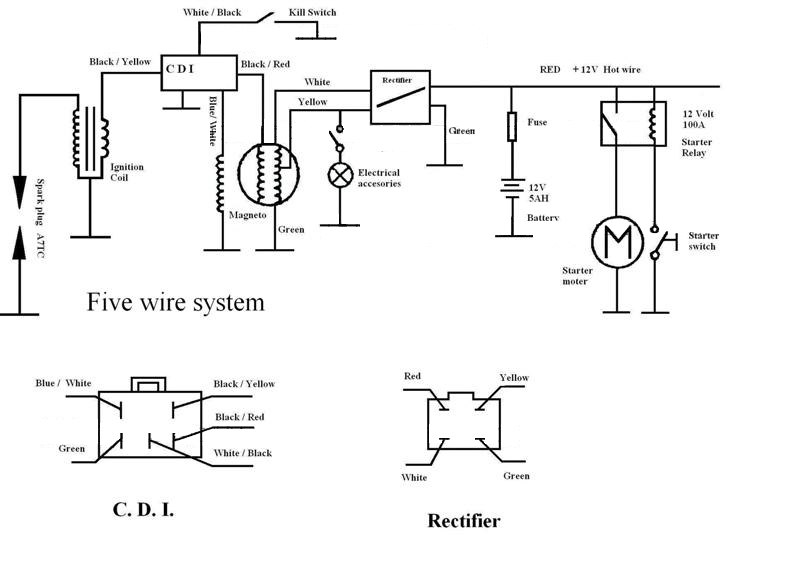 But most ATVs use a stator, which is designed to provide electric power.
Unlike alternators, stators do not recharge the battery. This is why a four wheeler’s battery needs to be charged while a car’s does not.
So if you forgot to charge the battery, it might have a little juice left, but not enough to start your vehicle.
In that case, you need to charge the battery. You can do this with another ATV battery or a car battery. Do not turn on the car if you use a car battery. You will risk frying your ATVs’ electronics.
If you haven’t already invested in a jump box, like the NOCO Boost Plus (link to Amazon) this is a good time to do so. Jump boxes are designed to connect safely to 12-volt batteries. The USB ports are handy for charging phones and other devices as well.
Since the number one cause behind an ATVs failure to start is the battery, keeping your battery healthy is essential. Follow these tips to keep your battery healthy:
 Get in the habit of plugging the battery into a jump box or battery tender.
How To Charge an ATV Battery will walk through all the steps to keep your battery charged and lasting a long time.
I like to use the Ctek Smart Charger found here on Amazon if the ATV is going to be sitting for more than a couple weeks. That way the battery is good to go when I need it.
If you have checked the battery, charged it, or replaced it and the ATV still does not start, it could be due to a bad solenoid. Also called a starter relay, the next most common reason an ATV doesn’t start is a bad solenoid, also known as a starter relay.
A solenoid provides the contact point between the battery and the starter. It works like this: when the starter switch is activated, amperage is sent to the solenoid.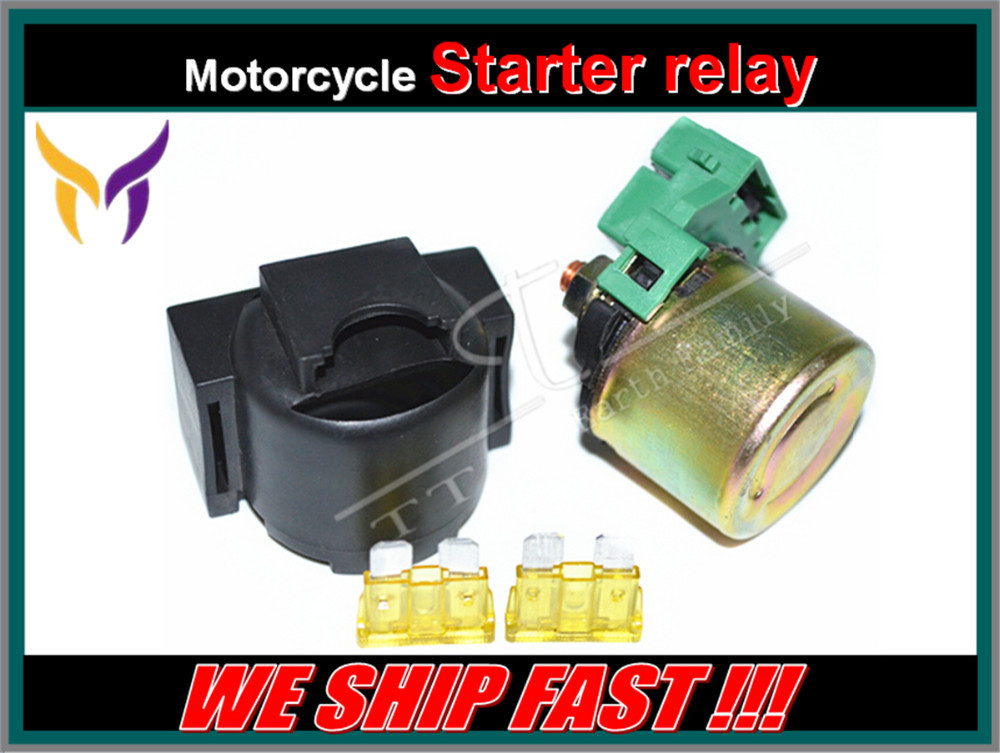 The amps cause the armature inside the solenoid to move, which completes the starter and battery circuit.
When you try to start your ATV and hear a single click, chances are good your starter relay is the problem. But there are a few other signs that the solenoid is the cause of the clicking.
You will have to replace it. The starter solenoid will have two wires going from the battery and a pair of smaller cables going to the fuse housing. Before taking it off, make sure the battery is not hooked up. Otherwise, you are risking getting shocked.
ATVs with an electric starter can sometimes be jumped with the wrench trick. Locate the two wires coming from the electric starter. They should be positioned in such a way that you can use the wrench to jump-start your quad.
The number one reason an ATV clicks and doesn’t start is the battery, so you should troubleshoot that first. If your battery is functioning correctly, the next common source is the starter solenoid or a bad starter motor. Occasionally you could have hydro-locked your engine, or the fuses have failed.
The good news is that isolating battery problems is usually straightforward and replacing them is easy. The hard part will be parting with your hard-earned cash.
Sharing is caring!
Sometimes there is such an effect: you press the starter button, and under the seat the relay clicks distinctly, but the starter does not move.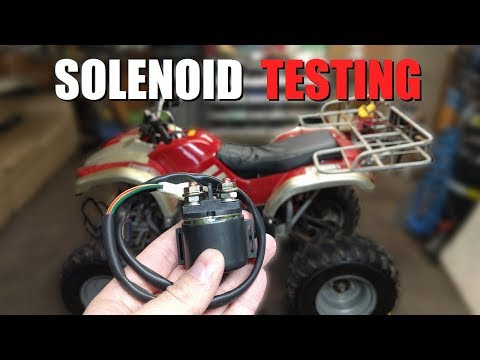 Or at some point, he (the starter) seems to grab for a split second, but immediately stops working. This is especially common in winter, when a large current is required to scroll the starter. There may be two reasons for this.
The first is a malfunction of the starter retractor relay (article 9010-150310-1000). It is usually expressed in the oxidation of the contacts inside the relay housing. Although it is airtight, but ... water will always find a crack. In this scenario, you need to change the relay. Or try to open it and clean inside. This is discussed in the second part of the article.
And there is a second option - oxidation of the contacts of the starter wires. I didn’t even think that there could be significant oxidation, but here’s what I saw in reality.
Removed the connector and with a socket 10 unscrewed both terminals of the starter supply cable.
I took out the relay - and then it turned out that the contact pad was noticeably oxidized. But it is in this place that the current flows. Okay, let's clean it up.
But what's more! Having removed the green part with the contacts (you need to pick it up with a thin screwdriver by the locks), I saw that it was a nightmare in general.
There is even more oxidation on one contact, and on the other - a thick layer of rust! How it actually worked is unclear. I scraped off the rust with scissors and cleaned it with a dremel.
Now order. You can bet.
Just beforehand, I lubricated all contact surfaces with a thin layer of grease. Of course, it would be nice to have conductive grease for contacts or for battery terminals - but where can I get it in the country ... Never mind, my Castrol LMX grease is also suitable for electricians;). At least all the contacts that I have ever lubricated with her have been preserved in excellent condition, there were no oxides or corrosion anywhere, and the current passed. So it will come down. In general, it is correct to lubricate not the contacts themselves, but their sides from the outside, but I do it this way, wrong.
Yes, and of course, you must not forget to clean and lubricate the wire terminals. Fine sandpaper works well for cleaning - for example, I used a 1000 grit sandpaper.
If the procedure for cleaning the external contacts did not help, then you can open the relay. True, this operation, one might say, is a one-time operation, since it is necessary to violate the design of the hull. I have not figured out how to open the case in another way.
So, the lid is held by three pressed-in locks. And how to straighten them - I did not come up with. The metal is thick, so you can’t straighten it back with a thin screwdriver or an awl.
So I just took a dremel and cut out these locks with a cutter.
I opened the relay, and there it’s not like a swamp, but it’s very wet. And metal parts are heavily coated with oxides. Yes, I’ll pay attention here that the relay does not undock into two halves, since wires hold it from the side of the contacts.
How does it even work? The starter power wire goes to two power contacts. Between them there is a jumper spring-loaded from the inside. All of this is made of copper. A spring-loaded steel core presses on the end of the jumper (you can see it on the right, it is removed). Its spring is stronger than the jumper spring. Therefore, in the normal state, the contacts are open. When the relay receives a start signal, the electromagnet windings turn on and draw the steel core into the electromagnet. The jumper spring takes over and the jumper closes the contacts.
The problem is that you need to clean the contact group from oxides from the inside (!). It would be nice to do this with acid (some kind of Cilit), but there is a danger of damaging the spring. You can pour a weak acid, for example, acetic acid, into the lid for a short time.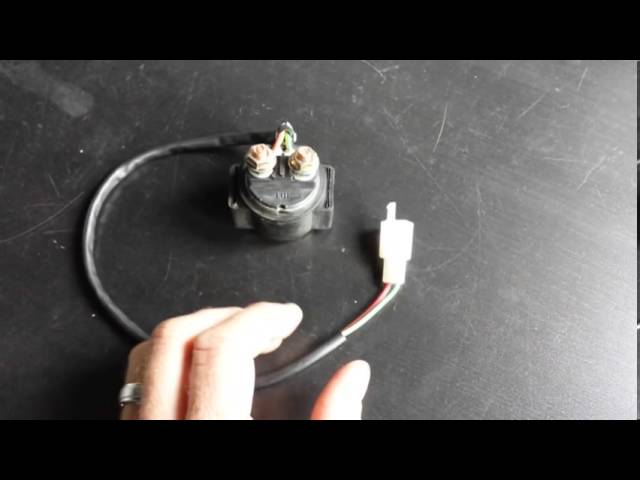 And press the jumper to clean the surfaces mechanically.
If you have a contact cleaner, be sure to use it.
Fill, leave to soak, clean.
And after cleaning everything must be dried well.
The relay housing must now be assembled with glue. Otherwise, the body will not hold. However, you can slightly bend the corners with a hammer and screwdriver.
But of course the best way to repair a relay is to replace it. By the way, a relay from some VAZ may well come here, although I don’t know the specifics. Maybe someone will share their experience in the comments.
Attention: This article and images in it are subject to copyright. Partial or complete reproduction on other resources without agreement is prohibited.
Home → Repair → General recommendations → ATV does not start. Troubleshooting.
ATV won't start? Don't know where to start troubleshooting? Then let's try to find out the main reasons why an ATV may refuse to start.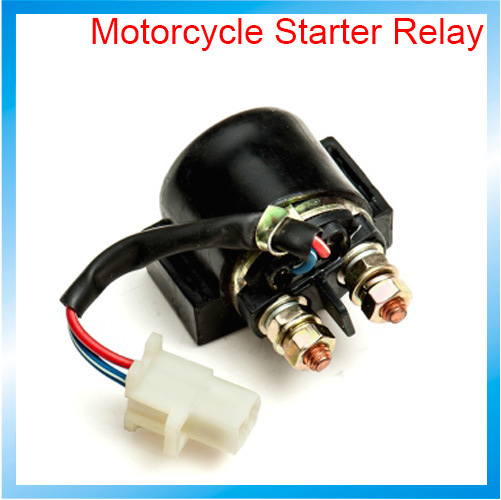
Unfortunately, the equipment of any manufacturer sooner or later starts to act up, no one is safe from this, but finding a malfunction and starting an ATV that refuses to start is not so easy, especially if you are far from a service station.
No matter how trite it may sound, the first thing to do is to check the presence of gasoline in the gas tank: believe me, very often a person tries to start an ATV with a dry tank.
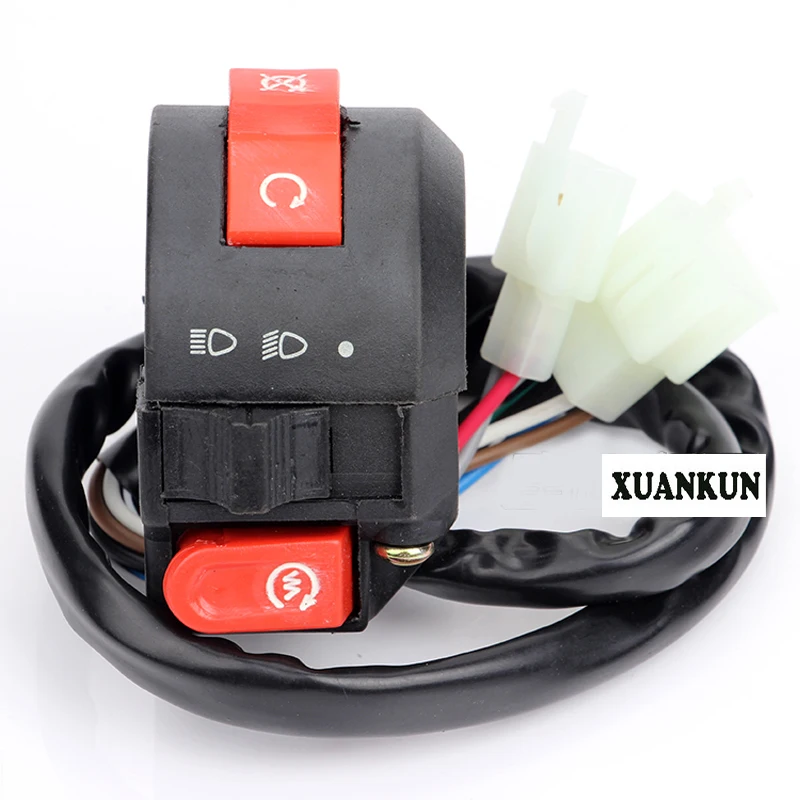
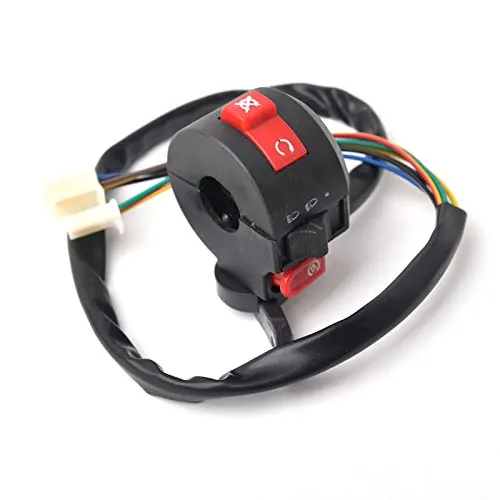
Check if the engine power button is disabled, it is usually located on the steering wheel on the left side, and also pay attention to the fuses, one of them may have blown.
Next, take a multimeter and measure the ATV battery charge level: a charged battery should produce from 12.6 to 12.8 volts and confidently turn the starter, if the battery is low, charge it.
It is also necessary to pay attention to the battery terminals, they must be clean and not oxidized, and the clamping bolts must be tightened.
If, when trying to start the ATV, you notice that the starter does not turn, you must first check and, if necessary, replace the starter relay. To check if the starter itself is working, you need to make sure that the engine mass is in good condition (oxides, no contact, wire damage) and apply positive to it directly from the battery (observing the polarity), if the starter spins, look for a problem in the wiring. If there is no reaction to your actions, most likely the starter is out of order.
Check spark plug condition and spark. This is what a spark plug looks like when installed in a serviceable and tuned engine:
If you notice a significant deviation in the color of the spark plug, you may need to tune the ATV carburetor.
In order to check the presence of a spark, you need to unscrew the spark plug, insert it into the candle cap, lean it against any metal part of the ATV (do not forget about safety precautions: there should be no gasoline smudges nearby) and turn the starter, the spark should be sure and distinct noticeable. If there is no spark, it is necessary to replace the spark plug, if there is no spark, look at the wiring, and also replace the ignition coil.
Make sure your ATV's air filter is clean and saturated and that the air pipe from the filter to the carburetor is free of damage or blockage.
Determine if fuel is entering the carburetor, if the fuel filter is clean, if the fuel pipes are intact, clean the carburetor with cleaning fluids and blow out the passages.
Determine if the fuel pump is good. After turning on the ignition, you should hear the sound of turning on the fuel pump and pumping gasoline into the fuel system. It is also necessary to check the operation of the fuel pump relay.
A very common cause of a bad engine start is a worn piston and, as a result, poor compression (as a rule, this applies to ATVs with decent mileage), compression can be measured with a special device called a compression gauge.
Quite often the ATV does not start well in winter, but there is a set of measures that greatly facilitates the start of the ATV, you can get acquainted with them by clicking on the link.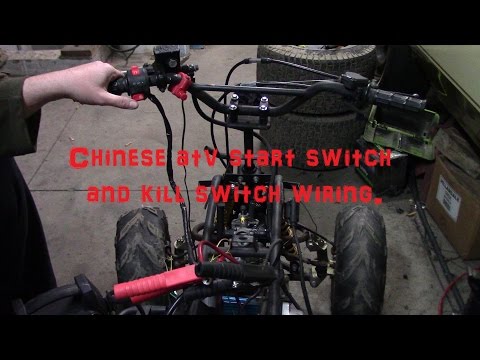
Gentlemen, I ask for advice on where to dig. ATV Stealth 500 GT, stopped starting from the button, turns the starter in vain without a hint of seizing. Starts well from the handle! I charged the battery, checked the frog, everything is fine, but it refuses to start from the button at all (((
I would recommend trying with another battery (for example, temporarily take it from a car).
Only when the engine is running, do not unhook the battery - the ignition unit will burn out in an instant.
Does the starter turn at idle or does the starter turn normally, but the quadric does not start?
the starter turns the engine, the battery was taken for service, they said that everything was ok with charging before that.
Need clarification - how does the starter turn the engine? Very cheerful or not very cheerful?
Here's the thing - Kazuma has such a switch that a slight drop in voltage can cause the absence of a spark, and at the same time the battery charge is enough to scroll the engine with a starter. The first sign is that it starts from the rope and does not start from the starter.
It's easy to check - see comment #1. And the fact that someone said that the battery is in order means absolutely nothing!
spins briskly! Well, not quite "doesn't mean anything" kmk. if you rely on what has been said that the battery holds a charge, I drive-off the beaten track-I try from the button ... in vain (((I guess that 400 km after installing a new battery, I simply couldn’t stumble it into the trash so that it wouldn’t hold a charge.
Damn! Yes, try it with another battery!
Delov then for 5 minutes, and according to the results, you can already dig further.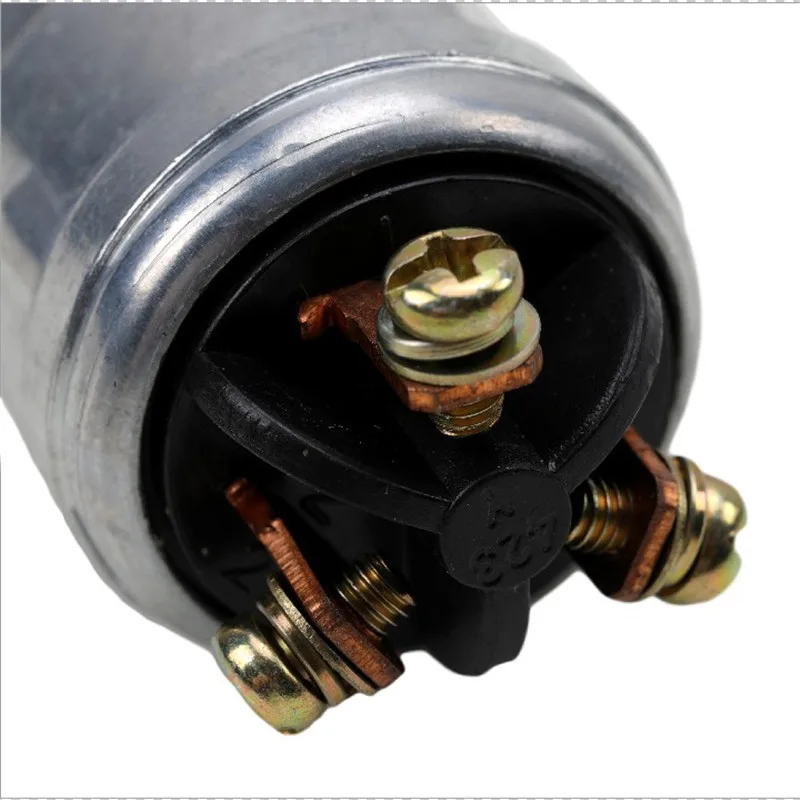
I also started sinning on the switch after dancing with the battery
Let's start. Did it start on the old battery? Or they changed it to a new battery and it started to start. Which battery, acid or gel? I had a case at 90's, a friend bought a new car, while it was warm everything started up, the frosts did not plow.
If there was a problem in the switch, it would not start from the handle. It is necessary to look along the chain, the terminals are screwed, whether the contacts in the terminals, the starter relay, the starter itself are moving away. I had this on Panda, the starter winding burned out and it turned twice as slowly. It also seemed to be spinning briskly, but it was not enough to start the engine.
dachshunds, you are very right, let's go in order!) Right after buying the quadric, I bought a battery and installed a new, ordinary alkaline one (actually the same as it was before. ) three months ago and drove no more than 300-400 km on it. once I came to the garage and when I pressed the button, the ATV just turned the flywheel without even a hint of a seizure. I looked at the button, it was snapped off, then I experimented with the frog for operability - when the pedal is not depressed, the starter does not turn at all, from here I concluded that the frog is working! Checked the fuse - all good. fired up with no problem! sinned back then on the battery and let the quadric work for half an hour. off the beaten path, I try to start it with the button - in vain! turns just as cheerfully as before! just in case, I took it to a friend (he has a good charger) as they connected it, the currents immediately all fell, which he told me by phone that the battery was working in principle (not discharged). drew attention to the following moment: when turning the key, the buzzer always worked before, but now it does not always work. but in that and in that case the quadric still refused to start.
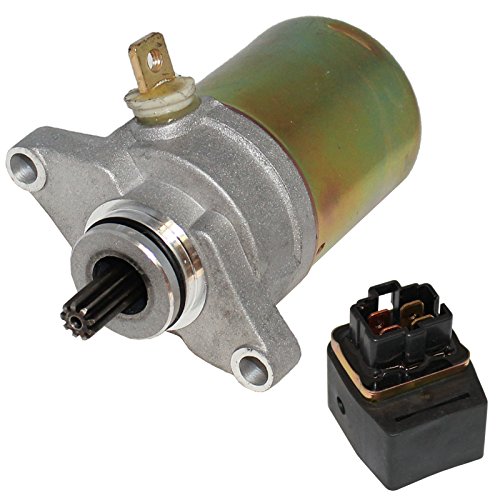 here's another moment: you know, when the car won't start, you step on the gas with the pedal and it starts to move, it felt about the same here: you press the trigger and it starts to spin as cheerfully as possible, but without flashes.
The ATV is constantly subjected to significant loads, due to which the components of the vehicles wear out. This leads to a deterioration in the operation of the equipment or its breakdown. Therefore, let's figure out what to do if the children's ATV does not start. In this article, we will look at the main problems and ways to "resuscitate" the ATV.
Commonly, ATV problems are caused by misuse of the machine, high loads and irregular maintenance. The main reasons why the ATV won't start are:

To determine why a child's ATV is not working, you need to start with the simplest - technical fluids. Quite often, the problem arises due to the banal lack of gasoline. In this case, the quadric will not start or will start to stall. Therefore, before each ride, the rider needs to check the fuel level in the tank.
Also, the ATV may not perform well due to low-quality engine oil. If problems occur after changing the fluid, drain the lubricant, flush the system and fill in new oil. This is especially true for devices with a four-stroke engine, which must be "bathed" in grease.
Most riders store their ATVs for the winter. And if the procedure was performed incorrectly, it will be difficult to start the quadric after a long period of inactivity. Let's start with a simple battery failure. After a long stay in the cold, the battery can “leak” and completely fail. Do not forget that the battery could simply be discharged.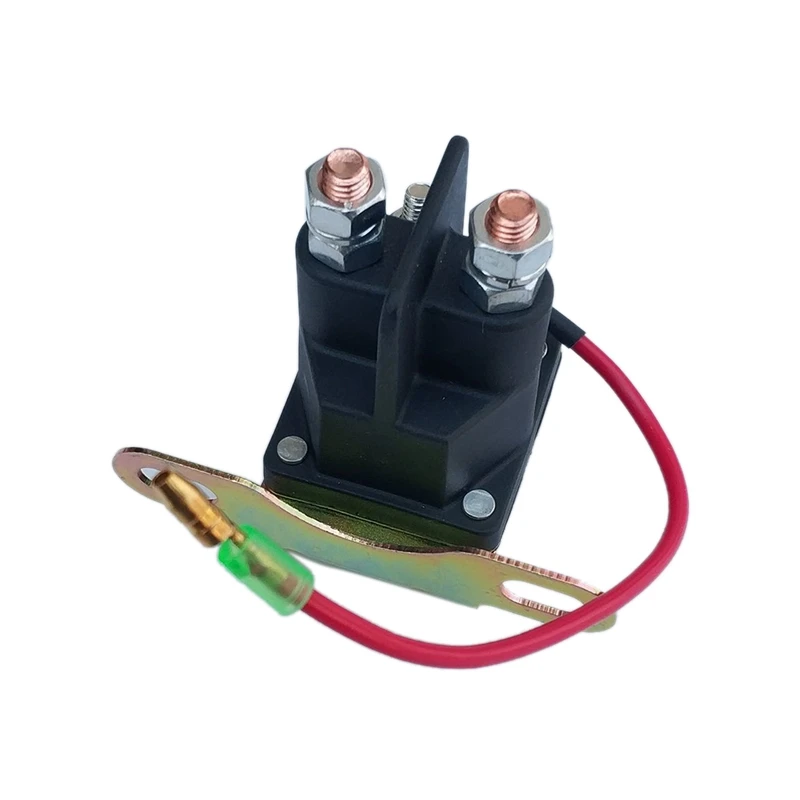
Also, in case of improper preservation, rust appears in the ATV fuel system, the spark plug and wiring fail.
To determine the exact cause of the failure:
But if the children's ATV does not work on the battery, it would be best to contact a specialized service. Technicians will need to check the ATV's engine, wiring, and batteries.
Quite often, problems with starting the quadric engine appear due to a starter malfunction or damaged contacts. To verify that this is the cause of the problem, you need to:
But what if you are far from home and the starter does not work on the children's ATV? In this case, you need to close the relay contacts. This way you can start the ATV engine.
Something as small as a spark plug can also prevent the quad from starting. Therefore, it is important to inspect the part, and if it is damaged, it should be replaced. But if the electrode is intact, you should: