Sign in
Sign in to view full video or become a member now!
Duration: 6:06
A band saw is one of the more versatile tools in the shop, commonly used for cutting curves, ripping a straight edge on rough lumber, resawing, safe cutting of small parts, and other various tasks. Like any wood cutting tool, a band saw generates a lot of dust and debris in normal operations, and some of this can stick to the band saw tires, creating an accumulation of material on the surface. This is particularly common when cutting resinous woods such as pine. As this material accumulates on the band saw tires, it can cause the blade to wobble and flutter, creating vibration and a lower cut quality. Therefore it is good practice to periodically clean and protect your band saw tires to help ensure that your band saw continues to perform to its full potential.
Knowing how to properly maintain a band saw is just as important as knowing how to use a band saw.
In this video George provides instruction on a simple two-step process that can be used to properly maintain your band saw tires. At a high level these steps include:
First, you need to remove the material that has accumulated on the band saw tires. The key here is to use a solvent that is aggressive enough to remove the debris, but not so harsh that it dissolves the tire itself. Using the right product can ensure that this process takes only a few minutes, and should not require a lot of effort.
The second step is to apply a protective coating to the tire that will slow the accumulation of debris on the band saw tires by making it more difficult for the material to stick to the tire. This step can also extend the life of the band saw tires.
Get AccessUnlock exclusive member content from our industry experts.
Unlock exclusive member content from our industry experts.
Get everything included in Premium plus exclusive Gold Membership benefits.
Purchase video and add to your personal library with on-demand video access.
How to Clean Band Saw Tires
Video On-Demand Access
Add to Cart
Handyman's World is a participant in the Amazon Services LLC Associates Program, an affiliate advertising program designed to provide a means for sites to earn advertising fees by advertising and linking to amazon.com.
Excessive buildup of sawdust and pitch on your bandsaw tires is bound to happen once in a while. Because the bandsaw requires the blade to ride on the exact center of the tire for the best tension, it’s a good idea to keep it clean so it can be positioned precisely.
Cleaning your bandsaw tire is a simple process, as long as you keep a few things in mind and take the necessary precautions.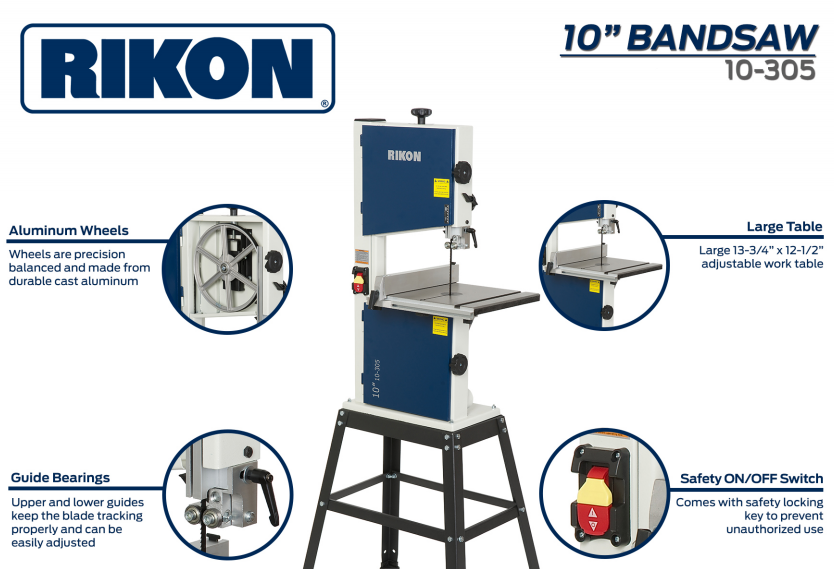
The frequency with which you need to clean your bandsaw tires depends on how much and how often you use it. If you cut green, or unseasoned wood, expect the bandsaw to need cleaning more often. You can think of it as regular maintenance to keep the saw in perfect running condition.
Everytime you use your bandsaw on wood, fine particles and bits of sawdust accumulate on the bandsaw tire, especially on the lower tire, where sawdust tends to get trapped under the blade as it travels around the wheel. You might only need to clean your bandsaw occasionally if you are a light user, and if the bandsaw is operating fine. On the other hand, you may need to clean it more frequently if you regularly cut resinous wood that leaves pitch residues, pine tar, and sawdust on your bandsaw tires.
There are two methods to clean the bandsaw tires. One method uses a cleaner, and one doesn’t. If your bandsaw’s tires are mostly covered in fine sawdust or dry powdery wood particles, you can try cleaning without any chemical cleaner.
You shouldn’t need cleaners or soap unless you’ve been cutting resinous wood like pine. Before you begin cleaning, gather the following items: a piece of cotton cloth, 120-grit sandpaper, an old stiff toothbrush. Then, follow the process below:
 Using an old toothbrush, rub the wheel until all visible debris is removed.
Certain hardwoods don’t leave a resin residue on your saw, but pine and green woods do. In case your bandsaw has especially stubborn residue buildup, you may need to clean it with a cleaner or soapy detergent. Make sure that whatever cleaner you use is safe for applying on rubber.
For this method, you’ll need the same things as for the process above plus some 2050 blade cleaner or any other suitable water-based cleaner. Similarly, first follow steps 1 to 3 of the process above before continuing with the next steps:
Never use any cleaner or liquid for cleaning the tires that may be corrosive or harmful to the rubber or urethane tires. Some suggestions for cleaning liquids include WD-40, Simple Green, and Goo Gone. Avoid using oven cleaners, solutions containing alcohol, or anything that leaves an oily residue on the tires.
Another tip is to let the bandsaw dry overnight after usage before attempting to clean the tires. The dry sawdust and buildup is a lot easier to remove as it scrapes off a lot easier than when wet.
Some people recommend using a cabinet scraper for cleaning the gunk. You hold the cabinet scraper in one hand and spin the wheel with the other, gently rubbing the scraper against the tire. It’s best to avoid using rough sandpaper, iron wool, or other objects to scrape the gunk off the tires as they may damage the rubber.
You can also lubricate your bandsaw mechanism once the tire has been cleaned.
You should clean the rubber tires on your bandsaw only when needed, such as when there is sawdust or pitch buildup on the wheels. To prevent the buildup from creating inaccuracies in the saw, follow the suggested cleaning methods above. You can choose to clean without any chemicals if the buildup is mostly sawdust and dry wood particles or use a cleaner to remove tar pitch, resin, or sticky residues.
Once it’s cleaned, your bandsaw will be all set for your next crafting project.
When designing chainsaws, the specialists of Husqvarna always listen to the opinion of professionals who operate the tool on a daily basis in logging. Our goal is to transfer their experience into the production of new models and thus make the tool even more perfect from the consumer's point of view. We believe that Husqvarna chainsaws must always meet the highest demands for efficiency, safety, and environmental friendliness.
Husqvarna's history is a body of knowledge passed down from generation to generation. We have used and enriched them, and today we want to share our experience with you. nine0005
After all, even if you don't often use a chainsaw, it will be useful for you to learn how the professionals work with it.
The advice we give you is general. Each country may have specific regulations that you must adhere to.
The appearance of the saw and the location of the controls may vary depending on the model. We want you to know the best way to use your chainsaw. At first it may seem that this information is too much, but a little practice. and you will soon learn to handle the instrument with confidence. nine0005
If you are a beginner, if possible, start with an experienced partner.
Husqvarna strongly recommends that after reading this manual, you carefully read the operating instructions for your saw before you start working.
We hope you enjoy your saw and enjoy the results.
Safety first.
The chainsaw is an efficient tool, however, it can be dangerous for the operator if handled incorrectly. That's why we say: safety first. The most important component of work safety is overalls. Even if you are just sawing firewood, you must use personal protective equipment. nine0005
Compulsory head and hand protection.
Never operate the saw without first wearing a helmet with a full face mask and hearing protection. Put on a pair of sturdy gloves.
Robust shoes.
Make sure that the toes of your boots are protected by steel plates and that the saw cut protection is integrated into the ankle. nine0005
Protective jacket and trousers.
The safest trousers are those with saw cut protection. In the event that the saw comes into contact with the trouser leg, the protection helps to quickly and effectively stop the chain. It is also recommended to wear a bright breathable protective jacket.
If necessary, call for help.
Make sure you have a first aid kit close at hand. If possible, always keep a mobile phone and a whistle with you so that in case of an accident you can call for help. nine0005
Take the time to familiarize yourself with the saw, to learn the general principles of operation, and to understand how the main mechanisms of the tool work, especially those on which your safety depends.
Chain catcher.
There is a chain catcher at the bottom of the saw.
Gas coin lock lever.
Throttle lever design prevents accidental chain movement. The gas coin works only when you press the gas lock lever, for this, simultaneously with pressing the gas coin, you must firmly squeeze the chainsaw rear handle with your right hand. nine0005
Ignition switch.
With an easily accessible switch, you can quickly stop the engine.
Right hand guard.
In the event of an unexpected dismount or chain break, your right hand will be protected by a guard located at the bottom of the handle.
Rebound protection.
Kickback can occur if most operations are carried out carelessly. The rebound occurs, as a rule, along the trajectory up and back. The reason for the rebound is the contact of the moving chain, in the area of \u200b\u200bthe driven sprocket of the tire (rebound zone), with an object.
In the event of a kickback, the chain brake is activated, stopping the chain immediately. It can also be activated manually by moving the handle forward.
Using a saw.
The following tips will help you get started safely and easily with your chainsaw. However, first of all, carefully read the owner's manual and become familiar with the principle of operation of the chainsaw, its most important parts and controls. nine0005
Circuit test.
If the chain is not new, it is recommended to sharpen it, since working with a sharpened chain becomes more efficient and safer. Also make sure the chain is properly tensioned.
Don't forget to tighten the new chain after you've run the chainsaw for a while.
Fuel.
When filling the fuel and oil tanks of the saw, place the saw on a stable surface. A special combination canister valve helps fill the tank without spilling fuel. To avoid the risk of fire, never start the saw where the fuel has been refueled. nine0005
Safety distance.
It is always best to work with a partner, but make sure that a partner or other people are at least five meters away from you when you start the saw. When felling trees, this distance should be much greater.
Before starting, place the saw on a firm surface, making sure that the chain is not in contact with the ground or other hard objects. nine0005
1. Engage the chain brake by moving the inertia brake handle away from you, otherwise the chain will start to rotate when the saw is started.
2. Press the Smart Start decompression valve button (if equipped).
3. If the engine is cold, pull the choke lever fully out.
4. Slide the toe of your right foot through the rear handle while holding the front handle with your left hand. With quick, repetitive motions, pull the starter cord by the handle until the first flash occurs in the engine (engine . sneezes.). nine0005
5. Now return the choke lever to its original position. Continue pulling out the starter cord until the saw starts. Press the throttle once to stop the engine from idling.
If the engine is already warm, do not use the choke lever. The rest of the steps to start the engine will be identical. If it is difficult to start the saw even though its engine is already warm, pull out the choke lever as you would for a cold start, but push it back in immediately. nine0005
After starting the saw, do not release the chain brake until you are ready to work.
Checking the chain brake.
Check that the chain brake is working. Place the saw on a level, stable surface and depress the throttle. Activate the chain brake by depressing the handle with your left wrist without releasing the saw handle. The chain should stop immediately.
Is the chain lubrication working?
Also check chain lubrication. While holding the saw over a light surface such as a tree stump, increase the chain speed by depressing the throttle. After that, a streak of lubricating oil should appear on the surface.
Using a saw.
The basic rules for using a chain saw are as follows. Hold the saw firmly with both hands, wrapping your fingers around the handles. To reduce the force of a possible kickback, make sure that the thumb of your left hand is located under the front handle. nine0005
Balance.
Don't be afraid of the saw. If you keep it close to your body, its weight won't feel as obvious. And you will be able to better balance and control the instrument. To maintain balance, you need to stand with your legs wide apart.
Driving and driven chain.
Sawing can be done with both ends of the chain: top and bottom. If the bottom edge is used, the sawing is done by the drive chain, which means that the chain is driving the saw away from you. When sawing with the top edge of the chain, you are sawing with the driven chain, so the chain guides the saw towards you. nine0005
Knee bend.
To protect your back, do not work in a bent position. Instead, bend your knees.
Workplace mobility.
Make sure the chain does not rotate when moving. To do this, activate the chain brake or turn off the engine. Use a tire cover before driving for longer distances.
Felling trees.
When felling a tree, it is important to plan the work in detail. If you do not have experience, ask a professional to be present at your work. When working, remain calm and careful. nine0005
Environmental legislation.
Before felling trees, check that the upcoming activities comply with environmental regulations and ensure that all necessary permits are in place.
Accident prevention.
Having decided to cut down a tree, you should think about how to protect yourself and others from an accident.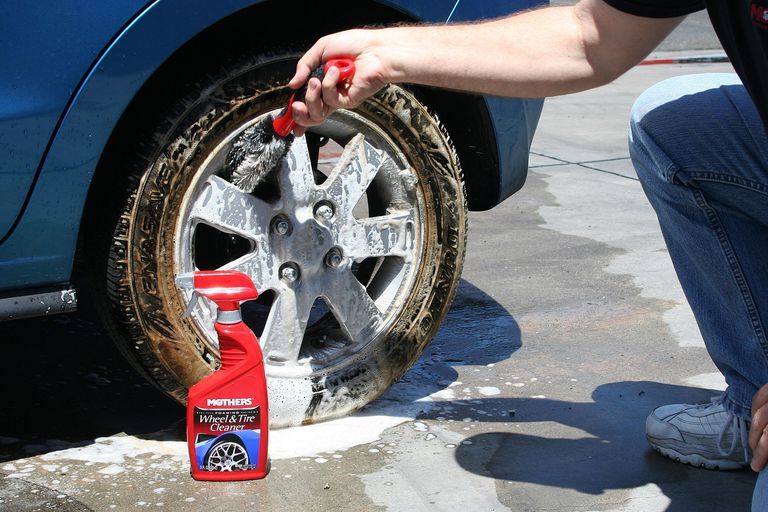 Pay attention to everything that is related to safety in one way or another. Are there roads, power lines or buildings nearby? If these objects are in the vicinity and you are not a professional, you should leave this work to a more experienced person. If you know that people often appear in this area, you should put up warning signs. Start felling only after making sure that the required amount of fuel mixture in the tank and oil for chain lubrication! nine0005
Felling direction detection.
Look at the tree and consider what factors can affect felling. Is the tree standing straight or is it tilted? Which way is the wind blowing? In which direction should the tree fall, taking into account the environment and the factor of facilitating subsequent work?
Safe retreat
Clear undergrowth around the tree to prevent cutting. It is necessary to clear the bushes and overgrown the retreat path at an angle of 45 degrees behind the tree in both directions. On both sides of the tree, nothing should prevent you from moving away from the falling tree and staying at a safe distance. nine0005
Barrel preparation.
To work effectively, the underside of the tree trunk must be cleared. The most secure way. cut branches with the bottom of the tire from top to bottom. Use the barrel as protection between you and the saw. Never cut branches above shoulder height.
Directional swath.
For directional felling, you must first make a notch on the tree trunk with a saw, which determines the direction the tree will fall. The guide notch can be made in several ways. One of them that we show you is called an open guide notch. Determine exactly in which direction it should fall. Select a landmark in the area as a milestone. If the tree has root nodules, it is best to remove them. First, an oblique upper cut is made, at an angle of approximately 60 degrees. It is necessary to saw through the tree approximately 20-25% of its diameter. After that, a horizontal cut is made, which should converge with the top one. nine0005
Not finished.
Next, the felling cut must be made. horizontal cut slightly above the notch. It is extremely important to stop sawing just before the guide cut is reached and stop the so-called undercut. Not finished, keeps the tree trunk on the stump and ensures the fall of the tree in a given direction. The thickness of the undercut should be 10% of the diameter of the tree, or at least two centimeters.
Safety distance.
Before you start felling, make sure that there are no people near you at a distance of two lengths of the tree you are going to cut.
The technique is determined by the thickness of the wood.
Felling techniques depend on the thickness of the tree. First of all, you should determine what to do if the tire is longer than the diameter of the tree.
Operating position.
Stand with your legs wide apart and lean against a tree trunk with your shoulder. In order not to leave a stump too high, make the guide notch as low as possible.
Top notch cut.
Hold the saw at the correct angle and point it at the physical landmark of your choice. It should line up with the guide marks on the saw body, start sawing. Check from time to time that the correct angle and direction of the cut is maintained. nine0005
Bottom notch cut.
Remaining in the same position, make the bottom notch cut. Make sure it lines up exactly with the top notch.
Felling cut.
Use either the top or bottom of the tire. Saw until there is enough room to insert a felling blade. Make sure the felling blade does not touch the rotating chain as you continue sawing. Leave an even width undercut, 10% of the tree diameter. Pull out the saw and work with the feller until the tree begins to fall. nine0005
Felling tools.
Felling tools prevent the tree from falling in an undesirable direction and from pinching the saw unit during sawing. Felling shovel. This is a tool for felling small trees. The felling wedge is best suited for felling large trees.
Guide notch, large trees.
When the tire is shorter than the diameter of the tree, a slightly more complicated felling technique is required. The basic principle remains the same as in the previous examples, however, since the bar will not go through the trunk, it is necessary to complete the guide notch on the opposite side of the tree. Make sure the new cuts match up with the previous cuts as closely as possible. If you do not have much experience, it is better to take an experienced partner with you. nine0005
Infeed.
What you are about to do now is called plunge. With the motor running at full power, begin inserting the bottom of the tip of the bar into the barrel, just behind the intended undercut. Be careful not to touch the tree with the top of the bar tip. When the tip of the saw is slightly immersed in the trunk, carefully turn the saw so that its position is parallel to the guide notch. Press down on the tire so that it enters the tree. After that, cut at a short distance from the underdrink. about the width of the tire. This will help you avoid the risk of running into the undercut when turning the saw. Carefully run the saw around the trunk. When you reach the middle, insert the felling wedge. Continue sawing until the bar is parallel to the guide notch on the opposite side of the trunk. It may be necessary to drive in a felling wedge to cause the tree to fall. In some cases, multiple wedges are required. nine0005
Rot.
If the wood is rotten, you should be very careful. It is better to seek help from a professional. If the trunk looks damaged or has an unnatural appearance, the tree may be rotten. The rotted area of the tree is discolored and soft to the touch. Since rot weakens the tree, the undercut must be increased to ensure safe felling.
Stuck trees. nine0004
Tree stuck in another tree when falling. this is one of the situations requiring professional intervention. If you need to ask for help, do not leave the tree unattended.
Pruning and bucking.
During pruning and bucking operations, the chance of kickback increases. Therefore, you should work calmly and methodically, trying not to use the nose of the tire. nine0005
Optimum working height is achieved when the stem is at thigh height. Stand to the left of the trunk and work from the base of the tree (butt) to the top. Get into a stable position with your feet shoulder-width apart and holding the saw close to you. Work with the top and bottom of the bar, always trying to keep the saw against the trunk or thigh. Move only when there is a barrel between you and the saw bar.
Branches at the top of the trunk can be cut with the saw on its side. If the height of the working area allows, you can cut the branches at the bottom of the trunk at the same time as the rest. To avoid clamping the saw bar, it is necessary to determine how tense the branches are. nine0005
If the tree is lying directly on the ground, do not cut the branches from below until you have cleared the trunk of the upper branches and can turn it over. Be careful if the barrel is very close to the ground, as there is a danger that you will touch the ground or something with the tip of the tire, which in turn will cause kickback.
Cutting large branches.
If the tree has thick branches, remove other obstructing branches first. Since thick branches can be under a lot of stress, cut them in pieces from the end to the trunk. Keep the bar vertical when sawing to avoid the risk of it getting stuck. If the branch is very thick, it may need to be filed on both sides. nine0005
Bucking.
Carefully inspect the tree and surrounding area before bucking, especially if the trunk is thick. First determine how tense he is. Watch the reaction of the trunk when you start sawing. You may misread the voltage. Step aside from the cut, as if the trunk has disintegrated, it can jump up. Never stand below the trunk if it is placed on a flat surface.
Top pressure.
If the barrel is laid in such a way that the pressure comes from above, start the cut from above. Saw the trunk about one third until it begins to pinch the bar. After that, start sawing from below to align the top and bottom cuts.
Bottom pressure.
Conversely, if the barrel is positioned in such a way that the pressure comes from below, proceed in reverse order. Start sawing from the bottom, about one third of the thickness of the trunk until it begins to pinch the bar. After that, start sawing from above to align the top and bottom cuts. nine0005
If the saw is stuck.
If the tire is stuck in the barrel, do not try to remove it immediately. Stop the engine and tilt the barrel until the saw comes out of it.
Maintenance.
At the end of work, it is necessary to spend a little time servicing the saw to make sure that it functions properly, does not pose a danger to the user and can be used at any time. The frequency of maintenance depends on how often you use the saw. nine0005
Chain sharpening.
Chain sharpening is an important saw maintenance procedure that is easy to perform if you follow the recommendations and use equipment provided by Husqvarna. By sharpening your chain relatively often, you will make this procedure as easy as possible. Lock the saw in place. Block the chain by engaging the chain brake. Start by sharpening the cutting teeth. Position the template on the chain with the arrows in the direction of the driven bar sprocket. Position the file at the right angle to the rollers. Sharpen every second tooth with a strong pushing motion. Then turn the saw and sharpen the rest of the cutting teeth. nine0005
Depth gauge sharpening.
After every third sharpening of the cutting teeth, the depth gauges between the teeth must be ground down. Hold the template firmly with one hand. Select hard (hard) or soft (soft) depending on the type of wood you are using the saw to cut. Holding a flat file with your other hand, grind down the depth gauges until the file touches the template. nine0005
Chain and bar replacement.
After a certain number of sharpenings, when the longest part of the cutting tooth is less than 4 mm, the chain must be replaced. Remove the bar and install a new chain. Adjust chain tension. A loose chain may come off, and a tight chain will wear the bar. If the chain is properly tensioned, it can be lifted about one centimeter from the middle of the bar and easily pulled by hand. nine0005
Cleaning.
Some parts of the saw need to be cleaned from time to time. Open the clutch cover and clean the chain brake band. It is also necessary to clean the tire from time to time. Open the cylinder cover and clean the air filter. If necessary, clean the cooling fins and vents. To ensure proper engine cooling, periodically check the flywheel vanes for dirt.
Check.
Other parts must be checked regularly to ensure proper function. This applies in particular to the chain brake, throttle lever and chain catcher. It is necessary to check the integrity and degree of wear of the chain drive sprocket. It is necessary to check the integrity and degree of wear of the chain drive sprocket, as well as the tightening of screws, bolts and nuts. For more information on maintenance, please refer to the saw manual. nine0005
Properly maintained chain saws are essential to ensure productive results and extended service life so that the saw will serve you faithfully for many years to come. It is necessary to follow simple rules that will significantly extend the life of the equipment.
The chainsaw is a reliable powerful tool that, depending on the class, can perform tasks of varying complexity. With proper care, the saw will work properly, if not, you will have to change consumables more often and contact service centers for help, and in the worst case, buy a new tool. nine0005
During the operation of the chainsaw, it is necessary that dry friction does not occur in the piston group of the tool, even for a short time. To do this, you need to use high-quality oil.
High-quality lubricants provide multifaceted equipment care, namely: reduce friction, improve fuel parameters, protect engine system elements from oxidation and corrosion.
Poor quality oils cause significant damage to the motor. A saw with such oil will cut, but will not work for a long time. Seizures will appear in the piston group, which, subsequently, will lead to a complete failure of the chainsaw engine. The desire to save money can lead to significant repair costs and the purchase of a new tool. nine0005
For two-stroke engines, special oils should be used, which are marked 2T. Two-stroke oil contains additives that provide the necessary viscosity when mixed with gasoline. For chainsaw users, it will not be out of place to get acquainted with the instruction manual immediately after purchasing the tool and find out which viscosity index is recommended.
Oil for four-stroke engines cannot be used. Such oils are designed for long-term operation and cannot burn out simultaneously with gasoline. This contributes to the formation of sooty and resinous compounds, which lead to failure of engine valves. nine0005
Chainsaw oils are divided into three types:
Red mineral oil, used in the warm season.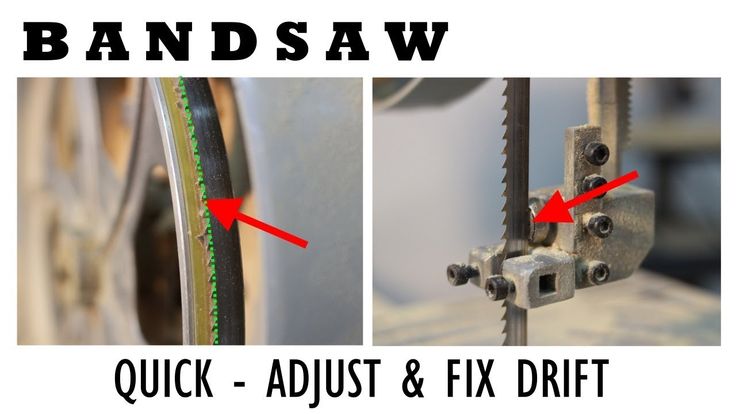 Most household saws run on this oil. It is also used when the operator does not have time to wait for the saw to warm up and after starting it is necessary to immediately start working.
Green synthetic oil with a lower viscosity - this compound is more effective if the saw is heavily loaded and working at low temperatures. nine0005
Blue semi-synthetic oil - has a low smoke composition, provides high tool performance during intensive use.
Each of the three oils, with its own chemical composition, must be mixed with gasoline in a certain proportion.
A chainsaw engine requires a mixture of gasoline and oil to run efficiently. Each tool comes with a 1 liter measuring container, with the help of which a fuel mixture with the correct proportions is made. nine0005
Chainsaws with equal sawing capabilities may have different proportions of the working mixture. This information should be read in the instructions before starting work. Also, the recommended proportion of the mixture is duplicated on the covers of the gas tanks of the saws. Usually it is from 20 to 40 grams of oil per liter of gasoline.
If the oil content in the fuel mixture is excessive, deposits will form in the engine system. Lack of oil can lead to rapid engine wear. The fuel mixture should be prepared before work. During storage, the composition will lose its initial properties. Mixtures that stand for a long time without use and then are poured into the tank worsen the condition of the system and contribute to the appearance of smoke during the operation of the saw and the formation of soot. Experts advise to dispose of the excess mixture if it was not possible to use it within 10 to 14 days. nine0005
The main causes of failures that are associated with the guide bar are: lack of lubrication, incorrect chain tension, incorrect saw technique.
To increase the life of the tire, after a long sawing, it is necessary to turn it over 180 degrees for even wear. Then both sides will grind the same. If burrs appear on the guide, they must be removed with a file. nine0005
The chain on the bar must be properly tensioned. Too much tension may cause wear of the guide bar. If the tension is too low, the chain may fly off. The tension is considered optimal when the chain is closely adjacent to the chainsaw tire, but at the same time it can be freely rotated around the guide by hand. In the process of work, to adjust the tension, always let the chains cool down.
Insufficient chain lubrication can cause premature chain wear. The oil level for the chainsaw cutting system should be monitored and, if necessary, topped up. nine0005
To check if there is enough lubricant for the bar and chain, you need to: start the saw, point the bar at the workpiece and increase the engine speed, if there is a trace of oil on the workpiece, then there is enough lubricant for the cutting elements of the saw.
The groove and lubrication hole on the guide bar should be cleaned regularly. It is strictly forbidden to use used engine oil, this will lead to a breakdown of the oil pump.
Also, every time you fill the tank, you need to lubricate the tire sprocket so that it serves for a long time and properly. For this, special syringes are used for applying lubricant. The syringe with lubricant is brought to the hole at the end of the tire, the lubricant is squeezed out into the hole. Then the sprocket scrolls and grease appears on its teeth.
For productive work of the tool, the chain must be sharp. When working with a blunt chain, fuel consumption increases and equipment wear increases. The chain should be sharpened in a timely manner. nine0005
If the chainsaw starts to stall in working condition, this may be due to a dirty muffler. As a rule, this occurs after several years of operation of the unit.