By Tom Morr, automedia.com
Difficulty: Difficult
Estimated time: 240 minutes
Most people think that wheel alignment is best left to the professionals. This is true in many respects, but some alignment specs are easy to check yourself, and toe is one aspect of alignment that can be checked at home. This can come in handy after replacing steering or suspension components so that the vehicle won't be wildly out of adjustment for the trip to the alignment shop, or at the very least provide a better understanding of the alignment process.
Factors affecting wheel alignment
In theory, all four wheels should be perpendicular to the ground and parallel to each other. When the vehicle starts pulling to one side – or after a sharp impact with a curb – most drivers suspect that the wheels might be out of alignment. Irregular tire wear, vibration and odd handling characteristics are other clues.
The three factors that affect alignment are toe-in, camber and caster. The first two can easily be checked at home.
Toe-in
Car front tires are slightly pigeon-toed to intentionally place a very slight load on the wheel bearings. Typical toe-in specs vary from one-thirty-second to one-eighth-inch, depending on the vehicle. Check a service manual for your car's acceptable range.
The best tip-off to a toe problem is a saw-tooth wear pattern that's equal on both front tires. If the tread blocks point toward the frame, then toe-in is excessive; pointing outward indicates too much toe-out.
Toe-in spec-check and adjustment are shown in the accompanying photos. Although no specialized tools are necessary to check toe, companies such as Eastwood, JC Whitney and Harbor Freight sell tools specifically for this purpose.
Two things to remember when measuring and adjusting toe: First, true spec is measured midway up the tires. If the car's body makes this impractical, take the front and rear measurements one-quarter of the way up the tires, then double that to get the true toe as it would be in the center of the tires. Also, an off-center steering wheel can sometimes be corrected by adjusting one tie-rod more than the other. (Steering wheel position has no effect on your final alignment.)
Camber
Camber is the measurement of tire lean in degrees. If the top of the tire tilts inward, the vehicle has negative camber; outward lean is positive camber. Most newer vehicles have slightly negative camber to improve stability and handling.
Two indicators of camber problems are the vehicle pulling to one side (the one with more positive camber or possibly less air in the tire) and uneven tire wear across the tread. Camber is easy to check with an angle finder and a straight edge, ideally one that's the same length as the wheel diameter so that tire sidewall bulge doesn't interfere with the straight edge.
Many front-wheel-drive cars don't have camber adjustments, and out-of-spec camber here often indicates bent or worn parts. On vehicles that have adjustable camber, the job can involve adding shims between the control arms and frame and turning cam bolts.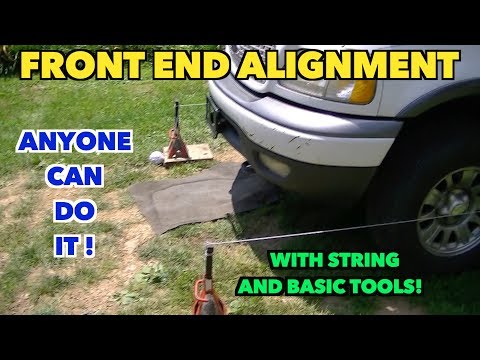 Many people prefer to let an alignment shop make these adjustments, particularly if their car has independent rear suspension.
Caster
Caster is the angle of steering pivot in degrees. Just as water-skiers lean backward for stability, most vehicles are designed with slight negative caster – the upper ball joint is to the rear of the lower ball joint (similar to the front wheels on a shopping cart).
A clue to caster problems is the vehicle pulling to one side (the one with less positive caster). Heavy steering and wheel hopping over bumps are signs of too much positive caster, and light steering but excessive wander are clues of too much negative caster. Aligning to spec usually involves repairing or replacing chassis parts, so the average motorist is probably better off leaving caster corrections to the pros.
Taking a few minutes to check your alignment will make your tires last longer and your vehicle handle better. Even if you choose to have a shop align the vehicle, you'll have a better idea of the problem – and knowledge normally equals power.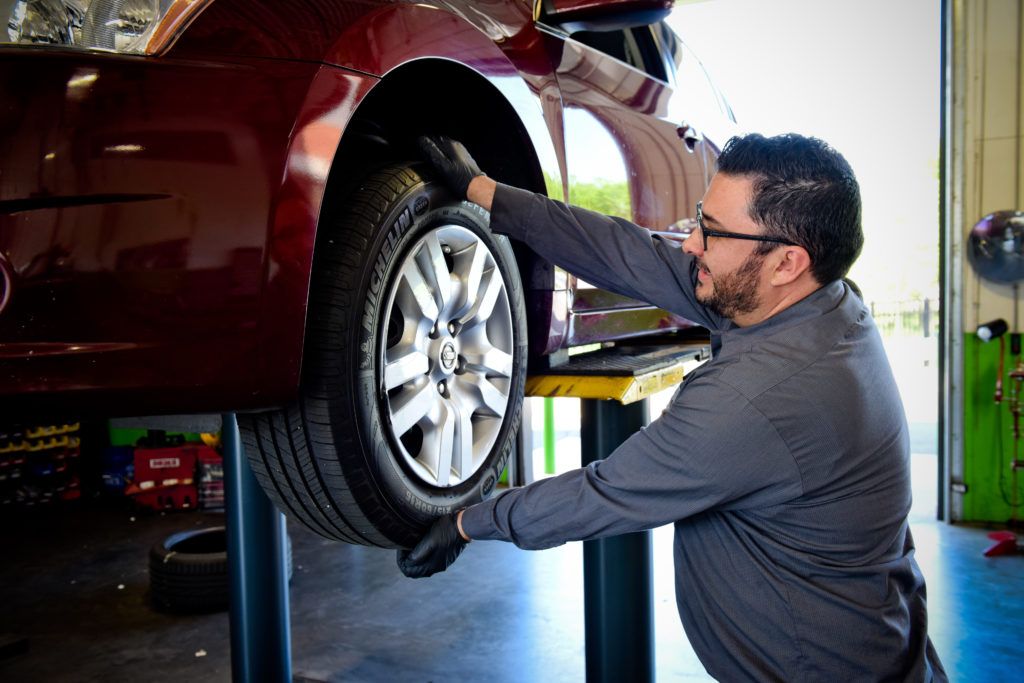
Jessica Shea Choksey | Nov 09, 2020
Vehicle alignment refers to a mechanical procedure that adjusts the suspension to its proper configuration, correctly positioning the axles and wheels to allow the tires to make even contact with the road surface. It also ensures that a vehicle's wheels are "squared up" to one another.
A vehicle comes out of alignment gradually over time from treading over minor imperfections on the roadway. Or, it can happen suddenly from a single impact such as driving over a deep pothole or curb. Outside of such an occurrence, you should perform an alignment on your vehicle at regular intervals, as directed by the owner's manual.
When a suspension is out of alignment, the effects are evident. The vehicle may pull to one side, suffer from uneven tire tread wear, and feel less precise in terms of steering. If you disregard these symptoms, the alignment can progressively worsen and affect the vehicle's overall handling dynamics and safety.
Want to Take Action?
Want to Take Action?
Shop Cars for Sale Online
Want to Dive Deeper?
Want to Dive Deeper?
Compare Cars Online
WANT TO MAXIMIZE YOUR PURCHASING POWER?
WANT TO MAXIMIZE YOUR PURCHASING POWER?
Find Local Incentives and Rebates on New Cars
Thank You
You are now subscribed to the J.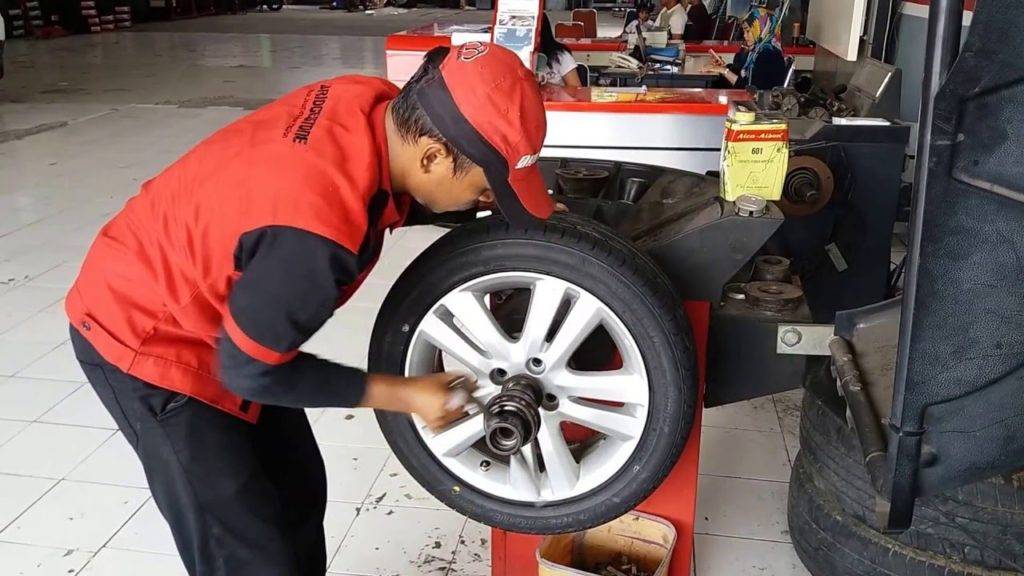 D. Power Cars Newsletter.
Explore new car previews
2023 Ford F-Series Super Duty Preview
F-Series Super Duty trucks got what they needed for the 2023 model year. Ford announced a more powerful line of heavy-duty trucks with a load of available new tech, great standard safety features, and unique upfits to make the trucks more appropriate for specific industries.
Read the full review
2023 Honda Pilot Preview
The fourth-generation 2023 Honda Pilot is about to go on sale, and Honda substantially upgrades it over the popular third-generation model it replaces. Honda will offer the redesigned 2023 Pilot in Sport, EX-L, TrailSport, Touring, and Elite trim levels in December 2022.
Read the full review
2023 Ram 2500 Heavy Duty Rebel Preview
Ram used the 2022 State Fair of Texas to show off its new 2500 Heavy Duty Rebel, a beefy off-road truck that retains its work-truck capabilities.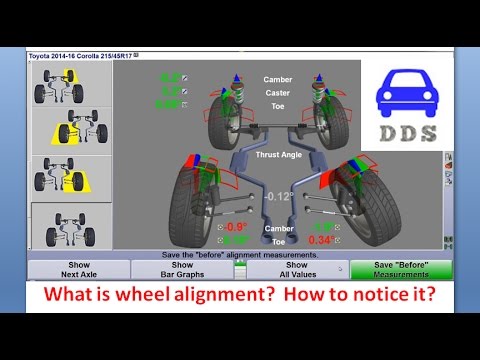 It brings hardcore off-road upgrades such as an electronic-locking rear differential and a rear limited-slip differential.
Read the full review
Read all articles
The change of seasons requires car owners to purchase two sets of tires. Off-season tires do not provide stability on an icy road and a comfortable ride in hot weather. The best solution is to purchase winter and summer tires. To save on service fees, you can use manual tire fitting when you need to change tires between seasons.
Insurance companies require timely replacement of tires. This ensures safety when moving in changing weather conditions. In the CASCO agreement, a separate clause states when to change tires to winter and vice versa. You can try to ensure high-quality tire fitting and comply with the requirements of the agreement on your own.
It is important for drivers to distinguish between warm and cold seasons in order to understand when to change tires for summer or prepare a vehicle for operation in winter. Experts advise relying on weather data, using self-made tire fitting under such temperature conditions:
In order to ensure safety while traveling, it is important to change the tires in time. I use a special tool and an understandable video about tire fitting with my own hands, you can try to cope with the work yourself.
Do-it-yourself tire fitting requires a special machine that will save you:
 You can use the device not only to change wheels on your vehicle. Large queues at workshops will help to find car customers.
Having decided to make a tire changer with their own hands, a manual tire changer is assembled first. You can find suitable models in stores, but you can assemble them yourself using available materials.
To do tire fitting with your own hands, the drawings are studied, and then everything you need is purchased. You can collect different types of devices. It is recommended to pay attention to functional and convenient models, which consist of several nodes:

It is recommended to choose high-quality rolled metal for the construction. Elements must withstand increased loads. The design must remain intact, not pose a threat to the master. Having decided to do the tire fitting with your own hands, the drawings for the manual tire changer are used as in the picture below.
To perform tire fitting with your own hands, hand tools are assembled in stages:

Last install the lever, which consists of a paw and a shoulder. The first element will be required to remove the tire. Having assembled the structure, you can understand how to do tire fitting with your own hands. To do this, use the video guide below, photos and explanations of the masters.
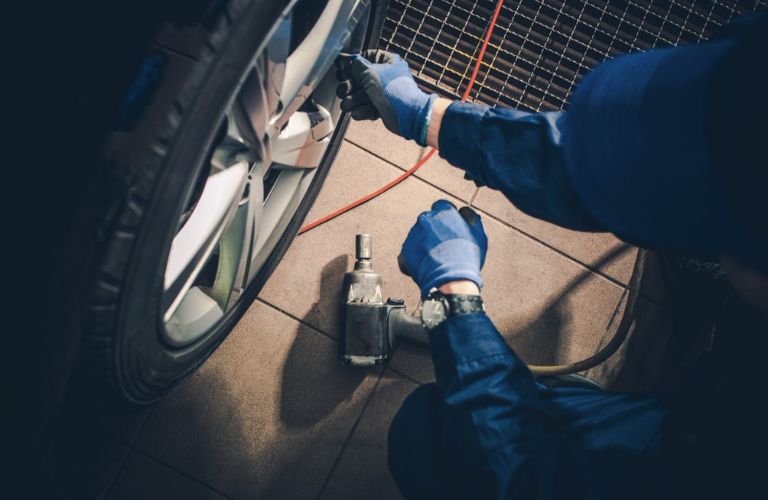
In the absence of a special machine, it is almost impossible to dismantle or install rubber yourself. After assembling the device, you can start changing tires, for which you should learn how to do tire fitting. The process is carried out in several stages:
Further work can be done with a simple pry bar of great length (elements with a welded handle) to completely rid the disc of rubber. To do this, it is necessary to insert the mount with a narrow part under the rubber in order to bring it out of the rim.
Fix the wheels after installing it on a homemade machine using a special clamp.

It should be understood that the process of changing tires is quite laborious and complicated. It is necessary not only to assemble the machine with your own hands, but also to use it correctly, helping yourself with additional tools. It is not always possible to do such work, so you have to look for high-quality tire fitting.
When deciding how to choose a tire service, it is recommended to pay attention to several points:
Quality tire service in Moscow is actually not so easy to find. Vostok-Auto Company offers you to use the services of specialists. We have at our disposal only professional equipment and highly qualified personnel.
We give a guarantee for our services and provide high quality work. This applies not only to tire fitting, but also to other services provided in our car service. You can order tire fitting by calling us by phone or by filling out the form below.
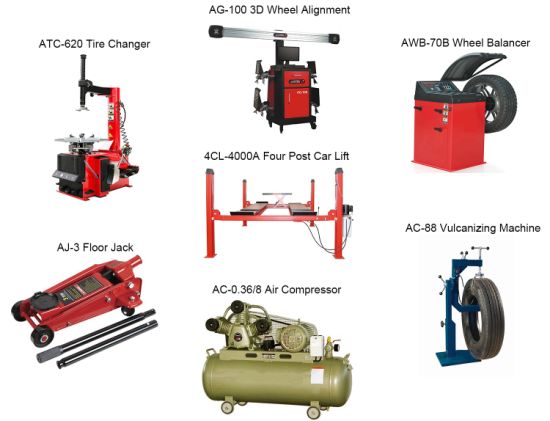
Equipment
Reading 5 min Views 26. 9k. Posted by
A punctured tire on a highway without a spare wheel is a classic situation that, in terms of the frequency of events, holds an honorable first place in the list of troubles for a motorist. The vast expanses of our Motherland add brightness and depth to this problem: there is not a single auto repair shop around, and if there is, then with a solid queue.
The most natural solution is to do the tire fitting yourself, that is, not to depend on anyone. The solution is excellent, but for its implementation you need to have some tools and skills. Where to gain skills and what tools to stock up, we read here and now.
Contents
Tire fitting on the track can be done with two mounting paddles and a special device to tear the tire off the rim.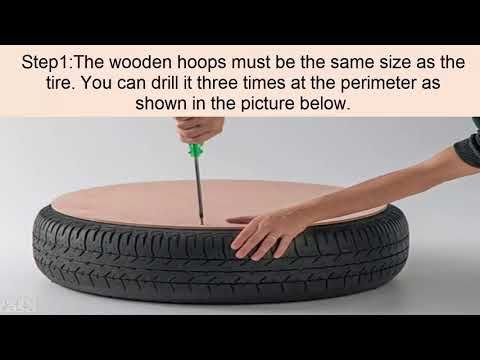 But it will turn out more convenient and civilized if you have a jack and a tow rope. And you will find them.
Therefore, we continue to work according to the following algorithm:
All these ten points are easy to describe, but very difficult to do. And if the weather conditions leave much to be desired, then it becomes completely sad, you will remember such a tire fitting for a lifetime. The quality of such an installation will never be perfect.
It would be wiser to get some kind of mechanized device for independent tire fitting. There are many options for such devices - a wide variety of design solutions can be found on the network.
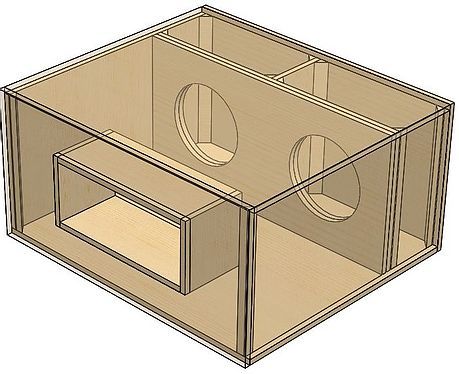
You can learn more about how to assemble a subwoofer with your own hands and about electronic radio circuits on the website - www.radiochipi.ru.
Does it make sense to spend time making a handicraft device when you can use a professional service? It's up to you and only you. Our job is to provide quality information.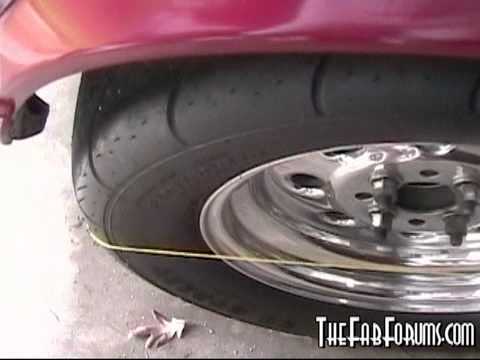
Homemade manual tire changer does the same thing that they do in a car service. With this functional equality, a handicraft machine has a number of advantages.
Judge for yourself:
We note right away that most of the mechanisms are designed for cars. Although no one bothers truck drivers to start building their own tire changer. On the topic " how to make a tire changer"There are a huge number of quite efficient videos on the net. They will be a great help.
If you've made up your mind to become your own tire beading business, your best bet is to have a complete DIY tire changer in your garage. It can be made in the form of a kit: and a device for beating the board.
The bottom of the machine in the form of an H-shaped frame is made of a steel pipe with a rectangular section. The frame size is approximately 90 cm x 60 cm. At a distance of 30 cm from the edge to the lintel, a high round pipe is attached perpendicularly by welding.
Scheme of a tire changer.The height of the pipe is about one and a half meters. It needs to be welded in the most stable way, so for the fortress it is better to weld “kerchiefs” of metal triangles with a thickness of at least 5 mm. A hub is welded to the round pipe - the middle part of the wheel.
At what height to weld the hub - we measure ourselves according to our height. It is necessary that the wheel lying on the hub is approximately at the level of your belt. The pipe must be at least 30 cm higher than the cylinder lying on the machine.
Bead breaker bracket must be welded below the hub. It is best cut out of a 5 mm thick steel sheet by drilling a hole in it for the bolt.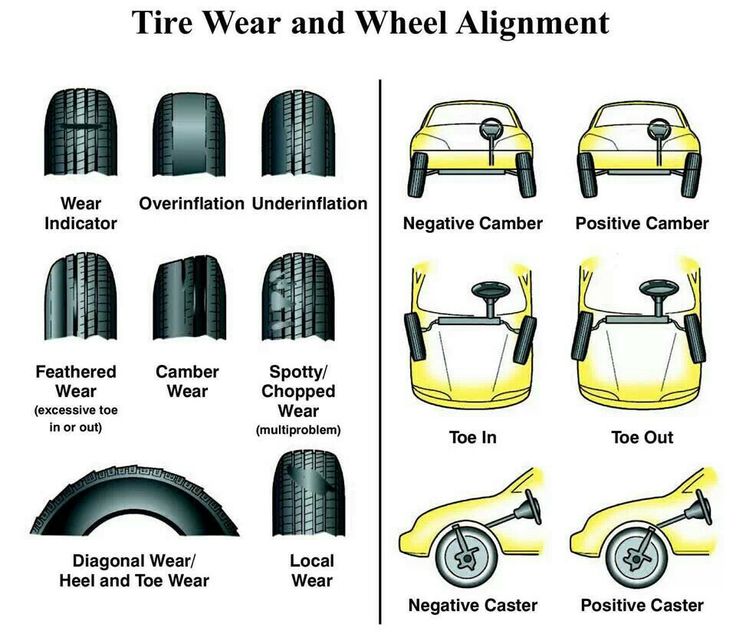 The pipe for this machine assembly must be found wider, because it will fit a lever one and a half meters long.
It, in turn, is made of a steel pipe, and the tips are made of a steel 20 mm bar. Consider the length of the lever yourself, it will depend on the strength of your hands and the free space in the garage.
How to do it right: