by Jody L. Campbell
Whether you have a flat tire on your Chevy truck that needs to be replaced or you want to install an aftermarket tow hitch, you're going to have to remove the spare tire. Mounted under the bed, the spare tire on the Chevy pickup requires connecting extension components in order to access the ratcheting mechanism and then activate it. Knowing how to remove and install a spare tire on any vehicle is always a good idea before you need to in the event of an emergency. Replacing a tire is never fun, but if you have to learn how to remove the spare tire in the process, it's just going to take longer and make the task more frustrating.
Locate the spare tire and lug wrench tool kit (equipped with the Chevy truck) behind the passenger seat. On a bench seat, tilt the seat forward and move it all the way toward the front of the truck for access to the tool kit. On extra-cab Chevy trucks, you'll need to lift the rear seat upward into the raised position to access the tool kit.
Loosen the retaining bolt by turning the dial handle counterclockwise. Loosening it will allow you to slide the tool kit out from under the retaining bolt, and if necessary, remove the bolt.
Separate the pieces of the tool kit at the back of the Chevy pickup. Locate the spare tire access hole on the right side of the rear license plate. In some newer model Chevy trucks, you might need to use the ignition key to remove a locking device designed as a spare tire theft deterrent. If so, insert the key into the lock and turn the key to remove the lock. Use a flashlight to look into the access hole to learn which adapter the spare tire cable requires in order to assemble the spare tire tools correctly. You will note a square drive application, a small hook application or a security lock application. If the security lock is required, place the lock onto the end of the small hook of the assembled spare tire tool before inserting it into the access hole.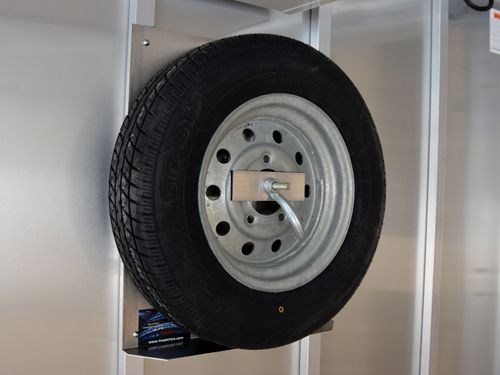
Assemble two of the spare tire tool extensions together, making sure the press-locks insert into the holes to interlock. The end of the tool must mate to the cable crank of the spare tire; this is revealed when using the flashlight.
Insert the two extensions into the access hole and turn them while pressing inward until they lock into the cable crank of the spare tire.
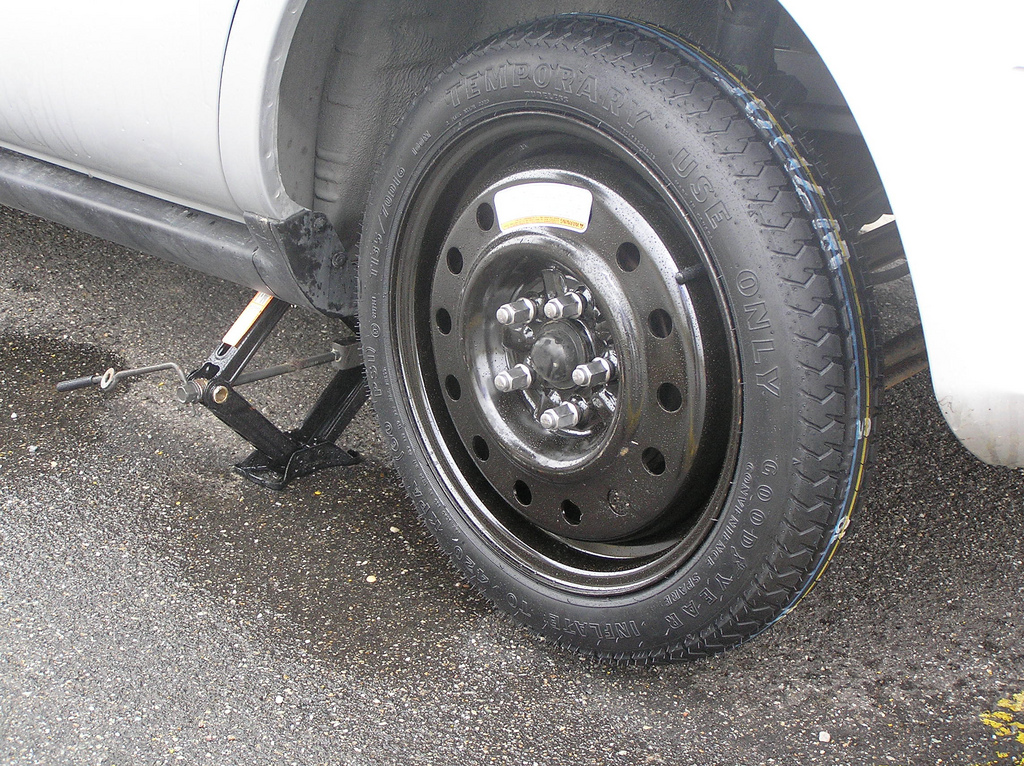
Retrieve the lug nut wrench. You will note a square drive in the center of the wrench. Place the square drive onto the extension tools in order to use it as an unwinding and winding device. Once locked into place, turn the lug wrench counterclockwise, lowering the spare tire from its mounted position. Continue to lower the tire to the ground until you can lift it and remove the cable flange from the hub of the spare.
To raise the spare tire, reverse the procedure and turn the spare tire tool in a clockwise motion to raise the cable.
Tips
 It will not do you any good if it's a low or flat tire.
 Things You'll Need
Writer Bio
Jody L. Campbell spent over 15 years as both a manager and an under-car specialist in the automotive repair industry. Prior to that, he managed two different restaurants for over 15 years. Campbell began his professional writing career in 2004 with the publication of his first book.
If you're used to having your spare tire on your trunk, it can be quite a daunting task to remove the spare tire under a truck. But don't worry. We got you covered. We've asked automotive experts how this procedure is done so that you can get started on changing your flat tire and be back on the road in a jiffy.
Follow these steps to remove the spare tire from your truck:
Hang on so we can elaborate on the given instructions so you can remove your spare tire from your truck with no hassle. We'll also share with you how to do this task when you don't have your tire removal kit. We'll also have a short discussion on how long you can expect your spare tire to last and how far you can drive using your spare tire.
Before you continue reading, let us say we hope you find the links here useful. If you purchase something through a link on this page, we may get a commission, so thank you!
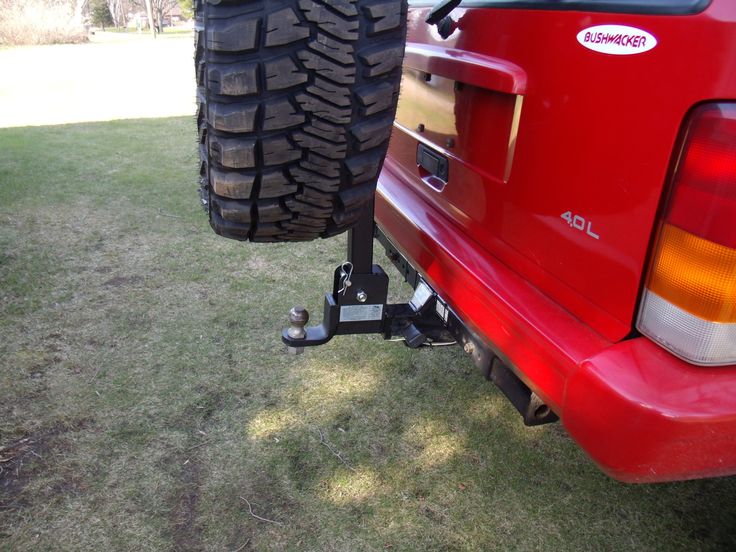
Unlike regular vehicles that conveniently have their spare tires in their trunks, pickup trucks have theirs underneath the truck bed. This is actually a genius move by manufacturers so that the spare tire won't take up valuable space on the bed of the truck. However, it makes removing the spare tire more challenging.
Don't worry because there's an efficient way of removing the spare tire without breaking your back or endangering your life. Just follow these steps. You can also watch this YouTube video for the demonstration.
Easy, right? You don't have to go under your truck after all!
Brand new vehicles come with a set of factory jack kits or tire removal kits to aid you in getting the spare tire off the truck. You need to familiarize yourself with these tools, so you'll know what they are used for.
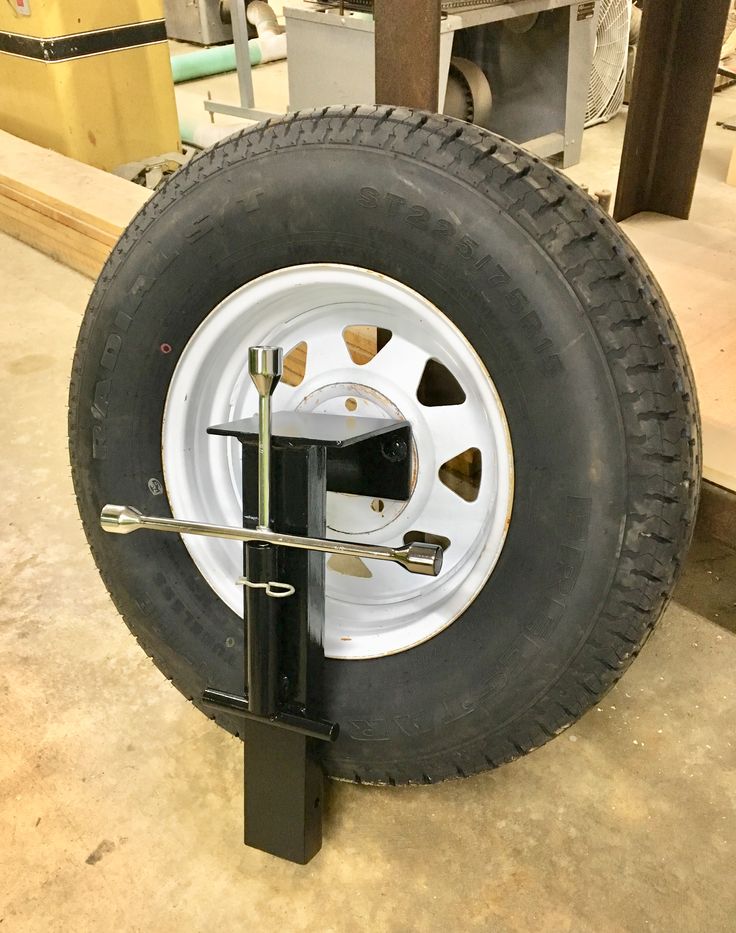
The tool that you use to lower the spare tire is called the jack handle. As mentioned above, this is a long piece of tool that you need to assemble so that you can connect it with the vehicle's tire-lowering mechanism. You turn the handle counterclockwise to unfasten the tire until it reaches the ground and you can remove it from the cable and tire holder.
If you don't have this in your tool kit, it's best to buy one as soon as possible. You never know when you're going to need it. Always be prepared for what can happen on the road.
Check out this spare tire jack handle on Amazon.
In case you have a tire blowout and you don't have a jack handle with you, there are other ways for you to remove the spare under your truck. But it would still involve other tools that hopefully you've got in your tool kit.
What you need:
Steps to lower the tire:
What you need:
Steps to lower the tire:
These are just two ways for you to remove the spare tire without a jack handle.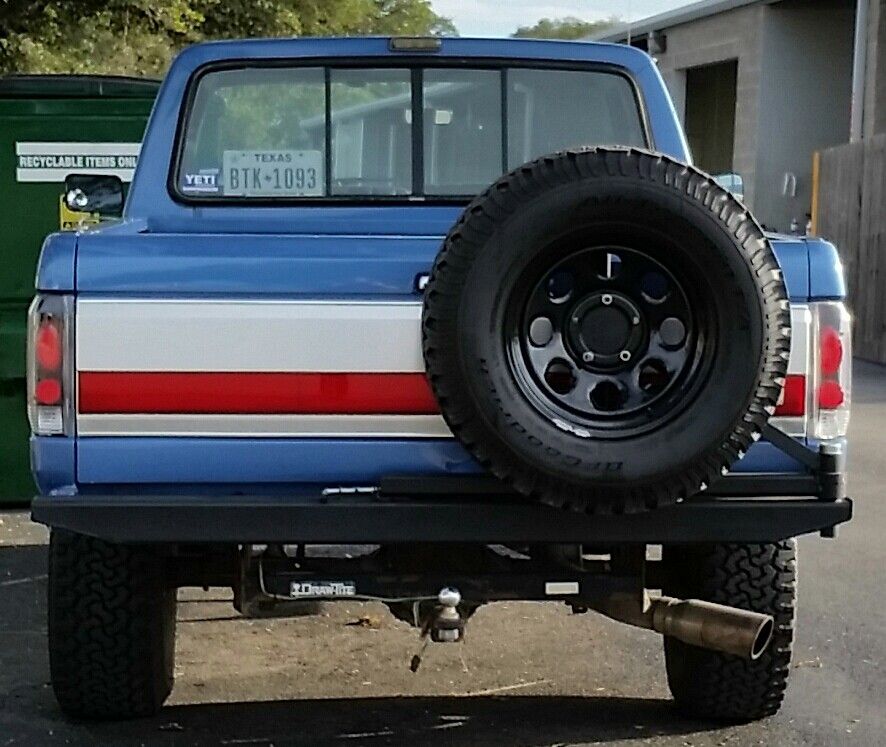 Basically, you can improvise with the tools that you've got to see which one will work best for you.
The lifespan of your spare tire will depend on its tire type. There are usually three types of spare tires: a donut, run-flat, and a matching spare tire.
A donut is also known as a space-saver or compact spare tire. This is smaller and lighter than a regular tire. In recent years, manufacturers began using donut spare tires on their vehicles to reduce cost and save valuable space since a full-sized tire takes up so much room.
Since they are more lightweight, they help improve the fuel economy and power consumption of your vehicle. However, this type of tire is made of weaker materials than traditional tires. They have a shallower tread depth which makes them more vulnerable on the road.
As such, a donut spare tire is just meant to be a temporary replacement for your worn-out tire. It has to be replaced immediately before you get yourself into trouble while using it.
A run-flat spare tire is more commonly found on newer vehicles. It is also called a zero-pressure tire. It is more durable than a donut tire. It is made of tougher materials that's why it can resist deflation even when it has been punctured.
But still, this is a temporary fix for your vehicle. You're better off having it replaced right away.
This is the most durable among the different spare tire types. It may not be made by the same manufacturer as your regular tires, but it is at par when it comes to performance on the road. As such, you can use it for a longer time after replacing your flat tire with this spare.
Again, the distance and speed at which you drive using a spare tire would depend on the type of tire that you have.
Donut tires are not designed to be driven for long distances.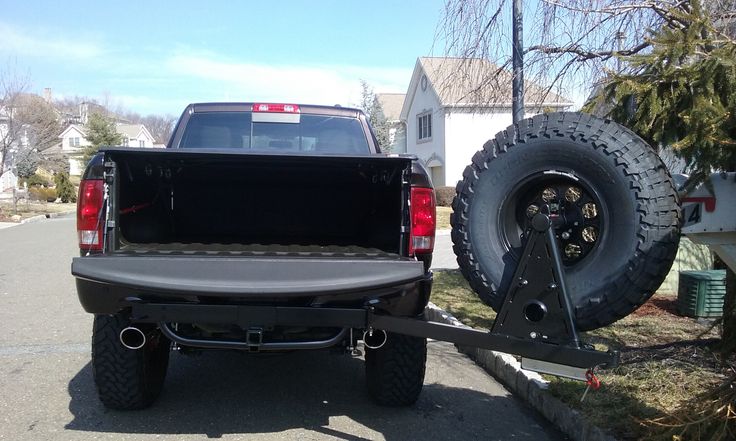 You have to maintain a speed of 50 mph or less. This means that you cannot use this on the highway.
Since donut tires are smaller than your other tires, they have to work harder to keep up with the rest. This makes them more susceptible to damages on the road.
With a run-flat tire, you can go beyond 50 mph since it has better endurance on the road. You can drive up to 100 miles with it. This will give you more allowance to find an able auto repair shop.
Lastly, a matching spare tire can be driven similar to a regular tire. You can go at the maximum allowable speed on the road and there's no limit on the distance.
Take note though that spare tires have different speed ratings so it's best to check yours. Don't go beyond the recommended speed to avoid damaging other components of your vehicle such as the transmission. It's bad enough that you had a flat tire, you don't need the added expense of additional repairs or part replacement.
Make sure you always have your tire removal kit with you so you can take off your spare tire under your vehicle without any hassle.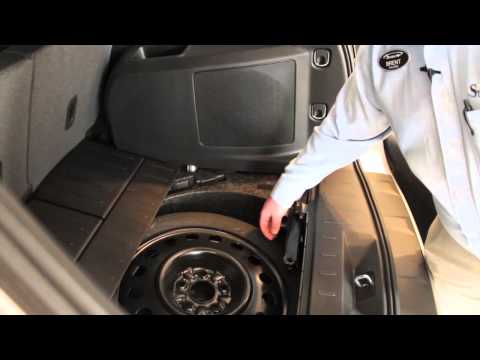 With the right tools, this task doesn't have to be a chore.
Check out these articles for some related reading:
Does Firestone Patch Tires For Free?
20 Types Of Tires You Should Know
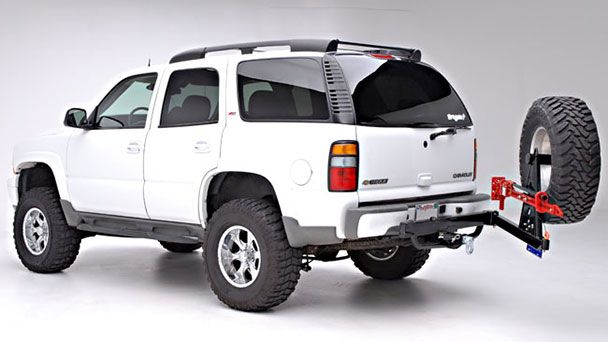
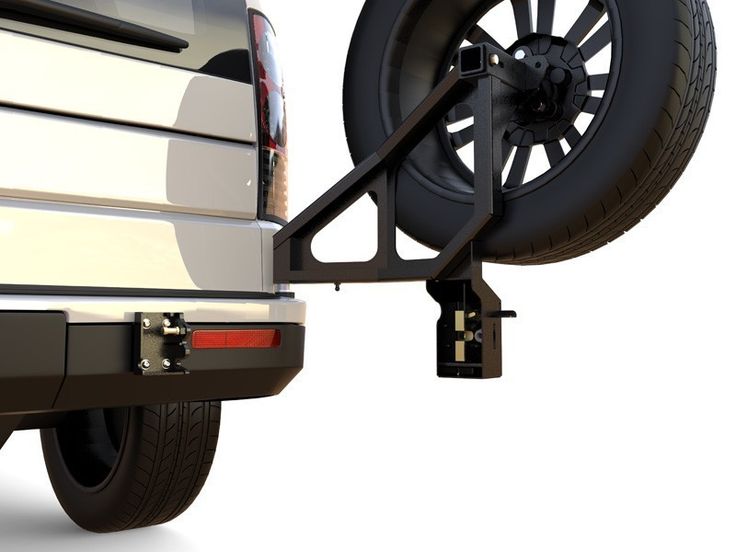
A significant difference between a Chevrolet Niva car and crossovers and many other SUVs is the method of mounting a spare wheel, which is located on the tailgate. This method improves the exterior design of the car, saves space in the trunk, and does not interfere with off-road.
On the Shniva, the spare wheel mount is located on a special bracket that is screwed to the fifth door. To improve the appearance of a car with a wheel hanging from the rear, the designers provided for the spare wheel to be covered with a plastic cover.
The main function of the cover is to keep the spare wheel in good shape and condition. It prevents the wheel from getting dirty, scratching the disc or getting other unwanted defects.
It does not come with the basic four caps and is sold separately.
Most often Chevy Niva is equipped with a standard spare wheel cover.
Chevrolet Niva spare wheel cover in car markets and shops can be found mainly in three versions:
To close the Shnivy spare wheel, you can use a standard purchased cover, or you can modify it (make a kind of tuning) in a simple way, by painting the emblem, or the entire cap. This does not require large expenses, but it changes the design of the Chevy Niva for the better.
When choosing a cap for a spare tire, it is important to pay attention to quality, because if you choose a low-quality sample, this can lead to the fact that at the time of installation on the disk, the cap will burst, and you will have to buy a new one. Therefore, it is better not to spare money and immediately purchase a high-quality product. The choice is yours!
· Vehicle design becomes more interesting
· This creates more space in the luggage compartment
· If a wheel needs to be changed, it is not necessary to remove everything from the luggage compartment
The wheel is fastened with a special bracket and four nuts. From a practical point of view, this solution is very convenient, but at the same time, it is very easy to lose the spare tire, since it is enough for the criminal to unscrew a few bolts and the wheel will be in his hands.
Protection
To complicate the removal procedure, you can install a special lock on the stud that secures the bracket or install a nut and a lock on the inside of the trunk, so you won’t be able to unscrew the bolt from the outside.
To give a more aesthetic look, they put on a spare tire cover for a Chevrolet Niva, as a rule, it comes with a kit, but if for some reason it is not available, you can purchase it.
The cover can be of two types:
dirt accumulates, and if a failed wheel is installed instead of a spare wheel, then the dirt that has accumulated on it and the worn tread cannot be hidden.
There are many options on the market, both standard and tuned, thanks to which you can close the spare tire. If for some reason you do not like what is on the market, you can change the Chevrolet Niva spare wheel cover yourself, this tuning is done by simply painting the emblem and no complicated actions are required, just:
installation on a disk, it will burst, so it is better not to spare money and purchase a high-quality product, but in any case, the choice is yours.
Jody L.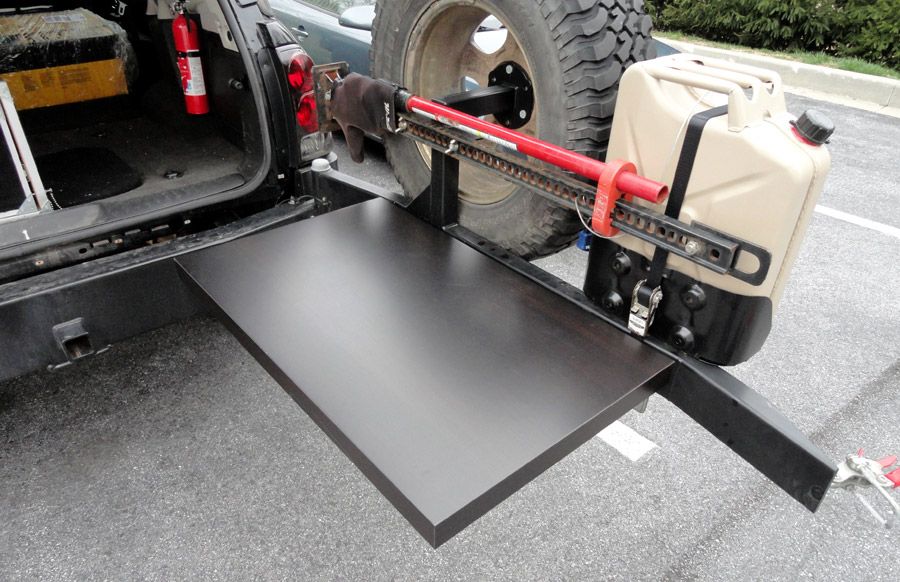 Campbell
If you have a flat tire on your Chevy truck that needs to be replaced, or you want to install an aftermarket hitch, you will need to remove the spare. The spare wheel on a Chevy pickup mounted under the bed requires additional components to be connected to access and then activate the ratchet. It's always good to know how to remove and install a spare tire on any car before you need it in case of an emergency. Changing a tire is never fun, but if you have to learn how to remove a spare tire in the process, it will take longer and make the task more tiresome.
Locate the spare tire and wrench tool kit (equipped with a Chevy truck) behind the passenger seat. On the bench seat, tilt the seat forward and move it all the way to the front of the truck to access the toolbox. On Chevy trucks with an extra cab, you need to lift the rear seat up to access the toolbox.
Loosen the locking bolt by turning the scale knob counterclockwise.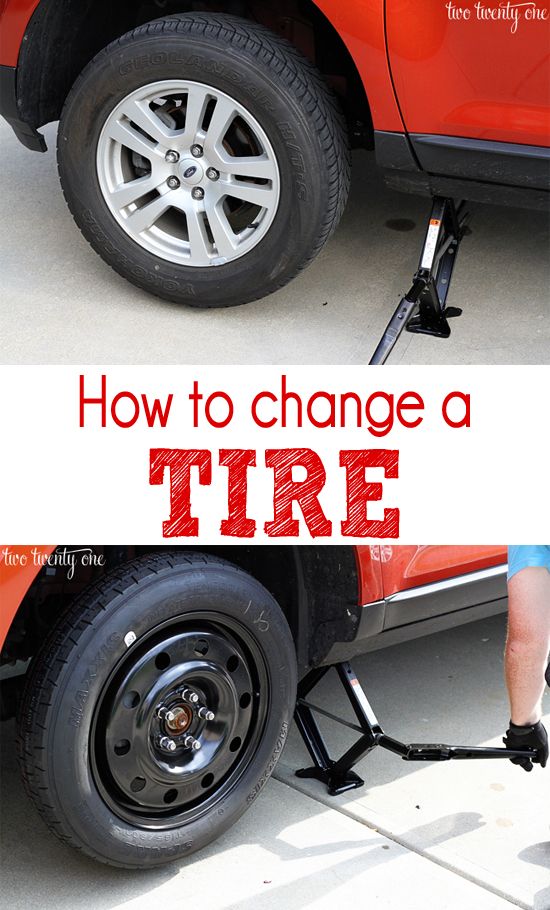 By loosening it, you can pull the tool kit out from under the mounting bolt and, if necessary, remove the bolt.
Remove the tool kit pieces from the back of the Chevy pickup. Locate the spare wheel access hole on the right side of the rear license plate. On some newer Chevy trucks, you may need to use the ignition key to remove the locking device, intended as a spare theft tire deterrent. If so, insert the key into the lock and turn the key to remove the lock. Use a flashlight to look into the access hole to find out which adapter is required for the spare wheel cable to properly assemble the spare wheel tools. You will notice a square drive attachment, a small hook attachment, or a security lock attachment. If a security lock is required, place it on the small hook end of the assembled spare wheel tool before inserting it into the access hole.
Assemble the two extensions of the spare wheel tool together, making sure the press releases fit into the lock holes. The end of the tool must mate with the spare wheel cable handle; this is detected when using a flashlight.
Insert the two extensions into the access hole and rotate them while pushing inward until they lock into the spare wheel cable arm.
Remove the lug wrench. You will notice a square in the center of the wrench. Mount the square drive on the extensions to use as a reel and reel. Once locked in place, turn the wrench counterclockwise to lower the spare tire from its installed position. Continue lowering the tire to the ground until you can pick it up and remove the cable flange from the spare hub.
To raise the spare wheel, reverse the procedure and turn the spare wheel tool clockwise to raise the cable.
.
Thomas West
SELECTION ref 1964 Image Marie-Thérèse GUIHAL from Fotolia.com
In the early 20th century, pickup trucks were simply modified cars. However, pickup trucks became popular when these utility vehicles became popular. Modern pickups have little to no parts in common with cars that usually have spare tires stored in the trunk. To avoid wasting valuable cargo space by stowing a spare tire in the bed of a pickup, manufacturers mount it under the bed at the back of the pickup. know how to do it right.
Locate the truck tire changing tools and remove them from the vehicle.
Locate the jack extension rods and jack handle. Insert the two halves of the extension rods together until they click into place.
Locate the hole in the rear bumper next to the rear license plate. Remove the lock from the hole with the ignition key if your truck is equipped to do so.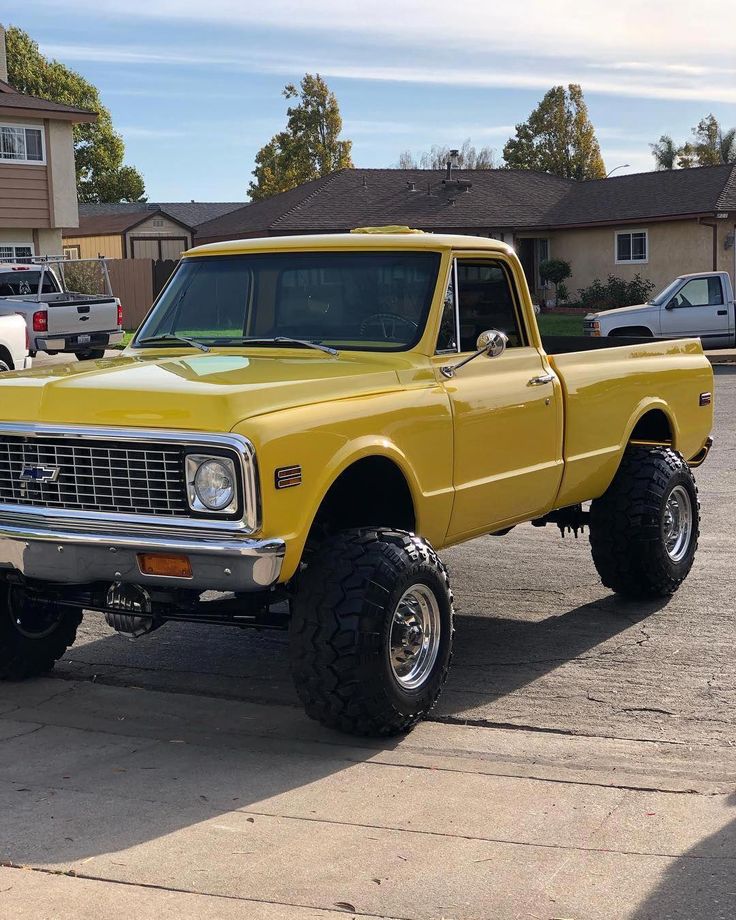
Insert the assembled extension rods into the hole until they contact the tire lowering mechanism. Slide the jack handle over the protruding end of the extension rods. Turn the jack handle counterclockwise until the tire, held by the cable, reaches the ground.
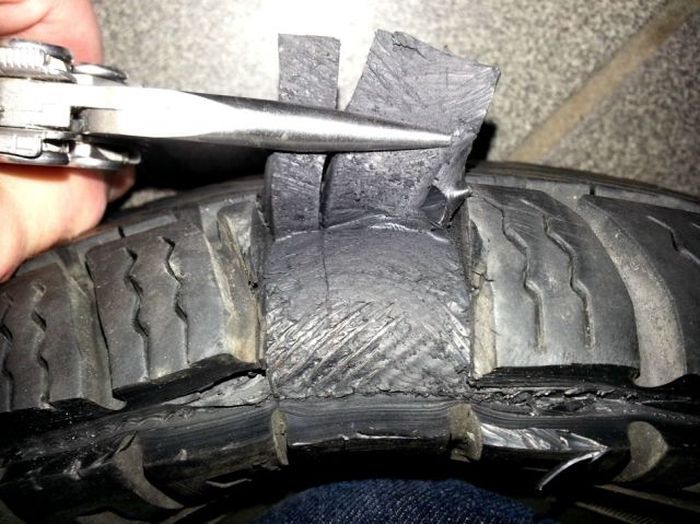
Use the bent end of the wrench from the tire change tool kit to engage the tire lowering cable. Pull the wrench from the rear of the truck to pull the tire towards you.
Thread the tire holder at the base of the lowering cable through the hole in the center of the spare wheel. Remove the spare wheel.
Reverse the order of steps 1 to 6 to stow the spare tire under the bed of the pickup truck.
.
It's important for drivers to know how to change a tire on their car. Almost every driver will experience a flat tire at least once, and this skill can make things easier.
Before you begin the process of replacing a flat tire with a spare tire, there are a few preparation steps you need to take. First, make sure you pull off the road slowly and park in a safe place. This area should be wide enough for you to move around the car without being run over by other motorists. Make sure your emergency flashers are on so other drivers know to be careful passing you when you are changing a flat tire. . In addition to using the emergency brake, place a large rock or stick behind the tire against the flat tire to keep the car from rolling. If you have a reflective warning sign, place it a few feet behind your vehicle for added safety.
1
To begin the process of changing a flat tire, place the spare tire and jack in the boot of the vehicle.
The spare tire is usually found in the boot
On most models, these two items are stored in a compartment under the boot floor. Carefully lift the spare tire and place it on the ground in close proximity to the flat tire. Car jacks usually have a built-in wrench. Remove the wrench from the jack and use it to loosen the hub cap on the damaged tire. After removing the hub cap, set it aside.
2
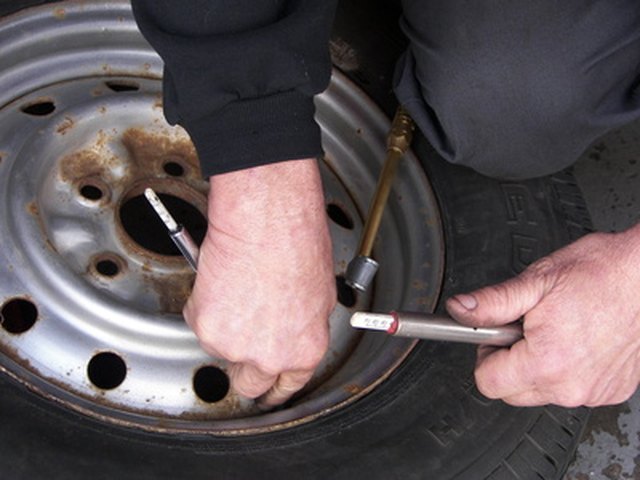
After removing the hub cap and before using the jack to lift the wheel off the ground, use a wrench to loosen the nuts on the flat tire .
You may need to work hard to loosen some of the nuts.
It is important to complete this step before using the jack to lift a wheel. Place a wrench on each nut and push the handle counterclockwise. Loosen only the nuts, do not remove them completely. If you are having trouble loosening the flare nut, use your foot or knee to apply pressure on the wrench handle.
3
The next step to change a flat tire is to use the jack to lift the wheel off the ground .
Lifting the vehicle with a hydraulic jack
Place the jack on a solid part of your vehicle's frame. Your vehicle owner's manual has specific information on the correct placement of the jack on your particular vehicle. Turn the jack clockwise by hand until it meets the vehicle. Then, using the handle of the jack, continue to rotate clockwise until the damaged tire is a few inches above the ground.
4
After jacking up the vehicle, remove the nuts that you loosened before using the jack, using the wrench .
You don't want to lose the lug nuts
Be sure to store the lug nuts in a safe place so you don't lose them when you change the tire. Carefully remove the flat tire and place it away from the road. Install the spare wheel on the wheel, aligning the holes with the bolts. Put the nuts on the bolts and turn them clockwise. After you have hand-tightened the lug nuts, use a wrench to make sure each nut is tight.
5
Finally, lower the vehicle off the jack by turning the knob counterclockwise . Remove the jack as soon as the spare wheel is securely on the ground. Once the jack is off, use a wrench to tighten the nuts on the spare tire to make sure it is secure enough to ride. Once the spare is fully installed, place the jack, wrench, hub cap, and flat tire back in the trunk of your car.
Drive carefully when using the spare wheel! Repair and reinstall a flat tire as soon as possible.
.
Knowing how to change a tire is an essential skill for all drivers. If you rely on a cell phone to save you in an emergency on the road, there's always a chance you'll forget to charge it, be out of range, or leave it at home. Flat tires can happen anywhere, and a cell phone is no substitute for knowing how to change a flat tire.
Luckily, changing a tire is not that difficult! Just follow these guidelines to get yourself ready if you have an apartment.
These items should be in your car:
8
Here are some items that are not included with your car but should be stowed away in the trunk or glove box in case you need to change a flat tire: 6 inch jack stand
 Find a safe place
 Once you realize you have a flat tire, do not brake hard or turn. Reduce your speed slowly and look around for a flat, straight stretch of road with a wide shoulder. An empty parking lot would be ideal. Level ground is good because it will keep your car from rolling. Also, straight sections of road are better than curves because oncoming traffic is more likely to see you.
Never attempt to change a tire on a narrow shoulder close to oncoming traffic. Keep driving (slowly) until you find a safer spot. When driving on a flat surface, you risk ruining the rim, so replacing the rim is better than being hit by an inattentive driver.
Be sure to read your owner's manual for specific steps to change a flat tire for your vehicle.
Your hazard lights or flashers will help other drivers see you on the side of the road. To avoid an accident, turn them on as soon as you know you need to pull over.
 Apply the parking brake
 After stopping, always apply the parking brake in preparation for changing a flat tire. This will minimize the possibility of your vehicle rolling.
Wheel chocks run in front of or behind the tires to further ensure the vehicle does not roll while you repair a flat tire. If you are changing the rear wheel, place it in front of the front tires. If you have a flat tire in the front, place wheel chocks behind the rear wheels.
Bricks or large stones will work just as well as "real" wheel wedges. Just make sure they're big enough to keep the car from rolling.
If your vehicle has a lug cap, it is easier to remove the cap before jacking up the vehicle. If your nuts are open, you can skip to step 6.
Use the flat end of a wrench to remove the cap. This will work for most vehicles, but some hub caps require a different tool to remove. Consult your owner's manual for instructions on how to properly remove a hub cap or wheel cap.
Using a wrench, turn the nuts counterclockwise until you break their resistance. You may have to use force, and that's okay. Use your leg or your entire body weight as needed.
Loosen the clamp nuts approximately ¼ to ½ turn, but do not remove them completely. Save this for when it's time to remove the tire/wheel from the car.
A suitable place for the jack is usually under the vehicle frame next to a flat tire. Many car frames have molded plastic on the bottom with a cleared area of exposed metal specifically for jacking. To safely raise and avoid damaging your vehicle, follow the jacking instructions in your vehicle owner's manual.
To prevent the jack from sinking under the weight of your vehicle and losing balance, place a small piece of wood 2x6 inches under it before attempting to raise the vehicle. This tactic is especially useful on tarmac.
With the jack correctly positioned, raise the vehicle until the flat tire is about six inches above the ground.
Never place any part of your body under the vehicle during or after the vehicle has been jacked up.
Now it's time to completely remove the nuts. Since you have already loosened them, you will be able to unscrew them mostly by hand.
Holding the tire by the treads, gently pull it towards you until it is completely free of the hub behind it. Lay it on its side to prevent it from rolling away.
Now place the spare on the hub, aligning the rim with the lug bolts. Press gently until the eyebolts protrude from the rim.
Install the nuts on the bolts and hand-tighten completely. Once they are all on, check each one again, tightening as much as possible. You will tighten them with a wrench after lowering the car to the ground.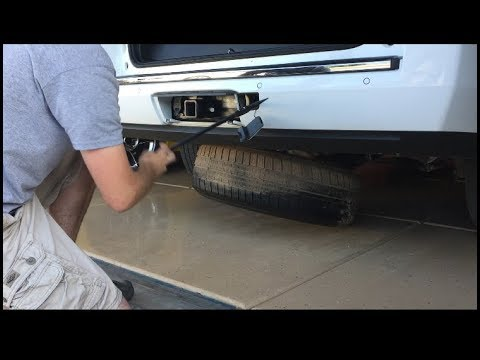
Use a jack to lower the vehicle so that the spare wheel is on the ground, but not all of the vehicle's weight is on the tire. At this point, you should tighten the lug nuts with a wrench, turning them clockwise as much as possible. Press down on the wrench with your whole body.
Lower the vehicle fully to the ground and remove the jack. Tighten the nut again with a wrench to make sure they are as tight as possible.
.
If the cap you removed from the flat tire fits your spare tire, install it the same way you removed it originally. If it does not fit, remove it along with the tire when laying down the equipment.
Here is a jack, wrench, wheel chocks, a flat tire and possibly a hubcap. Don't forget to put them all in the car before you leave.
 Checking the spare tire pressure
 You should check the spare tire pressure to make sure it is safe to drive on. "T-type" temporary spares, also called "mini spares", require 420 kPa (60 psi). If the tire requires pressure, drive immediately (slowly) to the service station.
Temporary spare tires are not designed for driving long distances or at high speeds, so drive carefully until you can visit a tire shop. A professional should be able to determine if your tire needs repair or is time to replace it.
In addition to taking the tire to a professional, the above procedure should take no more than 15-30 minutes to change a tire. Just make sure you don't miss a single step.
It is useful to change a tire in the garage or driveway so that you are ready to deal with this situation should it ever happen to you.
Knowing how to fix a flat tire is great, but regular maintenance is even more important.