Changing out an ATV axle is a pretty routine job. All ATVs will need this done at some point in its life. With the rough terrain most riders take their quads on, there’s bound to be a bent axle problem sooner or later.
Sometimes you need to change the axle out because it got bent, sometimes people want to get a longer axle installed to widen the stance of their quad. Either way, the process is the same.
These steps are universal for any ATV cv joint axle change, but each quad is a little different. If you’re ever in doubt about one of the steps, it’s best to check your users manual. But first, lets go over the warning signs that your axle is actually bad and needs replacement.
The first thing to watch out for is a clicking or popping noise that you can hear while riding. This noise is most likely heard during tight corners or taking tight turns. This is a fairly common noise to hear if your cv joint axle is wearing out and needs to be replaced.
Physically get done and look at the axle itself. If it looks bent or dinged up enough that you can see a curve in the axle, it probably needs to be replaced. Check the boots and cv joints for wear or breaks as well.
If you feel a vibration or shaking when riding, it could be your axle is bent. There are a number of other issues that would cause a shaky feeling though. If a shaking or wobbling while riding is your only warning sign and the axle doesn’t look bent, I would check out my Common Reasons An ATV Will Shake article before swapping out the axle.
Now lets look at the tools you need and the steps to take to change out your ATV axle.
You will also want to wear safety glasses and gloves when working on your ATV. You may need a new cotter pin for the axle castle nut and penetrating oil and cleaner if the axle is stuck on there.
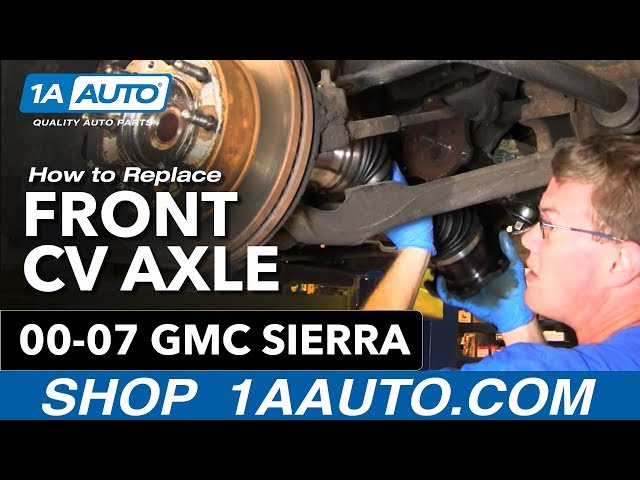
Lift the quad off the ground and place on jack stands or something very sturdy. You will be pulling on the lifted machine in later steps and don’t want it to tip.
Get the lug nuts off and remove the wheel. It is easier to loosen the lug nuts before jacking up the quad. You can put the lug nuts back on the hub after the wheel is off if you’re worried about loosing them.
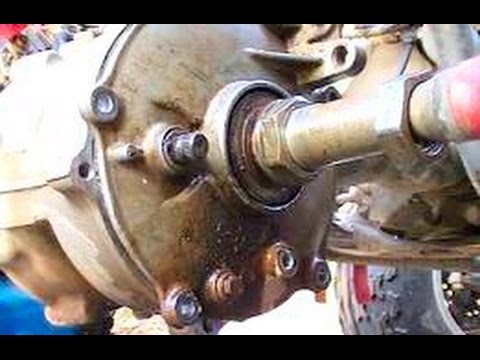
You might have a plastic cap covering the castle nut that you will need to remove first. Take the cotter pin out of the castle nut and remove the castle nut. It’s ok if you have some one hold the brake down to prevent the axle from rotating while you take off the castle nut.
The brake caliper is usually held on by two bolts, remove those and pull the caliper off the rotor. You don’t need to take the caliper apart any further than this. Simply zip tie it up out of the way and avoid letting it hang or putting strain on the brake line.
This is a good stage to check if you need to replace your wheel hub bearings. You will need to remove all the same parts and get to this point to do that job anyway, so why not if it needs it do it now.
If you try to rotate the hub bearing assembly and notice it wobbles or is grinding, check out my ATV Wheel Hub Bearing Replacement article to get more info about that. Now remove the hub.
This will allow you to move the A-Arms when you get to that step. Just remove the cotter pin if you have one and remove the bolt holding on the bottom of the shock. This is only required if you need to remove the bottom A-Arm bolt to move it out of the way, usually only need on front axle changes if you have to remove the tie rod ends from the steering knuckle.
To remove the bottom A-Arm bolt, simply take out the cotter pin if you have one and remove the nut holding it in place.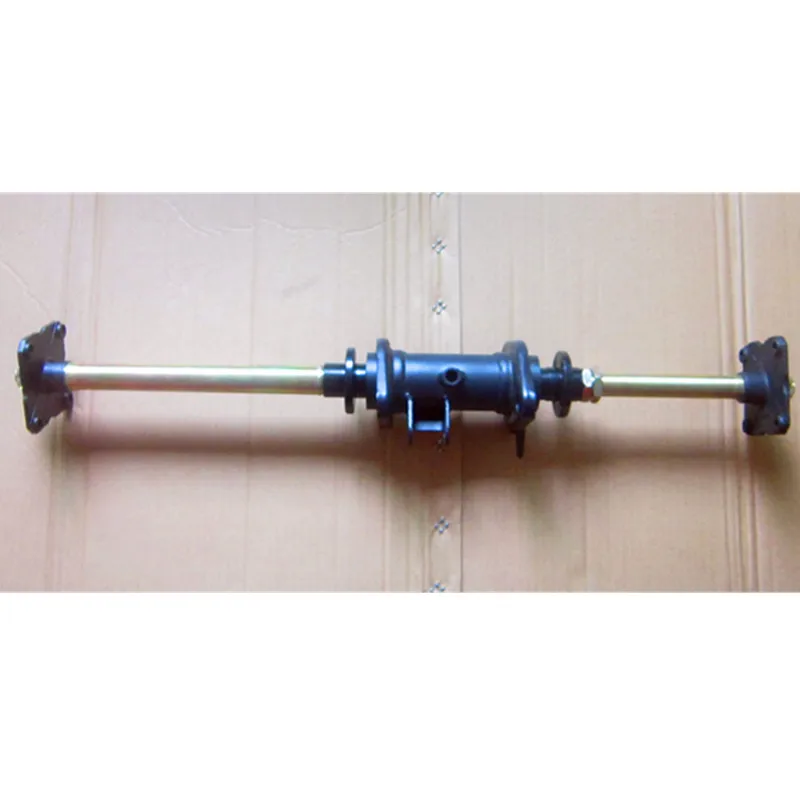 You need to pull the bottom ball joint out of the steering knuckle in order to get the axle out.
To remove the steering tie rod end the same steps apply. Remove the cotter pin if there is one and remove the bolt. You may not need to do this step depending on your machine, and this is also only required on a front axle change.
The main goal here is to get the steering knuckle or rear knuckle off the axle.
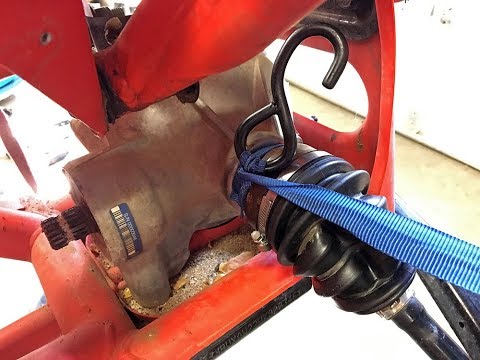
To remove the axle from the differential you will need to play with it a bit. A lot of times these axles can stuck on there and you may need to use some penetrating oil to make it easier.
Just give it a swift quick jerk on the axle to pull it out. This step is easiest done when you lower the bottom A-Arm and raise the top A-Arm and steering knuckle out of the way. Now it’s time to install the new axle.
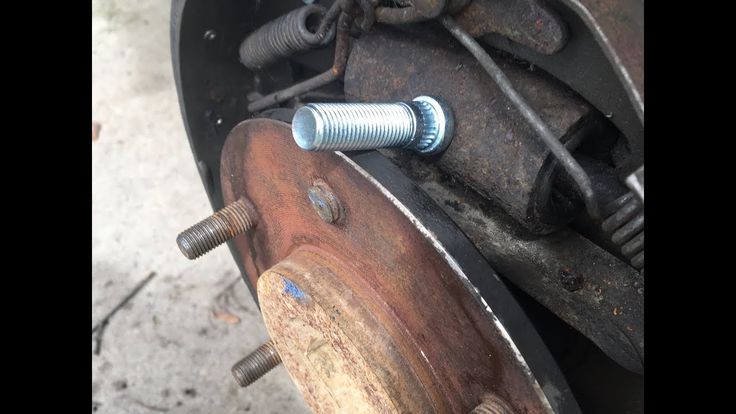
Get the new axle and line up the splines with the differential before pushing the new axle into place. It’s a good idea to grease up the splines on the the new axles before installing. Anti-seize grease will work just as well.
You may need to hit the end of the axle with a rubber hammer a couple times to get it seated in all the way properly. You should hear and feel it click into place nicely. You can give it a little tug to make sure it seated the right way.
This step is pretty straight forward, you want reinstall everything in the reverse order you took it apart. Get the steering knuckle or rear knuckle back on the axle, bolt the tie rod ends and A-Arms back together, and bolt put the lower shock bolt back on.
Now put the hub back on with the washer if there was one and the castle nut with a new cotter pin. Put the wheel back on and take the machine off the jack or jack stands.
With any maintenance efforts that involve removing the tie rod ends or anything to do with the steering, it’s a good idea to do an alignment afterwards. Especially if you were installing a longer axle to widen the stance of your ATV.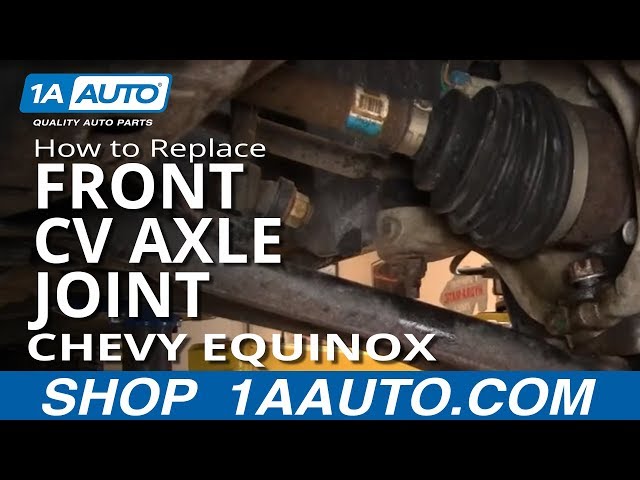
An alignment may not so crucial if you really only ride at lower speeds, but not getting one done can cause your tires to wear unevenly and cause extra wear to other parts of your machine.
To do an ATV alignment check out my How To Do An ATV Alignment article for the step by step process on how to get it done the right way.
That’s it! Those are the steps to replace the axle on your ATV. If you don’t know where to start the search for the replacement axle, I would try your local ATV parts store or Look At ATV Axles on Amazon. You can usually find the parts cheaper online, just make sure you get the right part for your make and model.
Sharing is caring!
2019-03-21 | Categories: How To Repair | Tags: atv axles technical help
The ATV and UTV become more popular vehicles in the USA recently, you can drive it on the field, trail, rock and mud to enjoy the fun, it’s really exciting sport. While, most of ATV parts are easier broken than the street car, such as Axle Shaft is the most common issues for the UTV/ATV driver.The Yamaha Rhino and Polaris Ranger as the most popular off-road vehicle, made to carry multiple people off the trail.Their are 4X4 vehicles, and they have an independent suspension with four individual axles. Do you want to know what's polaris ranger axle problems or when you need to replace Yamaha Rhino and Polaris Ranger CV Axle Shaft?
When a drive axle fails completely, it can leave you deadlocked in the streets. Knowing about the problems and symptoms of drive axles can be helpful if you run into any issues or find any indications of failure.
CV axles will fail for many reasons, one being wear and tear. If you have a 1995 Honda Rancher and you’ve never done anything to it then don't be surprised if things start failing. Not needing to work on your ATV doesn't mean it doesn't need maintenance. CV axles will also fail due to torn boots allowing mud, sand, water and any other foreign particles inside where they’re ground up at each rotation.
Signs of a Damaged CV Axle Shaft You Need To Know
1.Grease filled around the CV joint can seep out of them when the rubber boots are cracked or broken. Over time, the grease can spread out to the area inside the wheel rim.
2. You need pay more attention on clunking sound.When you put your car in gear you will likely hear a sudden sputtering or clunking noise as the vehicle struggles to get power in order to move forward if your axle is damaged or in need of some sort of repair. This is because the transmission won't be able to properly transfer engine power through the drive line to the axles to wheels.
3. A humming or growling noise is emitted due to a lack of lubrication in the CV joint. A steady knocking while driving at low speeds is also an indication of a bad CV joint.
4.If your vehicle will not move, it may be some axle trouble.This is likely because the axle has snapped at the universal joint. When you hit the gas your engine will only rev and you will not move forward.
5.When your vehicle shudders while accelerating, it indicates a fault in the inner CV joints.
HOW TO SAVE MONEY ON ATV CV JOINT REPAIR?
The main way of saving money on CV joint repair is to simply replace the half shaft itself, and choose a reliable online store to buy cheap and high quality cv axle shaft.You can shop around online and in person to get the best possible quote from the garages in your local area, so taking the time to compare estimates can save you money. HexAutoParts.com stocks high-quality front axles, rear axles drive axle kits. In our site, you can locate parts of your choice by entering your car's year, make and model.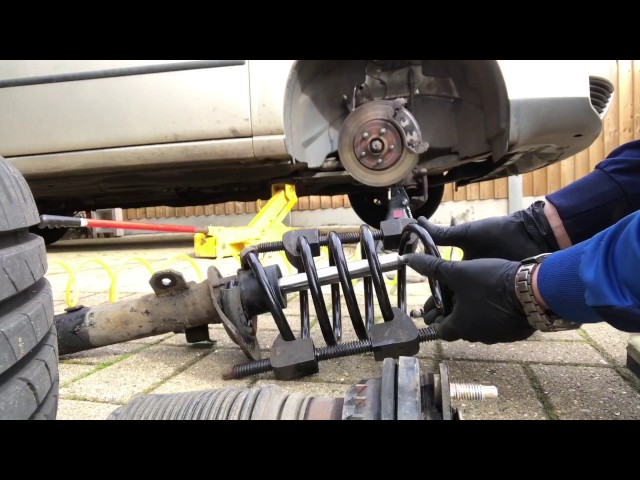 Your part's OEM number can also be used to find the appropriate fit for your vehicle.
If you want to get the CV Axle Shaft replacement tutorials you can keep eyes on our blog, we have professional repair guide CV Axle Install .Hex Auto Parts is one of the best place online to get replacement ATV parts that come with a warranty at competitive prices. We stock a wide range of OEM replacement and aftermarket parts for popular make and model. To find the right auto part for your car or motorcycle, simply tell us your car's year, make and model. Your order will be shipped from our TX warehouse to your location. HexAutoParts always offer free shipping for everyone here. Our products have been tested to meet or exceed industry standards. You can reach us on our support line at or leave us an email at [email protected], If you need help in choosing the part. Please feel free to leave us an online review. We value your feedback!
Prev: Good Thing to use A/C Compressor in Winter - Why we should Run Auto Air Conditioner in Winter?
Next: How to Choose Correct Wheel Spacer for Truck, Car and Jeep - What Size Wheel Spacer You Need
The suspension is considered to be one of the most important functional components of motorcycle equipment, since it is it that is responsible for the rider's comfort in the process of movement, and also provides a soft passage through problem areas of the terrain.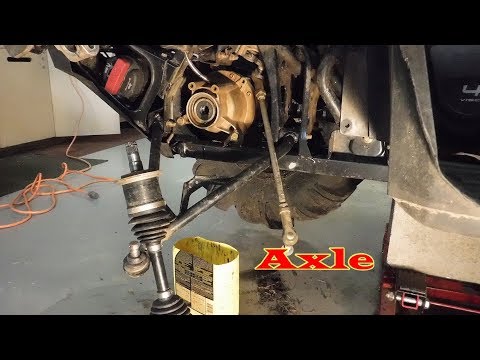 The sale of ATVs implies a special attitude to this unit and detailed advice on the procedure for its adjustment and maintenance.
There are dependent and independent types of suspension. The second type is most often found among modern ATV models. Each motorist can adjust it in accordance with his own preferences, as well as operating conditions.
Among the advantages of ATV dependent suspension it is worth noting:
Such attractive performance of this suspension is due to the extreme simplicity of its design.
Regardless of the type of ATV suspension, there are some regularities in its structure. There are front and rear suspension types. In order for 125cc ATVs to boast a high level of ride comfort, the front suspension is usually made independent. Often it is supplemented with elements such as a pair of wishbones and telescopic shock absorbers. As for the rear suspension, it can be dependent, independent or semi-independent, and can also be equipped with pendulums and shock absorption devices.
Suspension of any ATV is a set of spare parts, assemblies and assemblies located between the motor vehicle body and the track. It consists of the following components:
ATV suspension also performs many important functions, namely:
Based on this, the suspension, despite the relative simplicity of its device, plays a significant role in the design of any vehicle.
If your vehicle's suspension is not working properly or has failed, you may need to replace some of its components with new ones.
The following ATV suspension components most often fail:

To repair the suspension of an ATV without outside help, it will be enough just to find the failed elements of motorcycle equipment and replace them.
By adjusting the ATV's suspension for yourself, the rider will be able to get maximum pleasure and comfort in the process of driving. It is especially important to correctly configure this aspect in sports models of motorcycles. The fact that it is time to adjust the ATV suspension is indicated primarily by uneven tire wear, as well as the presence of problems and discomfort when driving a motorbike.
Adjust the suspension of a motor vehicle as follows:
 It is better to reduce compression in the case when slippage is observed.
 Before starting to adjust the ATV's suspension, it is recommended to write down all the initial values so that if you do not like the result, you can easily return the motorcycle to its previous state.
In the absence of experience in the repair and maintenance of motorcycles, it is strongly recommended that if you find any problems with the suspension, contact the specialists at the service center. The sooner you decide to repair an ATV, the better, because driving it with a broken suspension is not only inconvenient, but also quite dangerous.
05/29/2021 1679
Contents
When choosing a bike, many beginner cyclists often look at the rear derailleur, frame, and the presence or absence of a shock absorber. At the same time, insufficient attention is paid to such an important component as the wheel hub.
There are two types of hubs, front and rear. The front is simpler and is not subjected to the same loads as the rear, especially if the bike has a fork with a shock absorber. The rear hub is used to transmit torque from the pedals to the rear wheel, the dynamic characteristics of the bike depend on it, so we will talk about it further.
Bicycle hubs differ in the material from which they are made, as well as the internal structure. They usually consist of an axle, a hub with flanges to which the spokes are attached, and bearings. There are the following types of bushings for the rear wheel:
Rear cassette hub Novatec d042sb-ss
The first two types are the most common, and planetary ones remain rather exotic, although they are quite often used in city bikes.
Ratchet hubs are cheaper, but less reliable and considered obsolete, so a cassette option is better.
JOY TECH 434 Ratchet Rear Hub
An important factor to consider when choosing a hub is the type of bearings fitted to it. Bulk ball bearings remain the most common type, but industrial bearings in cartridges are more reliable.
In the first case, flare nuts are attached to the bicycle axle, which press the balls to the cups, which are structurally part of the body of the hub itself. Units with such bearings are easy to maintain and repair, but they quickly become clogged.
Industrial bearing R8RS rear hub KT-155
In products on industrial bearings, the balls in the cassette are pressed directly into the hub. They are great for a sport bike as they have more efficiency and better mud protection. Another advantage of bushings on industrial bearings is that they do not require adjustment of the axial clearance and frequent lubrication, but they are quite difficult to disassemble.
Typically, the hub housing is the wheel hub. It has flanges on which spokes are attached, and due to the presence of a set of sprockets on the rear wheel, the spokes are slightly shorter on one side. For bushings with loose bearings, the inner surface has paths along which the balls move.
The rear axle of a bicycle is a threaded rod rigidly fixed in dropouts, which does not transmit torque, but at the same time bears the main load when the bicycle is moving. It is usually made of steel, titanium or aluminum alloy and is an integral structural element of the hub.
Depending on the type of attachment, the axles can be hollow or solid. The hollow ones are used in conjunction with eccentric tie-downs to make it easier to install and remove the wheel. Such axles have greater rigidity and less weight.
Eccentric clamps
Another way to fasten the wheel is to fix its axle in the frame stays with special nuts. For a frame with horizontal dropouts, an axle with nuts is more suitable because of the more reliable and durable wheel mounting.
Rear hub axle Quando KT-262R 175mm with nuts
Some models of mountain bikes and cyclocross bikes use through axles (thru axle), one of the ends of which is threaded. These axles are part of the frame design and are usually supplied with the frame.
The thickness of the rear axle depends on the type of bike, and its length is determined by the distance between the dropouts of the frame stays. In some models of bushings, the diameter can be changed using special adapters. Usually the following axles are used (the first number is the diameter, and the second is the length):
High End extreme sport bikes can use special thicker axles for increased strength.
The rear wheel mechanism of a bicycle needs periodic maintenance and repair, and often inexperienced cyclists have problems disassembling and assembling it. However, this is a fairly simple operation, and after a little practice it ceases to cause difficulties. The main thing is to choose the right tool and be patient. You should also show maximum accuracy, otherwise a small part or a ball that has rolled somewhere can cause serious problems, and it will be impossible to assemble the mechanism correctly. If you are not confident in your actions, then you can even record the process on video so that during reassembly it is clear where this or that element should be installed.
Rear hub and its components
All conventional hubs are designed to be disassembled from the opposite side of the sprockets, i.e. the left side. Consider the sequence of actions when disassembling the product on bulk bearings, since this design is the most common:
 After dismantling the cassette, you need to remove the brake disc on the left side of the hub (if disc brakes are installed).
 The scheme for disassembling the bushing on industrial bearings is even simpler, the only difficulty is removing the cassettes with balls, since they are quite tightly pressed into the hub. The cartridge will have to be taken out with a special tool or knocked out with hammer blows on the axis, but this must be done very carefully so as not to damage the flange.
Sometimes you have to disassemble the drum itself, on which the cassette with stars is attached. In this case, you will need a special puller with slots. But such a need arises extremely rarely, and in this case it is still better to contact the workshop.
Maintenance of the rear hubs consists of removing the old grease, cleaning the parts of dirt, checking their integrity and applying new grease. It is necessary to thoroughly rinse not only the bearings and the inner surface of the hub, but also the threads on the nuts and the axle, as sand is often stuffed into it. When twisted, it collects on the surface of the cone, which can cause crunching and even damage to the balls. For this, gasoline, thinner or special detergents are usually used. After cleaning, apply lubricant to all moving parts.
The bushing is assembled in reverse order.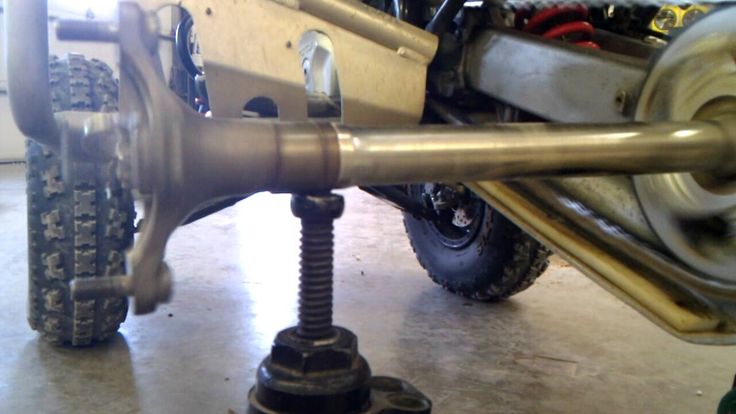 If the details are not lost, then everything will pass without any difficulty.
When installing the wheel in dropouts, you should pay attention to one important point: the axle with the hub must fit into them quite tightly. If there is a gap, spacer washers should be inserted. Otherwise, the feathers will tighten and bend when the wheel is fixed, which can lead to permanent stresses in the feathers and, in the end, to the destruction of the structure.
If the hub locknuts are not tightened enough, the rear axle will vibrate against the bearings during wheel rotation. As a result, cavities appear on the paths of the cones, and the balls are deformed. If the backlash is not eliminated in time, then chips form on the cones and the inner surface of the bushing. In especially neglected cases, the balls can even jump out of the tracks and start rotating inside the hub, grinding off the axle and destroying the hub, then you have to replace the entire assembly and re-spoke the wheel.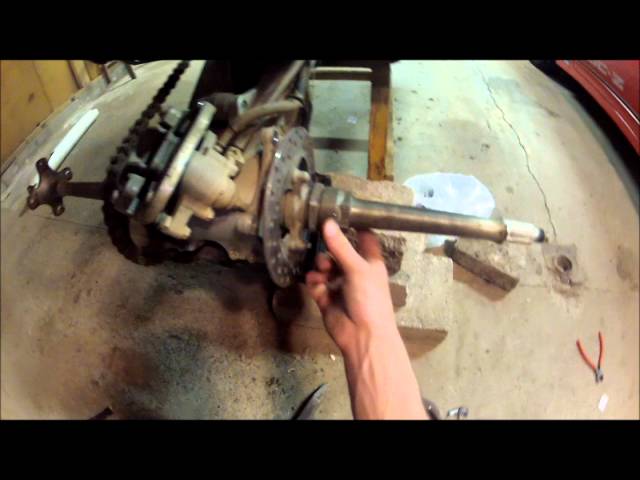
To avoid play, the cones must be set correctly. To do this, gradually tighten the flare nut, trying to find a state in which the wheel rotates freely without beating. When the correct position is found, secure the cone with a locknut. When locking the cone, the axle often starts to rotate, and the correct position is lost, so you can clamp the right end of the axle in a vise.
This situation is the opposite of the previous situation: the flare nuts are too tight, which causes excessive friction in the hub, and the wheel rolls off. In this case, adjustment of the cones is also required, and all actions are similar to those described above.
Another common problem is the distortion of the axle or violation of its integrity, caused by poor-quality materials used in their manufacture, or the design features of the sleeve itself. Such failures are mainly characteristic of ratchet bushings, since their thrust bearings are too far from the axle attachment point in the dropouts of the frame stays. As a result, there is too much leverage, and when the load increases, the axle becomes unusable.
Broken bicycle rear axle
Unfortunately, if the axle is broken or bent, you will have to put in a new one, as they cannot be repaired. The good news is that axles are inexpensive and easy to replace. Please note that manufacturers use different threads, and cones may vary in size and fullness. Therefore, when going to the store, it is better to take them with you so as not to make a mistake when buying a replacement and choose the product that fits your hub.
Noises, squeaks and crunches signal that your hub needs to be serviced. And this should be done as soon as possible, otherwise everything can end very badly. First you need to disassemble the sleeve, change the lubricant and check the parts for defects. Damaged components must be replaced. If after all this the problem persists, then you should consult a specialist.