Home / Selle Anatomica Blog / What to Do About Fixing a Flat Bike Tire While out on a Ride
July 15, 2020
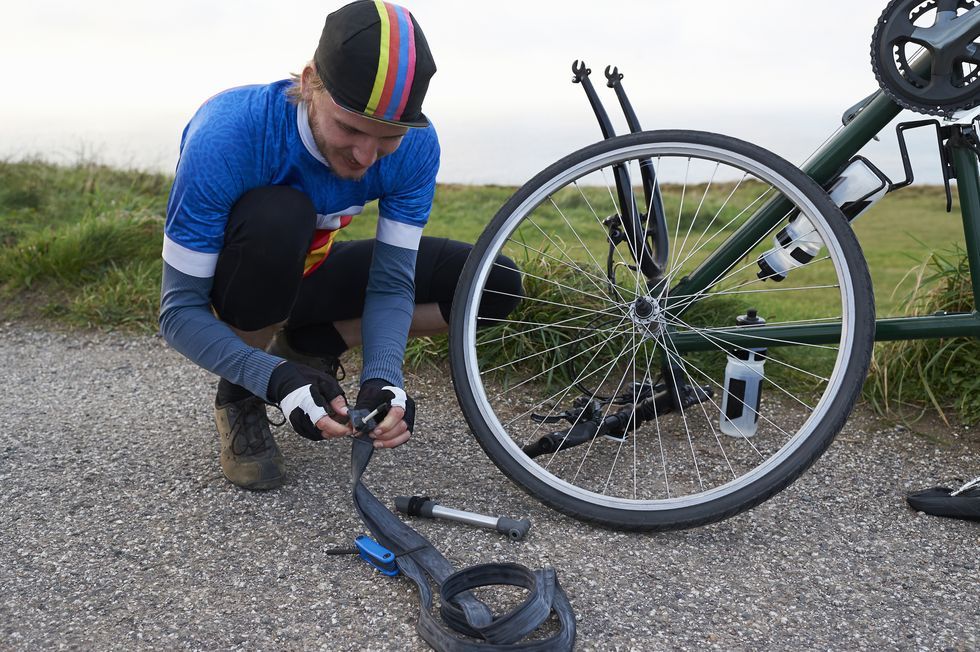
It’s a nightmare scenario for any cyclist: You’re halfway into a 50-mile ride when you suddenly begin to feel your wheel rumbling against the pavement. You pull off to the side to examine your tire, and your fears are confirmed. It’s a flat.
Now, if you had come prepared with the right supplies and experience fixing a flat bike tire, this would only be a minor nuisance. But as it is, you have neither, and now you’re stuck 25 miles from your car with no easy way to get back.
Most likely, you’d like to avoid this situation. And, since your chances of evading a flat tire are slim to none, it’s best to prepare yourself for the inevitable.
Here again, our friend and cycling mentor Coach Darryl comes to save the day.
First things first—let’s get our terms straight.
“Everybody calls it a flat tire and it isn’t,” says Coach Darryl. “It’s actually a flat tube.” Unless you’re riding the rare tubeless road bike wheels or a fat-tired mountain bike, you’re going to be changing the tube on the inside of the tire, not the tire itself.
So why do these tubes go flat with that protective layer of thick rubber tire around them? When road cycling, Darryl notes, the culprit is usually a construction staple or wire, though sometimes it can be glass, a rock or just a big bump.
You’re most likely to have to fix a flat bike tire — or rather inner a flat tube — when it’s getting old, after the first 1,000 or 2,000 miles. As your narrow road tires wear down, the contact surface (where the tire touches the road) expands from a narrow point to a surface roughly 30% wider than it was. This wider contact area makes it that much easier to pick up a sharp object from the road. The tire also grows thinner, providing less of a protective barrier for the tube.
Occasionally, though, you can get a bad tire or tube (or you put the new one in wrong — we’ll get to that). If that’s the case, you’ll know it quickly, probably on the first ride. For this reason, Darryl recommends giving yourself a 10-day lead time to try out new tires before a big ride.
Bicycle flats are a fact of cycling life. In fact, you may get more than one on a long ride. Darryl once had six in one 25-mile ride. So, yeah, Coach always comes prepared.
He recommends bringing two spare tubes on a 30-to-45-mile ride, a third if you’re going more than 50 miles, and a fourth if you’re going over 100. You can stow these last two in your jersey pockets.
Beyond the tubes, you should also bring several CO2 cartridges that you can use to refill your tire in a matter of seconds. Without these, you’re cranking a hand pump 200-plus times for several minutes. Yes, that’s as exhausting as it sounds. If you’re already invested in a long ride, you do not want to expend extra energy fixing a flat bike tire.
Do bring a hand pump as a backup, along with two valve adapters for your CO2 tanks and two tire levers (small plastic "tire irons” for prying the tire off the rim).
With the right equipment and a little know-how, you can change a flat bike tire and be back on your bike in 10 minutes. Here’s the step-by-step guide.
This should be the easy part, as most wheels these days are quick-release or through-axle (depending on your brake type). If your flat is on the back, though, be sure to change your gear to the smallest cog, furthest from the bike frame. Your derailleur will naturally spring to this position when you remove the chain, so that’s where you want it to be to make it easier to get the chain back on the wheel when you’re finished.
Once you have the wheel off the bike, let any remaining air out of the tube so it’s easier to detach from the rim.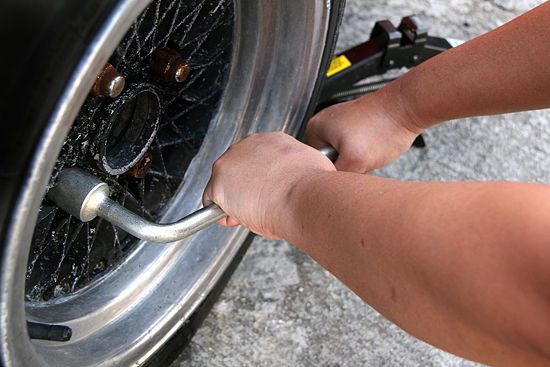 With the air out, you’ll need your tire levers to remove the tire.
Starting at the opposite side of the valve stem, carefully use the pointed end of a tire lever to pry the tire and tube loose from the rim. If you encounter any resistance, use a second tire lever about three inches from the first, then pry at both points.
As it begins to separate, slowly move the tire lever around the tire, gently prying as you go, until you have the tire completely removed from the wheel.
Before you completely remove the flat tube, you need to find the hole. Otherwise, the object might still be in your tire, ready to puncture your new tube when you get back on the bike.
Starting furthest from the valve stem, pull the tube out of the tire all the way, leaving just 2 or 3 inches on either side of the valve. Once you find the hole, you can then line it up with the tire to see if the cause of your flat is still lodged there. Finding the cause is essential to ensure you fix your flat bike tire once from the initial cause.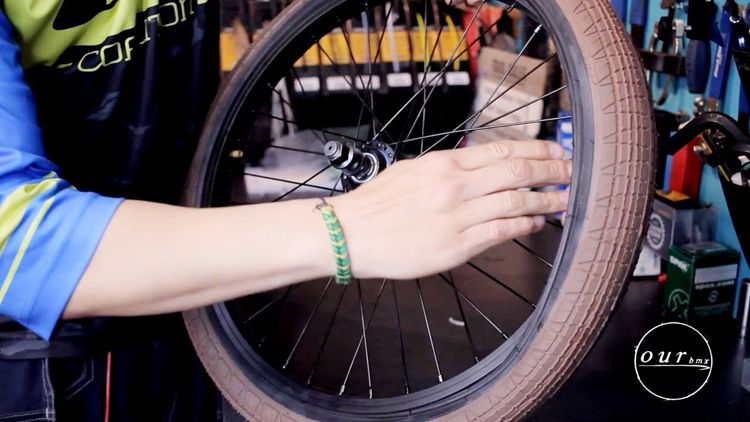
With the flat tube hanging partially out, use a hand pump to blow it up just enough to hear where the air is leaking. If you have trouble hearing it, put your hand or your face close to the tube to feel the air seeping out. Darryl notes that, if you’re fairly certain that a bump was a cause, rather than something sharp, you can skip this step.
When you find the hole, line it up with the tire to find the culprit and remove it. In most cases, Coach Darryl says the tire will be ready to hold a new tube. In the rare instance that you have a damaged side wall, though, you can use an old piece of tire or even a folded dollar bill to cover the hole and prevent the new tube from forcing its way through and going flat. This isn’t a replacement for a new tire, mind you, but just enough to get you home or to a bike shop.
After you’re sure there’s nothing left in your tire to ruin your new tube, you can completely remove the old one.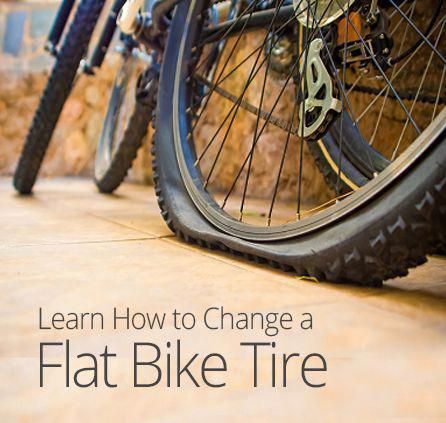 Before you begin to put the new tube in, blow it up just enough to give it its normal shape. This will keep it from getting twisted or folded when you seat it inside the tire.
Once it’s partially blown up, start by seating the valve stem where it fits, then work your way around from both sides of the valve to get the tube all the way inside the tire.
This is the hardest part of repairing a flat bicycle tire. You’ll start at the valve again here, pushing it up from the inside of the tire so that it pushes the tire higher than it would normally be on the road. This will give you enough clearance to get the tire around the rim first at the valve stem.
Now work your way around from both sides of the stem so that you’ll finish at the farthest point from it. Those last 8 inches or so are going to be the most difficult, and Darryl recommends keeping your gloves on and using your palms (not your thumbs) to push the tire onto the wheel. The hands are far stronger than the thumbs, and the gloves will protect your palms.
Although some people use their tire levers to get those last few inches around, Coach Darryl cautions against this because you can inadvertently pinch your tube in the process.
It’s important not to rush past this part and start blowing up your tire. Slowly examine all the way around the wheel on both sides, looking for any sign that the tire isn’t seated right. There should be a ridge about 1/8 of an inch away above the rim all the way around. If this is too far out at any point or you see any tube sticking out around the edges, you need to adjust the tire.
Again, this is where those small CO2 cartridges will come in handy to save you time and effort. But be careful — these cartridges fill your tire so quickly that it’s easy to overfill and pop your tube. (Keep in mind, also, that you’ll probably need to refill the tire again when you get home, since the smaller CO2 molecules will leak out more quickly. )
)
Attach the cartridge to the adaptor valve (the piece that connects it to the valve on the wheel), screwing it all the way in. Position the valve on your wheel toward the ground so you can apply pressure to the valve and not leak any CO2. Then tighten the other end of the valve adapter all the way onto the valve on the tire.
Unscrew the tank just enough to release the CO2 into your tire, while holding your hand on the tire to check the pressure as it fills. (The tanks frequently have more CO2 than will fit in your tire, so you can pop your new tube if you’re not careful.) As soon as your tire is full enough, tighten the tank back down to stop the air flow.
Give everything one more check to make sure the tire is seated correctly with no tube sticking out. If everything looks good, put your wheel back on your bike and you’re ready to ride.
And, finally, try the process of fixing a flat bike tire from the comfort of your home before you attempt it on the road. It’s best to get used to the process before you find yourself threatened with sunset or bad weather.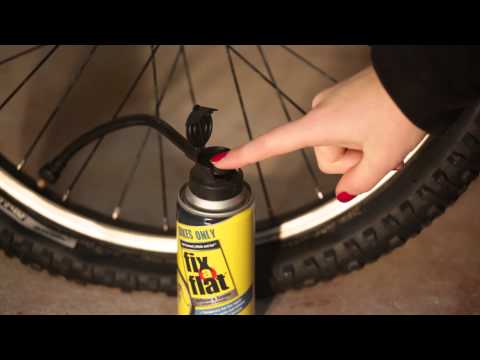
You can find more insights from Coach Darryl over at his website.
Share:
Please enable JavaScript to view the comments powered by Disqus.
By Jim Langley
Here are four reasons why it’s good to be able to fix flat tires fast on your road bike: 1) so you don’t cool off too much and have to warm up again; 2) so your riding buddies don’t have to wait too long for you; 3) so you don’t freeze or overheat in extreme weather; and 4) so that you have a chance to chase back onto that fast group ride or event where they don’t wait when you flat.
But none of these reasons is why I learned to fix flats at warp speed. Bruce Anderson, the owner and head mechanic at Andy’s Cycle Shop in Keene, New Hampshire, taught me.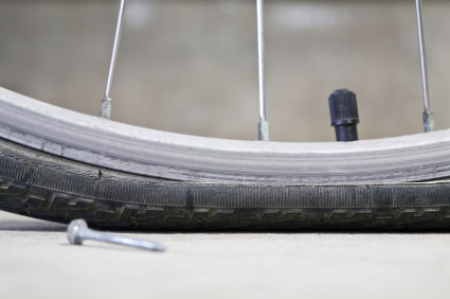 I went to work there in 1973, and my first job was fixing flats. Bruce wanted it done right and done fast so that customers wouldn’t have to wait to ride. So, he would egg rookies like me on with taunts and insults, motivating us to get as fast as he was.
I wanted to give Bruce a shout out because this summer I visited our old shop and found him, at 75 years young, still running the place almost single-handedly with the same energy and passion he had back when Nixon was in the White House. He told me he still loves the bike biz and he’ll retire when he turns 85!
The process Bruce taught me and that I have used ever since is fast because it’s simple. It also avoids the most common problems caused by other techniques.
First, a few disclaimers. I’m focusing on how to fix a flat fast, so I’m assuming you already know that you need a spare tube and a good pump that inflates fast (I carry a full-size framefit pump, not a mini), and that you know how to remove and install your rear wheel. I’m also figuring that you have Presta valves (not Schrader — the same type found on car tires).
Further, I assume you know that if you don’t remove any sharp object(s) in the tire before you install the new tube, that you’ll likely have a second puncture down the road.
Tip: But I want to point out that you may be willing to take a chance. Let’s say you’re doing a century and you’ve found a fast group riding at the perfect pace for you to achieve your target time. Suddenly you flat and have to stop.
In this situation, you might be willing to not spend much time trying to find and remove what caused the flat. And you could get lucky and have the piece of glass or sharp rock fall out as you remove and replace the tire. Or, just removing/reinstalling the tire/tube might change the angle of the object against the tube, letting you finish the ride without another puncture. Obviously, it’s always best to know that you removed the tube popper, but for sheer speed you may sometimes want to skip that step and hope luck is on your side.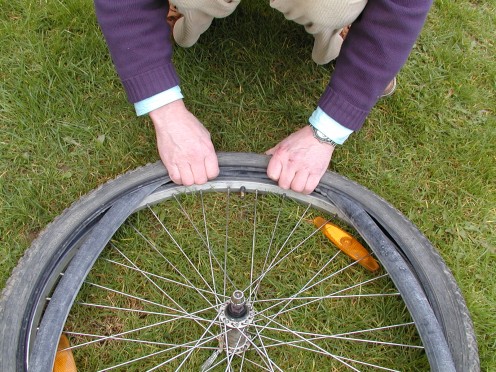
There are only a few tricks to know, but they make a big difference. In the order used, here they are:
1. With the majority of standard clincher tube-type tires, you don’t need tire levers to remove tires. You can do it with your hands and it’s a lot quicker to “rip” the tire and tube off in one move than it is to pry the tire off little by little with levers.
Tip: Taking the tire and tube completely off the rim is faster than removing one side and pulling out the tube. But more importantly, it gets the tire off the rim, where it’s much easier to see/find any sharp object in it and knock it out, and it also makes it easy to see and check that the rim strip is still covering the sharp holes in the rim, another flat-causer.
Trick: When the tire is fully inflated, it’s essentially locked onto the rim. To get it off by hand, you must: 1) get all the air out of the tube; 2) push the Presta valve up inside the tire; and, 3) squeeze the sides of the tire together to get the tire edges (called the “beads”) off their locked position and down toward the middle of the rim.
With practice, you can do all of this in one “move” by pressing and holding the Presta valve with one hand, while you go around the tire and wheel with your other hand. The hand holding the valve keeps it open and also pushes it up inside the tire. The hand going around the wheel squeezes the tire forcefully to get any remaining air out and to pinch the beads together and off the rim sidewalls. You can do this whole move in a few seconds.
2. Next, remove the tire and tube as one by holding the wheel vertically with the valve stem at about 6 o’clock. Place both hands together side-by-side at the top of the tire so that you can squeeze the tire with your fingers there and roll it back.
The object is to get both thumbs beneath the side of the tire (the sidewalls, not the beads) so that you can pry with your thumbs to pull the tire up. Doing this gives you a lot of surface area to hold onto and lets you force the bottom of the tire into the rim so that you have a bit of slack at the top where your thumbs are.
When you’ve pulled the tire as far as it wants to go, continue holding the tire with your thumbs so that it can’t slip back where it was, and push it over the opposite side of the rim. Don’t be gentle. Show that tire who’s the boss. You can do it!
Tip: The weight of the hanging wheel helps you keep the tire in place on the bottom and lift it up over the rim on the top. If it seems too tight still, keep your dominant hand/thumb in place up top, and use your other hand to go back and squeeze and wiggle the tire at the bottom, and as you do this shake the wheel using its weight to force the tire to relax and drop into the rim.
To remove tighter tires, it helps to put the wheel on the ground so you have something to push against. Just keep pushing and the tire and tube will come right off the rim and you can then pull if needed to remove it from the wheel completely. If only one side comes off, reach inside and pull the tube out partially, which helps free the other side of the tire.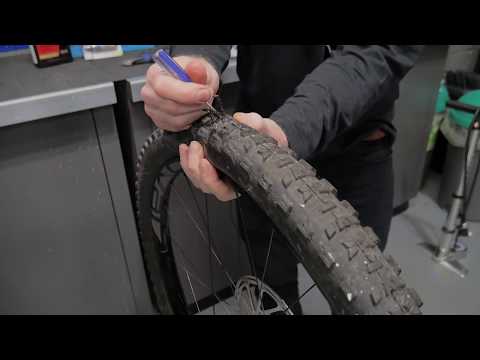
3. If the tube is still in place, now pull the flat tube out of the removed tire and stuff the tube in your jersey pocket. Get your spare tube out, remove any valve cap and nut and put them in your jersey pocket with the ones you might have already removed from the old tube (no caps or nuts are needed to fix flats fast).
Trick: Then, perhaps the most important step, is to inflate the new tube just enough to make it round and remove any wrinkles. Do this by opening the Presta valve tip, pressing it down if it’s stuck and blowing into it with your mouth as if you were blowing up birthday balloons. But — and this is the part of this step many people don’t get right — be sure to tighten the valve tip after you’ve blown air into the tube so that none of the air you just blew in can escape during tire installation! The tube has to be inflated and round for fast tire and tube installation.
Tip: If you don’t do this and the air gets out during installation, the tube becomes flat and has a tendency to slip beneath the tire beads. That makes it much more difficult to install the tire and can also cause the tire to get blown off the rim when fully inflated and/or cause a pinch flat.
4. To put the tire back on, take the new tube that you just put air in and put it inside the tire. The aired tube has shape so it will want to stay inside the tire. Pick up the tire/tube combo, holding it up vertically near the valve stem, stand the wheel vertically, leaning it against your shins with the valve stem hole at 12 o’clock.
Tip: Place the valve stem in the valve hole in the rim. Do not force the valve stem fully into the valve hole. Just get it in place and started into the hole. If it’s pushed/pulled down at this point it will interfere with getting the tire in place.
Now quickly move your hands from the top of the wheel down and around the wheel in opposite directions, pushing down on the tire and manipulating it to get the side of the tire that’s on the bottom onto the rim.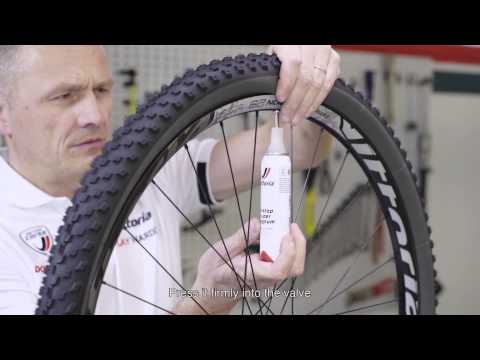 You may need to lift the wheel off the ground to get the portion of tire at 6 o’clock on the rim.
To finish the job, go back to 12 o’clock, push the other side of the tire onto the rim there and then repeat the process of moving your hands down, pushing and popping the other side of the tire onto the rim. With a little practice you can put both tire sides on in one move instead of doing it in two moves.
Trick: Almost always, about a 6-inch section at the top fights you and doesn’t want to pop over the side of the rim. To create a little slack, use the same tire pulling-and-squeezing technique you used to get it off, and then let all the air out of the tube that you blew into it.
If it’s still tight, pick the wheel up while holding your hands near the tight section you still need to pop on. Kneel or bend over and rest the wheel on your thigh/knee so that the tight section is right on top of your knee. Now, you have something solid to push against and with the heel of your hand (not your thumbs), you can push the tire onto the rim and finish the job.
Tip: Don’t try to push the entire tight section on in one push. Instead focus on getting an inch on at a time and with a few pushes, it’ll pop back on. Again, show that tire who’s in charge!
5. All that’s left is to inflate the tire, install the wheel and hit the road. Good job! Keep in mind that you don’t need full inflation to ride, even if you’re in a race, so you can save a bit more time by just getting the tire hard enough to ride rather than trying to top it off fully.
Everyone loves to ride a bike. Well, almost everything. And the head of the metropolitan traffic police, Dmitry Korzyuk, rides it, and the founder of the Internet portal TUT.BY, Yuri Zisser. But will cyclists be able to fix a two-wheeled vehicle if a wheel suddenly breaks on the road? Blogger Alexander Deshchenko decided to fill this gap.
A bicycle is a rather complicated technique. And any technique tends to fail over time. I will try to enlighten those interested in common breakdowns, as well as throw in some repair ideas.
There are plenty of parts on the bike. Of course, it does not reach the tractor, but still it will take a couple of days for someone who decides to take care of studying the names and purposes of at least most of them. Therefore, we will not deal with this, we will limit ourselves to the minimum that is necessary for successful and safe movement.
If your bike rides, the pedals turn without extraneous sounds, and the gears (if equipped) change easily and naturally, you can be envied. Seriously - as with people, there are no completely serviceable bicycles, there are underexamined ones.
The most common "disease" among new bikers is flat tires. Rubber is not completely sealed, and over time, tire pressure decreases. In addition, the cleanest city in the world does not let you relax, from time to time providing an excuse to practice bicycle repair.
If such a misfortune has overtaken you, do not panic - of all bicycle diseases, blown-out wheels are the easiest to "treat". If at home you found a flat tire during the second whole, try pumping up, maybe you just didn’t pump up the previous time.
By the way, pumps are cheap, portable and good, you can choose any two characteristics. Personally, I always have an inexpensive portable (more precisely, portable, because it hangs on a frame) pump at hand, and at home there is a good stationary one. In principle, pumping wheels is also better in the mind. At the end of any, even the cheapest and Chinese tires, the working pressures for which this tire is designed are indicated. If you don’t pump enough, you run the risk of breaking through on any bend in the terrain. If you pump it over - you can simply burst, like Piglet's balloon in the famous cartoon. Although, of course, there is a pattern "pumped up less - it's softer to ride, pumped up more - it rolls better."
But back to the flat tire. If you pumped it up, and it went down again, then it’s bad business with him, not with you. But here, too, you should not be especially upset.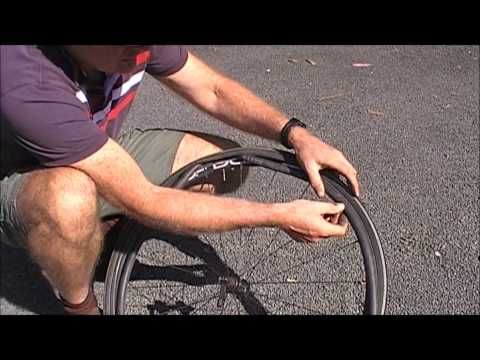 It is quite possible that when the wheel is inflated with the naked ear, a whistle of air is heard, or even some foreign object sticks out, indicating the place of the puncture.
If the rupture is visible, you can pull out a piece of the chamber with a hole, glue it, put it back and do not even remove the wheel from the fork. In bike shops you can find a wonderful mobile kit for patching wheels, a small box is sold for little money, the lid of which is two plastic spatulas for disassembling the tire, and inside there is a number of patches, a tube of glue and a piece of sandpaper.
If you have an interest in cycling, I highly recommend it, the thing is simply irreplaceable. Of course, the set is more likely to be marching and will not help in difficult situations, however, most of the common punctures heal.
By the way, the patches from the kit are quite large in size, they can be additionally cut into several smaller ones. It is very simple to seal the hole found on the camera - you clean the surface around it a little, smear it with glue and press the patch tightly. Usually they are made of "raw" rubber, so the main thing is to fix it correctly on the camera, carefully fill it back into the wheel and pump it up, and then under pressure it will flatten to almost zero thickness and implant like a native. And finally, you can inspect the tire itself for cuts.
Based on materials from the Avto.tut.by portal
It's time to turn on spring and update your technical wardrobe. Surely your young lady has been dreaming of a beautiful bike for a long time or has already grown out of the previous one. It's time to make a choice and have time to buy a 24-inch bike with a favorable discount. Female teen models, of course, not much ...
We are often asked - ".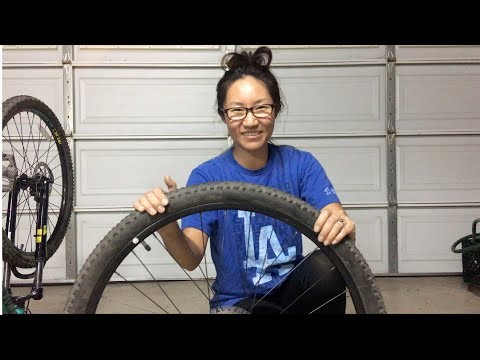 ..what is a butyl inner tube for a wheel?". Let's read this short article together to get the answer to this question. Let's start with the definition of what is butyl? Butyl is a highly elastic and airtight synthetic rubber, to which…
Artem Gorev, a cycling specialist, dispels all myths. Most people who want to buy a bike are not particularly knowledgeable about the subject and have a natural desire to consult with someone before buying, and they: - turn to their friends for help, ...
Bicycle specialist Artem Gorev advises: Every time I sell a bike to a person who is at the very foot of the cycling Olympus, I give a short briefing, i.e. I list the most important, in my opinion, points that a novice cyclist should remember in ...
Valuable advice is given by bicycle safety specialist Artem Gorev. Oddly enough, but with age you begin to appreciate life more (at least, I noticed such a feature in myself), it would be nice to think about the reasons for this paradox, but I will restrain myself, the purpose of this article is somewhat different.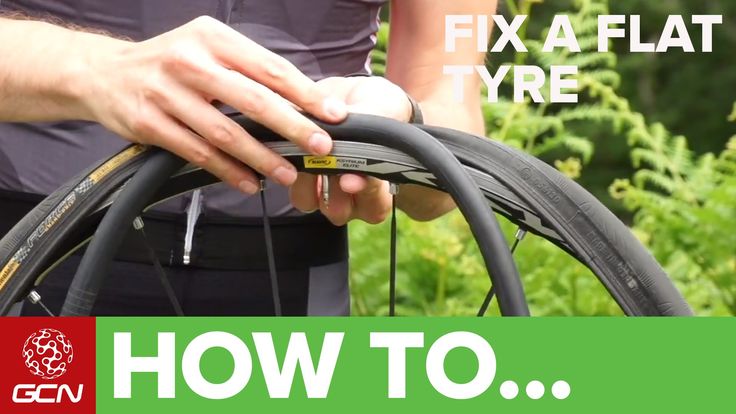 …
…
Artem Gorev, expert on safe cycling, tells. You bought a bike and hit the road for the first time. Of course, you are aware that this is not a safe business, but excellent knowledge (and observance) of the rules of the road relaxes you, an ugly inner voice whispers ...
Bicycle specialist Artem Gorev conducts research and gives advice. The other day I read an interesting article written by American professional rider Neil Bezdek called Finding the Right Cycling Coach. In addition to advice on choosing a coach, ...
The seasonal problem of all outdoor enthusiasts is what to do with the bike in winter. If you are not an extreme, ready to ride in snowdrifts, then for five months you need to attach an iron horse somewhere. In fact, the bicycle turns out to be a very fragile creature, and even if it withstands wintering .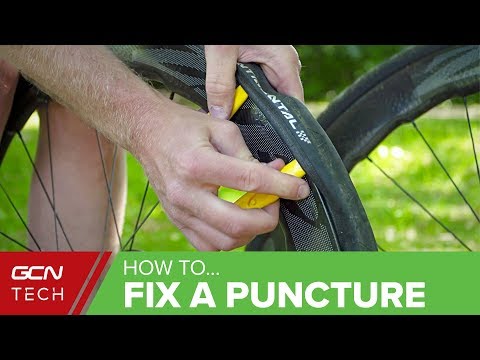 ..
..
A city bike needs a professional service once a year, while a cross-country bike requires more frequent workshop visits. According to Kert Olle, head of technical products at Rattamaailm, home care of a bicycle starts right from the very…
Tires have a huge impact on the performance of a bike. We will reveal all the secrets... Camera: To be or not to be? Conventional tires use an inner tube filled with air, but how do tubeless tires work? In most…
Jump to page:
Kristina Izvekova
Surely, you have heard how our grandfathers got out of such situations, and maybe even you yourself have ever resorted to their method. Realizing that you can’t go far on a flat tire without harm to the disk, Soviet drivers stuffed it with everything that caught their eye: rags, grass, clothes ... Of course, this dubious method is still relevant today, but it’s better to try other options first.
Those who grieve over a punctured Run Flat tire are in a better position. Such tires are distinguished by reinforced sidewalls that, after damage and a complete loss of pressure, can support the weight of the machine. If you believe the manufacturers, then on such rubber you can move towards tire fitting at a speed of no more than 80 km / h without any fear. No, this is not your story? Then here are your other options.
Photo: cellcode.us
Car service is within easy reach and the tire is only slightly damaged? Try inflating the wheel and see how soon it deflates again. If the rubber is reluctant to part with the air, then jump behind the wheel and carefully move towards the tire fitting. Periodically stop, check her "well-being" - if necessary, contact the pump again. Remember, as long as there is an air gap between the ground and the disc, the risks of damaging the tire are low.
If the previous option doesn't work for you for one reason or another, look online - or ask a local - for the nearest auto parts store. There you can buy a kit for emergency resuscitation of a “punctured” tire or a special sealant that can “glue” damage in a tubeless tire. With arms growing out of the right place, it won't be hard for you to "fix" yourself.
215255
Photo: vagvisaren.info
184928
It happens that there are no services or shops near the scene of an accident. And if your business is so bad that you can only rely on the help of outsiders, try to find on the Internet the so-called mobile tire fitting - mobile specialists working with wheels and tires right on the spot.