Fixing a flat tire on an ebike can be a bit of a pain, especially if the flat tire is in a hub motor wheel. The best method is to try and avoid flat tires to begin with, but if you’ve already found yourself stuck with a flat tire, here’s how to fix it.
We’ll assume the flat tire is in the hub motor wheel. If it’s not, follow the same steps but you can ignore all the stuff about the motor/wire/etc and just focus on the wheel.
Start by turning the ebike off and flipping it over so it rests on the handlebars and seat. I also like to take the battery out first to make the ebike lighter and ensure the ebike doesn’t accidentally switch on while I’m working on it. Also, consider laying down a blanket first to keep from scratching your seat, rack, handlebars, etc. Don’t forget to flip down any mirrors or other handlebar accessories that could interfere with the bars resting squarely on the ground.
If you have rim brakes, open them so they don’t get in the way of the tire or rim. If you have disc brakes, they’re fine the way they are.
Loosen the axle nuts on either side of the hub motor until the hub motor’s axles are free to wiggle up and out of the dropouts. You may need to remove a torque arm, if you have one mounted on your motor and it interferes with removing the axles from the dropouts.
If your hub motor has a connector close to the motor, disconnect it so that you can pull the wheel all the way out and separate it from the bike. This will make the rest of the job much easier.
Make sure you remember to cut any cable ties that holding the motor wire to the frame so you don’t accidentally stress the wire by pulling it while it’s still attached.
If your motor wire doesn’t have any in-line connector, the rest of the steps will be a bit more difficult. It is still quite doable, but you’ll have to perform each step while the motor is still wired to the bike. Just start by taking the tire off the rim on the side opposite the wire, usually the non-chain side. Next, pull the inner tube out of the tire, including the valve stem from the rim.
Get your new tube ready with a little bit of air in it, but don’t inflate it enough to start stretching like a balloon. Just give it a little bit of air to make it less like a wet noodle and easier to handle.
With your new tube within reach, use one hand to lift up the wheel so the axles clear the drop outs and use the other hand to pull the old tube out (or you could just cut it out to make this step simpler). Now, while the wheel is still up in the air and axles are clear of the dropouts, grab the new tube and squeeze it between the axle and the frame with enough room to clear so that it won’t get pinched when you let the motor down. Now slowly lower the motor back into the dropouts. If the axle flats don’t quite align, use a 10mm or adjustable wrench to rock the axle back and forth a bit until it slides down into the dropouts.
Now work the new tube into the tire, inserting the new valve stem through the rim. Reseat the tire bead in the rim and slowly inflate the tire to the proper PSI, checking that the bead is seating evenly all around the wheel on both sides.
If your motor wire had an in-line connector, you can disconnect the hub motor wheel entirely and do all of these steps either on the ground or work bench, which will make it easier and more comfortable.
Assuming everything looks good, meaning your wheel aligns nicely and the tire is properly seated, close the axle nuts and your brakes. If everything went back just as you had it, your brakes should still be aligned just how they were before you started. If your brakes are now rubbing, check to make sure the axle is seated all the way down on both sides.
Once you’ve got everything closed and set perfectly, flip the bike back over and you’re ready to get back out on the road! And if you want to try to avoid getting a flat tire next time, check out my article on tips to never get a flat tire again!
photo credits 1
Simple tips & tricks to doing it quickly
Before every ride, check the condition of your tires.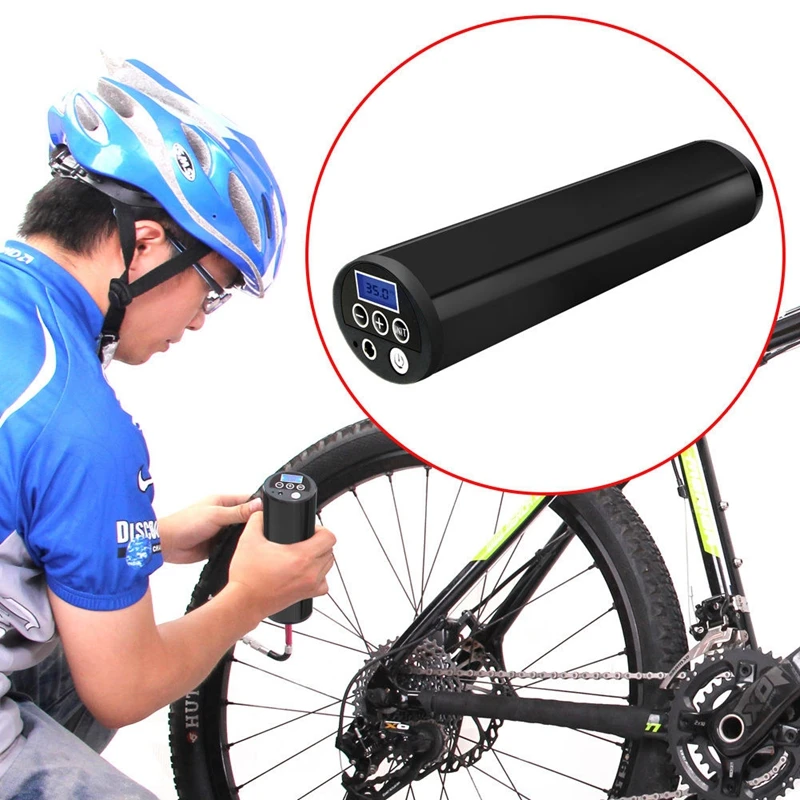 Is there enough tread? Are the sidewalls in good shape, or are there cracks or other wear?
If you’ve never had a flat tire, you haven’t ridden a bicycle much. It’s just something that will happen when you ride. Off-road riders seem to get them more, from thorns and pinch flats on the trails, but commuters will have them at least occasionally.
Check your tire pressure before every ride. We recommend a good digital gauge for accuracy.
CHECK YOUR TIRES
If your pump has a gauge, it’s a starting point, but they’re usually not completely accurate.
Before each ride, check both the condition of your tires and the air pressure. If your tires are worn (i.e., if the tread is worn off or if there are cracks or wear in the sidewalls), it’s time to replace them. Without the tread, the tires can be very slippery in many conditions and can cause you to wipe out. They also have less protection against thorns and other jagged objects you may run over on a ride.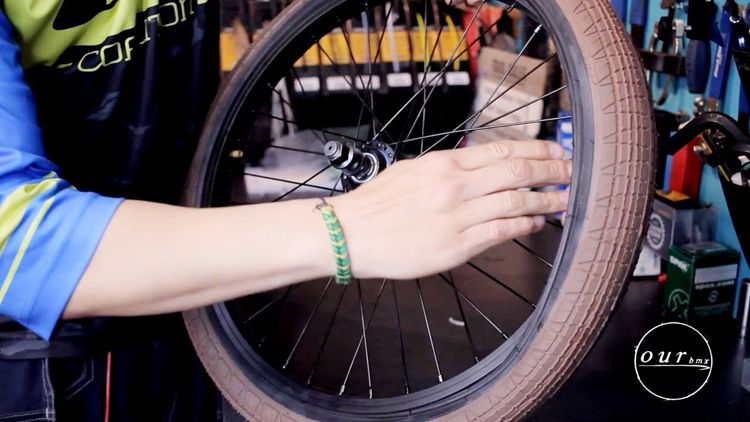 If the sidewalls give out, you will have a flat that can’t be fixed on the road.
Check the air with a reliable gauge. Though you can get an idea of your tire pressure from a good floor pump, there are some great purpose-made digital gauges that can give you an accurate pressure reading. Many have both types of valve attachments—Schrader and Presta.
A small pump can be mounted on your bike or carried in a pack in case you get a flat on the road.
ESSENTIALS
If you own a bike, you need to have a few essential items to deal with your tires. You’ll definitely need a pump, but it’s better if you have two. Go to your bike shop and get a good floor pump, as it’s the fastest and easiest way to pump up your tubes. Most will have both types of valve attachments. While you’re there, pick up a smaller pump you can always carry with you, and make sure it’s the right type for your bike’s valve style. Some can mount on bottle-cage bosses for your frame, and others can be carried in a pack or a seat wedge.
As an alternative, if you’d rather, you can carry a CO2 cartridge pump with you. These fill tubes quickly and effortlessly, but you will have to carry a couple of cartridges with you.
If you do get a flat from a leak caused by a thorn or similar, try to find the leak without taking the wheel off. If you can, pry the bead off the rim with your fingers. You’ll never nick a tube this way.
There are some leaks that can’t be patched, so a spare tube is a must-have. Make sure you always have spare tubes in the right size for your bike. Have at least one at home and one that you carry on the bike or in a pack you always take.
A set of tire levers is great for times your fingers won’t work. This set of plastic ones weighs almost nothing, and the two parts fit together to take up minimal space in a bag.
A good patch kit can be a lifesaver on a ride. The advantage is that patching a tube means you don’t have to take the wheel off of the bike. If your bike doesn’t have quick-release hubs, this means you’ll also have to carry that size wrench with you to remove the wheel, which can be heavy and take more time. If it’s the tire on a bike with a hub drive, you’ll also likely have to disconnect the quick-disconnect on the wire leading to the hub. Check your owner’s manual about orientation of connectors, axles, etc. in this case. There are times it can make a difference (e.g., a BionX wheel has a slot that must face straight down when you reinstall the wheel so the system can calibrate correctly).
FINDING THE LEAK
If you can find the leak, often you’ll be able to find the thorn or puncture hole. If you know where the leak is to start, patching will be easier. If you don’t know where it is, sometimes you can pump up the tire and spin it slowly to listen for the leak. If you still can’t find it, you’ll have to take the tube off, which means taking the tire off and taking the tube out.
Once you have the wheel off, fully deflate the tire using the valve. Then take the tire bead off the rim. This can be done with fingers, which is safest, but if you need extra leverage, you can use a tire lever. A set of tire levers, usually the plastic ones are thebest and lightest, is another thing to consider carrying with you.
Hook the other end on a spoke; that’s what that little indentation is for.
Insert one of the levers under the bead, then pry it back and hook the other end on a spoke to hold it in place. Then, put another lever in a few spokes down the line and pry it back. Taking care not to nick the tube, slide this lever around the rim to pull the bead over the rim all the way around. Then pull the valve out of the valve opening in the rim. With Schrader valves, this can be done easily by just pushing it through. With Presta valves, there’s usually a nut threaded down on the valve, and you’ll have to unscrew that and set it aside, then you can push it through the hole.
Remove the tube and inspect it. If it’s a really small hole that you can’t see, pump some air into the tube. A cursory check can be done running your hand over the tube, but some leaks are small enough that your hand may not feel it. Hold the tube up by your face and hold the tube near your lips (not touching) and rotate the tube around until you feel it. Your lips have more nerve endings than your hands and will feel the air escaping from the tube easily.
When you do find the puncture, mark it with a ball-point pen or Sharpie. This will make it easier to find the hole again after the next step.
An alternate to that is submerging the tube, a part at a time, in a sink filled with water. You’ll see the bubbles escaping where the leak is. You’ll then have to fully dry the tube before patching it.
Most patch kits come with a metal scraper or a small square of coarse sandpaper. Use this to make a cross-hatched, rough area for the patch to stick on to.
Before you do anything else, mark the hole with a marker or ball-point pen. This will make finding it again much easier, even after you rough up the surface.
Self-adhesive patches are the easiest, and you never find that your rubber cement is all dried up when you need it most. Thanks to the X, you can center this on the puncture, then burnish it down smooth with a thumbnail.
There are two types of patch kits. One is the old-fashioned kind, with patches, rubber cement and either a metal grater or a piece of coarse sandpaper (e.g., 150 grit). The other kind forgoes the rubber cement in favor of self-adhesive patches.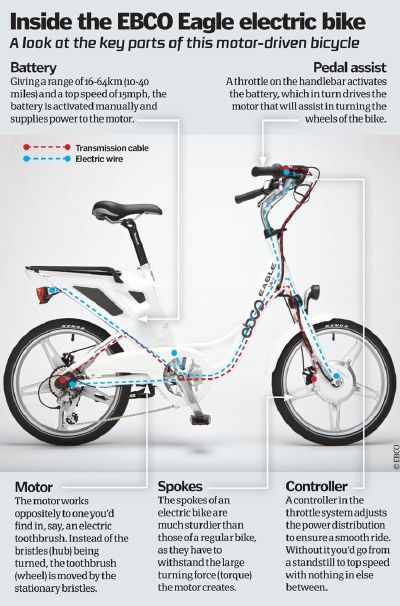 You’ll need to rough up the surface of the tube for the patch to stick. Make sure the rough area is larger than that of the patch. Then apply rubber cement and let it dry and apply the patch, or apply a self-adhesive patch. Here’s where that pen mark comes in handy; you will know where to center the patch. Nothing is worse than patching a tube, only to find that the leak is right on the edge of the patch!
After that, inflate the tube lightly to make sure the patch is on correctly and sealed. Then you can put it back into the tire, use your fingers and re-seat the tire bead, then pump the tire up carefully, watching that the bead is seated evenly. Pump the tire up enough to check, then deflate it fully. This helps ensure you’re not folding or pinching the tube anywhere. Then re-inflate it, checking the bead again. If you’ve done this right, you’ll have a patched tube that can be used for a long time. If you patch a tube more than once, though, it’s time to replace it when you get home.
Installing a new tube is the same process, including inflating, checking, deflating, re-inflating, and checking again.
Another consideration is that if you have a rear hub motor, you should know where the quick disconnect is to be able to disconnect it to remove the back wheel. Knowing that before you ride is important.
DOLLARS AND SENSE
If your tire is worn, especially the sidewall, you’ll need to replace the tire as soon as possible. If you’re riding trails and something slashes a small hole in your sidewall, you’ll need to patch that so the tube doesn’t protrude and ultimately explode with a loud bang. You’ll first have to let the air out of the tube, then pry the tire bead off the rim. You need something sturdy to help the sidewall in its effort to hold in the tube. We’ve seen guys use used Gu packets, large tire patches or even dollar bills. American paper money is actually not paper but a type of fabric (75-percent cotton and 25-percent linen), and as such it can be a good temporary patch to keep your sidewall from blowing out.
Once you’ve ensured your tubes and tires are ride-worthy, you’re ready to be back on the road. You have the tools to keep going, so you don’t have to walk your bike all the way or call a friend to come get you. With a little practice, you can fix a flat with no sweat in a couple of minutes. Having the right stuff on the ride comes in handy; we often run into people with a flat who are unprepared. It’s always good karma to stop and help someone get back up and running.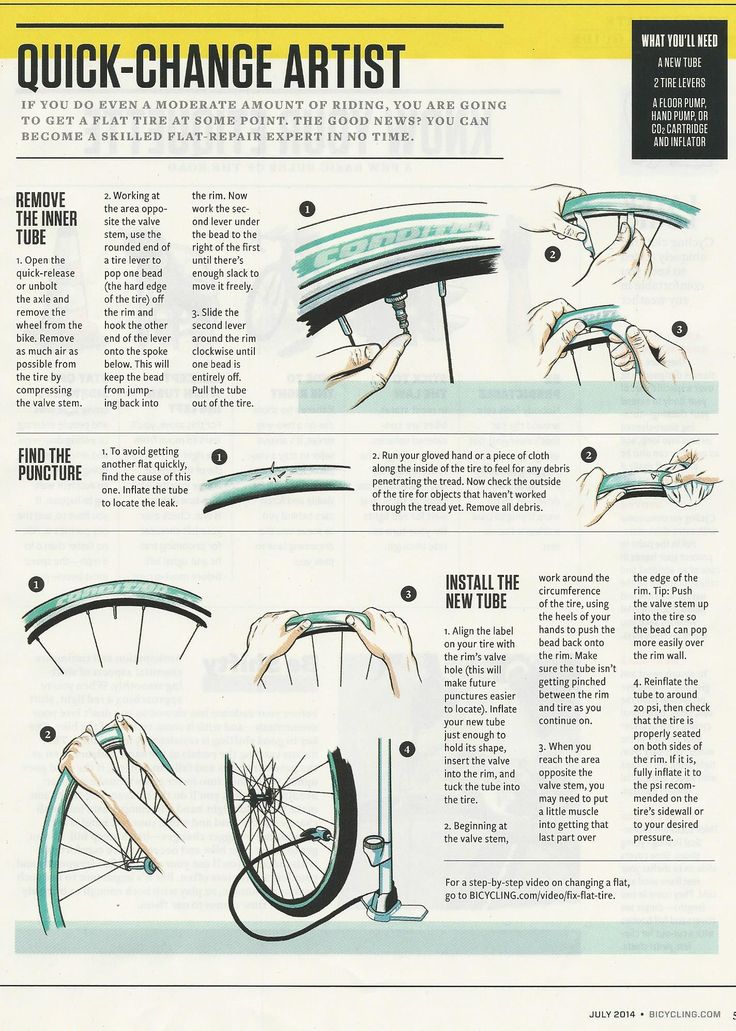 You never know when that favor will be returned down the road!
Everyone loves to ride a bike. Well, almost everything. And the head of the metropolitan traffic police, Dmitry Korzyuk, rides it, and the founder of the Internet portal TUT.BY, Yuri Zisser. But will cyclists be able to fix a two-wheeled vehicle if a wheel suddenly breaks on the road? Blogger Alexander Deshchenko decided to fill this gap.
A bicycle is a rather complex technique. And any technique tends to fail over time. I will try to enlighten those interested in common breakdowns, as well as throw in some repair ideas. nine0003
There are plenty of parts on the bike. Of course, it does not reach the tractor, but still it will take a couple of days for someone who decides to take care of studying the names and purposes of at least most of them. Therefore, we will not deal with this, we will limit ourselves to the minimum that is necessary for successful and safe movement.
If your bike rides, the pedals turn without extraneous sounds, and the gears (if equipped) change easily and naturally, you can be envied. Seriously - as with people, there are no completely serviceable bicycles, there are underexamined ones. nine0003
The most common "disease" among new bikers is flat tires. Rubber is not completely sealed, and over time, tire pressure decreases. In addition, the cleanest city in the world does not let you relax, from time to time providing an excuse to practice bicycle repair.
If such a misfortune has overtaken you, do not panic - of all bicycle diseases, blown-out wheels are the easiest to "treat". If at home you found a flat tire during the second whole, try pumping up, maybe you just didn’t pump up the previous time. nine0003
By the way, pumps are cheap, portable and good, you can choose any two characteristics. Personally, I always have an inexpensive portable (more precisely, portable, because it hangs on a frame) pump at hand, and at home there is a good stationary one. In principle, pumping wheels is also better in the mind. At the end of any, even the cheapest and Chinese tires, the working pressures for which this tire is designed are indicated. If you don’t pump enough, you run the risk of breaking through on any bend in the terrain. If you pump it over - you can simply burst, like Piglet's balloon in the famous cartoon. Although, of course, there is a pattern "pumped up less - it's softer to ride, pumped up more - it rolls better." nine0003
But back to the flat tire. If you pumped it up, and it went down again, then it’s bad business with him, not with you. But here, too, you should not be especially upset. It is quite possible that when the wheel is inflated with the naked ear, a whistle of air is heard, or even some foreign object sticks out, indicating the place of the puncture.
If the rupture is visible, you can pull out a piece of the chamber with a hole, glue it, put it back and do not even remove the wheel from the fork.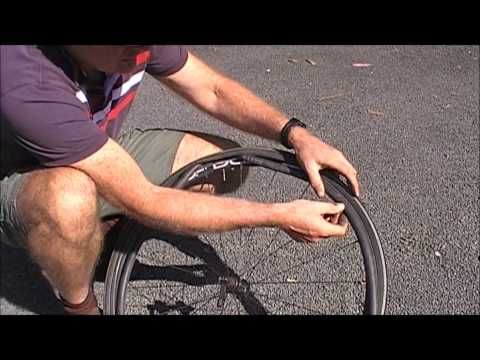 In bike shops you can find a wonderful mobile kit for patching wheels, a small box is sold for little money, the lid of which is two plastic spatulas for disassembling the tire, and inside there is a number of patches, a tube of glue and a piece of sandpaper. nine0023
If you have an interest in cycling, I highly recommend it, the thing is simply irreplaceable. Of course, the set is more likely to be marching and will not help in difficult situations, however, most of the common punctures heal.
By the way, the patches from the kit are quite large in size, they can be additionally cut into several smaller pieces. It is very simple to seal the hole found on the camera - you clean the surface around it a little, smear it with glue and press the patch tightly. Usually they are made of "raw" rubber, so the main thing is to fix it correctly on the camera, carefully fill it back into the wheel and pump it up, and then under pressure it will flatten to almost zero thickness and implant like a native. And finally, you can inspect the tire itself for cuts. nine0003
Based on materials from the Avto.tut.by portal
It's time to turn on spring and update your technical wardrobe. Surely your young lady has been dreaming of a beautiful bike for a long time or has already grown out of the previous one. It's time to make a choice and have time to buy a 24-inch bike with a favorable discount. Female teen models, of course, not much ...
We are often asked - "...what is a butyl inner tube for a wheel?". Let's read this short article together to get the answer to this question. Let's start with the definition of what is butyl? Butyl is a highly elastic and airtight synthetic rubber, to which…
Artem Gorev, a cycling specialist, dispels all myths. Most people who want to buy a bike are not particularly knowledgeable about the subject and have a natural desire to consult with someone before buying, and they: - turn to their friends for help, ...
Bicycle specialist Artem Gorev advises: Every time I sell a bike to a person who is at the very foot of the cycling Olympus, I give a short briefing, i.e. I list the most important, in my opinion, points that a novice cyclist should remember in ...
Valuable advice is given by bicycle safety specialist Artem Gorev. Oddly enough, but with age you begin to appreciate life more (at least, I noticed such a feature in myself), it would be nice to think about the reasons for this paradox, but I will restrain myself, the purpose of this article is somewhat different.…
Artem Gorev, expert on safe cycling, tells.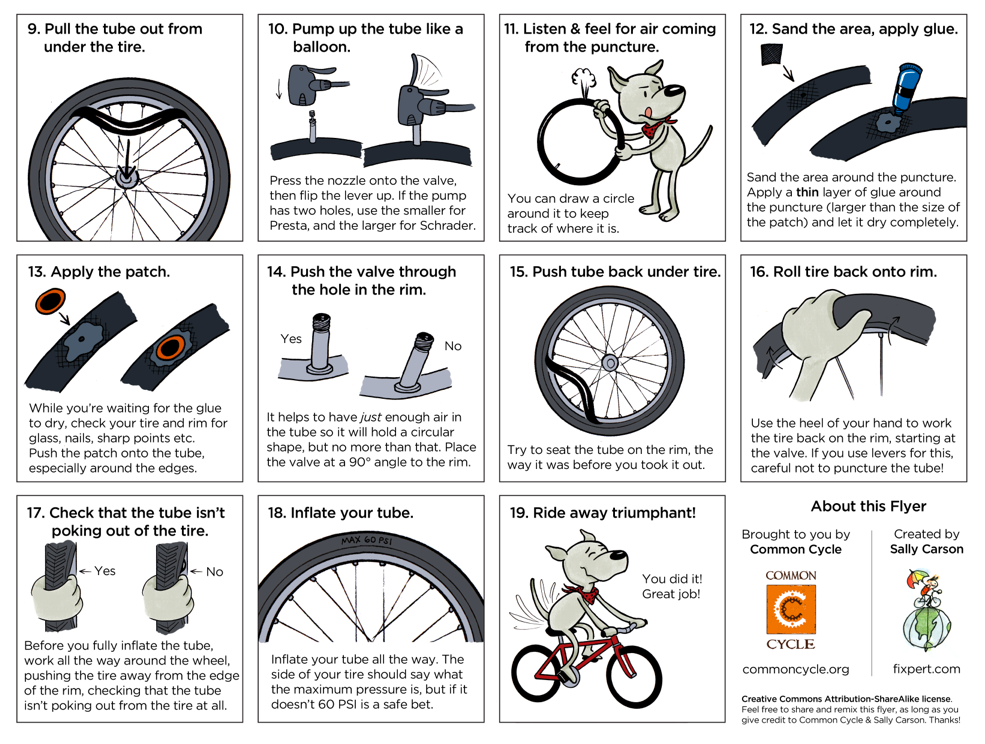 You bought a bike and hit the road for the first time. Of course, you are aware that this is not a safe business, but excellent knowledge (and observance) of the rules of the road relaxes you, an ugly inner voice whispers ...
Bicycle specialist Artem Gorev conducts research and gives advice. The other day I read an interesting article written by American professional rider Neil Bezdek called Finding the Right Cycling Coach. In addition to advice on choosing a coach, ...
The seasonal problem of all outdoor enthusiasts is what to do with the bike in winter. If you are not an extreme, ready to ride in snowdrifts, then for five months you need to attach an iron horse somewhere. In fact, the bicycle turns out to be a very fragile creature, and even if it withstands wintering ...
A city bike needs a professional service once a year, while a cross-country bike requires more frequent workshop visits.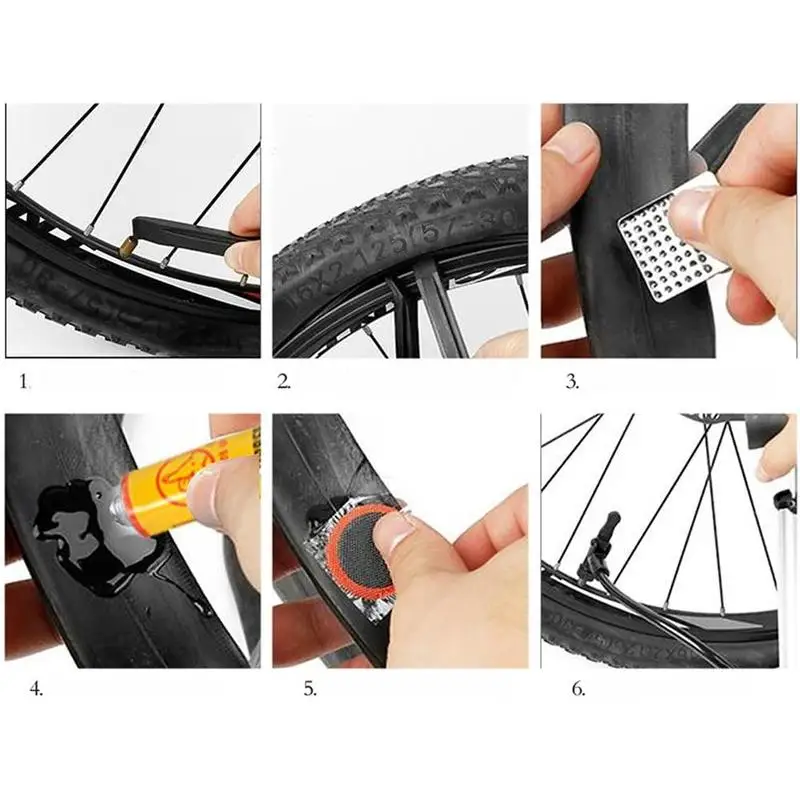 According to Kert Olle, head of technical products at Rattamaailm, home care of a bicycle starts right from the very…
Tires have a huge impact on the performance of a bike. We will reveal all the secrets... Camera: To be or not to be? Conventional tires use an inner tube filled with air, but how do tubeless tires work? In most…
Jump to page:
In addition to the rim and TR tires, you will need:
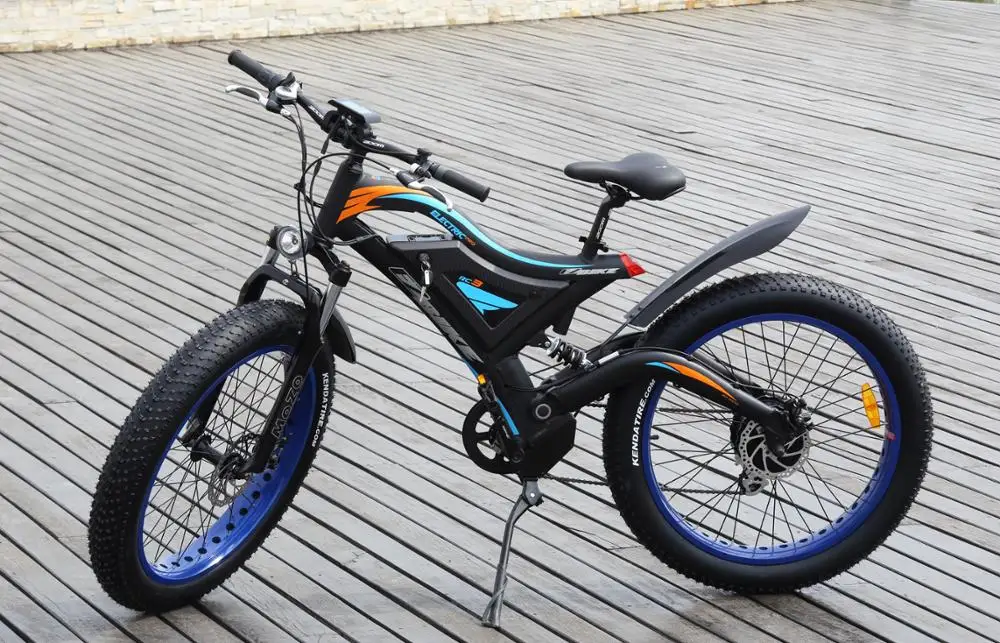 The nipples add 15 grams of weight to both wheels.
 First of all, you need to forget about the use of beads, as they can damage tires. We do everything with our fingers.
1 All manipulations are carried out on an already assembled wheel. First we need to seal the rim. To begin with, we clean and degrease the rim. Since the holes for the nipples sometimes have burrs and can damage the yellow tape, we check the holes on the rim and grind the burrs with a file (most likely they will not be there). Then we wipe the rim over the entire diameter with a zero, degrease it with alcohol or another liquid and wipe it dry. Attach yellow tape. At the same time, we stretch the tape, we are not afraid to apply force, be sure to pass the central groove so that the tape fits into it. We start gluing 7 - 10 mm from the hole for the nipple with the expectation that it will be glued twice. We cut the tape and pierce the hole for the nipple with an awl. In order not to crush the seals, tighten the valve without using any tools. Then lubricate the rim from the inside and the heel of the tire from the outside with a special fluid designed for installing tubeless tires. Also, instead of this liquid, you can use a solution of water and soap. nine0132 We start gluing 7 - 10 mm from the hole for the nipple with the expectation that it will be glued twice. We cut the tape and pierce the hole for the nipple with an awl. In order not to crush the seals, tighten the valve without using any tools. Then lubricate the rim from the inside and the heel of the tire from the outside with a special fluid designed for installing tubeless tires. Also, instead of this liquid, you can use a solution of water and soap. nine0132 | |
| 2, 3 - first put the first bead of the tire inside the rim, and then carefully the second bead. You have to work consistently and slowly. | |
| 4, 5 - after installing both beads into the rim, the tire is inserted entirely into the rim and simultaneously straightened with a smooth circular motion of the hands. | |
6 Then we insert the tube, pull the tire onto the rim (it will be tightly stretched, it will fit both sides into the central groove on the rim, and the heel zones of the tire will be located close to the inner cavity of the rim). Loading up the camera. You can usually skip this step, but we need it in order to properly press the yellow tape to the rim with the camera and level it. In addition, we can see how the tire sits on the rim, which at the stage of installation with sealant will greatly simplify your life. As the tire sits tight, it may become crooked at first. That is, part of the bead cord of the tire will become as it should be under the bead of the rim, and the other part will remain in the central groove and, regardless of the force applied, it will not want to move into place. To correct this situation, we pump air to the pressure recommended by the manufacturer or a little more. It's different for every tire width. A loud sound will indicate that the tire bead has popped out of the center groove and snapped into place against the rim bead. If even now the tire has not become even, then you can help it to fall into place with your hands. If you want the labels on the tire to match the stickers on the rim, then pre-tighten the tire evenly, because after you have tensioned at least one side, it will be very, very difficult to dislodge the tire. Loading up the camera. You can usually skip this step, but we need it in order to properly press the yellow tape to the rim with the camera and level it. In addition, we can see how the tire sits on the rim, which at the stage of installation with sealant will greatly simplify your life. As the tire sits tight, it may become crooked at first. That is, part of the bead cord of the tire will become as it should be under the bead of the rim, and the other part will remain in the central groove and, regardless of the force applied, it will not want to move into place. To correct this situation, we pump air to the pressure recommended by the manufacturer or a little more. It's different for every tire width. A loud sound will indicate that the tire bead has popped out of the center groove and snapped into place against the rim bead. If even now the tire has not become even, then you can help it to fall into place with your hands. If you want the labels on the tire to match the stickers on the rim, then pre-tighten the tire evenly, because after you have tensioned at least one side, it will be very, very difficult to dislodge the tire. In this state, the wheel should be left for a day or several hours and you can start pouring tire sealant. We release air from the chamber. In the process of pressure drop, one or the beads may slip into the central groove. In the ideal case, one side remains in place, and we dismantle the slipped side. We take out the chamber, screw the nipple into place and fill in the sealant for tubeless tires. The amount of sealant depends on various conditions - I would recommend 100 grams. Before pouring the sealant, we board the tire about 3/4 of its circumference with the nipple up. It would be nice if someone could help you. One person holds the wheel and tire to keep the bead from slipping off the rim while a second person measures and pours the sealant. If you still have to work on your own, then it’s better to hang the wheel, because it’s wrong to pour sealant into a wheel that is on the ground with disassembled rubber. In order not to try to measure the sealant with the help of a container, we hang the jar of sealant on a conventional electronic kitchen scale, remember the weight and pour it until it comes out approximately 100 grams less when weighing again. In this state, the wheel should be left for a day or several hours and you can start pouring tire sealant. We release air from the chamber. In the process of pressure drop, one or the beads may slip into the central groove. In the ideal case, one side remains in place, and we dismantle the slipped side. We take out the chamber, screw the nipple into place and fill in the sealant for tubeless tires. The amount of sealant depends on various conditions - I would recommend 100 grams. Before pouring the sealant, we board the tire about 3/4 of its circumference with the nipple up. It would be nice if someone could help you. One person holds the wheel and tire to keep the bead from slipping off the rim while a second person measures and pours the sealant. If you still have to work on your own, then it’s better to hang the wheel, because it’s wrong to pour sealant into a wheel that is on the ground with disassembled rubber. In order not to try to measure the sealant with the help of a container, we hang the jar of sealant on a conventional electronic kitchen scale, remember the weight and pour it until it comes out approximately 100 grams less when weighing again. So you kill two birds with one stone, firstly, you know exactly how much sealant is filled in (a few grams will still run away during sealing), and secondly, you know how much the weight of your bike has increased. Filling the sealant, we begin to bead the tire. The bead slides into the center groove and prevents sealant from escaping from the side. nine0132 So you kill two birds with one stone, firstly, you know exactly how much sealant is filled in (a few grams will still run away during sealing), and secondly, you know how much the weight of your bike has increased. Filling the sealant, we begin to bead the tire. The bead slides into the center groove and prevents sealant from escaping from the side. nine0132 | |
7, 8 Turn the wheel a little by hand so that the sealant spreads evenly and pump it up with a high-quality floor pump that is able to create sufficient pressure. Since the tire sits tight, even at the very beginning the air loss will be insignificant, we pump up the air and wait until the bead falls into place. We recognize this moment by the loud sound of rubber hitting the rim flange. Along the way, you need to check for any bubbles of liquid or soapy water for installation, which may indicate the presence of gaps between the walls of the rim and the tire. Take the wheel in both hands and shake it in all directions to seal small holes - if the tires are of good quality, then this process will be quick. We put the wheels on the bike and go for a ride. At first, it is possible that the tire will lose pressure - this is a slow process, but in 2-3 days the pressure can drop by one atmosphere. This problem can be solved by disassembling, draining the sealant and washing the inside of the tire with a brush and soap. In the middle, the tire is specially treated with a substance due to which the sealant does not stick, but flows down. As for me, if you ride actively, then the tire can be simply periodically pumped up every three to four days. If the installed tire still strongly poisons the air, then it must be strongly rubbed with a solution of laundry soap. For better spreading of the sealant, sometimes the tire inside can be lubricated with an alcohol solution. When the sealant is completely dry and does not cope with small punctures, it can be sealed with 88-m waterproof rubber adhesive. Similarly, you can seal tires with defective sidewalls or holes that the sealant cannot seal in any way. We put the wheels on the bike and go for a ride. At first, it is possible that the tire will lose pressure - this is a slow process, but in 2-3 days the pressure can drop by one atmosphere. This problem can be solved by disassembling, draining the sealant and washing the inside of the tire with a brush and soap. In the middle, the tire is specially treated with a substance due to which the sealant does not stick, but flows down. As for me, if you ride actively, then the tire can be simply periodically pumped up every three to four days. If the installed tire still strongly poisons the air, then it must be strongly rubbed with a solution of laundry soap. For better spreading of the sealant, sometimes the tire inside can be lubricated with an alcohol solution. When the sealant is completely dry and does not cope with small punctures, it can be sealed with 88-m waterproof rubber adhesive. Similarly, you can seal tires with defective sidewalls or holes that the sealant cannot seal in any way. |