Outside's long reads email newsletter features our strongest writing, most ambitious reporting, and award-winning storytelling about the outdoors. Sign up today.
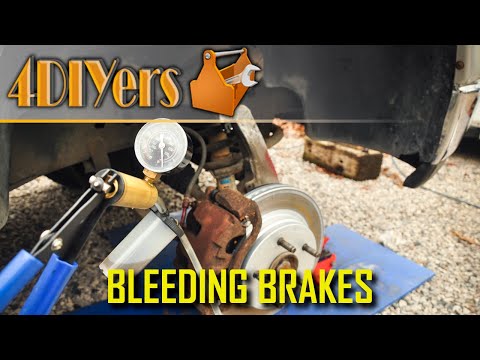
Outdoor enthusiasts are more subject than most to having to deal with a vehicle breakdown in a remote location where immediate help may not be available. Since tire punctures are by far the most common problem a vehicle will experience—and something more likely to happen on dirt roads—and since you can’t always count on your spare tire, it makes sense for us to arm ourselves with the tools and knowledge it takes to repair them ourselves. Here’s how.
How Do You Know You’ve Got a Puncture?On a paved road, if your steering wheel starts to wobble vaguely in your hands, or if you hear a loud thumping sound that coincides with your wheels’ rotation, then you’ve got a flat tire. Off-road, at lower speeds, you’ll likely hear that thumping before you feel it.
In both cases, avoid risking further damage to the tire or vehicle by finding the first safe location to pull off the road or trail.
Video loading...
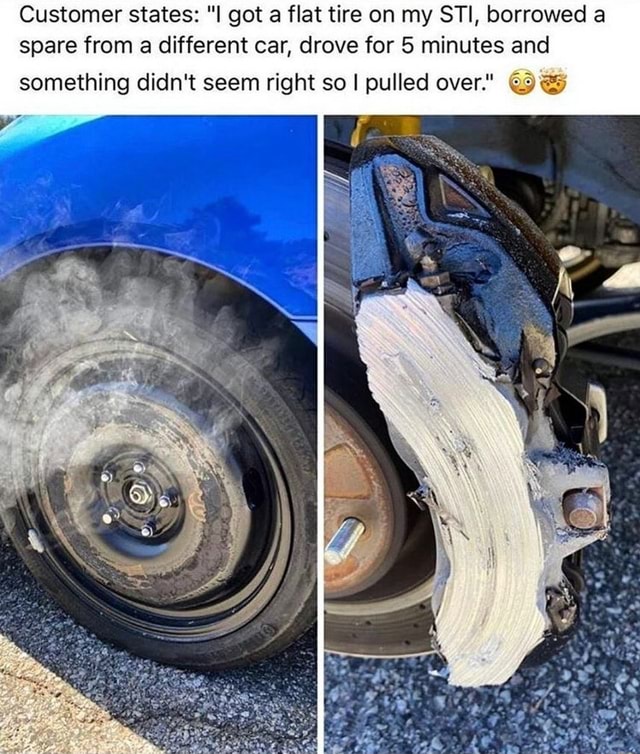
Don’t Rely on Your SpareIt’s become less and less common for new vehicles to come equipped with a full-size spare tire. Space savers, or donuts, are only designed to get you a very short distance at very low speeds—across town to the tire shop, basically. You should avoid using a space saver on a dirt road or trail if at all possible.
And even if you have a full-size spare with a matching tire and wheel, it’s still possible to puncture more than one tire at a time. And man, that’s going to cause a big problem if you’re not prepared or if it happens somewhere you can’t easily call for help.
What You NeedThe tools you should have to fix a flat tire yourself don’t cost much more than getting a tire plugged at a tire shop. And they’re hundreds of dollars cheaper than calling for a tow. They’re also small and light. There’s really no excuse for not carrying this stuff in your car or truck.
The best tire-repair kit I’ve found is made by Boulder Tools and costs $38. Like other kits, it includes rope plugs and the tools you need to install them, but this one goes above and beyond by including items like needle-nose pliers, spare valve cores, and a folding razor blade.
You will also need a compressor. That’s what you’ll use to reinflate your tire after you fix the puncture, or how you’ll air back up to road pressures if you’re airing down for off-road driving. If all you need is an emergency option, one of these $23 Slime compressors is perfect. It plugs into your cigarette lighter (or 12-volt outlet), so you don’t even need to open your hood. You don’t want to rely on something like this if you’re regularly inflating oversize off-road tires, but that’s a story for another time.
I also stick a can of Fix-a-Flat in every car my family owns, plus those of most of my friends. Fix-a-Flat includes both a sealant and compressed air in a single can, allowing you to take care of the kind of small punctures caused by a screw or nail without even removing the wheel. And that capability makes it a unique tool in your arsenal—one that can come in handy for even complicated repairs where it’s not safe to to try and remove a wheel or where gaining the ability to roll the car a few hundred yards can make the situation much safer (think: a steep slope off-road or the side of a busy highway, with trucks rushing past just feet away).
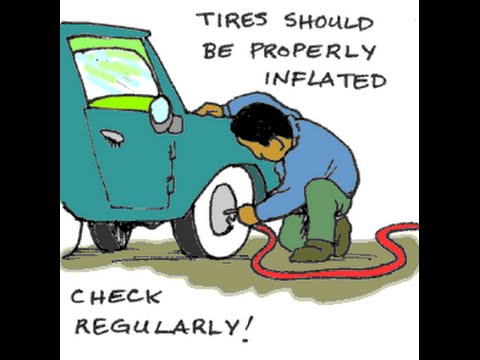
Everyone should also carry a quality tire-pressure gauge. Use it to check the pressure of your tires once a month, and adjust them to factory-recommended settings if they’re off. Ambient temperatures, elevation, and just time can all cause a tire to lose or gain pressure, and when it does so, it can harm your fuel economy, handling, and performance.
Avoid TroubleRegularly inspect your tires and replace them before the tread wears to 2/32nd of an inch deep. An easy way to check this is to insert a penny upside down into the tread (Lincoln’s head first). If the tread reaches past Honest Abe’s hairline at his forehead, you’re good. If not, order new tires. Tires worn to or past 2/32nd of an inch of tread will be much more prone to punctures and won’t provide the same grip as a tire in good condition.
Tires also have a maximum life span of six years. To determine how old your tires are, look for the tire identification number on the sidewall: it begins with DOT, is 11 digits long, and ends in four numbers. The first two digits of those last four numbers represent the week (of 52 in a year) the tire was manufactured. The last two are the year.
If your tire shows any signs of cracking or tearing, or if anything white or metallic has worn through the rubber, replace it immediately.
You also need to make sure you’re using an appropriate tire for the conditions you’re facing. If you’re traveling off pavement, a quality all-terrain tire will help you avoid punctures both in the tread and, more importantly, the sidewall.
Make sure any vehicle you’re driving has all of the necessary tire-change tools present and accounted for. You’ll need a lug wrench and a jack at a minimum. Don’t be that person who forgets to put them back into a car. I even check for these things in rental cars before driving off—they’re that essential.
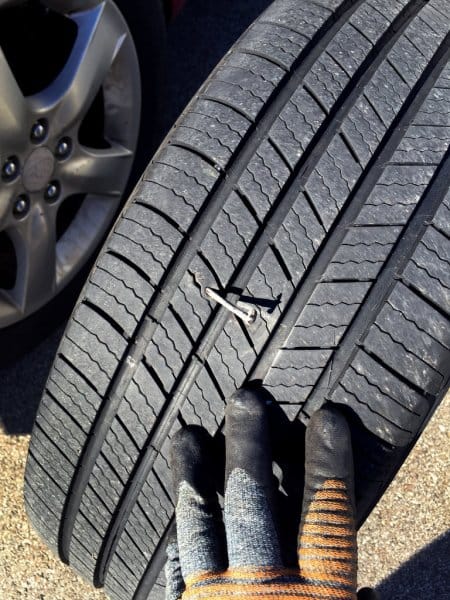
Right in the middle of your tread is a good place to find a foreign object. (Nathan Norby)Once you’re in a safe place, hop out of the car, and find the flat tire. Try to identify the source of the puncture. Sometimes a foreign object will be very obvious at just a glance. Sometimes you’ll need to roll the car a foot or two to expose the problem.
If you are able to see that there’s obviously a nail or screw embedded in your tire’s tread, that’s good news. If the nail or screw is strongly embedded into the tire’s tread, there’s no need to remove it at this time. Get out your can of Fix-a-Flat, follow its directions to connect it to your tire valve, and empty the entire contents of the can into the tire. You should see the tire visibly inflate. If it returns to normal, drive off immediately, go a few miles, then stop and check your tire pressure, adjusting it if necessary. If the tire seems to be holding air, you’re good to continue driving, but take a look at the tire any time you stop. When you get back from your trip and have the time, go ahead and follow the rest of the steps here to repair the puncture with a plug.
If you can’t find the source of the puncture, if it’s an exposed hole, or if you don’t have a can of Fix-a-Flat, you’ll need to take the wheel off.
Step Two: Remove the WheelFirst, remove your spare (even if it’s a space saver), and place it under the frame of your vehicle in front of the front tire or behind the rear tire. That way, if your vehicle falls off its jack, it will fall onto the spare, minimizing injury to you and damage to the car.
Loosen the lug nuts before you raise the vehicle. Remember: lefty loosey.
Next, follow the instructions in your owner’s manual to locate and use the jack accordingly.
Once the wheel is off the ground, finish removing the lug nuts. Put them somewhere safe. Pull the wheel out toward your body. Be careful—wheels can be heavy.
Step Three: Evaluate the PunctureIf you have a hole in your tread, it can be fixed. Tires in good condition won’t experience more than a simple hole in that location. If the hole is in your sidewall (the portion of the tire that rides roughly vertical), you just need to mount your spare and have the tire replaced at the first possible opportunity.
If the hole is in the tire’s tread and can’t be taken care of by simply dumping a can of Fix-a-Flat into it, roll the tire around to the back of your vehicle where tools are and where you can safely work away from traffic. Look for holes and foreign objects as you roll it. If a hole is small and the tire is no longer leaking air, it may be a good idea to mark the hole for easy reference later.
The recommended kit includes these needle-nose pliers; otherwise, a multitool is a good stand-in. (Nathan Norby)Step Four: Remove the Problem
If there’s a foreign object in your tire, and the tire can no longer hold air, remove it. In the video, I used a screw gun to put the screw in the tire, meaning its threads engaged with the rubber and steel belts. Most roads don’t have their own screw guns, so the puncture won’t engage the threads in the same way, and it should be easier to pull out using your needle-nose pliers.
I’ve seen tires punctured by everything from a steel bar to a particularly nasty cactus barb. Organic objects like tree branches can leave residue behind. Try and get all of that out of the way.
The reaming tool will slowly enlarge and clean the hole. (Nathan Norby)Step Five: Enlarge the HoleIf the hole is larger than a pencil, skip this step. If not, grab your tire-repair kit’s reamer, and use it to enlarge the hole until it is roughly the size of a pencil.
If you have a very small hole, this will be difficult at first. Install the reaming tool by slowly screwing it into the tread while applying downward pressure. Otherwise, just push the tool into the hole all the way up to the handle, then yank it out. Repeat until the hole is large enough that you can insert and remove the tool without much effort.
Remove a rope plug from the plastic wrapper, flatten one end with the needle-nose pliers, and push it through the eyelet on the installation tool. Grasp the protruding edge of the plug with the pliers, and pull it through the eyelet until equal lengths of the plug protrude from both sides.
Grab a finger of lube from the kit, and apply it to the plug and leading edge of the tool.
Firmly push the installation tool in as far as it will go, then yank it out as hard as you can. (Nathan Norby)
Place the tool tip down on top of the hole in the tire, grasp the tool securely with both hands, and force it through the tire until the depth guide is flush with the tread. Then yank the tool straight out of the hole as hard and fast as you can. The rope plug should pass through the eyelet and remain inside the tire.
The plug should remain in the tire when you yank the tool out. Now just trim off that excess length. (Nathan Norby)If you have only a small puncture, one plug should do. If not, you may need to install a second or third. If you must install multiple plugs, then plan on taking that tire to a shop the first possible opportunity, where it can be evaluated for safety. You may have to replace it. But most of the time, that single plug will be enough. Use the razor to trim the excess length flush with the tire tread.
If your tire holds air up to the recommended pressure, then odds are it’s going to be good to go. Just check the pressure again after a few miles to make sure. If for some reason you’re losing a little air around the plug, try adding Fix-a-Flat. (Nathan Norby)Step Eight: Reinstall the Wheel
Use your air compressor to inflate the tire to the recommended pressure. (You’ll find that listed inside the driver’s doorjamb.) Once inflated, reverse the tire-removal steps described above to reinstall the wheel. First, install the lug nuts by hand to secure the wheel to the hub. Then, once you’ve lowered the vehicle back down and removed the jack, use the lug wrench to make sure all the lug nuts are as tight as possible. Tighten them in a star pattern, so the wheel snugs back to the hub evenly. Remember: righty tighty. Check these again later that day.
Return all your tools, the jack, and the lug wrench to their proper locations. You’d don’t want to misplace this stuff.
And that’s it. No tow truck. No hiking out a dirt road in search of help. No waiting on AAA while sitting on the side of a busy highway. No huge expense.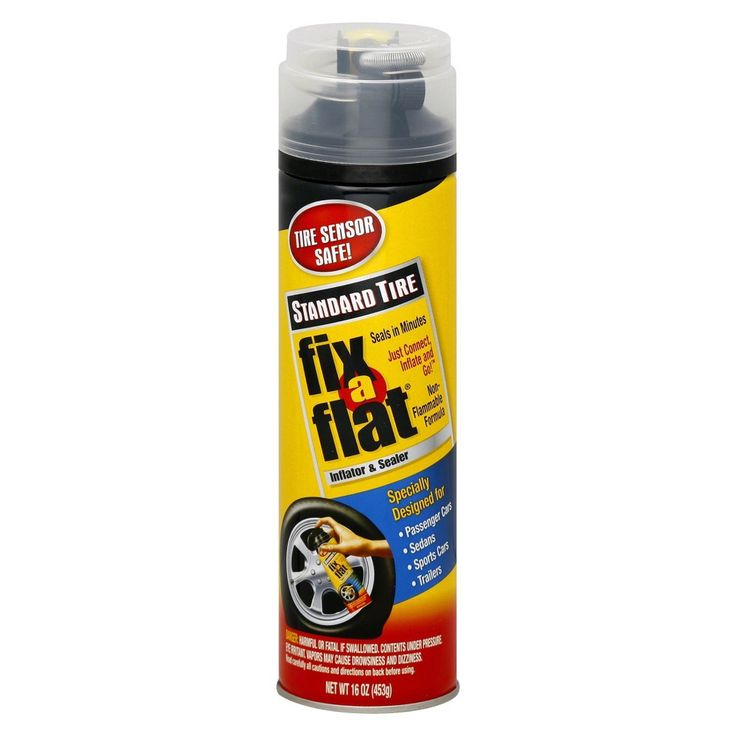 And no more than a few minutes of hard work.
In a previous blog, we went through each of the steps necessary to change a flat tire. But what do you do when you open the trunk and find that your spare is flat, too? Or what if in a series of unfortunate events, your spare is punctured shortly after you put it on?
No matter what situation you may find yourself in, it's never a bad idea to have another trick up your sleeve; another way to fix a flat tire when a spare isn't available. Fortunately, there are two methods that are simple, cheap, and effective. Read on as we show you what to do if you have a flat and no spare!
Imagine this: You're on a road trip with the family (and the dog) and you stop at the gas station for a much-needed snack. As you walk back to the car, hotdog in hand, you notice something strange on your front tire - it's the dreaded silvery glimmer of a nail.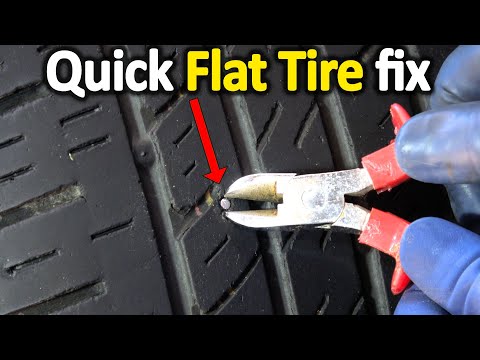 What's more, the tire looks like it's deflating and sooner rather than later, you'll have a full-blow flat.
As the children grow restless and the dog loses its patience, you think through your options. Unfortunately, the spare tire isn't one of them - it's flat, too. Now what? In most cases, roadside assistance would be the best option, but the whole family can't ride in the tow truck to the tire shop and you don't want to leave them with the dog in the parking lot.
Fortunately, you read a blog somewhere that helped you put together a roadside emergency kit. You fish it out of the vehicle and sift through it to find exactly what you need to get back on the road.
So, what was it you found in your kit that saved the day? There are two main tools you can use to temporarily fix your flat without changing the tire completely (assuming your tire isn't totally ruined): puncture sealant and a tire patch kit.
Regardless of which tool you have on hand, the first step is locating the puncture site.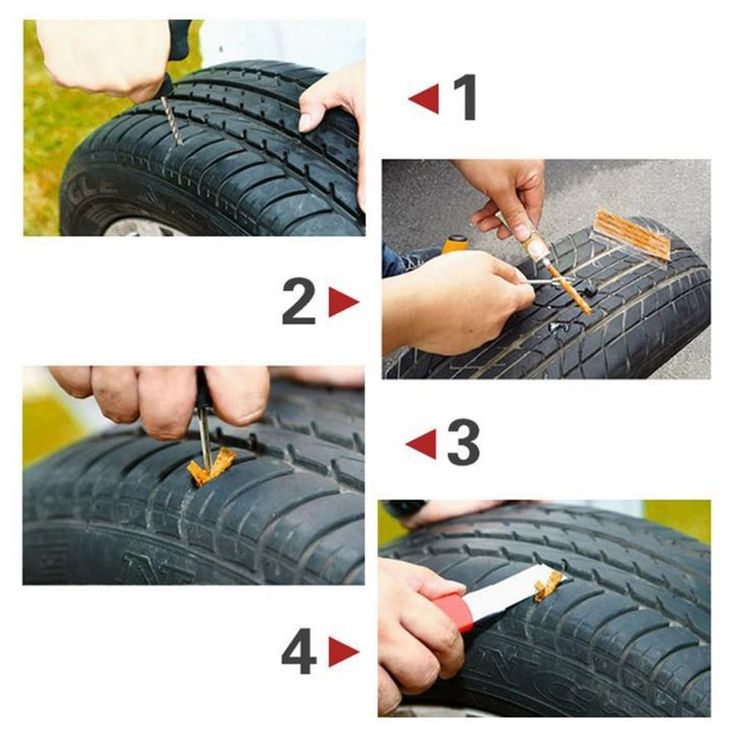 Of course, this won't be particularly difficult if you ran over something like a nail, but finding a hole in a punctured tire isn't always so easy. To locate the source of the leak, try the following:
Visual inspection. First, you can look over the tire to try and find any obvious punctures or foreign objects (like nails).
Listen. If you don't see anything right away, bring your ear close to the tire and listen for a faint hissing sound.
Feel. Sometimes, an otherwise invisible puncture can be found by holding your hand just above the tire to feel for the leaking air.
Soap and water. If all else fails, try the soap and water method. Fill a bucket with water and add dish soap. Then, carefully coat the outside of the tire until it is covered in suds, either by hand or a spray bottle if you have one. Wait for the leaking air to create a small frothy patch of bubbles - you've found the leak! Mark it and then wash the soapy water away.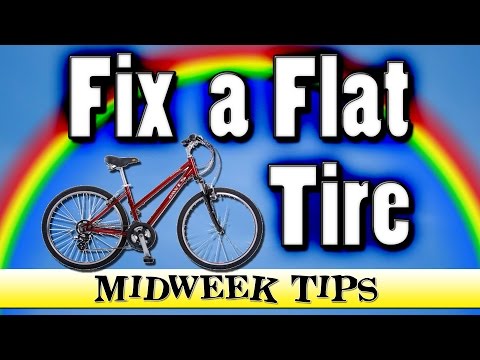
Of course, if you find yourself with a flat on the side of the road, you may not have soap, water, and a bucket on hand. However, if you're near a gas station or grocery store, you may be in luck. All you need is a water bottle (or any plastic bottle) and hand soap from a restroom. Simply add the soap to the water in the bottle, shake it up, and gently pour and spread it over your tire!
Now that you've found the leak, let's look at the two most common ways you can fix it.
There are a number of different products on the market that can seal a puncture, and they fall into two main groups. Some brands are a gel-like substance that hardens around the puncture. These products can work well, but they usually require other tools to effectively apply and can be quite messy.
The more common puncture sealant products come in an aerosol can, and don't require anything additional. For our purposes, we'll be focusing on this variant. While the specific directions may vary from product to product, they generally work in a similar fashion.
The aerosol cans typically contain a foam or liquid sealant along with extra air. You attach the can to the tire's valve stem with the tube provided and fill it with the sealant, which presumably covers the puncture from within before hardening. Obviously, these products aren't going to fix major punctures or gashes, but they can be a great temporary solution.
Before using a puncture sealant product, make sure to read the can for product-specific instructions. They'll likely look something like this:
Step 1: You'll first need to remove any foreign objects, like a nail, with a pair of pliers.
Step 2: Position the tire with the valve stem at the top.
Step 3: Attach the nozzle on the can of sealant to the valve stem.
Step 4: Press the button and allow the fluid to enter.
Although the can comes with a little extra air, you'll likely need to add more air after the sealant becomes firm.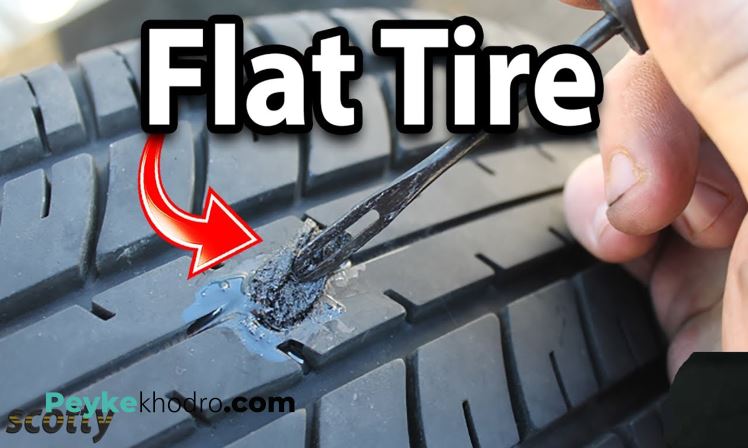 Once you've allowed the sealant time to dry, you can use some of your soapy water to make sure it has done its job and stopped the leak.
So how long can you drive with a tire that has been fixed with tire sealant? Although it depends on the product, some manufacturers say you can drive for up to 100 miles. However, most experienced experts will tell you that that estimate isn't realistic, and it certainly isn't advised. Again, tire sealant solutions are meant to be temporary, emergency measures rather than a permanent fix. For that reason, you should make a tire shop your next stop.
That having been said, these little cans can be just the thing you need in a pinch. They're small and inexpensive, so you can potentially keep several in your emergency kit.
A tire plug kit is another tool you can use to temporarily fix a flat until you can replace the tire with a new one. You'll find that there are all sorts of different kits that range from the most basic tools to a collection of implements for every possible scenario.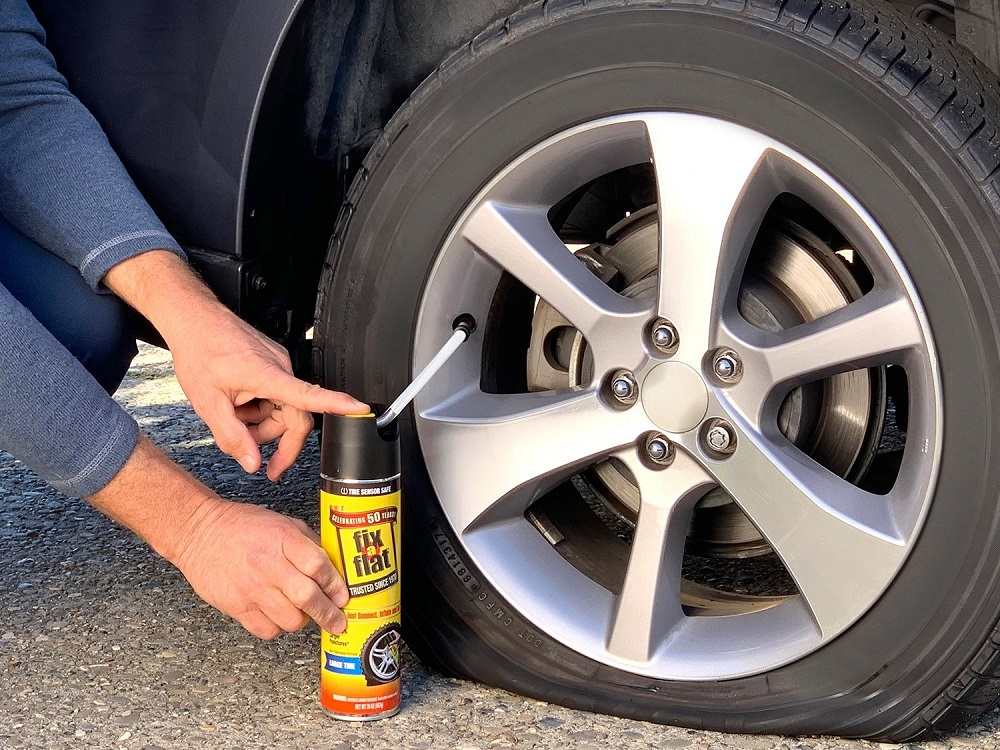 However, the fundamental components you'll need to plug a flat tire are as follows: a rasp tool, a threading tool, the plug itself, and cement or sealant.
Some of the larger, more extensive kits will come with pliers to remove foreign objects, a knife to trim the excess portion of the plug, and even work gloves to protect your hands while you make the repairs. While you can get by with the basic components, you'll probably want to have the other items at your disposal anyway. If you don't have them in your roadside emergency kit, it's a good idea to find a tire plug kit that comes with all of the above.
Step 1: First, you'll likely need to remove the tire. This may not be necessary in every case, but you need to be able to have direct access to the puncture point. If your tires are larger, or if the tires take up too much space within the wheel well, you may not have the clearance needed until the wheel is off. For more detailed instructions on how to remove your tire and wheel with a jack and a lug wrench, read our previous blog, "How to change a flat tire in four simple steps. "
"
Step 2: If the object that punctured your tire is still in place, use your pliers to remove it.
Step 3: Use the rasp tool to clean the puncture hole. The rasp tool is a long, pointed piece of metal with a rough, textured end. By quickly running it and out of the puncture, it helps make the hole more uniform, cleaning away stray pieces of rubber, but also providing a rough texture for the plug to grip on to.
Step 4: The insertion tool should look like a long, thin piece of metal with an eyelet at the end (like the head of a really large sewing needle). Thread the plug through the eyelet, and then firmly press the plug into the hole using the insertion tool. Some kits come with a glue, cement, or adhesive product, which you'll want to apply to the plug prior to insertion. Depending on your kit, there should be some portion (like 1/4 - 1/2 inch) of the plug protruding from the hole after insertion.
Step 5: Cut away the excess portion of the plug using your knife. Then, apply a layer of adhesive over the top to seal it in place and cover any small cracks.
Step 6: Wait for the adhesive to dry, then apply some of your soapy water to the plug site to test for leaks and fill them in with adhesive if necessary.
Step 7: Before replacing the tire, inflate the wheel to ensure that the plug and seal holds. If it does, you can now place the tire back on the vehicle, fasten it in place with the lugnuts and finish inflating.
How long can you drive with a tire plug? Unlike tire sealant, plugs can potentially last for hundreds of miles, or even years after you apply it. Of course, this depends on the plug, the type and location of the puncture, and how well the plug was installed. Furthermore, depending on the cause of the puncture, your tire may be more prone to flats and blowouts in the future.
No matter what the cause of your flat is, or what method you choose to fix it, the safest option is to visit your local tire shop as soon as possible.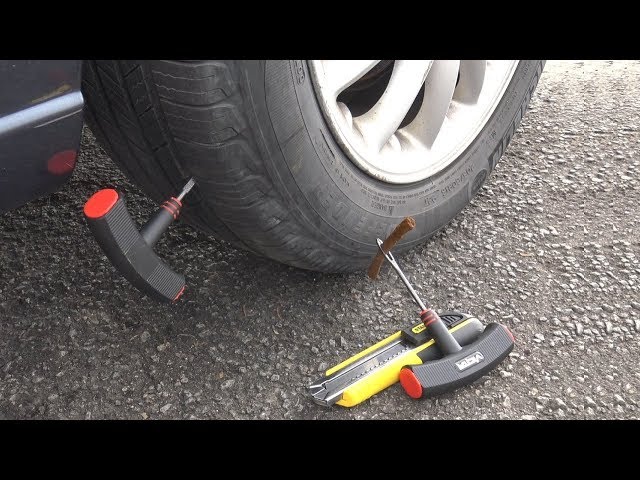 It can be easy to forget about your tires when you're going through your list of auto maintenance tasks. However, taking care of your tires through routine tire maintenance is the best way to avoid flats in the future.
Fixing a flat tire isn't always simple and sometimes, you need a helping hand. When you add Germania's Roadside Assistance Service to your personal auto policy, help is never far away!
Visit our website to learn more about Germania's Auto Insurance products!
Read more: Replacing a tire can be expensive, but your auto insurance doesn't have to be! Check out our blog to learn which auto insurance discounts you should look out for!
In our realities, economy-class rental housing rarely boasts a design solution or European-style renovation. Usually these are old apartments, inherited by the owners from their grandmothers, with repairs and furniture from the Soviet era. But even such an apartment can be made pleasant and comfortable for life - without major repairs and the purchase of new furniture.
With the help of wallpaper, you can transform the interior beyond recognition: correct proportions, add volume and air. At the same time, it is not necessary to wallpaper the entire room: one wall is enough to update the interior. In this way, you can zone the space (for example, highlight the head of the bed or the back of the sofa), add depth to the room and place accents.
Vinyl stickers can also be used - they are easy to use and do not damage the surface of the walls.
Start with the wardrobe and wall: they should be against the wall where the interior door is located. Volumetric objects make the space visually heavy - remove them from view. In addition, do not arrange all the furniture along the walls, but try to highlight the zones. For example, a sofa in the living room can be placed across the room, and you can change the interior of the kitchen by simply moving the dining table away from the wall.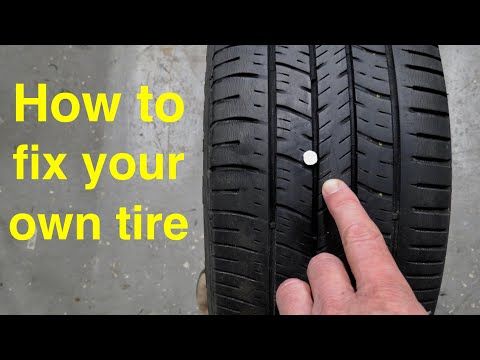
As a rule, the feeling of clutter is created by an abundance of small items. Pack the master's legacy in boxes and hide them on the mezzanine, under the bed or in a niche between the ceiling and the upper kitchen cabinets. You can also move the sofa away from the wall and place stacks of boxes behind it. Cover the upper boxes with a wide board - you get a functional console.
Design: Marina Stashkova, Elena Borovkova
The interior of a rented apartment can be significantly improved by hiding protruding wires and old batteries. For example, a wire tangled underfoot can be turned into an original piece of decor by wrapping it with ribbons or a thick rope. The main thing is that the color of the "wrapper" is combined with the interior palette. And the battery can be decorated with a special screen or painted to match the walls. Now it will not become a disadvantage, but a harmonious continuation of your interior.
Is the condition of the doors in the rented apartment bad? It doesn't matter - paint them in rich black. Shades of black not only perfectly hide cracks and scratches on the surface of the wood, but also create an advantageous contrasting accent in the interior. Like white, black is easy to pair with other hues in the palette, making updating with color an effective and budget-friendly alternative to buying new doors.
Most old apartments have a single chandelier in the center of the room. Living with such lighting is at least uncomfortable. To remedy the situation, take care of the side light in the living room. Place table lamps and a floor lamp in the room: they will create soft lighting and a pleasant atmosphere. The interior will immediately change, because the light can work real miracles!
Design: Maya Cormorant
The secret to cozy lighting in hotel rooms is extremely simple: the more downlights, the better.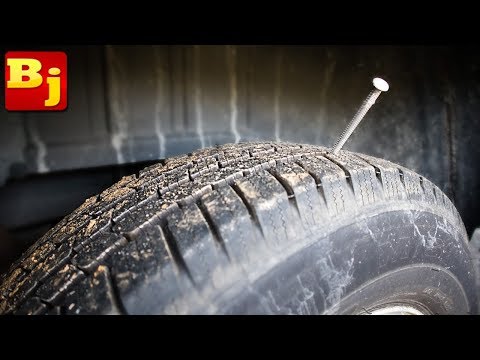 Save on interior decor and replace them with holiday garlands. You can hang them on windows, mirrors, wardrobe and bookcases or on the ceiling and doorways. You can be sure: now home evenings will become truly cozy!
Beautiful fittings will transform almost any closet. A simple replacement of handles can save even a hopelessly outdated kitchen set. Scratches on the dining table will help to hide a new layer of varnish or wax - in a pinch, they can be hidden by a bright tablecloth. The same trick can easily be applied to the workplace: breathe new life into an old desk by updating it with plexiglass. Just decorate it with your favorite wallpaper, wrapping paper or a collection of vacation photos.
Let your interior have more sparkling metals: silver, gold, bronze. Metals make the interior more elegant, and also favorably combined with dark wood (which is so often filled with old rented apartments) and mirrors. Metal can be, for example, picture frames, doorknobs, stands for lamps and lamps, as well as the legs of tables and chairs.
Replacing textiles is perhaps the fastest and most cost-effective way to refresh your interior space. A beautiful plaid, decorative pillows and removable chair seats will help to hide the old upholstery of the master's furniture. And new bed linen compensates for the purchase of a new bed.
Design: DAO decor
Hang the cornice closer to the ceiling: this way you will visually enlarge the space of the interior. And curtains flowing to the floor will help to achieve the maximum effect. Remember the magic of mirrors: they create the illusion of open space and fill the room with light.
Design: Irina Sobylenskaya
A screen is not only the easiest way to zone a space. It is also the best assistant for the owners of rented apartments: you can hide behind it what you don’t want to look at, but you can’t throw it away. It is also convenient to hang clothes that you plan to wear tomorrow on the screen.
Your collection of anything will be a great decoration for a rented apartment. So, a stack of old magazines can replace a bedside table and even a broken coffee table leg. A collection of cameras or decorative plates will look much better on a previously empty wall than behind the glass of a bulky cabinet.
And shells brought from the sea can be turned into an original decoration - just find a suitable vessel for them and decorate it with a ribbon or rope.
Refresh your interior with fresh flowers. Indoor plants will complement the room and give a wonderful aroma. And to make the interior cozier and more individual, try replacing ordinary vases with vintage watering cans or milk jars.
Design: Nastya Antonyuk
Smells and music have a lot to do with interior design: with their help, the living room will become a cozy room, not a deaf room.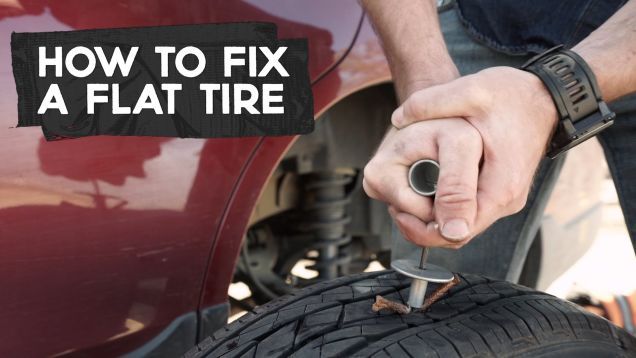 Pleasant music, perfumes for the home are effective techniques that will transform any space. Remember: they do not work separately, but in conjunction, and are no less important than the choice of furniture and wallpaper.
Design: Maxim Kovalevsky
Inspiration
2022-02-10T07:56:00+00:00 2022-02-10T12:58:53+00:00 10 ways to transform a rented apartment quickly and inexpensively 2022-02-10T07:56:00+00:00 Do you have a limited budget? Do you want to stylishly equip a rented apartment for little money? Here are ten effective ways to help you do just that. 10 ways to transform a rented apartment quickly and inexpensively
Do you have a limited budget? Do you want to stylishly equip a rented apartment for little money? Here are ten effective ways to help you do it
How to make a rented apartment cozy? How to turn someone else's home into a cozy room without extra costs, in which you will be pleased to return? With a little effort, it is easy to transform the environment and bring it closer to home with the help of decoration.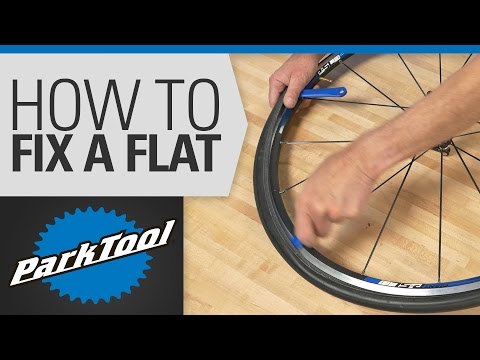
The simplest and proven way to change the environment is to use textiles. Such an undertaking is unlikely to be expensive. But it is easier to create an individual modern style in the room with the help of curtains, bedspreads, blankets, rugs, chair covers. Moreover, they are easy to transport in case of a change of apartment.
— You might not need to skimp on good linens. Most often, there is no time to fill the bedspread. A beautiful bed set is a great alternative to a bedspread: it will always look beautiful even when it is not removed.
As a rule, there is always one central chandelier in the room. A good way to transform the environment is to add additional light sources. It is better that the lamps and floor lamps are on clips. So with their help it is easier to create mood and lighting solutions. If you hang your special lamp, the room will become closer and dearer to you.
It is now fashionable to rent an apartment for two or three people. It's both more economical and more fun. Collective arrangement is more rational: someone will bring curtains, someone will bring a rug, an iron and other necessary little things.
Use metal baskets or any other baskets to help you organize your personal belongings. If desired, mark each - where whose.
Decorative pillows are a real find. With their help, it is easy to create uniform compositions on armchairs and sofas for a competent stylistic addition to the interior.
Different colors and shapes can be used here. On chairs and stools they are used to soften. And if friends have come, there will always be a place on the floor where you can sit on pillows.
Puffs are also great additional sources of comfort. They are easy to move and create such a cozy environment.
Do not throw away glass jars. They are easy to adapt as convenient food storage containers. Functional and beautiful, even if there is no kitchen set. An open shelf from a wide board is quite suitable for this.
Glass containers are useful if there are no special vases for flowers. This is the fastest and most inexpensive way to decorate a room, although it is short-lived. In winter, instead of flowers, use dry twigs as decoration.
An old tried and true way to quickly make a room feel cozy and homey is to use photographs, paintings and posters. Especially if the wall is empty or does not look very attractive.
A large poster or picture will also save the day. They will bring positive energy into the room. The room will take on a trendy look.
— Usually the walls in a rented house leave much to be desired — faded and uninteresting. You can repaint them to your liking if the landlord allows. Or hang a large poster with your favorite story in a conspicuous place. Use stickers that can be easily removed without leaving any residue.
To match the colors of the story on the poster (no more than 2-3 colors), choose bright pillow cases, you can even sew them yourself.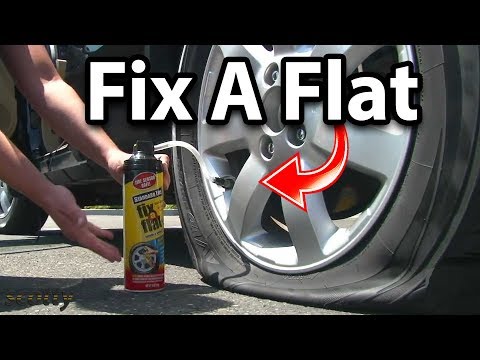 Lay them out on a sofa or bed, add a blanket, rug. All this will add comfort! You can replace the master's curtains with those that match the color of the new decor elements.
Greenery always creates a favorable atmosphere of comfort in the house. Considering that students always do not have enough time, you should not plant flowers that need complex care. Simple ficuses are enough. In a minimalist version, a cactus is suitable.
The effect of a green fresh island can be created by grains of cereals. If they are placed in a shallow container and lightly sprinkled with earth, they sprout very quickly.
— Live indoor flowers add home comfort — you can ask for sprouts from familiar flower growers and plant them yourself. And use anything as flower pots. For example, old tea cups, jars with paper or twine wrapped around them - a stylized man-made planter. Your imagination may suggest an interesting option.
A slate board is a great decor item for a rented apartment.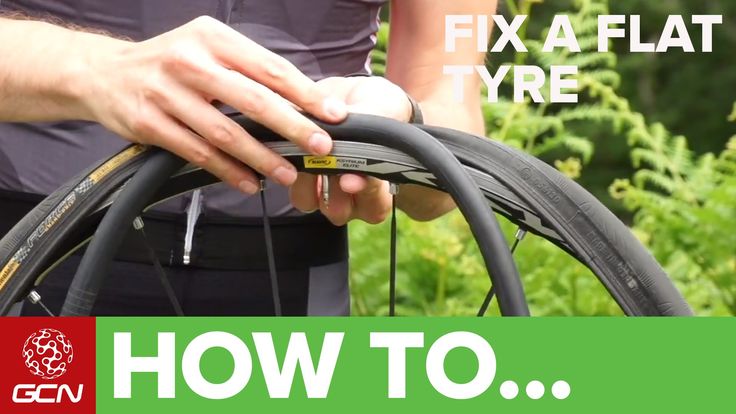 You can adapt it anywhere: on the wall, refrigerator, on the table. Even an old unattractive interior door is easy to revive with a slate.
In addition, it is convenient to leave a list of duties, messages to each other, if you live together or three.
How to solve the problem of personal space for two or three students in one apartment? Especially when there are no interior doors in the room. A partition screen will become a mobile and inexpensive solution for space zoning.
It is more convenient to use the harmonica version. They are easy to move, fold and store. Behind the partition it is easier to hide the bed and create a small seating area. The screen is also useful in the case when there is no closet. It is easier to hide things behind it and make a mini dressing room.
When a rented apartment is unfurnished, it becomes a problem. After all, you never know how long you will live in it. And transporting bulky furniture from place to place is not very fun and convenient.
In this case it is better to use multifunctional modular furniture. It is easy to move, create the desired compositions.
— Everything that can be moved and moved is called movable property. In the future, when you next move, you can easily take all this with you. Pick up rugs, vases, lamps, removable covers for sofas, armchairs, chairs and other items that you like. So you can quickly and affordably equip any rented apartment in a cozy home.
If you have to buy a bed, let it be with additional lockers for things. Many students use inflatable sofas or mattresses.
By the way, now cardboard furniture is rapidly coming into fashion. It is durable and lightweight. Not only bookshelves or storage boxes are made of cardboard - chairs, tables and even beds are also made from it.
As a last resort, you can always find old chairs, stools, suitcases, paint them and create a vintage setting.
— As a rule, there is not enough furniture.