Due to the rough terrain that ATV tires are subject to, getting a rip or puncture in tires is not uncommon. However, rips are especially mind boggling for ATV owners who recently bought new tires. Get new tires is pricey and patching tires seems to be more economical, but can ATV tires actually be patched?
The good news is that ATV tires can be patched much like a regular car tire. Depending on the quality of the patch, the repair may even last a while before you have to worry about it. Patching an ATV tire can save you some money if you learn to do it yourself.
Patches aren’t permanent, especially for ATVs that are often driven on rocky terrain. If the patch doesn’t break, it’s possible to keep your tire until it’s time to change to a new one, although it’s recommended to get a new tire.
In this post, we will go over everything you need to know about patching up your tires.
Patching vs Plugging ATV TiresThere is a slight difference between patching and plugging of tires. Patching is usually done from the inside of the tire and on rips or sidewall tears. These rips will require a larger patch to cover the rip.
Plugging is usually done on the outside and works best for hole punctures caused by spikes or other sharp objects. The repair of these kinds of damages are usually pretty straight forward and requires a tire plug kit.
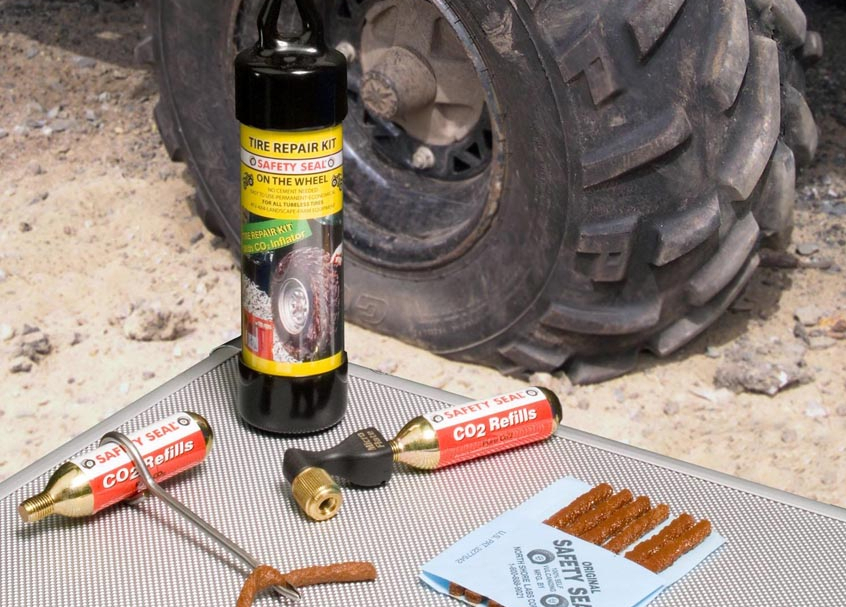
If you have tubeless tires, patching from the outside is probably the easiest option. You don’t need to remove the wheel. All you need is a tire repair kit and some CO2 cartridges.
No matter which tire repair kit you choose, it will usually come with the following items:
Here are the steps you need to plug your tire using the tire repair kit:
Sidewall rips and tears are sometimes unavoidable and if you’re using tubeless tires, you need to be prepared to fix rips on the fly.
For slidewall rips, it’s best to patch the tire from the inside. This minimizes the chances that the patch will rub other objects outside of your tire, making your patch more secure.
For this fix you’re going to need to remove your tire from the rim. It’s recommended that you practice this at home by deflating your tires, that way you will know what to do even if you’re stranded in the middle of nowhere.
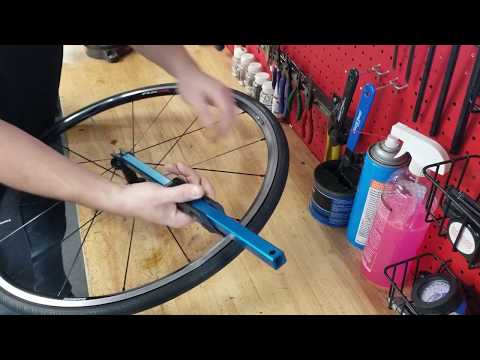
Removing the ATV Tire from the RimFor removing the tire from the rim, you will need two tire irons with flat blades that will be used to wedge the tire out of the rim.
Here are the steps you need to follow if you want to remove your ATV tire from the rim.
 Insert it between the edge of the ATV tire and the rim.
 Once you have removed the tire, the next step is to patch it from the inside. You will need a tire patch kit for this procedure. A tire patch kit will usually come with the following items:
Here is how you would use the tire patch tool:

Once your tire is patched and ready to be placed back onto the rim. The steps to do this is basically the reverse of removing the tires.
Here are the steps for installing the ATV tire back onto the rim:

It’s all fun and games when you’re riding near your home. Even if your tires rip or puncture, you will be able to quickly run home and get the supplies you need to fix them.
However, if your riding in a remote area, you wouldn’t want to be stranded with a 500 pound machine. Therefore, it’s a good idea to bring along a few items with you if you’re planning for a long trip.
Here is a list of things you bring with you. You can put them in a bag strapped to your ride:
The above list provides the basics of what you’ll need for repairing tires.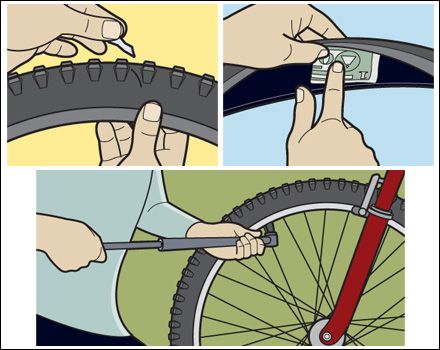 Before you go, do some planning, get an idea of the area and terrain you will be riding on and bring the necessary items with you in case you get a flat tire.
Yes, you can put tubes in your ATV tires. Tubes are usually made of latex or butyl rubber. They are inserted inside of your tires and when inflated, provides an extra layer of protection and structural integrity for your tires. They are great if you run into large rips on the sidewall of your tires that may be difficult to patch.
Keep in mind that if your sidewall rips, you still need to replace your tires or patch it. The innertube is there is maintain the structural integrity until you can get home.
Most ATV tires nowadays are tubeless but it’s not a bad idea to install them.
Should You Slime or Fix a Flat Atv Tire?Slime is a type of tire sealant that you squeeze into your ATV tires or tube. When a puncture occurs, air from inside of the tire will escape through the puncture. If you added Slime to your tires, the air will drive the slime through the hole. As the slime passes through, it dries and plugs the hole.
So should you use Slime on your tires or fix your ATV tires by patching or plugging? The answer to this question depends on the types of damage you have on your tires. Let’s discuss this in detail below:
Advantages of using Slime Slime can be pre-installed up to 2 years.
 If you are debating if Slime is right for you, check out Slime’s Official FAQ to learn more about this product.
To use Slime on your ATV tires, follow these instructions:
A typical ATV will require 24oz (710ml) of Slime
 2 miles (32km)
As you may already know, patching can be an option for fixing a flat car tire or motorcycle tire. But does it work on ATV tires? After all, ATV tires are typically used in much rougher conditions when going off-road. Like with so many other problems you can stumble on as an ATV owner, no one answer fits all.
ATV tires can be patched, depending on the size, shape, and location of the puncture. Minor to medium holes in the threaded area of the tire can be patched using a traditional patch or preferably a plug patch. More extensive tears or sidewall damage cannot be permanently fixed, but temporary solutions are available for emergency repairs.
So how do you know whether your specific puncture can be patched? And when should you choose to patch over other alternatives such as a string plug, tire slime, and others? Here are some guidelines to follow.
Not all tire leaks and punctures are the same. This is important because the type of leak you face dictates the best method for fixing the leak.
Just as there are different types of tire leaks, there are various ways of fixing them. Not all holes can be patched; other methods may be better suitable.
There is also a difference between repairing a car tire and a slow-speed, such as an ATV tire. For car tires, you are only allowed to repair a tire if:
ATV tires for off-road use are not subject to the same regulations, but they still make for good guidelines, especially if you do a lot of high-speed trail riding or racing.
The sidewalls are the weakest part of any tire.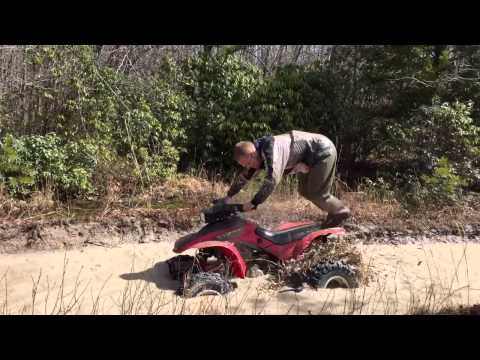 Because the sidewalls of a low-pressure tire need to be flexible, they have less rubber and lack some of the steel or nylon enforcement used in the threaded area for puncture resistance.
The flexible nature of the low-pressure tire sidewalls makes them more prone to tears and harder to repair. While you might be able to patch a tear in the sidewall, it may not last too long, especially if you run the tire at low pressure. As soon as you go over a rock, the sidewall will flex, making the patch the weakest link.
There is no proper way of permanently repairing a sidewall tear or puncture. However, there are a few aftermarket options to consider that will get you by if you’re in a pinch.
Note that products such as sidewall repair kits or sidewall slugs are not meant as permanent repairs but simply emergency repairs until you can replace the tire. They are only for slow-speed, off-road use and should never be used on high-speed or on-road tires.
There is no safe or legal way of repairing the sidewall of an on-road tire. Your only option is to replace the tire with a new one. If your other tires are worn, you may need to replace them as well to prevent driveline wear or damage, especially if you ride a lot on paved roads.
Your typical minor puncture happens from running over a nail, a piece of wire, or any other small and sharp metal object. The air may leak out over a few hours or a few days if the protruding object is still stuck in the tire.
These punctures are typically easy to fix, both temporarily out on the trail or permanently when you get back home to your garage or a tire shop.
Most small punctures up to ¼ inch in diameter in the threaded area of a tire can be permanently repaired from the inside using a plug patch. However, the angle of the puncture should be at least 45 degrees or more to the tire.
Patching from the inside is the recommended method for fixing smaller punctures, and it’s the only one that is considered by the industry as a permanent repair if done correctly.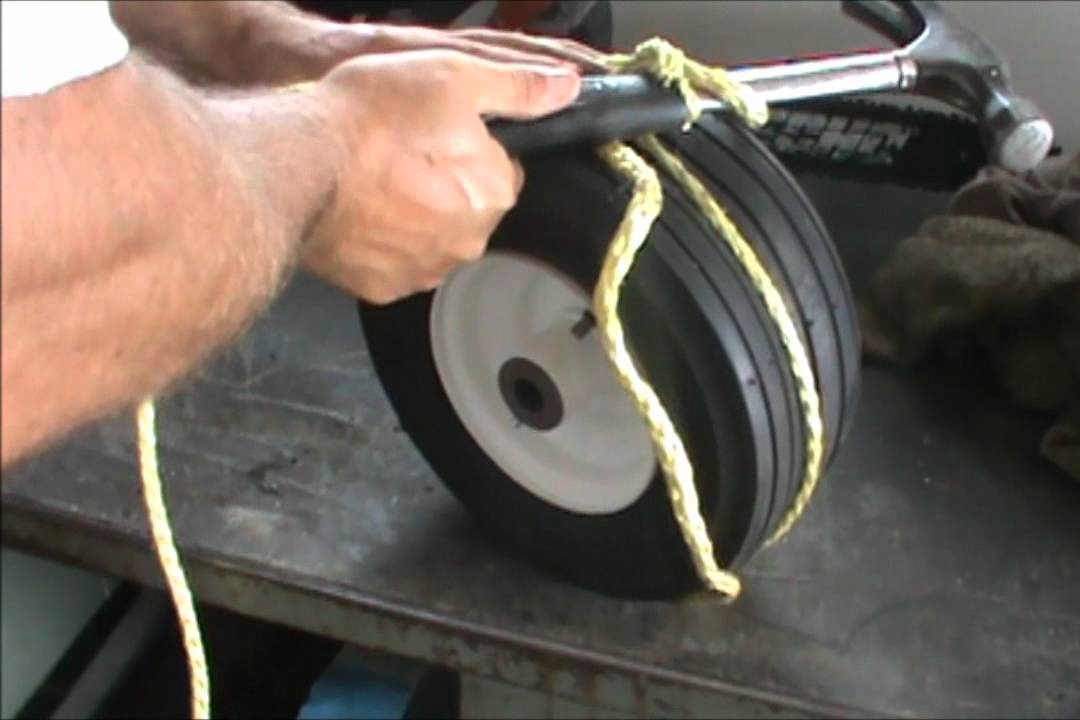 An inside patch plug will more than likely outlast the remaining lifetime of your ATV tire.
Related: How to patch an ATV tire – Illustrated Guide
If you’re out on the trail or just looking for a quick fix, you can fix most small punctures using what is commonly referred to as a string plug kit or rope plug kit—more on the pros and cons of string plugs vs. patches further down in this post.
Other alternatives include Tire Slime, which injects the tire with a slimy substance that covers and seals small leaks. While this method is effective on most small leaks, it leaves a mess inside the tire and may bring it out of balance if not installed correctly.
Next, you have the slightly more severe punctures from hitting a dry branch, a piece of rebar, or something in that category. The hole is typically between ¼ of an inch to ½ inch in diameter.
This type of puncture will cause your tire to deflate in seconds and may or may not be so easy to repair.
As long as the puncture has a round shape and is not larger than the diameter of your thumb, you will likely have a good chance of fixing it using a tire patch. However, it is not recommended to patch a hole bigger than ¼ inch in diameter for on-road or high-speed use.
Any puncture larger than a small screw or nail should be patched for a proper seal. While a sting plug may be able to seal the leak enough to bring you home, it needs to be replaced with an appropriate patch plug as soon as possible.
With large punctures, we refer to holes bigger than the diameter of your thumb. This type of damage typically happens from tearing or slicing rather than a clean poke-through.
Tears or slices typically occur when spinning the tire on a sharp rock, dry branch, or a pointy or sharp metal object.
Most tire manufacturers don’t recommend patching larger punctures or tears because of the permanent damage to the tire’s inner structure that cannot be repaired with a patch.
Before discarding your torn or severely punctured ATV tire, consider looking into products such as Glue Tread External patch kit (link to Amazon).
Leaks around the rim’s bead are commonly caused by corrosion, debris, or a damaged rim. This type of leak typically drains the tire slowly over several hours or even days.
Products such as tire slime or similar work in many cases but will leave a mess when it’s time to replace the tire.
Check this post to learn more about properly fixing this type of leak.
String plugs or any other style of tire plug where the plug is installed from the outside are only recommended as emergency repairs to get your ATV back home or to the nearest tire shop.
While string plugs are not intended as a permanent repair, a properly placed plug will likely last the tire’s lifetime. This type of repair can be sufficient for off-road or at slower speeds.
For on-road or high-speed use, it’s always recommended to replace the string plug with a permanent patch as soon as you get the chance.
As speed increases, the rubber in the tire expands, increasing the chance of the plug coming out of the tire.
Traditional patching is when a rubber patch is glued to the inside of a tire using rubber cement. While traditional patches are more reliable than a tire plug, they are not considered safe for on-road or high-speed use. They may, however, work well with slow-speed off-road tires, such as most ATV tires.
When used at a higher speed, the problem with traditional patches is that the glue that keeps the patch in place will lose some of its bonding power as the tire heats up, and the patch may come off.
Plug patches combine the benefits of traditional patches and tire plugs in one product. The glued-down patch keeps the plug from detaching from the tire, and the plug helps the patch stay secure to the tire.
www.adv.rbc.ru
www.adv.rbc.ru
www.adv.rbc.ru
Autonews
TV channel
Newspaper
Pro
Investments
+
New economy
Trends
Real estate
Sport
Style
National projects
City
Crypto
Debating club
Research
Credit ratings
Franchises
Conferences
Special projects St. Petersburg
Conferences St. Petersburg
Special projects
Checking counterparties
Library
Podcasts
ESG index
Politics
Economy
Business
Technology and media
Finance
RBC CompanyRBC Life
www.adv.rbc.ru
Photo: Mikhail Tereshchenko / TASS
www.adv.rbc.ru
See also
Nail, rebar or sharp stone - sometimes you can damage a tire almost from scratch. First of all, the scale of damage is important, and often rubber can still be repaired. Most often, motorists turn to tire shops for repairs in the middle of autumn or spring - just in the season of replacing summer tires with winter tires and vice versa. In order not to stand in lines, it is worth knowing exactly when to go to the tire shop and when to go to the store.
The most common "injury" to rubber is a puncture, and it can most often be repaired. Professionals in the nearest service will do it much faster, and your hands will remain clean. But if the puncture caught you in a deserted place, and there is a pump and a tire repair kit with harnesses in the trunk, you can patch up the tire yourself. Most often, when repairing the front tires, the wheel can not even be removed, it is enough to turn the steering wheel in the right direction and find the puncture site.
First, the hole is cleaned with a helical awl, the repair harness is smeared with glue and tucked into the eye of the awl, after which it is inserted into the tire hole. With a sharp movement, the tool is removed, and the tourniquet remains inside and securely clogs the hole. The tails are cut with a knife, but it is recommended to leave about 20 mm. After that, the tire can be inflated and the pressure checked.
Repair with tourniquets is not considered long-term, because after some time they dry out and begin to let air through. A more advanced puncture repair method is vulcanization. The hole is sealed with an elastic patch, and the funnel at the puncture site is filled with a special compound. A vulcanizer is put on top, which heats the patch and solders the excess.
Under service conditions, the puncture is also repaired with cord fungus. The puncture site is processed and drilled to roughen. Everything is smeared with glue, after which a fungus is introduced from the inside of the tire, its cap is rolled, and the excess legs are cut off from the outside.
Photo: PA Images / TASS
A puncture can also be repaired with sealant. Many car manufacturers with run flat tubeless tires put compressor repair kits in the car instead of a spare tire - a bottle of pressurized sealant. The car is raised on a jack, after which the sealant is pumped into the damaged wheel through the nipple. Next, you need to spin the wheel and pump it up. After repair, the car should be driven a couple of hundred meters to check the tightness of the tire. If it has not recovered, the procedure is repeated.
It happens that a self-tapping screw or a nail closes the hole in the tire, remaining inside. Do not rush to pull it out - until the pressure drops, you can safely get to the service for vulcanization. Sometimes the wheel begins to blow off a few weeks after the self-tapping screw got into it. Therefore, it is better to check tire pressure periodically, and if the pressure sensor lights up, you should at least visually inspect the tire for a nail head.
A bump or bulge most often occurs on the side of a tire after hitting an obstacle or hitting a hole at speed. From the impact, the sidewall carcass threads are damaged, the tire ceases to hold the load and pressure, swelling appears. Any small bump eventually turns into a larger one, and with such a defect, the wheel can burst at any time. This is a direct safety hazard because a sudden flat tire can cause loss of control and a road accident.
Some bulges can be repaired, but no patch will ever restore a tire to factory stiffness. The ideal option in this case is to replace the tire. If a hernia has appeared on the tread, then you can extend the life of the tire with the help of cord patches - ready-to-use patches with an adhesive layer. But if swelling is found on the sidewall, the likelihood of repair is minimal, the wheel is easier to change. Blisters on low profile tires are generally not repairable.
Only car service professionals can repair a side cut. Cord patches will be needed to repair the damage, but after some time the wheel will still have to be changed. This method will work only if the gap is not in the shoulder area of the tire, then no one will repair it.
In general, cuts or punctures, unlike punctures, are considered non-repairable, since the integrity of the frame is violated.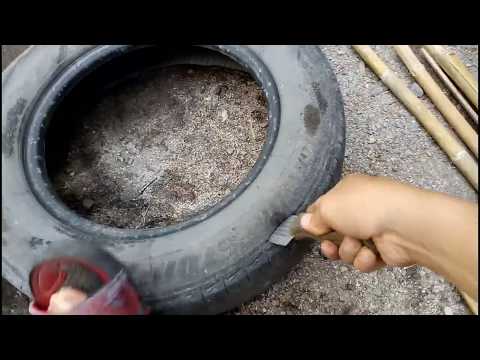 And breakdowns do occur on the go, when the tire abruptly loses pressure and has time to make only a few turns “on the rims” before it comes to a complete stop. In this situation, the cord breaks and the layers of the tire are destroyed. Even if it is possible to close the hole, it is not recommended to use such a weakened tire.
Photo: Mikhail Pletsky / Russian Look
Cracks, sidewall abrasions and unprofessional tire fitting can also lead to tire problems. Cracks can occur as a result of improper storage of tires. Their danger is that moisture begins to flow to the cord, and this already renders the frame unusable. Air can also escape through cracks. Cracks cannot be repaired and tires will not last long. A tire with cracks is deformed, blistered, and may even break while driving.
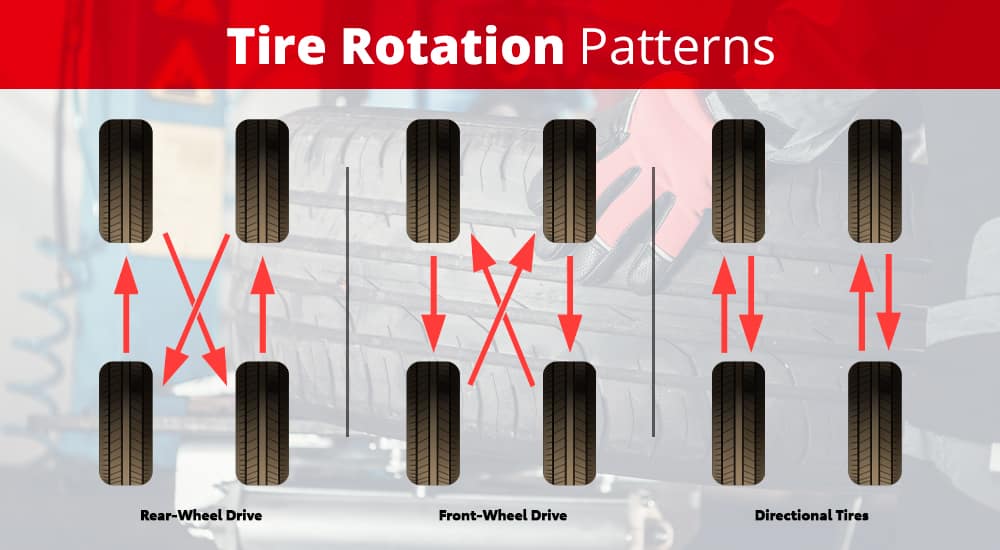
Rubbing against curbs or driving on uneven roadsides can damage the tire sidewall. When driving like this, it is worth inspecting the tires for damage regularly. If a slight wear is found, the wheels can be swapped, which will slightly extend their service life and allow you to delay the purchase of new ones.
Improper fitting can damage the tire bead. In this case, the tire will lose its geometry and sit on a disc with a bevel, “eights” will be visible during rotation, and the driver will feel vibration while driving. It is impossible to repair this defect, the wheel must be changed as soon as possible, otherwise there is a risk of damage to the suspension.
How to Tires
www.adv.rbc.ru
www.adv.rbc.ru
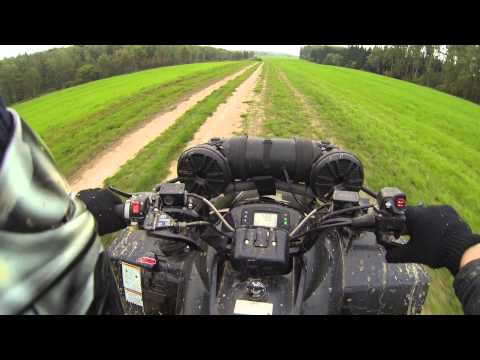
ATVs are famous for their stability and reliability, however, even the highest quality models, including Stels ATVs, can fail. Of course, only a master can deal with serious breakdowns, but you can do something with your own hands, and some breakdowns will have to be repaired on your own, including punctured tires. This is one of the most common problems that ATV riders face, and it's not surprising, especially given that ATVs move on such surfaces, where there is no need to talk about safety. That is why you need to be ready in case of trouble to solve the problem. The main thing, as in many ways, is not to panic, so if you hear a suspicious hiss, don't be scared, but take out the first aid kit of your ATV.
I must say right away that it is better to replace a damaged tire, but this is not always possible and can be done on the spot, and minor repairs will allow you to finish the trip and return home on your fours. In fact, there is nothing complicated about this, and it is quite possible to repair holes up to 5 centimeters in diameter, the rest are usually associated with damage to the device itself, so there is no need to talk about the end of the trip.
In order for the test not to take you by surprise, you need to prepare in advance and always have a few basic things with you.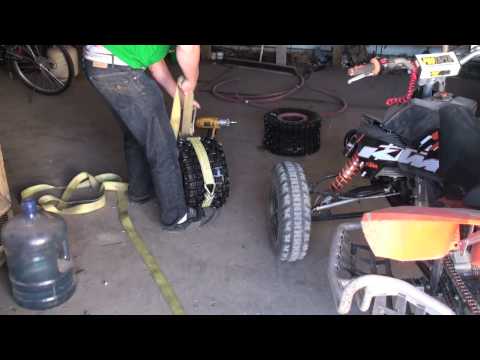 Designate storage space on your ATV ahead of time and remember to refill as you use it. Often in repairs, the main problem is precisely the need to get out of the ground what you forgot to take with you from home. So, here is a list of what will make you feel confident on any road - a repair kit, it includes a reamer - an expander and a special tool for installing patches.
Patches, this is exactly what ends quickly and that you need to constantly buy more, the rest of the materials are not consumables or you can do without them. Patches come in different shapes, for example, I prefer long ones, the main thing is their good stickiness.
Pump. After the “treatment”, the tire will have to be pumped up and you cannot do without a pump. Here the choice is yours, manual or electric, as for me, the simpler the better, folding pumps are still good, they take up less space in the trunk, although it's more about your personal preferences and the possibilities of your wallet.
Rubber adhesive. In principle, there is usually enough sticky layer on the patches, but just in case I carry it in the trunk too, the whole gluing process is greatly simplified. A pressure gauge is a device for measuring tire pressure, if you bought an ATV in a store, it usually comes with an ATV.
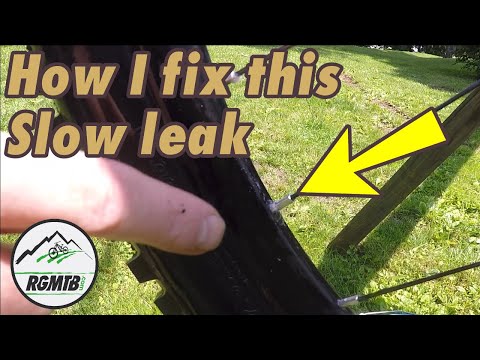
If you notice an air leak, start by looking for a hole in the tire, if the tire is already deflated and the air is coming out weakly, inflate the tire and find where the air comes out. It is usually quite easy to find a hole if it is caused by a foreign object - a nail or a branch. If you don't see the hole, spin the tire on the wheel and listen for exactly where the hiss of the escaping air is heard. In the most extreme case, put the tire in water - a puddle or lake - and you will be able to see the air bubbles escaping. Remember that air can escape not only through a hole in the tire, but also through the junctions of the tire parts or the tire and the valve.
Once you find the hole, work the edges of the hole with a reamer, making the surface rough, after that the patch will better adhere to the rubber. Take a patch tool and thread the patch into it, if there is glue, smear it with a little glue and insert it into the tire halfway. The next moment is very important - you need to quickly pull the tool out of the hole, but do not pull the patch with you. If you are doing this for the first time, you may need to practice - I told you that patches run out quickly. Usually, if the hole is microscopic, one patch is enough, but sometimes you have to use several, in this case, repeat the steps, inserting the patches until the air stops coming out of the hole. When the hiss is no longer heard, leave the tire for a few minutes to allow the glue to dry. Do not forget to trim the ends of the patches protruding from the operation site, leave no more than three millimeters, otherwise such a patch may simply fall out while driving. When everything is ready and your tire has restored its integrity, pump it up to the required pressure and you can continue driving. Do not forget that if the hole was large enough, after returning home, the tire will have to be changed to a new one.