The two main reasons to alter the gear ratio of your ATV is to get more acceleration or to get more top speed. A lot of riders will use terms like ‘gear up’ or ‘gear down’ to describe the changes to their gear ratio by swapping out a sprocket for one with a different number of teeth.
You may have also heard people talk about a ‘taller’ or ‘shorter’ gear ratio. But to understand gearing up or gearing down and what it means to your gear ratio, you have to know what the gear ratio is actually a calculation of.
If you’d prefer to skip all the details about gear ratio, there is a chart below you can use to decide what number of teeth you want your sprockets to be. Just remember, the smaller the gear ratio number, the more top speed you’ll get. The larger the gear ratio number, the more acceleration you’ll get.
To obtain your gear ratio is simple, you can use the chart provided below, or simply divide the number of teeth on the rear sprocket, by the number of teeth on the front sprocket. For example if your rear sprocket had 40 teeth and your front sprocket had 12 teeth. 40/12 = 3.33, your gear ratio would be 3.33.
The term ‘gearing up’ or ‘gearing down’ refers to changing one of your sprockets out with one that has a different amount of teeth, to change your gear ratio. Gearing up may also be called going taller, and gearing down may be called going shorter.
You can gear down by installing a larger rear sprocket (with more teeth) or a smaller front sprocket (less teeth). Gearing down will actually increase your gear ratio number. Gearing down will increases acceleration but will decrease top speed.
You can gear up by installing a smaller rear sprocket (less teeth) or a larger front sprocket (more teeth). Gearing up will decrease your gear ratio number. This will increase your top speed, but decrease your acceleration.
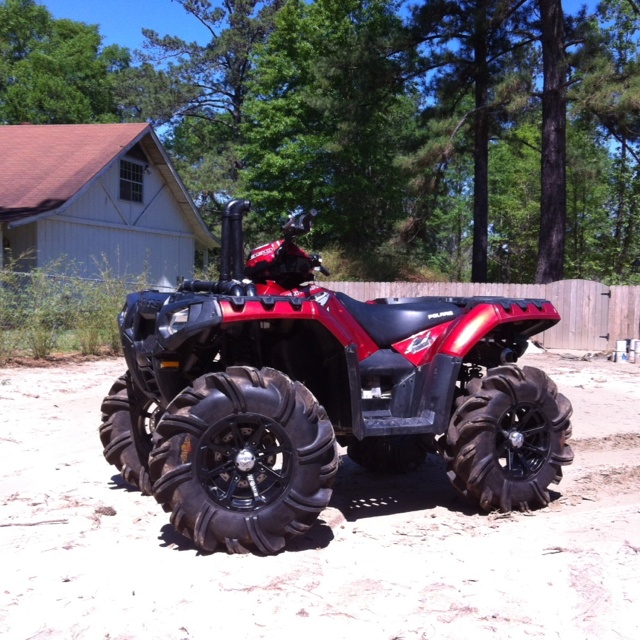
Tire size plays a big role in your gearing. Think about it this way, your gear ratio or ‘final drive ratio’ is changed so your tire rotates more or less per sprocket rotation right. So for every inch you increase your tire size it’s equivalent to 1-2 teeth on the rear sprocket.
Another calculation you could use to give you a better idea is to divide the front sprocket teeth by the rear sprocket teeth, then multiply by tire height in inches and pi. This will give you the amount of ground your tire will cover after one front sprocket rotation.
For example, your front sprocket has 13 teeth, your rear sprocket has 41 teeth, your tire is 22″ tall, and pi is 3.14. The equation would be: 13 / 41 * 22″ * 3.14 = 22.9″
Your tire will travel 22.9 inches for every front sprocket rotation. I know this is getting more in depth than it needs to be, but I find this stuff interesting. If you use this same example, but change the rear sprocket to 44, you will notice the ground covered drops to 20.4″ per rotation.
So we can prove with math this way, that increasing the rear sprocket increases torque and acceleration, but will decrease top speed. With a smaller rear sprocket, more ground will be covered per rotation which increases top speed.
Basically what I meant to say, is that you could effectively gear down your ATV by simply getting larger tires. Larger rear tires will increase acceleration and decrease top speed. While smaller rear tires will decrease acceleration and increase top speed.
This really depends on personal preference, but gearing down has always been recommended for tight trail riding and track riding. If you’re going to be cornering a lot and need to slow down and accelerate often, it’s best to gear down to increase torque and acceleration.
Gearing up is great for open stretches and straight-aways. A lot of people that plan to race their quads in straight open areas will gear up their ATV for more top speed.
I would suggest only changing out your rear sprocket for gear ratio changes if you can. One tooth on the front sprocket is equal to about three teeth on the rear sprocket give or take. It’s a lot easier to make small gearing changes if you only swap out the rear sprocket.
Besides, if you use a smaller than stock front sprocket, you will be causing extra wear and tear on the chain. The chain will need to now make a tighter turn around that front sprocket, which will wear it out faster.
I would only adjust the sprocket by a couple teeth at a time. If you don’t know what you’re doing, you could be making major changes in the way your ATV runs.
If you’re riding through mud a lot, and notice your machine bogging down on you, you may need to gear down a little bit. Be careful though, if you gear down too much, you may notice that you need to shift a lot more often.
With a higher gearing, you will need to shift less, but may not have the power to get out of tough spots. Higher gearing is best for flat straight areas that you have no chance of getting stuck in.
Keep in mind that when changing out a sprocket for a different size, you may need to adjust the size of your chain to fit. If you plan on getting a new sprocket, I would look at new chains as well.
For an in depth step by step guide to change out a sprocket, I wrote a How To Change The Chain And Sprockets On An ATV article to help you out.
This chart can be a guide for you to help decide what size sprocket you might want to go with. With more rear sprocket teeth, you are increasing your acceleration. With less rear sprocket teeth, you are increasing your top speed.
It’s important to keep your chain and sprockets lubed up and in good working order if you want them to last. It’s true, the sprocket teeth wear down and the chain stretches. But you can help minimize those effects by keeping the chain clean and waxed.
I like to use this Chain Cleaner And Chain Wax Kit from Amazon to keep my chain and sprockets cleaned and working. I like that set because of how easy it is to use the aerosol cans. Just spray the cleaner wipe the chain down, spray some rust protection and chain wax on and you’re good to go.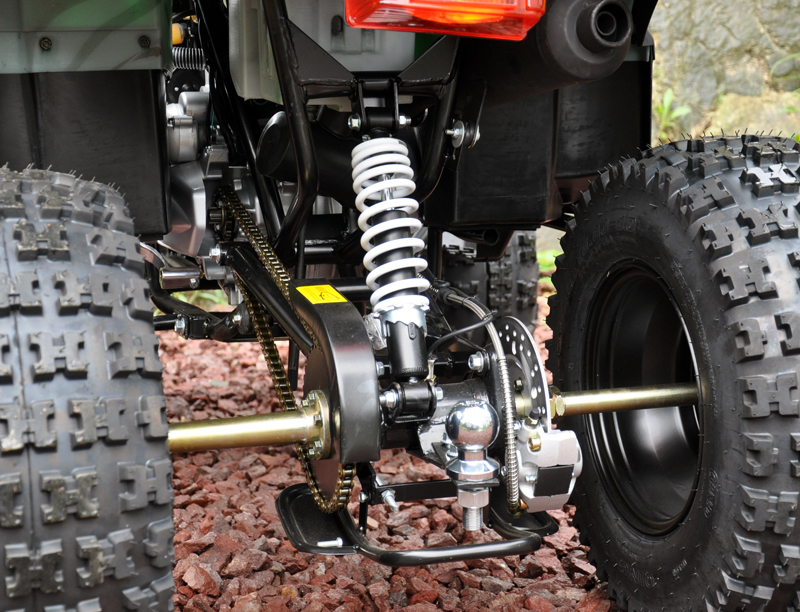
To find out if you’re chain has stretched you can measure the distance between pins and compare to what’s in your users manual. If you’re replacing your sprocket due to wear, I would suggest also replacing the chain. It’s best for the chain and sprocket to wear together.
If your sprocket looks like this image, replace it. You will notice the teeth on the sprocket wearing out and becoming sharper or scared. If it gets bad enough, it will stop gripping the chain and you’ll feel the sprocket slipping off the chain. When it does finally catch the chain again, it could snap it.
Sharing is caring!
An ATV that has a clutch is considered a manual transmission ATV, unlike an automatic transmission ATV that does all the shifting for you. Driving a manual ATV is actually pretty easy once you get the hang of it. After a while it becomes second nature and you will be able to ride without even thinking about it too much.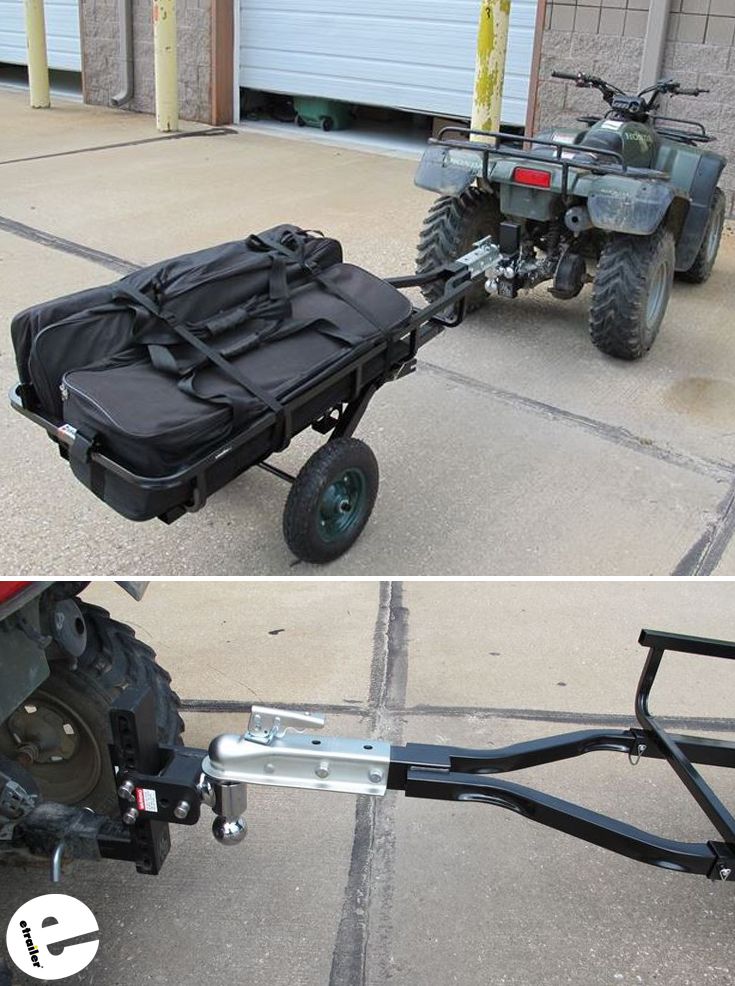 You will need to be able to coordinate between your hands and your feet to shift. I will go over step by step exactly how to start, get into gear, and shift with a manual ATV.
First, lets go over the components you will need to know to drive an ATV with a clutch.
 This brake will activate the front tires only.
It’s best practice to start the quad when it’s in the neutral gear. It is possible to start the ATV in any gear as long as you hold in the clutch lever. Remember, when you pull in on the clutch lever, you’re essentially putting the quad in neutral, as long as you’re holding in the clutch.
If you start your quad in gear, you need to pull in on the clutch and start the engine. Be careful though, if you let go of the clutch with the engine running and the transmission in gear, you will stall and could do damage to your transmission. I only start mine in neutral so that way I can let off the clutch and the quad will idle, and I suggest you do the same.
To get into neutral before starting the quad, you need to pull in on the clutch lever and use your left foot shifter to find neutral. Neutral is usually located between 1st and 2nd gear. You typically won’t be able to get into neutral from 2nd gear though. You should shift to 1st gear by clicking down on the foot shifter, all the way down to 1st gear. Then lightly shift a half click up into neutral. A full click up from 1st gear will put you into 2nd gear, a half click up will put you into neutral.
This is the part that everyone gets hung up on, I know I did when I first learned. It’s really not that hard once you get the hang of it though, it takes some practice. Don’t let yourself get discouraged too easily and you’ll be just fine.
Start off by being in neutral with the engine running. Pull in the clutch lever and hold it in. Now shift into 1st gear by pressing down on the shifter with your foot. To start accelerating, you need to give it some gas with the throttle while you slowly let out the clutch. You have to do these at the same time, that’s what usually gets people.
When you feel the clutch engage, the quad will start to move forward and you can let go of the clutch all together. You’re now in 1st gear moving forward. Be careful though, if you come to a stop without pulling the clutch back in, or getting back into neutral, the ATV will stall.
It may help to just practice getting the quad moving in 1st gear using the clutch and throttle for a bit. Every quad is a little different so it’s hard to say how much throttle to give, and how far to let the clutch out before it grabs. A good starting point though is to try about half throttle, and let the clutch out slowly until you get a good feel for it.
If you keep stalling your engine, you’re either not giving enough gas or you’re letting the clutch out too quickly. If the front end lifts up on you, you’re probably giving it too much throttle when you let the clutch out. It may take patience to get the hang of, but just take it easy and practice.
Once you’ve got the ‘start driving’ part down you’ll want to go faster. Luckily this isn’t as hard as getting the quad moving in the first place.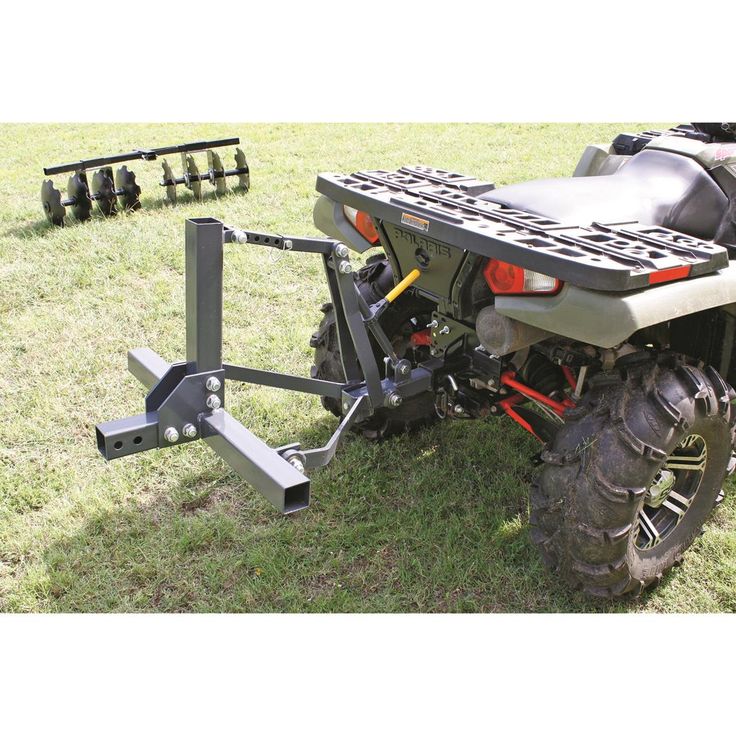 To shift up a gear you want to be about 75% or more of the rpm range for your engine. You typically want to shift up in the higher rpm ranges or you will just bog down the engine. For example, being in 4th gear but only going 5mph will give you no power, and you might even stall.
To shift up, you have to let off the throttle and pull in the clutch lever all the way. With your left foot, pull up on the shift lever into the next higher gear then let the clutch out and give it throttle. Keep in mind when switching from 1st to 2nd you need to do a full click up to shift, a half click will put you in neutral.
If you feel more comfortable slowly letting the clutch out and giving gas at the same time like you did to start in 1st, that’s fine. It is not necessary though. That’s why I think shifting between gears is easier than starting out in 1st. Because you can just let off the gas, pull in the clutch, shift, let go of clutch all together, and give it gas again. You’ll be able to do this faster with time, and it becomes second nature after a while.
To downshift you do the same steps except press down on the shifter with your left foot. Keep in mind that if you down shift at a high speed you will red line your engine and could cause damage. Downshifting is only really needed when you’re slowing down. What I do is just hold the clutch in whenever I’m slowing down, and once I’ve slowed to the speed I want, I shift down into the gear best suited for that speed, and let the clutch out.
You really do need to know what gear is best for the speed you’re going. Unlike shifting up through gears, you can shift down through multiple gears at a time depending on how much you slowed down. If your ATV doesn’t have a speedometer, the best you can do is just get a feel for what speed you’re going and what gear you should be in.
This is the easiest part, but the most important, you should definitely know how to stop before you even try riding an ATV with a clutch.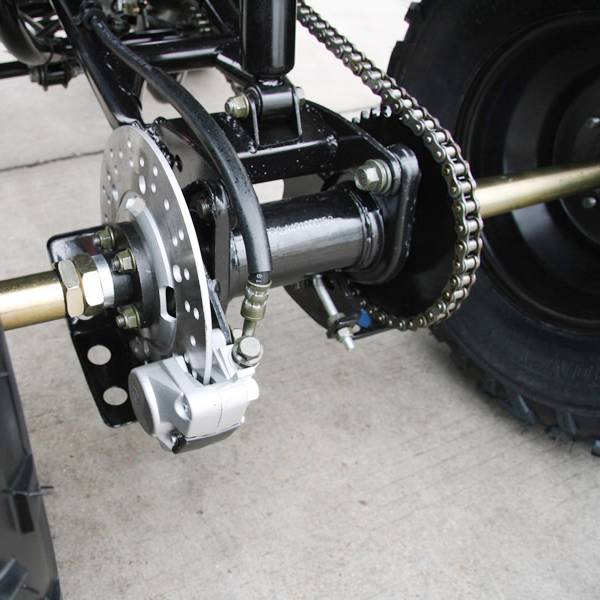 To come to a complete stop simply let off the throttle, hold in the clutch, and apply the front and rear brakes until you’ve stopped moving. You can down shift while you’re slowing down or wait until you’ve stopped to down shift all the way to 1st gear. Either way, it’s important that you hold the clutch in this entire time. Once you’re into 1st gear, do a half click shift up into neutral. Now you can let off the clutch and the engine will idle.
The front brake is applied by using the front brake lever on the right side of the handle bars. The front brake is typically about 3/4 of your stopping power. Some people never even touch their rear brakes at all, which is fine. To use your rear brakes apply the foot brake by your right foot. The rear brake becomes more useful when you start to learn more advanced braking and cornering, or if you just like to skid to a stop.
That’s it! now it’s time to practice, a lot. You’ll get the hang of it and you’ll want to start trying more advanced maneuvers in no time. As always, remember to wear proper safety gear. At the very least, make sure you wear a helmet, goggles, and a decent pair of boots. If you want to check out some gear I’ve tried, tested, and recommend myself, check out the Recommended Gear section of this site.
Sharing is caring!
Articles
02 Dec
Any wheeled vehicle - from a bicycle to a multi-ton truck - has a transmission in its device: a system that transmits rotation from the engine to the wheels. The operation of the transmission - and therefore the speed of driving - can be controlled by shifting gears.
Gear shifting is organized differently in each mode of transport. In the article below, we will tell you exactly how to shift gears on ATVs, and what gearboxes are found on such equipment.
Gearboxes for ATVs can be of two types:
Rare and mostly found in older models, but other variations can be found. For example - "automatic" with the ability to manually shift gears.
Manual ATVs are a little more difficult to drive (at least at first, until you get used to it), but you can more accurately select the appropriate mode.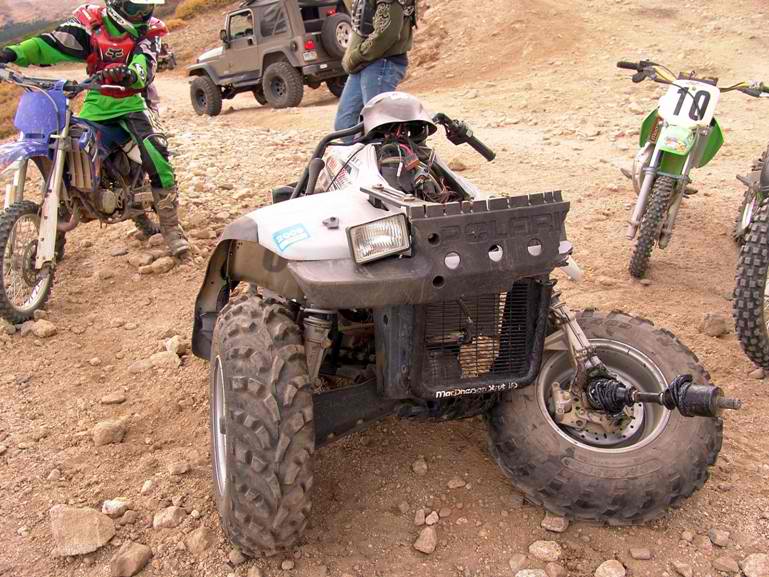 And vice versa: CVT "boxes" are much easier to operate, they are easy to master for a beginner who gets behind the wheel of an ATV for the first time. But on the other hand, with active driving along a route with variable difficulty, riding a CVT will be a little less convenient.
For example: you are driving on a flat packed dirt road on H and you see a large stretch of muddy road ahead with deep mud (or a steep hill, or bumps, or stones). You will have to come to a complete stop and shift to L, drive through mud, and when you get back on a dry road, come to a complete stop again and shift back to H. , like motorcycles, and a manual clutch lever on the handlebar on the left.
The foot lever device can be of two types:
 The rear lever shifts gears up, the front lever shifts down.
 The shift itself is carried out in the same way as on motorcycles:
When exactly to switch speeds up and down is determined by the tachometer, speed, road complexity, weight of the load taken and the characteristics of the ATV itself (power, weight).
CVT gearboxes are much more common on ATVs. The clutch in them does not need to be squeezed out, and the “mode” of driving forward is selected from two (most often) options: in high (suitable for driving on an easy route) or in low (for difficult sections, steep climbs and towing) gears.
An important difference from driving in a manual transmission: switching between L and H is carried out only when the ATV is completely stopped, with the brake applied. To select a mode, move the knob to the desired position. Switching between L and H on the go is impossible.
The rest of the gears - park, neutral and reverse - of course, are also included when the ATV is standing still.
Gears are transmission modes that allow you to adapt your ATV to different tasks and road conditions. Shifting increases traction or top speed.
In this article, we will tell you how to change gears correctly on ATVs with different types of transmission so as not to break anything and confidently overcome any routes.
The CVT is the most popular 4WD utility ATV.
The variator consists of two pulleys. A belt is stretched between them, which rotates along a larger or smaller radius as the engine speed changes. This ensures a smooth change in gear ratio. In fact, the same thing happens as when moving the gears in a manual transmission.
The principle of operation of the variator The variator is combined with the gearbox. The shift lever can be in five different positions:
L - downshift;
H - overdrive;
N - neutral;
P - parking lock;
R - reverse.
Downshifting allows the ATV to climb steep slopes, off-road, or haul loads more easily and without damage to the CVT. In overdrive, the technique can develop maximum speed. It is recommended to use it for driving faster than 10 km/h.
There is no conventional clutch on an ATV with a CVT. Instead, a centrifugal automatic. Therefore, before each shift, be sure to come to a complete stop, apply the brakes and reduce the engine speed to idle.
To stop, just remove your finger from the throttle trigger - the ATV will quickly slow down and stay even in the H or L position until the driver again increases the engine speed.
For a long stop, it is better to switch to neutral. To prevent the vehicle from rolling away, you can apply a hand brake or a P gear.
Manual transmission is commonly used on small displacement RWD ATVs. Structurally, it is similar to the transmission of a high-speed bicycle, only instead of sprockets there are gears. They are connected in different combinations depending on the selected gear.
In order not to break anything when changing gears, there is a clutch. This mechanism decouples the transmission from the engine and allows the gears to engage without load. To control the clutch there is a separate lever on the steering wheel.
On an ATV with a manual transmission, the gears are shifted by a lever located at the left footrest. How exactly depends on the specific model. Popular options:
N is a neutral gear, in which the vehicle will not go anywhere. R is reverse.
This is what a manual transmission looks like on an ATV0115 What is the difficulty. It can be difficult for a beginner to move off. If you release the clutch too quickly or add insufficient rpm, the engine will stall. If you give too much gas and drop the clutch, the vehicle will move with a jerk and may even jump out from under the rider.
What to do. At first, you can try to start without gas at all - just release the clutch smoothly and slowly. This will help you feel the moment when the ATV is ready to go and you need to increase the engine speed.
What is the difficulty. At first it is not obvious when to switch.
What to do. You can focus on the sensations. If vibration is felt, the ATV twitches and accelerates sluggishly, you need to switch down, and if the engine “roars”, up. Another option is to look at the speedometer. Each gear has its own optimal speed range. Here are the average values:
Manual transmission shifts with foot lever. Depress the clutch before every shift.