Over time and with frequent use, even the best tires will wear out. When your tires wear out, it’s best to change them as soon as possible, as worn-out tires reduce the vehicle’s efficiency in braking, increasing the chances of an accident.
Of course, to change a tire, you must remove it from its rim (or wheel). Removing a tire from the wheel is relatively easy and does not require highly specialized skills or equipment. It can be done manually, by hand or with a manual tire changing machine.
Removing a tire from the rim is a relatively straight forward process:
Here’s what you’ll need to remove a tire from a rim:
Place the tire on the ground or any level surface, and locate the air valve—a small rubber or metallic device. The valve has a cap, which you will need to take off (by twisting anti-clockwise) to reveal the valve core inside. The core is a metal cylinder in the valve, by which the tube in tire gets inflated, and removing it releases the air in the tire.
You will need to use a core removal tool to remove the core from the valve. The tool is similar to a small screwdriver; you put the end into the valve and again twist anti-clockwise to let out the air. The tools are inexpensive and are available in auto stores and online.
The bead is the edge of the tire attached to the rim. When the tire’s air pressure is sufficient, it keeps the bead firmly attached to the rim.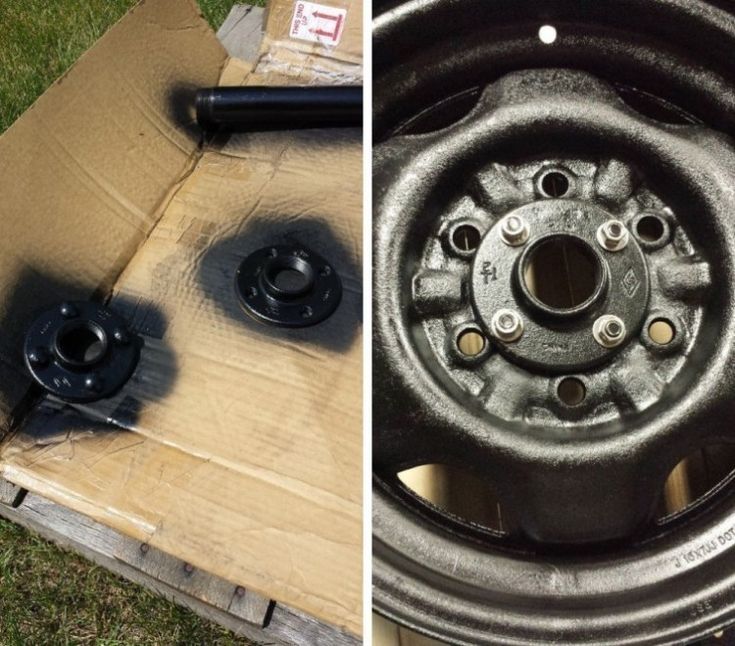 Therefore, deflating the tire and with the application of force, you can separate the bead from the wheel and remove the tire.
There are several ways to remove the bead after deflating the tire. Some of these methods include:
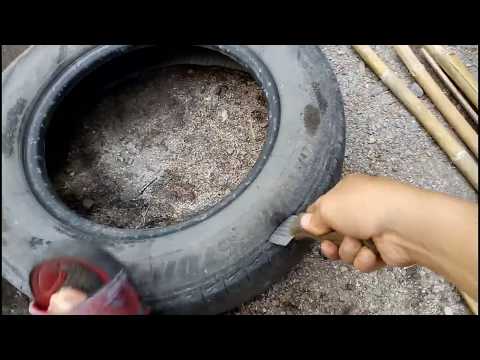
This method is perhaps one of the simplest ways to disengage the bead from the rim without using any additional tools. Set the tire on the ground and drive over the tire. Doing so forces the edge down and out of the groove.
Sometimes you may need to repeat the process a few times before the bead breaks. However, take care to drive only on the rubber and not the metal, which may damage the rim.
Lowering a vehicle over the tire is another relatively simple way to break the bead. It involves raising the car with a jack and then pushing part of the tire under the vehicle. The car gets lowered, resting on the rubber right next to the metal wheel, consequently pushing the edge of the tire out of its groove.
However, do not attempt this method if you do not fully understand how to jack a car, as there are some technicalities involved.
You can also cut through particularly tough beads using a sharp knife. However, cutting through will cause largely irreparable damage to the tire. To cut, lay the tire flat on the ground, and saw along a section nearest to the edge, taking care not to veer toward the metal wheel to avoid damaging it.
As the name suggests, a tire bead breaker is a tool designed to detach the tire from the wheel. This tool is the easiest way to detach the bead without damaging the rim.
You may use any available lubricant such as oil or dish soap, applying generous amounts around the edges of the rim and tire. Ensure that the lubricant gets under the rim too. The purpose of lubricating is to make it easier to pull out the tire over the rim’s edge.
Having lubricated the wheel and tire edge, use your feet to press down on the rubber, creating an opening. Carefully push the pry bar into the newly created opening, and lift the tire up and over the edge of the rim.
Hold the pry bar in place, and insert the flat-head screwdriver next to it, using the screwdriver to pull out the edge over the entire circumference of the wheel. Flatter pry bars and screwdrivers work best for this task.
After successfully extracting the bead, you will need to do the same thing on the other side. Start by applying generous amounts of lubricant to the edge of the rim and bead, again ensuring that the lubricant gets under the rim.
Like before, press down the tire and insert a pry bar into the opening, lifting the tire over the rim’s edge. Again use the screwdriver to pry the tire out on all sections. At this point, the tire should be entirely free of the wheel, and you can easily lift it from the tire.
While removing the tire from a rim by hand is not an overly complex procedure, it is a rather hands-on process, and not everyone prefers this method.
One other way to remove the tire from the rim without going to the mechanic is to use a manual tire changing machine.
This compact machine allows you to skip the greater part of the tedious process of separating the wheel from tire, and is manually operated, unlike those found in a mechanic’s shop. Manual tire changers are cheap and available in stores and online. The machine also comes in handy if you don’t know how to put a tire on a rim by hand.
In addition to the machine, you will need:

Place the machine over the plywood board and use a pencil or pen to trace the outline onto the board, indicating the bolt positions. You may use boards other than plywood, just ensure that it is of sufficient thickness (at least ¾ inches).
Screw the bolts into the wood, at points marked for holes. Using 5 inch long bolts with ½-inch diameter works best for this.
Flip the wood over and position the machine over the bolts, securing each bolt with a nut and washer.
An alternative to wood is to bolt the machine to a concrete floor. This option affords greater stability, but it is more tedious to achieve, as it requires the use of a masonry drill.
Locate the air valve on the side of the tire, removing the cap to expose the core within.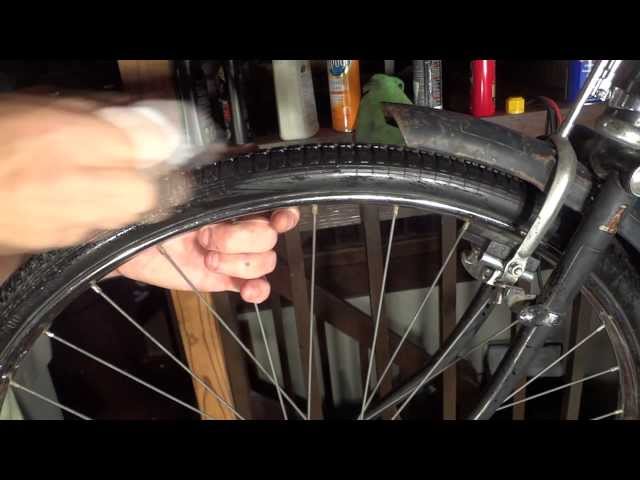 Insert the core extraction tool into the valve and twist counterclockwise to deflate the tire.
Set the now deflated tire and rim on tire changing machine. Ensure that you hook the rim to the small triangular-shaped nub at the base, and that the front of the wheel faces upward. Next, drop the machine’s arm onto the rubber at the edge of the rim. The arm resting on the rubber is wedge-like, to fit between the metal wheel and the rubber.
Typical tire changing machines come with a changing rod to help in removing the tire. However, any metallic rod with a pointed end will suffice. Insert the changing rod into the open end of the arm, and slowly apply pressure; this will cause the arm to press down on the rubber and reveal the wheel.
Rotate the tire, pressing down the tire changer arm on all points along the edge of the rim. Afterward, flip the tire and repeat the process to break the bead on the other side.
Set the tire over the machine’s top by sliding it over the central tube connected to the machine arm. Next to the central tube is a smaller spoke that should pass through one of the rim’s lug nut holes.
Place the bracket piece, which is a large ring with four spokes attached. The spokes prevent the tire from tilting or turning when you start to pull the bead over the rim. Finally, place the cap over the bracket piece and twist clockwise to secure the tire firmly.
Before you attempt to remove a tire, apply generous amounts of lubricant to the edge of the wheel and adjoining rubber, ensuring that the lubricant gets under the rim as well.
Gently push the pointed end of the changing rod between the rubber and the rim, then lift the bead over the rim’s edge. Slide the rod along the circumference of the rim, using the central tube as leverage.
When all the tire sections are free from the wheel, push the rod down to the bottom of the tire and repeat the process to free the tire on the other face of the wheel.
You can remove a tire from a rim either by hand or using a manual tire changing machine.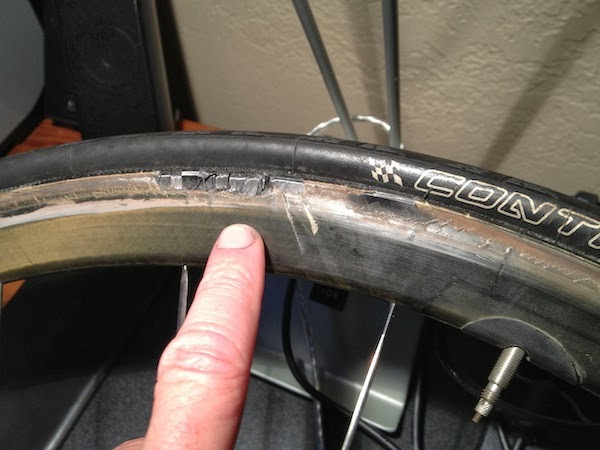 Hand removal can be tedious and requires screwdrivers, pry bars, lubricants and a core removal tool. You will need the same set of tools when using the changing machine for removing the tire.
The manual changing machine also comes in handy if you do not know how to put tire on rim by hand.
Whichever way you choose, the processes of removing a tire from a rim are fairly simple and easy to follow.
Tires are just as crucial as the engine when it comes to maintaining your car’s safety and performance. At some point, however, tires wear out and this compromises the car’s efficiency, especially in traction and braking ability which can potentially lead to fatal road accidents.
If any of your tires exhibit a pattern of excessive wear, it’s about time you change them. Changing tires involves taking off the rubber tread that is tucked inside the wheel’s rim, a grunt work that many would rather pass and hand to a mechanic.
But what if we tell you, popping the bead out of the rim is not too much of a mundane job if you are armed with the in-depth information on how to do so. Doing your own tires will save you a lot of money from costly repairs that should be otherwise spent wisely spent on other car-related maintenance.
With few hand tools and tricks, you can remove the bead off the rim yourself. But the easiest and quickest way to do it is by using a tire-changing machine. This article will cover both of these methods.
Prying the tire loose from the rim might sound intimidating especially if you are a novice or new to tire maintenance. But you don’t really have to be an auto mechanic or expert to do the task. All you need is the right tools, basic mechanic skills, and know-how. The following is an easy guide to carry out the goal.
What you will need:
● Lubricant (Alternative: liquid dish soap or oil)
● Crowbar, Prybar, Tire Levers, Tire iron (any of these)
● Presta or Schnader or any Valve Core Removal Tool (Alternative: Pliers)
● Screwdriver
● To break the bead manually, you need either one of these things: a Jack, a Knife or any other sharp cutting tool, a vehicle
● Optional: Tire Bead Breaker, Tape
The Procedure:
 The air cap or valve core is a small pressure sealing device made of either rubber or metal cylinder located on the core which is where the tire is inflated from. You will need a Schrader or Presta valve tool to extract the air cap from the rim.
Thread the tool inside the valve stem and twist it in a counterclockwise direction. This should loosen and remove the cap off the tire. Then release and allow the air to exhaust.
A valve core removal tool is a small metal that resembles a small screwdriver. It is a handy tool that is relatively inexpensive and often available in a set for different valve sizes like that of the Awpeye 4 Pack Valve Core Remover Tool.
 There are three methods and tricks you can use to break the bead bundle between the bead and the rim.
● Drive and run over the tire you are working on. The aim is to force the rubber down so its easier for the bead to pop out. Hence when driving your vehicle over the tire, make sure that it is the rubber part you are driving onto and not the metal rim. You may need to run the car over it a few times to break the rubber part.
● Put the whole weight of the vehicle on the tire via suspension. The method involves raising the vehicle using a jack and partially lowering it. Once the vehicle is lifted, place the tire underneath the jack. Adjust the jack and lower the vehicle onto the bead part of the tire. Warning: Do not attempt this method if you are new to the process of car suspension unless there is an expert or professional supervision. The procedure requires lifting a car and working underneath it which is can be really dangerous to you and to your vehicle especially if you don’t know what you are doing.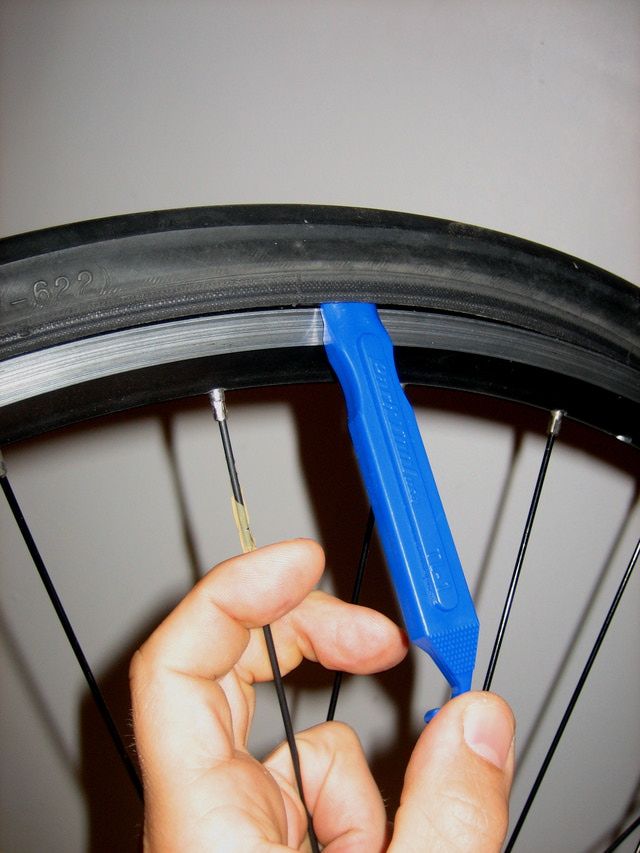
● Cut the bead off the rim. You can cut through with it using a saw blade or a drywall knife. To cut it, follow the seam running alongside the bead, carefully not touching the metal rim. Be cautious as you cut because you don’t want to damage the metal rim To avoid the blade veering towards the tread, insert a wooden towel in the sections that are already cut.
If you are really having a hard time with the bead, you can easily get away with a bead breaker tool. A tire bead breaker is a handy tool designed to dismount the innermost diameter of the tire interfacing the wheel. The operation is so fast and easy it’s basically like opening a canned good! It’s also the safest way to de-bead without damaging the rim. To make the most of your purchase, invest in a well-designed bead breaker like that of BeadBuster XB-450. To date, this is the most affordable and efficient bead breaker.
 Once you have managed to break the bead, grease the edge around the rim as well as the bead by applying the lubricant. This will prep the area when prying the tire later on. You will find it easier to pop the bead off the lip of the rim easily once everything is lubricated. Use as much as a lubricant as necessary. To avoid accidentally scratching the metal easily while prying, you can also tape the edge of the rim prior to lubrication.
  At this point, it is only the bottom half that is loosened, you still have to work on the other half of the tire. So to do this, flip the wheel over on the other side and pry in the wheel off in the same fashion as you were prying in step 4. Use as many pry and screwdriver alongside lubricant as necessary.
If you find taking a tire off a rim by hands too much of a task, time to pull out the big weapon. A tire changing machine skips most of the lengthy process of manually separating the tire from the rim.
Note that the tire changing machine we are referring to differs from that of the actual heavy-duty tire changing equipment technicians used in the shop. The manual tire changing machine is a rather portable and handy tool that requires no power hookups to operate. While the machine will mostly do the job, you will still need the help of a few hand tools.
What you will need:
● Plywood Board (Alternative: any strong wood surface that is at least ¾ inches thick)
● Manual Tire Changing Machine
● Tire Changing Rod (Alternative: any metal rod or tube with a pointed tip)
● Screwdriver
● Bolts (preferably 5 inches long and ½ inch wide)
● Presta or Schnader or any Valve Core Removal Tool (Alternative: Pliers)
● Marker or Pencil
● Lubricant (Alternative: liquid dish soap or oil)
● Optional: rug or paper
The Procedure:
 Using a marker, trace the machine’s base on the platform. Do put a mark on the holes or the location of the bolt as well.
Some prefer a block of concrete as a base because they are sturdier and stable. Others drill the machine directly on the floor. But note that you will need a mason drill to engage the bolts into hard cement. Nonetheless, the bolting process is the same as with the wood material.

 You will use it to expose the rim of the tire. Start the process by sticking the rod’s pointed end into the rim-tire joint. Using your hand or your foot, apply pressure on the wedge by pushing it down. This will gradually exposed the rim.
 To avoid scratches on the rim while inserting the rim, you can wrap a rug or any cloth (a paper may do) around the spoke.
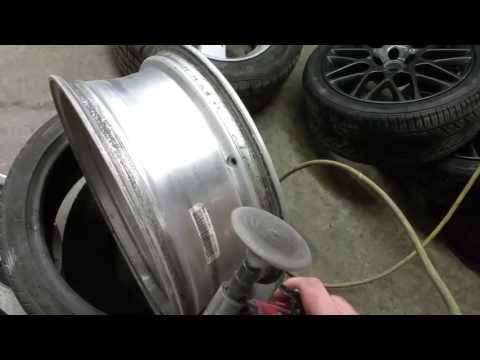 Apply generous amount lubrication as necessary.
You may not be able to pry a certain section in one shot and that is fine. If this happens, simply go back by lifting the foot pedal using your foot to turn the rod counterclockwise.
Related video:

This article has thoroughly discussed the process of disengaging the tire from the rim and now it’s your turn to take the wheel. Sure, the entire process of changing your own tire– from removing the wheel of the vehicle to fitting new tires might seem lengthy and complicated but hey at least we have taken down one of its processes, namely removing the tire off the wheel. Doing your own tires will save you money and soon enough, you will be reaping the satisfying feeling of your hard work.
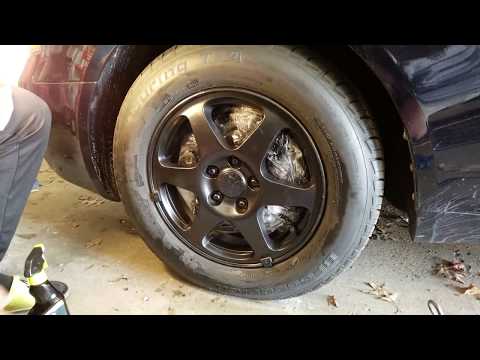
At least twice a season, a modern motorist inevitably gets to the tire service. Changing seasonal tires and balancing wheels, assessing the condition of the tread and the quality of tires is an integral process of preparing a car for operation.
At first glance, such works seem simple and trivial. I unscrewed the bolts, removed the wheel, put the disk on a special machine, and it was done. But in reality, your safety in future trips depends on the quality of each process carried out.
With the help of a sledgehammer and several powerful metal plates, it is theoretically possible to remove the old tire and put on a new one. The problem is that not only the aesthetics of the disc will suffer, but also its evenness. Most likely, after such installation, the wheel of a modern car simply will not hold pressure.
Even the owners of the most budget cars use the services of an installation service. And the reason for this is not only that it is difficult to make an independent installation. The fact is that the prices for tire fitting in Dolgoprudny are so affordable that the game is not worth the candle. It is much easier and faster to perform services on a good service.
True, the choice of this very service should be made carefully. If the wheel balance quality is poor or if the quality of the residual tread is poorly assessed, the most unpleasant problems in operation are possible.
Even 15 years ago, most budget and even middle-class cars drove on stamped ferrous metal wheels.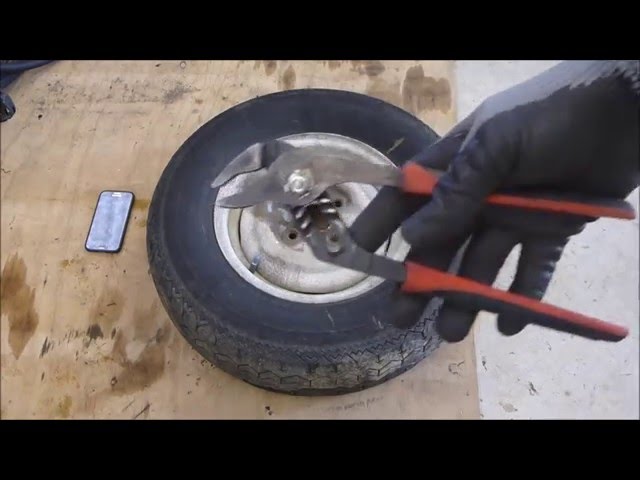 Even with the deformation of such wheels, it was possible to carry out a rough straightening with a sledgehammer and go further on a safe journey. Today, cast, forged, designer and painted wheels require the following mounting features:
You can often hear at the tire service that in order to save money, the car owner refuses the balancing service. You can simply swap tires, changing summer to winter ones. But this is not the best solution.
Almost always, during the season, the tires wear out unevenly, and the old weights are lost.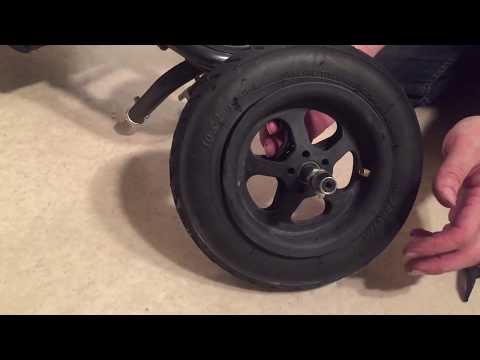 Therefore, after installing new tires, the balance of the wheel disappears. If the imbalance is only 10 grams, then at a speed of 110 km / h you will feel rhythmic bumps or vibration of the steering wheel. The lion's share of this impact is extinguished by the suspension, which collapses from one trip with a poorly balanced wheel.
It is not worth neglecting the balancing service, this can lead to problems with the suspension, steering, and poor trajectory retention. The safety of driving a car will be a big question.
If you decide to change the wheels in the garage, get ready for trouble on the road. Incorrect wheel alignment, poor balance of rims and tires, unnoticed damage - all this leads to serious violations in terms of driving safety.
The car can drive from side to side, the suspension vibrates, the steering wheel is fuzzy, bumps and other troubles are felt. Also, after tire fitting services, it is recommended to perform a wheel alignment check so that the rubber wears out evenly and not too actively.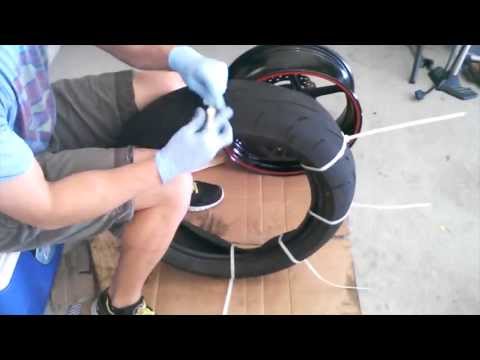
Among inexperienced owners, the question often arises about how to properly disassemble and then flange a tire on a scooter. The work is simple, but it has a number of nuances.
If a number of recommendations are not followed, a perfectly suitable tire can be easily damaged. Even if the current tire is in a deplorable state, and there is no point in putting it back, it is still important to do it correctly without damaging the disc.
Contents
Practice shows that scooter owners have to remove the tire for the following reasons:
It is easier to repair the wheel yourself when another tube is available. It is quite difficult to seat a tubeless tire without leaving gaps - a sharp increase in pressure is required, which only a high-performance compressor can generate.
But if you still have to change the tires, you can use the "folk method". After unscrewing the nipple, pour some gasoline inside. After shaking the wheel, set fire to the steam coming out through the hole. There will be a small explosion, due to which the sidewalls settle on the rim.
Regarding safety - this procedure is not capable of breaking the tire, since it has a good margin of safety. But this should not be done in the garage, moving away from the cans of gasoline for a long distance, so as not to provoke a fire. Such manipulations are not recommended to be performed with a new instance, since unburned gasoline will remain inside. Wear from it will accelerate several times.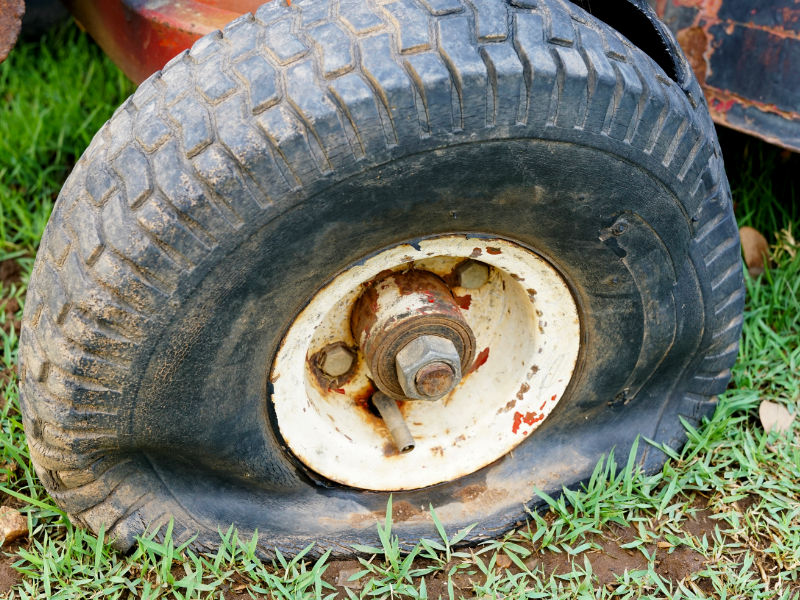
Rear-mounted tires are more prone to wear and punctures as they account for approximately 70 percent of the weight. The reason is simple - the driver's body is located closer to the rear than to the front.
To remove the rubber, all the air must be released and the side cord removed from the rim. The work is difficult, because it cannot be done manually. If there is a vise in the garage, press the rubber with them.
If these are not available, it is allowed to slightly run over the surface with a car wheel. Moreover, it is better to use light vehicles - and a truck or jeep is able to bend the disk, after which you will have to purchase a new one. You need to stomp on the sidewalls, pushing them to the central part of the rim. You can use a simple shovel by inserting the point between the tire and the rim and applying pressure to move the edge of the tire.
For dismantling, it is recommended to use narrow pry bars. The use of thick, wide vehicle mounts causes additional difficulties when working on a small diameter wheel.
Alternatively, you can use long heavy-duty screwdrivers. If it’s uncomfortable to carry mounting tools with you, any owner will always have a pair of screwdrivers.
The beading is carried out from the nipple. Starting from the opposite side, the nipple will not allow the wheel to sink inside the rim. If you see that something is preventing the sidewalls from peeling into the middle, determine the cause and get rid of it.
You should not rely on your own strength, because you can easily break the tire cord. And if you have a lot of strength, the rim itself will break. To disassemble the tire using narrow screwdrivers or pliers, the worn part should be held in a special depression on the rim.
Before dismantling the rear wheel on a scooter, always remember the distance between the screwdrivers - it should be a maximum of two to three centimeters.
It is recommended to disassemble the wheel so that the rim is on the ground with the side in the working position near the muffler.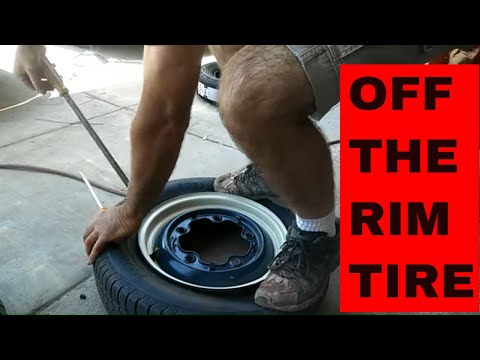 This should be done because, with careless dismantling, scratches will not be very conspicuous, because. silencer covers them.
When replacing an old tire that will not need to be reassembled, lubricate the bead with soapy water or oil. This will greatly simplify and speed up the replacement process. Oil can corrode the tire, so treat the surface with a degreaser before starting installation. Tire installation is carried out exclusively with the use of a soap solution.
A number of professionals recommend that you use plastic tie-downs to disassemble the wheels. How to do this, you can see in the photo below:
Slide the tire as far as you can onto the rim. Only then grab the screwdrivers or pryamki. Manufacturers recommend inflating the tire from the rear up to 2.