There are plenty of great things that you love in ATV off-roading. And there is one thing that may turn an awesome ride into a nightmare. It's drowning your quad.
It’s absolutely thrilling to race across hills and valleys, enjoy spectacular views, and explore new muddy trails. Usually, it means you have to drive through deep mud holes, ponds, lakes, or even streams. However, getting water in your quad’s engine is one of the easiest ways to totally ruin your four-wheeler. It’s more common trouble than you might think, and it may happen not only when you contrive to sink your quad to the bottom of the deep blue sea.
When you drive fast through deep puddles, the water may get into the air intake, and then enter the engine system. Experienced riders who are used to challenge waist-deep mud usually install snorkels which allow them to ride through the deeper holes, but you are not a hundred percent safe even then.
So, what’s the problem? When water enters one or more cylinders, your engine becomes hydrolocked.
Attention! The key thing you should keep in mind – if you get stuck in the middle of puddle and the water is seeping in your engine, DO NOT TRY TO START IT!
It's better to get wet by falling into the water than to kill the motor. Take a deep breath, and cool down. You have a lot of work to do and not let your ATV die. Follow these steps.
When you drown your quad, hit the kill switch. Get your ATV out of the water as soon as possible. At this point your main goal is to prevent more water from leaking in everywhere.
Hook your drowned vehicle to your buddy’s ATV or use a winch to tow it on the bank.
Off-road will keep you dry and safe in water and mud
Find out the best look for you
Ask your buddy for assistance and tip your quad 90 degrees backward. It should allow water to flow out of the exhaust, cylinders, and CVT.
Once it stops, set the quad down on the ground.
These are “first-aid” steps you need to make on the spot. From this point it’s better to tow the vehicle to your garage or service where all the tools are at hand.
And speaking of safety, when you're going into deeper waters it is vital to find a pair of waders with adjustable cinching top.
Image from: kvadromanual.com
If you can’t get evacuated, continue your ATV recovery. Take off the seat, inspect the air box and remove the air filter.
Look carefully at your air intake and clean everything. Make sure that there is no water and mud left in the air box so that your ATV’s engine will be safe when you start it.
If you have a carbureted vehicle, open your carb drain and let it drain for about a minute, then close it.
Loosen your engine oil drain bolt, open it carefully until water starts to flow. Once you see oil comes out reinstall the bolt..jpg) Let it sit for 10 minutes, then repeat as many times as needed until you no longer see any water coming out.
Let it sit for 10 minutes, then repeat as many times as needed until you no longer see any water coming out.
This is how milky oil looks like // Image from www.hondaforeman.com
Now it’s time to inspect your engine. Remove the spark plugs. Start the engine to force out any water from the cylinders.
How to be sure that remaining water is completely out? Refill oil to the engine and turn it over again, with no plugs in it. Wait for a few minutes, and check the oil color.
If there is any water left, the oil will look like a milky substance. In this case drain and change the oil, and start the engine over. Do it again and again until the oil is clean. Depending on how much water is in the engine, it may take up to 8-9 reps.
Clean and reinstall the spark plugs. Try to start your ATV. If it starts, let it run at idle speed for a few minutes. Then, shut it off, refill it with your normal oil and oil filter. Run it again for a couple of minutes, shut it off, and check for milky colored oil again. If you have none, your ATV is ready to go.
Off-road will keep you dry and safe in water and mud
Find out the best look for you
This guide will help you start the submerged ATV again and ride back to where you’ve started. Don’t forget to carry out the complete revision procedures afterwards.
You should check the fuel system, and transmission, flush the brakes, and look for any water droplets left on electric connections. Of course, in some cases, you will need to order a few spare parts. Your quad deserves your care. And you deserve well-functioning vehicle and more exciting ride next time.
However, this how-to guide is not a magic wand that will prevent any swamped ATV from being broken down. So, if you have completed all the steps above, and the engine still doesn’t run, or runs uneven, the best decision is to call your experienced mechanic.
We do hope that none of these things will ever happen to you. In case you have any doubts that the ford is too deep for passing, remember, you wear waders not just for fun. They will keep you dry while you are wading and measuring the water with your feet, instead of risking your quad.
Also think about adding a snorkel kit, if you still don’t have it. It will allow you to go through deeper water with no crucial damage to the engine.
-28%
AQUAMASTER-ZIP LIGHT Camogrey
with central zipper
598 EUR
430.40 EUR
-12%
AQUAMASTER LIGHT Red
reliability & comfort
438 EUR
386.20 EUR
AQUAMASTER Blue
reliability & comfort
647 EUR
-20%
HIT
AQUAMASTER Red
reliability & comfort
259 EUR
207.20 EUR
AQUAMASTER Red
reliability & comfort
677 EUR
AQUAMASTER LIGHT Blue
reliability & comfort
478 EUR
HIT
AQUAMASTER Blue
reliability & comfort
299 EUR
AQUAMASTER LIGHT Red
reliability & comfort
478 EUR
HIT
AQUAMASTER Red
reliability & comfort
299 EUR
-8%
HIT
AQUAMASTER RED
reliability & comfort
637 EUR
585. 20 EUR
Explore all
All-terrain vehicles are one of the most popular choices for off-road work and play for Americans; the U.S.-based ATV manufacturing industry has enjoyed steady growth over the past decade, and this trend is expected to continue through 2023 and beyond. However, as with any vehicle, corrosion of metal parts can be a serious issue impacting the longevity of components as well as overall customer satisfaction.
The choice of paint product for an ATV’s exhaust and muffler system may seem inconsequential, but the coating acts as the first line of defense against wear and tear and environmental exposure. On many models, these parts are barely visible, and even on models that showcase the exhaust, aesthetics is a minor concern when the component in question can be expected to spend most of its time covered in dust or mud. However, there are a few reasons why paint choice should be a major concern, as the right coating can minimize the risk of corrosion by providing crucial protections against heat and impact.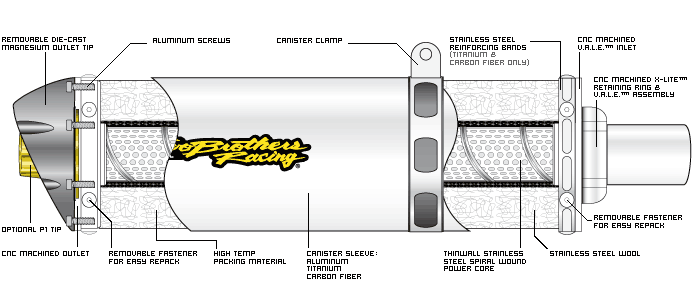
Why is impact resistance important in an ATV powder coating?
ATVs in use are often subjected to the harshest of environments. Traveling at high speeds over sand, dirt, gravel, rocks, underbrush and more can impact vulnerable surfaces and cause paint to chip, flake, and peel away. High moisture and salty environments, such as coastal areas, may accelerate these effects. Heat from the exhaust can compound these problems, compromising the coating and resulting in bubbling, thinning, and flaking of substandard paint.
In addition to heat and external objects impacting the paint, the “quench” factor must be considered. ATV mufflers can become very hot, then experience sudden drops in temperature when driven through water, snow, ice, or freezing mud. When the cold substance meets the metal component, rapid cooling takes effect, which can also cause damage to the coating and result in cracks or microscopic pitting appearing in its protective film.
Exposure to moisture and oxygen through any weaknesses in the coating will cause the underlying metal to swiftly corrode. Loss of protective paint and subsequent corrosion can result in a need to constantly repair or replace components. Of these components, engine exhaust headers and mufflers made of a material other than stainless steel are most likely to be affected by high temperatures, paint damage, and metal corrosion.
The solution to ATV muffler and header vulnerabilities to corrosion is a high-temperature, impact resistant coating. The correct type of coating will be able to adhere closely to the metal, flexing with it as it bends, dents, or deforms under impact, and preventing flaking and chipping. Since the underlying metal isn’t exposed, corrosion can be prevented, and ATV parts will last longer under harsh and constant use.
Best impact resistant coating products for ATVs
There are two options for ATV exhaust and muffler coatings – liquid and powder. While some liquid coatings can offer a high level of heat resistance, powder coatings have a thicker build, are inherently more durable due to the baking process, and can have superior adherence on properly prepared substrates. Powder coatings intended for ATV mufflers and exhaust systems should pass rigorous testing for weathering, heat, impact, and quenching.
High temp powder coatings can be specifically formulated for heat and impact resistance, making them ideal for use on mufflers and other exhaust system components. ATV manufacturing processes can benefit from powder coating both engine headers and mufflers to maximize heat and impact resistance, and reduce corrosion and customer complaints about damaged parts.
Temperatures that can be protected against with heat resistant powder coatings range from 600°F all the way up to 1100°F. The high temp paint is designed to withstand not just heat, but impact, weather, coastal salt spray, and harsh off-road conditions. When applied to properly prepared ferrous and non-ferrous substrates, the chances of a break in the paint surface and exposure of the metal underneath can be significantly minimized.
INFERNEX® high temp impact resistant ATV muffler coatings
When it comes to a perfect blend of heat resistance and impact protection, powder coatings such as those in the INFERNEX® line stand up to the challenge. For example, the PS-1000 black powder coating delivers:
o Peak temperatures of 1000°F, and continuous temperatures of 880°F
o A 5B adhesion rating after 1 hour at peak burn
o The ability to weather up to 240 hours of continuous salt spray
o The ability to withstand up to 300 hours of QUV accelerated weathering
o A 2B pencil hardness rating to protect against scratches
o An impact resistance rating of 60
All of these factors add up to a powerful level of protection for ATV mufflers and headers. The powder coating, when properly applied and cured (for 20 minutes at 450°F), adheres tightly enough and with the flexibility required to dimple on impact along with the metal beneath. Instead of cracking, chipping, or flaking, the coating maintains the seal to keep moisture and oxygen away from the highly corrosive substrate.
Why choose Forrest Technical Coatings?
For the past 40 years, Forrest has been a pioneer and a leader in the marketplace, developing and producing heat resistant coatings and setting the bar for industry standards.
Other companies can offer a few generic high temp paint products. Our robust and diverse product line has been built out over the past several decades, resulting in a wide range of options to fit nearly any high temperature need across a broad swath of potential exposures.
For the ATV industry specifically, we’ve committed to providing the best impact resistant coatings for mufflers and exhaust system components, to help drive down costs associated with corroded parts and provide superlative protection across the board.
ATVs are typically expected to perform under extreme conditions. Our powder coatings for ATV application are easy to apply and cure, and provide extra levels of durability to metal components prone to abuse and corrosion during their normal operation as well as when used in extreme environments. Providing long lasting component coatings as a standard feature will allow vehicles to roll off the line prepared for the most adventurous off-road use, anytime, anywhere.
Restoring a Recessed ATV to Function
The realization that an ATV is not a submarine usually comes at an inopportune moment.
______________
Text: Mikhail Pimus, photo from the archive of the editors
A rare bravado-filled ride by a noisy ATV company through the woods ends without retrieving the sunken vehicle with the jubilant owner from the deepest puddle in the area.
We will talk about what operations mechanics have to do in order to pump out a drowned person in the framework of this article using the Yamaha Grizzly ATV as an example. The symptomatology is as follows: after removing it from the water, the ATV stopped pulling, began to smoke, work unstably and stall, steam comes from everywhere.
Our Grizzly was equipped with a snorkel system that allows it to be partially flooded without water getting into vital components and assemblies.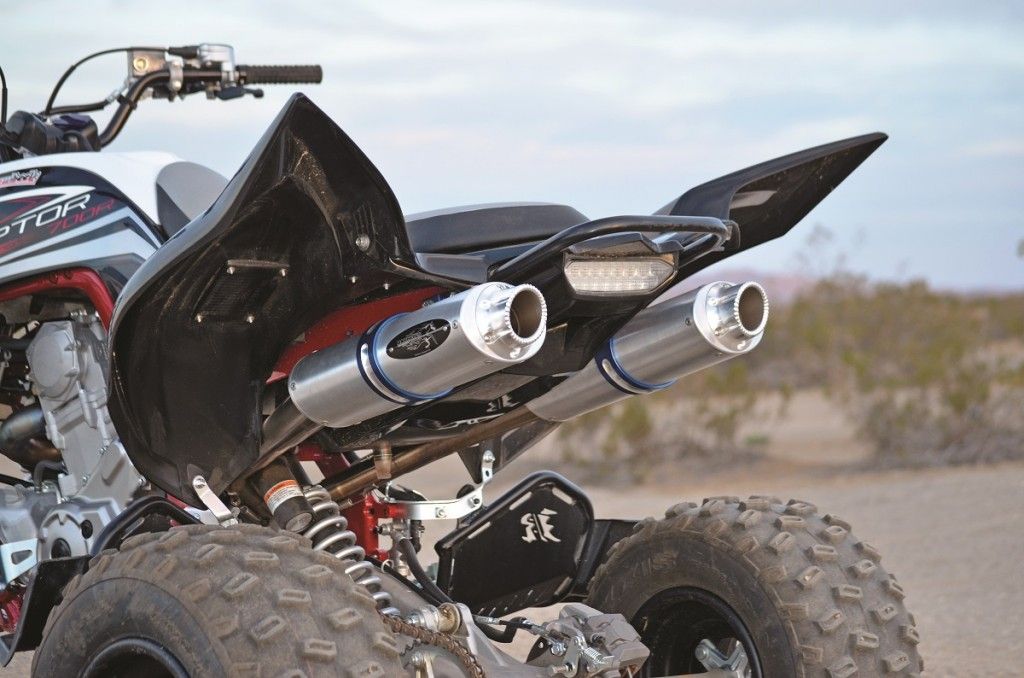 Unfortunately, the angle of installation of the nozzles was not chosen correctly, the tightness of the system was not sufficiently ensured. When flooded, water will inevitably enter the variator ventilation system, engine and gearboxes.
The first step after removing the submerged machine from the water is to look into the inspection window on the engine to make sure that no water has entered (the oil should be clear, free of inclusions and emulsion). This may be enough, but the correct scenario is to remove the air filter, get to the spark plugs, unscrew them and crank the engine several times with the starter, then make sure that the oil level in the sight glass has not changed. If there is even a slight hint of the presence of water, it is inevitable to replace all fluids (oil, antifreeze, brake fluid) and inspect the battery.
Inspection of our Yamaha Grizzly showed that the engine was in order. The rehabilitation procedure continues, the next step is to remove water from the variator tank. To do this, open the drainage hole on the left in the footboard area and wait until water flows out from there. Since it will still not be possible to completely dry the variator in this way, the assembly will have to be partially disassembled, dried, and any damage identified and repaired. The greatest threat to this assembly is not water, but dirt and sand, which can cause destruction of belts and working surfaces of rubbing parts.
Partial disassembly of the plastic on the right side, removal of the protective cover and footboard will help to get close to the variator mechanism. Visually assess the condition of rubbing surfaces, the presence of moisture and dirt. After that, the variator will have to be disassembled, cleaned, remove the old grease, defect the old parts and pick up new ones, apply new grease and assemble everything in the reverse order. The assembly and disassembly of the V-belt variator mechanism is a rather time-consuming operation worthy of a separate discussion.
The muffler, even equipped with an extended exhaust elbow, could also swallow water. Any modern motorcycle is equipped with drainage holes on the muffler. In the case of the Yamaha Grizzly, this is a full drain plug at the bottom of the exhaust pipe. To remove water, it is not necessary to dismantle the exhaust system, just unscrew the plug and drain the water as much as possible, rocking the ATV. Small residues on the hot will evaporate themselves.
The next step is to check the air filter. You can get to it after a partial analysis of the plastic lining in the steering wheel area. We remove the seat, most likely, it will have to be dried thoroughly, the spongy material very quickly absorbs water, over time it will begin to rot and exude an unpleasant odor. There is a small glove box under the seat, if water has accumulated in it, it must also be drained through a special drainage hole. In order not to splash water on the floor of the garage, be sure to place a special canister or basin under the ATV. The workmanship of Yamaha ATVs allows you to carry out repairs with a minimum of tools. Having unscrewed a few bolts and removed the plastic rivets and casing, we easily get access to the container where the air filter is located. The sponge filter element after cleaning, drying and impregnation with special oil can be used again in work.
To check the gearboxes, it will be more convenient to hang the ATV, this can be done using a hydraulic lift, a powerful jack or a small stump. Properly designed shrouds, often found on ATVs, have service holes to access the drain plugs on the gearbox. Through these holes, using a long nozzle with a socket head, we unscrew the plugs, return the ATV to a vertical position, and drain the gear oil. When repairing expensive equipment, you should not rely on chance, so the gear oil must be completely replaced (with the oil recommended by the manufacturer, which is selected from the catalog), even if no water is found in it.
Summarizing all of the above, here is a complete list of components that need to be inspected to revive the ATV after flooding: engine, gearboxes, air filter, exhaust system, CVT mechanism and power steering mechanism (if any). A few hours spent fussing with an ATV, in the future, may well become a decisive reason to bypass deep water obstacles.
Share:
All magazines
Views:0 Author:Site Editor Published Time: 2022-05-25 Origin:Working
carbon or hydrocarbons. So, technically speaking, an ATV carburetor is a device that saturates the air with fuel. We need to know something about when to adjust it.
carburetor When to adjust ATV ?
on a disassembly What follows carburetor and assembly at ATV ?
Generally speaking, if there is black smoke coming out of the exhaust pipe or the RPM of the ATV carburetor is unstable. Also, if the filling valve is not smooth and the transition is poor, then it is time for us to adjust or clean the ATV carburetor. ATV carburetor, and then adjust the idle speed again. If the air filter element is too dirty, it is better to adjust it after cleaning the filter element so that the ATV carburetor performs better. If it is winter, some manufacturers adjust the ATV carburetor so that the car can be started relatively easily. To some friends like to achieve the goal of fuel economy by adjusting the position of the oil needle retaining ring, which makes it difficult to start the car.
ATV carburetor parts must be thoroughly cleaned. It is usually cleaned with ATV carburetor cleaner, and can also be replaced with alcohol or gasoline. and then clean with a soft brush. Make sure that there are no collisions between the parts during cleaning, and do not use detergents made of metal or metal wire. After cleaning, dry with compressed air to completely remove dirt and colloid from the measuring hole, nozzle and oil passage. The surface of the cleaned ATV carburetor should be metal, and there should be no dust on the measuring hole. Other parts of the ATV carburetor can be cleaned directly in clean gasoline. wash with dirty gasoline to prevent substances from entering the oil passage.
Do not damage the small parts of the ATV carburetor, such as the measuring hole, spring, steel ball, push rod and gasket. If there is any defect, we need to replace or repair them, otherwise it will cause significant circumstances. parts such as graduated cylinder, spring must not be improperly installed or omitted.