Whether you are stuck with the misfortune of sending your ATV through the ice on a frozen lake, or if you’ve sunk it into a bottomless mudhole, there are some crucial steps you need to take to save your bike from the junkyard.
I know exactly how you feel right now, but fear not! The bike is not necessarily trashed; you can most likely salvage it without breaking the bank.
If you are somewhat mechanically inclined, you should have no problems performing this recovery on your own. If there is no engine damage, your bike has a good chance of getting back in shape without any permanent damage.
All you have to do is to follow the steps in this guide.
Yes, there are a lot of steps, but not all are too time-consuming. Time-vise you should set aside the better half of a day to do this properly.
If you skip some steps or parts of the steps, you may find yourself paying the consequences later, so take your time to do it properly.
Page Contents
Before I get into the actual steps, I’ll address why water sometimes may enter your engine. Because it is not only when you sink the bike to the bottom of the ocean this may happen.
If you ride fast through deep water, it may splash up into the air intake, sucking water into the engine. Riders who intentionally ride in waist-deep mud install snorkels to prevent this from happening, but you are not safe even then.
When adequate amounts of water enter the engine, it will hydro lock. And it actually takes a surprisingly small amount of water for this to happen.
I won’t get too technical as I’m not claiming to be a trained mechanic. But basically, what happens is that when the piston goes up in the cylinder, it compresses the air above the piston just as it is supposed to.
But unlike air, water cannot be compressed, at least very little. So if you get more water inside the cylinder than the volume above the piston, when it is at its highest point (not very much!), the excess water has nowhere to go.
The piston cannot complete its travel. It’s like trying to fit 2 liters of water inside a 1-liter bottle. It cannot be done.
When this happens, one of two things will occur:
If you are lucky, all that happens is that the engine stops; it dies out instantly when the piston cannot travel any further. This is a more likely outcome if the hydro lock happens when the engine is idling or when you are not using too much power.
The engine can also die out before any damage is done to the engine if it chokes out because of water entering the air/fuel mixture.
If you are not so lucky, you will get one or more mechanical failures like bent or broken piston rods, fractured crankcase, engine head or engine block, damaged bearings or valves.
All this because the piston tries to neglect the laws of physics. Keep in mind that damage to the engine is more likely when the hydro lock happens at speed.
If you hear any abnormal metal sounds when the water enters, you may be out of luck. You may be able to bring back to life a damaged engine after a substantial rebuild, or in the worst-case, you may need to replace the whole engine.
If you have completed this guide, including installing new spark-plugs, and the engine still won’t run, or it runs rough, it’s time to start thinking of calling your favorite mechanic.
A simple compression test may give you a good indication if everything is as it’s supposed to be.
But now you have quite a lot of work ahead of you, so let’s start recovering!
As soon as you get water into the engine, hit the kill switch and get a buddy. The bike needs to get out of the water as soon as possible to prevent more water from seeping in everywhere.
You will need a winch, or a tugboat, depending on how deep of a mess you’ve gotten yourself in.
Turn off the key. Please put it in neutral and tow it on shore.
At this point, you are your own worst enemy. You are panicking and may be acting irrationally.
Doing the wrong things now will only make the situation worse.
So before you move on, you need to make sure you are thinking clearly. Now is not the time to do anything hasty.
Whatever you do, DO NOT try to start the engine at this point. It is most likely hydro locked, and trying to start it may cause or worsen any damage that already has occurred.
Your air filter box will likely be full of water at this point. The box needs to be cleaned to prevent more water or dirt from entering the engine.
 Make sure it is dry, and applied air filter oil before you install it.
Get help from a buddy or three and tip the bike 90 degrees backward until water stops running out of the motor and the exhaust. Then set it back down again.
Now you are done with the initial “first-aid” and should get the bike to wherever your tools are.
Tow it, put it on a trailer, or airlift it with a helicopter. But do not ride it at this point!
When you get home, your goal will be to get the water out of the engine as soon as you can.
Clean out the air inlet if there is any mud, muck. Ensure there is no mud left so that you don’t suck in any additional debris into the engine when you start it.
Do not forget to clean the breather tubes. Disassemble them, rinse them in water and let them dry before you reassemble them.
Depending on how long your bike was submerged, water may have entered the stator housing. Remove the stator cover, and some water will likely pour out.
Use an air compressor to blow from all angles to get most of the water out. Then use a hairdryer or any hot air blower to dry out the rest of the moisture. Be careful, so you don’t melt anything, keep some distance with the blower.
If you don’t have these tools, you need to wait longer for the stator to dry out. But make sure the stator housing is completely dry before reinstalling the cover.
If your bike has a belt-driven transmission, you need to drain out all of the water. Most bikes have a drain plug at the bottom that you can open. If your bike doesn’t have this, you need to open the belt housing cover.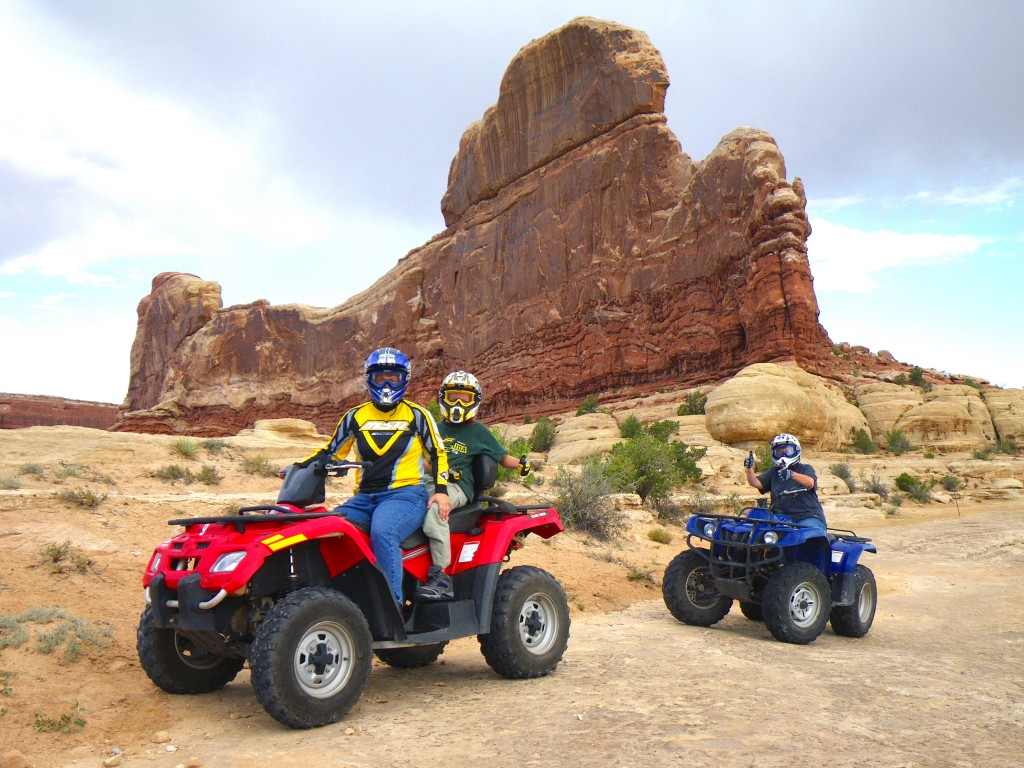
If you were riding in some muddy water, you should preferably open the cover in any case to clean the inside and the pulleys. Let dry before you reassemble. If you ride with a wet belt, you may get belt burning.
If your bike was completely submerged, you need to flush the cooling system to remove any contaminated water. Water may have entered through the overflow.
Drain it. Run it with clean water for some minutes. Drain again and fill up with the factory spec coolant.
Again, if the bike was completely submerged, you will likely have gotten water inside your gas tank. Drain the tank and also the carburetor or the throttle body which holds the injector.
If you are lucky, you will find a small screw at the very bottom of each of these components for easy draining. If not, you have to be creative.
If the carburetor does not have a drain screw, you can alternatively drop the float bowl (the bottom part, held in place with 4 screws).
Also, disconnect the throttle body/carb air duct inlet tube and dry out.
If your bike has a carburetor and you want to do an extra thorough job, you should consider cleaning the carburetor inside to be completely certain you got rid of any remaining moisture or dirt.
Take the carburetor out of the bike and disassemble it. You can leave the floater in place, but it’s best to remove the jets for better access.
Use compressed air to blow in any hole and angle to get as much of the water out. Spray it with carb cleaner. Then let it dry completely before reassembling.
If the bike was submerged for some time, the gaskets may also be soaked in water and need drying or replacing. They are only a few bucks, so a re-pack is recommended.
With the carb off, use a paper towel to clean both the intake manifold and the reed valve area (outlet).
Then refit the carb to the bike.
Now it’s time to start the engine to blow out any remaining water from the engine. You will also lube it to prevent the internals of the engine from rusting.
Remove all spark plug wires and spark plugs (or the injectors if the bike is fuel injected). This is done to create an opening for the water and pressure to escape when the cylinder is moving.
Do not skip this part because failing to create an opening at the top of each cylinder will possibly lead to hydro-locking and damage to the engine! Consider yourself warned.
Turn the engine several times until it stops squirting water out of the holes where the spark plugs or injectors were. Use the kick starter if the bike does not have a starter. A good 5 minutes of kicking should do the job.
Put everything back in place and start the four-wheeler. Don’t rev it. Let it idle for some minutes to let it clear the exhaust.
While it runs, spray some WD40 into the air inlet to lube up all of the motor’s insides and displace any water. Some think seafoam is better, but be aware that it may gum up your carburetor.
If you spray too much, you will choke out the motor, so spray just short bursts at a time until you have gotten a general amount of lube inside the engine.
It will smoke like crazy because of the water evaporating and the wd 40 burning but don’t be alarmed; this is normal. At least for the first couple of minutes.
If your bike has plugs, they were likely fouled when the bike hit the water and needs replacing before you will be able to start the bike.
Then it may start and run for some seconds before it dies again.
Expect to go through about 3-4 plugs before you get the bike going. A minimal amount of water left in the engine will be enough to foul the plug when initially trying to start it.
Be patient, and check for a spark. Using starter fluid or even trying to jump-start the bike is not recommended as this will only result in more fouled plugs.
As long as the bike runs rough, try replacing the spark plugs as they are likely gone bad.
You may have been lucky and avoided getting water into the engine oil, but it’s not worth risking it if you are not sure. You may be able to see the water mixed with oil by pulling out the dipstick.
You will get a definite answer as soon as you drain the crankcase. If the oil got water into it will not look black (or clear brown if it was new). It will look light brown and mushy, almost like creamy coffee.
After draining the contaminated oil, fill up with ordinary diesel to flush out any bad oil and water. Because of the diesel’s limited lubing abilities, you should not ride the bike or rev it with diesel in the engine.
Don’t even bother with installing a filter, as it will need replacing anyway. Just put the cover back on with no filter. If the bike cannot be started without a filter installed, just use a cheap one.
Start the engine and let it idle for a couple of minutes. Stop the bike and drain the diesel. Repeat one more time, or until you see only clear diesel.
The final time, let it drain for 30 minutes to get most of the diesel out.
Then you should fill up with some cheap engine oil to the maximum mark on the dipstick. You can skip the diesel altogether, but then you will need to use more oil, which costs more.
Start the bike and let it idle for 10 minutes to allow the oil to mix with any remaining water or diesel. Drain and repeat one more time.
After draining the second time, you can install a new filter and quality oil according to factory spec.
Now you are done!
Start by opening the cap where you would normally fill oil. Stick your little finger in and dip it in the oil. If the oil is clear, you are OK and can move on to the next step.
If it is creamy white, like the engine oil, water got in, and it needs replacing.
Drain all of the oil. You may need to tilt the bike to both sides to get it all out. If you have access to an air compressor, you will get even more oil out by blowing air into the filler hole on top.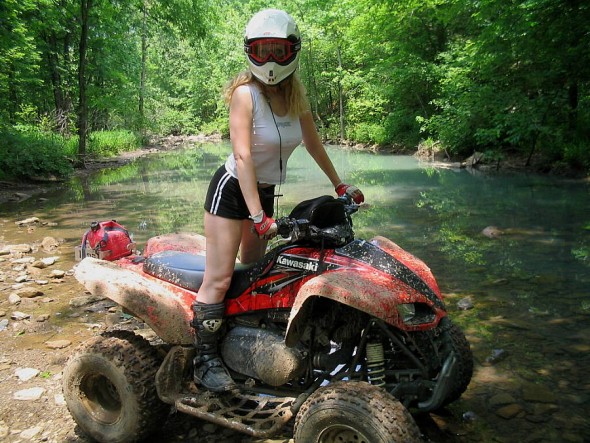
Fill up with some cheap oil as you did with the engine. Ride the bike for some minutes and immediately drain out the oil again. Repeat until the oil looks clear.
Then fill up with the manufacturer-specific oil according to the specs in the manual (usually until oil runs out of the overflow/fill hole with the bike on a level surface).
Really? Arent the brakes a sealed system, you may ask. How can water get in?
Well, the reservoir at the master cylinder will have a vented cap that allows air to enter or escape any time the cylinder is depressed or released. And if this cap ends up below water, water will enter the brake system.
Get some new brake fluid that matches your user manual’s requirements (usually DOT3/4). Start flushing the system by bleeding the brakes while you top of with new brake fluid regularly.
DO NOT let the reservoir tank level drop below the minimum mark, as air may enter the system, and the whole job will take much more time than necessary.
Continue until clear brake fluid starts to appear at the nipple.
This step is mostly done to prevent any issues down the road.
Disconnect all accessible electrical connections and inline fuses and blow them out. Give them a shot of WD40 before you reconnect them.
This will prevent any corrosion and bad connections later on.
Simply because it deserves it; after all, you’ve put it through! This will also prevent rust.
There are plenty of great things that you love in ATV off-roading. And there is one thing that may turn an awesome ride into a nightmare. It's drowning your quad.
It’s absolutely thrilling to race across hills and valleys, enjoy spectacular views, and explore new muddy trails. Usually, it means you have to drive through deep mud holes, ponds, lakes, or even streams. However, getting water in your quad’s engine is one of the easiest ways to totally ruin your four-wheeler. It’s more common trouble than you might think, and it may happen not only when you contrive to sink your quad to the bottom of the deep blue sea.
When you drive fast through deep puddles, the water may get into the air intake, and then enter the engine system. Experienced riders who are used to challenge waist-deep mud usually install snorkels which allow them to ride through the deeper holes, but you are not a hundred percent safe even then.
So, what’s the problem? When water enters one or more cylinders, your engine becomes hydrolocked.
Attention! The key thing you should keep in mind – if you get stuck in the middle of puddle and the water is seeping in your engine, DO NOT TRY TO START IT!
It's better to get wet by falling into the water than to kill the motor. Take a deep breath, and cool down. You have a lot of work to do and not let your ATV die. Follow these steps.
When you drown your quad, hit the kill switch. Get your ATV out of the water as soon as possible. At this point your main goal is to prevent more water from leaking in everywhere.
Hook your drowned vehicle to your buddy’s ATV or use a winch to tow it on the bank.
Off-road are the core piece of riding gear for ATV & UTV riders
Find out the best look for you
Ask your buddy for assistance and tip your quad 90 degrees backward. It should allow water to flow out of the exhaust, cylinders, and CVT.
Once it stops, set the quad down on the ground.
These are “first-aid” steps you need to make on the spot. From this point it’s better to tow the vehicle to your garage or service where all the tools are at hand.
And speaking of safety, when you're going into deeper waters it is vital to find a pair of waders with adjustable cinching top.
Image from: kvadromanual.com
If you can’t get evacuated, continue your ATV recovery. Take off the seat, inspect the air box and remove the air filter.
Look carefully at your air intake and clean everything. Make sure that there is no water and mud left in the air box so that your ATV’s engine will be safe when you start it.
If you have a carbureted vehicle, open your carb drain and let it drain for about a minute, then close it.
Loosen your engine oil drain bolt, open it carefully until water starts to flow. Once you see oil comes out reinstall the bolt. Let it sit for 10 minutes, then repeat as many times as needed until you no longer see any water coming out.
This is how milky oil looks like // Image from www.hondaforeman.com
Now it’s time to inspect your engine. Remove the spark plugs. Start the engine to force out any water from the cylinders.
How to be sure that remaining water is completely out? Refill oil to the engine and turn it over again, with no plugs in it. Wait for a few minutes, and check the oil color.
If there is any water left, the oil will look like a milky substance. In this case drain and change the oil, and start the engine over. Do it again and again until the oil is clean. Depending on how much water is in the engine, it may take up to 8-9 reps.
Clean and reinstall the spark plugs. Try to start your ATV. If it starts, let it run at idle speed for a few minutes. Then, shut it off, refill it with your normal oil and oil filter. Run it again for a couple of minutes, shut it off, and check for milky colored oil again. If you have none, your ATV is ready to go.
Off-road are the core piece of riding gear for ATV & UTV riders
Find out the best look for you
This guide will help you start the submerged ATV again and ride back to where you’ve started. Don’t forget to carry out the complete revision procedures afterwards.
You should check the fuel system, and transmission, flush the brakes, and look for any water droplets left on electric connections. Of course, in some cases, you will need to order a few spare parts. Your quad deserves your care. And you deserve well-functioning vehicle and more exciting ride next time.
However, this how-to guide is not a magic wand that will prevent any swamped ATV from being broken down. So, if you have completed all the steps above, and the engine still doesn’t run, or runs uneven, the best decision is to call your experienced mechanic.
We do hope that none of these things will ever happen to you. In case you have any doubts that the ford is too deep for passing, remember, you wear waders not just for fun. They will keep you dry while you are wading and measuring the water with your feet, instead of risking your quad.
Also think about adding a snorkel kit, if you still don’t have it. It will allow you to go through deeper water with no crucial damage to the engine.
-28%
AQUAMASTER-ZIP LIGHT Camogrey
with central zipper
598 EUR
430. 40 EUR
-12%
AQUAMASTER LIGHT Red
reliability & comfort
438 EUR
386.20 EUR
AQUAMASTER Blue
reliability & comfort
647 EUR
-20%
HIT
AQUAMASTER Red
reliability & comfort
259 EUR
207.20 EUR
AQUAMASTER Red
reliability & comfort
677 EUR
AQUAMASTER LIGHT Blue
reliability & comfort
478 EUR
HIT
AQUAMASTER Blue
reliability & comfort
299 EUR
AQUAMASTER LIGHT Red
reliability & comfort
478 EUR
HIT
AQUAMASTER Red
reliability & comfort
299 EUR
-8%
HIT
AQUAMASTER RED
reliability & comfort
637 EUR
585. 20 EUR
Explore all
You won’t scare ATV owners with a water barrier – after all, we have an all-terrain vehicle under us, and not an urban “passenger car”.
But it also happens that the ATV cannot cope with deep mud or ford, and gets stuck. This situation is not rare, so everyone who gets behind the wheel of such equipment should know how to act.
Fortunately, all ATVs have a reliable and simple device, including drowning. Therefore, even if your all-terrain vehicle is completely submerged, this does not mean that it has died. If you act quickly and correctly, very soon you will be able to drive again.
Consider two situations:
In the first case, the most important thing is not to try to start: you can only complicate the problem.
In the second case, our actions depend on how deep the ATV has sunk. If the snorkels or the inlet are hidden under water, turn off the engine. If they remain above the surface, you can try to get ashore. To do this, you can either turn back along your trajectory, or choose another route if it is shorter. Just be sure to check the depth and hardness of the bottom so as not to drown the ATV completely.
If you didn’t manage to leave, and the engine eventually stalled (by itself or you turned it off) - the following options remain:
If none of the methods helped, you will have to look for a more powerful technique that will pull out the “drowned man”. If you have to leave the place of events for this, do not forget to mark it. The easiest way is to tie something bright on the nearest tree.
Important: ideally, the ATV should be evacuated to a place where there are conditions for normal inspection, drying and replacement of consumables. All steps listed below should be taken only if it is not possible to call a tow truck.
 We mix, pour it into the engine, start it and let it work for a few seconds. Repeat washing 2-3 times, then completely drain the mixture.
 When you get (whether on your own, in tow or by tow truck) to the garage, the ATV will have to be serviced more thoroughly.
If you haven't done something from the list above, do it.
If you have carried out the whole range of rescue operations while still on the shore, upon returning to the garage (or service station):
 It doesn't have to be if it's in good condition.
 Important: These steps are worth doing even if you started the ATV after drowning and rode it back normally. It may be that the water has remained somewhere - in the future this can lead to bad consequences.
| |||||||
| Home » Take a hit: why a single-cylinder ATV is not afraid to drown? Anyone who has delved deep enough into the subject of ATV travel has heard the word water hammer.
Some quad bikers try not to get into puddles at all, going around them as far as possible and denying themselves the pleasure of mixing mud. Better than repairing the engine later! But small single-cylinder engines are almost not afraid of water, confidently coping with bathing. Engine water hammer occurs when a large amount of liquid enters the combustion chamber at the same time. Oil, antifreeze or plain water - it doesn't matter, any liquid is incompressible. If its amount exceeds the volume of the combustion chamber at top dead center, the piston rests. This is where what we used to call water hammer happens. In multi-cylinder engines, the piston that has rested in the water cannot stop the engine - the inertia of the crankshaft and the working pistons of neighboring cylinders continue to push the stuck piston.
Most often, the connecting rod bends or breaks, in the latter case it also breaks through the cylinder wall with a piece of debris. Sounds scary! However, it is almost impossible to “catch a water hammer” on a single-cylinder engine, especially a small one. The fact is that he simply does not have other cylinders that can create additional pressure. All that puts pressure on the piston resting on the water is the inertia of a relatively light crankshaft. Theoretically, water can harm a single-cylinder engine, but in practice this happens extremely rarely. Recognizing a motor that has swallowed water is easy - try to start it. A starter, neither electric nor mechanical, will not be able to budge a piston that has rested in liquid. That is why the first thing you need to do is unscrew the spark plug and turn the engine with the starter, letting the piston push the water out of the cylinder.
Water usually enters the engine through the intake, so the carburetor must be removed and cleaned. But don't be in a hurry to get on the road - water could get into the oil during the swim. Mixed, such an emulsion will not lubricate the nodes well. Therefore, the reanimated motor should be allowed to idle for an hour or two, allowing the water to evaporate from the oil.
The latter will have to be changed in any case, but if you do not first remove the water from the oil, the replacement will not help to remove the emulsion. Water hammer once again confirms that simplicity is a guarantee of reliability, which will allow the ATV to get to the most impassable and unexpected places. |