This article will discuss the mounting and gluing of tubular tires. The tubular tire is made from a tire casing that is then sewn around an inner tube. The stitching is covered with a strip of cloth called "base tape". The tubular is then glued to a special rim, called a tubular rim. The tubular system is not interchangeable with the common "clincher" system.
1
What Tools do I need?
NOTE: The tubular tire system, even when mounted properly, is still susceptible to failure during use. Every precaution should be taken when bonding the tubular to the rim. At this time there are no industry standards for tubular mounting.
The basic principles that apply to gluing and adhesive bonding apply to tubular mounting. Generally, there should be enough adhesive to bond the tire and rim but not excessive amounts of glue. Excessive amounts of glue can become especially susceptible to failure from heat. There will be limits on the strength the bond between rim and tire.
 Use care when washing tubular and avoid scrubbing the rim/tire interface.
Most bicycle tubular glues are variations on contact cements. Tubular cement must hold the tire to the rim, but yet be somewhat flexible and giving when the tire is impacted laterally. Expoy or hard glue would tend to shatter when impacted rather than yield during a shock. Tubular cements tend to use volatile solvents that must bleed or dry out before the bond is fully secure.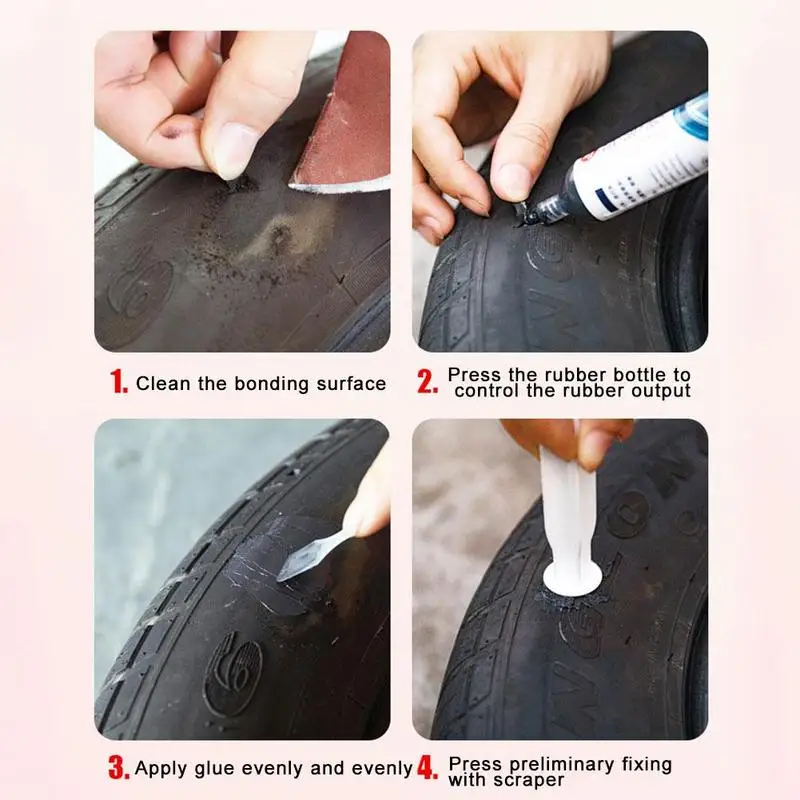 While the application technique is critical to maximum bonding strength, glue brands will vary in quality and adhesive strength. For more detail on tubular bonding see the technical article by Dr. Colin Howat on the subject of Tubular Tire Adhesive Performance at the Kurata Thermodynamics Laboratory.
The safety of the rider depends on the best possible gluing procedures. A clean work area is important, as is time and patience. Ideally, it would be best to have three days to bond a tubular to the rim. This would allow for full drying of base coats. It is possible to glue a tire in a shorter amount of time, but it is important to understand that tubular adhesive require time for proper curing. The bond strength increases after the tire is initially mounted.
2
As with all bonding procedures, clean surfaces are important. Use a clean rag and a solvent that will not leave an oily film, such as acetone or alcohol, to clean the rim surface. An oily surface will tend to repel the adhesive. Allow rim to dry completely before continuing. Wipe with a clean cloth only. Always take precautions when using strong solvents such as acetone. Use protective gloves.
Carbon gluing surfaces have special considerations. Most manufacturers of carbon rims state that acetone is acceptable for cleaning the gluing surface. Contact manufacturer for their recommendations. Abrading the carbon can be useful for cleaning surface. This is especially true if there is “mold release” on the rim. This is a slick substance that allows the carbon to come out of the mold during manufacturing. Use only a medium grade sand paper or emory cloth (approximately 120 grit). Do not abrade down to the fibers themselves. Clean with an oil-free solvent after any sanding.
The tubular tire can be a tight fit to the rim. It can help to stretch the tire on a dry rim and inflate it to full pressure. Allow wheel to sit overnight. If time is an issue, the tire can be manually stretched by placing it over your back “bandoleer” style.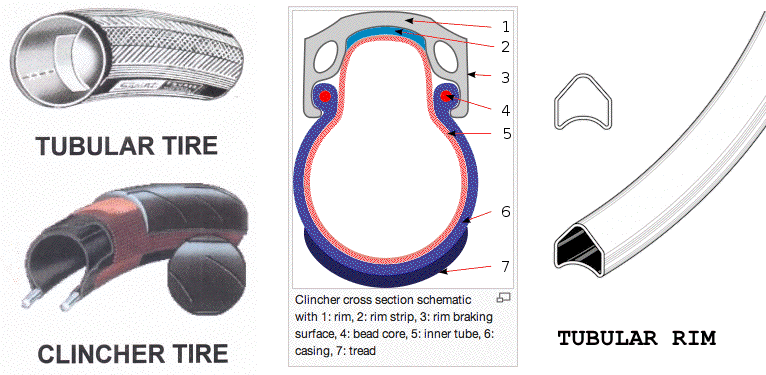 Place a knee in the tire and stretch, using your back.
Inspect base tape. If the base tape is covered with latex, attempt to scrape clean with a sharp edge. If scraping does not appear to remove any glue, do not scrape further. If scraping appears to clean and clear the tape, continue until full width of tape is finished.
Ideally, a bonded joint should have a little glue as possible but without “starving” the joint. It typically takes quite a bit of glue, however, to get a full bond with many tubulars. If you are using the typical tube of glue, you can expect to use one tube per new wheel set. If the rim has a good base coat already, you will need less glue.
Apply a single coat of glue to the base tape. Inflate tubular until base tape rolls outward. Handle the tire by the sidewalls. Pinch tire in the middle to form a “figure 8”. Apply a bead of glue a few centimeters at a time. Use an acid brush or tooth brush to spread the adhesive evenly across the base tape. Continue applying small sections of glue at a time until entire base tape is coated, including the area at valve.
Use care not to get glue on sidewall of tire. However, if glue does get on sidewall, do not remove with solvent. Simply allow drying and leave it alone. Hang tire off ground in a dust free environment allow to dry completely. A dry tire will be easier to handle when mounted to the rim.
It can be useful to hold the wheel in a truing stand. Place rags to protect the stand from glue. Set the calipers to drag slightly on the rim braking surface. This will keep the rim from rotating while glue is applied to the top.
If rim has no base coat, apply a first coat. Apply an adhesive bead a short section of rim. Spread evenly the full width of the rim with a clean brush. Allow this first coat to completely dry, ideally overnight. Apply an additional coat and allow this coat to dry as well. The third and perhaps final coat will be used to mount the tire while it is tacky, and not completely dry. If there is a poor fit between tire shape and rim shape, more coats may be required.
It is important the adhesive be applied fully to the edges of the rim. Most of the holding power will come from the outer edges of the tubular rim. Test edges for glue, as seen in the image below:
After applying the final coat the rim, allow to only partially dry. This may take 60 seconds to a few minutes, depending upon the glue and atmospheric conditions. Deflate the tubular until it is soft, but leave enough air so the tire holds its shape. This will help keep the sidewalls clean during mounting. Find a clean floor area to work on, such as tile, or even a toolbox lid. Do not mount on carpet, grass, or any surface that may contaminate the rim. Place the wheel vertically and place the valve in the valve hole. Begin to pull outward on the tire, holding the tire approximately 12-inches (30cm) to either side of the valve. Work the tire on a section at a time, while continuing to maintain pressure on the tire. The last section may be especially tight and difficult to get on the rim. Use thumb pressure to force tire onto rim.
After the tubular is mounted, IMMEDIATELY begin to true and align the tire on the rim. Sight the base tape on both sides of the rim. Generally, the base tape should appear even and centered. Check that the center of the tire is if fact centered on the rim. Pull and twist the tire as necessary. It can help to deflate the tire further to align, but re-inflate to check final alignment.
Check proper adhesion at this time. Roll the tire back in several places and inspect the glue at the rim and tire interface. Glue should be apparent at this area, as seen in the two images below.
A lack of glue will again show up at the edge of the tire and rim. The image below shows evidence of an inadequate amount of glue, referred to as a “starved joint”. Remove this tire and apply more glue to the rim.
After the tire is aligned, inflate tire fully. High tire pressure will help press the base tape fully in the radius of the rim. It can also help to roll the tire along the floor while applying downward pressure.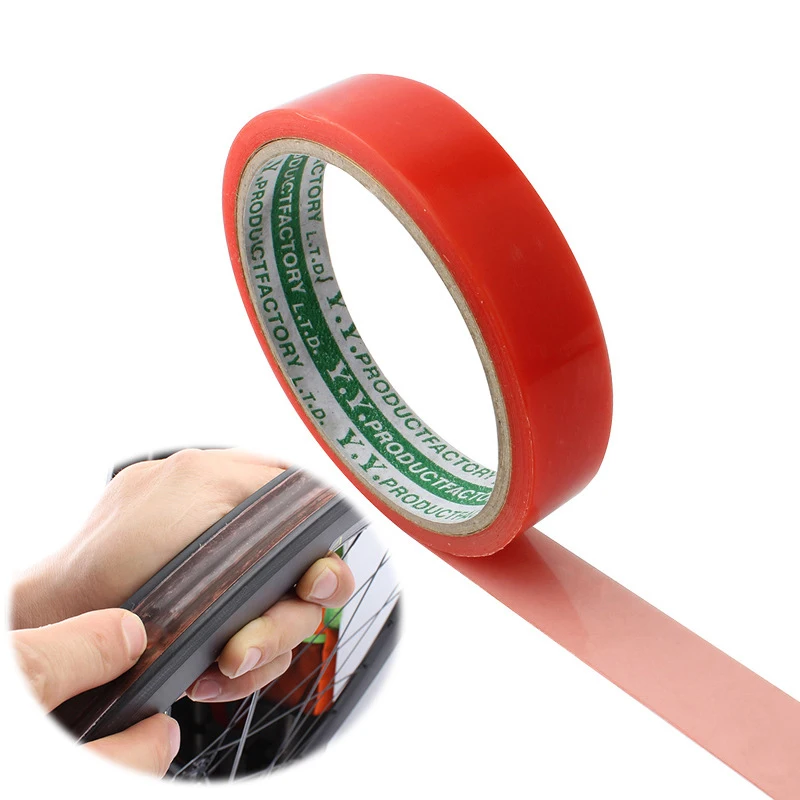
Clean braking surface of any glue. Use a strong solvent and a rag is the rim is aluminum. For carbon rims, wipe off glue as best possible without solvent.
Lastly, the tire MUST be allowed to fully cure. This will require time for the glue solvent to bleed out. It is recommended that a tire be allowed to cure for 24-hours. Gluing and using a tire in a short amount of time will not allow proper bonding, and can lead to failure, no matter the brand of glue.
3
The gluing procedures will vary depending upon of the condition of the used rim. If the rim already has a base coat, it typically can be reused. The old tire must first be removed. This may in some cases damage the tire and make it unusable. Deflate the tire completely. Pull back at the tire to work it loose in one spot, and then insert a dull edged straight tool, such as a steel tire lever or dull tipped screwdriver. Work the tool between the tire and rim.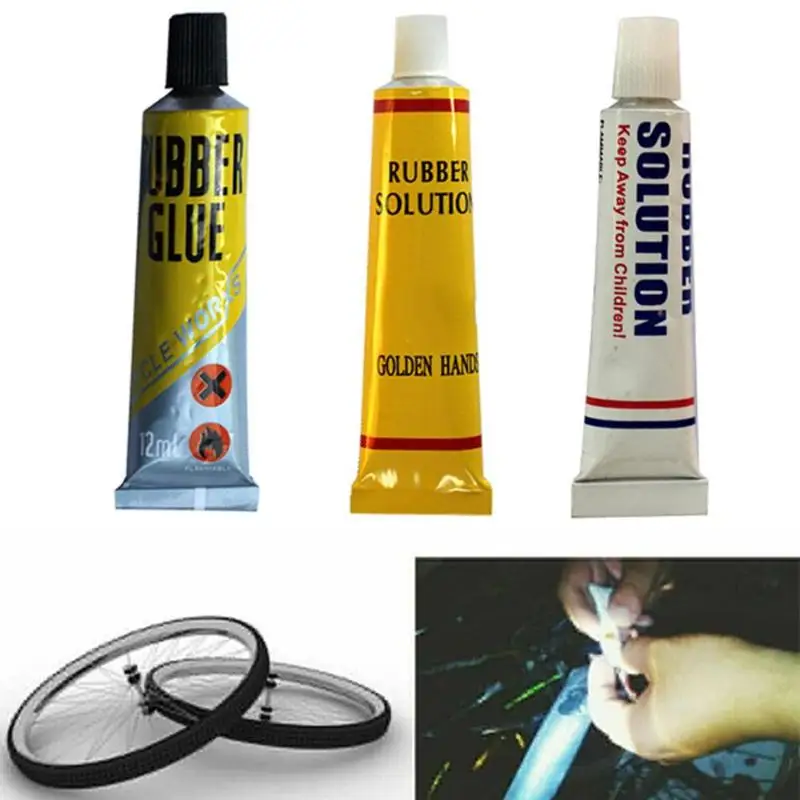 Lever the tool back and forth, then slide the tool along the rim to remove the tire.
The old tire, once removed, will give indications of the previous gluing. In the image below, the base tape shows very minimal contact.
There will often be a layer of dirt on the edges of used rims. Use a scraper and remove this glue and dirt. Remember, it is the edges that do most of the holding. It may be necessary to build up the previous coat. It is also possible that the old coat is thick in some area and bare in other. Apply glue accordingly. If the base coat is very old, or if it is dirty and contaminated, it should be stripped off. It is possible to use heavy bodied paint removers. Use a biodegradable remover when possible, and follow stripper directions.
NOTE: Do not use paint stripper on carbon rims. Many manufacturers recommend acetone to cut old glue. Contact manufacturer for their recommendations.
The base tape of a tubular is adhered to the tire with glue. If the base tape comes loose from the tire, it is difficult to repair to a “like new” condition. Use a thin coat of glue on the base tape. Install tire to a dry rim and inflate fully to push tape to rim.
For the average racer, gluing a tubular tyre is a messy ordeal. For pro team mechanics, it’s a part of virtually every day on a Grand Tour. This isn’t just because of punctures. Tyres wear out, pick up glass, wheels break and conditions change. When you have nine riders and each of them has a minimum of four bikes (race, two spare, and TT), that’s 36 bikes. 72 wheels right there. Add to that 10 pairs or more of spare wheels and you have a pile of work on your hands.
Presented here is a visual step-by-step guide on how, in my experience, most pro mechanics guarantee a safe, clean installation of a tubular. Lampre-Merida mechanic Moreno Bacchion was very helpful. Attempts at questions and answers were difficult as Moreno doesn’t speak English and our French didn’t seem to function too well either.
Observation can be a powerful teacher though. Sometimes words only get in the way. If you’re a visual learner, look through the photos and captions. If you prefer words, read below. Best of all would be to both read the guide below, then scroll through the gallery.
Bookmark this page if you only infrequently glue up a tyre for yourself. It shows a pro doing extremely efficient work. For us mortals, gluing a tyre is absolutely doable. It is a multi-day process though. So take your time and if you’re unsure, ask a mechanic you trust.
Also note that these instructions are for a new road tubular tyre and a tubular wheel that has already seen a tyre and glue. Ideally, for a new rim, build up three or more thin layers of glue over the course of several days. Apply a thin layer of glue to the tyre’s base tape as well – more if the tyre’s base is especially absorbent. Let each layer you apply dry overnight. For cyclocross or track racing, you’ll want to take extra steps.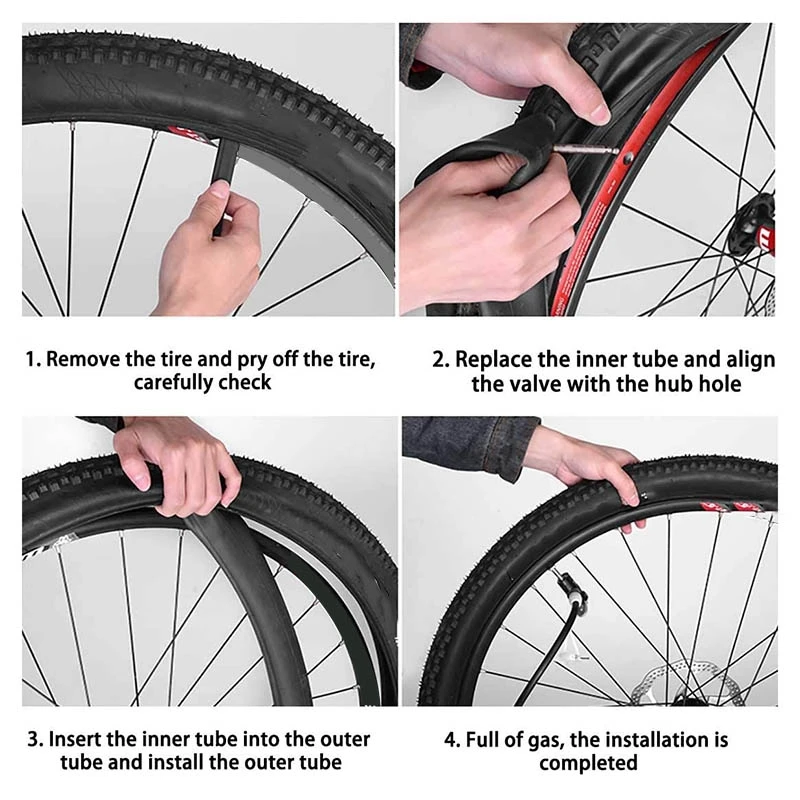
First you need to prepare your new tire. Pro team mechanics will glue up to 80 tires in advance for a race like the Tour. These are glued, stretched and have valve extenders installedNick Legan
If your loving wife or husband isn’t keen on having pre-glued tyres on hand year round, be sure to pre-glue the base tape of your tyre at least two days before installing it. This gives the glue one day to dry completely and another day to stretch it on a spare Fulcrum carbon deep section rim.
You know, all those extra carbon rims you have around? Keep at least one of them to stretch tyres after you’ve put on the initial layer of glue. This makes installation quite a bit easier.
This is Lampre-Merida’s Moreno Bacchion. On a rainy morning before the start of Stage 2 he was busy working, keeping his inventory of race wheels tip top. Graciously he let us photograph him while he worked. Here he scrapes excess dried glue off the rim using a utility knife.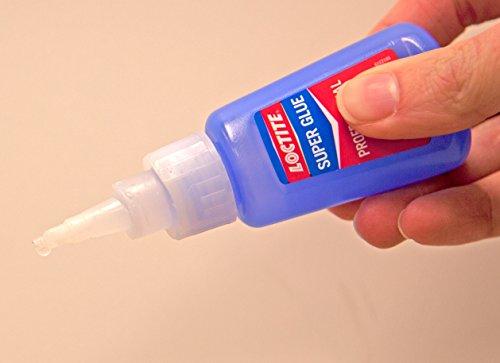 He also quickly checked that the wheel was trueNick Legan
Install your wheel in a truing stand. Check that it is true. Without a tyre is the best time to perform adjustments as you can easily verify that the wheel is true and round.
Next, clean the rim using a three-step process. First, scrape excess dried glue using an inexpensive knife/razor blade. Some glue is sure to squeeze out at the edge of the gluing surface if you’re applying sufficient glue.
Next up, Moreno uses a narrow wire brush to remove large pieces of dried glue and roughen up the surface so that it will better adhere to new layer he’ll put on nextNick Legan
Then grab a wire brush to simultaneously roughen the existing glue and knock off any chunks. Be sure to not scratch the braking surface. You’re only applying the brush to the gluing surface.
Last step in prepping the rim is a wiping the rim bed with a clean, solvent-soaked rag. This removes any debris and reactivates the existing glue on the rimNick Legan
Using a clean rag, apply a bit of solvent to clean off dried pieces and to re-activate the existing glue.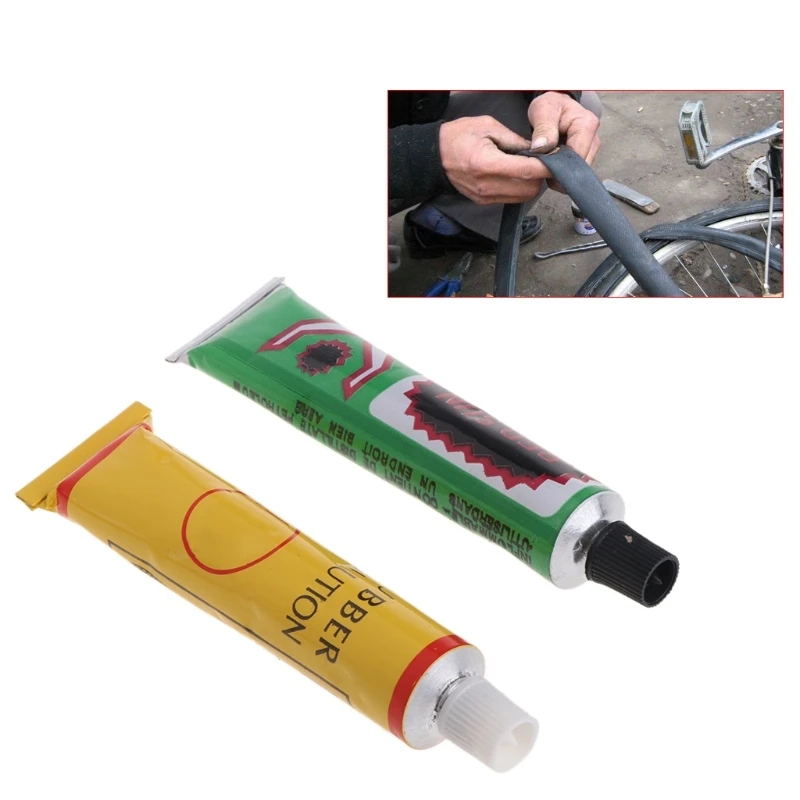 Acetone works well here. Be sure to go easy with the solvent though.
And anytime you’re gluing a tyre or working with solvent, do it outside or in a very well ventilated space. Also try not to touch any decals or paint with the solvent. The colors can run when using acetone.
A coffee break is always a good idea, especially before the can of glue is openedNick Legan
While some contend that beer helps when gluing tyres, I prefer a stimulant. In a most Italian move, Moreno’s colleague delivered him an espresso. He took five minutes to discuss the wet weather with his directeur sportif then got back to work.
Moreno uses a narrow paintbrush to apply a thin layer of glue to the rimNick Legan
Carefully, lovingly even, apply a thin layer of tubular glue to the rim. Moreno is using Continental. I like Vittoria Mastik. While the large can of Continental glue has a brush built into it, Moreno quickly threw that away.
Instead he used a small paintbrush that is a tad narrower than the width of the rim. He keeps it in a bottle with solvent in it to keep the glue from hardening.
Before moving on, Bacchion wipes any excess glue that may have gotten onto the brake trackNick Legan
After coating the entire gluing surface, Moreno then took his solvent rag and wiped off any excess glue that he may have accidentally applied to the braking surface.
While I don’t personally perform this step, Bacchion wipes the pre-glued tire with a bit of solventNick Legan
Take your tyre off the stretching rim and, using the same solvent rag, wipe the base tape of the tyre. This clears debris and “wakes up” the dried glue a bit. Set it aside in a clean spot. Make sure you have your valve extender installed if you need one for your rim.
A front wheel tray for a turbo trainer is a handy tool when installing a tubular.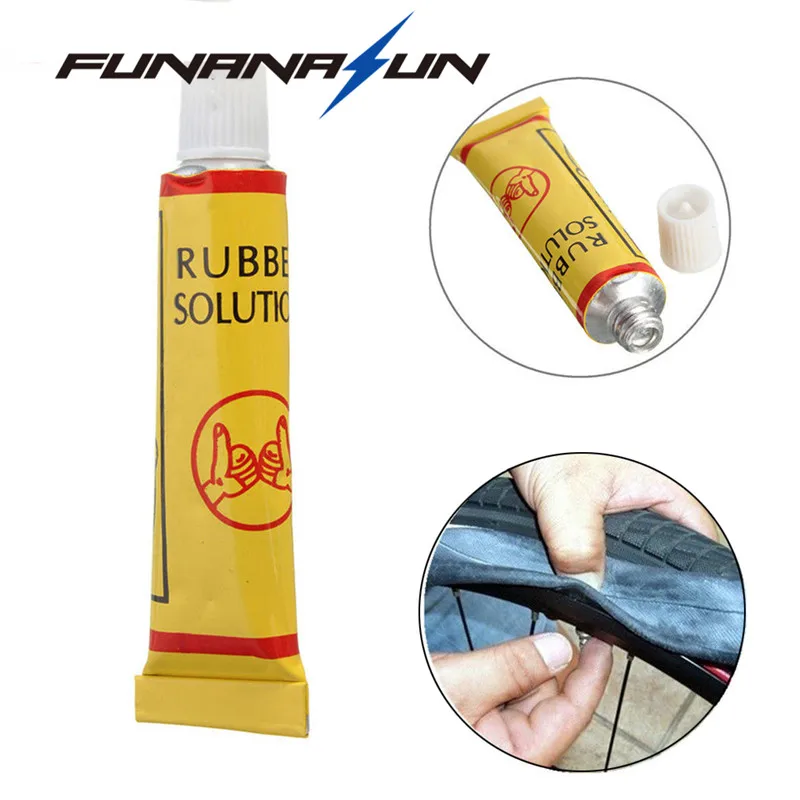 You can also use a piece of woodNick Legan
A few big deep breaths are always helpful when psyching up for the physicality of installing a tubular on a rim. I like to think strong thoughts, visualizing an Olympic clean and jerk competitor. Then I look in the mirror, come back to reality and hope that my emaciated cyclist arms can get the job done.
Moreno does this every day, so he took a moment and yawned instead. The savvy Italian then got out an Elite trainer front wheel tray to hold his wheel, carefully putting the valve hole at top dead center.
After putting the rim in the tray with the valve hole at top dead center, Bacchion begins to quickly and evenly stretch the tire onto the rimNick Legan
With enough air in the tyre to give it shape, put valve into the valve hole. From here the going gets tough. It’s important to put even tension on the tyre as you install it. Too much pressure on one side can make for a crooked valve stem and for spots that don’t adhere well and tick while riding.
He works his way down both sides simultaneously, applying even pressure as he goesNick Legan
There are no tricks here. It takes some grunt and strong wrists. Work your way around the rim, doing your best to center the tread of the tyre as you go. When you near the end, lift the wheel off the stand (or a piece of wood to keep the rim from collecting dirt) and try to pop the rest of the tyre onto the rim without smearing the glue.
Bacchion places the last section of tire on the rim, straightening it in the processNick Legan
With the tyre now on the rim, give the wheel a spin. You need to act quickly to get the tyre as straight as possible. A good place to start is with equal parts of the base tape showing on both sides and consistently around the circumference of the tire. If you’re using a high quality tyre, this should be enough. Sometimes you’ll need to adjust for a slightly wobbly tread.
Once you’re happy with your straight-as-an-arrow tyre placement, pump it up. Go to 100 psi or so (7 bars). Give it another quick spin to verify how awesome you are, then roll the wheel on the ground, pushing the tyreinto the gluing surface using your body weight. Start at the valve stem and roll it back and forth before making your way around the tire.
After inflating the tire and giving it a quick spin to ensure the tread is straight, Bacchion pushes the tire into the gluing surface, forcing the tire into the rim bedNick Legan
Continental tyres are among the tightest tubulars produced. They require a lot of strength to install in a single go. Stretching your tyre on a clean rim after you’ve allowed the base tape glue to dry is the single best thing you can do to make this process easier.
Inflate it to 100 psi and leave it overnight before you need to stick it to your rim. Vittoria and other tyres made in the same factory are quite a bit looser and don’t always need to be stretched.
Lastly, the Italian mechanic wiped off any glue that seeped out after he pressed the tire into the rim. DoneNick Legan
Nothing says professional like an expertly glued tubular tyre. Nothing says amateur like globs of glue at the top of the brake track. So grab that solvent rag from before and make your way around the wheel. Again, be careful to avoid rim stickers.
Set the results of your labor aside overnight to dry before riding, at least 12 hours! Now it’s time for that beer.
Another season of changing shoes is approaching. And you may remember that on one of the tires after the last winter/summer there is a jamb - a small bump. I don’t want to run to the store for the sake of one new tire. We understand. Or maybe it looks even better if repaired?
Yes, not every wheel that has met with a nail, rebar sticking out of the ground or a sharp stone on the road is considered damaged. Everything, of course, depends on the scale of the damage and its location on the tire itself. Some are easily repaired, while others are simply impossible to do - the tire can only be sent to the trash. nine0003
A bulge on a wheel, referred to by drivers as a bump or bulge, is the most common tire sidewall defect. It appears due to a collision with an obstacle or after falling into a pit, more often at high speed. The threads of the sidewall carcass are easily damaged by impact, and the tire at this point can no longer hold the load and air pressure - swelling appears. A small bump sooner or later turns into a big one, and driving with such a defect is dangerous - the wheel can shoot at any moment. At high speed, this is fraught with loss of control, departure from the road and a rollover. nine0003
The quality of roads in Kazakhstan contributes to the appearance of bulges on tires
Some types of bulges are repairable, although this is a temporary measure. Not a single patch can restore the factory rigidity. Ideally, change the tire.
Special cord patches can extend the life of a tire with a herniation, even if the swelling has appeared on the tread. The sidewall is a different story. If the swelling appeared at a distance of more than 40 mm from the side, it can be repaired. If not, then the wheel needs to be replaced. Blisters on low profile tires are most often non-repairable. nine0003
For maximum safety when riding with a repaired bump, insert the tube. This is an inexpensive and reliable solution. On our market, you can find cameras made in China and Russia, the latter are slightly more expensive, but also of better quality.
The elimination of a side cut is a serious operation, therefore, as in the case of a bump, you will have to go to the professionals. We need cord patches, fortunately in our time they are of different sizes and with a different number of layers. And if you do it wisely, then you can't do without special tools and vulcanization. nine0003
A cut, by the way, cannot be healed in all cases. If the gap is in the shoulder area of the tire, it is unlikely that anyone will undertake to repair it, since no guarantees can be given here. However, our Kulibins take on even the most difficult cases, cutting out parts of the sidewalls from the tires and even weaving the cord on their own.
Tire overhaul. We would not put such a wheel on ourselves
Low profile tires can be repaired, but more difficult. A tear in the sidewall is easier to seal on tires with a medium or high profile. nine0003
Sometimes a cut is confused with a pluck. This is when the outer layer of the sidewall caught on something sharp, a tear formed, but the frame itself remained intact. There is nothing wrong with that, although the drivers at the tire fitting company successfully repair the cut, for which they take it accordingly.
If a piece of rubber remains on the sidewall, then glue it with ordinary superglue (101st). If it came off, then it is better to cover it with raw rubber and vulcanize. Leaving the pluck bare is not recommended, because the tire carcass, often consisting of a metal cord, will quickly corrode. nine0003
In Europe, defective or used tires are perforated before being sent for scrap to prevent their resale and possible operation. But they don’t know that we have such holes on the sidewall patched once or twice
Cuts and hernias are not the only possible damage to the side of the tire. You can also spoil the side ring, in the process of changing shoes, for example. If it’s for garlic, then such a tire is already dangerous. Sooner or later, the tire pressure and the load in motion will start to squeeze the rubber off the rim - a wheel explosion can occur. nine0003
This ailment is repaired if the wire ring - the base - is intact. There are no special technologies and materials to correct this particular problem, but most often craftsmen use a two-component composition for chemical (also called cold) vulcanization. After mixing, the mass is pressed into a fat-free damage. Compound manufacturers recommend waiting 72 hours before mounting a tire. Of course, our masters do not pay attention to this condition - they put the tire right away. And it’s good if the wheel is flat because of this at night in the parking lot, and not on the road. nine0003
If the side ring tears are barely noticeable, but the wheel still deflates, then you can use a special liquid - a bead seal designed to seal a tubeless tire.
These seals have been used in motorsport for some time. In particular, in the American Formula D Drift Series, drivers used compounds to keep the tire on the rim even with minimal tire pressure. Now they are banned.
Pay attention to the left rear wheel of the Nissan Silvia S13. Due to too low pressure, it was literally taken off the disk under load
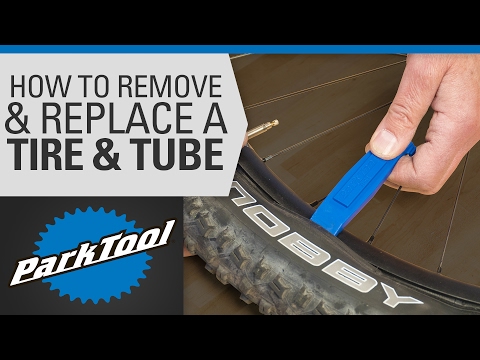
Every schoolchild has faced this problem when patching the inner tube of his bike after hitting something sharp. Repairing a car tire puncture with your own hands will also not be difficult even on the road. But for this you will need a pump (or compressor) and a universal tire repair kit with harnesses. All this is sold at any car market or gas station.
Repairing a tire on the side of the road with harnesses
The process is simple. If we are talking about the front wheels, then in most cases the wheel can not even be removed, it is enough to turn the steering wheel in the right direction, find the puncture site and carry out repairs. First, the hole is cleaned with a helical awl from the set. The tourniquet itself is smeared with glue and tucked into the eye of the awl, after which it is inserted into the tire hole. With a sharp movement, the tool is removed, and the tourniquet remains in place and clogs the hole. The tails are cut with a knife, but not at the root, it is recommended to leave about 20 mm. The tire is inflated and checked. nine0003
Sometimes a nail or self-tapping screw clogs the hole by itself, remaining in it. If you see a hat in a tread, do not rush to pull it out. While the pressure is holding, move to vulcanize. And sometimes they drive with a screw in a tire for weeks.
Repair of a puncture at a tire shop
Punctures are also repaired with harnesses at a specialized service, although among professionals such repairs are not considered long-term. After a few months, the flagella dry out and can let air through. There are more advanced methods like cold and hot vulcanization. The latter is more reliable. In this case, the hole is sealed with an elastic patch, and the funnel from a foreign object is filled with a special compound. After that, a vulcanizer is put on the tire, it heats up the rubber and solders it. nine0003
In addition to the plaster, the puncture is also repaired with special cord fungi. Craftsmen process the puncture site: drill it and treat the surface with a tool to roughen it. Then the repair area is lubricated with glue (it is also called cement) and a fungus is introduced. This is done from the inside of the tire. The cap of the fungus is rolled, and the excess legs are simply cut off from the outside.
Puncture repair with sealant
With the advent of tubeless wheels, and later run flat tires, many automakers began to abandon spare wheels. Instead, repair kits with compressors are supplied with the machines. A repair kit is essentially a bottle of pressurized sealant. Later, such spray cans began to appear on the shelves of ordinary car dealerships. nine0003
This method has not taken root in the CIS, because the condition of the roads makes it necessary to have at least a stowaway in the kit, but it can also be considered as a method of repair on the road.
The car must be jacked up and sealant must be pumped into the damaged wheel through the nipple. Next, you should spin the wheel, then pump it up, lower the car and drive a few hundred meters. If the tire tightness has not been restored, repeat the procedure.
For commercial vehicles, cutting the tread with a special device (regrower) is a common thing. Moreover, such tire retreading is provided by the factory (marked REGROOVABLE on the sidewall) to increase the service life. But there are entrepreneurs who undertake to deepen the grooves in tires for passenger cars. But they are not intended for such an operation. Often used tires for sale are “refreshed” in this way. Be careful!
What is the threat?
The worst option is that the retreaded tire will shoot out on the road, as the master can damage the undertread layer when deepening the grooves. Such a tire will not be able to hold pressure at some point. There will be a boom! At best, the tire will indeed last a little longer, but is the game worth the candle? We think it's not worth it.
How is cutting done?
A regrower is used to cut the tread.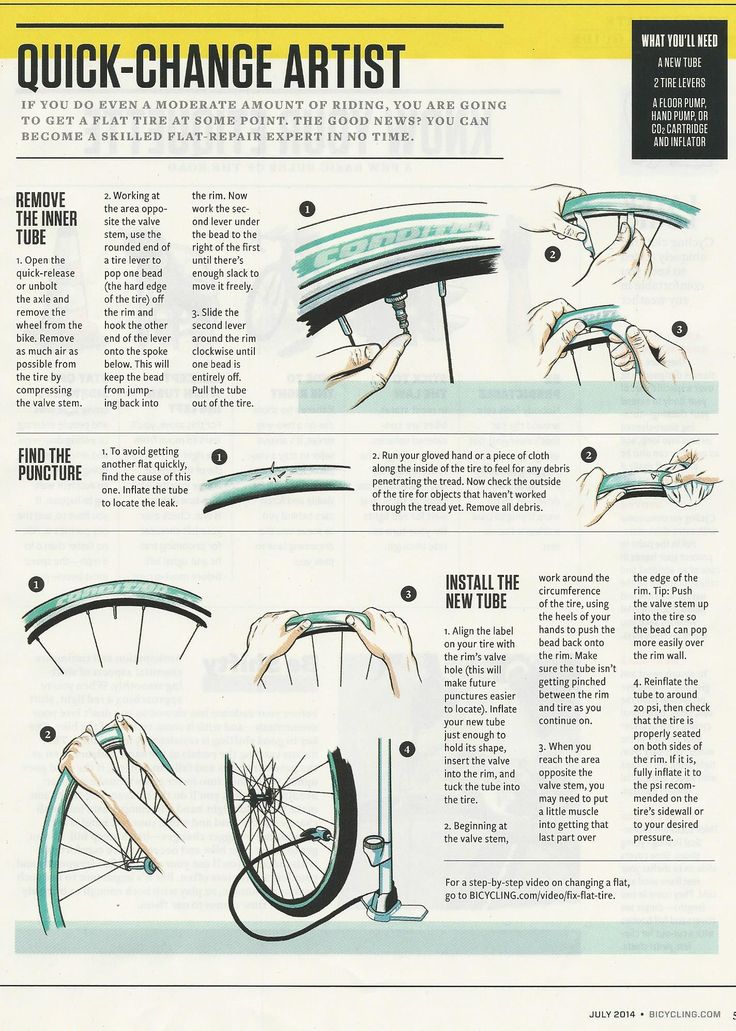 Roughly speaking, this is a large soldering iron with interchangeable tips of various shapes. It goes through rubber like a knife through butter. nine0003
If the tire is for passenger cars, then it is worth taking on a regrower only in one case - when part of the tread pattern was welded with "new" rubber during repair. This is where threading comes in handy in order to restore the grooves and symmetry of the tread.
Vehicle operation is prohibited if:
- tires have a residual tread height of less than 1.6 mm; nine0131
- tires have punctures, cuts, ruptures that expose the cord, as well as delamination of the carcass, delamination of the tread and sidewall;
- tires in size or load capacity do not match the car model;
- tires of various sizes, designs (radial, diagonal, chamber, tubeless), models, with different tread patterns, winter and summer, studded and non-studded, new and restored, are installed on one axle of the car; nine0131
- Tires retreaded according to the second repair class are installed on the front axle.
What is a second class repair?
This is the case when the carcass of the tire is restored after serious damage. A side cut (or tear) is a serious damage to the tire carcass.
Repairing a tire side cut by applying a patch or welding the cut yourself will not lead to anything good. Poor repairs will put you at unnecessary risk to your life instead of saving you money.
A side cut on a tire is a very common problem, and many car owners solve this problem by simply replacing the cut tire with a new one. Of course, this way of solving the problem is ideal if you have extra money, since new tires are not cheap. The desire to save money, that is, to seal a side cut on a tire with your own hands, is an extreme on the other hand, since it is impossible to repair a side cut at a high level at home in the absence of high-quality equipment and materials. nine0003
If you are wondering if you can seal up a side cut, then the answer is - of course, yes. Only an experienced master in a tire shop can make such repairs well. And for those who are looking on the Internet for how to seal a side cut of a tire on their own and whether it is possible to seal a side cut on a tire with their own hands, and buys special tire change kits for such repairs, we want to say: “There is no need to take such risks!”. If the repair of the cut is done poorly, then at the most unexpected moment you may burst the tire. Imagine what would happen if you were driving at high speed in heavy traffic! Therefore, it is better to entrust this matter to professionals. nine0003
Tire fitters use hot and cold vulcanizing tires to repair side cuts. Hot vulcanization refers to the following process:
The cut site is cleaned of dirt and degreased;
Raw rubber is taken (a special rubber compound with a plastic structure) and the cut itself is filled with it;
· A place filled with raw rubber is heated to very high temperatures, while the rubber melts and is bonded to the tire. nine0003
In order to make the repair of the side cut even better, as well as to give the tire stiffness lost during the cut, a cord patch is attached to its inner side by cold vulcanization. This term refers to the use of a special chemical adhesive. In order for the patch to stick well, it is necessary to wait about 24-36 hours, and only after that it is possible to install the repaired tire and its further operation.