Found it somewhere cheaper? We will price match any advertised, in stock, shipped price on any item we carry!
Move your mouse over image or click to enlarge
PlanetSXS is not affiliated with UTV Manufacturers in any way. References within this web site to Polaris, Yamaha, Can-Am, Honda, Arctic Cat, John Deere and UTV and/or Side by Side Manufacturers is for the convenience of the public, and does not constitute endorsement or recommendation by PlanetSXS.
PlanetSXS offers parts and accessories directly from the manufacturers and from our distributors.
PlanetSXS is not responsible for any problems, issues or damages as a result from aftermarket accessories, parts, wheels, tires and other/all products purchased from PlanetSXS.com and installed on your/other's vehicles.
FREE UPS Ground Shipping Promotion on Orders Over $99.00
• Free UPS ground shipping promotion is valid only on orders shipped to the lower 48 contiguous continental United States.
• Order total of $99.00 for Ground Shipping must be reached with product purchases only and will not include shipping, overweight charges or other miscellaneous fees. Free shipping order value is calculated on the total amount of your order excluding overweight packages.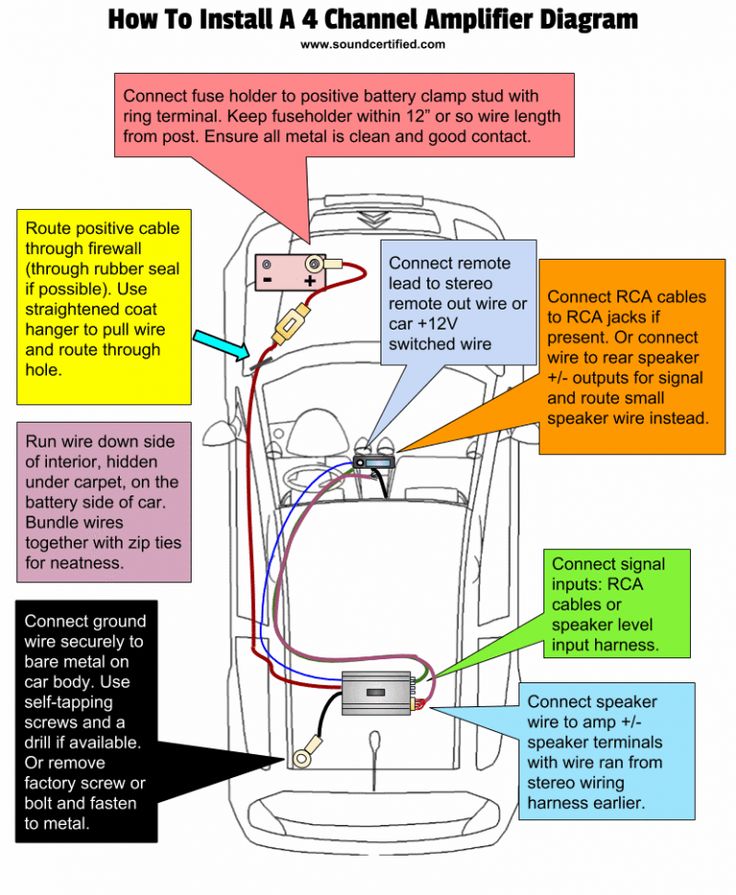 Over-sized packages and special shipping fees are not waived with this offer. Charges are subject to change. Confirm your shipping charge and method at time of order.
• Offer does not apply to orders shipping to Hawaii, Alaska, Puerto Rico, Canada, APO/FPO, Postal Office Box or any international orders.
Exceptions to FREE Shipping Promotion
• Offer does not apply to orders shipping to Hawaii, Alaska, Puerto Rico, Canada, APO/FPO, Postal Office Box or any international orders.
• Hazardous chemicals, aerosols and batteries must be sent ground due to shipping carrier regulations. Regular shipping charges will apply.
• Orders are held to ship complete
You may return most new, unopened items for a full refund within 30 days of delivery. These items should be in their original packaging and have their serial number or UPC. Special order returns are at our discretion on a case by case basis. If you would like to make a return or exchange, you must contact us by phone or email and submit an RMA (Return Merchandise Authorization) number before returning your items. This RMA number is usually written on the bill of lading (issued by the mail carrier's shipping department) or somewhere on the packaging. If you cannot find your RMA, one may be obtained by contacting us by phone or email.
You will be responsible for any shipping costs when returning an item.
All returns will be subject to a 15% restocking fee. Remember, if you would like to return or exchange your item, you must contact us before sending it back. Items returned to us without notification will not be eligible for a refund or exchange.
No returns on electrical items including audio
Returns will not be accepted on items that are:
From $329.00
Sale
From $266. 90 $314.95
From $775.00
$699.95
$379.95
$799.95
From $700.00
$649.95
$451.99
From $700.00
From $434.95
$519.95
Table Of Contents
 How To Wire A ATV Winch Switch:
The Winch Switch needs to be wired accurately to make the winch work properly. You will need power for the winch, switch, and receiver.
How to Wire a Light Switch? 5 Smart...
Please enable JavaScript
How to Wire a Light Switch? 5 Smart Tips You Should Know
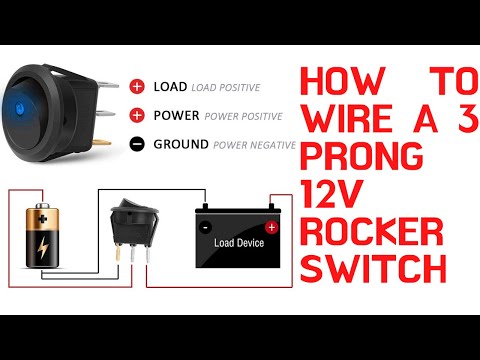
Connect the black wire to the battery positive terminal (red wire to negative terminal) and connect the white wire to the switch ground terminal.
Connect red and green wires to the receiver ground terminal.
Install the switch in the desired location. Connect the power to the winch and check to make sure it works properly.
If not, consult your winching manual for further instructions because there could be some extra wiring, but usually, this is a complex process of wiring a winch switch.
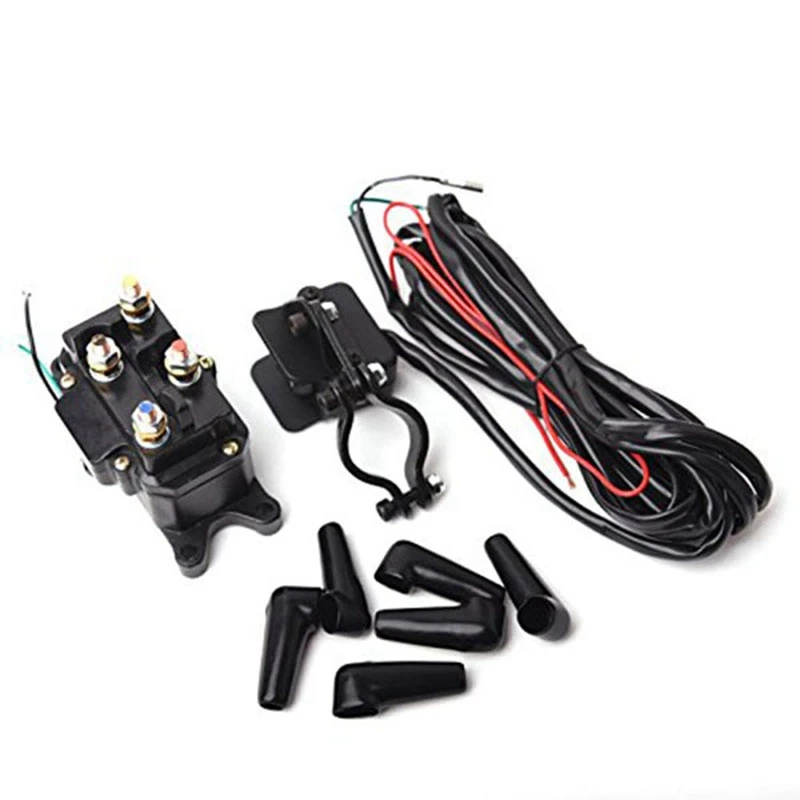
Best Four Types For Winch Wiring1. How To Wire A ATV Winch Switch:source: DIY chatroomATV winch switches can be wired in a couple of ways. The first way is to use an inline switch and the second way is to use a remote switch.
If using an inline switch, connect the black wire to the battery positive terminal and the white wire to the switch ground terminal.
Connect the red and green wires to the receiver ground terminal.
If using a remote switch, connect the black wire to the battery positive terminal and the white wire to the switch ground terminal.
Connect the red and green wires to the receiver ground terminal.
2. How To Wire SUVs Winch switchTo wire SUVs winch switch, you will need to connect the black wire to the battery positive terminal and the white wire to the switch ground terminal.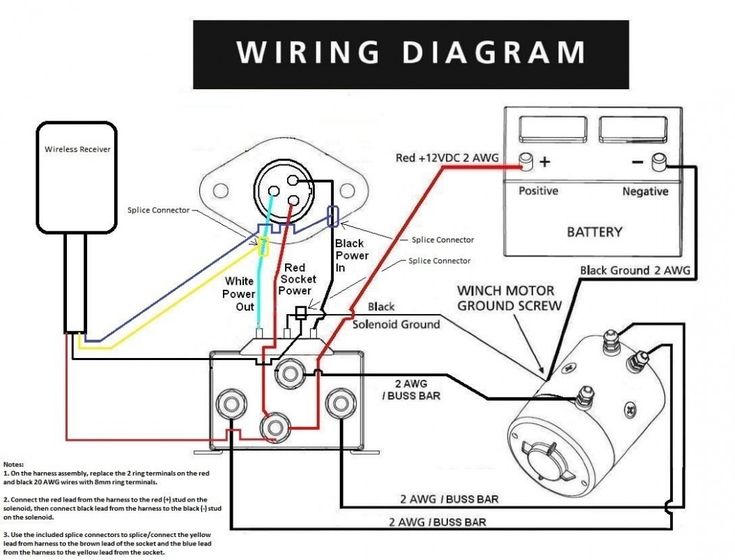
Connect the red and green wires to the receiver ground terminal.
3. How To Wire Remote Winch SwitchRemote winch switches are more complicated to wire because they have some extra wiring work.
First, connect the black wire to the battery positive terminal to wire it up. Connect the white wire to the switch ground terminal.
Next, connect the red and green wires to the receiver ground terminal.
Please make sure the wires are long enough to reach the switch without stretching them too much.
Finally, connect the black and white wires of the remote switch.
This will activate the switch. Please make sure the switch is correctly aligned before you plug it in.
Wire Winch Power Switch:
Winch Power switches are more complicated to wire because they need two separate circuits.
The first circuit is for the winch power, and the second is for the remote switch.
Rest the process is the same as wiring a remote winch switch.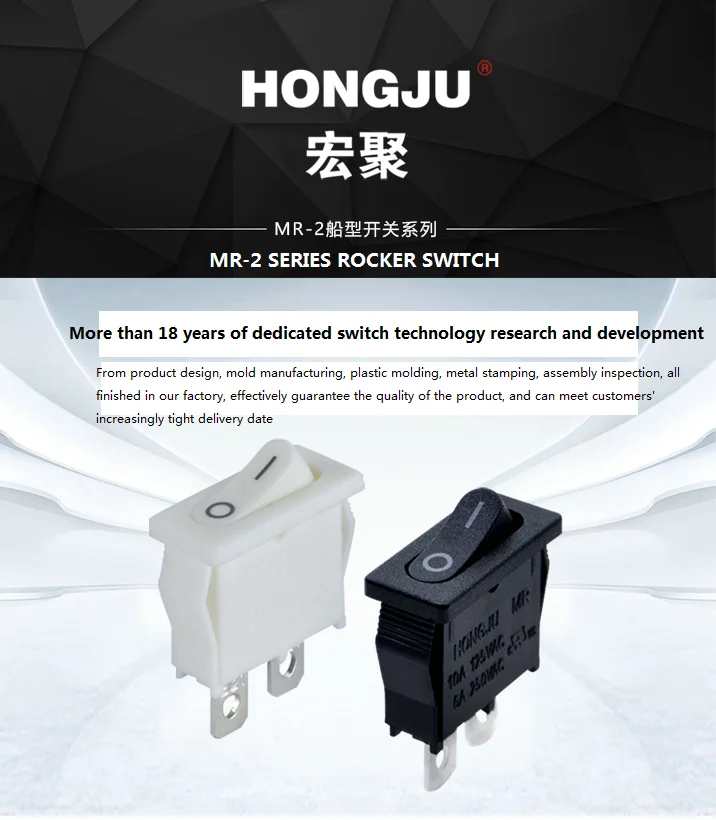 You only have to follow all the steps for both switches.
Mictuning winch switches are used to control the mictuning winch.
To wire it up, connect the black and white wire respectively and then connect the other two wires to the ignition wire.
Please make sure the black and white wires are long enough to reach the switch without having to stretch them too much.
Remote winch switches are used to control the mictuning winches from a distance.
So, there will be two extra wires if you are using a remote control winch which will also need to be connected with a remote switch button, same as a power switch.
What If Your Wiring Doesn’t work:If your wiring does not work, a few things can be checked:
1. Ensure all of the wires are correctly connected and long enough to reach the switch without stretching them too much.
2. Please make sure the switch is correctly aligned before plugging it in.
3. If everything else checks out and the wiring still does not work, it may be necessary to replace the switch.
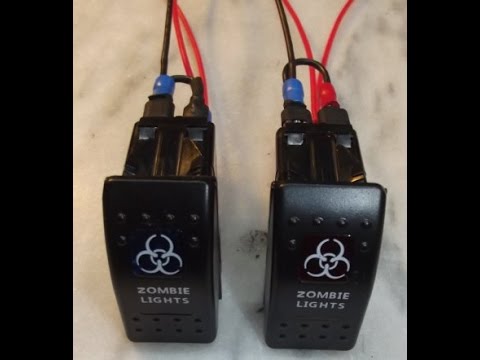
Rocker switches are used to control the speed of the winch.
To wire it up, first, connect one black wire to the power terminal and one white wire to the neutral terminal.
Then connect the other two wires to the rocker switch, and that’s all you have to do to take on the rocker switch onboard.
2. How To Test A Winch SwitchTo test a winch switch, first, make sure the power is turned on to the winch.
Then, manually move the switch to the desired position. If the switch works, your wiring is correct, and you can move on to the next step.
If the switch does not work, there may be a problem with the switch or with the wiring. In this case, it may be necessary to replace the switch.
3. How To Fix A Winch SwitchIf the switch does not work, it may be necessary to replace it.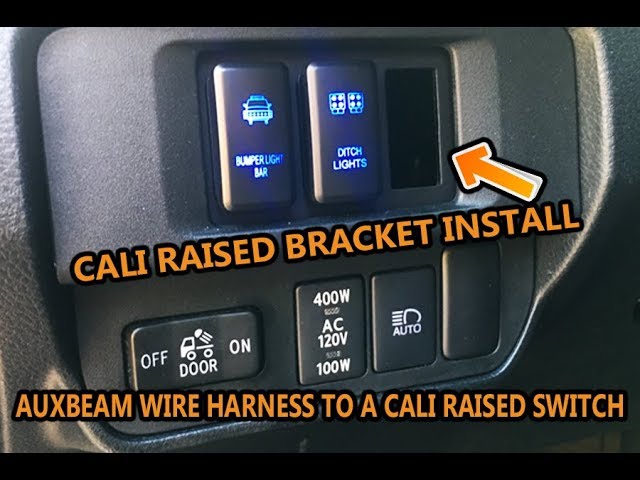
To replace the switch, first, disconnect the wires from the old switch and connect them to the new switch.
Then, reattach the cover and screws.
If the switch works but does not turn the winch, it may be necessary to adjust the cable tension.
Loosen the cable clamp and pull the cable until it is slightly tight.
Reattach the clamp and check to make sure the winch turns. If not, loosen the cable further and reattach the clamp again. Finally, tighten the cable as needed.
If the switch does not work and the winch turns when the lever is pulled, replacing the cable or switch may be necessary.
Conclusion:Wiring a winch is a piece of cake if you know how to connect the wire accurately.
The most common issue with a winch switch is that the cable is not tight enough, so make sure to adjust it as needed.
If the switch does not work, you may have to replace it. The process is the same either way.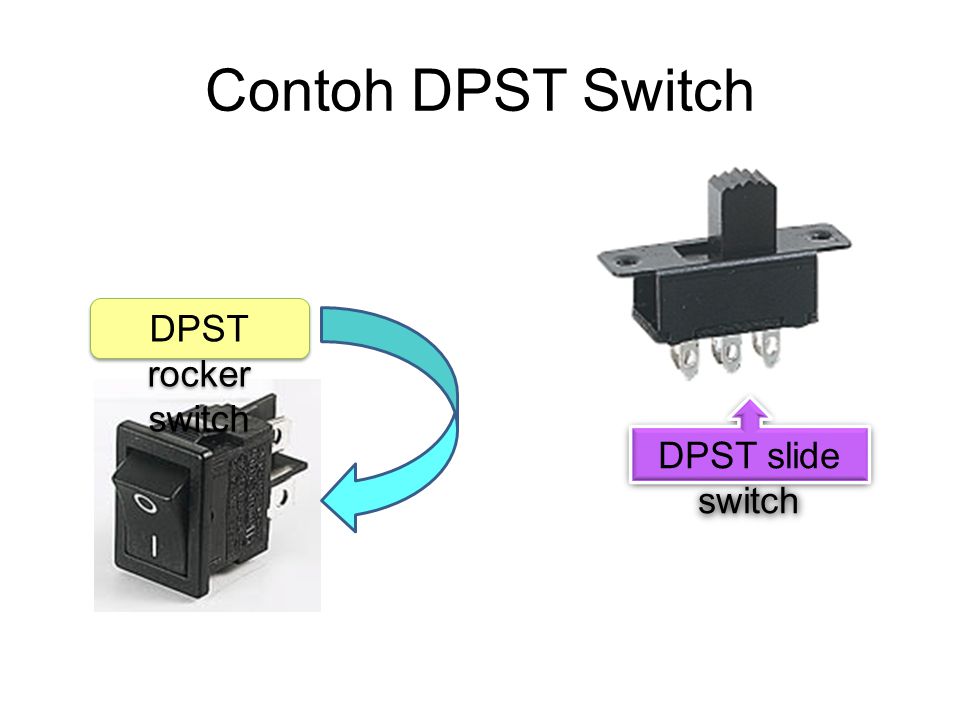
So, wire your winch switch with ease, and to make it work correctly, follow all the mentioned steps.
Video Guide:Also ReadGeorge Carter
Hey, It’s George here! I have been working with heavy-duty machines for 10 years now. I started this blog to help others and let them know better about the different heavy duty machines, how they work how we have been doing over the years. I am hopeful you will find this blog helpful for you and get the best recommendations according to my experience.
The use of button modules for switching electrical circuits is not always convenient due to the difficulty of visual position control, especially if there is no light indication on the buttons. Rocker switches are used in applications where constant visual position control is required. The principle of their operation does not differ from push-button ones, but at the same time you can immediately see in what position the switch is.
There are two-position (on / off) and three-position (on / off / on II) devices, the use of one or another type of switch is determined by the requirement for controlling the operation of electrical equipment or an automation and monitoring circuit. The body of the switches and the control link are made of high quality dielectric material, which is resistant to significant mechanical loads in a given temperature range.
| Series | Key features | Material | Mechanical | PDF | |
|---|---|---|---|---|---|
|
|
| Miniature rocker switch in single pole configuration Wave soldering Max. current / voltage with resistive load: 0.4 A 20 V AC or DC Protected against electrostatic discharge (ESD) up to 10 kV Possibility of panel installation | Housing: 4/6UL94-V0, high temperature thermoplastic Backstage: high temperature thermoplastic Contacts: gold-plated brass Terminals: Tin plated brass over nickel layer | Working temperature: Humidity test: EC 512-4 Service life at full load for:
Impact resistance: | |
|
|
| Subminiature rocker switch in single pole and double pole configuration Large variety of contact materials Same wiring diagram on PCB as TL, TP and TG miniature switches Wave soldering Max. current/voltage with resistive load: current/voltage with resistive load:
| Housing: PBT Drawstring: polyamide Contacts and terminals:
| Working temperature: Humidity test: 21 days at 95% RH (NFC 20-603 - IEC 68-2-3) | |
|
S-SR |
| Rocker switch in single pole and double pole configuration Possibility of panel installation UL approved Terminal outlet on the side or bottom Max. current / voltage with resistive load:
| Housing and cover: UL94-VO, glass-filled polyamide Drawstring: polyamide Contacts and terminals:
| Working temperature: Storage temperature: Humidity test: | |
|
AS |
| Rocker switch in single pole configuration Black body, various backstage colors to choose from Connection with a soldering lug or directly to the PCB via terminals double insulation UL and CSA approved Max.
| Body: PES Drawstring: polyamide Contacts and terminals:
| Working temperature: Service life: | |
|
MT |
| Rocker switch 1 pole 2 position Max. current / voltage with resistive load:
Possible degree of protection: IP68 Connection with a soldering lug or directly to the PCB via terminals Possibility of installation in a panel with a threaded bushing | Drawstring: Nylon 6/6 "soft touch" Finish: matt black or bright chrome Contacts and terminals:
Sleeve: chrome-plated brass Contacts:
| Working temperature: Service life: | |
|
7000 |
| Rocker switch in single pole and double pole configuration Numerous designs for panel or PCB mounting Approvals: VDE, UL and CSA Max.
| Housing: diallyl phthalate or high temperature thermoplastic Drawstring: polyamide | Working temperature: Service life: | |
|
57000 |
| Subminiature rocker switch in single pole and double pole configuration Approved: VDE and CSA Connection with a soldering lug or directly to the PCB via terminals Terminal outlet on the side or bottom Various shapes and colors of curtains Possibility of panel installation Class I Current / voltage with resistive load: 3 A 250 V AC - 6 A 125 V AC | Housing: diallyl phthalate Drawstring: polyamide Contacts: silver Finish: stainless steel or tin-plated steel | Working temperature: Service life: | |
|
FM |
| Rocker switch in single pole configuration with or without illumination Soldering lug connection, directly to PCB via terminals or "Quick connect" technology class II Approved: VDE and UL Humidity protection double housing | Body, yoke and frame: PA6/6 Contacts: silver Terminals: silver plated | Working temperature: Life time: 10,000 cycles | |
|
S |
| Rocker switch 2 or 3 positions in single pole and double pole configuration Approved: UL Terminal outlet on the side or bottom Possibility of panel installation Lots of backstage options Max.
| Housing and coating: UL94-VO, glass-filled polyamide or PES Drawstring: polyamide Contacts:
| Working temperature: Storage temperature: Moisture test:
| |
|
SR |
| Rocker switch in single pole and double pole configuration Approved: UL Lots of backstage options Electrostatic discharge (ESD) protection - optional Soldering: 300 °C 5 s Max.
| Housing and coating: UL94-VO, glass-filled polyamide or PES Drawstring: polyamide Contacts:
| Working temperature: Storage temperature: Humidity test:
| |
To place an order, you can contact our managers through the contact form or write to [email protected].
Offices in Moscow, St. Petersburg and other Russian cities.
Start failure. Councils for the operation of the ATV.
Often, owners of off-road vehicles are faced with the problem of starting the engine after storage.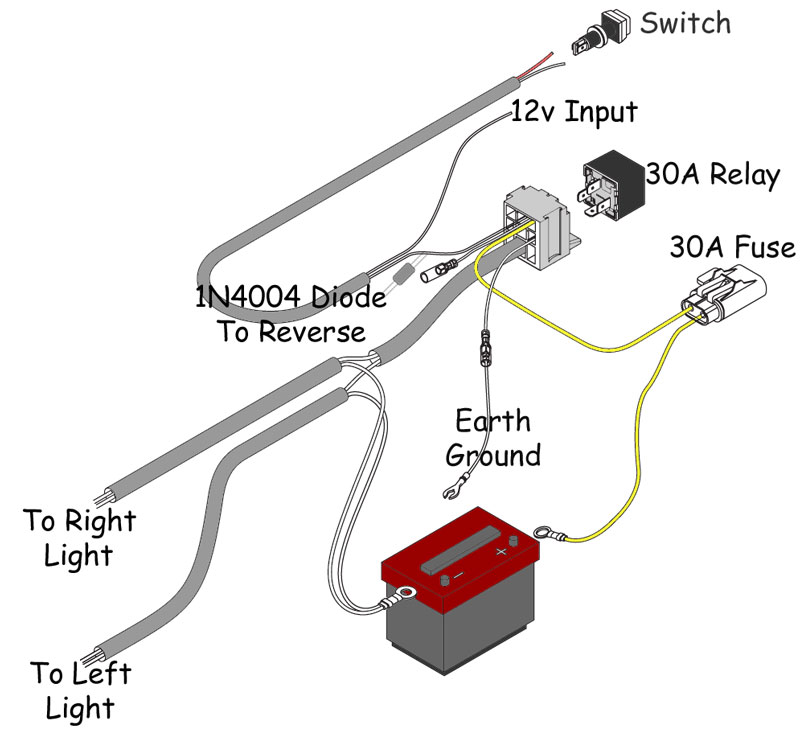
The reasons for the failure to start can be different, and it is worth looking into them:
If the ATV has not been used for a month, and the battery terminal has not been removed before storage, there is a chance that the battery is dead. Experts even have the concept of "self-discharge of the battery."
Extremely low or high temperatures can also cause the battery to drain quickly.
When the ignition is switched on, the panel must glow brightly! If this does not happen, the battery is discharged and when you press the starter button, the panel goes out. The battery needs to be charged!
Battery requires:
Checking the position of the emergency engine shutdown button.
The emergency engine stop button is located on the left handlebar of the ATV. When it is pressed, the starter is blocked on the ATV, and on injection models of the ATV, the button turns off the fuel pump.
Checking the ATV fuel system.
Checking the fuel in the tank. Fuel may partially evaporate or leak if the fuel line hoses are damaged.
If the ATV is stored in a cold room, there is a possibility that water may freeze in the gasoline poured into the tank, which got there when refueling equipment in warm weather. Particles of ice block the access of fuel.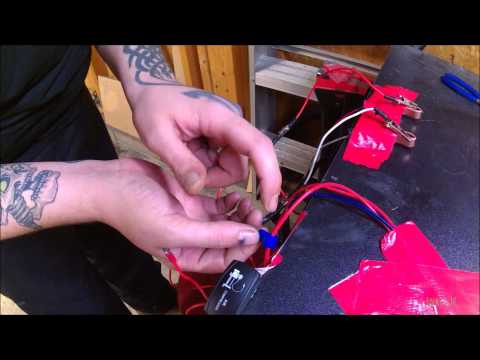
The next step is to test the filter.
Fuel filters are used to filter and remove particles of dust, rust, dirt, which are found in metal containers for storing and transporting fuel. The main reason for water and particles to enter the fuel filter is refueling from untested containers.
The presence of foreign particles in the filter is one of the main causes of poor starting of the engine. If there is frozen water in the filter, the filter must be heated and the melted water should be poured out. If rust or dirt is found in it, the filter should be replaced with a new one:

 4 A 20 V AC or DC
  current / voltage with resistive load:
  current / voltage with resistive load:
 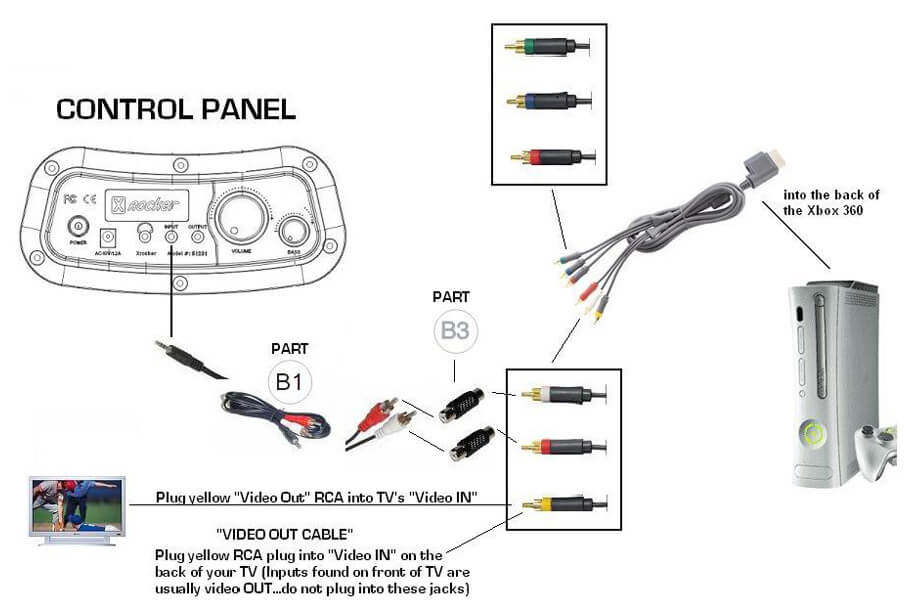 current / voltage with resistive load:
  current / voltage with resistive load: