All bike tires slowly leak air every day. Even if you’re an occasional rider, and you only take your bike down from the bike rack once a week, the tire pressure will still decrease. Before you ride, you should always check your tires’ PSI and, if needed, inflate them with a floor bike pump or a handheld pump.
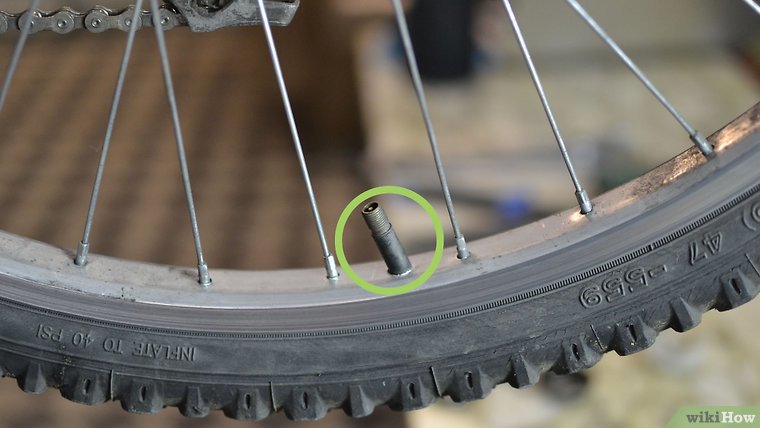
On the sidewalls of your tires, you’ll see the manufacturer’s recommended pressure range for PSI (pounds per square inch). Different bike tires have different ranges, and narrow tires need more pressure than wide tires. The recommended PSI for different tires are:
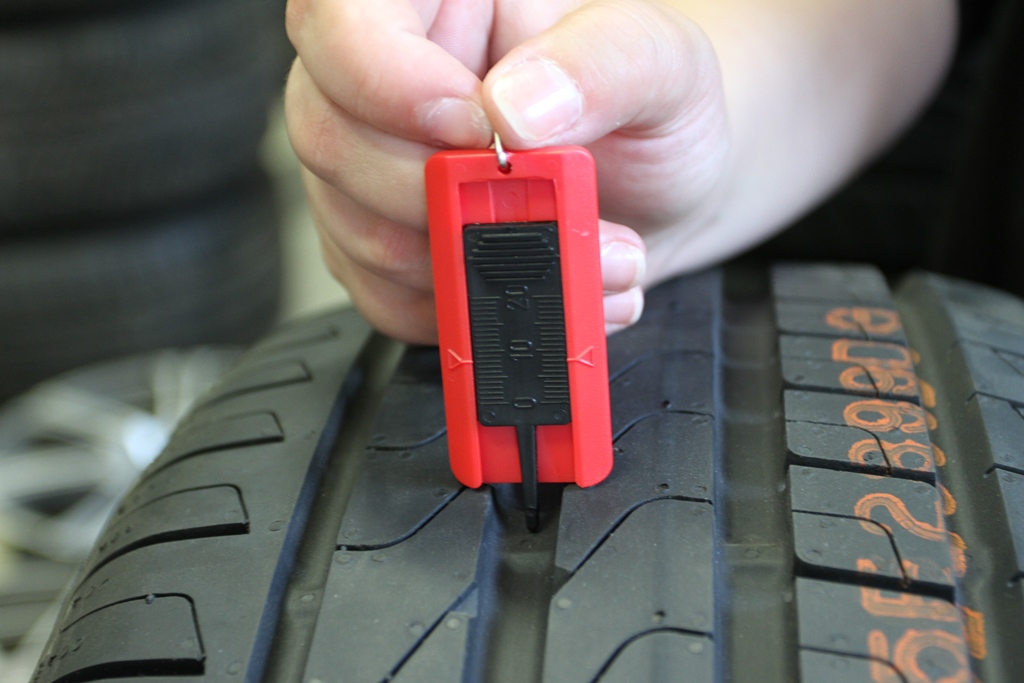
Experienced cyclists can often estimate whether their tires need to be pumped by pinching the tire between their thumb and forefinger. The more accurate way of knowing when your tire should be pumped is by measuring its pressure with a pressure gauge; if the air pressure is measured below the recommended PSI, it’s time to pump.
First pump your bike tire to the middle of the range for the recommended PSI. You also need to take your body weight into account. Tires that bear a heavier rider need more PSI. Weather conditions and terrain also affect how a bike rides, so you’ll need to experiment with different PSIs to feel what’s most comfortable to you.
A Schrader valve is the type of valve you’ll find on car tires, older bike tires and mountain bikes. It consists of a metal pin in the center of a threaded valve, and a rubber cap that’s screwed onto the valve. Most bike pumps like those we reviewed have a dual head to accommodate both Schrader and Presta valves or a single head with an adapter.
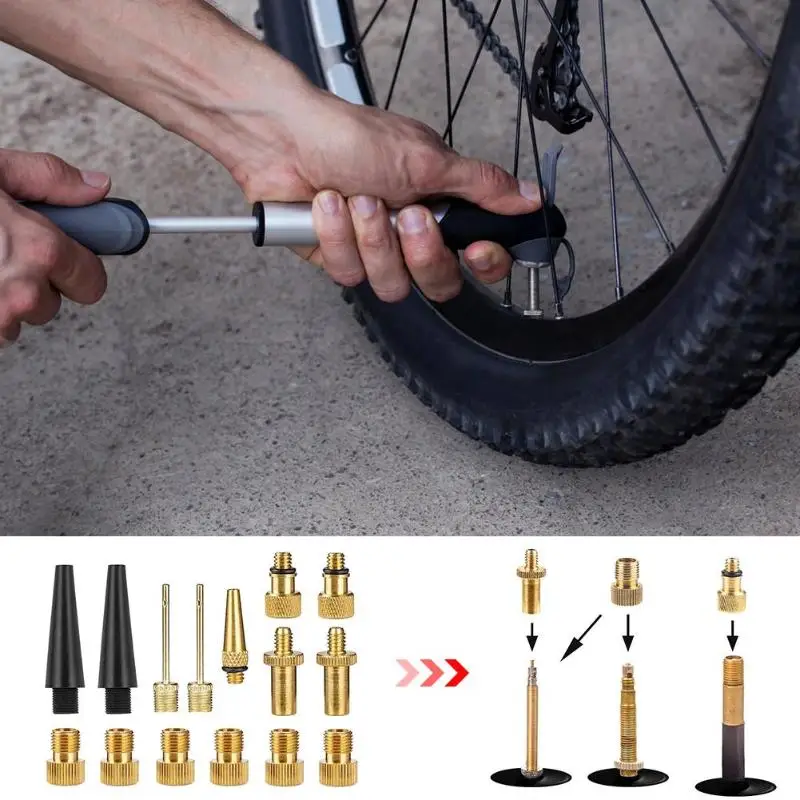
A Presta valve is found on road bikes and some mountain bikes. It’s a slender valve with a nut at the top that is loosened and tightened before and after inflation. Almost all new bike pumps have a head with openings for both Schrader and Presta valves, or they have an adapter for switching from Schrader to Presta, like one of our top picks, the Topeak – Road Morph G.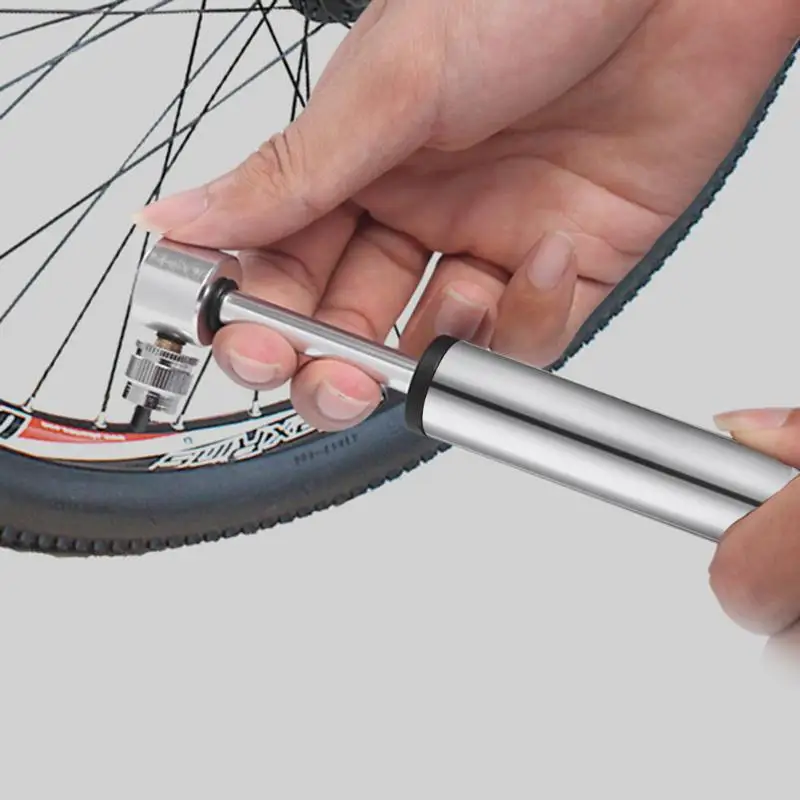
If you’re out riding and your tires need air, you could give them a quick inflate with a CO2 injector, like the one we reviewed. But if you don’t have a CO2 injector in your bag, and you forgot your mini pump, then you can pull into a gas station and inflate your tires there.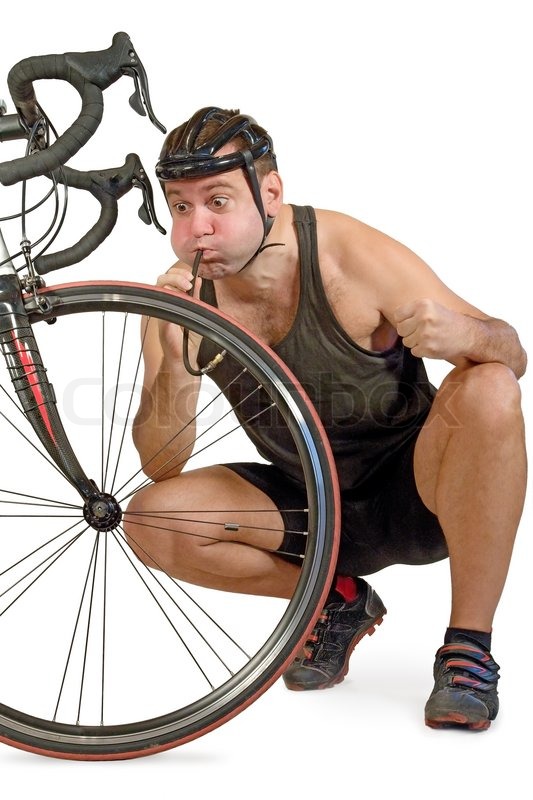
If you don’t have a pressure gauge, ask the station attendant for one. Inflate your tires to optimal pressure in short bursts; a gas-station air pump has very high pressure, and you run the risk of popping your tire.
A gas-station air pump will only fit a Schrader valve. But if your tires have Presta valves and you don’t have a Presta valve adapter, there’s still a way to inflate them.
Share this Review
Gene Gerrard, Writer
Gene has written about a wide variety of topics for too many years to count. He's been a professional chef, cooking-appliance demonstrator, playwright, director, editor of accountancy and bank-rating books, Houdini expert and dog lover (still is). When he's not writing for Your Best Digs, he's performing as a magician at the Magic Castle in Hollywood.
I headed off from my house one Saturday early in my biking career, drooling with excitement for the mountain bike ride I’d been awaiting all week. Then, before I had reached the trailhead, I noticed my rear tire was significantly low. I felt like I was riding through mud – on the pavement! Remembering a gas station with an air pump on my way to the trailhead, I figured I could easily pump up my tire without a wasted trip back to my house.
But, when I tried to inflate my mountain bike tire… AAACK! Foiled! The gas station had a standard car pump and, new biker that I was, I forgot my bike tires have a presta valve. A week of hungering for a mountain bike ride… RUINED! All because of a puny little valve.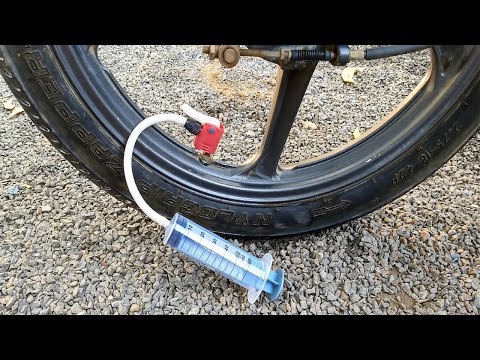 Oh, the angst. Do NOT let this happen to YOU!
Unless you grew up biking, most of us are so familiar with car tire valves, we assume it’s the only type of valve. In truth, car tires use what’s called a Schrader valve. It’s about the diameter of a pencil and has a tiny “button” in the center that, when pressed, allows air in or out, but holds air pressure relatively steady when not compressed.
Presta valves, on the other hand, are significantly skinnier than Schrader valves. They don’t have a button in the center of the valve and instead have an attached screw mechanism at the tip. When screwed closed, it holds air pressure in the tire. When unscrewed, you can pump air in or release air out.
Presta ValveCurrently, presta valves are the most common type of valve on high-end mountain bikes. Racers and high performance cyclists prefer them. They’re becoming increasingly common – even on mountain bikes on the low-end of the price spectrum.
Why, you ask. (Perhaps with a significant number of swear words as you kick your flat mountain bike tire or throw your useless Schrader pump.) Why use an uncommon, obscure valve that doesn’t fit a standard pump? Is it just to make mountain bike newbies suffer? Why? Why?
No, it’s not just to frustrate you.
Presta valves are generally more reliable and allow pumping your tires to a more precise pressure. By virtue of design, all Schrader valves release tiny amounts of air over time, requiring occasional “topping off”. Having a cap on the valve can significantly decrease the air loss, but it still means, at any given moment, your tire may not have the pressure you pumped it to.
A casual mountain bike rider may not know what pressure they should be riding or even notice when the pressure is off. But for high-speed riders, tire pressure can have a significant impact on speed, race performance and riding safety.
The screw on the tip of the presta valve allows a rider to close off the tube at the desired pressure and not require a cap.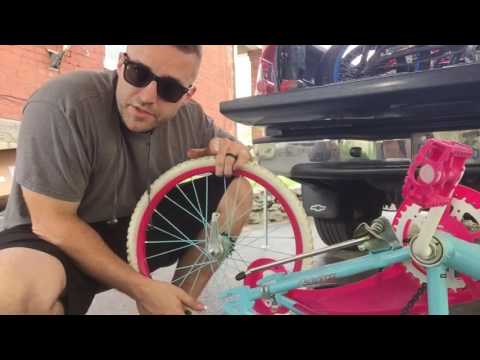 Barring an unnoticed leak or a puncture during a ride, the tire will now reliably hold the pressure you want.
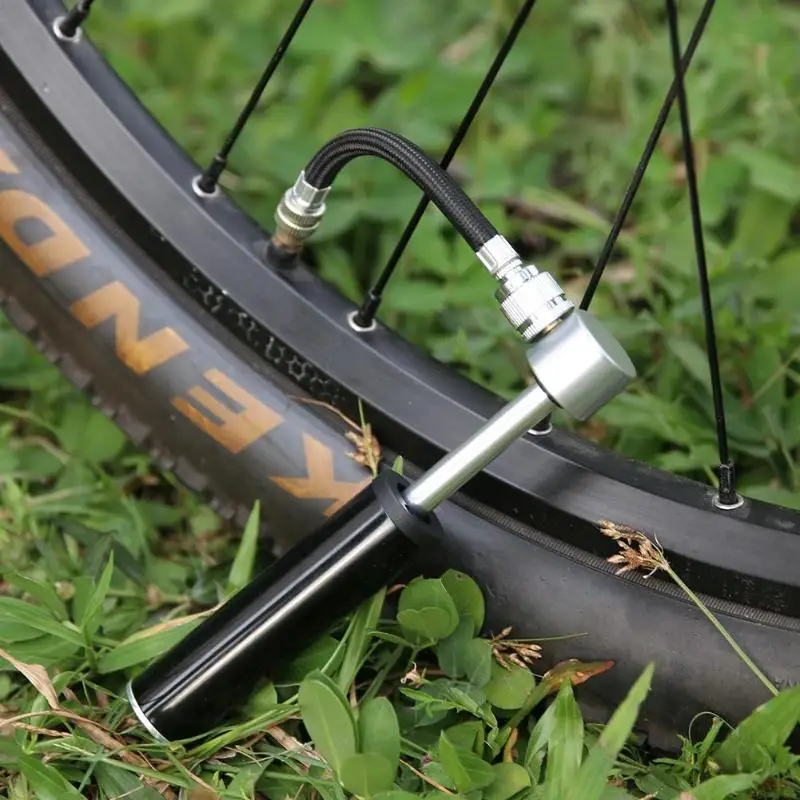
You can inflate a presta valve with a common air pump, such as at a gas station or portable air compressor. However, you need an adaptor that’s ridiculously small in size but huge in importance: a presta valve adaptor.
Presta valve adaptorHere are the steps to inflate a presta valve with a standard pump:
Since more and more mountain bike tires use presta valves, most bike pumps are either universal (meaning one hole works on both presta and Schrader valves) or they have two separate holes, one for each valve type.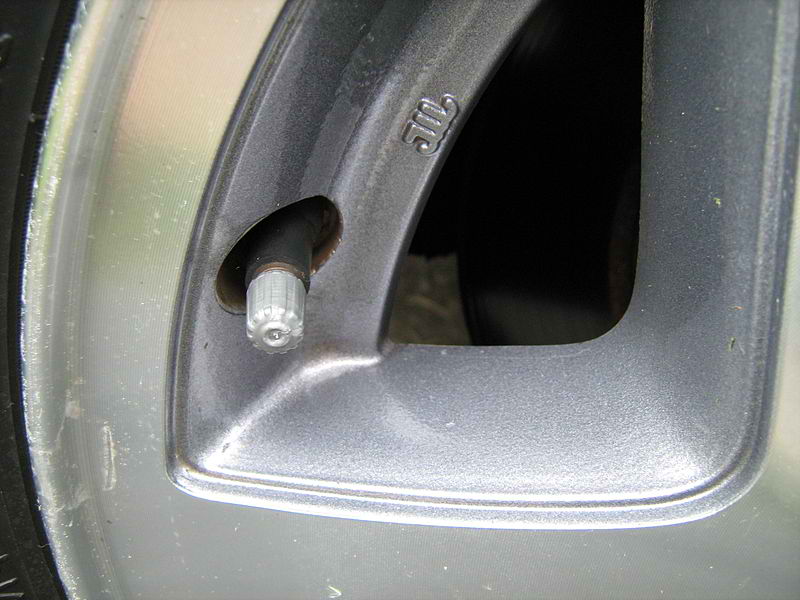 However, you should always carry a valve adaptor when you ride for situations when a standard pump is the only option. Some cyclists do this by keeping a valve adaptor screwed on their tire valve all the time. Just make sure the valve is screwed closed before putting the adapter on!
Presta valve adapters are extremely tiny and portable. This also means they’re easy to lose. The good news is they’re fairly cheap. I usually buy a handful at a time and keep one in my garage bike tools and one in my portable tool kit for rides. Having one in your glove box isn’t a bad idea, either!
All bike shops sell valve adapters and some general sporting goods shops and hardware stores carry them as well. You can also buy valve adapters online easily and cheaply.
This simple question actually does not have a straightforward answer. The simple rule is to refer to the tire manufacturer’s specs on tire pressure that are printed on the sidewall of your tires. Consensus of riders is that mountain bike pressure should be 30 psi on the front tire and 33 psi for the rear tire. This information should serve you well if you have only a casual interest in mountain biking and are doing entry-level to intermediate trails two or three times a month.
However, if you spend a significant amount of time on your bike (and an equally significant amount of time dealing with pinch flats, blowouts or skidding out on corners), you’ll want to dive deeper into the science of bike tire pressure. DIY Mountain Bike has a fabulous, in-depth article and survey results examining appropriate bike tire pressure.
The fastest and easiest (and cheapest) way to check your tire is with your hand. When you squeeze it, it should be hard in the center with only a tiny bit of give farther out on the tire near the treads. A hand test, however, is – not surprisingly – not very accurate!
If you want to be precise, a tire pressure gauge will be necessary. But be warned: tire pressure gauges are notoriously unreliable and the sensitive sensors are easily broken. For my recommendation, read my tire pressure gauge product review.
If you’re in a pinch (perhaps literally!), and you don’t have a universal pump or a valve adapter, you can modify a tube cap to create a functional adapter using a presta valve CAP.
Remember to screw the tire valve shut after inflating! I know you’re tired of hearing that, but it’s important.
Now that you know everything you need to about how to inflate a presta mountain bike tire, you’ll never find yourself hungering for a ride and find yourself deterred by a standard tire pump!
And don’t forget to screw the presta valve closed…
Professional writer Kat Jahnigen was 2 miles from the nearest village – and roughly 2,310 miles – from the nearest English-speaking town – when her bike tire burst.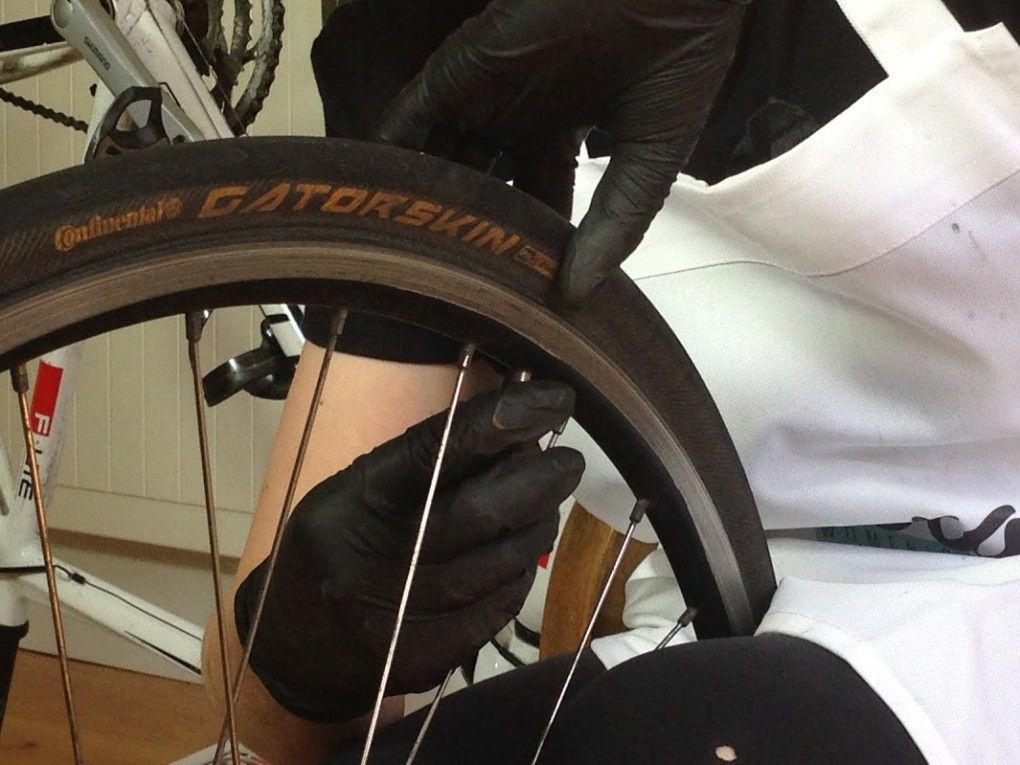 At that time, she was a college student on a bike trip across the desolate, rocky island of Crete. It suddenly occurred to her that it would’ve been good to learn some basic bike repairs before setting off on a solo bike trip.
Check out Kat’s website WriteHire at writehire.net.
Who would have thought that inflating road bike tires would be such a nerve-wracking affair?
I swear it wasn't that hard when I was a kid.
You see, after a long break from cycling, I decided to take my bike to work last week. I noticed my tires were low and opened up my new pump for the first time.
Unfortunately, I was not able to remove the inner screw with my fingers, and with pliers it seemed that I would break it out. I know that many cyclists can understand.
The good news is that my son was there to lend a helping hand before the surgery.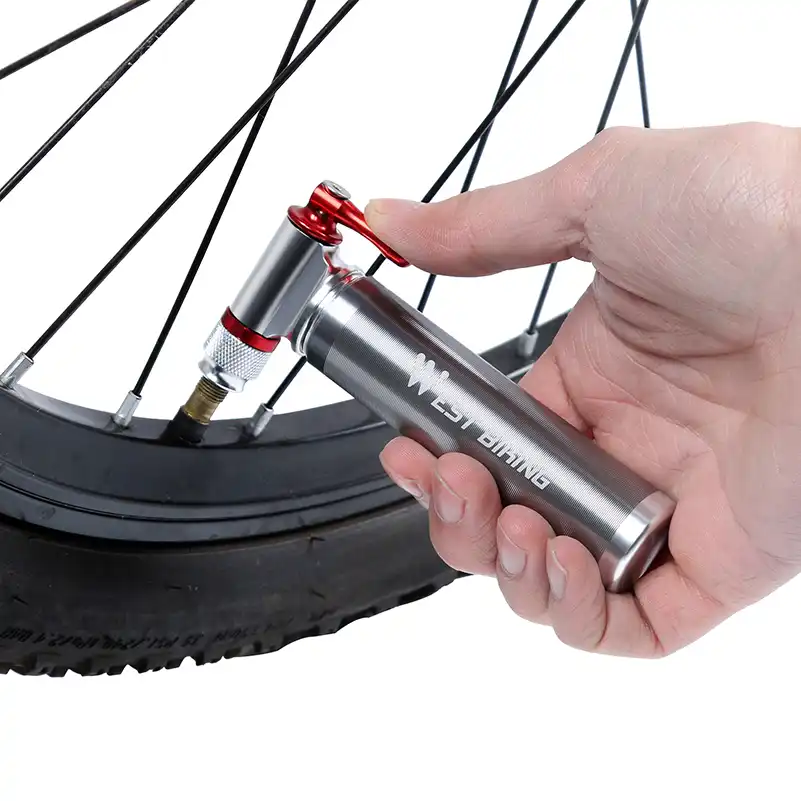
And here are the steps we took to pump up my road bike;
1) The correct choice of bicycle pump
2) Determination of the correct pressure in the tires of the bicycle
9000 9000 3) 9) 9) 9) 9) 9) 9) 9) 9)0002 8) Verification of inflation
9) CLAP CLAPE
As you can see, you are not so difficult, especially if you have suitable equipment and equipment all that.
I have been training successfully for the past few days and if you have been struggling to inflate your road bike tires, I will share my experience in the guide below.
Read more!
Here are some of the basic items you need to know about bike pumping.
Valves are ports or connections between the bike's inner tube and the pump. They provide air inlet and outlet.
There are several different types of valves, but the main ones are:
Presta valves are narrower than Schrader valves with a narrow rim bore.
They are also generally longer, making it easier to install the pump.
However, their extra length and lightweight design make them a bit brittle and easier to break.
They are less reliable than Schrader valves and in my years of cycling I have broken a couple of Preston valves more than Schrader valves.
In addition, they are not compatible with car tire pumps or air pumps at gas stations. For pumping you need an adapter.
But they make up for their short life and incompatibility with gas station pumps by their ease of use.
I prefer the Presta valve to the Schrader valve because it allows for quick and easy opening of the valve.
They do not have a spring in the valve so they are also easier to lower with more positive action. This is especially useful with small capacity hand pumps, as they do not require a built-in spring compressor in the pump.
Schrader valves are wider and stronger than Presta valves.
They are less likely to break than Presta valves and will last a long time.
They are not as easy to fill as Presta valves. Sure, you can open the valve on the Schrader to let the air out using the tip of a key or your fingernail, but that's just inconvenient.
The smartest part of the Schrader valve is that it has a spring mechanism that keeps the valve closed and air inside.
This is different from the screw valve on the Presta valve, which means that there is no need to re-screw the valve after inflation because it will not let air out unless it is pressed down.
What else? Another great benefit of the Schrader valve is compatibility with automotive pumps.
Schrader valves do not require special bicycle pumps.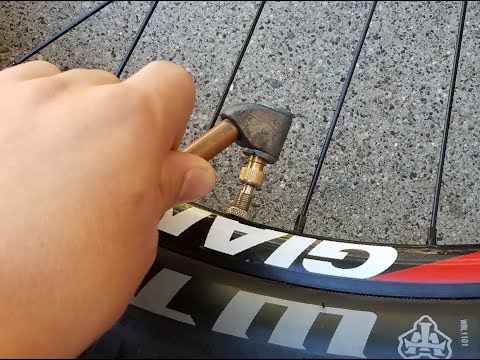 This is useful, especially for beginners who do not yet have a complete set of equipment.
Both the Schrader valve and the Presta valve have their strengths and weaknesses.
They are also designed to be used on different bike tires, so it's not a question of which is better than the other.
The main thing to remember is that the valves have different widths, so it is not easy to replace one with another.
One wheel can only accept one type of valve.
For example, Schrader valves are thick and difficult to fit into the tube hole on a road bike rim. Conversely, the Presta valve is too thin to fit the tube hole on a mountain bike.
The Presta valve usually requires an adapter to mount to the MTB rim. But there may not be enough room for a larger Schrader valve to fit on very narrow tires.
The difference in valve types means that the pump heads will also be different.
Simply put, you cannot use Schrader pump heads to fill a Presta valve and vice versa.
You can still use a different pump head for a different valve if you have an adapter.
Another workaround is to purchase double mount pump heads.
Two nozzle pump heads have a Presta bike tire pump and a Schrader head in one unit.
I'm a big fan of dual mount pump heads considering I have both a road bike and a mountain bike.
This saves me the trouble of having two pump heads or buying an extra adapter.
Finally, we have pump types. They will complete our discussion of the basics of inflating bicycle tires.
As the name suggests, bicycle pumps are tools for pumping air into bicycle tires.
We have different options, but the most popular bicycle pumps:
1) caterpillar pump
2) mini pump
3) Air compressor
4) mini inflator
Husenic pump , also known as a floor pump, is the most popular bicycle tire pump.
This is the basic pump that every cyclist should own.
However, floor pumps are bulky, reaching 2 feet in height. The good news is that they have a high inflation capacity, making the task of inflating easier and effortless.
Caterpillar Pump Bike Tires take the hassle out of using smaller pumps.
And as if that weren't enough, the floor pumps come with great features to make pumping easier.
For example, mine can support both types of valves. Accessible pump heads can also lock onto the valve so there is no need to worry about air escaping.
In addition, the best bicycle tire pump has an accurate pressure gauge, so it's easy to read the tire pressure.
The only downside to track pumps is that they are bulky and not portable. They are usually stored in the garage and are ideal for those who stay at home.
Mini pumps are a smaller version of track pumps.
These are portable pumps, ideal for those who need to take the pumps with them on their bike rides.
Mini pumps, also known as compact pumps, are small enough to fit in your pocket and come in handy in the event of a flat tire while on the road.
These compact pumps ensure you get home with a puncture rather than being stuck miles away with a puncture and no way to inflate your tires.
Mini pumps can inflate bicycle tires at high enough pressures, but they are as good as track pumps.
It takes some elbow grease to use the mini pump, but in my opinion I'd rather inflate a tire more than be stuck with a flat tire miles from home.
Our third type of pump is not strictly a bicycle pump.
Mini pump, also known as CO2 pump, uses a CO2 canister to inflate bicycle tires.
C02 cartridges are typically filled with compressed carbon dioxide for quick, easy and efficient filling.
The main advantage of mini inflatables is that they are ultra-light, so they won't weigh you down on long road bike rides.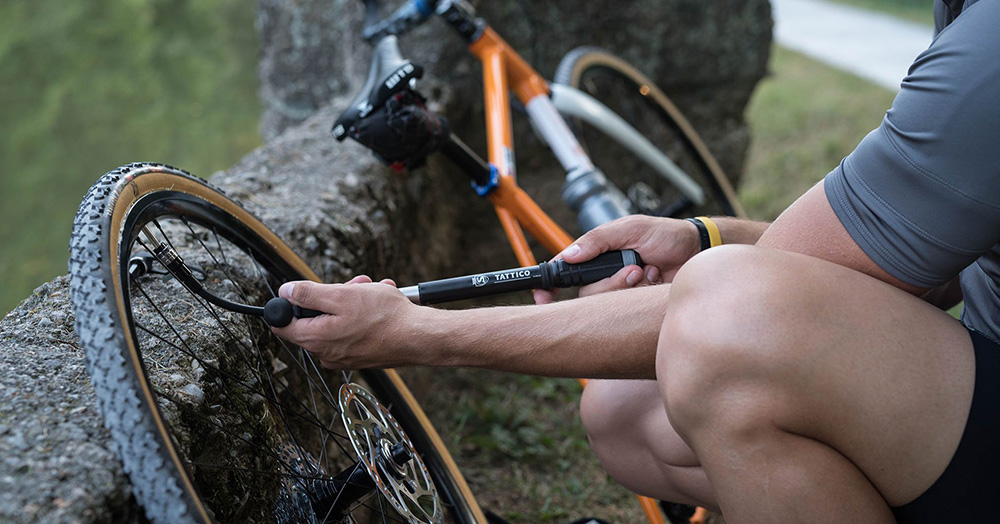
Secondly, they are effective at filling bicycle tires and require only a fraction of the effort and time compared to a mini pump or a floor pump.
The biggest disadvantage of mini inflators is that they are disposable and disposable.
So it only allows you to refill your tires depending on the number of CO2 cartridges you have prepared.
Our final option, the compressor, is rare among casual road cyclists.
Air compressors are expensive and often used exclusively by professional cyclists or team mechanics.
The biggest advantage of compressors is that they make the inflation process quite easy, especially if you plan to inflate to the desired pressure.
This air pump saves time and makes it easier to inflate multiple bike tires.
Now that we've covered the basics of inflating a bike, let's look at the exact step-by-step details of inflating road bike tires.
The first step is to determine the type of valve that is used on your bike's rim.
The two main types are Presta and Schrader valves.
Once you have identified your bicycle pump, the next step is to select a pump that is compatible with your bicycle valve.
If your pump is not compatible with a particular valve, consider purchasing an adapter.
After confirming the compatibility of the bicycle pump, the next step is to determine the ideal bicycle pressure.
Proper bicycle tire pressure is critical to avoid bumpy/stiff riding or hard cycling.
I would recommend choosing a bicycle pump that shows accurate tire pressure. This avoids over- or under-inflating your bike.
It is usually easy to determine the correct pressure because most tires have the correct pressure marked on the sidewall. If not, check the exact pressure in the user manual.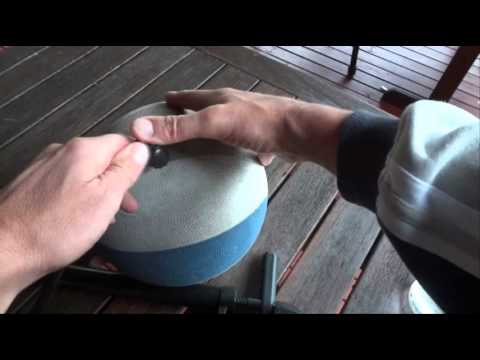
But generally road bikes require higher pressure than mountain bikes. Road bikes need to be stiff enough and minimize ground contact to reduce rolling resistance.
On the other hand, mountain bikes need more ground contact for better traction and overcoming obstacles.
Generally, the recommended pressure range for road bikes is 80-130 psi and mountain bikes require 25-35 psi.
The dust cap is a convenient addition to the valve port that prevents dirt and debris from entering the valve.
Presta Valve and Schrader have the same plastic cap design.
You just need to unscrew the lock nut and remove the cap.
Be sure to keep your hat in a safe place so you don't lose it. I usually prefer to keep mine in my back pocket.
After you remove the cap, the next step is to tighten the pump head over the open head.
This is more than just putting it on top, but you will need to turn it clockwise until it fits snugly.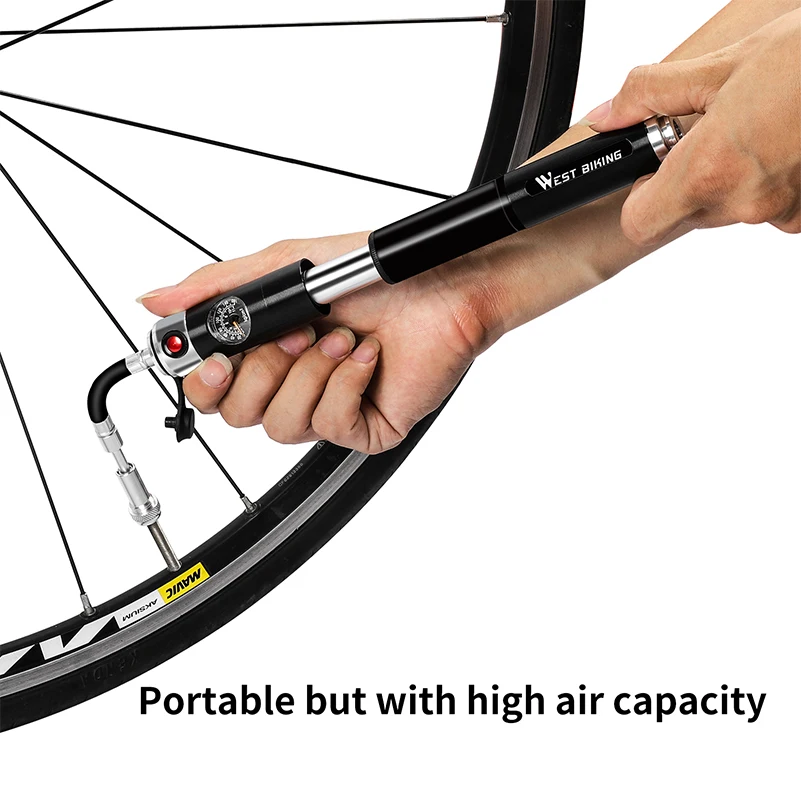 A good way to know if it's blocked is to feel the resistance.
However, be careful not to overtighten as you may break the valve.
It is also necessary to re-confirm the correct nozzle (Presta or Schrader valve) by pressing the valve.
Once the pump head is firmly and securely screwed to the bicycle tire valve, it's time to start pumping.
But not now.
Most bicycle tire pumps have a lever that initiates the inflation or inflation process.
The mechanism and instructions will depend on the type of pump.
But usually most track pumps require you to turn the handle 90 degrees and then push the lever on the top of the pump.
Then you can start to inflate the tire.
But, as I said, specific instructions will depend on the pump model.
This step is the actual inflation.
Normally the inflation action is to move the lever up and down until the tire is full.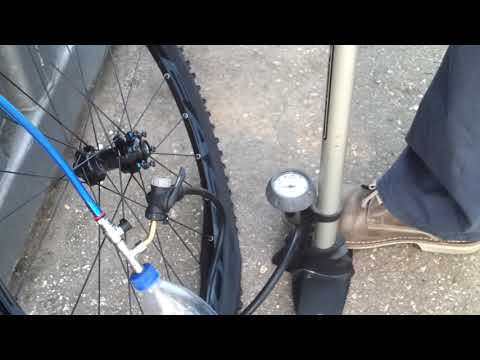
You just need to put the pump between your legs, grab the lever with both hands and start pumping the track pumps.
Conversely, for a hand pump, small pumps or air compressors, hold the nozzle with one hand, pointing it at the nozzle, and pump with the other hand.
If your bicycle tire pump has a pressure gauge, it's easy to determine the correct pressure for your tire.
If not, you can test inflation using your thumbs.
As soon as you inflate and feel that your thumbs can no longer press, the tire is sufficiently inflated.
However, this is usually not the best method because it can sometimes be misleading. In addition, it will also depend on your physical fitness.
Another thing is that different tires have different pressures. What works for a road bike may not work for a mountain bike.
After pumping is complete, remove the pump from the valve.
Removal is the opposite of pump installation. For example, if you have a pull-up lever, you just need to press it. Plunger pumps may require a few pushes to remove the pump.
Remove the valve stem from there.
You may also hear a hiss when the tire is removed. It's excess air, usually in the pump, so it's normal. This will not affect the overall PSI of your tire.
It is easy to check the exact level of tire pressure if you use a digital pressure gauge.
Checking the correct tire pressure and correct tire inflation is especially useful for cyclists who are looking for comfort and excellent driving performance.
However, it is important to note that different bicycle tire pumps have different scales, so you need to be especially careful.
Another precaution to consider is that dirt and debris on the valve and pressure may affect the accuracy of the dial.
Now, if your bike tire is overinflated, you can relieve the air pressure a little by opening the valve.
If you have a Schrader valve, you just need to press it with a wrench or fingernail to release the air. In the case of a Presta valve, simply open the plastic caps and press the nut.
Once you've made sure your tire is inflated to the correct pressure, the next step is to close the valve to prevent air leakage.
If you have a Presta valve, start by screwing in the lock nut until it is tight, then put the cap back on.
With the Schrader valve, you just need to put on the dust cap. It doesn't matter if you leave it open because Schrader pumps don't lose air until the valve spring is pressed.
But it's always good to have a cap to prevent accidental pressure or getting dirt and other debris on the valve.
Inflating a Presta valve is no different from a Schrader valve.
However, you will need a Presta valved pump.
The key to inflating a Presta valve is the pump head insert.
You start by removing the valve cover and unscrewing the lock nut. The next step is to position and insert the pump head.
The hand pump is one of the traditional and popular ways to inflate road bike tires.
It offers a simple and fairly easy way to inflate a tire.
Here is a step by step guide to using the hand pump:
1) The first step is to find a flat and level surface. The tires should be straight and vertical away from you.
2) Attach the pump head to the valve. Make sure the nozzle is securely attached.
3) Place your hands on the pump handles and start pumping.
Tubeless tires differ from conventional tires in that they do not have inner tubes.
They also don't use traditional bicycle pumps, but instead use air pressure. The inner tube is filled with sealant to prevent punctures while riding.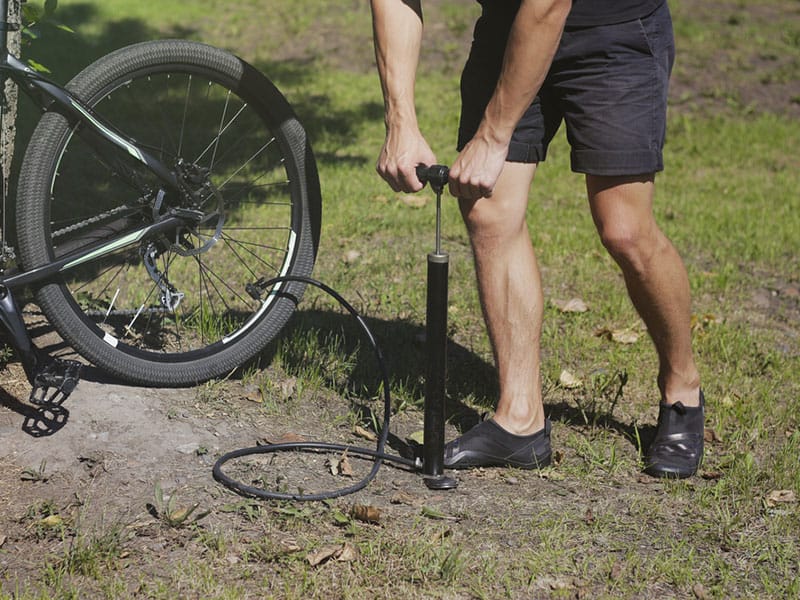
Here is a step-by-step guide to inflating a tubeless bicycle tire:
1) Purchase an air compressor with an appropriately sized blower head. The inflator head should also have a valve core remover to easily remove the valve stem core.
2) Position the inflator head over the valve of the inner tube. Make sure it is properly aligned for easy screwing in and out of the stem core.
3) Apply pressure to draw enough air.
4) If you feel that the tire has become hard and you can squeeze it more, remove the valve stem core and then remove the pump while holding the compressor firmly with your other hand.
If you don't have a valve stem remover, a coin or small key can be an ideal replacement.
Proper tire inflation is essential to keep tires from feeling hard or bouncy.
Ideal tire pressure should be between hard rock and spring pressure for optimal performance and comfort.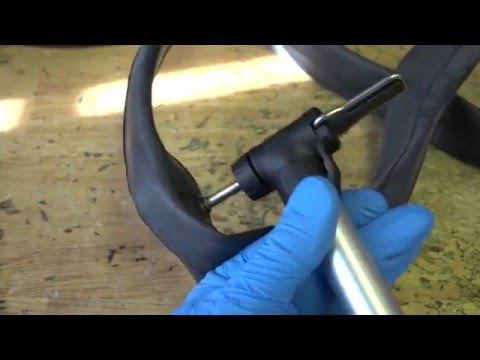
There are several ways to determine the ideal pressure or how much air you need for your tires.
You can check the manufacturer's manual. Alternatively, check the pressure with the pump gauge.
The last option is crude and involves reading tire pressure with your thumbs.
I am not a big fan of the latter method and I would advise you to find a positive pressure pump with a pressure gauge for accurate pressure readings.
If your tire is under-inflated, you can add enough air until it reaches the correct pressure.
This will depend on the frequency of use.
However, for most casual riders, you can inflate tires every two weeks.
Proper tire pressure will save you from pinching from time to time.
Proper bike pressure is even more important for racing bikes because it can affect comfort and speed.
The last thing to consider when choosing tire pressure is temperature and environmental conditions.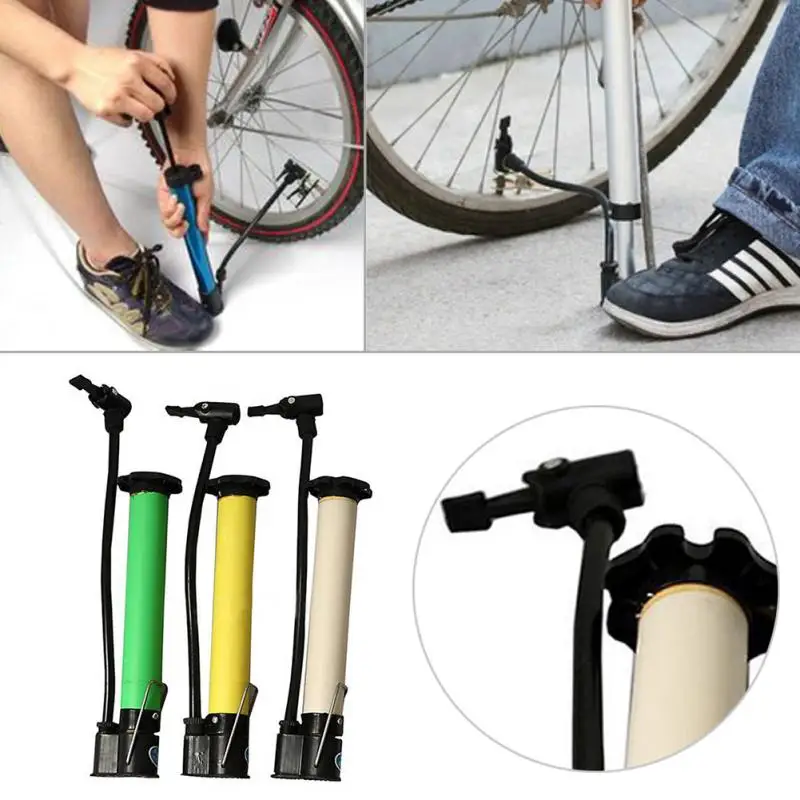 Tire pressure will increase or decrease depending on available temperatures.
Therefore, always check the pressure after driving for a couple of hours.
This is everything you need to know about inflating a road bike tire.
Make sure all equipment is ready before starting the process. More importantly, make sure your equipment is compatible with your bike system.
Finally, keep your tires inflated correctly. Properly inflated tires are comfortable to ride and optimized for performance.
Sharing care!
0 shares
First and last name
Email address
Message
FINANCIAL AND MEDICAL DISCLOSURES
HobbyKraze is a member of the Amazon Services LLC Affiliate Program, an advertising affiliate program designed to provide website owners with the means to earn any advertising fees through advertising and links to amazon.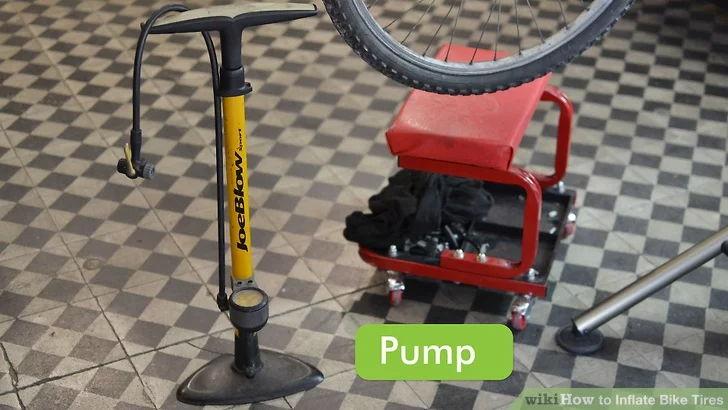 uk a website that may be linked to the Amazon Service. Affiliate Program Ltd. As their partner, we earn on eligible purchases.
The information contained on this website does not constitute medical advice and is not endorsed by medical professionals. All content on this site is for informational purposes only.
We are an independent property and the views expressed here are our own.
Let's talk
Facebook Twitter Instagram pinterest
st. Lavaca, 1401, PMB 40510
Austin, TX 78701
Subscribe to updates
Explore the world, unleash smart hobbies and awaken the joy of life in yourself!
Full name
Email address
© 2022 Hobbycraze. All rights reserved.
Contents
Bikers don't seem to have a more common breakdown that can ruin the very process of comfortable cycling.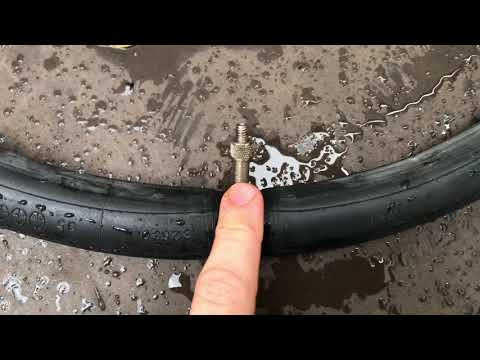 It's annoying, because, in extreme cases, you can continue to move "on the rims" if there is absolutely nothing to fix the breakdown. In addition, if you have sufficiently high-quality and expensive wheels, then every meter that you had to drive over potholes gives pain to the biker's heart. He sees tires and rims falling into disrepair...
First of all, I need to give some advice to those cyclists who find this article on the Internet, but they have nothing with them: no repair kit, no bicycle first aid kit. If there is absolutely nothing to glue the wheel with, then you can continue the journey, however, with some precautions.
Tips if there is nothing to repair the camera:
 But in order not to burn with shame, looking friends in the eye, it is better not to do this.
 So, every self-respecting biker should have a repair kit in order to seal the wheel properly. Moreover, its weight and volume is very small. Recently, very small and convenient bicycle first-aid kits have appeared that do not require rubber glue, and therefore time. Plugged it in and went. It used to be, in Soviet times, that you first had to coat the chamber with rubber, wait for it to dry, then apply it again ... Currently, you can glue a bicycle wheel very quickly.
What you need to take with you to seal the wheel on the bike:
Fitting kit. Ideally, you need to have three pieces, with skill you can get by with two. As a child, I had to make do with a spoon, which is very convenient in order to "hook" the camera.
Pump. If there is no pump, then everything else is in vain. You don't have to spend money on a pump.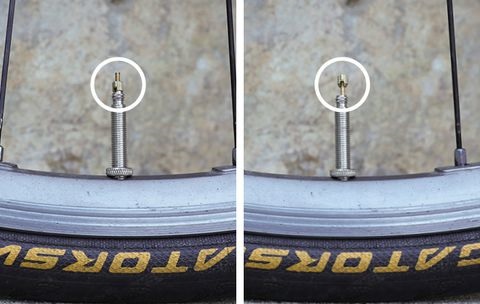 Years of experience show that the best, compact, lightweight and reliable folding telescopic pumps are made in Taiwan, the Philippines and Europe.
Russian pump manufacturers, even under the conditions of the “import substitution” policy, produce a miserable semblance. Our pumps are disposable products that allow air to pass through, which must be held with both hands, etching from a cable that does not screw on the valve, and if screwed on, then only once due to poor quality steel.
Bicycle patches. Usually they are included in the set and are both round (for punctures) and oval (for tears). In extreme cases, you can cut them yourself. In this case, you will need rubber glue. Modern kits include self-adhesive patches.
Tip: use the same old tube as a source of patch rubber. In this case, the curve of the rubber will ideally fit the curve of the chamber. In the event that you find flat patches, you need to glue them well around the edges, and when installing, make sure that they do not come off.
Metal mesh, sandpaper. With this tool, you will need to clean the chamber to give the rubber a velvety finish for more precise grip, as well as for degreasing. A 2x2 cm piece is enough.
Rubber adhesive. With its help, the rubber of the chamber is first primed, and then gluing occurs, that is, it is used twice. Glue, as well as self-adhesive patches, must be checked before the start of the season. Otherwise, you may find yourself in a situation where sealing the camera is simply impossible, since everything has dried up.
What kind of glue can be used to glue the camera, except for rubber? The masses have tried everything: from cyanoacrylate and Moment glue to epoxy resin, which is capable of pouring everything tightly. It is best to use rubber glue because of its affinity for the camera material. Cyanoacrylate and epoxy make the material brittle and unreliable joints.
In addition, rubber glue is inexpensive, sold in miniature tubes, which are enough for the whole season.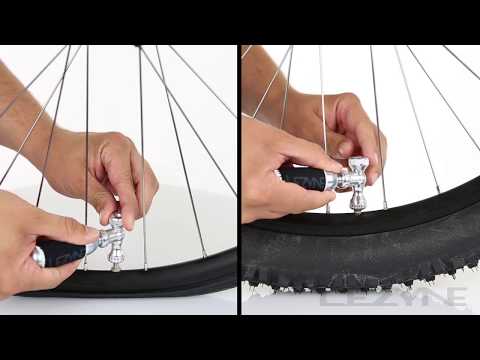
These are all the basic tools and accessories to be able to comfortably seal the bicycle tube.
Tip: you can bring a small bicycle handle and a small bottle of water if you are not bringing liquid to drink. This is useful to make it easier to find the puncture site. In addition, a LED headlamp will not hurt, which the cyclist should always have in case they have to do something on the route at night.
It's time to practice. We present the complete algorithm of action. Let's try to be brief, because sometimes there is so much written on the Internet...
 The second method seems to be preferable, since at the beginning of the tire removal process, lateral loads are possible and the valve can simply be torn off, especially if it is at an oblique angle to the rim plane.
 If there is no water source, you can bring the camera to your face.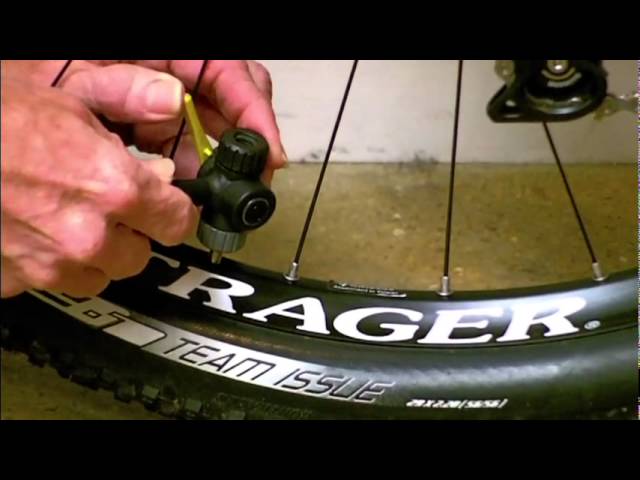 The most sensitive place is the lips. If you bring the camera to your lips, and even pre-wet them, you will feel the lightest breath.
In the event that you have rubber adhesive, you need to follow the instructions: first lubricate the cleaned area, wait a few minutes and press the patch.