Delivery options and delivery speeds may vary for different locations
Sign In
or enter a zip code
Email * Password *
REPAIR & HOW TO
MAINTENANCE
TROUBLESHOOTING
GUIDES
TIPS & TRICKS
ALL ARTICLES WATCH VIDEOS ABOUT US SHOP PARTS CONTACT US
If you’ve already replaced the clutch drive belt on your Polaris ATV but you’re still experiencing performance issues, you may have a bigger problem inside the clutch.
Clutch problems might create the need to rebuild the entire clutch system. Watch the video above and follow the steps below for part one of this three-part Polaris Sportsman 850 clutch rebuild series to learn how to remove the primary clutch and secondary clutch.
NOTE: The primary clutch is also referred to as the drive clutch and the secondary clutch as the driven clutch.
How to Remove the Clutch on a Polaris ATVStep 1. Put the ATV on jacks, and remove both rear wheels to make reaching all of the bolts easier.
Step 2. Remove the 15mm bolts holding the frame brace in place, followed by the frame brace itself.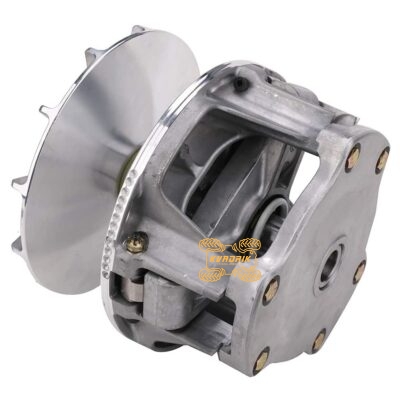
Step 3. Remove the eleven 10mm bolts holding the clutch cover in place, then pull off the cover itself.
Step 4. Remove the clutch drive belt.
There are two methods for removing the clutch drive belt on your Polaris ATV:
Method 1:
Watch the clip below to see the first method of removing the clutch drive belt on a Polaris Sportsman 850 ATV.
Method 2:

Watch the clip below to see the second method of removing the clutch drive belt on a Polaris Sportsman 850 ATV.
How to Remove the Driven or Secondary Clutch on a Polaris ATVStep 1. Remove the 15mm bolt at the center of the driven clutch.
NOTE: There are two washers on the bolt: one on the inside and one on the outside. Don’t lose these washers.
Step 2. Slide the driven clutch off the shaft.
How to Remove the Drive or Primary Clutch on a Polaris ATVStep 1.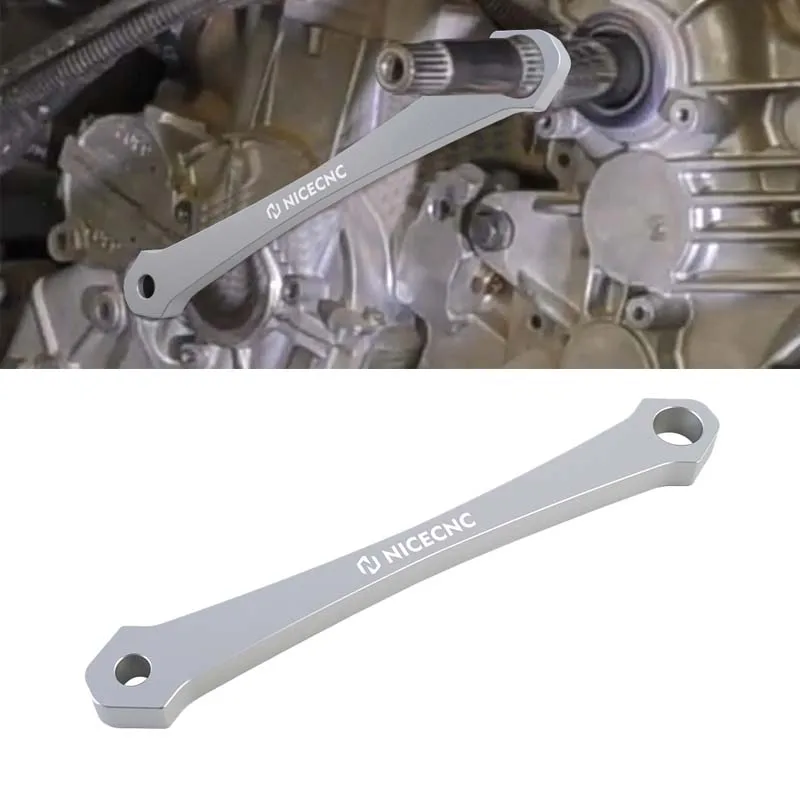 Use an 18mm socket to loosen the bolt in the center of the clutch, turning it clockwise. Wedge a drive extension in to hold the clutch in place while you loosen and remove the bolt.
Step 2. Insert a primary clutch drive puller into the opening for the 18mm bolt that was just removed, then bottom it out. Use a 22mm socket and drive to turn it clockwise to break the clutch loose from the shaft.
Step 3. Remove the drive puller so the clutch can slide right off.
With the drive and driven clutch removed, you’re ready to begin the process of rebuilding the clutch. Continue watching our Polaris Sportsman 850 clutch rebuild video below to move forward to the next phase: disassembling the clutch and replacing it with new components.
body
Home » Automotive Parts and Accessories » Best Polaris Clutch Removal Tool: How To Remove A Clutch The Right Way
Assuming you would like an introduction on how to remove a polaris clutch:
There are a few different ways that you can remove a polaris clutch, but the best way is to use a clutch removal tool. This will make the process much easier and will ensure that the clutch is removed properly. First, you will need to locate the clutch removal tool. This can be found at most auto parts stores or online. Once you have located the tool, you will need to follow the instructions that come with it. Usually, this will involve attaching the tool to the flywheel and then twisting it in order to loosen the clutch. Once the clutch is loose, you can then remove it from the engine.
A polaris clutch removal tool is necessary in order to remove the clutch from a Polaris snowmobile. This tool is specifically designed to remove the clutch from the engine, and it is the only tool that can properly do this job. Without a polaris clutch removal tool, it would be very difficult to remove the clutch from the engine, and it could damage the engine.
PRODUCT IMAGE
PRODUCT NAME
RATING
ACTION
Check Price On Amazon
The Primary Clutch Puller for Polaris is a handy tool that makes removing primary drive clutches on Polaris ATV’s and Snowmobiles a breeze. This Clutch Removal Tool is made of super high quality steel and is heat treated for accuracy. It is 3/4″ – 16 thread and 10-1/2″ long. This Clutch Removal Tool comes with a great service support guarantee. If any issues from our tools arise please don’t hesitate to contact us. We guarantee the quality of our tools and want to ensure you’re only getting the best. Because doing the best we can do that and you deserve the best.
• What is a Primary Clutch Puller for Polaris?
A Primary Clutch Puller is a tool used to remove the primary clutch from a Polaris ATV or UTV.
• What is the function of a Primary Clutch Puller?
A Primary Clutch Puller is used to remove the primary clutch from a Polaris ATV or UTV.
• What are the benefits of using a Primary Clutch Puller?
Primary Clutch Pullers are designed to make the removal of the primary clutch from a Polaris ATV or UTV quick and easy.
• How do I use a Primary Clutch Puller?
The Primary Clutch Puller is threaded onto the end of the crankshaft. Once the puller is secure, the center bolt is turned clockwise to remove the clutch.
• What are the dimensions of a Primary Clutch Puller?
Most Primary Clutch Pullers are standard size and will fit most Polaris ATVs and UTVs.
• Where can I purchase a Primary Clutch Puller?
You can purchase a Primary Clutch Puller from most Polaris
Why We Like This
• Fits Polaris ATV & Snowmobile 1985 up ( but does not include 400, 500, 600, 700, 800 domestic twins, 99 700 and 800 XCR, 99 trial RMK and Supersport 550 Fuji )• Made of super high quality steel and heat treated for durability• Precise machining for accuracy• 3/4″ 16 thread• 10 1/2″ long
Check Price On Amazon
The E-cowlboy Primary Drive Clutch Puller Remover Tool is designed to pull out your clutch and reduce the risk damaging the threads. The thread design makes our E-cowlboy clutch tool fit and release your primary clutch perfectly.
Constructed from high standard forged steel for strength, strong accuracy, durability and longevity, our Primary Drive Clutch Puller is coated with black oxide finish for resistance to rust and corrosion.
This Primary Drive Clutch Puller is a direct replacement for OEM 2870506 PP3078 15-878 30260 and has OE standard quality and performance.
If you’re not 100% satisfied with the Primary clutch puller, simply return it for a full refund in 30 days. We offer premium support and a 12-month warranty.
• What is the primary drive clutch puller remover tool for 1985-2016 Polaris all models ranger/RZR/Sportsman/General/Scrambler OEM # 2870506?
This is a tool that is used to remove the primary drive clutch from 1985-2016 Polaris all models ranger/RZR/Sportsman/General/Scrambler.
• How do you use this tool?
To use this tool, first remove the snap ring from the groove in the end of the crankshaft. Next, threaded the center bolt of the clutch puller into the end of the crankshaft until it is bottomed. After that, place the clutch puller body over the end of the crankshaft so that the two legs of the puller straddle the groove in the crankshaft. Finally, screw the adjusting nut onto the center bolt of the clutch puller until it contacts the clutch puller body.
• What are the benefits of using this tool?
The benefits of using this tool include being able to remove the primary drive clutch without damaging the clutch, as well as being able to reuse the primary drive clutch.
• Are there any precautions that need
Why We Like This
• Fits most Polaris models from 1985 2016• Designed to pull out your clutch and reduce the risk of damaging the threads• Constructed from high standard forged steel for strength and accuracy• Coated with black oxide finish for resistance to rust and corrosion• Comes with a 100% satisfaction guarantee
Check Price On Amazon
The RZR Clutch Cover Removal Tool is the perfect tool for easily removing the clutch cover on your Polaris RZR. The removal tool kit comes with a flexible shaft and a reversible socket that fits 8mm clutch cover screws and 1/4″ hose clamps. The tool’s handle is designed according to ergonomic principles, ensuring comfort during use and reducing fatigue. The RZR removal tool is also made of aluminum alloy, making it lighter and more durable than other removal tools made of steel.
• 1.What is the RZR Clutch Cover Removal Tool?
The RZR Clutch Cover Removal Tool is a tool used to remove the clutch cover on a Polaris RZR XP 1000 or XP Turbo RS1 Ranger XP 1000.
•2.Why would you need to remove the clutch cover?
You may need to remove the clutch cover to access the clutch for maintenance or repair.
•3.How does the RZR Clutch Cover Removal Tool work?
The RZR Clutch Cover Removal Tool works by screwing into the clutch cover and then providing leverage to remove the cover.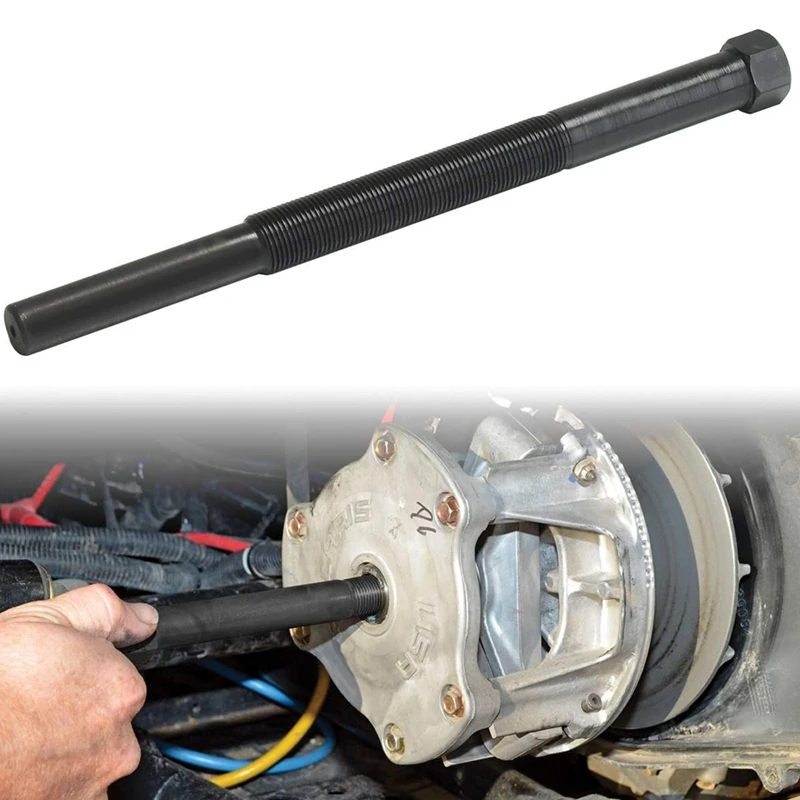
•4.What are the steps for using the RZR Clutch Cover Removal Tool?
To use the RZR Clutch Cover Removal Tool, first screw the tool into the clutch cover. Then, using the handle, lever the cover off of the clutch. Repeat this process five times with different values to ensure the cover is removed correctly.
•5.What are some tips for using the RZR Clutch Cover Removal Tool?
Some tips for using the RZR Cl
Why We Like This
• Compatible with 2016 2020 Polaris RZR/RZR 4 XP Turbo & RS1, 2018 Polaris Ranger XP 1000 & 2019 Polaris Ranger Crew XP 1000• Flexible shaft and no slip grip for hard to reach places• Reversible socket fits 8 mm clutch cover screw heads and 1/4″ hose clamp• Ergonomic handle for comfort and fatigue reduction• Made of aluminum alloy for durability
Check Price On Amazon
Belt changing tools are designed to make the process of changing a belt much easier and less time consuming. There are a variety of different types of belt changing tools available on the market, each designed to work with a specific type of belt. Clutch removal wrenches are a type of belt changing tool that is designed to remove the pressure plate and clutch disc from the engine. This type of tool is necessary when changing the clutch or performing other maintenance on the engine. These types of tools are also useful for removing the belts from the engine when they need to be replaced.
• What is the name of the tool used to remove and replace a vehicle’s belt?
A belt changing tool is used to remove and replace a vehicle’s belt.
• What is the name of the tool used to remove and replace a vehicle’s clutch?
A clutch removal wrench tool kit is used to remove and replace a vehicle’s clutch.
Why We Like This
• Made by CNC machining of high quality solid aluminum alloy for durability and longevity• Non slip design for easy use and belt replacement• Compatible with all Polaris RZR models• Package includes one belt replacement tool• Full refund or replacement if defective
Check Price On Amazon
When it comes to replacing the clutch drive belt on your Polaris RZR or Ranger, there’s no need to break the bank. With the 3PCS Clutch Drive Belt Removal Tool, you can easily and affordably remove and replace your old belt in minutes. This essential toolkit includes everything you need to get the job done quickly and correctly, preventing damage to your belt or pulley in the process. Simply attach the tools to your belt and pulley and apply pressure to remove the old belt. Then, follow the same process in reverse to install the new belt. With this easy-to-use, budget-friendly tool, you can keep your vehicle running like new for years to come.
• What is the function of a clutch drive belt removal tool?
A clutch drive belt removal tool is used to remove the drive belt from a vehicle’s clutch.
• How do you use a clutch drive belt removal tool?
To use a clutch drive belt removal tool, first locate the drive belt on the vehicle. Then, using the tool, loosen the drive belt by turning the tool counterclockwise. Once the drive belt is loosened, remove it from the vehicle.
• What are the benefits of using a clutch drive belt removal tool?
A clutch drive belt removal tool makes it easy to remove a drive belt from a vehicle’s clutch.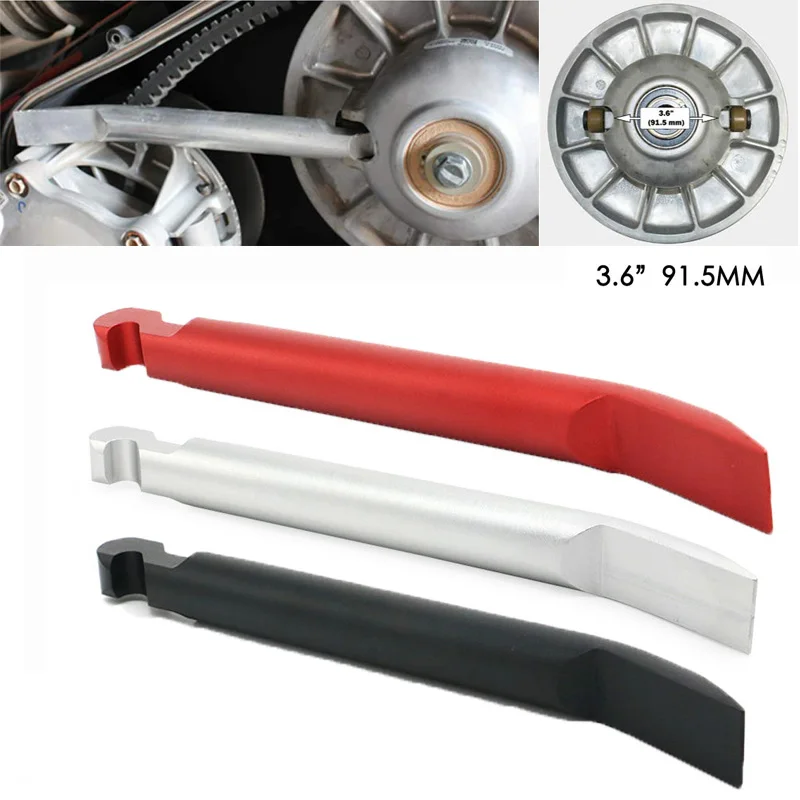 This can be helpful when replacing a damaged or worn drive belt.
Why We Like This
• Made of high quality metal for durability• Fits Polaris 2016 2019 RZR XP Turbo / 2016 2019 RZR 4 XP Turbo / 2018 2019 Ranger XP 1000 / 2019 Ranger Crew XP 1000 / 2018 2019 RZR RS1• Helps prevent damage to belt or pulley during removal or installation• Comes with 3 tools in total• Replaces OEM number 2875911
Polaris is known for making some of the most durable and dependable ATVs on the market, and their clutches are no exception. When it comes time to replace or repair your Polaris clutch, having the best removal tool will save you time and frustration.
There are many reasons to invest in a good quality clutch removal tool. For one thing, it will make removing and installing your new or repaired clutch much easier. A good removal tool will also ensure that you do not damage your clutch during removal or installation. Additionally, a good quality polaris clutch removal tool can be used on other brands of ATVs with similar setups – making it a worthwhile investment for any serious ATV rider or mechanic.
When shopping for the best polaris clutch removal tool, it is important to consider what you need the tool for. There are many different clutch removal tools on the market, so knowing what you need ahead of time will help you narrow down your choices.
One thing to consider is the size of the tool. You’ll want to make sure that thetool you choose is able to reach all of the bolts on your clutch. Another thing to think about is whether or not you need a cordless model. If you’re going to be working in difficult-to-reach areas, a cordless model might be a better option for you.
You should also consider how easy the tool is to use. Some models can be quite complicated, so if you’re not comfortable using them, it might be best to choose something simpler..jpg?x-oss-process=image/auto-orient,1/quality,q_70/resize,m_mfit,w_350,h_350) Additionally, some models come with kits that include other tools that can make your life easier when working on your clutch (such as an alignment tool).
Additionally, some models come with kits that include other tools that can make your life easier when working on your clutch (such as an alignment tool).
Finally, think about price when choosing a clutch removal tool. Although most models are relatively affordable, there are some higher-end options that can cost quite a bit more money. Knowing how much you’re willing to spend will help you narrow down your choices even further.
There is no definitive answer to this question as there are a variety of clutch removal tools available on the market, each with its own advantages and disadvantages. Some of the more popular options include the Motion Pro Clutch Remover/Installer tool, the Park Tool CM-5.2 Cyclone Chain Tool, and the Shimano TL-FC32 Chain Tool. Ultimately, it is up to the individual to decide which tool is best for their needs.
There are a few different ways to use a polaris clutch removal tool.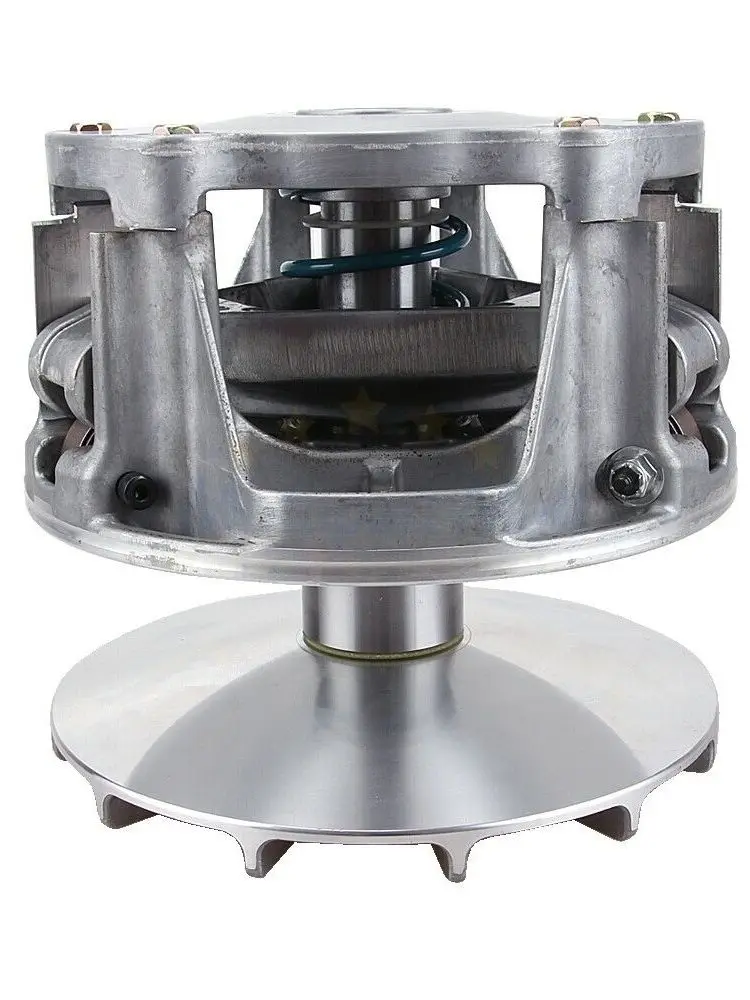 One way is to use it to remove the clutch from the engine. Another way is to use it to remove the clutch from the transmission.
There are many benefits of using a polaris clutch removal tool. Some of these benefits include: -The ability to remove and install the clutch without having to remove the engine-Reduced wear and tear on engine parts-Improved clutch performance-Decreased noise from the engine
The polaris clutch removal tool is a simple device that is used to remove the clutch from the engine. It consists of a handle and a small piece of metal that is inserted into the clutch housing. The tool is then used to unscrew the clutch from the engine.
There are a few reasons that a Polaris clutch removal tool is the best choice for removing a Polaris clutch. First, the tool is specifically designed for removing Polaris clutches, so it is the most likely to work correctly and not damage the clutch. Second, the tool is designed to fit into the small space between the clutch and the engine, so it can remove the clutch without having to remove the engine first. Finally, the tool is relatively inexpensive, so it is a good value for the money.
Assuming you have a good product, the conclusion of your sales pitch should summarize why the product is valuable and how it will benefit the customer. Plus, it should create a sense of urgency so the customer doesn’t miss out on a great opportunity.
Here’s an example:
“So, in conclusion, this is an amazing product that will definitely help you with your problem. It’s easy to use, efficient, and will save you time and money in the long run.
The ATV clutch is responsible for shifting gears, as well as damping vibrations while riding. But if the element is worn out, the rider will face a number of problems: jerking, slipping, etc. In this case, the component will have to be changed. Therefore, let's figure out how to replace the clutch and when to do it.
The movement of the ATV is directly dependent on the condition of the clutch. And even if you were able to buy a quality ATV, it is recommended to check this unit every 6-7 thousand km. But improper operation of equipment or overloading can “kill” the mechanism even earlier. If the device crashes, you will notice that:
All these problems can be solved by repairing or replacing the ATV clutch.
Note: Please note that the assembly of many Chinese ATVs leaves much to be desired. Therefore, after buying a quadric, you should check how the clutch is installed. If the nut on the mechanism is not fully tightened, you will hear a rumble in the CVT area while driving.
How to remove and install a new clutch on a children's ATV depends on the model of the device. For example, on some models, the chain reducer is covered with plastic parts (footboard, etc.). In this case, the master needs to dismantle all interfering elements.
To replace the clutch you need:

The procedure is quite simple, but the design features of the ATV can make it a little more difficult. For example, in order to remove the mechanism from a teenage all-terrain vehicle, you need to dismantle the gearbox cover, unscrew a few screws, unscrew the nut, remove the washer and remove the clamp. Before changing the clutch on an ATV, study the documentation for the device.
It should be said right away that replacing the clutch on an ATV with a CVT is a little different from servicing children's or teenage vehicles. And the thing is that in order to complete the procedure, the rider will have to dismantle the transmission. Because the quad's clutch is hidden behind the CVT, the rider needs to:

This will give you access to the quadric clutch. Then you just have to unscrew the central bolt, loosen and get the mechanism. After that, you need to install a new component, tighten the nut and assemble the variator.
In fact, even Chinese mechanisms have a significant service life. Therefore, the main reason why the clutch on an ATV burns out is the improper use of technology. Component lifespan reduces:
If you "spare" the clutch, the resource of the mechanism will last even for 10 thousand km.
02/19/2021 1989
The clutch on an ATV is responsible for both shifting gears and reducing vibration while riding. ATVs for children are no exception.
As a rule, the occurrence of any problems with this component of motor vehicles, the rider feels immediately. It is recommended to service the ATV clutch every 6000-7000 km, but sometimes all kinds of problems can occur earlier. The rate of wear of the functional components of motor vehicles directly depends on the conditions of its operation.
The following points can serve as a signal that something is wrong with the motorbike clutch:
Depending on the severity of the failure, the problems described above can be solved either by repairing the vehicle's clutch or by replacing it completely. As for Chinese models of ATVs, here it is necessary to check whether the nuts on the clutch are securely fastened. Poor assembly of motorcycles can also cause suspicious sounds in the variator area.
To change the clutch on a children's ATV by yourself, you will need:
In general, this procedure is quite simple and fast. In older models of ATVs, everything is somewhat more complicated. Before proceeding with the dismantling of any components of motor vehicles, be sure to read the instructions from the manufacturer.
Even in Chinese models of ATVs, the clutch boasts an impressive margin of safety, and therefore its breakdown often occurs as a result of improper use of this equipment.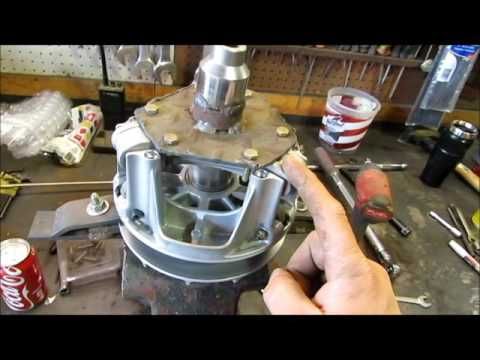
The main causes of premature ATV clutch wear include:
The only way to prolong the life of your ATV clutch is to use it properly and carefully. It is advisable to use good oil, and do not forget about timely maintenance.
The use of high-quality clutch discs in the ATV ensures a smooth start of the vehicle, and also fully ensures reliable grip without slipping even under fairly high loads. The exception is children's electric ATVs, in which there is simply no clutch disc.
ATV clutch usually needs to be adjusted no more than once a year. Before starting work, place the vehicle on a special footboard.
The process of adjusting the clutch on a motorbike is quite simple, and consists of the following steps:
 If necessary, refer to the user manual for assistance. If the cover prevents access to the clutch, then dismantle it;
 Since adjusting your ATV's clutch is easy, you can repeat this procedure as needed. In the vast majority of motorcycle models, this functional component is adjusted in a similar way. If there are certain nuances in the clutch setting, they are explained in detail in the official vehicle manual.