This post contains affiliate links.
Adding air to your RV’s tires should be straight forward but when you are faced with dual tires, also known as dually tires or duallies, it can seem a little more complicated. There are a few different ways that you can go about adding air to your dual RV tires, and the best one is going to be the one that you are most comfortable with but some ways are definitely easier than others.
To inflate dually tires, access the inner valve stem (with or without an extender), attach the chuck to the valve stem and use an air compressor with a high PSI rating to fill the tires.
RV tires are expensive, and nothing puts a damper on a trip like a blowout. Properly inflating your RV’s tires is going to help extend the life of your tires and keep your trip rolling smoothly. I’ve got a couple of tips and tricks that will make the process of properly inflating your duallies easier.
Table of Contents
Adding air to the outside tire is easy – you just remove the stem cap, attach the air hose and chuck to the valve stem, fill the tire while checking the pressure, then replace the stem cap. Inflating the inside tire is when it gets fun.
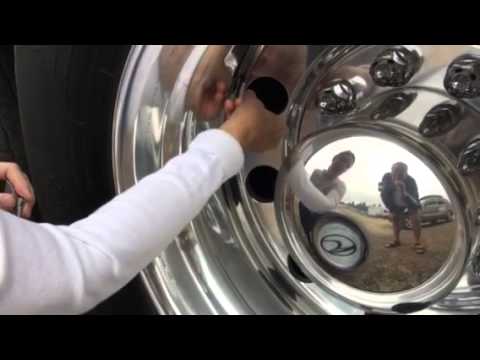
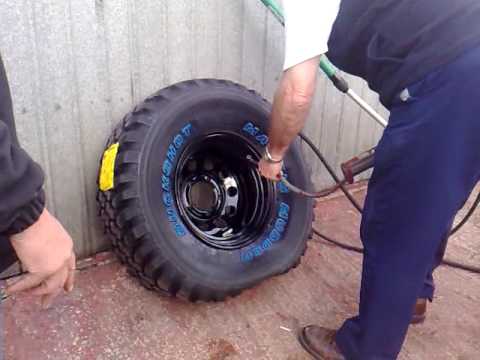
One of the biggest challenges that comes with filling dually tires is accessing the inner wheel’s valve stem. If your dual rims are properly aligned then you won’t have as much trouble reaching it. If you’re like 99% of RV owners, your dual rims won’t seem to be properly aligned.
You can fix this by taking off the outside tire to reposition it so that the inner valve stem comes through the cutouts in the rim. Once your inner valve stem is at least accessible you’ll be able to fill it in the future without taking off the outside tire.
Fix It Yourself is a self-guided online course where certified RV tech Ed Wilcox walks you through all the steps you need to know to properly maintain your rig and fix problems when they come up.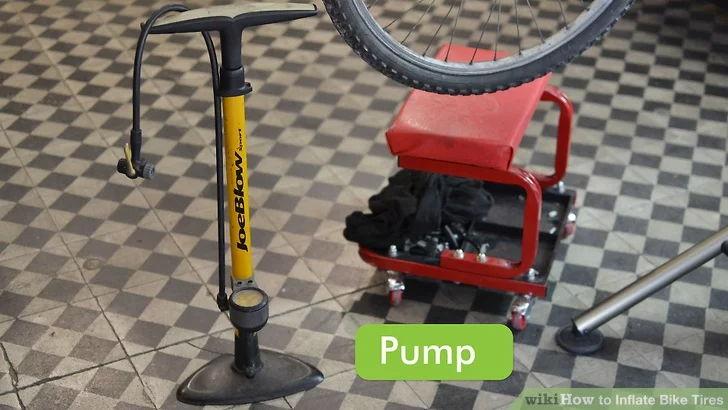 Check it out HERE!
You can either use a personal air compressor or an air pump at a gas station, truck stop, etc to fill your tires, but if you do decide to use your air compressor you have to make sure it has a high enough PSI to get the job done. Dually tires typically should be filled to 80 PSI, and not all air compressors will be able to reach that pressure.
To use your compressor you’ll want to get a pressure gauge that’s long enough to reach the valve stem, which means you’ll need about a 12-inch hose without a valve stem extension installed.
The pressure gauge will let you keep an eye on the tire’s PSI as you’re filling to make sure that it doesn’t get under- or overinflated. You can monitor the pressure by just placing the pressure gauge onto the valve stem without pumping any air into the tire.
Sale
AstroAI Digital Tire Inflator with Pressure Gauge, 250 PSI Air Chuck and Compressor Accessories. 2; Includes an inflator, straight locking...
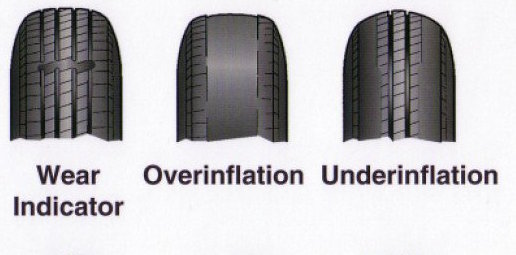
If a tire is under-filled it will cause more wear and tear on the tire, not to mention it can make your RV more prone to tipping over which is definitely something you do not want to deal with. If your tire is overfilled, you increase the likelihood of a blowout and you also decrease your tire’s lifespan.
In order to fill the tire, you can try using an angled inflator chuck to better reach the valve stem and you can also find them in different lengths. It may take some playing around with different chucks to find the one that works best for your RV. You can also try getting a valve stem extension with different angles like 90 degrees, 120 degrees, etc.
Once you have your air compressor hooked up, squeeze the trigger/lever on the compressor hose to pump air into the tire and release the lever to see what the tire’s current PSI is.
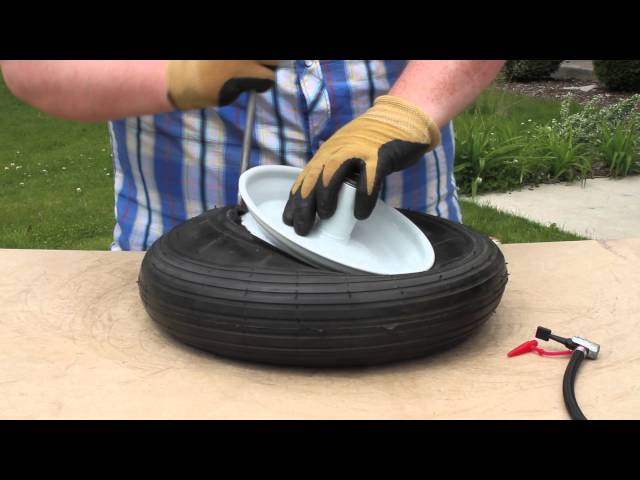
A valve stem extender is exactly what it sounds like – a part that you can install to extend the length of your valve stem. Most of them are made of stainless steel and they attach directly to the tire stem, and you can leave them installed so that you’re all set for next time.
Sounds great, right? No more cramped spaces, no more fumbling for the valve stem, no more hassle.
While that may sound like the best thing in the universe (especially if you’re already an hour into trying to check your dually tire pressures), most RV forums are actually pretty divided on how well they work and especially how safe they are for your RV.
Some people argue that they’re just as hard if not harder to install than just putting the chuck on the stem, and other people have had bad experiences with them leaking if left on for long periods. Still other people have reported the inside of the valve stem, which is rubber, deteriorating despite the stainless steel exterior.
On the other side of the coin many people swear by them, saying they have never had a problem and their valve stem extenders make the dually filling process so much easier.
Some newer and higher-end RVs will come with extenders already installed, which is awesome. If that’s the case then you can use them until you have to replace the tires and then look at replacing the extenders at the same time.
There are many valve extender kits that have good reviews and are recommended on the RV forums, but everyone seems to agree that you should avoid the airless stem extenders. One person reported losing two perfectly good tires in less than a year thanks to leaks from the airless extenders.
CKAuto 6 Pack 45 Degree 90 Degree 135 Degree Metal Valve Stem Extenders, Universal Valve Stem...
 ..
..This is an equalizing valve that allows air to flow freely from one tire to the other, allowing both tires to be at equal pressure. I know what you’re thinking – I just checked the tire pressures and they’re both the same. Why would I need something like this?
While the tires will be at the same pressure after you fill them, on the road is a different story. The inside tire is going to heat up more due to lower airflow and the in-board brakes, and this higher temperature is going to cause the pressure in your inside tire to rise as you travel.
As I mentioned, too-high of pressure can leave you prone to a blowout and put more wear on your tire, so the tire equalization valve seeks to remove that risk.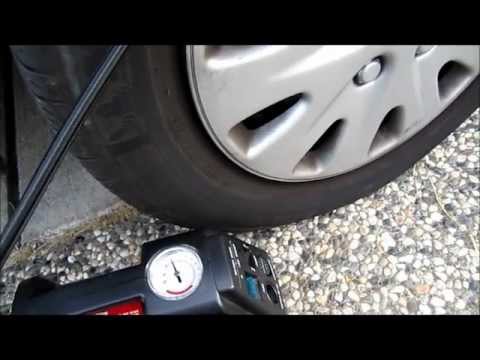
Products like the Crossfire Dual Tire Pressure Equalization System show you if your tires are properly inflated while allowing the higher pressure in the inside tire to equalize with the outside one. This will add to your tires’ overall life expectancy and hopefully save you money in the long run.
Sale
Crossfire Dual Tire Pressure Equalization System, 110 PSI, one per pkg. (CF110STABT)
Did you know that a tire being 20% under inflated will cause at least a 30% loss in the life expectancy of your tire? Similarly, a tire being 20% overinflated will cause at least a 10% loss in your tire’s life expectancy while increasing the risk of a dangerous situation.
You should check your dually tire pressure before setting out on every trip, and when you fill up for gas while on your trips.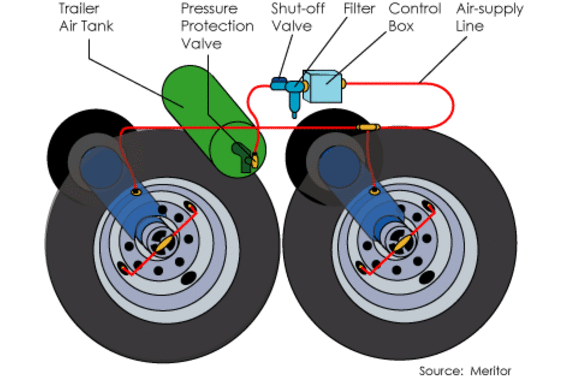 It’s especially important to check if your RV has been sitting still for a while, as dry rot can cause leaks and other issues.
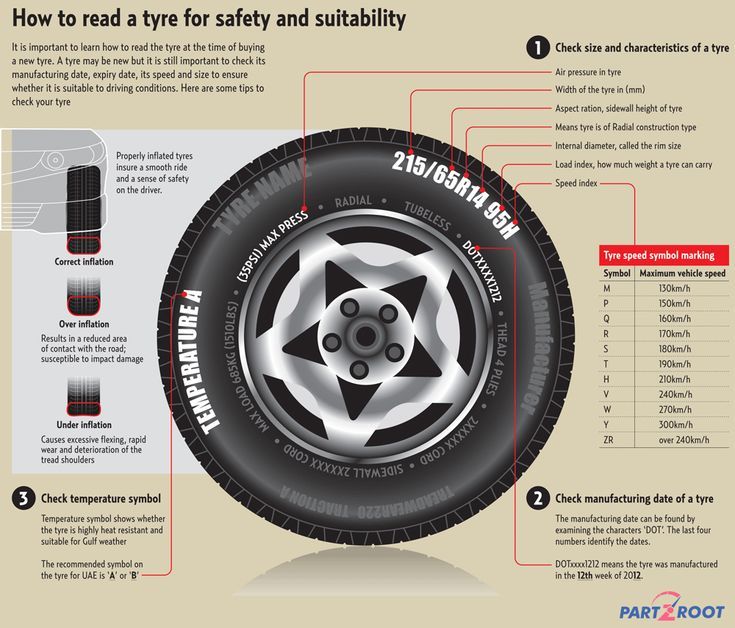
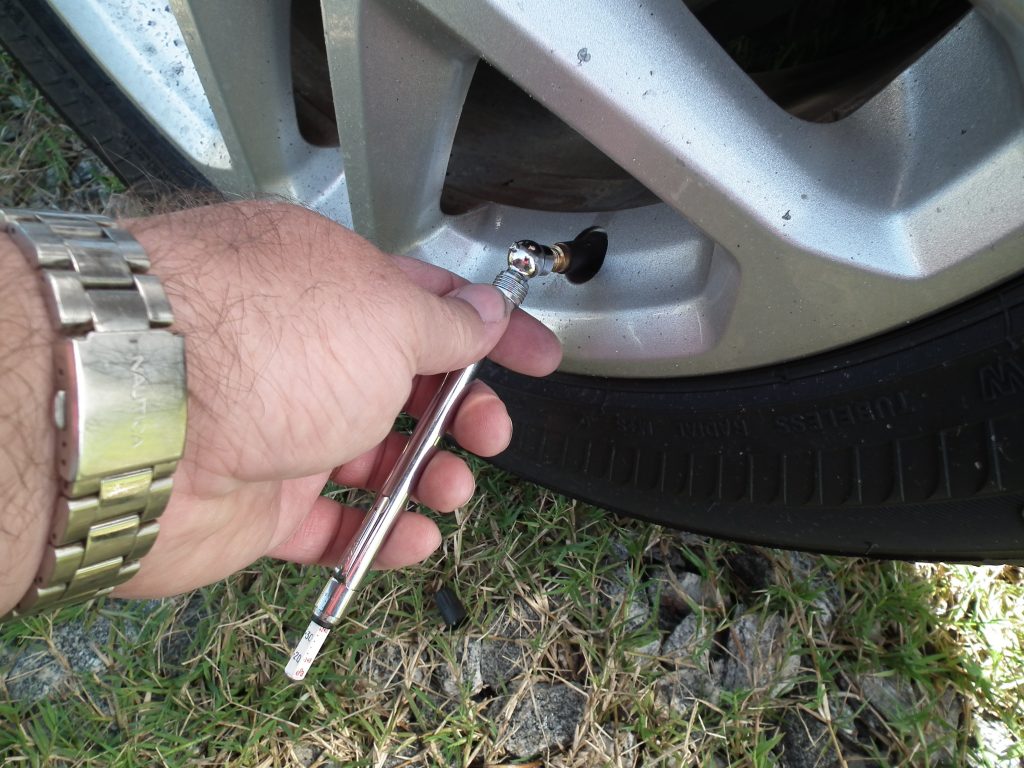
Generally, your RV’s dual tires should be at 80 PSI, and to check the pressure you’ll need to make sure the tire pressure gauge is rated high enough so that you get an accurate measurement. A pressure gauge that is too low will max out without telling you if you’re actually at 80, and one that is too high may not give you an accurate reading.
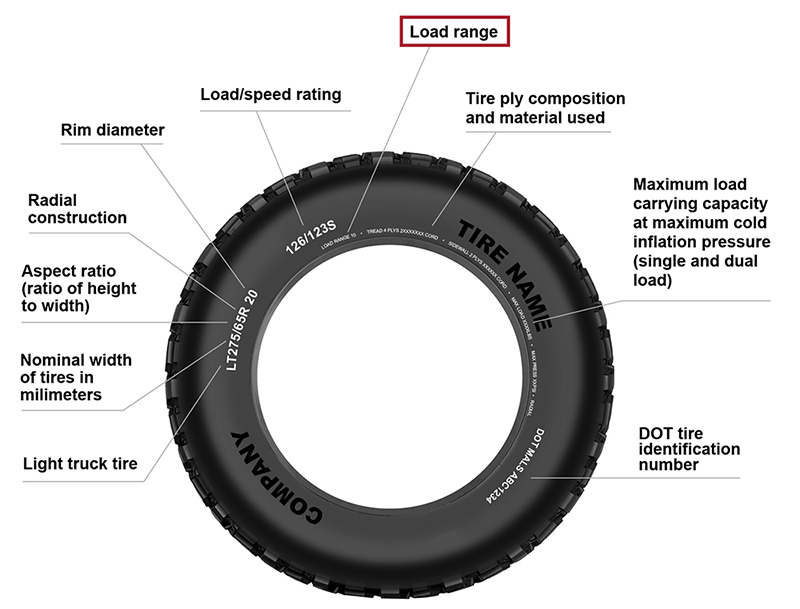
But before you go and just fill your tires to 80 psi you’ll want to check the owner’s manual of you RV or the placard stating the tire pressure rating for your RVs tires. You should also check on the tire itself what the rating is.
The rating found on the sidewall of the tire will actually state “maximum load-carrying capacity and the minimum air pressure required to carry this load”. This means it’s a good idea to know what your RV actually weighs for each axle when you are fully loaded for a trip, including all passengers.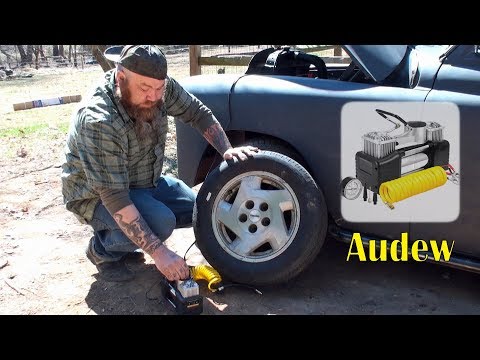
Tire pressure should also be checked when cold. This is because when you start driving your tires warm up, increasing the air pressure in your tire. Any manufacturer rating from both the tire and RV will be for a cold tire.
A tire pressure monitoring system is exactly what it sounds like – a way to monitor the air pressure of your tires in real time. This is done through the electronic system that sends periodic reports to the main console and will also alert you of any potential issues.
A sensor is mounted in each wheel or as part of your anti-lock braking system (depending on the model), and these sensors are what monitors your tire pressure,
These systems are fairly pricey up front, but they will save you a lot of money and time on the back end by allowing you to keep your tires inflated at the ideal pressure and therefore reducing the wear and tear on them.
Some monitoring systems will only track pressure while others will also give you information about temperature. The EEZTire-TPMS6 system will give you real-time updates about both while also providing audio and visual alerts to any problems, and it’s one of the highest-reviewed monitoring systems on the market.
EEZ RV Products EEZTire-TPMS6ATC Real Time/24x7 Tire Pressure Monitoring System - Color Monitor + 6...
The most costly parts of RV ownership are repairs and maintenance. That’s why I recommend learning to do your own RV repair and maintenance.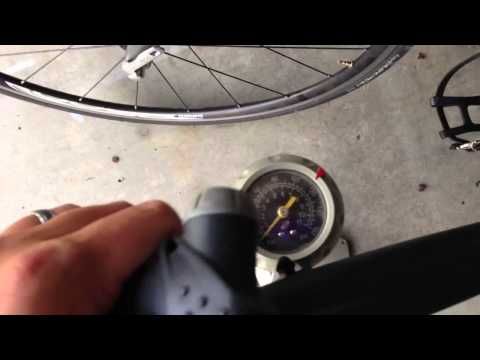
The Fix It Yourself RV Maintenance Course is the perfect way to learn how to do the most common repairs and maintenance on your RV. A Certified RV Technician wrote and filmed the course so you know the information is actually correct.
Plus it’s downloadable so you can access it from anywhere, even when boondocking in the middle of nowhere with no service.
Find out more about the best RV Maintenance and Repair Course available!
Learn to Fix Your RV Yourself
Closing ThoughtsNow you know how to inflate dual RV tires and why it’s important, and hopefully, you’ll be more confident the next time you get ready for a trip. Just remember to use a compressor with a high enough PSI, choose your valve stem extender wisely, and don’t be afraid to take the outside tire off in order to get the inner valve stem positioned where it’s supposed to be.
| Preview | Product | |
|---|---|---|
EEZ RV Products EEZTire-TPMS6ATC Real Time/24x7 Tire Pressure Monitoring System - Color Monitor +. .. .. | Check Latest Deals | |
| Crossfire Dual Tire Pressure Equalization System, 110 PSI, one per pkg. (CF110STABT) | Check Latest Deals | |
CKAuto 6 Pack 45 Degree 90 Degree 135 Degree Metal Valve Stem Extenders, Universal Valve Stem. .. .. | Check Latest Deals | |
| AstroAI Digital Tire Inflator with Pressure Gauge, 250 PSI Air Chuck and Compressor Accessories... | Check Latest Deals | |
GSPSCN Silver Dual Cylinder 12V Air Compressor Pump for Car, Heavy Duty Portable Tire Inflator. .. .. | Check Latest Deals |
A trip can be fun, or it can be frustrating, depending on the state of your tires. When your tires are properly inflated, you will have a safe and comfortable trip. If they are not, you could encounter major problems, such as a blowout on the road. Dual RV tires add an extra wrinkle to your tire maintenance.
If a tire is underinflated even as low as 20%, it reduces its lifespan by 30%. Likewise, if it is overinflated in the same percentage, there is a 10% decrease in the tire’s life expectancy. Moreover, there is an increase in the chances of something going wrong along the way.
Inflating an RV tire is simple, or at least it should be. But with dual RV tires, it becomes a little more complicated. This article will provide a detailed step-by-step guide on how to inflate dual RV tires.
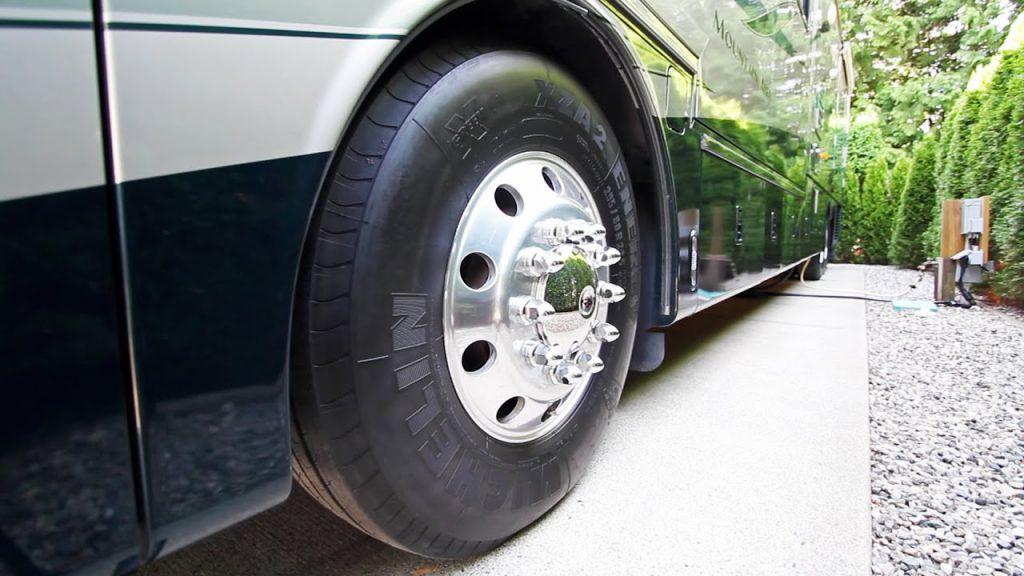
A vehicle having dual RV tires means there are two tires side by side. Dual tires are usually located at the rear of a vehicle. Generally, dual RV tires are more common with Class A and Class C motorhomes.
Dual tires have their benefits, as each tire helps share the load with the other. As such, overloading is less likely. Another benefit is that it improves braking compared to a single-rear-wheeled vehicle. But beyond stability, dual tires are beneficial when one gets damaged. The undamaged tire helps maintain some control until the vehicle can stop and the other tire is fixed.
Step 1: Get an air compressor. The air compressor should be one with a high enough PSI rating. Dual RV tires are typically required to be filled to as high as 120 PSI. However, not all air compressors can go that high. If you decide to use an air compressor, make sure it can reach at least 120 PSI.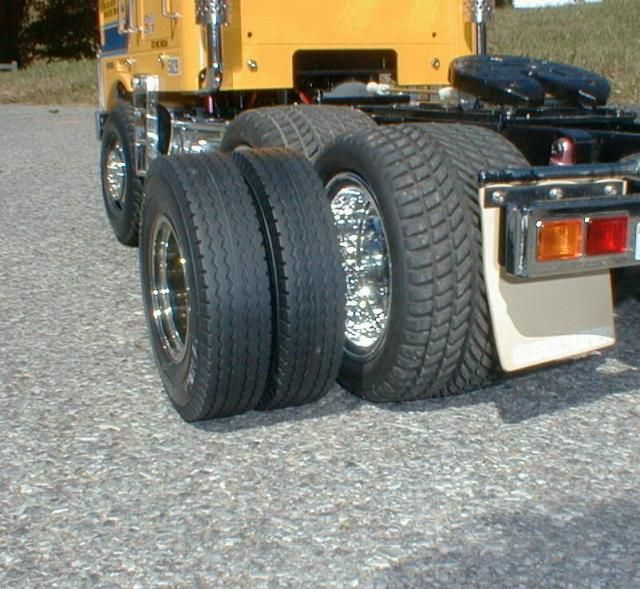
Step 2: Get a pressure gauge. You will need a pressure gauge long enough to reach the valve stem to use the air compressor. The pressure gauge helps you keep an eye on the tire’s PSI to ensure you don’t underinflate or overinflate.
Step 3: Inflate the outside tire. Detach the stem cap, attach the air hose and chuck to the valve system, and add air to the tire. Remember to check the tire pressure while inflating the tire. Then, replace the stem cap.
Step 4: Access the inner wheel’s valve stem. To fill your dual RV tire, you must reach the inner valve stem. An angled inflator chuck helps you reach the valve better. Inflator chucks also come in different lengths. However, you may have to do a few trials to know the one that works. Alternatively, you can consider getting a valve stem extension that has multiple angles.
Step 5: Attach the inflator chuck to the valve stem of the tire. Hook the valve stem with the air compressor.
Step 6: Fill the inner tire with the air compressor. The next step is to squeeze the lever on the compressor hose and pump air into the tire. Release the lever and check the current PSI rating of the tire. Keep doing this until you reach the required pressure. Go slowly and steadily because while you want to reach the expected rating, you don’t want to go above. Underinflated tires will overheat and pose greater risk of an accident. Overinflated tires will decrease in the tire’s lifespan and cause a rougher ride. Both scenarios can cause premature tire failure.
Step 7: Replace the stem cap. When replacing, tighten the cap moderately to prevent the cap from cracking.
You may encounter some challenges while inflating your dual RV tires. The most common problem is accessing the inner wheel’s valve stem. If your dual rims are properly aligned, reaching the inner stem shouldn’t be difficult. In addition to misaligned rims, you may have valve stems that are too short or missing the extender.
Another issue is the protective rubber saddle that keeps the valve stem centered in the outer wheel is missing or worn. This causes the stem to wear on the edge of the outer wheel.
Semi-trucks and large buses or motorhomes may utilize a tire pressure equalization system, which ensures both tires are at equal pressure. You typically don’t see these on RVs, but high-end motorcoaches might be a good candidate for them.
Either way, it’s important that both tires in a dual pair be set to the same pressure.
As always, check your owner’s manual to know the required pressure rating for your RV tires. Check the tire to know its pressure rating. The pressure ratings are usually located on the sidewall of the tire, however, it’s best to weigh your RV and set tire pressure according to load charts for your tire manufacturer, based on the weights taken.
Check your dual RV tires:
Dual RV tires add only a few extra considerations to your regular tire maintenance. Ensure they are equally pressured and the inner valve stem is in good shape, and you should be fine. Also consider a good tire pressure monitoring system for constant tire pressure monitoring.
Make sure you keep track of all your RV maintenance and repairs with an online tool such as RV LIFE Maintenance. Not only can you keep all of your documents in one place, but you’ll also receive timely reminders when maintenance is due to help you avoid costly repairs and potentially serious accidents.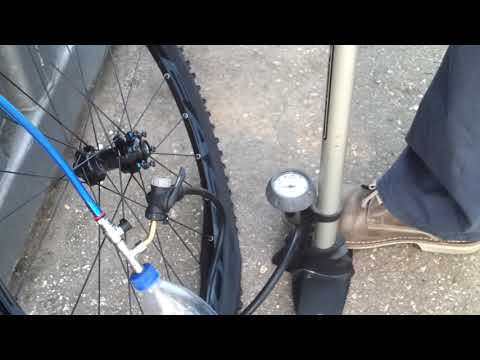
Mark Johnson is the Founder and Editor In Chief of tiresglobe.com.
| Address: , Tula, Novomoskovskoe shosse, 50 | Phone: 8 (4872) 252-223 | E-mail: [email protected] | Feedback |
BRAKING WEAR WITH LOCK WHEELS (SW)
DIFFERENTIAL FEATURES: pronounced local wear; size and shape correspond to the contact patch. Presence of tread cut scratches. As a rule, other tires on the same axle have similar characteristics. POSSIBLE CAUSE: Wheel lock due to overbraking or braking system defects. RECOMMENDATION: Tire: Removal of the tire from service with sufficient wear. Vehicle: Check the operation of the brake system.
TEARS (RUPTURES, CRACKS) IN THE EXTREME GROOVES OF THE Tread
DIFFERENTIAL FEATURES: Breaks in the outer grooves of the tread. POSSIBLE CAUSE: Repeated, repetitive driving on penetrating objects (curbs, rails, etc.) Frequent turns and maneuvering "on the patch". Hot tires are more susceptible to this damage. RECOMMENDATIONS: Tire: Operation possible subject to legal regulations. Vehicle: Avoid driving over obstacles and maneuvering in confined spaces.
MULTIPLE CUTS
DIFFERENTIAL FEATURES: many cuts all over the treadmill. POSSIBLE CAUSE: Driving on aggressive pavement (construction sites, quarries). RECOMMENDATIONS: Tire: Further use is possible if legal regulations are complied with. Vehicle: No.
PROTECTOR LEAVE
DIFFERENTIAL FEATURES: belt delamination which can lead to complete tire failure. POSSIBLE CAUSE: Long-term operation with insufficient tire pressure or overload, causing the internal components of the tire to overheat. RECOMMENDATIONS: Tire: Remove the tire from service. Regularly check and maintain the tire pressure recommended by the manufacturer. Avoid overloading tires. Vehicle: No.
CHANGING THE PROPERTIES OF RUBBER
DIFFERENTIAL FEATURES: change in the condition of the tread rubber, shoulders or sidewalls. Rubber becomes softened, sticky, lamellas and grooves become closed. A change in the shape of a part of the tire may be accompanied by a strong specific odor. POSSIBLE CAUSE: Tire contact with petroleum products or petroleum products. RECOMMENDATIONS: Tire: Remove the tire from service. Check tire storage conditions. Vehicle: Check and repair any fuel or oil leaks. Avoid parking in areas with oil stains.
NETWORK OF CRACKS
DIFFERENTIAL FEATURES: network of cracks in the surface of the rubber on the sidewall of the tyre. POSSIBLE CAUSE: Aging due to long-term use, exposure to ultraviolet rays. Vehicle: No.
TWIN TIRE SIDEWALL CONTACT
DIFFERENTIAL FEATURES: Sidewall damage. Damage to the integrity of the sidewall rubber due to contact between the dual tires (with/without carcass damage). POSSIBLE CAUSE: Wheel pair contact resulting in concentric sidewall wear and premature removal of the tire from service. RECOMMENDATIONS: Tire: Remove from service if the rubber is abraded to the carcass or there are wrinkles on the inner sealing layer. Vehicle: Use rims with recommended dimensions, offset (distance between tire centers of symmetry), follow recommendations for minimum distance E for twin wheels.
SIDEWALL RUBBER DETAILING (DELAMINATION)
DIFFERENTIAL FEATURES: Separation of the sidewall rubber layer due to pressurized air penetrating (infiltration) into the inner layers of the tyre. POSSIBLE CAUSE: violation of the integrity of the internal sealing joint during installation/dismantling (for example, with a shovel). Outside breakdown with object stuck. RECOMMENDATIONS: Tire: Remove the tire from service and prevent it from being repaired, hot retreaded or welded on. Check the methods and technology for marking the tire, mounting/dismantling and avoid repetition. Vehicle: Check that the rim is in good condition (no dirt, rust, etc.)
Frame tear on sidewall
FEATURES: Smooth concentric tear on the sidewall. POSSIBLE CAUSE : Operating with tire pressure not as recommended (reduced), driving with overload. Different inflation pressures in dual tires. Incorrectly matched pair: different degree of wear, size, brand, type. RECOMMENDATIONS: Tire: follow the recommended tire pressure, avoid overloading, follow the recommendations for choosing twin wheels:
Vehicle: No.
Sidewall damage due to strong impact / pinching
DIFFERENTIAL FEATURES : Rupture of carcass with/without damage to sidewall rubber and/or liner. POSSIBLE CAUSE : Violent impact on an obstacle (kerbstone, edge of a pit...) with the sidewall pinched between the rim flange and the obstacle. RECOMMENDATIONS: Tire: Dismantle and hand over to truck tire service specialists to study and determine the possibility of a quality tire repair. Vehicle: No.
Violation of the integrity of the rubber layer of the heel of the bead
DIFFERENTIAL FEATURES: Traces of foreign objects (rust, sand…) on the rubber layer of the bead base and/or bead heel. POSSIBLE CAUSE: Poor condition of the seat and flange (rust), ingress of dirt during installation If the disc is severely worn, replace it. Maintain cleanliness in the tire shop. Strictly follow the recommendations for tire fitting. Vehicle: No.
Bead toe damage
DIFFERENTIAL FEATURES: Damage to the bead toe rubber when mounting/demounting a tire POSSIBLE CAUSE : Improper mounting/dismantling techniques and/or severe tool wear. RECOMMENDATIONS: Tire: Remove the tire from service. Have tires mounted/dismantled at specialized truck tire shops or using proper mounting/dismantling tools and techniques. Vehicle : None.
Bead failure due to thermal effects
DIFFERENTIAL FEATURES: Qualitative change in the composition of the bead rubber (heel and base), bluishness, stickiness, cracks, burns, unwound carcass threads. POSSIBLE CAUSE: Excessive bead heating, often due to brake failures or vehicle braking too long (heat generating friction between brake drum and lining). RECOMMENDATIONS: Tire: Remove the tire from service. Vehicle: Check the condition of the brake system. Avoid prolonged braking on descents. Observe the rules of safe traffic. Types of heat transfer:1. Thermal conductivity of materials (conduction) Thermal conductivity of materials (conduction)
Poker example: The heat from the fire is transferred along the poker to the hand, and the longer the poker, the greater the heat loss: the side that we hold in our hand has much less heat. 1 - Contact between brake linings and drum Less distance means less heat loss. Strong and fast local heating. 2. Thermal infrared radiation3. Convective heat exchange
Heat radiation Example - furnace chimney: A fire in a furnace heats its walls with infrared radiation. The screen between the fire and the object absorbs this radiation. The heating of the screen increases as it approaches the flame. Convective heat exchange Example - heating radiator: The hot air heated by the radiator rises and transfers heat.
Wrinkle (shagreen)
DISTINCTIVE FEATURES : "Marbling", the presence of wrinkles and small folds on the sealing layer in the zone of greatest deformation. POSSIBLE CAUSE: Driving with insufficient tire pressure and/or overload. RECOMMENDATIONS: Tire: Remove the tire from service. Vehicle: No.
Destruction of the sealing layer
DIFFERENTIAL FEATURES : Spilling of rubber sealing layer with subsequent possible complete destruction of the tire carcass. POSSIBLE CAUSE: Continuous operation with overload or low tire pressure. RECOMMENDATIONS: Tire: Remove and dispose of the tire. Vehicle : No.
Electric shock damage
DIFFERENTIAL FEATURES: Electrical discharge can damage the rubber and in some cases carcass threads and even the bead ring, resulting in typical craters. POSSIBLE CAUSE: Electric arc (flash) due to contact of a body part with a source of high voltage or lightning. RECOMMENDATIONS: Tire: Remove all vehicle (truck) tires from service for a thorough check. Vehicle: No. « back to list | |
K category:
Tractor and car repair
P publication:
Vehicle wheels and tires
H read more:
Typical part defects
Vehicle wheels and tires
Most trucks have disc wheels with removable side rings. The disk and wheel rim are connected by welding. Wheel rims are flat, collapsible. A removable rim bead ring is required for tire mounting. It is fastened with a lock ring, or it can itself be split, and in this case it is installed on the rim without a lock ring. The wheel rims are attached to the hub studs with taper nuts. To prevent the wheel nuts from spontaneously unscrewing when the car is moving, the threads of the studs and nuts of the right wheels are right-handed, the left ones are left-handed. The rear wheels are dual. The inner wheel is fastened with cap nuts (futors) having internal and external threads; the outer wheel is put on these nuts and tightened with outer nuts with conical chamfers screwed onto them. The KamAZ car has a discless wheel, consisting of a spoke hub and a split rim. The GAZ-24 car has disc wheels, with welded non-separable rims, which have a deep recess in the middle part for easy tire mounting. Such rims are called deep.
Fig. 1. Wheels and tires:
a - a truck with a flat rim, b - a passenger car with a deep rim; 1 - tire, 2 - chamber, 3 - rim tape, 4 - wheel disk, 5 - removable bead ring, 6 - key ring, 7 - bead, 8 - bead core (wire rings), 9 - sidewall, 10 - frame, 11 cushion, 12 tread, 13 valve0525
A car tire mounted on a deep rim consists of a tire and a tube, while a truck tire mounted on a flat rim also includes a rim tape.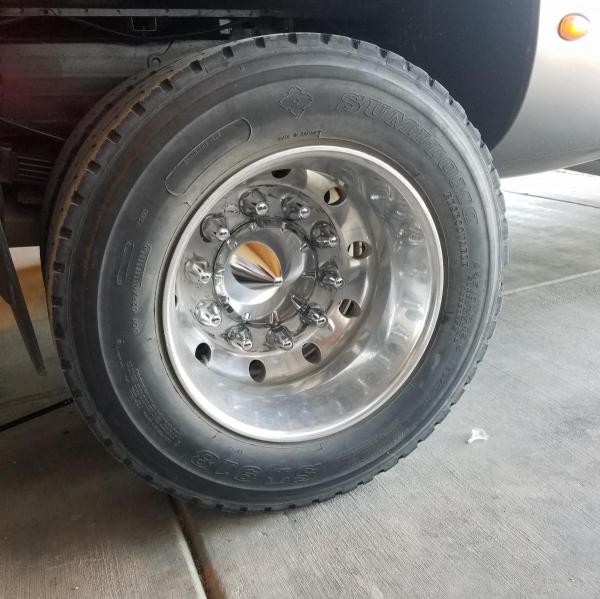 Other types of tires are also used - tubeless, with a removable tread, etc.
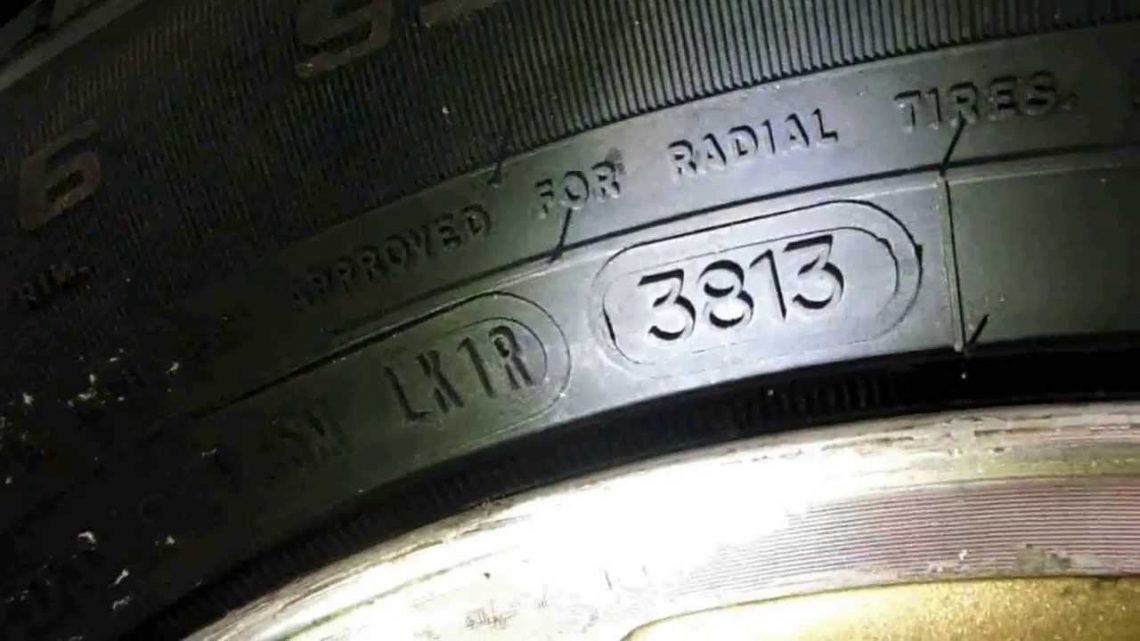
Each vehicle is fitted with tires of a certain size, according to which they are marked. Tire size is indicated in inches or millimeters with two numbers: the first indicates the width of its profile, the second - the diameter of the wheel rim, for example: 9.00-20 in inches or 260-508 in millimeters. Radial tires of this size are designated respectively 9.00R -20 or in millimeters 260-508R. In addition, a stamp is placed on the tire indicating the plant, month, year of manufacture and serial number. For example: O VII 8346057539, where O is the Omsk plant, VII is July, 83 is the year of manufacture and then the tire number.
Tire consists of carcass, bead cores, cushion layer and tread with sidewalls.
The carcass of the tire is the main power part of the tire and is made of several layers of rubberized durable fabric - cord. Depending on the location of the cord threads in the carcass, tires are divided into diagonal and radial.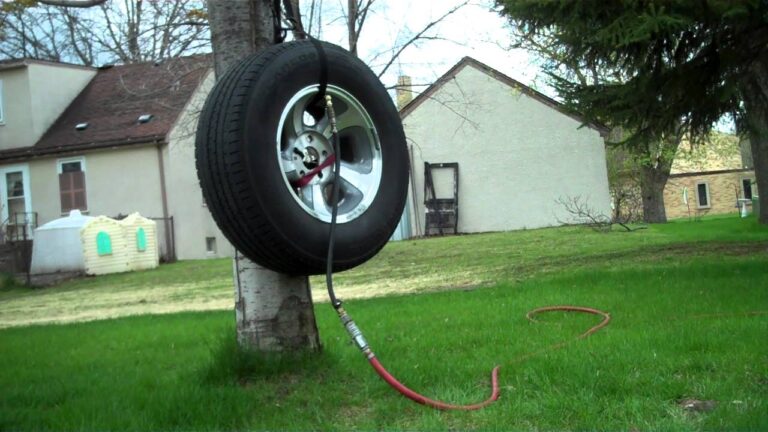 The latter are more promising, as they provide greater vehicle stability, better grip and are more durable than diagonal ones by about 40%.
Beads are designed to attach the tire to the wheel rim. To increase rigidity and strength, wire rings (cores) are laid in them.
The cushion layer is a rubberized layer that softens the impacts transmitted from the tread to the carcass and prevents the tread from peeling off? frame. In radial tires, the cushion layer is usually made of steel cord.
The tread, which is a thick layer of wear-resistant rubber, is in direct contact with the road surface and has a profiled surface for good grip (tread pattern). Depending on the operating conditions, tires can have a different tread pattern: road, universal, off-road and winter.
Tread sidewalls are a thin elastic rubber layer that protects the sidewalls of the carcass from damage, moisture, etc.; they indicate the designation of the tire.
The tube of a car tire is a hollow closed sleeve made of elastic rubber.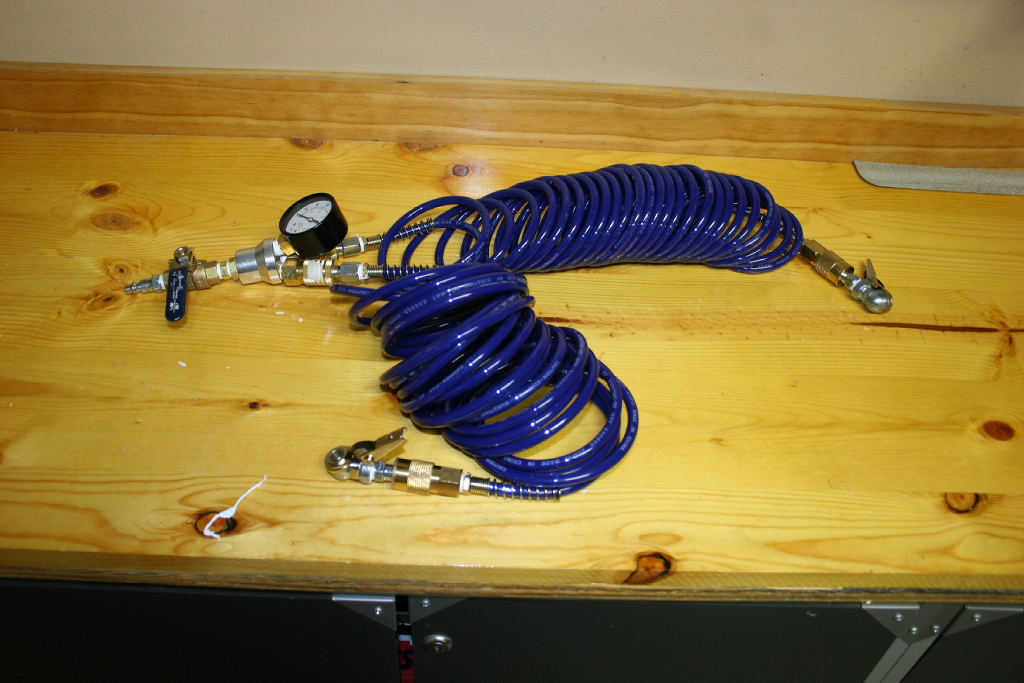


 ) Store tires in places protected from exposure to ultraviolet rays and ozone.
 Regularly check and maintain the recommended tire pressure. Find out the reason for the loss of pressure (puncture, valve, disc rim condition, etc.).