Please enable javascript to view the website ..
Repair help > Front-Engine Lawn Tractor repair > Front-Engine Lawn Tractor repair guides
January 1, 2015
By Lyle Weischwill
This step-by-step repair guide explains how to change a front tire on a riding lawn mower if the old tire is damaged beyond repair. Replacing the front tire is fairly easy; you just need a few tools and a manufacturer-approved riding mower part.
Follow the steps in this repair guide and video to replace the front tire on Craftsman, Husqvarna, Toro, Troybilt, Ariens, Poulan, MTD, Murray, Snapper, Yard-Man, John Deere and Weed Eater riding mowers and lawn tractors.
If you'd rather use tire sealant to repair the tire, the video How to Repair a Riding Lawn Mower Tire shows how.
Quick links
Tools required
Floor jack or bottle jack
Jack stand
Slot screwdrivers
Pry bars
Pliers
Valve stem core removal tool
Liquid detergent
Water
Wood blocks
Work gloves
Safety goggles
Compressor air supply
Repair difficulty
Time required
60 minutes or less
Repair difficulty
Time required
60 minutes or less
Replacing a front tire on a riding lawn mower
This video explains how to replace the front tire on a riding lawn mower.
01.
Park the riding mower on a level surface and set the parking brake.
Turn the ignition switch off and remove the key.
Wear work gloves to protect your hands and safety goggles to protect your eyes.
Lift the riding lawn mower hood and disconnect the spark plug wire.
Lower the tractor hood.
Tip: Disconnect both spark plug wires if your engine has 2 cylinders.
PHOTO: Disconnect the spark plug.
02.
Block the rear tires to keep the riding mower from rolling.
Position the jack under the frame and jack up the riding mower to raise the front wheel.
Place a jack stand under the frame to support the riding mower.
Remove the jack.
PHOTO: Block the rear wheel.
03.
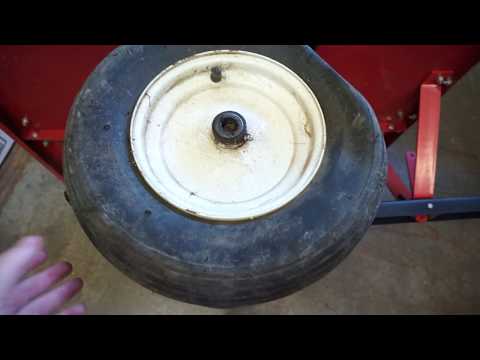
Pull off the axle cover.
Remove the retaining ring and then pull off the washers.
Pull the tire off the axle.
PHOTO: Remove the front wheel.
04.
Remove the valve stem cap.
Remove the valve stem core, which lets any remaining air out of the tire.
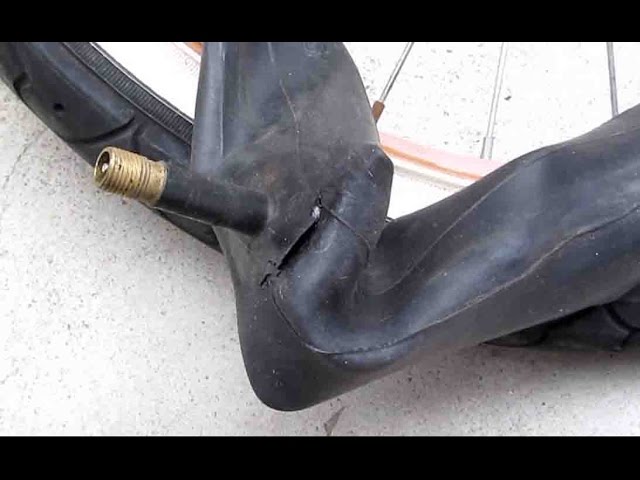
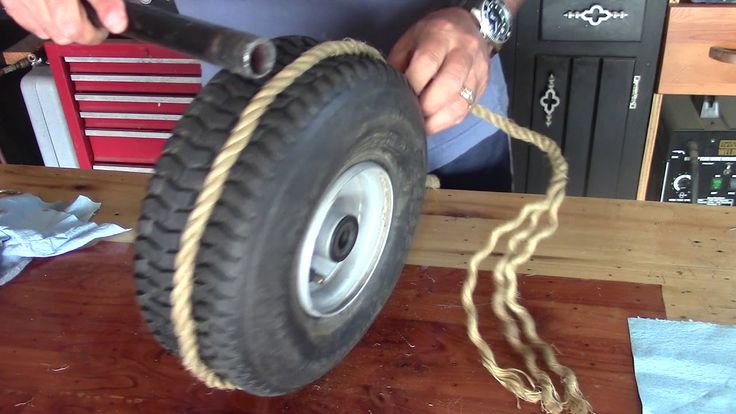
Break the tire bead and pry the tire off the wheel rim on one side.
Pry the tire off the rim on the other side.
PHOTO: Pry the tire off the rim.
05.
Clean the wheel rim.
Set the new tire flat on a work surface.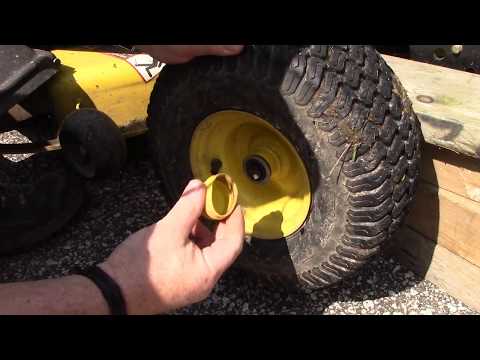
Lubricate the top tire bead with liquid detergent.
Pry the rim into the top side of the tire.
Flip the rim and tire over.
Lubricate the tire bead with liquid detergent.
Pry the remaining side of the tire onto the rim.
Warning: Use blunt tools to pry the tire to avoid damaging the new tire bead.
PHOTO: Lubricate the bead.
06.
Fill the tire with air to seat the tire bead.
Reinstall the valve stem core.
Fill the tire fully with air.
Tip: If the tire didn't fill with air, install a ratcheting tension strap around the center of the tire tread, tighten the strap to force the beads outward, and fill the tire with air to seat the tire bead. Carefully release and then remove the strap.
Tip: If the bead doesn’t seal, check the rim and replace it if you find damage.
PHOTO: Shoot air into the tire.
07.
Slide the wheel on the axle.
Reinstall the washers and snap the retaining ring onto the axle.
Push the axle cover onto the wheel.
PHOTO: Reinstall the wheel.
08.
Push the jack under the frame and raise the riding mower, and then pull out the jack stand.
Lower the riding mower to the ground.
Remove the wood blocks from the rear tires.
09.
Raise the tractor hood.
Reconnect the spark plug wire and lower the hood.
Tip: Reconnect both spark plug wires if your engine has 2 cylinders.
Warning: Undertaking repairs to appliances can be hazardous. Use the proper tools and safety equipment noted in the guide and follow all instructions. Do not proceed until you are confident that you understand all of the steps and are capable of completing the repair. Some repairs should only be performed by a qualified technician.
Choose a symptom to see related riding mower and lawn tractor repairs.
Main causes: punctured tire or inner tube, leaky valve stem, damaged wheel rim
Read moreMain causes: worn or broken ground drive belt, bad seat switch, transaxle freewheel control engaged, transaxle failure, dirty carburetor
Read moreMain causes: shift lever needs adjustment, neutral control needs adjustment
Read moreMain causes: worn or broken blade belt, broken belt idler pulley, blade clutch cable failure, bad PTO switch, damaged mandrel pulleys
Read moreMain causes: damaged cutting blade, worn deck pulley, damaged mandrel pulley, loose fasteners on mower deck components
Read moreMain causes: engine overfilled with oil, leaky head gasket or sump gasket, damaged carburetor seals, cracked fuel pump, broken fuel line
Read moreMain causes: clogged carburetor, damaged flywheel key, dirty spark plug, stale fuel, improper valve lash, engine needs a tune up
Read moreMain causes: faulty battery, bad alternator
Read moreMain causes: unlevel mower deck, dull or damaged cutting blades, worn mandrel pulleys, bent mower deck, engine needs tune up
Read moreThese step-by-step repair guides will help you safely fix what’s broken on your riding mower or lawn tractor.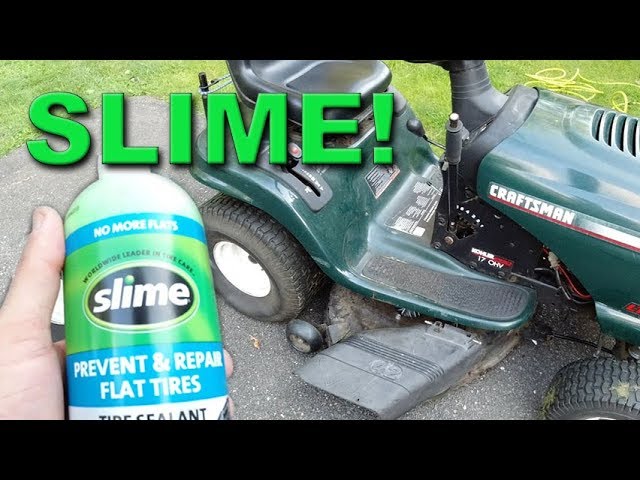
January 1, 2015
By Lyle Weischwill
Your mower can’t run on a damaged rear tire. Here’s how to install a new one.
Repair difficulty
Time required
60 minutes or less
Read moreJanuary 1, 2015
By Lyle Weischwill
If a blade on your mower is dull or bent, replace it following the steps in this repair guide.
Repair difficulty
Time required
30 minutes or less
Read moreJanuary 1, 2015
By Lyle Weischwill
Help your mower run better by replacing the fuel filter during your riding mower's annual tune-up.
Repair difficulty
Time required
15 minutes or less
Read moreUse the advice and tips in these articles and videos to get the most out of your riding mower or lawn tractor.
August 6, 2020
By Lyle Weischwill
Learn how a blade removal tool makes replacing the blade easier and safer
Read moreApril 9, 2019
By Kim Hillegass
Keep these 6 things on hand to keep the mower season running smoothly.
Read moreMarch 1, 2016
By Lyle Weischwill
Learn how to use a battery charger if your mower battery is dead.
Read moreDryer
Samsung DVE52M7750V/A3-00 dryer parts
Electric Range
Shop GE JBP70WK4WW electric range partsShop Maytag MET8885XB02 electric range partsShop Kenmore 79096419406 electric range parts
Electric Wall Oven
Shop KitchenAid KEBS177YAL2 electric wall oven parts
Front-Engine Lawn Tractor
Shop Model #917274961 Craftsman lawn tractor
Furnace
Weatherking Furnace Repair Parts
Garage Door Opener
Shop Craftsman 13953918D garage door opener parts
Gas Range
Shop Magic Chef 83EY-1 gas range partsShop Model #NX58K3310SS/AA-00 Samsung gas slide-in range
Gas Snowblower
Shop MTD 31AS6HEG799 gas snowblower parts
Miter Saw
Shop Craftsman 137212290 miter saw parts
Parts
Refrigerator Door Bin DA63-08646A
Refrigerator
Refrigerator Parts CraftsmanNorge Refrigerator Repair Parts
Snowblower Attachment
Craftsman Snowblower attachment Repair Parts
Speaker
Kenwood Speaker Replacement Parts
Top-Mount Refrigerator
Shop Roper RT18HDXJW00 top-mount refrigerator parts
Toys & Games
Shop Model #6209SR Roadmaster sidewalk wagon
Wet/Dry Vacuum
Craftsman 12512008 wet/dry vacuum parts
By Amelia Allonsy
Lawn mowers might require a tire change as a result of an unexpected flat tire or from regular wear. After years of frequent use, the tires treads wear down and become smooth, resulting in loss of grip and traction. Sunlight's ultraviolet rays, weather and general use can weaken tire rubber, resulting in dry rot and tire sidewall cracking. Tire replacement requires basic tools you likely already have on hand.
Lifting the lawn mower is the first vital step in changing a tire on a riding lawn mower. Floor jacks are designed to lift the lawn mower by forcing hydraulic fluid into a lifting ram. Block the rear tires in the front and rear of the tire with wooden blocks or bricks. The floor jack is centered under the front or rear axle while you pump the jack handle to lift the mower. Jack stands are designed to support the weight of the lawn mower safely to prevent jack failure when removing the tires. Place the jack stands under the front or rear axle, one on each side of the axle as close to the tire as possible.
Front tires and rims are generally held onto the axle by a C-clip on newer models or a cotter pin on older model lawn mowers.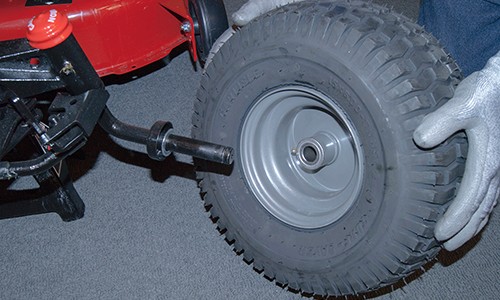 A flat screwdriver is needed to remove C-clips from the front axle. Insert the screwdriver head between the C-clip and axle shaft and pry back gently to remove it from the axle. Remove cotter pins from the axle shaft with needle-nosed pliers. Bend the ends of the cotter pin straight and pull the cotter pin free from the axle shaft. After removing the C-clip or cotter pin, you can slide the flat washer from the axle shaft and slide the tire and rim off the axle shaft by hand.
Riding mower rear tires are held in place with bolts, C-clips or cotter pins. Loosen and remove bolts with a socket wrench. After removing the bolts, you can slide the rear tire and rim from the rear axle. Use a flat-head screwdriver inserted between the clip and axle shaft to pry off the C-clip. Straighten cotter pins with needle-nosed pliers so you can slide the tire off the axle. Remove and repair one tire at a time to prevent damage to the lawn mower in case it may shift or fall.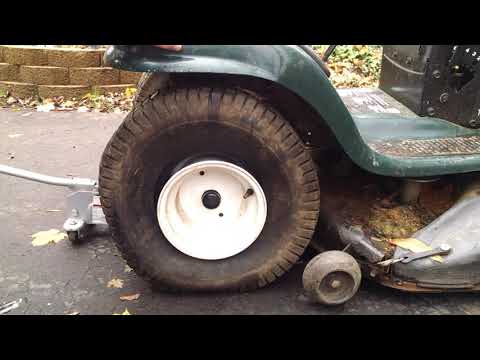 Use the same tools to install a tire back onto the axle, but proceed in reverse order.
Sometimes simply pushing down on a flattened tire is enough to break the bead seal that secures the tire to the rim. When this isn't enough, you can use two tire spoons, also called tire irons, to break the seal and remove the tires from the rims. Wedge a tire spoon between the tire and rim and hit the tire spoon with a hammer to break the seal. Pry backward on the tire spoon to create a gap between the tire and rim. The first tire spoon stays in place while you repeat the process with a second spoon opposite on the tire. Work the spoon around the circumference of the tire and rim to complete the removal process. Repeat this process in reverse to install a new tire to the rim.
References
Writer Bio
A former cake decorator and competitive horticulturist, Amelia Allonsy is most at home in the kitchen or with her hands in the dirt. She received her Bachelor's degree from West Virginia University. Her work has been published in the San Francisco Chronicle and on other websites.
Belarus
CameroonCôte d'IvoireEgyptEquatorial GuineaGambiaGhanaGuinea BissauIsrael (en) Israel (he)KenyaKuwaitLebanon (ar)Lebanon (en)LiberiaMozambiqueOman (ar)Oman (en)Qatar (ar)Qatar Arabia (en)Saudi Arabia (en)SenegalSeychellesSouth AfricaTanzaniaTunisiaTurkeyUgandaUnited Arab Emirates (ar)United Arab Emirates (en)ZambiaZimbabwe
AustraliaAzerbaijanMainland ChinaFijiFrench PolynesiaHong KongIndiaIndonesiaJapanKazakhstanMalaysiaNew CaledoniaNew ZealandPapua New Guinea PhilippinesTheSingaporeSouth KoreaTaiwannamantanUbebetube0003
AlbaniaAustriaBelarusBelgium (fr)Belgium (nl)Bosnia and HerzegovinaBulgariaCyprusCroatiaCzech RepublicDenmarkEstoniaFinland (fi)Finland (sv)FranceGeorgiaGermanyGreeceHungaryIcelandIrelandItalyLatviaLithuaniaLuxembourg (de)Luxembourg (fr)MoldovaMontenegroNetherlandsNorth MacedoniaNorwayPolandPortugalRomaniaRussiaSerbiaSlovakiaSloveniaSpainSwedenSwitzerland (de)Switzerland (fr)Switzerland (it)TurkeyUkraineUnited Kingdom
ArgentinaBoliviaBrazilChileColombiaCosta RicaDominican RepublicEcuadorGuatemalaMexicoNicaraguaRepublic of PanamaParaguayPeruUruguay
Canada (EN) Canada (FR) Mexicousa
 Place the charger
 Practical advice
Husqvarna Automower® is very easy to use and you will appreciate it right after installation and set up. Here are some tips to help you install a Husqvarna robotic lawnmower on your property with ease.
Inspect the lawn first. To minimize the risk of blockage and damage to the mower, stones, branches, tools, toys, and other items should be removed from the grass. In addition, if the grass is taller than ten centimeters, it is recommended to cut it again with a regular lawn mower.
Place the charging station on a level surface in the center of the area to be trimmed. Leave free space around the charging station. Make sure the charging station is located near a power outlet and protected from sunlight and splashing water from sprinklers.
 Charge the battery
 After placing the charging station, the robotic lawnmower must be charged. Place the robotic lawnmower on the charging station and proceed to the next step. Charging a fully discharged battery takes 80-100 minutes.
Lay the boundary wire along the perimeter of the lawn to be cut. Simply secure the wire to the ground with the included tie-downs. This will help the robotic lawnmower determine where to turn. Loop boundary wires around flowerbeds and shrubs for the mower to drive around.
The guide wire helps Husqvarna Automower® find its way back to the charging station. Connect one end of the wire to the station and position the other end in the farthest part of the garden so that the robotic lawnmower can easily find it. The free end of the guide wire must be attached to the boundary wire at their intersection. Then connect the boundary and guide wires to the charging station.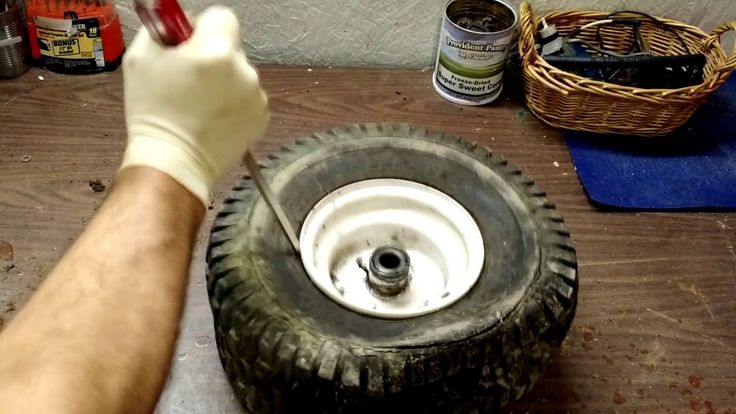
Turn on your Husqvarna Automower® and enter your four-digit PIN, set the cutting height and set the operating hours. That's all! The setup process is complete. The robotic lawnmower will remain in the charging station until it is fully charged. After that, she will go to the part of the garden where you last mowed the lawn.
How-to guide
Practical Recommendations
WHAT DREATIONS IS WINTERS
Practical recommendations
Practical recommendations
Practical Tips
Practical Tips
Practical Tips
Practical Tips
Showing 10 of 95
No one wants tires to damage the grass while landscaping.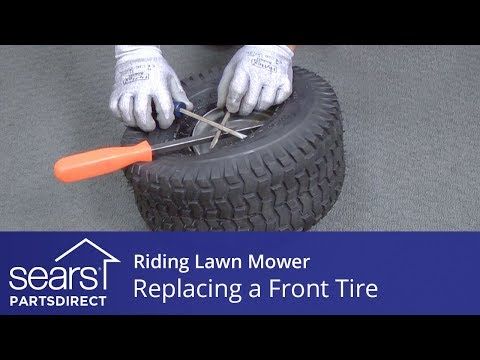 In other words, garden tires should have minimal impact on the soil. For this purpose, BKT specialists have developed a line of tires for garden and lawn equipment.
When choosing tires for lawn and garden work, you should pay attention to parameters such as maneuverability, strength and handling. Compact tractors and lawn tractors equipped with tires with these qualities will be able to perform at their best.
Tires built for performance
Among agricultural tires, the range of tires for garden and lawn equipment stands out, first of all, for its minimal impact on the soil. In addition, it is characterized by a long service life, excellent maneuverability and excellent puncture resistance. It is on these characteristics that the efficiency of compact tractors and lawn tractors depends.
Lawn tractors are rarely overloaded, but the tires fitted to them must still have a high load capacity. Why? The fact is that tires with high load capacity have a thicker and stronger carcass, so they resist punctures better.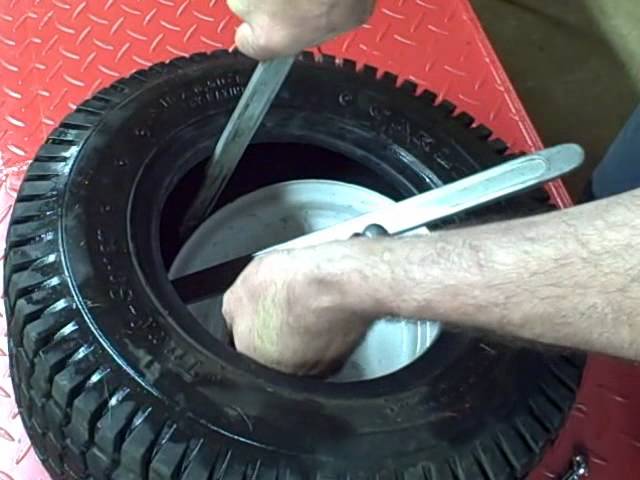 This is especially important when operating the lawn tractor on uneven terrain with lots of spikes, or when using the tractor for other tasks other than mowing grass.
Which tread pattern should I choose?
It all depends on the soil and the type of work, so this question is best asked by someone who is well versed in tires.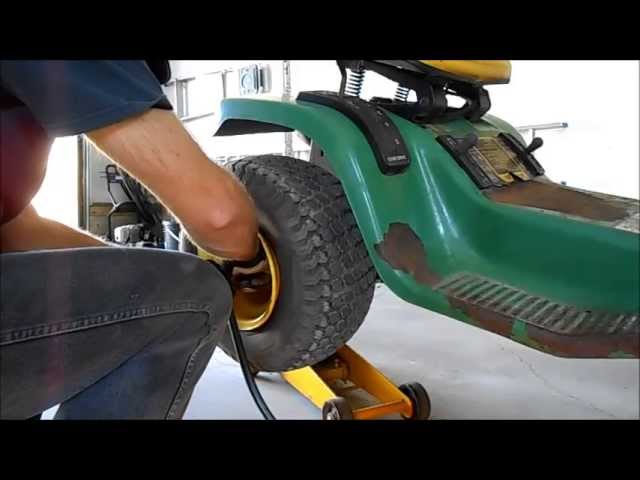 Our consultants are always at your service.
In general, the BKT range of tires for garden and lawn equipment includes models with different tread patterns to suit different working situations.
Mixed use dirt tires are the most popular choice for compact tractors and lawn mowers. The tread pattern of these tires provides excellent traction on slippery grass while preventing tire penetration and ground damage.
Find out more about our tires LG 306, LG 307 and LG 408.
The All Terrain Tire is a great choice for dirt, sand or soil. Large blocks and deep tread grooves provide excellent traction on loose surfaces. And thanks to the increased voids between the blocks, they have an excellent ability to self-clean.
Maybe the AT 119 is right for you?
Tires with longitudinal ribs are mainly designed for easy rolling and long life. This projector pattern provides excellent lateral stability, preventing the tractor from slipping sideways.